

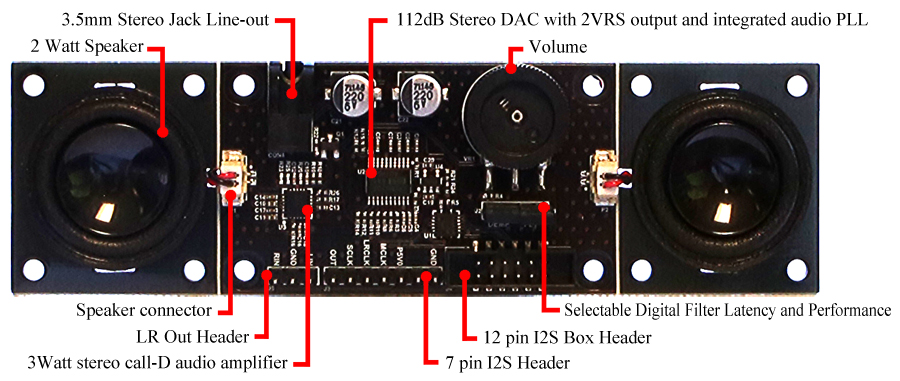
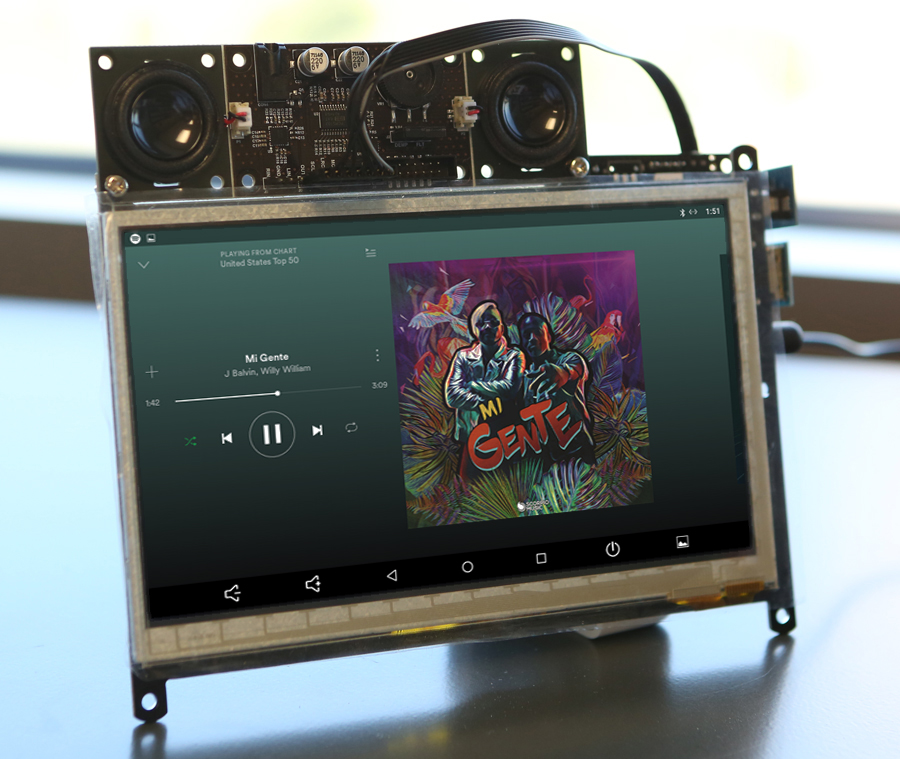
The I2S 2Watt Stereo Boom Bonnet Kit (https://goo.gl/1mXXVH) is a compact speaker system for the ODROID-XU4 and ODROID-C1+/C2. It uses I2S as digital sound standard for audio output. It is very easy to install, and you’ll be rockin’ out in 15 minutes. To connect it to your ODROID, follow these steps:
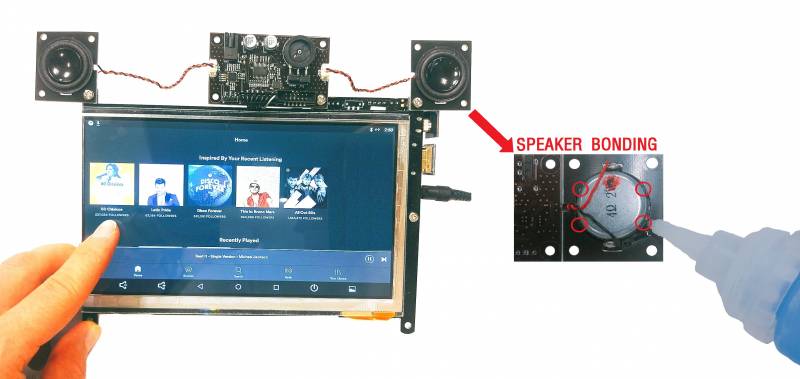
- Plug 2 x 2 Watt 4 ohm stereo speakers to the connector on the Boom Bonnet board and attach them with glue
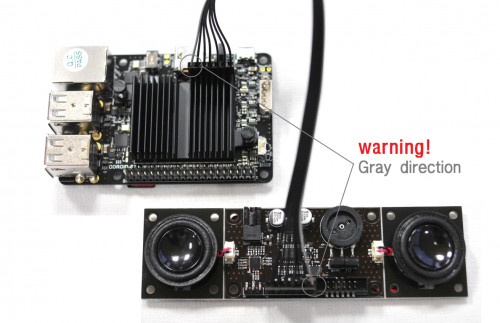
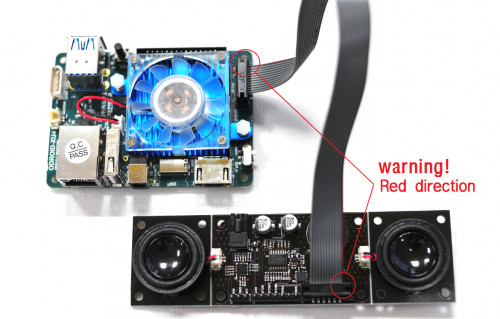
- Connect the GPIO ribbon cable one side to the boom bonnet board and the other side to ODROID board
- Update the OS to the latest version
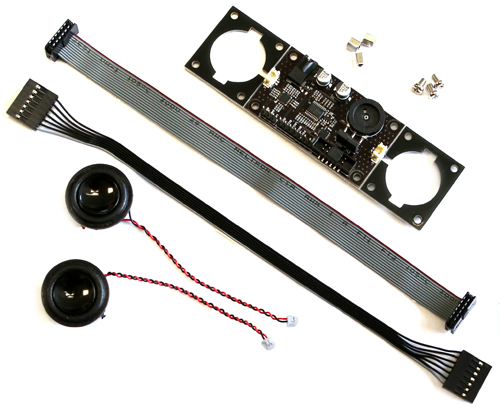
You can easily adjust the audio output level with a potentiometer on the board. It will deliver adequate fidelity sound, but may include some low-grade system noise and is not a replacement for a high fidelity speaker system. The package includes:
- Stereo Boom Bonnet board
- 2 x 2W / 4 ohm mini speakers (28mm diameter, 11.5mm thickness)
- 3 x 5mm PCB spacers
- 3 x 5mm screws
- 200mm 7-pin GPIO ribbon cable (200mm) for the ODROID-C1+/C2 or a 12-pin version for the ODROID-XU4
Installation
Connect the stereo boom bonnet to ODROID-C1+/C2 using an I2C cable, attach a USB keyboard, USB mouse and HDMI monitor, then power up the system, then update the system:
$ sudo apt update && sudo apt dist-upgrade
Next, ensure that the stereo boom bonnet kernel modules are loaded:
$ aplay -l
**** List of PLAYBACK Hardware Devices ****
card 0: ODROIDHDMI [ODROID-HDMI], device 0: I2S.27 dit-hifi-0 []
  Subdevices: 0/1
  Subdevice #0: subdevice #0
odroid@odroid64:~$
odroid@odroid64:~$ sudo modprobe snd-soc-pcm5102
odroid@odroid64:~$ sudo modprobe snd-soc-odroid-dac
odroid@odroid64:~$ aplay -l
**** List of PLAYBACK Hardware Devices ****
card 0: ODROIDHDMI [ODROID-HDMI], device 0: I2S.27 dit-hifi-0 []
  Subdevices: 1/1
  Subdevice #0: subdevice #0
card 1: ODROIDDAC [ODROID-DAC], device 0: I2S.27 pcm5102-0 []
  Subdevices: 1/1
  Subdevice #0: subdevice #0
Then, navigate to Applications → Sound & Video → Sound → Hardware Tab & Output Tab and select “ODROID-DAC”. If you have to load the driver every time whenever your ODROID-C1+/C2 starts, you can register the driver into /etc/modules and reboot:
$ su
Password:  (root password is "odroid")
# echo "snd-soc-pcm5102" >> /etc/modules
# echo "snd-soc-odroid-dac" >> /etc/modules
# exit
After the reboot, check the driver with the following command:
$ aplay -l
**** List of PLAYBACK Hardware Devices ****
card 0: ODROIDHDMI [ODROID-HDMI], device 0: I2S.27 dit-hifi-0 []
  Subdevices: 1/1
  Subdevice #0: subdevice #0
card 1: ODROIDDAC [ODROID-DAC], device 0: I2S.27 pcm5102-0 []
  Subdevices: 1/1
  Subdevice #0: subdevice #0
Schematics are available at https://goo.gl/pxTTd9, and detailed information may be found on the Wiki page at https://goo.gl/JY1Y7B.
Be the first to comment