

Looks to me everyone has been stuck indoors for longer than they desired. Some of us had to work during this time too. Working on a small laptop screen is no fun task, and using HDMI cables while kids run around is not fun either. So, how about we use an ODROID as a secondary screen? This is somewhat a continuation of my previous article "Multiscreen Desktop using VNC" featured in a previous ODROID Magazine article: https://bit.ly/3bw1oEb.
So, the good news is, you do not need anything described in that article. I managed to go through x11vnc's man page and found some options that greatly simplify things and reduce the number of hacks needed.
Getting an extended desktop
The goal is to have a dual-screen setup - one screen would be your laptop's display, the second screen would be a networked ODROID. The laptop (in my case) runs Linux (obviously), so we are looking for a linux solution for the problem. Ideally one that works over wifi.
First thing we need to do is to extend the physical desktop. In the previous article I used xrandr to extend the physical desktop size. However, that causes issues - especially with applications not knowing where the physical screen ends, which makes maximizing windows a pain. This time we will extend the desktop by adding a new virtual screen.
For a laptop with an intel GPU we can do this by adding /usr/share/X11/xorg.conf.d/20-intel.conf with this contents as described here https://bit.ly/2xQSQZW:
Section "Device"
  Identifier "intelgpu0"
  Driver "intel"
  Option "VirtualHeads" "2"
EndSection
If you have a NVidia GPU, you can try this instead: https://bit.ly/3awV5yW.
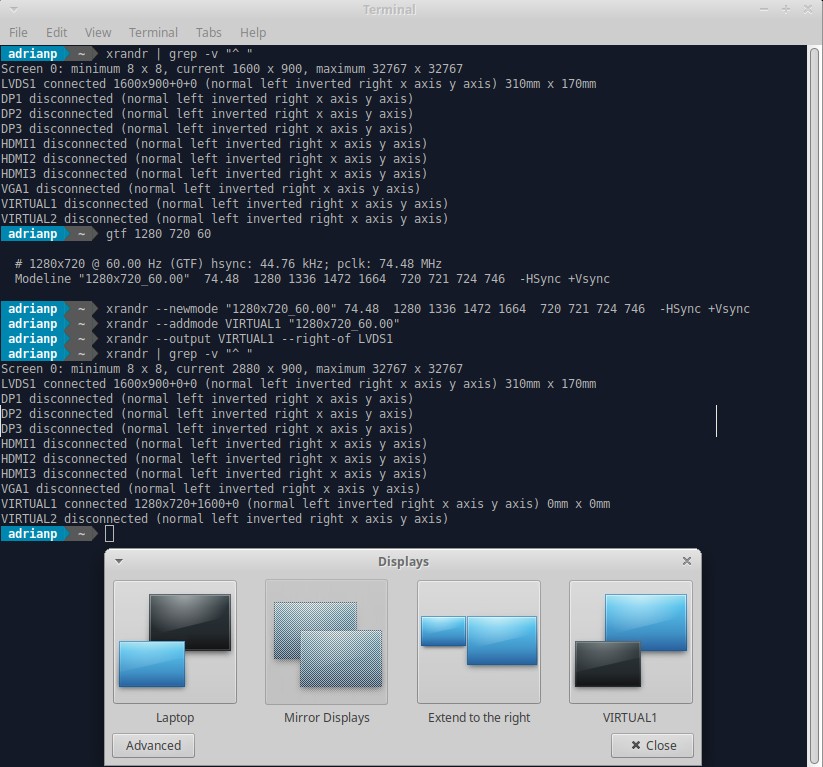
If you restart your Xorg server, you will see two new virtual displays in your xrandr output:
$ xrandr | grep VIRTUAL
VIRTUAL1 disconnected (normal left inverted right x axis y axis)
VIRTUAL2 disconnected (normal left inverted right x axis y axis)
Now that we have a new screen available, we'll need to set up a specific resolution and activate it. For my experiments I used a 720p resolution for it because it's small enough to be streamed without issues and big enough to be readable from a distance on a big screen TV.
You will need to calculate the correct timings for your desired resolution and add a new mode to the virtual display. Fortunately there is a tool that does that based on an input resolution and refresh rate and it comes part of xserver-xorg-core package:
$ gtf 1280 720 60You can use the command's output to get the relevant information for you and enable the screen:
$ xrandr --newmode "1280x720_60.00" 74.48  1280 1336 1472 1664  720 721 724 746  -HSync +Vsync
$ xrandr --addmode VIRTUAL1 "1280x720_60.00"
$ xrandr --output VIRTUAL1 --right-of LVDS1
You should now get a popup, like in Figure 1 showing the new screen and asking you what you want to do with it.
Sadly, I was unable to enable virtual displays the same way on ODROID-XU4, so this technique requires that your master PC is an Intel-based one. But wait - if you only have an ODROID around (hopefully an ODROID-XU4, where xrandr plays nicely) as a master computer, all is not lost. You can still expand the desktop, as described in the previous article using the script: https://bit.ly/34VZiuV:
$ DISPLAY=:0 xrandr --output HDMI-1 --fb 2560x720 --panning 1280x720The fb parameter specifies the total resolution, while the panning parameter specifies one screen resolution. This will create space for your second screen (on the left of the main screen), but it will behave as one monitor (so maximizing will not work correctly without fakexinerama, which also has its problems).
So now we have a new desktop surface to the right of the main screen and we need to project it to a different, physical screen. We have two ways of doing it.
The Chromecast way
But wait, you say - I don’t have a Chromecast! I just have this ODROID-N2 running Android TV… Well, you are in luck! You have a Chromecast, but you need to install an app from the Play Store called Cast Receiver (https://play.google.com/store/apps/details?id=com.softmedia.receiver.castapp&hl=en) that acts as a Chromecast and can receive streams from Chromecast-enabled apps (https://forum.odroid.com/viewtopic.php?f=178&t=37501). Note that the app is a demo, but for some things (like Youtube streaming) it doesn't enforce its time limits.
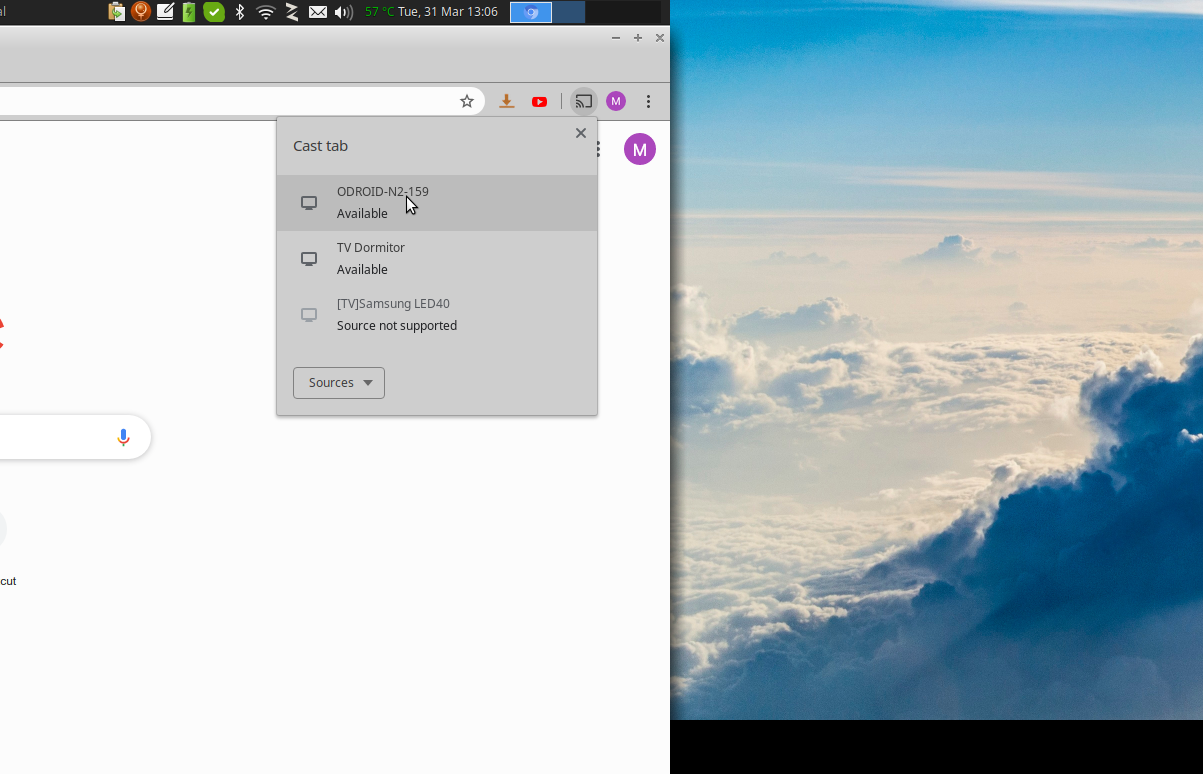
So, the logical thing to do is to use Chromium's Cast tab feature to cast the second screen to the Chromecast device. Let us see that in action. Open Chromium, select the three dot menu, select Cast… and if you are in the same LAN with your chromecast you should see it in the list (Figure 2).
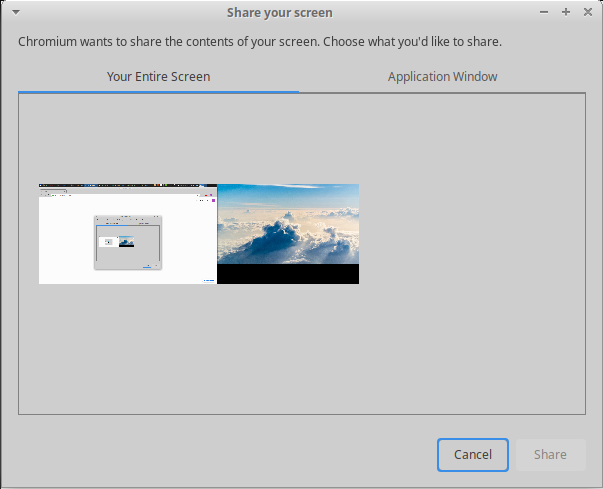
If you click on the Sources… button you can select between Cast tab and Cast desktop. If you select Cast desktop you should get a selection of apps or screens that you want to cast. If you are ok with just casting one app, then fine, but we want to cast the virtual screen. Unfortunately, there seems to be a Chrome bug that prevents us from doing that - it sees the combined desktop as a screen, not as two independent screens.
So, currently casting from Chrome is a no-go, though it might change in the future. The quality was fine, performance was ok and there was only about a half-second lag between mouse input and visual feedback. Not ok for gaming, but ok for most office tasks.
So, plan B is using mkchromecast to cast a region of the screen. You can install it with
$ sudo apt-get install mkchromecastYou can run it with the --discover parameter to get the names of the chromecasts in your network (see figure 5).
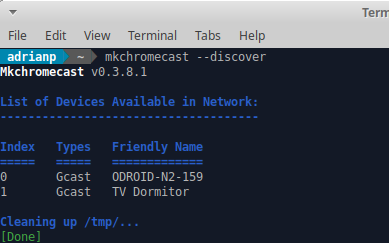
Knowing the name you can then write a more complicated command to use ffmpeg to grab X11 with a specific size and from a specific offset and stream the video to your chromecast of choice:
$ mkchromecast -n "ODROID-N2-159" --video --command 'ffmpeg -f \
x11grab -r 15 -s 1280x720 -i :0.0+1600,0 -vcodec libx264 \
  -preset ultrafast -tune zerolatency -maxrate 10000k \
  -bufsize 10000k -pix_fmt yuv420p -g 60 -f mp4 \
  -max_muxing_queue_size 9999 -movflags \
  frag_keyframe+empty_moov pipe:1'
Most of the parameters above should remain fixed for best streaming speed. The -n parameter lets you select your desired output chromecast, -r specifies the framerate, -s represents your virtual screen size, while :0.0+1600,0 represents the offset from where you want to capture. This offset reads as follows: read from Xserver :0.0, with an offset of +1600 pixels on the x axis and a 0 offset on the y axis. The x value should be your laptop's screen width in pixels, so that ffmpeg can skip your physical screen. The y value is 0 because X11 reads the y axis starting from the top, going down.
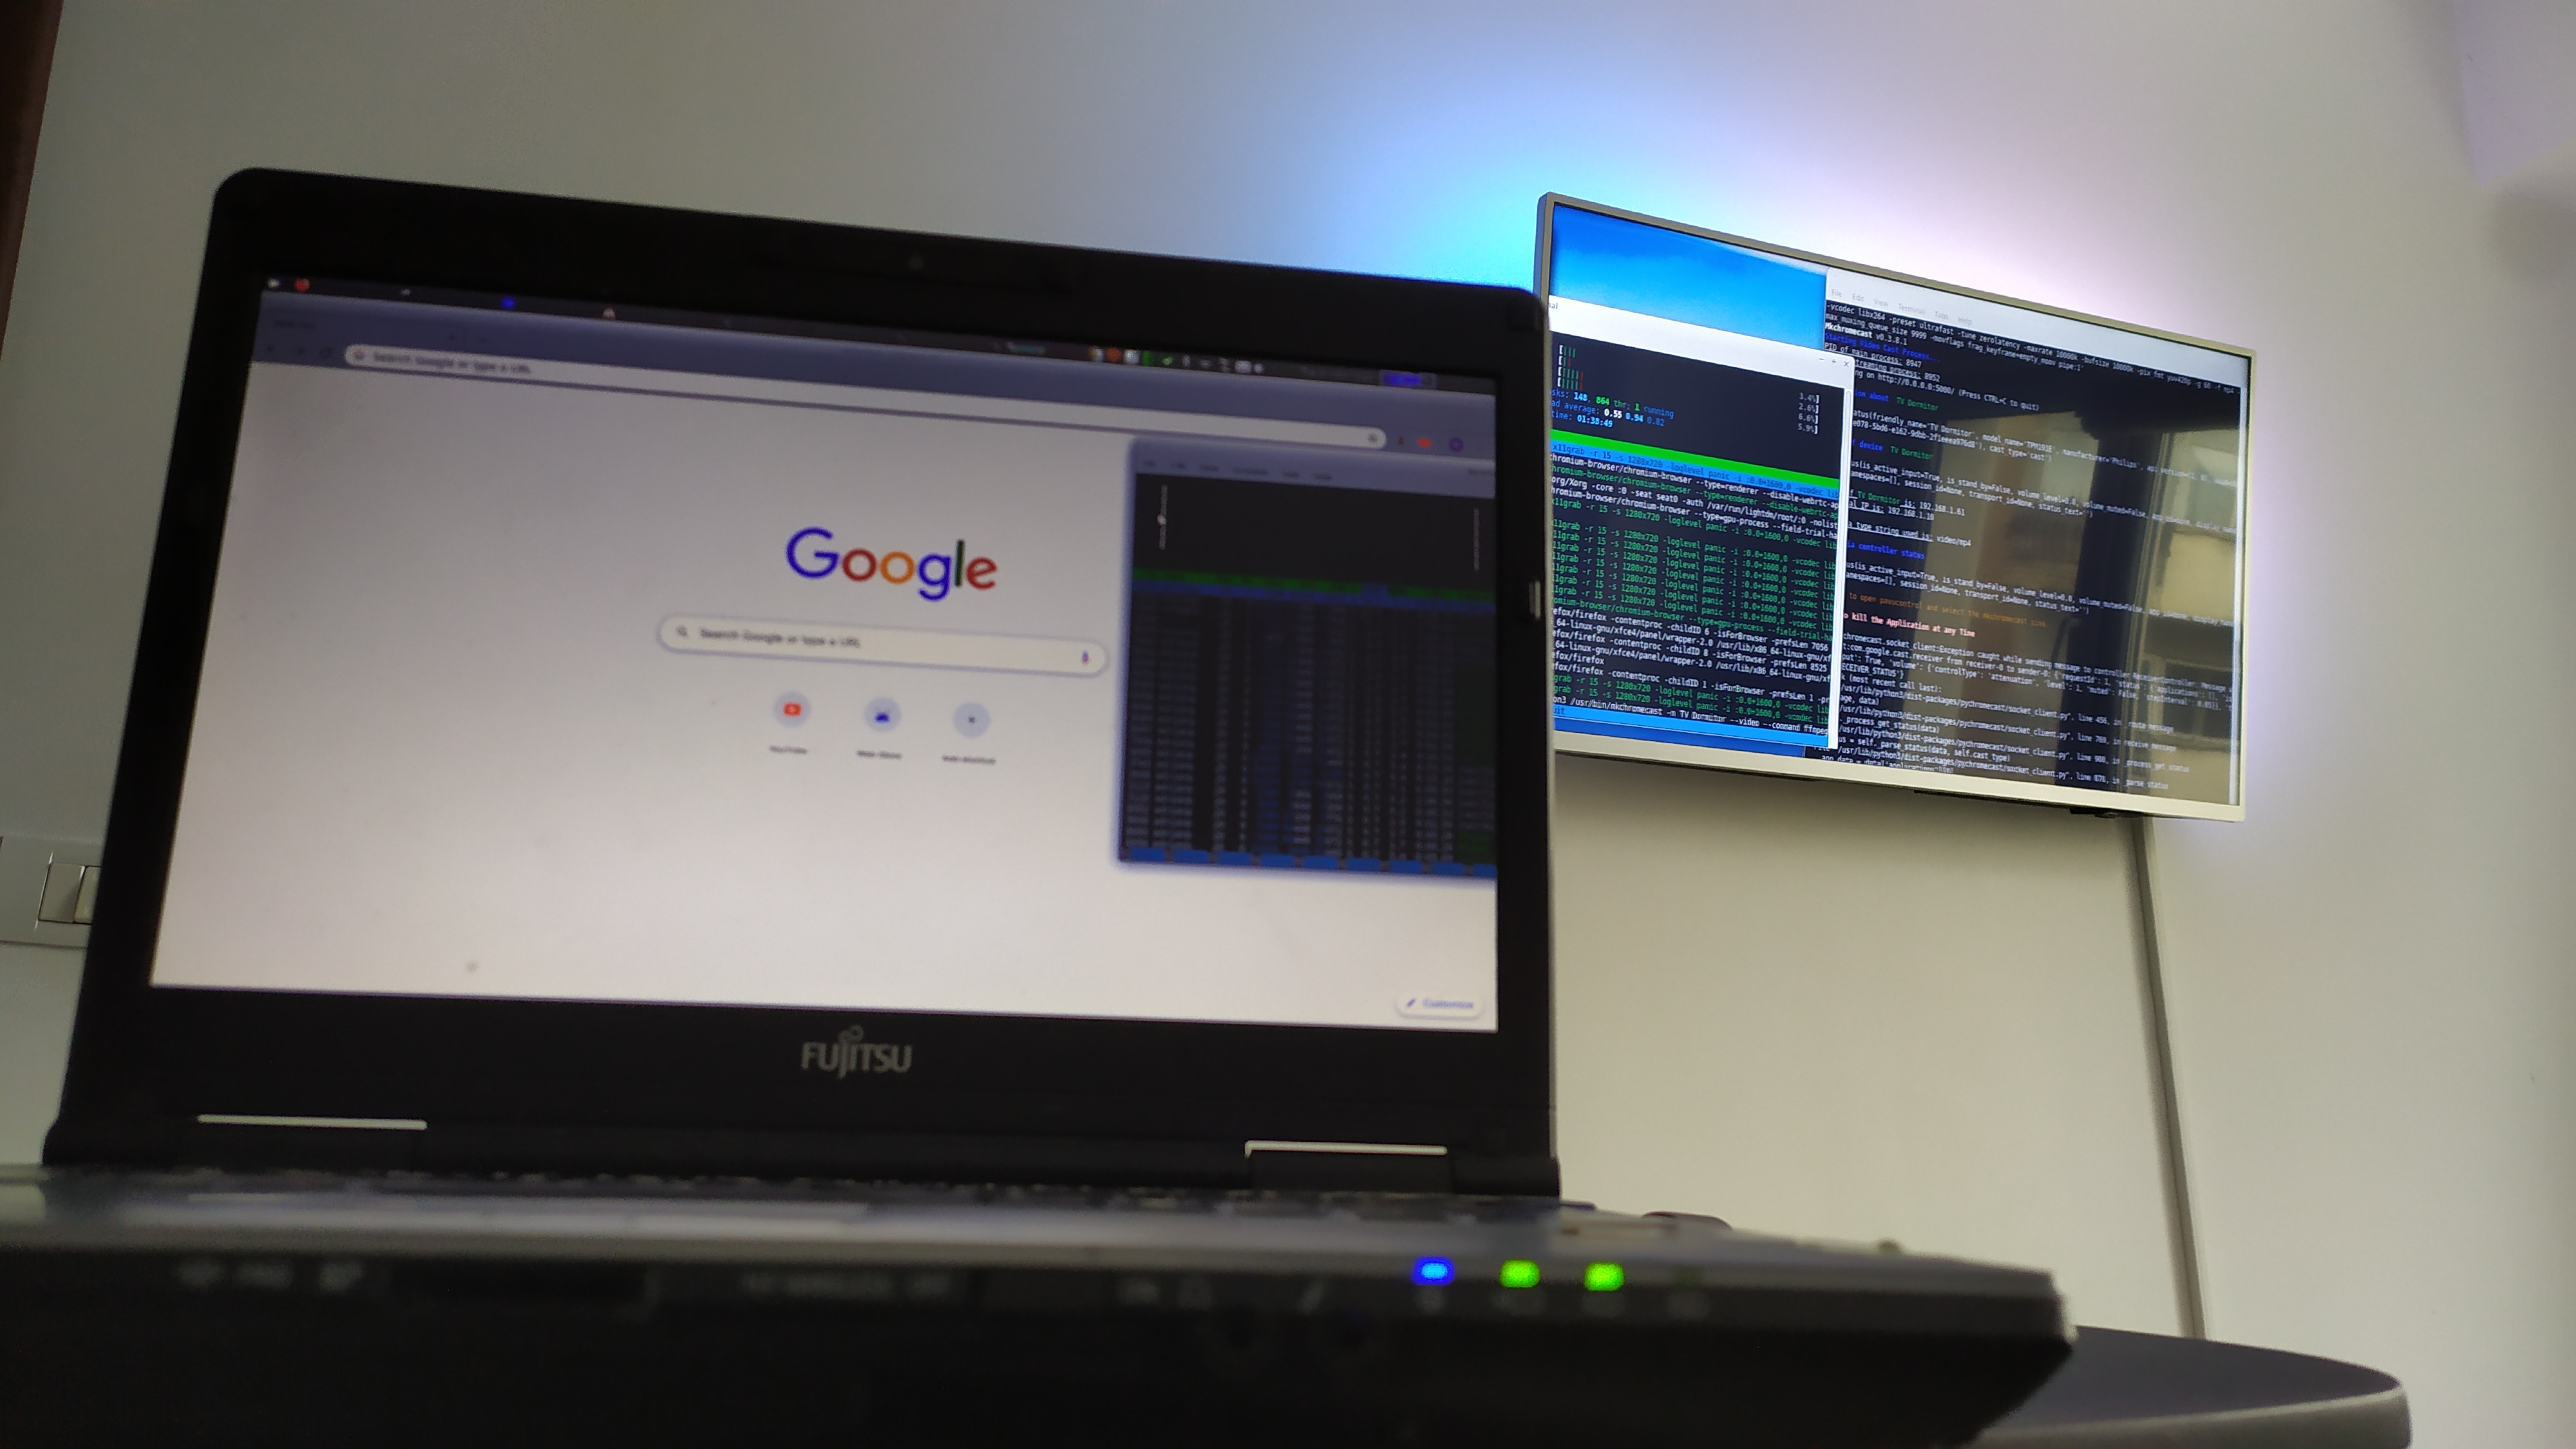
Now, the result looks better. Except performance is nowhere near what Chrome can do. Despite ffmpeg parameter tuning, because of network buffers, compression buffers, etc., there is a 5-6 second lag between your action and the screen response. So, this is only suitable as a second screen for documentation, email and things that does not require interaction (e.g. watching logs scroll by).
The VNC way
We can do better. How about we cast the screen via VNC? This is what I tried in my previous article, but in a convoluted way that did not work that well because I had to capture/transport and render off-screen half of the desktop. Had I spent more time reading x11vnc's manual (http://www.karlrunge.com/x11vnc/x11vnc_opts.html), I would have found out the -clip option that does just that! The idea is to start a VNC server that is cropped to the virtual screen size and on the TV side use a VNC viewer program to display the server's contents. The big advantage is you can "cast" to any VNC-enabled system, so you do not need to run Android on your Odroid, and also, if your smart TV has a VNC client app, it can be used directly.
I put together a small shell script that creates the virtual screen and also starts x11vnc in the background without authentication. Please adjust it to fit your needs:
$ cat new_720p_screen.sh
#!/bin/bash

# calculate the desired modeline with gtf:
# gtf 1280 720 60
#
#  # 1280x720 @ 60.00 Hz (GTF) hsync: 44.76 kHz; pclk: 74.48 MHz
#  Modeline "1280x720_60.00"  74.48  1280 1336 1472 1664  720 721 724 746  -HSync +Vsync

/usr/bin/xrandr -d :0 --newmode "1280x720_60.00" 74.48  1280 1336 1472 1664  720 721 724 746  -HSync +Vsync

/usr/bin/xrandr -d :0 --addmode VIRTUAL1 "1280x720_60.00"
/usr/bin/xrandr -d :0 --output VIRTUAL1 --right-of LVDS1

#start x11vnc
x11vnc -forever -bg -geometry 1280x720 -shared -noprimary -auth /var/run/lightdm/root/:0 -display :0 -clip 1280x720+1600+0 -threads -noxdamage
The interesting x11vnc parameters you will need are: -geometry sets the resolution of the target VNC session and should match your virtual screen size -clip defines a target resolution (1280x720) and an offset from the current screen (1600 pixels from the edge of the X11 server, on the x axis, 0 pixels from the y axis). The offset should match your primary screen size if extending to the right, and should be negative and match the virtual screen size if extending to the left of your main screen -threads and -noxdamage improve video responsiveness
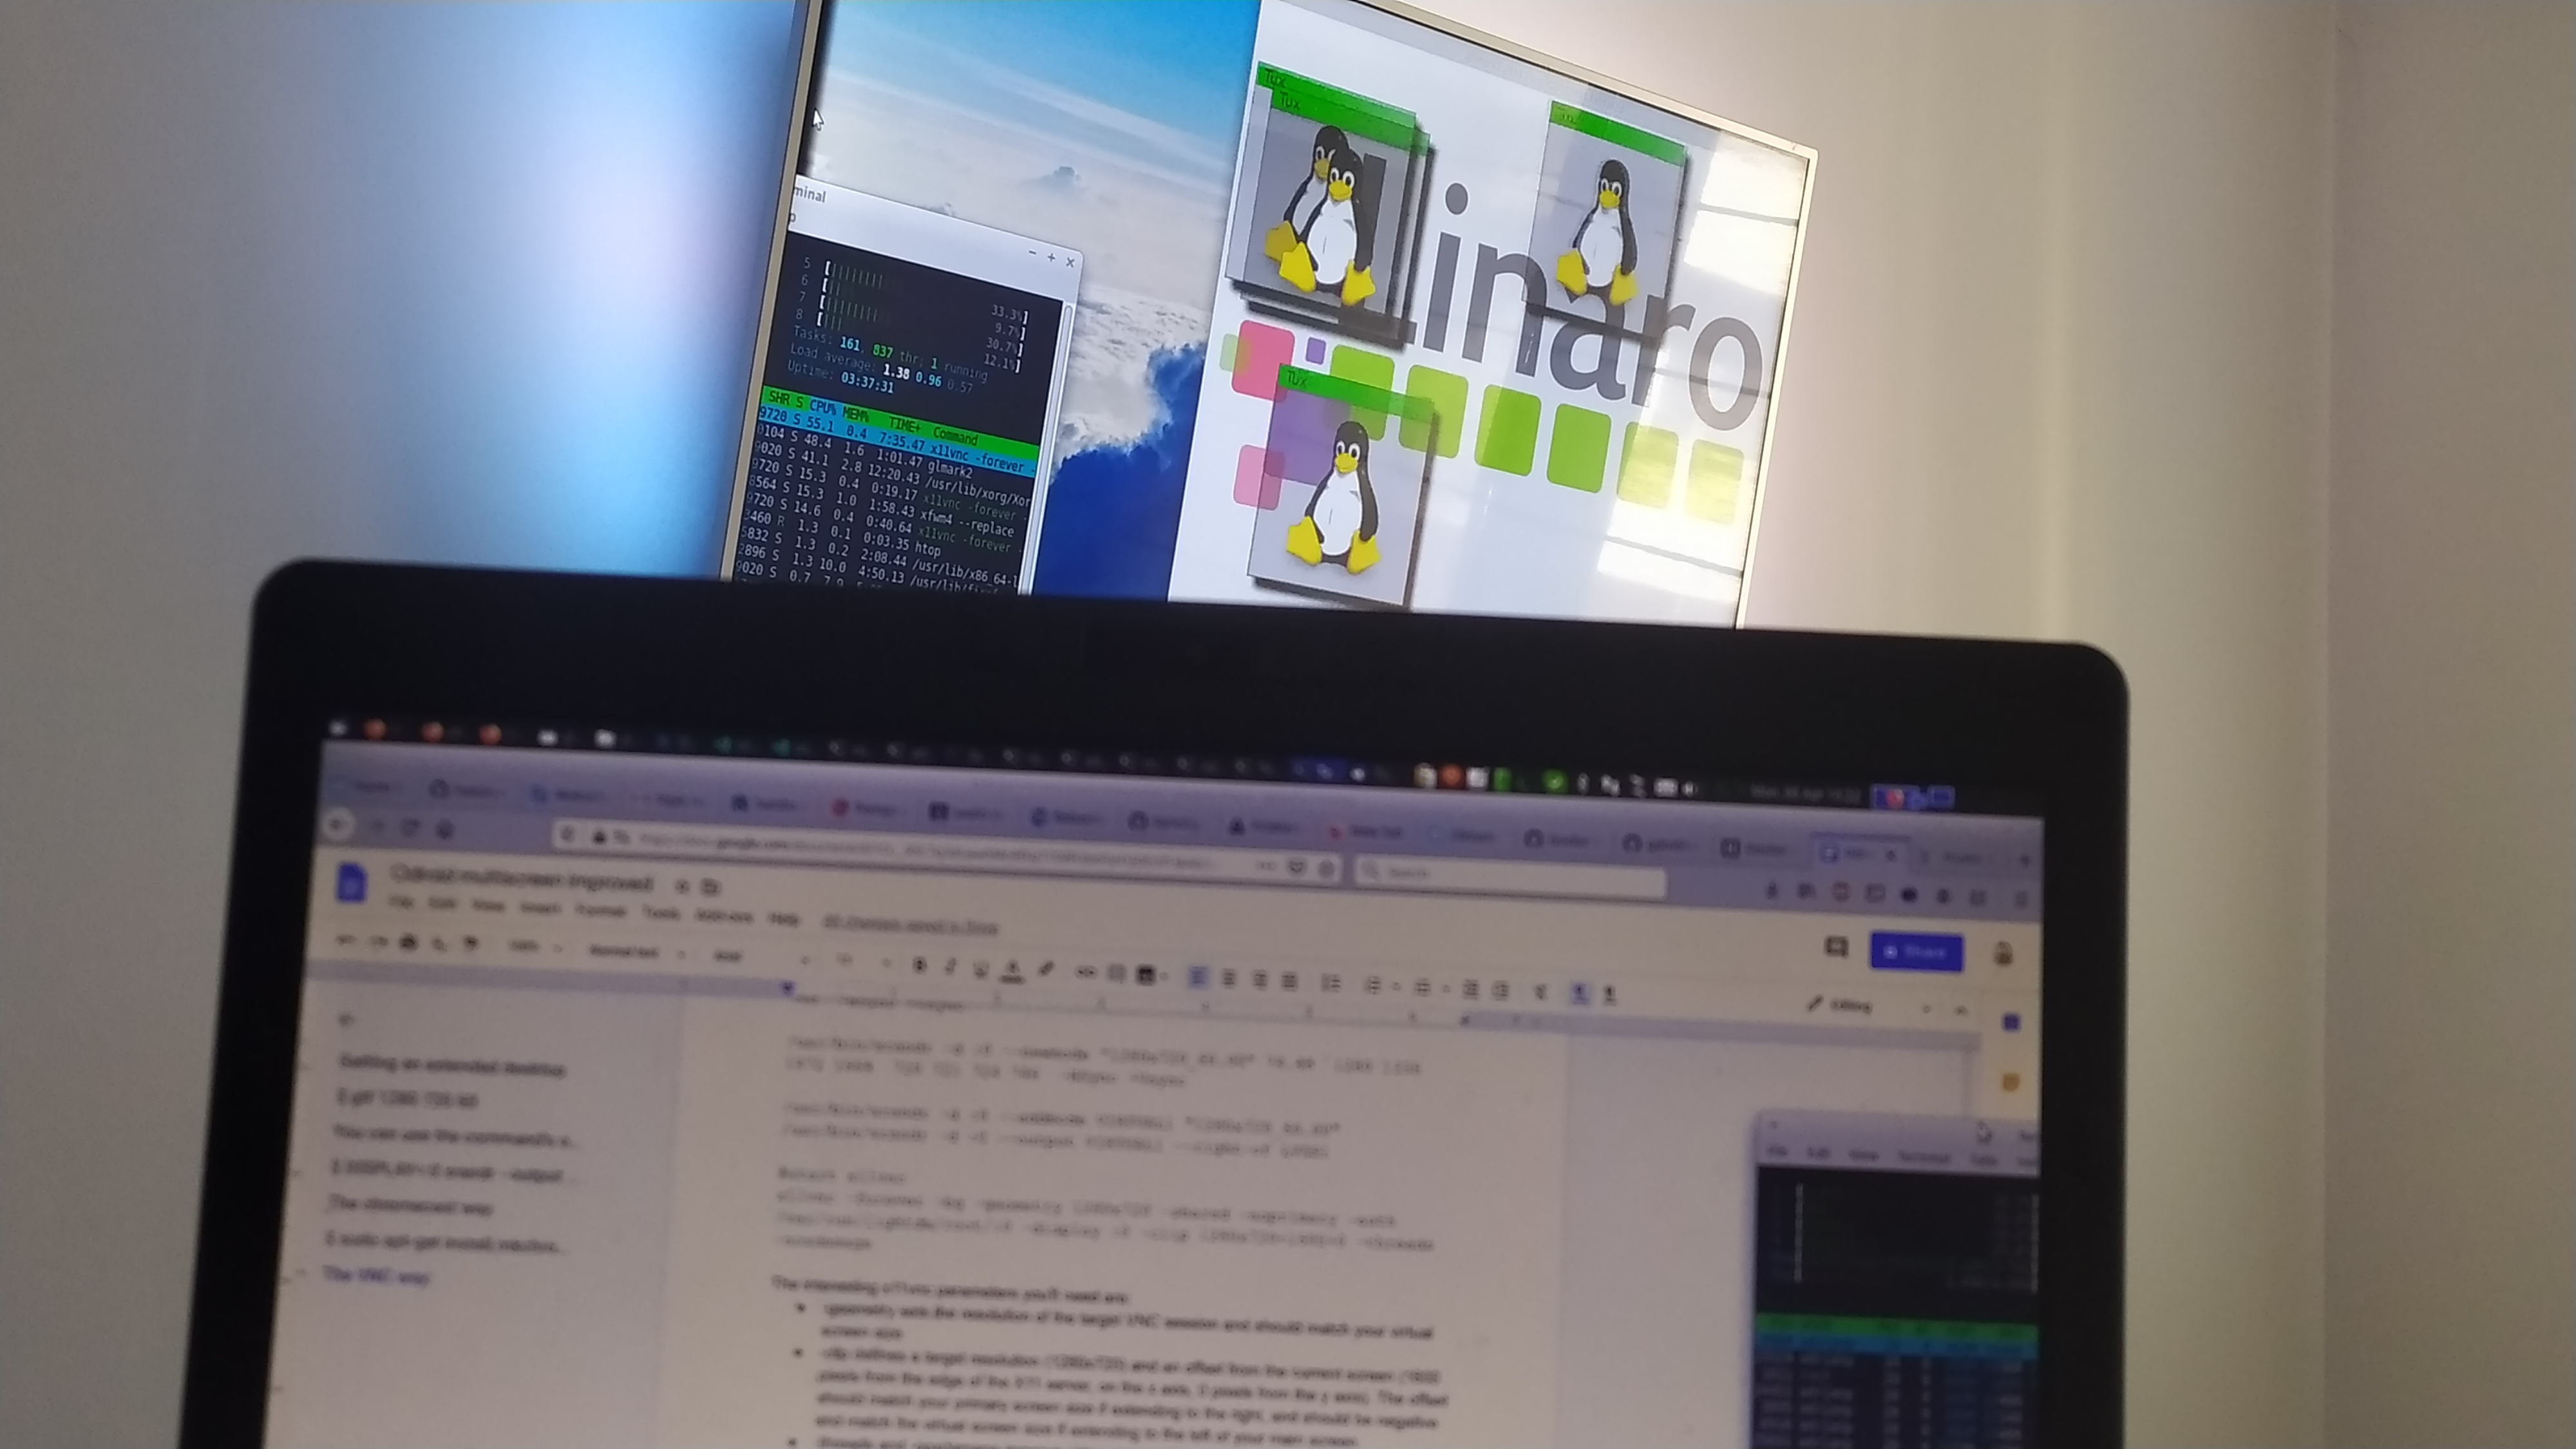
Once you run those commands you can use any VNC client to connect to your PC's IP address on port 5900 and view the virtual screen only. If you are on Android TV you can use TruVNC (https://play.google.com/store/apps/details?id=com.mm.truvnc.lite&hl=en) which worked really well in my case, otherwise any supported VNC client should do the trick.
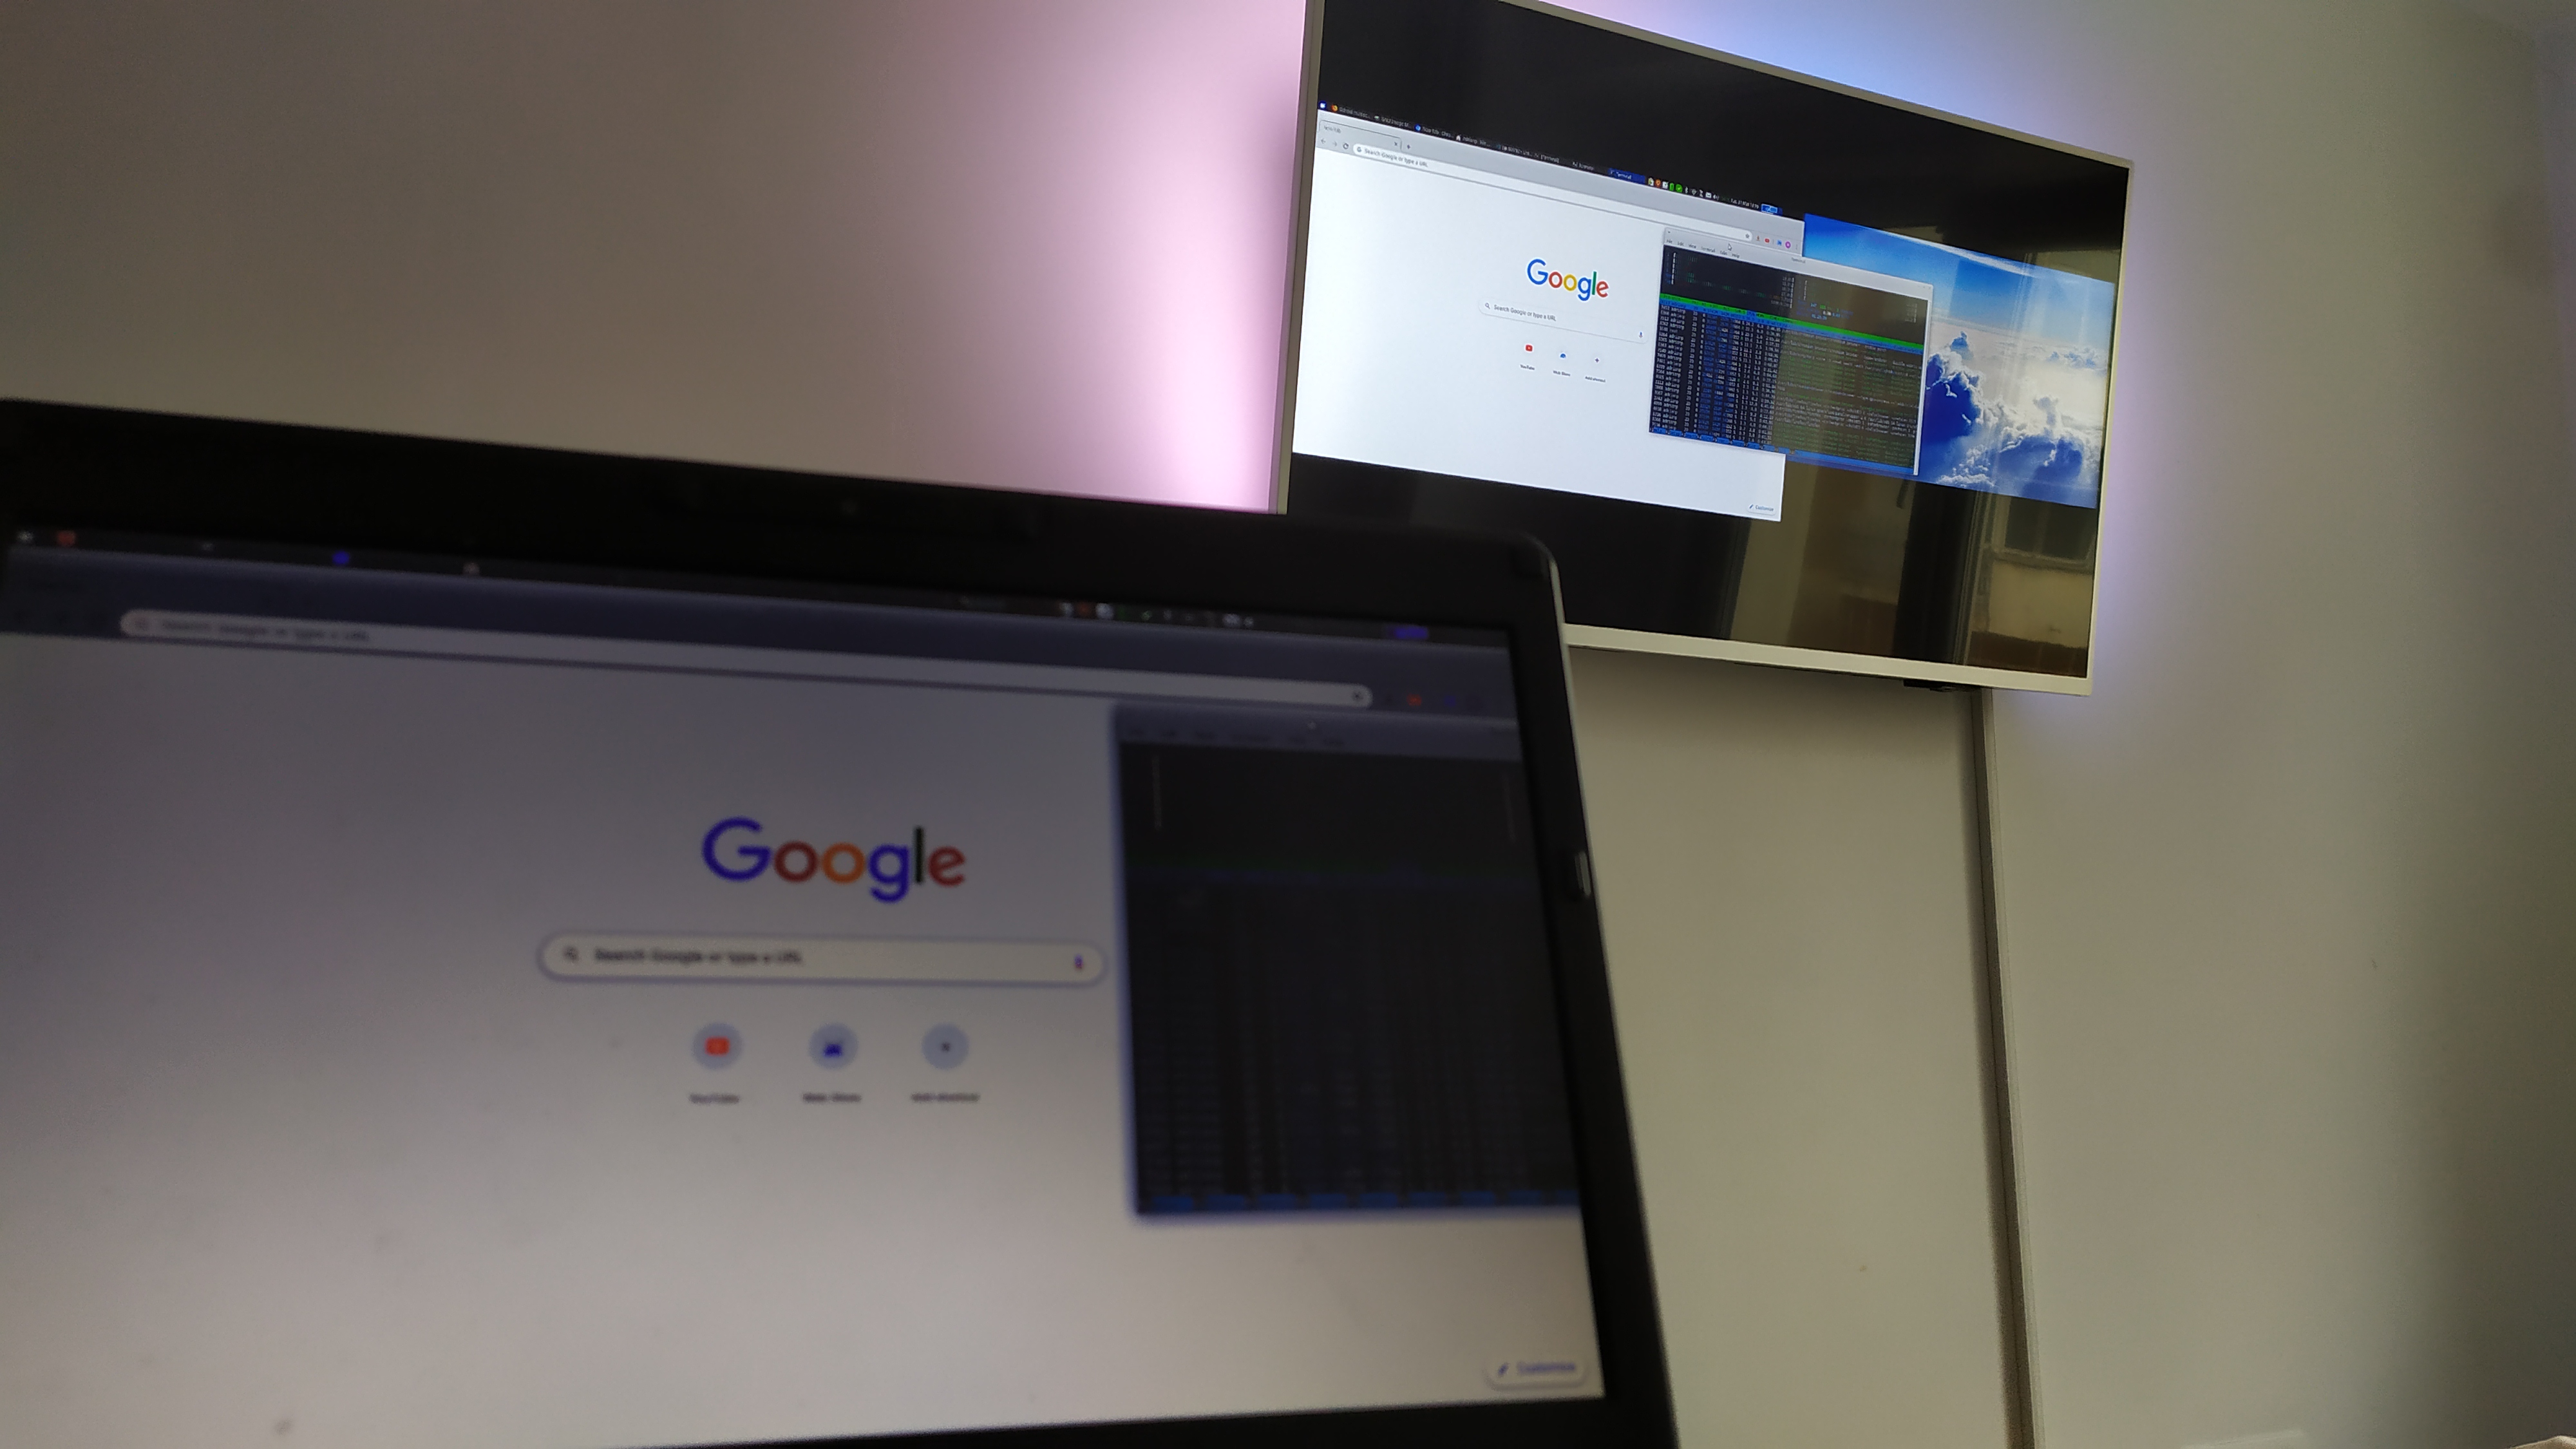
In terms of performance - it is great! I get less than 1s lag over wifi and much faster response while using a wired connection, so I am pretty happy with it! I ran glmark2 on the virtual display and it rendered smoothly over VNC, with the occasional tearing effect because of the noxdamage option (otherwise it gets blocky). Playing video is also smooth, except for some tearing. CPU usage is not that high as well. So, give it a try, see how you like your new expanded desktop.
For me, I am going to use it like this during the quarantine, and when I get back to work I will set up an ODROID-XU4 with an old 1280x1024 monitor as my third monitor, so I can be the envy of the office! For comments, questions, and suggestions, please visit the original post at https://forum.odroid.com/viewtopic.php?f=53&t=38409.
Be the first to comment