

This article explains how to enable the CAN bus on ODROID-N2 via HW SPI interface. The detailed instructions to acquire data via a MCP2515 Bus Monitor board are documented here, as well.

H/W connection
The following products are required to configure the hardware:
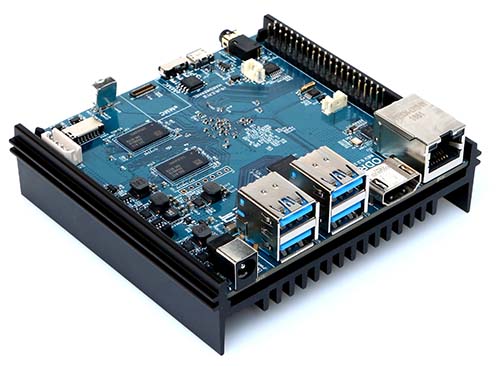
- ODROID-N2
- Tinkering kit
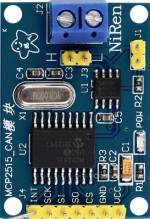
- MCP2515 CAN module

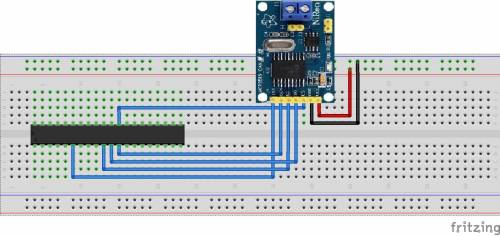
Reference circuit

With tinkering kit

Software installation
Note:
- Operation confirmed with ODROID-N2 Ubuntu minimal image on 4.9.205-64 kernel.
- The can-bus example uses the same cs-pin as spidev, so both must not be enabled at the same time.
- If spidev is enabled, the can-bus may not work properly.
Updating of the kernel is highly recommended. This is available with Linux odroid 4.9.205-64 or higher version
root@odroid:~# apt update && apt full-upgradeEnable the modules using **device-tree-compiler**
root@odroid:~# apt install device-tree-compilerChange the status to **okay** on the SPI nodes of the device tree.
# SPICC0
root@odroid:~# fdtput -t s /media/boot/meson64_odroidn2.dtb \
                 /soc/cbus@ffd00000/spi@13000
[status okay
root@odroid:~#
# can0
root@odroid:~# fdtput -t s /media/boot/meson64_odroidn2.dtb \
                 /soc/cbus@ffd00000/spi@13000/can@0
status okay
root@odroid:~#
Check if the status changed.
# SPICC0
root@odroid:~# fdtget /media/boot/meson64_odroidn2.dtb \
                 /soc/cbus@ffd00000/spi@13000
Status okay
root@odroid:~#
# can0
root@odroid:~# fdtget /media/boot/meson64_odroidn2.dtb \
                 /soc/cbus@ffd00000/spi@13000/can@0
Status okay
root@odroid:~#
Then reboot to apply the changes. you can also check if the modules were correctly loaded.
root@odroid:~# lsmod | grep spi
spi_meson_spicc      20480  0
root@odroid:~# lsmod | grep mcp251x
mcp251x              24576  0
can_dev              24576  1 mcp251x
root@odroid:~#
Verifying CAN support configuration
Verify the CAN host driver is registered correctly.
root@odroid:~# ls /sys/class/net/
can0  eth0  lo
root@odroid:~# ifconfig can0
can0: flags=128  mtu 16
      unspec 00-00-00-00-00-00-00-00-00-00-00-00-00-00-00-00  txqueuelen 10  (UNSPEC)
      RX packets 0  bytes 0 (0.0 B)
      RX errors 0  dropped 0  overruns 0  frame 0
      TX packets 0  bytes 0 (0.0 B)
      TX errors 0  dropped 0 overruns 0  carrier 0  collisions 0

root@odroid:~#
Power on the CAN hardware. Set the bitrate before performing all operations Example: Set the bitrate of the can0 interface to 125kbps:
root@odroid:~# ip link set can0 type can bitrate 125000 triple-sampling on
root@odroid:~# ifconfig can0 up
root@odroid:~# ifconfig
can0: flags=193<UP,RUNNING,NOARP>  mtu 16
      unspec 00-00-00-00-00-00-00-00-00-00-00-00-00-00-00-00  txqueuelen 10  (UNSPEC)
      RX packets 0  bytes 0 (0.0 B)
      RX errors 0  dropped 0  overruns 0  frame 0
      TX packets 0  bytes 0 (0.0 B)
      TX errors 0  dropped 0 overruns 0  carrier 0  collisions 0

eth0: flags=4163<UP,BROADCAST,RUNNING,MULTICAST>  mtu 1500
      inet 192.168.10.8  netmask 255.255.255.0  broadcast 192.168.10.255
      inet6 fe80::e160:7710:5360:f82a  prefixlen 64  scopeid 0x20
      ether 02:00:00:0d:1d:01  txqueuelen 1000  (Ethernet)
      RX packets 24  bytes 6066 (6.0 KB)
      RX errors 0  dropped 0  overruns 0  frame 0
      TX packets 54  bytes 6420 (6.4 KB)
      TX errors 0  dropped 0 overruns 0  carrier 0  collisions 0
      device interrupt 22

lo: flags=73<UP,LOOPBACK,RUNNING>  mtu 65536
      inet 127.0.0.1  netmask 255.0.0.0
      inet6 ::1  prefixlen 128  scopeid 0x10
      loop  txqueuelen 1  (Local Loopback)
      RX packets 129  bytes 10117 (10.1 KB)
      RX errors 0  dropped 0  overruns 0  frame 0
      TX packets 129  bytes 10117 (10.1 KB)
      TX errors 0  dropped 0 overruns 0  carrier 0  collisions 0

root@odroid:~#
Install the SocketCAN utils.
The can-utils package is a collection of CAN drivers and networking tools for Linux. It allows interfacing with CAN bus devices in a similar fashion as other network devices.
sudo apt install can-utilsWe need to perform the Loopback test on a single CAN port. Set loopback mode on can0
ifconfig can0 down
ip link set can0 type can bitrate 125000 loopback on
ifconfig can0 up
ip -details link show can0

root@odroid:~# ifconfig can0 down
root@odroid:~# ip link set can0 type can bitrate 125000 loopback on
root@odroid:~# ifconfig can0 up
root@odroid:~# ip -details link show can0
3: can0: <NOARP,UP,LOWER_UP,ECHO> mtu 16 qdisc fq_codel state UNKNOWN mode DEFAULT group default qlen 10
  link/can  promiscuity 0
  can <LOOPBACK,TRIPLE-SAMPLING> state ERROR-ACTIVE restart-ms 0
        bitrate 125000 sample-point 0.850
        tq 400 prop-seg 8 phase-seg1 8 phase-seg2 3 sjw 1
        mcp251x: tseg1 3..16 tseg2 2..8 sjw 1..4 brp 1..64 brp-inc 1
        clock 5000000numtxqueues 1 numrxqueues 1 gso_max_size 65536 gso_max_segs 65535
root@odroid:~#
The following command shows the received message from the CAN bus
candump can0On a second terminal, The following command sends 3 bytes on the bus (0x11, 0x22, 0x33) with the identifier 500.
cansend can0 500#11.22.33
How to test CAN-bus link between 2 ODROID-N2 boards
Connect CANL, CANH pins between two ODROID-N2 boards
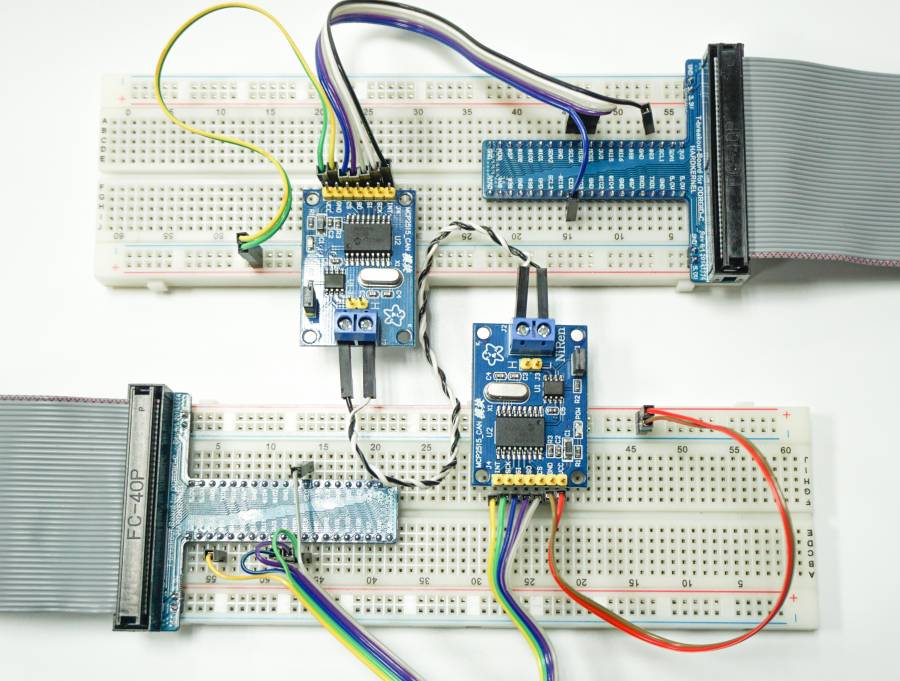
Power-up both boards and type the following into the shell of both boards for configuring the CAN bus device:
ip link set can0 type can bitrate 125000 triple-sampling on
ifconfig can0 up
Type the following into the shell of board 1 (which is used for testing/receiving over the can0 device):
candump can0Type the following into the shell of board 2 (which is used for testing/sending data packets over the can0 device):
cansend can0 500#11.22.33At this point, board 1 will receive the data packet sent from board 2:
root@odroid:~# candump can0
  can0  500   [3]  11 22 33
  can0  500   [3]  11 22 33
References
https://wiki.odroid.com/odroid-n2/application_note/gpio/can-bus
Be the first to comment