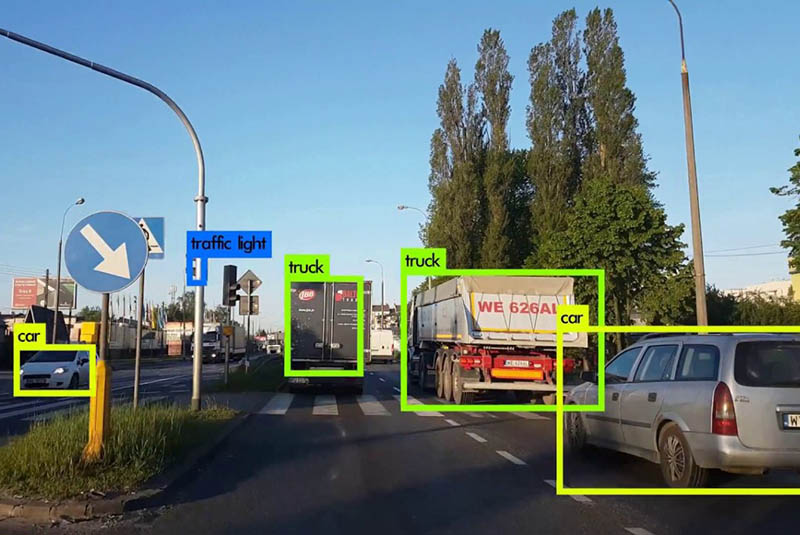
YOLO (https://pjreddie.com/darknet/yolo/) is a neural network model that is able to recognise everyday objects very quickly from images. There’s also TinyYOLO (http://machinethink.net/blog/object-detection-with-yolo/), which runs well on mobile devices. This guide tells you how to get TinyYOLO installed and running on your ODROID-XU4. To follow along, login to your ODROID, and run the commands show in the sections below.
Install TensorFlow
First, we make sure everything is up to date:
$ sudo apt-get update
$ sudo apt-get upgrade -y
$ sudo apt-get dist-upgrade -y
$ sudo reboot
Get some swap
Bazel won’t build without using swap memory on the ODROID-XU4. Pop in a blank 8GB USB drive, which will get erased, and run the following command:
$ sudo blkidCheck the device name, usually /dev/sda1, and with that name, run:
$ sudo mkswap /dev/sda1
$ sudo swapon /dev/sda1
$ sudo swapon
Install the requirements
We’ll need real Oracle Java, instead of OpenJDK. I tried OpenJDK, built Bazel with it, but it failed to SHA-1 hash downloads, and so was useless. So, we need to install the following packages:
$ sudo apt-get install pkg-config zip g++ zlib1g-dev unzip
$ sudo apt-get install gcc-4.8 g++-4.8
$ sudo update-alternatives --install /usr/bin/gcc gcc /usr/bin/gcc-4.8 100
$ sudo update-alternatives --install /usr/bin/g++ g++ /usr/bin/g++-4.8 100
$ sudo apt-get install python-pip python-numpy swig python-dev
$ sudo pip install wheel
$ sudo add-apt-repository ppa:webupd8team/java
$ sudo apt-get update
$ sudo apt-get install oracle-java8-installer
$ sudo apt-get install oracle-java8-set-default
$ java -version
Install Bazel build system
Google builds things using Bazel. TensorFlow is from Google. Thus, we need to build Bazel first. This takes about a half an hours, go get some lunch while it runs:
$ wget https://github.com/bazelbuild/bazel/releases/download/0.5.4/bazel-0.5.4-dist.zip
$ unzip -d bazel bazel-0.5.4-dist.zip
$ cd bazel
$ sudo ./compile.sh
Now, Java will run out of heap here, so we need to do the following modifications:
$ sudo vi scripts/bootstrap/compile.shFind the line with “run” on it, and add some memory flags, change it to the following:
run “${JAVAC}” -J-Xms256m -J-Xmx384m -classpath “${classpath}” -sourcepath “${sourcepath}”
Then, compile again:
$ sudo ./compile.sh
$ sudo cp output/bazel /usr/local/bin/bazel
Download and configure TensorFlow
Now we can actually download and configure TensorFlow:
$ git clone --recurse-submodules https://github.com/tensorflow/tensorflow.git
$ cd tensorflow
I couldn’t get the latest version of TensorFlow to install, since it had BoringSSL C99 compile issues. To fix this, checkout version 1.4.0, and configure:
$ git checkout tags/v1.4.0
$ ./configure
Say no to most things, including OpenCL, as shown in Figure 1.

Build TensorFlow
Next, we need to build Tensorflow. If you thought Bazel took a long time to build, then you haven’t built software before. Hold onto your hats, because we’re in for a ride here:
$ bazel build -c opt --copt="-mfpu=neon-vfpv4" --copt="-funsafe-math-optimizations" --copt="-ftree-vectorize" --copt="-fomit-frame-pointer" --local_resources 8192,8.0,1.0 --verbose_failures tensorflow/tools/pip_package:build_pip_package
 Building…
 1,900 / 4,909 files… error.
Oops, NEON doesn’t work. Ok, let’s turn that off. But, we’ll want to fix it later:
$ bazel build -c opt --copt="-funsafe-math-optimizations" --copt="-ftree-vectorize" --copt="-fomit-frame-pointer" --local_resources 8192,8.0,1.0 --verbose_failures tensorflow/tools/pip_package:build_pip_package
 3,700 / 4,622 files… error.
 In file included from tensorflow/compiler/xla/service/llvm_ir/llvm_util.cc:30:0:
 ./tensorflow/core/lib/core/casts.h: In instantiation of 'Dest tensorflow::bit_cast(const Source&) [with Dest = long long int; Source = void (*)(const char*, long long int)]':
 tensorflow/compiler/xla/service/llvm_ir/llvm_util.cc:400:67: required from here
 ./tensorflow/core/lib/core/casts.h:91:3: error: static assertion failed: Sizes do not match
In this case, XLA is causing problems. It’s new, and not needed, so let’s drop it for now and reconfigure and rebuild without it:
2,345 / 3,683 files… 3,112 / 3,683 files… 3,682 / 3,683 files…
Target //tensorflow/tools/pip_package:build_pip_package up-to-date: bazel-bin/tensorflow/tools/pip_package/build_pip_package
Next, install it:
$ bazel-bin/tensorflow/tools/pip_package/build_pip_package /tmp/tensorflow_pkg
$ sudo pip2 install /tmp/tensorflow_pkg/tensorflow-1.4.0-cp27-cp27mu-linux_armv7l.whl --upgrade --ignore-installed
At first when I ran the following command, it ran using python 3 and failed to install, so after some googling and learning about pip filename rules, I figured it out and just used pip2 instead:
$ sudo pip install /tmp/tensorflow_pkg/tensorflow-1.4.0-cp27-cp27mu-linux_armv7l.whl --upgrade --ignore-installedThen, the most fun issue was when I first ran “import tensorflow”, when I got this message:
>>> import tensorflow
 Traceback (most recent call last):
 File “”, line 1, in
 File “tensorflow/__init__.py”, line 24, in
 from tensorflow.python import *
 File “tensorflow/python/__init__.py”, line 49, in
 from tensorflow.python import pywrap_tensorflow
 File “tensorflow/python/pywrap_tensorflow.py”, line 25, in
 from tensorflow.python.platform import self_check
 ImportError: No module named platform
I googled the issue, and it seemed to be about locales, as shown at https://github.com/tensorflow/tensorflow/issues/36. So, I set a locale first, after also seeing that it needed to be capital US (http://bit.ly/2ifyle4), and rebuilt, and it still gave me the same issue:
$ export LC_ALL=en_US.UTF-8
$ export LANG=en_us.UTF-8
The next day, with fresh googling powers, revealed that actualy, it was just that I was just running it in the build directory! It has a directory called tensorflow in it, and python was looking up into that to find things. So just changing directories to another fixed the issue.
$ python2
 >>> import tensorflow
 >>> print(tensorflow.__version__)
 1.4.0
It looks like everything is working, so onto YOLOing.
Running YOLO
I’m sure there are a few implementations of YOLO out there by now, so let’s pick one from https://github.com/experiencor/basic-yolo-keras:
$ git clone https://github.com/experiencor/basic-yolo-keras.git
$ cd basic-yolo-keras
Get weights from https://1drv.ms/f/s!ApLdDEW3ut5fec2OzK4S4RpT-SU, or raccoon from https://1drv.ms/f/s!ApLdDEW3ut5feoZAEUwmSMYdPlY
$ wget /tiny_yolo_features.h5
$ wget /tiny_yolo_raccoon.h5
Next, edit the configuration file, and change the model to “Tiny Yolo":
$ vi config.jsonDownload a picture of a racoon:
$ wget https://upload.wikimedia.org/wikipedia/commons/b/be/Racoon_in_Vancouver.jpgThen, run the script:
$ python2 predict.py -c config.json -i Racoon_in_Vancouver.jpg -w tiny_yolo_raccoon.h5It’s missing the imgaug package, so we’ll add it and its dependencies:
$ sudo pip2 install imgaug
$ sudo pip2 install keras
$ sudo pip2 install h5py
Both h5py and scipy take a little while to install. Can it find the raccoon in Figure 2?

$ python2 predict.py -c config.json -i Racoon_in_Vancouver.jpg -w tiny_yolo_raccoon.h5Yes, now that’s a detected raccoon!


Be the first to comment