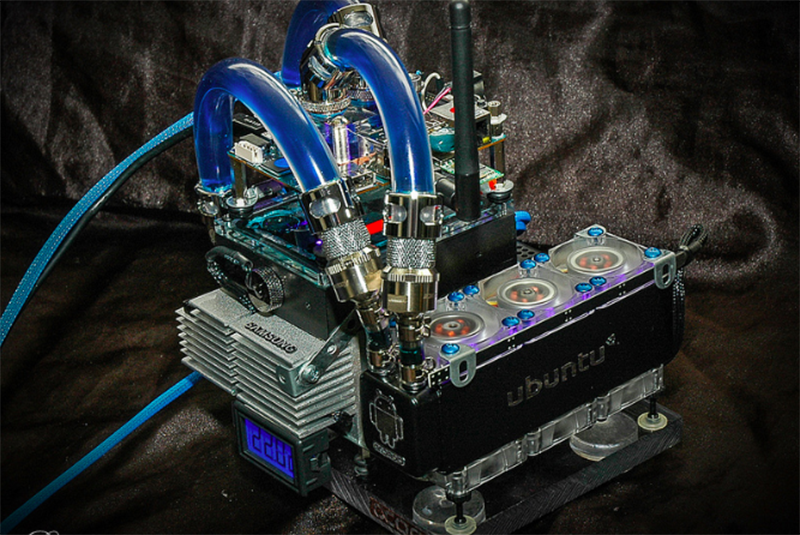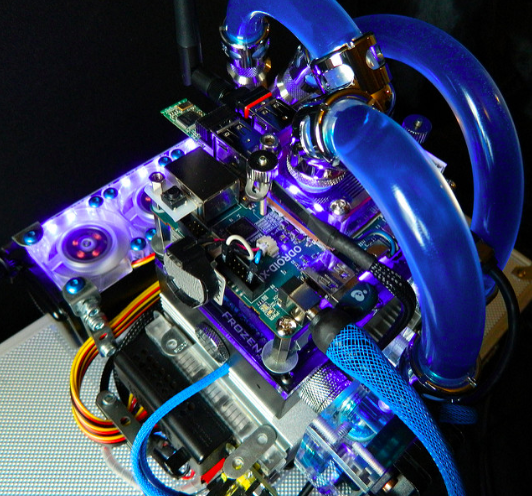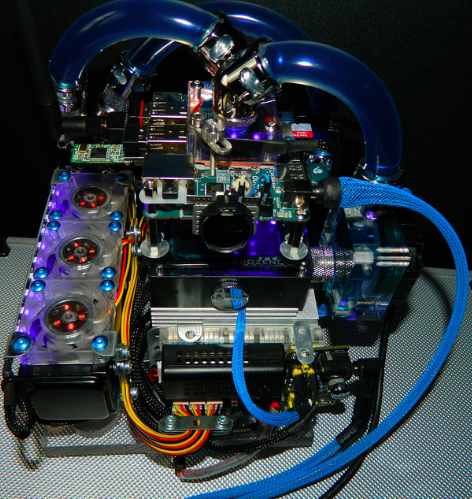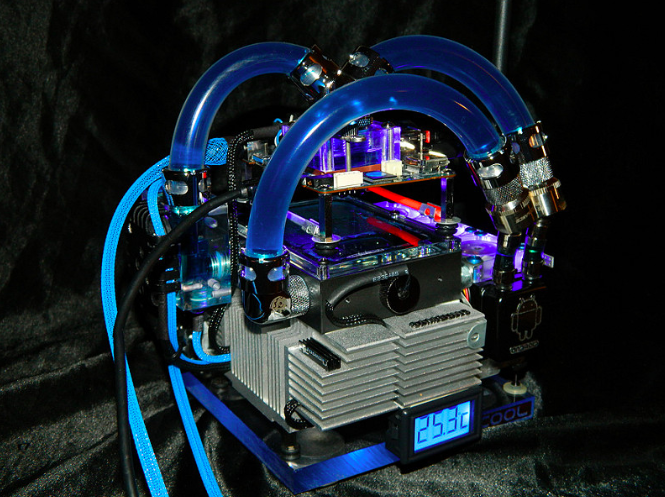
Building a liquid-cooled ODROID took about 5 weeks to complete, with an average of 12-18 hours a day spent working on the project. It weighs a whopping 6.5lbs, with a total cost of around $950, including the board, accessories, cooling hardware, and shipping,
Wiring
Wiring the 18 connections for the 6 fans took almost 2 days to determine how to get the brackets to be perfect. Many hours were spent cutting wires and re-soldering new connectors as well as making them shorter. The power supply proved to be a project in itself. I needed to provide 12v, 5v, 3.3v, and 1.2v to all of the various diff connectors and had to fit 15 connections into the smallest space possible, while still dishing out the various different voltages, along with placing capacitors and resistors.

Breadboard
I found that using a breadboard permanently, rather than soldering up a new PCB, was actually better, since it had a deep base already and can be changed quickly if needed. The main input is a breadboard Arduino power supply, which gave me 5v/3.3v without having to use voltage regulators. I just soldered new leads to the bottom of the input board at the main 12v jack in order to bypass the board and rails, which gave the center of the board the 12v needed for the fans, pump, and LED bars.

Fan and pump
I added a fan controller to tone down the fans and lights when I want it to run it silent and dim. The main UV led strip and fans are connected to the fan controller that gears the voltage down to approximately 6v, which keeps the fans just barely spinning but dead silent. I used a polycarbonate bullet-proof plexiglass as the base, then ran a multicolor LED through a hole that I drilled and installed a switch for selecting the color for the base. The pump runs at a constant 12v and seems perfect for the pressure required, so I didn’t bother implementing the pump that into the fan controller loop. The pump’s instructions state that it can run as low as 6v, but I determined that the bottleneck at my radiator could be overcome by pushing the pump at full strength. The pump is quiet and worked out well.

Enhancements
I have ideas for a better setup, but can’t really afford to do another one for some time. I think that I can cool the XU-E significantly more, but for now I’ve shown that the concept works and runs solidly. Although the project could have been built for much less money, I wanted to use high end parts to give it a more polished look.
Hardware
- Alphacool DC-LT Ceramic 12V DC Pump + Plexi Top
- Alphacool NexXxoS XT45 Full Copper Triple 40mm Radiator with 6 fans in a push/pull configuration.
- 12V fans are 40mmx10mm running at ~6000rpm pushing ~9.5cfm
- 3/8ID 5/8OD tubing, aside from the 1/4ID to 3/8OD tubing to convert down to the radiator. Only 2 types of 40mm radiator are made, and there are no options for anything except 1/4ID on this breed, so I needed to use a bunch of extra fittings in order to convert it down
- Bitspower, Enzotech, and Koolance connectors
- Monsoon Free Center compression fittings for the tubing
- XSPC LCD temp display with temp sensor for reservoir
- FrozenQ Flex tank reservoir
- Fesser One UV Blue Non-Conductive Coolant
- Fujipoly Extreme Builder Thermal Pad 11.0W/mk
- Darkside UV LED strips
The rest of the parts were o-rings and lighting, as well as various other accessories needed for the power supply setup. The base is an old Macintosh CPU heatsink I found. The rest of the project is mostly held together by an older Erector set that I disassembled. The rubber feet are salvaged from a Playstation controller.
Software
- Ubuntu 12.04, 13.10, 14.04 and Server
- Xubuntu
- Lubuntu
- Kali Linux
- Debian
- Arch
- openSuse
- Fedora
- Suzie
- Funtoo
- Abacus OS
- XBMC 13
- Android Jelly Bean 4.2.2

Be the first to comment