It seems that tracking people has grown into a multi billion dollar market (https://goo.gl/T1XZS8) and can be used either to build profiles on people (learn a person's habits and monetize based on them), or to optimize stores and venues based on where the people go to. For example, if a clothes store can track your movements (and remember where you have been on previous visits) they can build a profile with the kinds of clothes you like to look at and can bombard you with personalized advertisement later on. People tracking can be done in lots of ways, from face recognition to wifi/bluetooth tracking, with varying amounts of accuracy. As with any technology, tracking can be used to do good (e.g. find buried people after an earthquake) or evil (stalk your cute neighbor next door).
In my case I want to track when the nanny is home or not so that I know I have to go to pick up my son from the park instead. This can be done remarkably easy with wifi tracking and Home Assistant. The problem is my nanny's phone does not connect to my wifi network, so I need to use a passive way of monitoring.
We have discussed in the past how wifi operates (https://goo.gl/yWD2j1) and also how it can be sniffed (https://goo.gl/uEsdMo). In short - clients and access points regularly broadcast their SSID or send probe requests to ask for any/specific SSIDs in the area. All wireless traffic (even encrypted traffic) has layer 2 information (MAC addresses) unencrypted and this can be sniffed. In order to sniff wifi traffic you have to have a wireless card that supports monitor mode (HardKernel wifi adapters support it). Typically MAC addresses are unique per device and can be used to track a specific device, so anyone with a monitor wifi card can track you (as we are about to see).
Installing bleeding-edge Kismet
The simplest way to start listening to the wifi spectrum is to install kismet. Kismet takes care of putting your wifi adapter in monitor mode and can also log all the sniffed traffic. In order to have access to the new UI and also to have a REST API you will need to install kismet from sources instead from a package manager (both Ubuntu 16.04 and 18.04 have too old versions of kismet). You can get general instructions from here: https://goo.gl/qjwLKb.
You will need to install some development tools first:
$ sudo apt-get install build-essential git libmicrohttpd-dev \
pkg-config zlib1g-dev libnl-3-dev libnl-genl-3-dev libcap-dev \
libpcap-dev libncurses5-dev libnm-dev libdw-dev libsqlite3-dev \
libprotobuf-dev libprotobuf-c-dev protobuf-compiler \
protobuf-c-compiler
$ sudo apt-get install python python-setuptools python-protobuf \
python-sqlite python-requests
Compiling kismet will require more RAM than you probably have, so it is a good idea to enable disk-based swap. I managed to get away with 1G swap for my C2, but if you have more space available, you can create a bigger swap file:
$ dd if=/dev/zero of=/swap bs=1M count=1000
$ mkswap /swap
$ swapon /swap
Next, you can grab the latest development snapshot of Kismet, compile and install it:
$ git clone https://www.kismetwireless.net/git/kismet.git
$ cd kismet
$ ./configure
$ make -j 4
$ sudo make suidinstall
Once done you can deactivate the swap you created and reclaim your disk space:
$ sudo swapoff /swap
$ sudo rm -f /swap
Kismet will be installed in /usr/local, with its configuration located at /usr/local/etc/kismet.
You can create a new systemd startup script for kismet:
$ cat /etc/systemd/system/kismet.service
[Unit]
Description=Kismet wifi monitor

[Service]
Type=forking
ExecStart=/usr/local/bin/kismet -c wlan0 --no-curses-wrapper --daemonize -n
WatchdogSec=3600
Restart=always

[Install]
WantedBy=multi-user.target
$ sudo systemctl enable kismet
$ sudo systemctl start kismet
The systemd startup script starts kismet as a daemon, with no logging, bound to wlan0 (which will be put in monitor mode). I have had some problems with the USB ports on my C2 (mainly because I am running several gadgets off an unpowered hub) and sometimes the wifi adapter would lock up requiring a reboot. If I restart kismet every hour the problem goes away - this is what WatchdogSec does.
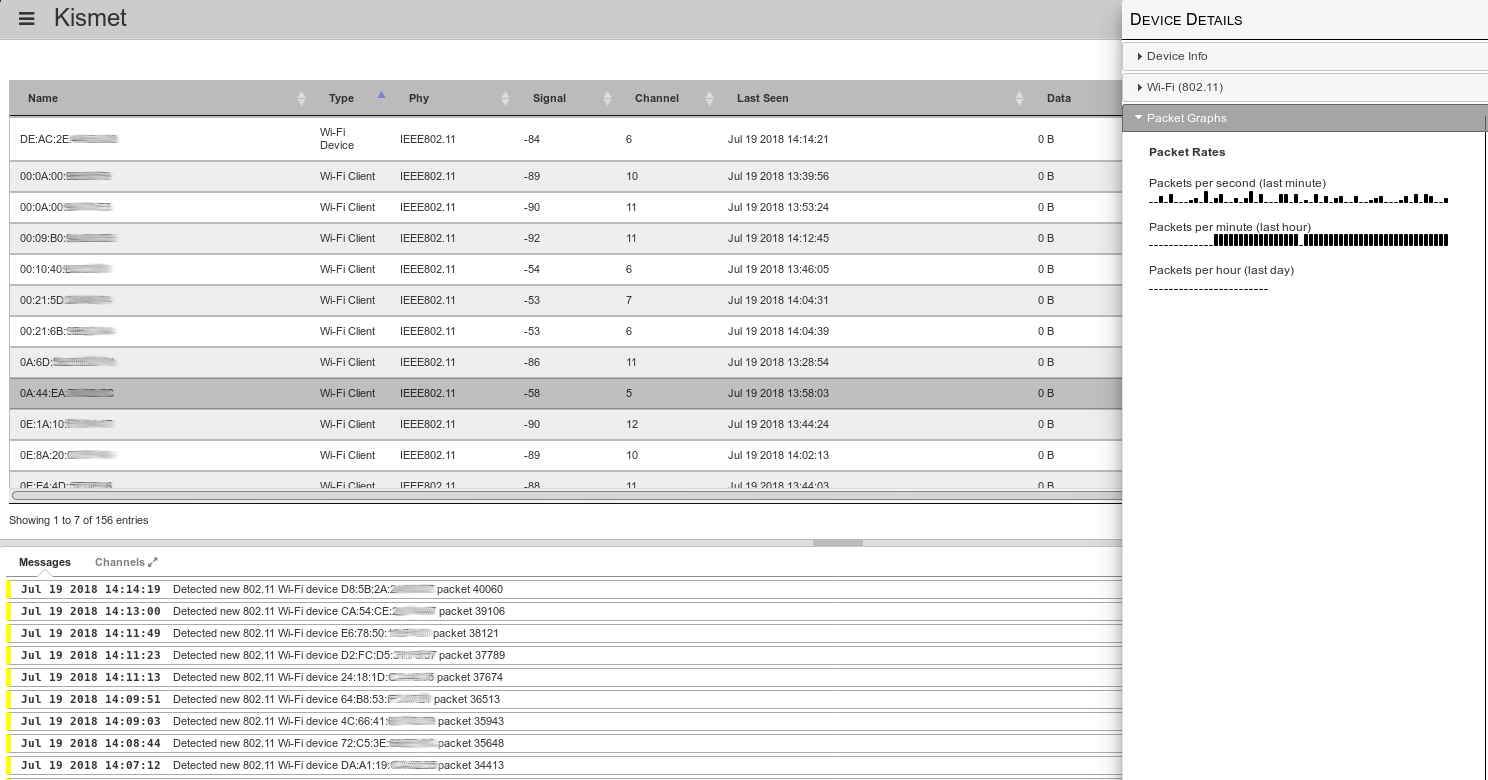
Once started, you can connect to its web interface on http://:2501/. You have read-only access without being authenticated, but you will need to create a user if you want to change settings. When you start kismet for the first time a random password for the user kismet will be generated and stored in /root/.kismet/kismet_httpd.conf.

Finding out the MAC
In order to track somebody via wifi, you will need to get their MAC address one way or another. You can ask for it, or use social engineering to find it out (e.g. ask to see their network settings in order to troubleshoot some made-up issue), or you will have to work for it in case you do not have access at all to the terminal you want to track.
If you are stuck in the latter case you will have to make some assumptions:
- The tracked person has wifi open and makes probe requests
- The tracked person has a static MAC
- You know when the tracked person is within sniffing range
In this case, here is the plan. Start kismet in monitor mode and have it log to file (sqlite3 database) ambient traffic. Stop the capture before the person of interest is within range and restart a new capture when the person is around. Leave the capture going for as long as possible (at least 10-15 minutes) and stop it when the person is no longer around. Next, extract the MAC addresses from both data sets and do an difference. You are interested in MACs that exist when the target was around but do not exist in the first dataset (remove MACs found in the first data set from the second one). You should be left with a smaller list of MACs - one of which is the target's MAC. You can further refine this based on timestamps - eliminate MACs seen after the target was no longer around or before the target arrived. If you still get a list of a few MACs and you cannot exclude some based on manufacturer (e.g. they are all Samsung phones), you will need to repeat the process a different time and see which MACs from a new recording are the same as the potential target MACs. By process of elimination, you should end up with only one MAC that appears in all captures and is not "a regular". If you are doing this in a "quiet" area (e.g. a house) you will find out the MAC pretty quickly. If instead you are doing this in a crowded area, you will have to do more iterations.
Let us see the plan in action.
First you need to do the capture. To enable this, edit /usr/local/etc/kismet_logging.conf and change log_prefix=/tmp/.
Next, edit the systemd service and remove the "-n" command-line switch, so that logging is done:
$ sudo sed -i 's/--daemonize -n/--daemonize/' \
/etc/systemd/system/kismet.service
$ sudo systemctl daemon-reload
$ sudo service kismet restart
Now you will get hourly log files in /tmp with the devices that kismet has seen. Once you have enough data, you can turn off logging and restart kismet by editing the systemd service and adding "-n".
Next you will need to divide the files you collected into two groups. The directory "0" will hold files where the target is known not to have been present, while the directory "1" will hold files where the target might have been present. You can do this division based on time (you have one hour slots by default).
$ mkdir 0 1
$ sudo mv /tmp/Kismet-20180718-07-33-00-1.kismet 0/
$ sudo mv /tmp/Kismet-20180718-10-33-03-1.kismet 1/
Next comes the hard work. We need to extract all MACs from all files in both folders and compile two lists - MACs from folder 0 and from folder 1. We can get data from inside the kismet log by using sqlite3 with an SQL syntax. Since sqlite3 doesn't support wildcards for file names, we need to do some bash trickery and iterate over each file.
$ sudo apt-get install sqlite3 bc
$ for file in 0/*.kismet; do sqlite3 -csv "$file" 'select \
devmac,first_time,last_time from devices;' | tee -a 0/0.dump; done
$ for file in 1/*.kismet; do sqlite3 -csv "$file" 'select \
devmac,first_time,last_time from devices;' | tee -a 1/1.dump; done
For both directories we have dumped out the MAC, start time and end time from Kismet. Next step is to aggregate the data (since having multiple files leads to duplicate entries). We will use sort + uniq and keep only the MAC address. In my case I ended up with 701 MACs which were known not to be the target, and 229 MACs that might have been the target.
At this step, we need to reduce this potential list further and we will eliminate MACs that have been seen only briefly (for less than 100 seconds) because they are likely just people or cars passing by. This further reduces the potential MAC set to 152 in my case.
$ cat 0/0.dump | cut -f 1 -d ',' | sort -u > 0/0.mac
$ while read line; do start=`echo $line | cut -f 2 -d ','`; \
end=`echo $line | cut -f 3 -d ','`; difference=`echo $end-$start|bc`; if [ "$difference" -gt 100 ]; then echo "$line" | tee -a 1/1_filtered.dump; fi; done < 1/1.dump $ cat 1/1_filtered.dump | cut -f 1 -d ',' | sort -u > 1/1.mac
Now the process of elimination begins - we delete the matching lines between the two files. For this we can use grep -v to print non-matching lines and we search for the contents of 0/0.mac inside 1/1.mac:
$ grep -v -f 0/0.mac 1/1.mac > potential.macThis leaves me with only 27 MACs to further investigate. I could filter by device vendor (if I knew it). One way to keep only Samsung devices is to look-up their MAC in the OUI database. You can install a local copy of the database with the ieee-data package and you can look up all the MACs and keep only the ones registered to Samsung.
$ sudo apt-get install ieee-data
$ while read line; do match=`echo $line | cut -c 1-8 | sed 's/://g' | xargs -n 1 -I{} grep {} /usr/share/ieee-data/oui.txt | grep -i Samsung`; if [ -n "$match" ]; then echo "$line"| tee -a samsung.mac; fi; done <potential.mac
I get only 4 MACs after applying this filter, so I'm getting closer. In order to further refine this I need to do more sniffing when the target is around and find which MACs from the new recording are found in the old recording until I am left with only one. Or, I could monitor all 4 and see inside Home Assistant which one behaves correctly.
Adding a custom device_tracker in Home Assistant
The advantage of the new kismet you just installed is you can query it via its REST API and get a JSON response of new devices that match your search criteria. The REST API documentation is available here: https://goo.gl/JFpnZM.
The plan is to implement a custom device_tracker as a module in Home Assistant that will take a list of MAC addresses or a list of SSIDs and will ask a kismet instance if it seen those MACs/SSIDs in the last 30 seconds. If Kismet has seen them, it will report their names, which in turn gets relayed to Home Assistant.
Currently, the kismet device_tracker can be used as a custom component. Hopefully, in the future when the REST API stabilizes it can be merged directly into Home Assistant. You can install it following these steps:
$ sudo su - homeassistant
$ cd .homeassistant
$ mkdir -p custom_components/device_tracker
$ cd custom_components/device_tracker
$ wget -O kismet.py https://goo.gl/WPGZZA
You will need to edit configuration.yaml and add the component:
device_tracker:
- platform: kismet
interval_seconds: 30
host: 192.168.1.15
port: 2501
consider_home: 420
clients:
- 84:98:66:47:cf:b9
- d0:31:69:38:f2:99
ssids:
- DIGI
For extra debugging (though it will be noisy), you can set the component to debug inside the logger as well:
logger:
default: error
logs:
custom_components.device_tracker.kismet: debug
Once you restart Home Assistant, the component will connect periodically to the kismet instance and query for the devices you listed. It will get results for the last "interval_seconds" period (e.g. for the last 30 seconds), so even if the mobile device was active for a little while in that interval it will get picked up and reported. The length of interval_seconds only affects how quickly a device is seen, not whether it is seen or not. The parameters have the following meaning:
- interval_seconds - how often to ask for updates from the kismet server
- host - the kismet server IP/FQDN (127.0.0.1 by default)
- port - the port where kismet is running (2501 by default)
- consider_home - how long should a client be still considered at home if he has not been seen (7 minutes is ok for clients with wifi open, but not associated to a network. May depend from device to device)
- clients - a list of MAC addresses to look for. Can be a regular expression
- ssids - a list of SSIDs to look for. Can be a regular expression
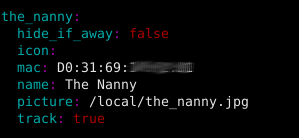
Devices which are discovered are added to known_devices.yaml and can be accessed as an entity inside Home Assistant. Once the devices have been discovered you can customize their entity name and add an image as well by editing known_devices.yaml

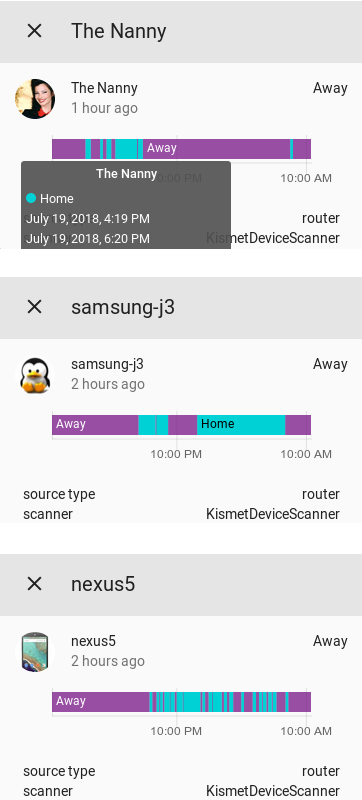
You can further add the entities to be tracked inside a group and display them in the main Home Assistant UI.
group:
people:
name: People
view: yes
entities:
- device_tracker.the_nanny
- device_tracker.samsungj3
- device_tracker.nexus5

If you are using Custom UI (https://github.com/andrey-git/home-assistant-custom-ui/) with Home Assistant you can also display the last changed time (e.g. "2 minutes ago") below the entity name so you can get a quick indication how long ago a person has arrived or left without expanding the card. To do so, make sure you are on the latest CustomUI version (run ./update-custom-ui.sh from within ~homeassistant/.homeassistant) and add the following in the configuration:
homeassistant:
customize:
device_tracker.the_nanny:
custom_ui_state_card: state-card-custom-ui
show_last_changed: true
Conclusion
So, how well is this working? It depends on the device being tracked. Older/cheaper devices make no attempt to hide their MAC and are easily picked up (like my Samsung J3). Newer/more expensive devices use random MACs to do probe requests and are harder to pin down. It is not impossible though. All phones use their real MAC address when connecting to a known access point. So, if you (separately) broadcast a list of popular access point names from the target's area (e.g. Starbucks, McDonalds, etc) you may convince its wifi to give itself away and try to connect to your access point. This method will leave traces, because all those wifi access points will be visible in the network list for all clients, raising suspicion, but this article will get you started: https://goo.gl/rXg2so.
Depending on the phone behavior, it might get to sleep from time to time and you might miss some probe requests (especially if the phone is on battery), but it should be quite visible when the screen is turned on or the user is making a call. To improve accuracy you might need to add more kismet listeners around your house to cover more channels or blind spots.

What can you do to avoid detection and tracking? Simple. Turn off your wifi when not in use. If you are not on the latest flagship phone (Android P seems to have included randomized MACs) you can still use third-party apps like Pri-Fi (https://play.google.com/store/apps/details?id=eu.chainfire.pryfi) by chanfire (the creator of SuperSU) to do the same thing. But depending on the tech-savviness of the person you are tracking - most people will not bother to conceal themselves.

Be the first to comment