

2ZoneMinder (ZM) is an integrated set of applications that provide a complete surveillance solution that allows the user to capture, analyze, record, and monitor an area through any CCTV or security cameras.
Main features
- Monitor from anywhere: ZoneMinder has a full-featured, web-based interface you can access from any Internet-accessible device
- Use any camera: ZoneMinder allows you to use any analog or IP-enabled camera
- Control of your data: ZoneMinder is fully on premises; it allows you to own your data and control where it goes
- Run small or super big systems: suitable for home and small business use, as well as multi-server enterprise deployments. It is compatible with many platforms, including ARM technology (ODROID is built on an ARM platform)
- Keep track of what matters: ZoneMinder allows you to browse information intuitively. Drill down to what you want to see in a matter of seconds
- Actively maintained and free of charge: a team committed to open source actively maintains ZoneMinder
Recently, I moved the ZoneMinder application from my old Radxa Rock Pro (an ARM board) to the more powerful ODROID-XU4. The better and easier to install working setup I found is ODROID-XU4 - Ubuntu 16.04.3 LTS – ZoneMinder 1.29*.
Installation
Let’s install ZoneMinder on our ODROID-XU4 board. On your SD card, install the Ubuntu 16.04.3 LTS image (the upstream Release 4.14.y) provided by Hardkernel at the address: https://wiki.odroid.com/odroid-xu4/os_images/linux/ubuntu_4.14/20171213
Then upgrade the system:
$ sudo apt update
$ sudo apt upgrade
$ sudo apt dist-upgrade
$ sudo apt install linux-image-xu3
$ sudo apt autoremove
$ sudo reboot
Now install LAMP (Linux, Apache, MySQL, PHP) on the board:
$ sudo apt install apache2
$ sudo apt install mysql-server
$ sudo apt install php libapache2-mod-php php-mysql
Now install ZoneMinder 1.29:**
$ sudo -iTweak MySQL configuration (not needed for ZM 1.32 or greater):
$ rm /etc/mysql/my.cnf (this removes the current symbolic link)
$ cp /etc/mysql/mysql.conf.d/mysqld.cnf /etc/mysql/my.cnf

$ nano /etc/mysql/my.cnf
In the [mysqld] section add the following:
$ sql_mode = NO_ENGINE_SUBSTITUTIONThen restart MySQL:
$ systemctl restart mysqlNow install ZoneMinder:
$ apt-get install zoneminderCreate ZM database (not needed for ZM 1.32 or greater)::
$ mysql -uroot -p < /usr/share/zoneminder/db/zm_create.sql
$ mysql -uroot -p -e "grant lock tables,alter,drop,select,insert,update,delete,create,index,alter routine,create routine, trigger,execute on zm.* to 'zmuser'@localhost identified by 'zmpass';"
Add permissions:
$ chmod 740 /etc/zm/zm.conf
$ chown root:www-data /etc/zm/zm.conf
$ chown -R www-data:www-data /usr/share/zoneminder/
Enable modules and ZoneMinder configuration:
$ a2enmod cgi
$ a2enmod rewrite
$ a2enconf zoneminder

$ a2enmod expires
$ a2enmod headers
Enable ZoneMinder to system startup:
$ systemctl enable zoneminder
$ systemctl start zoneminder
Configure php.ini with the correct timezone:
$ nano /etc/php/7.0/apache2/php.iniInsert your timezone:
$ [Date]
$ ; Defines the default timezone used by the date functions
$ ; http://php.net/date.timezone
$ date.timezone = America/New_York
Restart Apache:
$ systemctl reload apache2Done!
Now, you can find the ZM web page on http://IP_of_the_board/zm and add cameras.*** The same procedure is valid for ZM 1.32 (the last stable ZM release), thus avoiding commands not needed for ZM 1.32. In this case, before installing ZM you will need to add the ZoneMinder repo by Isaac Connor (the ZM maintainer on Ubuntu):
$ add-apt-repository ppa:iconnor/zoneminder-1.32Note that ZM 1.32 is available for Ubuntu 18.04, too. Please take into consideration that the ffmpeg in 18.04 Hardkernel image is not compatible and should be tweaked (see https://forum.odroid.com/viewtopic.php?f=95&t=33745#p247653 )
Notes
- There are other possible combinations, to be discussed later;
- There is no need to install dedicated ZoneMinder repository since ZM 1.29 is already available on Ubuntu 16.04 (xenial) repos
- All types of cameras can work: ffmpeg and mjpeg cameras connected via Wi-Fi, Ethernet cable, or USB
Other tweaks and tricks
After installation, check if ZM is working well on your LAN. See previous posts for ZM installation and FFMPEG modification, if you use HK 18.04 distro.
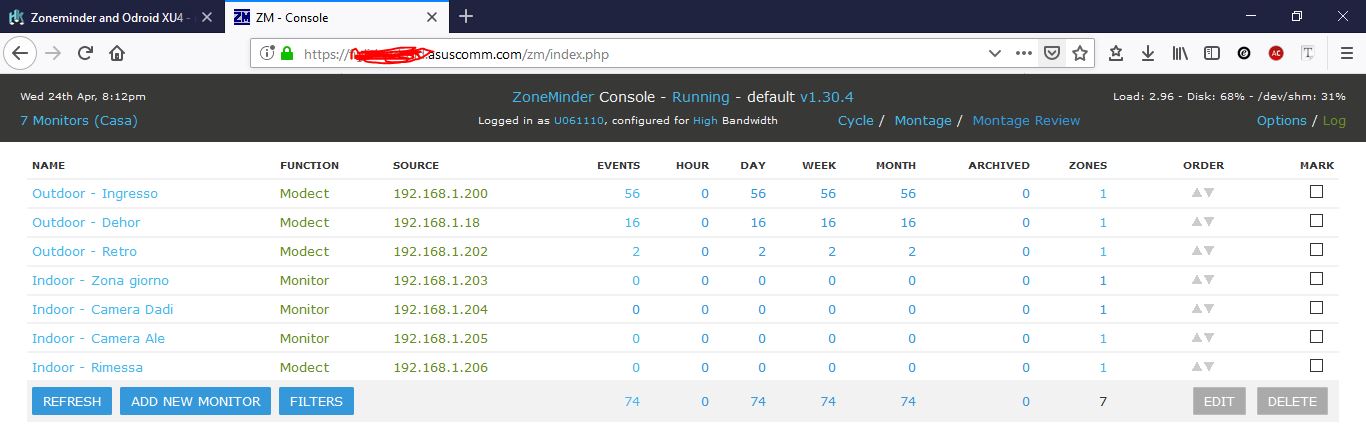
Open a Web browser (Firefox is recommended): http://LANserverip/zm (e.g. http://192.168.1.200/zm). If the ZoneMinder page appears, you are in good shape.
Set the ZM access in authenticated way: Go in Options/System. Flag on OPT_USE_AUTH. Close the browser, then open the browser and you will be asked to enter Userid/password. Use admin/admin*.
Modify userid/password: Go into Options/Users. Change username from admin to whatever1, set the new password to whatever2. Close the browser, then open the browser and you will be asked to enter Userid/password. Use whatever1/whatever2*
Check that AUTH_TYPE = builtin. If no, then set it: Check AUTH_RELAY = hashed and again if no, then set it. Change AUTH_HASH_SECRET to whatever*
Enable https for ZoneMinder: This is the easy way. There is another method using letsencrypt certificates. Go in terminal and add SSL to Apache2 by first creating a self-signed certificate:
$ make-ssl-cert generate-default-snakeoil --force-overwriteThis will create the following files:
/etc/ssl/private/ssl-cert-snakeoil.key
/etc/ssl/certs/ssl-cert-snakeoil.pem
Activate Apache SSL module:
$ a2enmod sslActivate Apache default ssl virtual host:
$ a2ensite default-sslRestart Apache:
$ service apache2 restartYou should now be able to access the Web server using https://LANserverip/zm (e.g. https://192.168.1.200/zm).
Enable port-forwarding of 443 port on your router. On an ASUS model, go to WAN/Port Forwarding:
Service name: HTTPS_Port_Forwarding Port: 443 Local IP: LANserverip (e.g.: 192.168.1.200) Local port: 443 Protocol: TCP
You should now be able to access the Web server using https://WANserverip/zm (e.g. https://5.157.104.224/zm).
You can dynamically link your WANserverip to a static host name (e.g. https://hostname/zm) through Dynamic DNS functionalities on your router (e.g., on ASUS and DLink) or using services like NOIP. This way you can securely expose ZoneMinder service in WAN--authenticated access and accessible in encrypted https, so all information flow on WAN will be encrypted--through a static Web address.
If you are asked to restart ZoneMinder, go to Terminal and enter the following command:
$ sudo service zoneminder restartHow to configure the camera There are four ways to do this--three easy, the fourth manual:
1. Use PRESETS 2. Use ONVIF automatic detection 3. Google it: Search for “inserting {camera model} ZoneMinder" 4. Manual configure
For your inspiration, the following are configurations for my three types of cameras:
A: FOSCAM FI8910W (old PTZ MJPEG model used for indoor)
General Name: whatever Server: None Source Type: Remote Function: Monitor (to view only)
Source Remote Protocol: HTTP Remote Method: Simple Remote Host: 192.168.1.203 Remote Host Port: 200 Remote Host Path: /videostream.cgi?user=user-on-camera&pwd=pwd-on-camera&rate=3 Target Colorspace: 24 bit color Capture Width: 640 Capture Height: 480
Leave other values as the defaults, other sheet Control on PTZ commands in next session.
B: FOSCAM FI8918W (PTZ FFMPEG model used for indoor)
General Name: whatever Server: None Source Type: Ffmpeg Function: Modect (to view and to record on motion detection)
Source Source Path: rtsp://user-on-camera:pwd-on-camera@192.168.1.206:200/videoSub Remote Method: TCP Options: blank Target Colorspace: 24 bit color Capture Width: 640 Capture Height: 480
Leave other values as the defaults, other sheet Control on PTZ commands in next session.
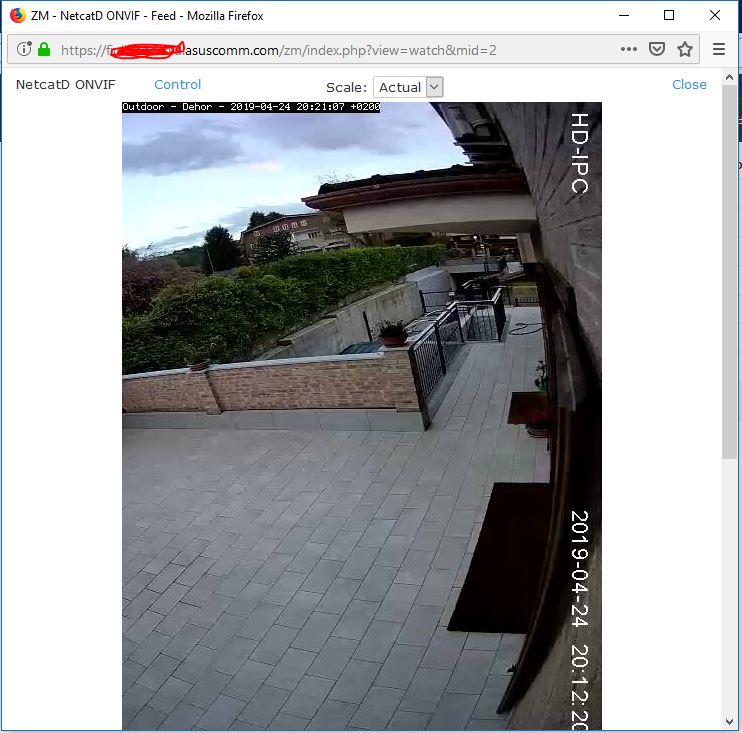
C: Jidetech POE PTZ FFMPEG dome model used for outdoor and LEFTEK POE PTZ FFMPEG dome model used for outdoor
General Name: whatever Server: None Source Type: Ffmpeg Function: Modect (to view and to record on motion detection)
Source Source Path: rtsp://user-on-camera:pwd-on-camera@192.168.1.200:554/1/h264minor Remote Method: TCP Options: blank Target Colorspace: 24 bit color Capture Width: 640 Capture Height: 480
Leave other values as the defaults, other sheet Control on PTZ commands in next session.
How-to record on SSD
- Install cifs-utils
$ sudo apt-get install cifs-utils-Create directory to mount SSD
$ mkdir /home/odroid/Documents/STORAGE-Edit /etc/fstab
$ sudo nano /etc/fstabInsert the following lines:
Note: the correct UUID of SSD can be discovered through ls -l /dev/disk/by-uuid/*
#SSD
UUID=BE28A67028A626FD /home/odroid/Documents/STORAGE auto nosuid,nodev,nofail 0 0
Press CTRL+O, then CTRL+X
$ sudo mount -aReboot, if needed.
$ mkdir /home/odroid/Documents/STORAGE/ZM-IMAGES
$ mkdir /home/odroid/Documents/STORAGE/ZM-IMAGES/images
$ mkdir /home/odroid/Documents/STORAGE/ZM-IMAGES/events
$ mkdir /home/odroid/Documents/STORAGE/ZM-IMAGES/temp

$ sudo nano /etc/fstab
Insert the following lines to create a bind:
/home/odroid/Documents/STORAGE/ZM-IMAGES/images /var/cache/zoneminder/images none defaults,bind 0 0 /home/odroid/Documents/STORAGE/ZM-IMAGES/events /var/cache/zoneminder/events none defaults,bind 0 0 /home/odroid/Documents/STORAGE/ZM-IMAGES/temp /var/cache/zoneminder/temp none defaults,bind 0 0
Press CTRL+O, then CTRL+X
$ sudo mount -a

$ sudo chown -R www-data:www-data /home/odroid/Documents/STORAGE/ZM-IMAGES
A similar procedure could be followed to mount a USB HD or a network storage disc.
How to record on motion detection In Console, click on column zones. For the camera, you want MOTION DETECTION. Click again on the picture. Set the area you want to check for detection. Leave unchanged if you want to check the full area. Now set the following:
Name: whatever Type: Active Unit: Pixels Alarm Colour: whatever Alarm check method: Blobs Min-Max Pix Thresh: 40 - 0 Filter: 5 -5 Min/max Alarmed area: 200 - 0 Min/max Filtered area: 20 - 0 Min/max Blob area: 20 - 0 Min/max Blob: 2 - 0 Overload Frame: 2
Save. Put in Console and the camera in MODECT mode (column function).
How-to implement PTZ commands
Enable PTZ commands: go in Options/System: flag on OPT_CONTROL. In Console, click in column source, for the camera you want to enable.
PTZ:
Control Controllable: flag Control Type: choose your camera model Control device: according tp your model (in my case blank) Control address: camera_ip:camera_port (in my case 192.168.1.200:8999)
Be the first to comment