ODROID-XU4 Tweaks: A Collection of Popular Modifications
November 1, 2019By Dennis PaulODROID-XU4, Tinkering, Tutorial
Like many others, I’m interested in getting the most out of my ODROID-XU4. During the time I’ve used it, I found out several tweaks that improved the speed or decreased the power consumption. In this article I would like to share what I have learned. This article is an authorized translation of the german article “ODROID-XU4: Tweaks unter Ubuntu 18.04 und Kernel 4.14”. The original German article can be found here: https://blaumedia.com/blog/odroid-xu4-tweaks-unter-ubuntu-18-04-und-kernel-4-14/
Note: Any changes to your system can potentially void your warranty and negatively impact the system’s stability, so every change is made on your own responsibility.
CPU overclocking and benchmarks
Hardkernel advises against changing the CPU clock speed values of the ODROID-XU4, since it can cause stability and heat issues. To prevent the latter problem, I recommend swapping the stock fan, as described in my article here: https://blaumedia.com/blog/odroid-xu4-luefter-und-kuehlkoerper-austausch/. The general problem is thermal throttling, automatically underclocking the processor to decrease the chance of damaging the hardware. Unfortunately, stability problems are inevitably left out until you have put together a perfectly functioning setup.
By default the four little cores, these are the processor's economical ARM cores, and the four BIG cores, performance focused cores, are operated with a maximum clock speed of 1.5 GHz and 2.0 GHz respectively. I'll explain below how to customize and compile the kernel to use 1.6 GHz and 2.1 GHz as maximum clock speeds. I couldn't find any problems or crashes during my 1 week test phase and would describe it as stable.
To illustrate the performance increase I did a small benchmark with sysbench. Here are the first of the results (lower is better):
Core-Type
Benchmark result without overclock
Benchmark result with overclock
Difference
little.cores
35.644 seconds
33.408 seconds
-6.27%
BIG.cores
21.695 seconds
20.624 seconds
-4.94%
Both
13.583 seconds
12.994 seconds
-4.34%
As you can see, with an increase of only 0.1 GHz you get much better performance. Especially the little cores because their base clock is only 1.5 GHz. The terminal commands are:
little.cores
$ taskset -c 0,1,2,3 sysbench --test=cpu --num-threads=4 run
BIG.cores
$ taskset -c 4,5,6,7 sysbench --test=cpu --num-threads=4 run
both cores
$ sysbench --test=cpu --num-threads=8 run
All commands were executed three times and the average was taken from the results. Of course the CPU Governor was set to performance. But now enough for the benchmarks! How can the CPU be overclocked? Thanks to ridge's observations in the code of the kernel, he wrote a little tutorial, available here: https://forum.odroid.com/viewtopic.php?f=93&t=30115
From the manual I copied the needed code; just log in as root and copy the following script into your terminal. The compilation can take up to 30 minutes - so in the meantime get yourself a coffee and check your email.
# Last update: 27. July 2019

# Cloning Git Repo
cd /tmp
git clone --depth 1 https://github.com/hardkernel/linux -b odroidxu4-4.14.y
cd linux

# paste the new clock rates
sed -i 's/<1500000000>/<1600000000>/g' arch/arm/boot/dts/exynos5422-cpus.dtsi
sed -i 's/<2000000000>/<2100000000>/g' arch/arm/boot/dts/exynos5422-cpus.dtsi

sed -i '/&cluster_a15_opp_table {/a
opp-2100000000 {
opp-hz = /bits/ 64 <2100000000>;
opp-microvolt = <1312500>;
clock-latency-ns = <140000>;
};' arch/arm/boot/dts/exynos5800.dtsi

sed -i '/&cluster_a7_opp_table {/a
opp-1600000000 {
opp-hz = /bits/ 64 <1600000000>;
opp-microvolt = <1250000>;
clock-latency-ns = <140000>;
};' arch/arm/boot/dts/exynos5800.dtsi

sed -i '/PLL_35XX_RATE(2000000000, 250, 3, 0),/i
PLL_35XX_RATE(2100000000, 175, 2, 0),' drivers/clk/samsung/clk-exynos5420.c

sed -i '/{ 2000000, E5420_EGL_DIV0(3, 7, 7, 4), },/i
{ 2100000, E5420_EGL_DIV0(3, 7, 7, 4), },' drivers/clk/samsung/clk-exynos5420.c

sed -i '/{ 1500000, E5420_KFC_DIV(3, 5, 3), },/i
{ 1550000, E5420_KFC_DIV(3, 5, 3), },' drivers/clk/samsung/clk-exynos5420.c

# compile kernel, readme: https://wiki.odroid.com/odroid-xu4/software/building_kernel#y
apt update && apt install -y git gcc g++ build-essential libssl-dev bc
make odroidxu4_defconfig
make -j8
make modules_install
cp -f arch/arm/boot/zImage /media/boot
cp -f arch/arm/boot/dts/exynos5422-odroidxu3.dtb /media/boot
cp -f arch/arm/boot/dts/exynos5422-odroidxu4.dtb /media/boot
cp -f arch/arm/boot/dts/exynos5422-odroidxu3-lite.dtb /media/boot
sync
When it’s done compiling, you can restart the ODROID-XU4 with the “reboot” command in your terminal. On startup, it’ll pick the new kernel and will use the newly defined clock rates.
RAM Overclocking and Benchmarks
The clock rate of RAM determines how high the data rate is set. Quite simply: the faster the clock rate, the higher the bandwidth. Hardkernel made it very easy to overclock the ODROID-XU4 RAM. By default it runs at 825 MHz and it is extremely easy to overclock it to 933 MHz. All you have to do is look for the line setenv ddr_freq 825 in /media/boot/boot.ini and replace the 825 with 933. Otherwise, I have the code ready for you again:
$ sed -i 's/setenv ddr_freq 825/setenv ddr_feq 933/' /media/boot/boot.ini
What improvements in performance can you expect? I have again carried out a small benchmark with sysbench. The following command was used:
$ sysbench --test=memory --memory-block-size=1K --memory-total-size=10G --num-threads=1 run
The total execution time improved from 10.733 seconds to 10.592 seconds - a change of -1.31%. In this case, everyone should decide for themselves whether to accept an increased power consumption for this "performance improvement". I, for my part, have enabled 933 MHz. The small ODROID-XU4 tweaks provide the good overall package 🙂
Improve IO Speed
Assign USB3.0 ports and Ethernet port to BIG.cores
As the source for the following contribution a thank you to Obihoernchen and the blog post here: https://obihoernchen.net/1416/odroid-xu4-tune-network-and-usb-speed/
The following is from his blog post and was taken over by me for this post for ODROID-XU4 Tweaks. You should definitely have a look at his blog!
By default, tasks/events created by the Ethernet or USB ports (interrupts) are distributed to all cores. So it can happen that a little.core gets assigned the task to download 10 GB from the Internet, where a BIG.core could complete it in a much shorter time. To make sure that this is done by the BIG.cores in the future, you should make sure at the beginning that the service irqbalance is deactivated:
# systemctl disable irqbalance
Then we open the file /etc/rc.local and insert the following before the exit 0:
usb2
# echo 6 > /proc/irq/103/smp_affinity_list
usb3
#echo 5 > /proc/irq/104/smp_affinity_list
network (usb3)
#echo 4 > /proc/irq/105/smp_affinity_list
According to Obihoernchen's benchmarks, transfers were up to 100 Mbit (12.5 MB/s) faster. For me, this is now a standard setting.
Using UASP for USB 3.0 Hard Drives
This is a general tip and has no code example ready but, it is one of my favorite ODROID-XU4 tweaks. As described and tested in my article ODROID-XU4: SSD vs. eMMC comparison (Boost!), https://blaumedia.com/blog/odroid-xu4-ssd-vs-emmc-boost/
Back then, I could warmly recommend using an SSD with a SATA-to-USB adapter that supports UASP. Here again is a table from that article:
Type
Read (Cache)
Read (Direct)
Write
eMMC
804.54 MB/s
155.44 MB/s
45.0 MB/s
SSD (without UASP)
890.57 MB/s
106.09 MB/s
125.00 MB/s
SSD (with UASP)
888.20 MB/s
343.56 MB/s
205.00 MB/s
The UASP adapters offer an enormous increase in performance.
Reducing power consumption
Many people certainly use the ODROID-XU4 as a small energy-saving home server - just like me. To reduce the power consumption in 24/7 operation a little, here are a few tips.
Disabling cpu cores
There is hardly any effort required to deactivate individual cores. But first you have to know that CPU0-CPU3 is your little.cores and CPU4-7 are your BIG.cores. Depending on which requirements you have on your ODROID-XU4, you should consider which cores to deactivate.
Replace the 0 at cpu0 with your wished core
# echo 0 > /sys/devices/system/cpu/cpu0/online
Downclocking GPU
Again the following tip comes from Obihoernchen's blog. This time it's about downclocking the GPU, the graphics processor of the ODROID-XU4. In pure server mode, it always runs at a maximum clock rate of 600 MHz; without being used. The Obihoernchen blog has also carried out measurements again and could probably achieve a power savings of about 20%!
To reach that benefit, you have to install the sysfsutils package with APT:
# apt update && apt install sysfsutils
Then we have to add the following in /etc/sysfs.conf depending on your kernel (with uname -a you can find out which one you started):
With a final “systemctl restart sysfsutils” the lower clocking is active.
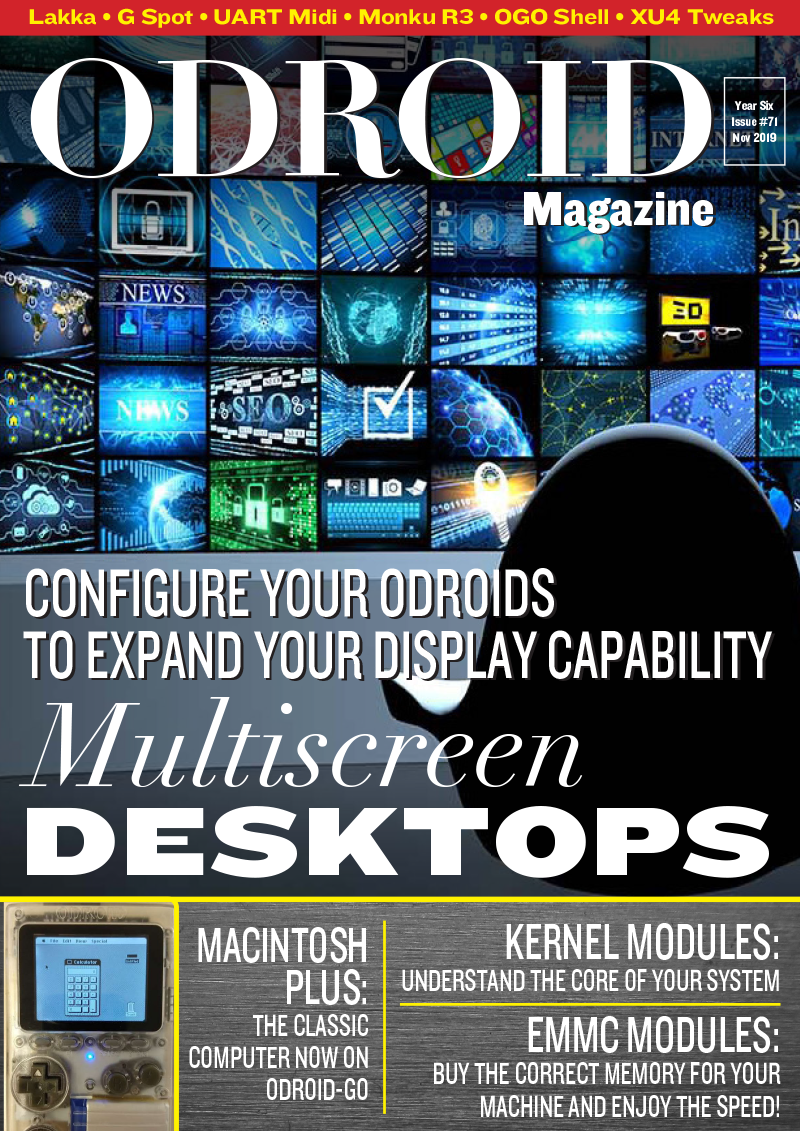
Recreating a Mac Plus: Using the ODROID-GO as a Macintosh Emulator
November 8, 2019By @johannesbehrODROID-GO, Tutorial
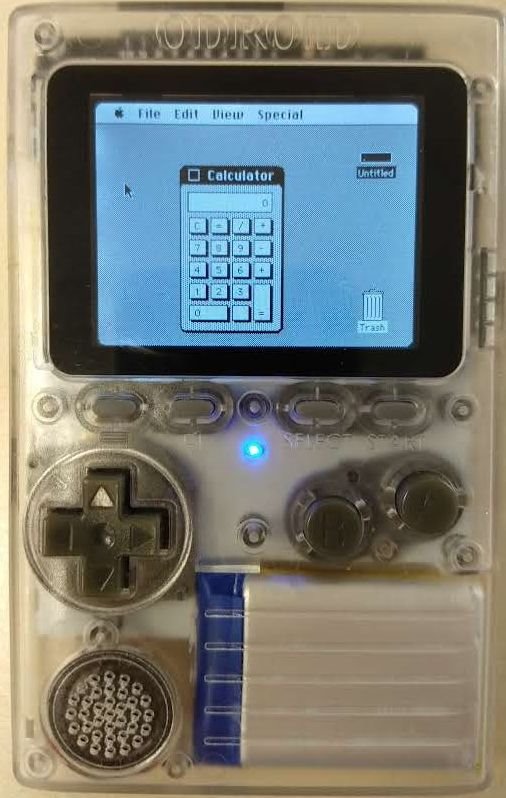
For fans of the Macintosh Plus, there is now a way to run an emulator on the ODROID-GO! Based on the work from https://spritesmods.com/?art=minimacplus, this project leverages the fact that both the original project and the GO use an ESP32 microcontroller.
Figure 1 - This is a spiffy project, if you own a GO device, you should try it out!
I also made some improvements, including:
Virtual scrolling, so that the screen follows the mouse
An on-screen keyboard, which can be toggled using the “B” key
Speed improvements
Feel free to create your one disks with all the nice programs you can find on the web. You can use up to 4 disk images (each 20 MB maximum size) at the same time. You can use the cool emulator at https://www.gryphel.com/c/minivmac/ to prepare your disks on a PC, and then copy them to your ODROID-GO. For comments, questions, and suggestions, please visit the original forum post at https://forum.odroid.com/viewtopic.php?f=162&t=36599.
eMMC Memory Modules: A Simple Guide
November 9, 2019By Brian ReeTinkering, Tutorial
Have you ever wondered about using the eMMC module capability on your ODROID device but thought, naah that looks too complicated. It can be down right scary if you are new to these devices. Besides, how do you use one? What tools do you need? Am I going to mess it up and be out $30? Maybe I should just stick with the SD card slot, right? Well if you are like me you might have had similar thoughts. This is the tutorial for you. It is short and sweet and I will cover using eMMC modules for an ODROID-XU4, from start to finish. You can take that knowledge and apply it to any of your other devices that support eMMC modules.
To follow along with your own hardware, you will need an ODROID-C1+, C2, or XU4. The tutorial specifically focuses on an ODROID-XU4. Let us face it - the ODROID-XU4 is awesome, it is super powerful and gives any SBC out there a run for its money. So, why not upgrade it and push it to the next level with an eMMC module as the boot drive? You will also need an eMMC module, an eMMC adapter, and a microSD adapter. Now there are eMMC adapters that go right to USB but since I use so many microSD cards I just decided to use an adapter I had and got an eMMC to microSD adapter instead. The base parts excluding the ODROID device will run you about $38. That includes a dual microSD, SD to USB adapter, an eMMC to microSD adapter and a 32GB eMMC module. Now, if you already have a microSD to USB adapter that brings the price down to around $27. Not bad at all. The 32GB unit gives us plenty of space for the operating system, its upgrades, etc. The enhanced performance will mean the unit will boot faster and function quicker all around. What is not to love?
A Monku Retro 1,2,3 / ODROID-C1+, C2, XU4 - Double check and make sure that you have the correct eMMC modules for your device
A compatible 32GB eMMC Memory Module
A microSD to USB Adapter
An eMMC to microSD Adapter
Preparing the eMMC Module
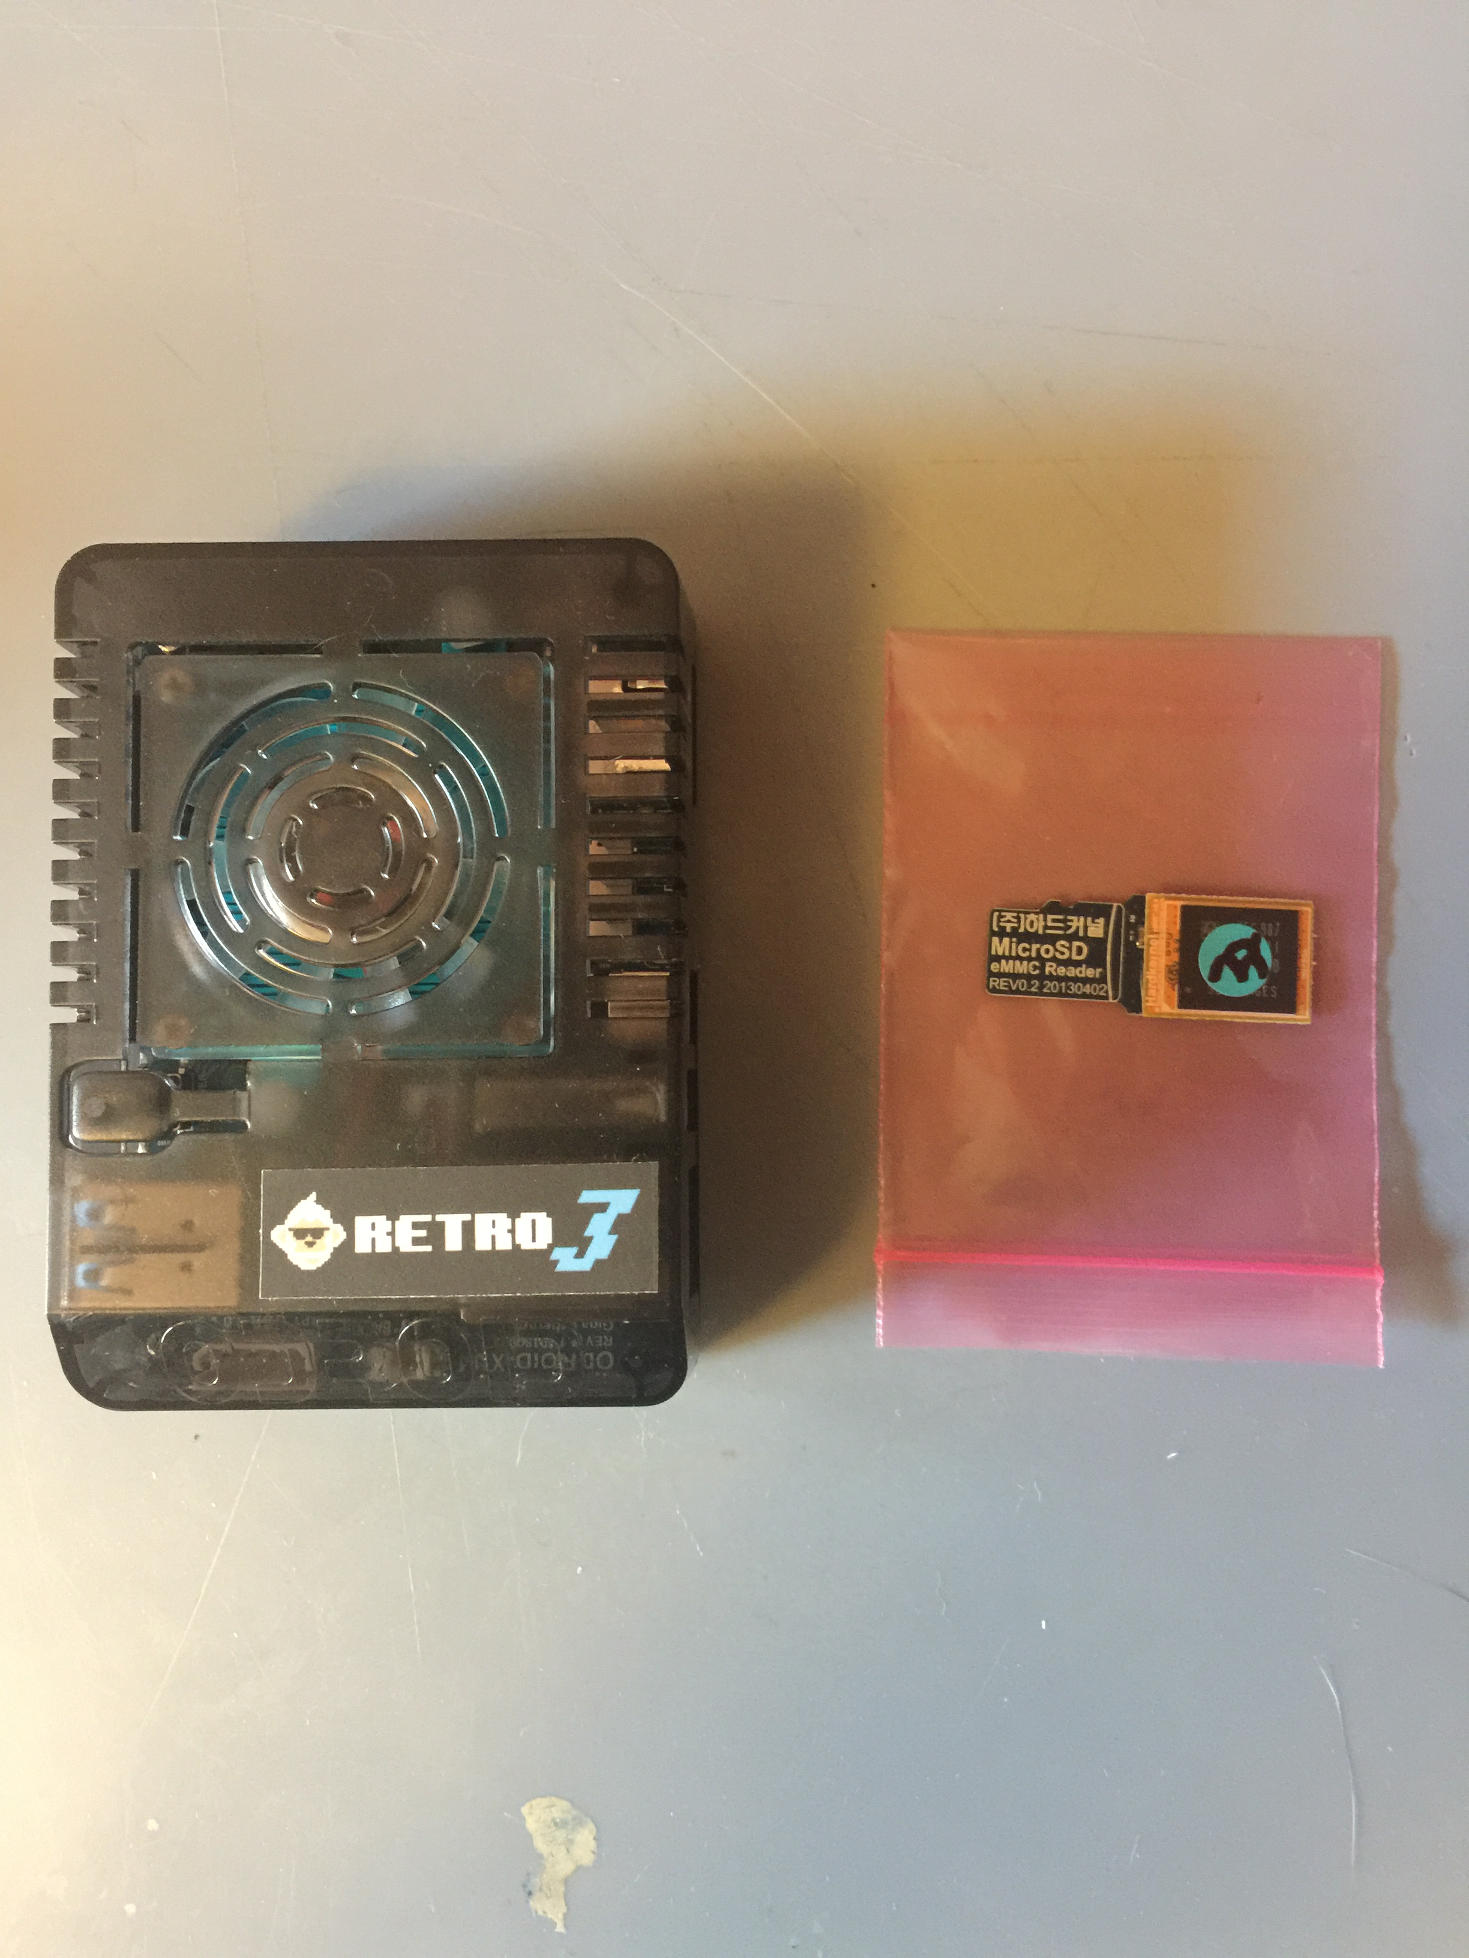
Let us take a look at the parts we will be working with. The following image shows the 32GB XU4 eMMC module and an eMMC to microSD adapter.
Figure 1
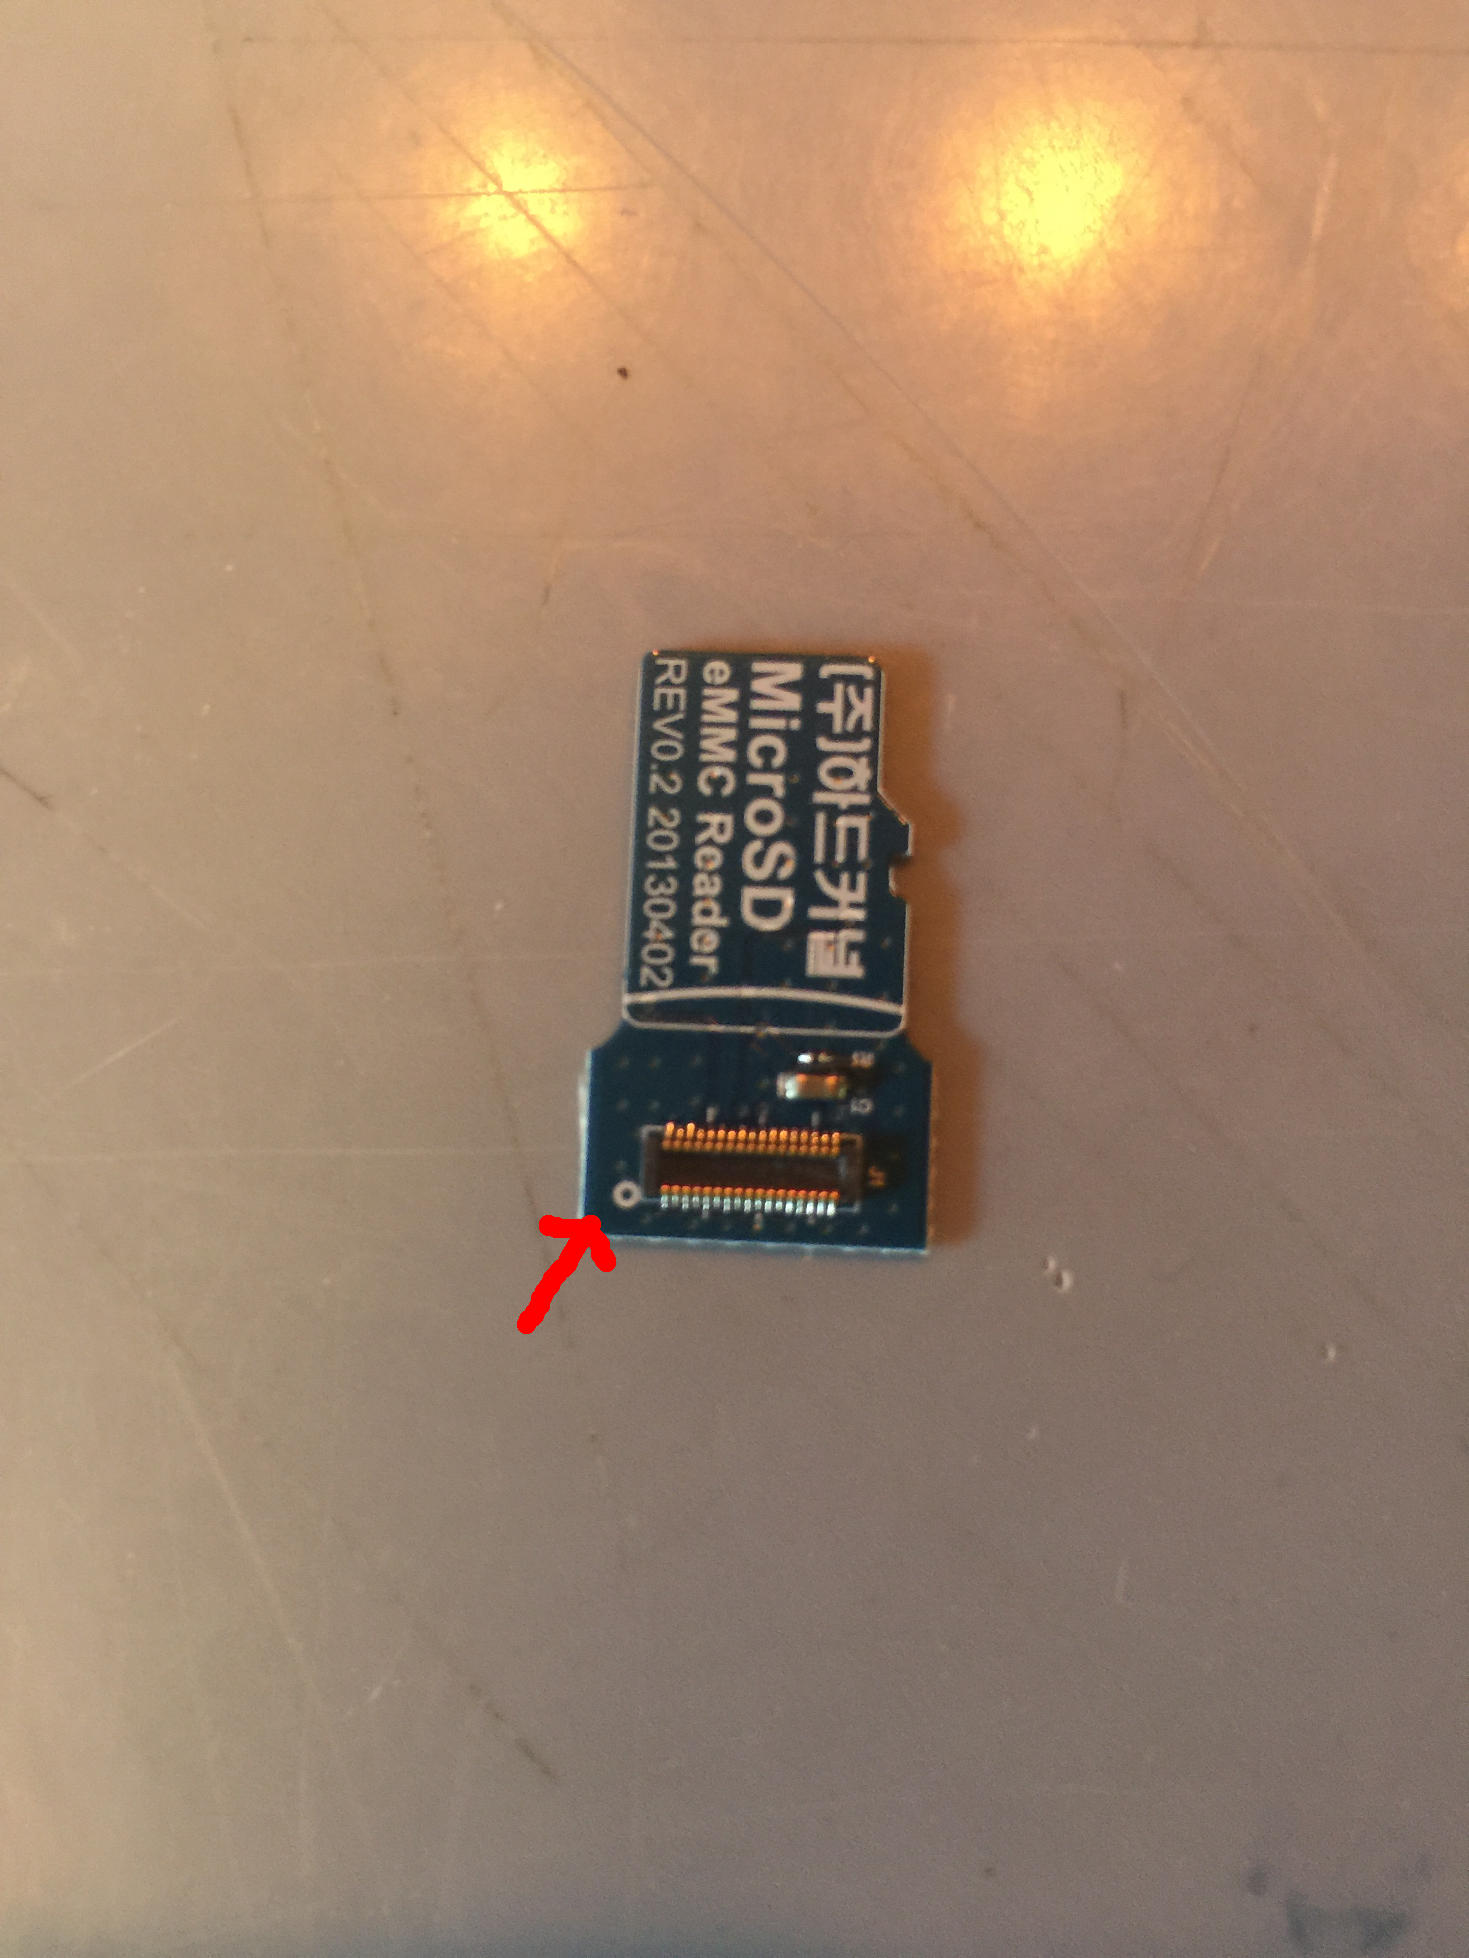
Take a moment to inspect the eMMC to microSD adapter. Notice the little white circle on one corner of the connection pins? The image below shows the circle next to a red arrow.
Figure 2
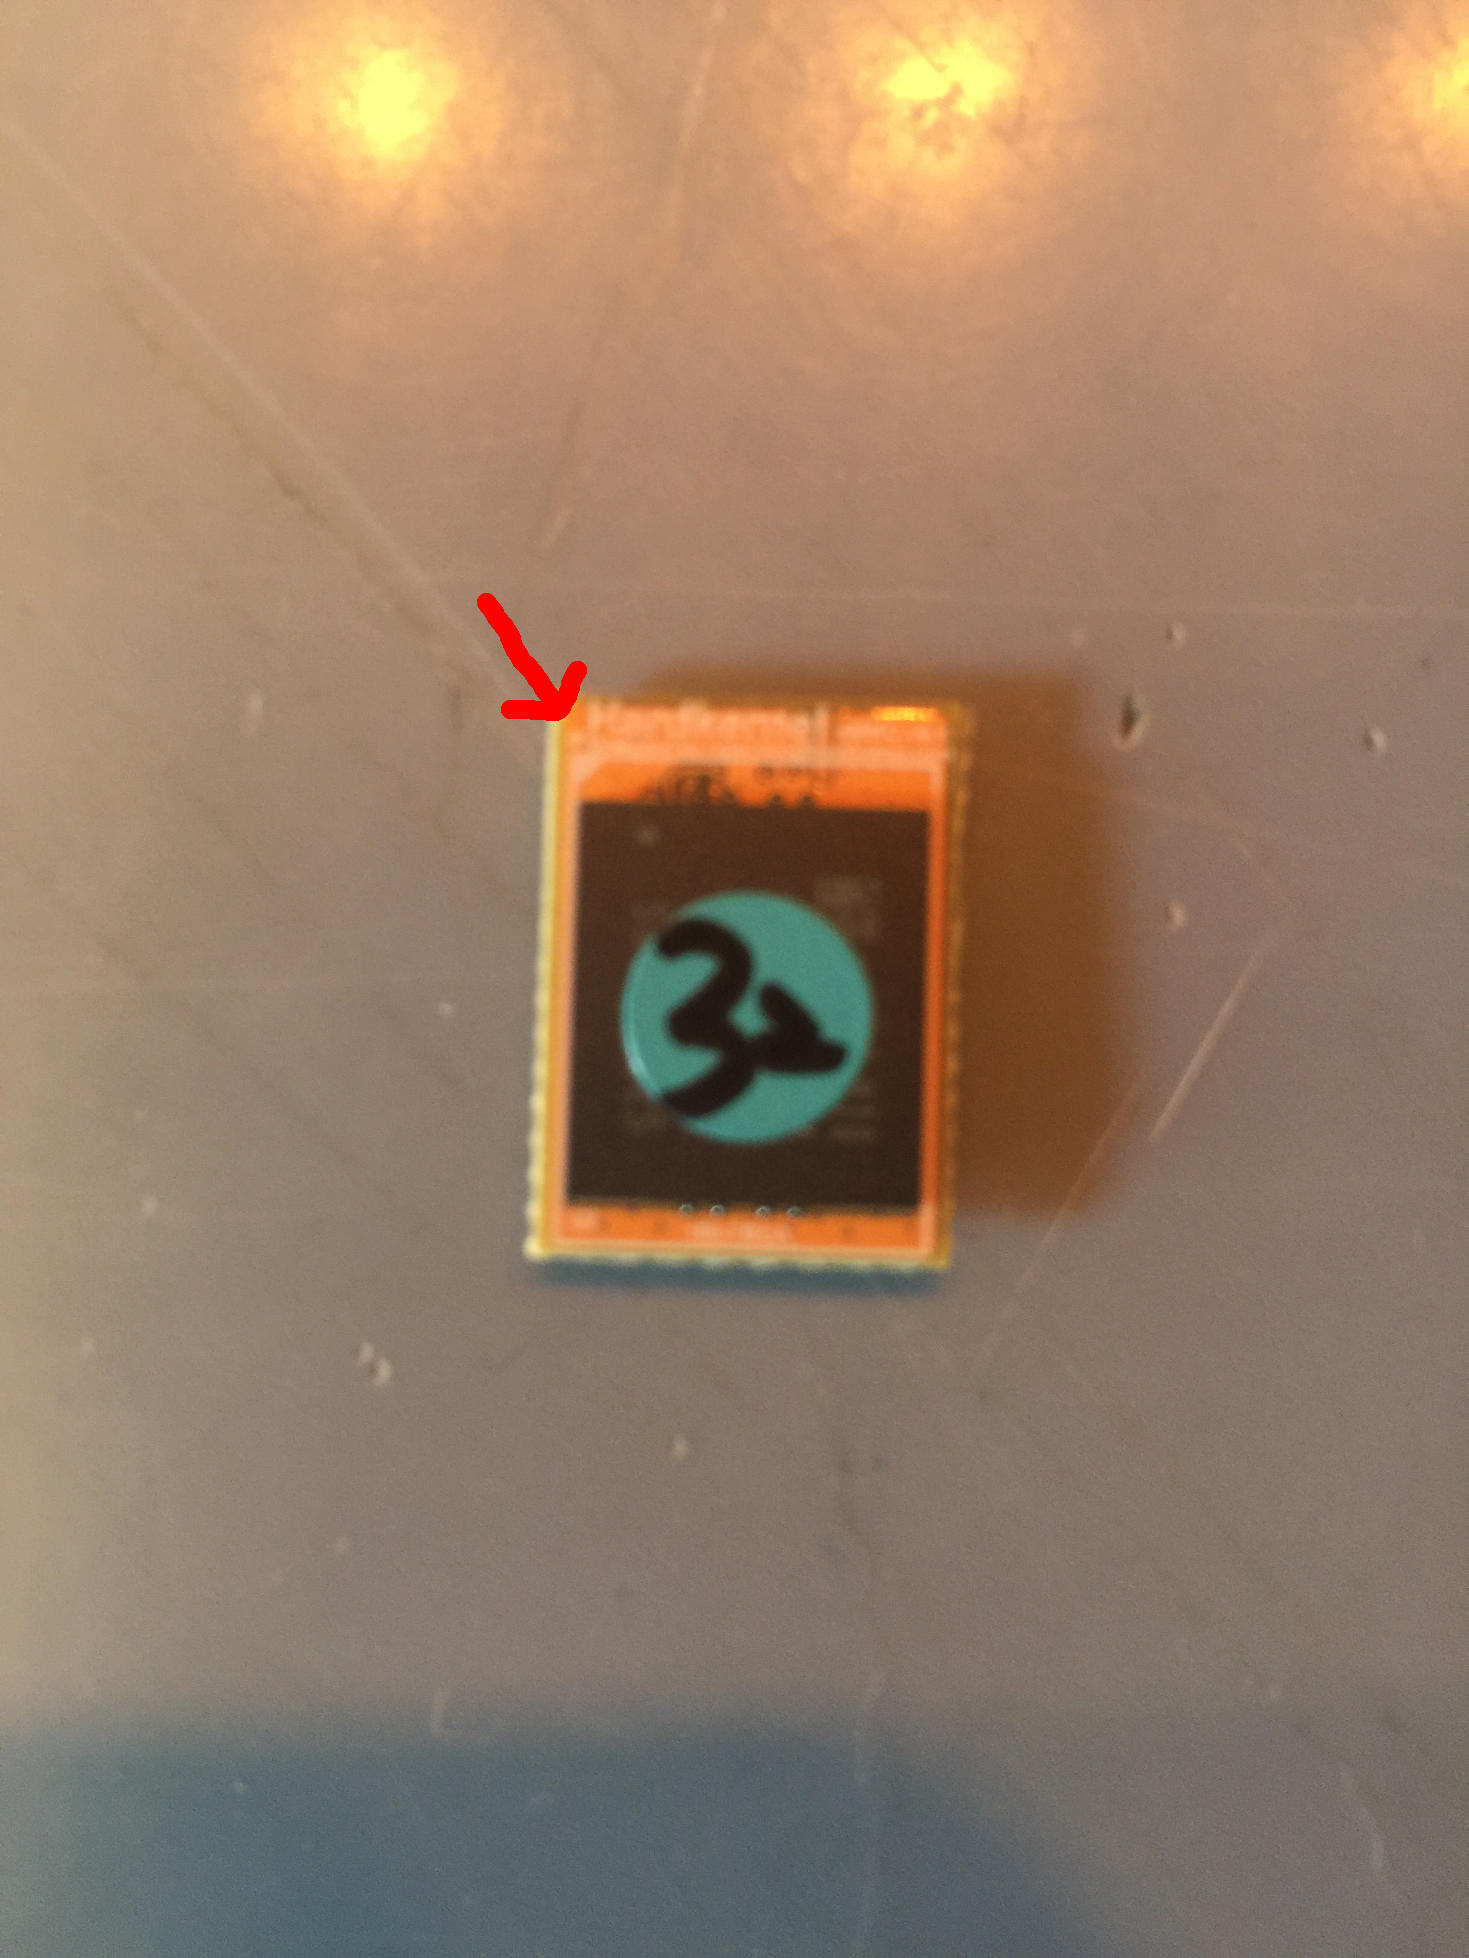
Now take a look a the eMMC module itself. Notice the little white triangle on one corner of the module? I will post an image below. The white mark in question is next to the red arrow.
Figure 3
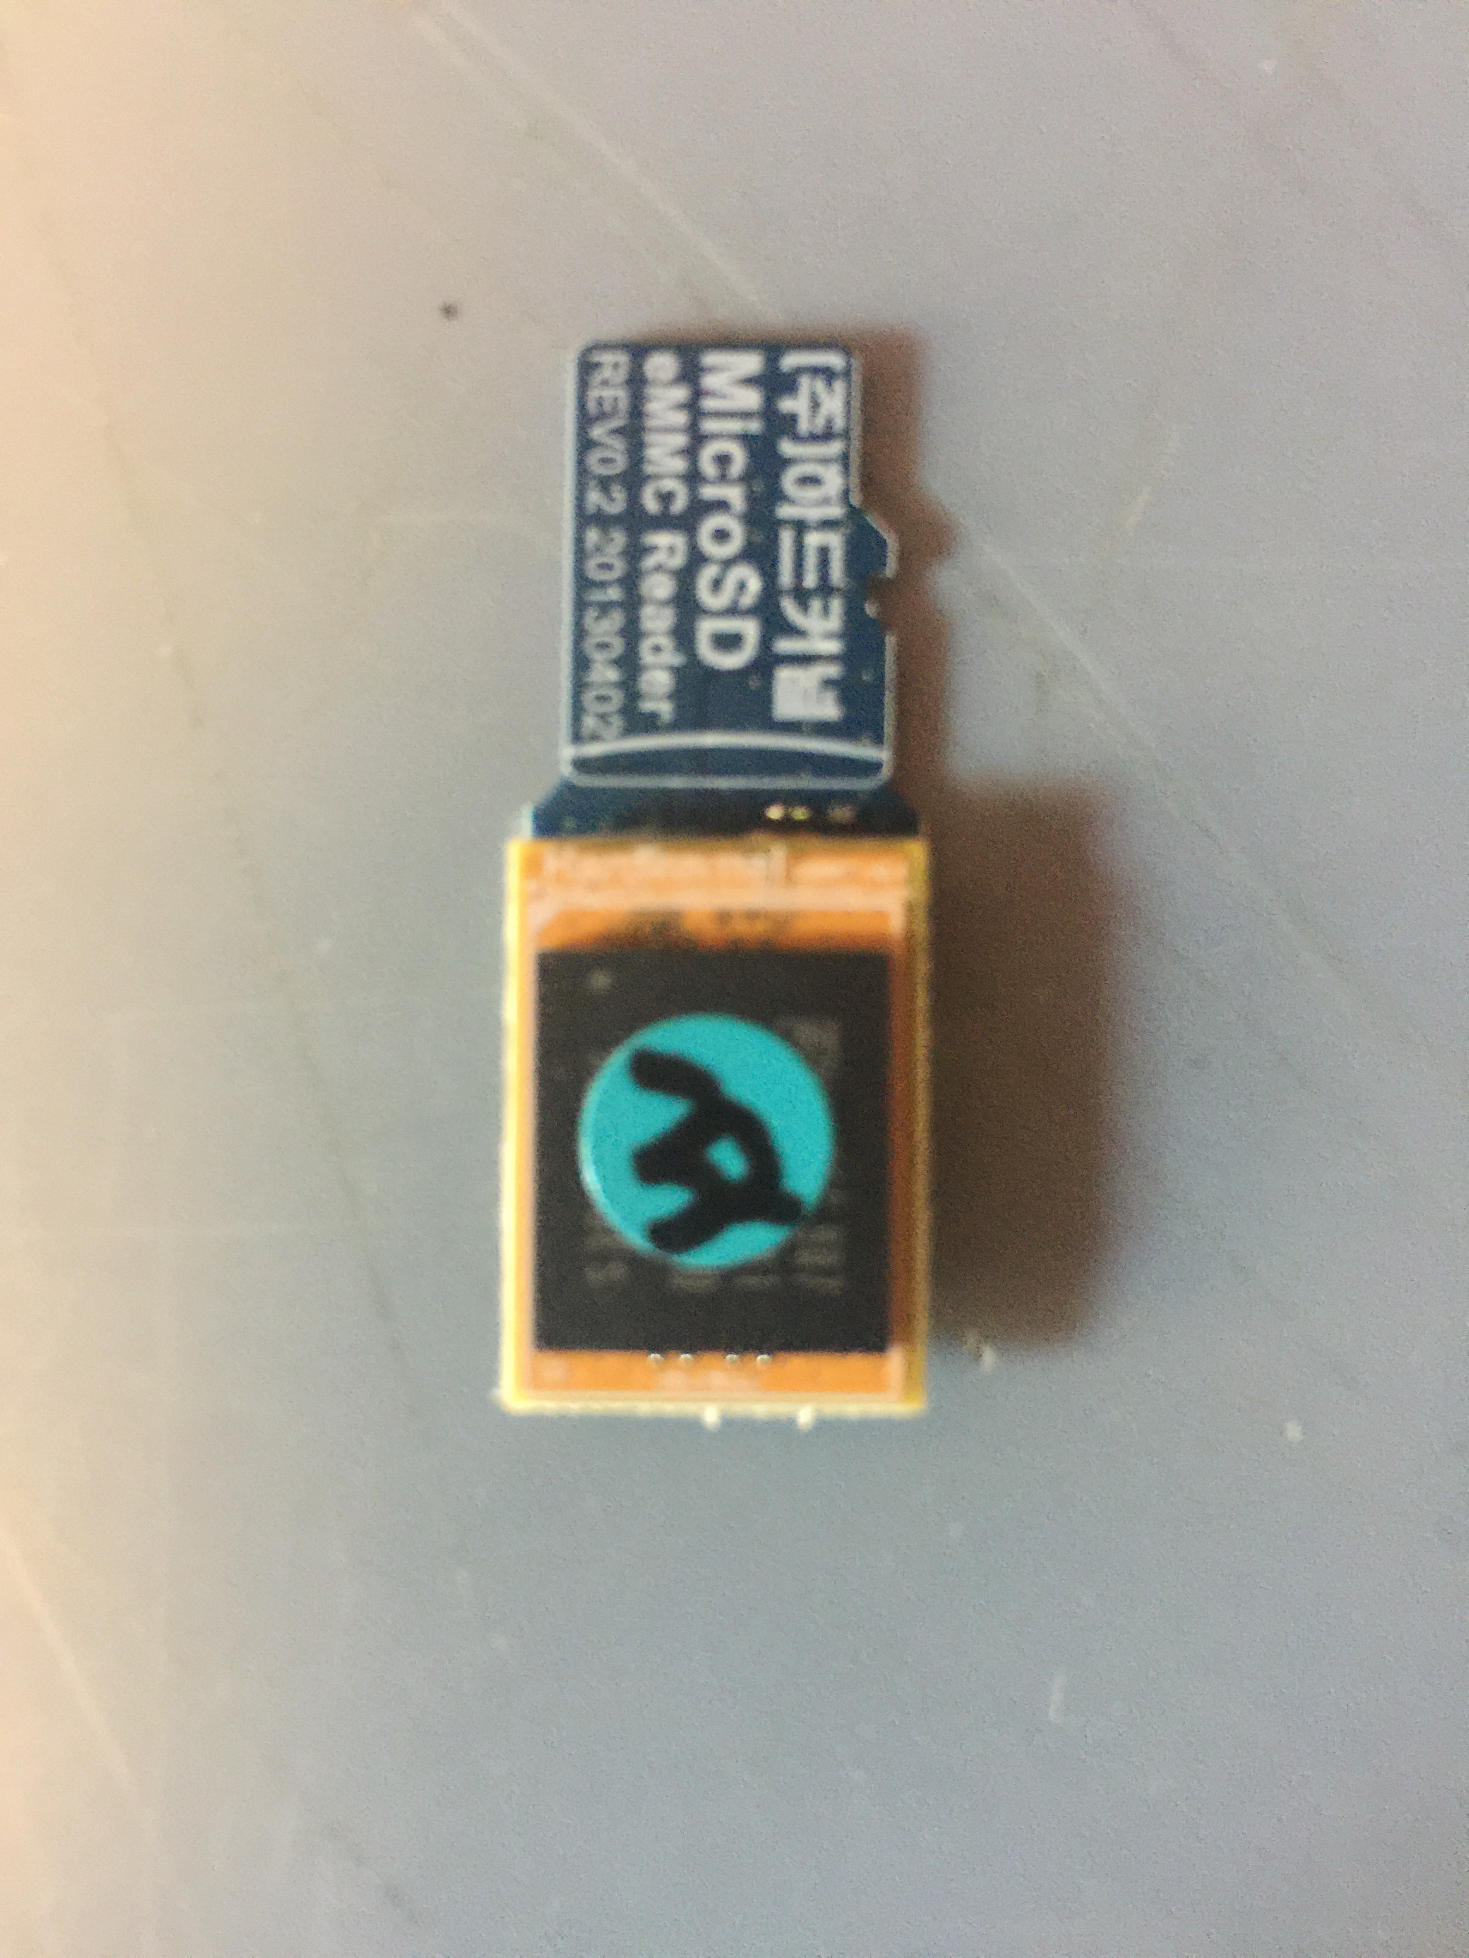
What we are going to do now is attach the eMMC module to the microSD adapter. You will want to line up the white triangle and the white circle so that they are on the same side of the connector pins. They will not be on the same corner, at least with the parts I have, but they will be on the same side. You will want to keep both items at an angle and let the connector pins meet then slowly and gently push them together. You can almost roll the eMMC module onto the adapter's connection pins. There will be a satisfying, though slight, sort of click once they are properly connected.
Figure 4
We are ready to flash our eMMC module. In the next step we will flash it with an OS image from the ODROID site.
Flashing the eMMC Module
Now that we have our eMMC module prepped and ready to flash let’s head over to the ODROID site that has all the different OS images. We will be focusing on Linux OS images for this tutorial.
You can use the second link to find images for other devices like the ODROID-C1+ or C2. Just locate the device on the left hand pane of the site. We will be using a slightly older Ubuntu 18.04 image, but it is one I have used before so I am comfortable with it. The image I downloaded for my XU4 eMMC test is the ubuntu-18.04.1-4.14-mate-odroid-xu4-20181203.img.xz image file.
Once you have got your image ready it is time to download some software that you can use to flash the eMMC module. If you are using a Mac I recommend getting Balena Etcher. It works great and I highly recommend it. If you are using Windows you can grab a copy of Win32 Disk Imager. Though not as pretty as Balena Etcher, Win32 Disk Imager gets the job done.
For Linux users you will have to perform the following steps. Don’t worry, it is not too bad.
1. Insert your SD card into your computer.
2. Locate the device, by running sudo fdisk -l. It will probably be the only disk with the right size. Note the device name; let us suppose it is /dev/sdx. If you are in any doubt, remove the card, run sudo fdisk -l again and note what disks are there. Insert the SD card again, run sudo fdisk -l and it is the new disk.
3. Unmount the partitions by running sudo umount /dev/sdx*. It may give an error saying the disk is not mounted - that is fine. Copy the contents of the image file onto the SD card by running
Of course, you will need to change the name of the image file above as appropriate.
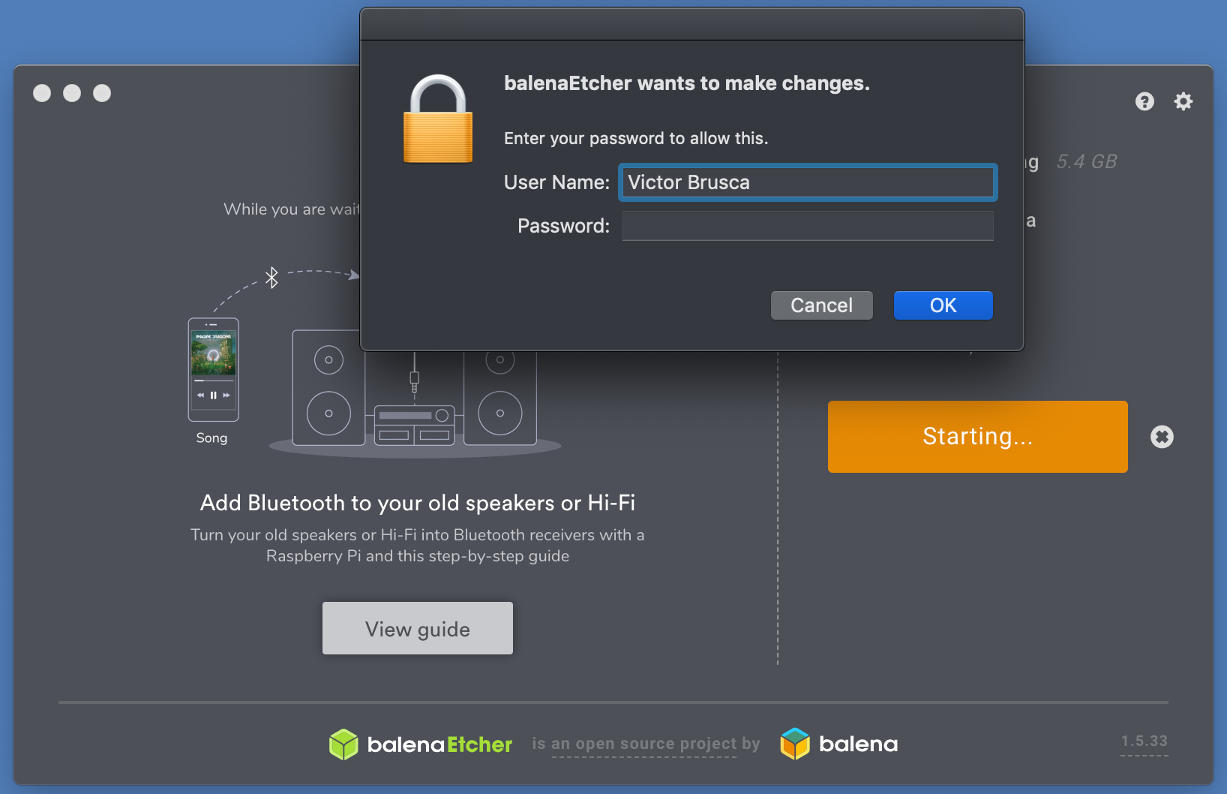
Double-check the drive, device, drive letter you are flashing. Make sure you are not overwriting another important drive. I will include images of the process as it looks on a Mac. You may be prompted to gain admin privileges on Mac and Windows.
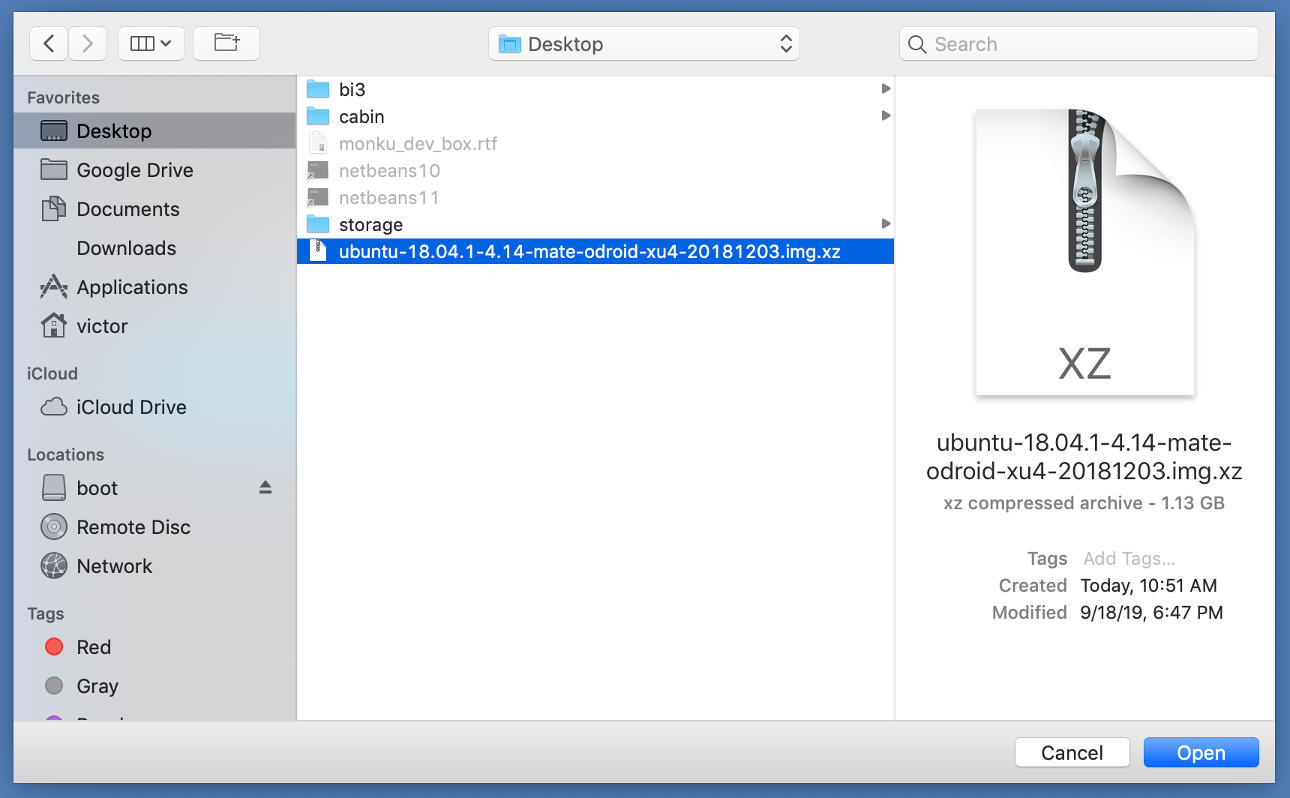
Select the image file that you want to flash the eMMC module with after inserting into a USB slot on your Mac; or, however, you intend to access the module.
Figure 5
Answer any prompts for admin privileges.
Figure 6
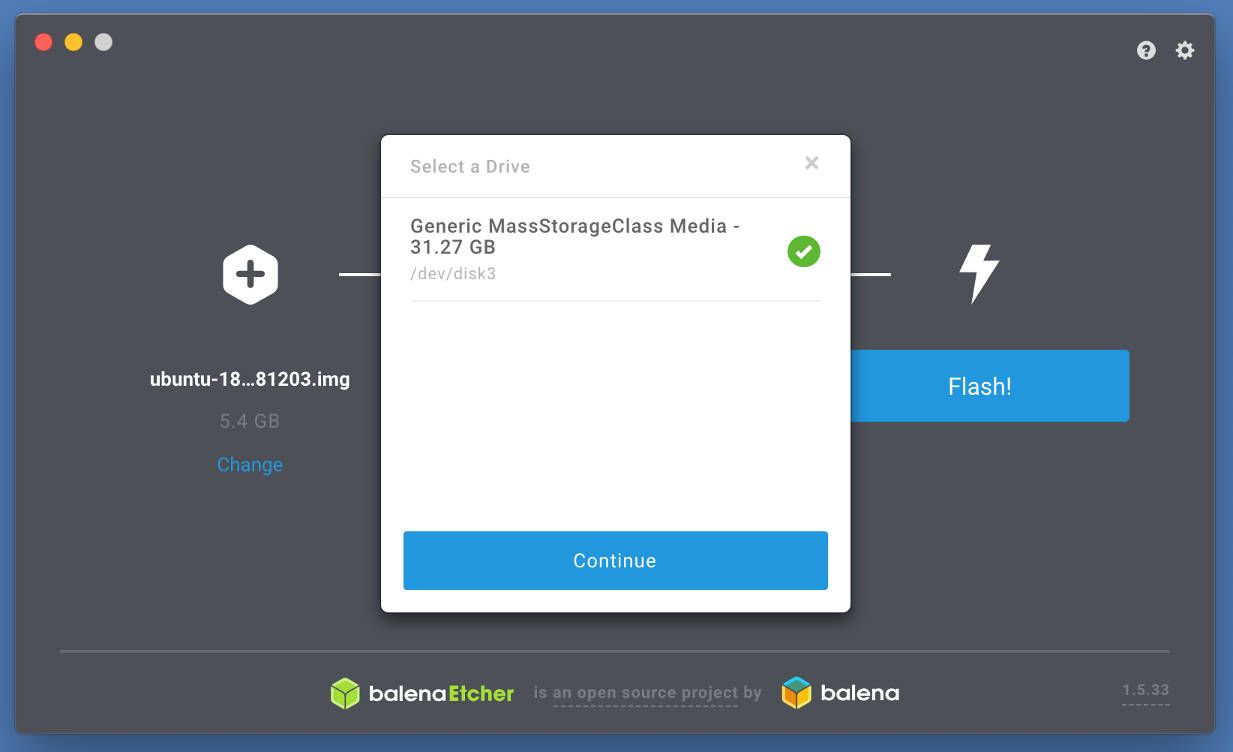
Double-check that you are indeed flashing the correct device and that it is the correct size.
Figure 7
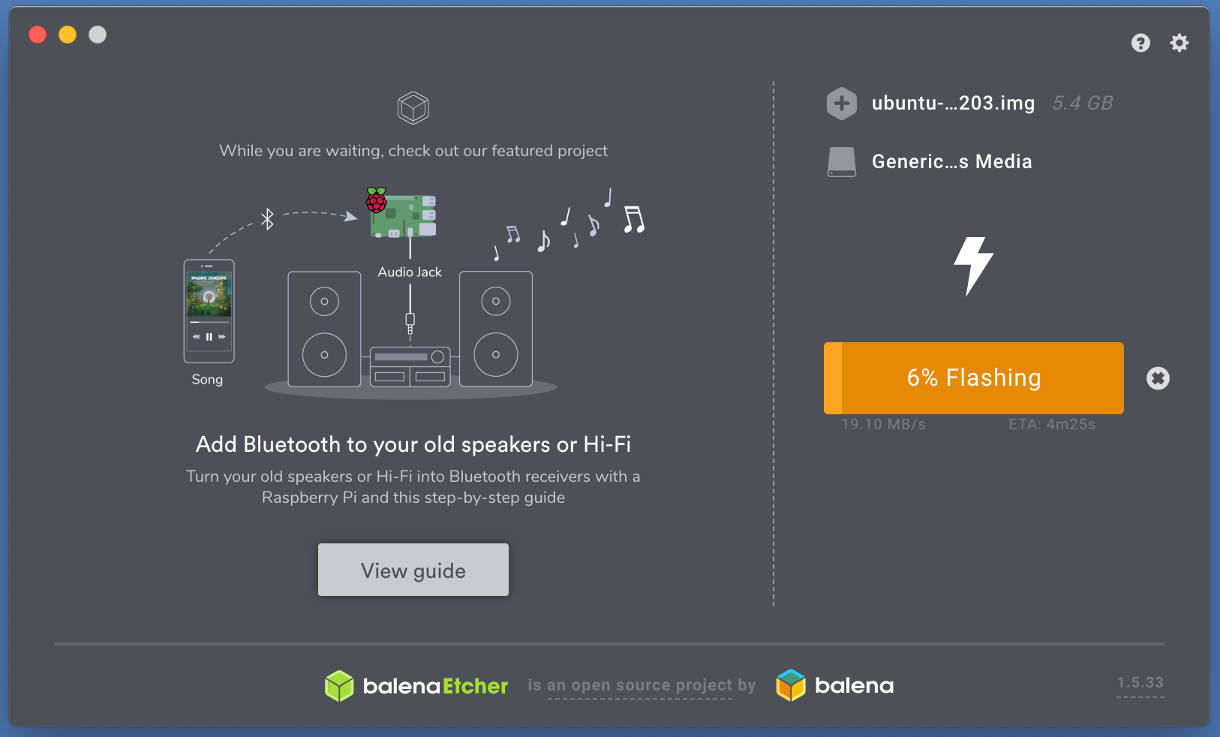
Start flashing the device and wait for the process to complete.
Figure 8
In the next part we will install the eMMC module and make sure that it is functioning properly on our device.
Installing the eMMC Module
So if you have followed along this far you should have an eMMC module all flashed and ready to boot! Let’s take a look at our ODROID-XU4 and the eMMC module. Note the module is still connected to the eMMC/microSD adapter.
Figure 9
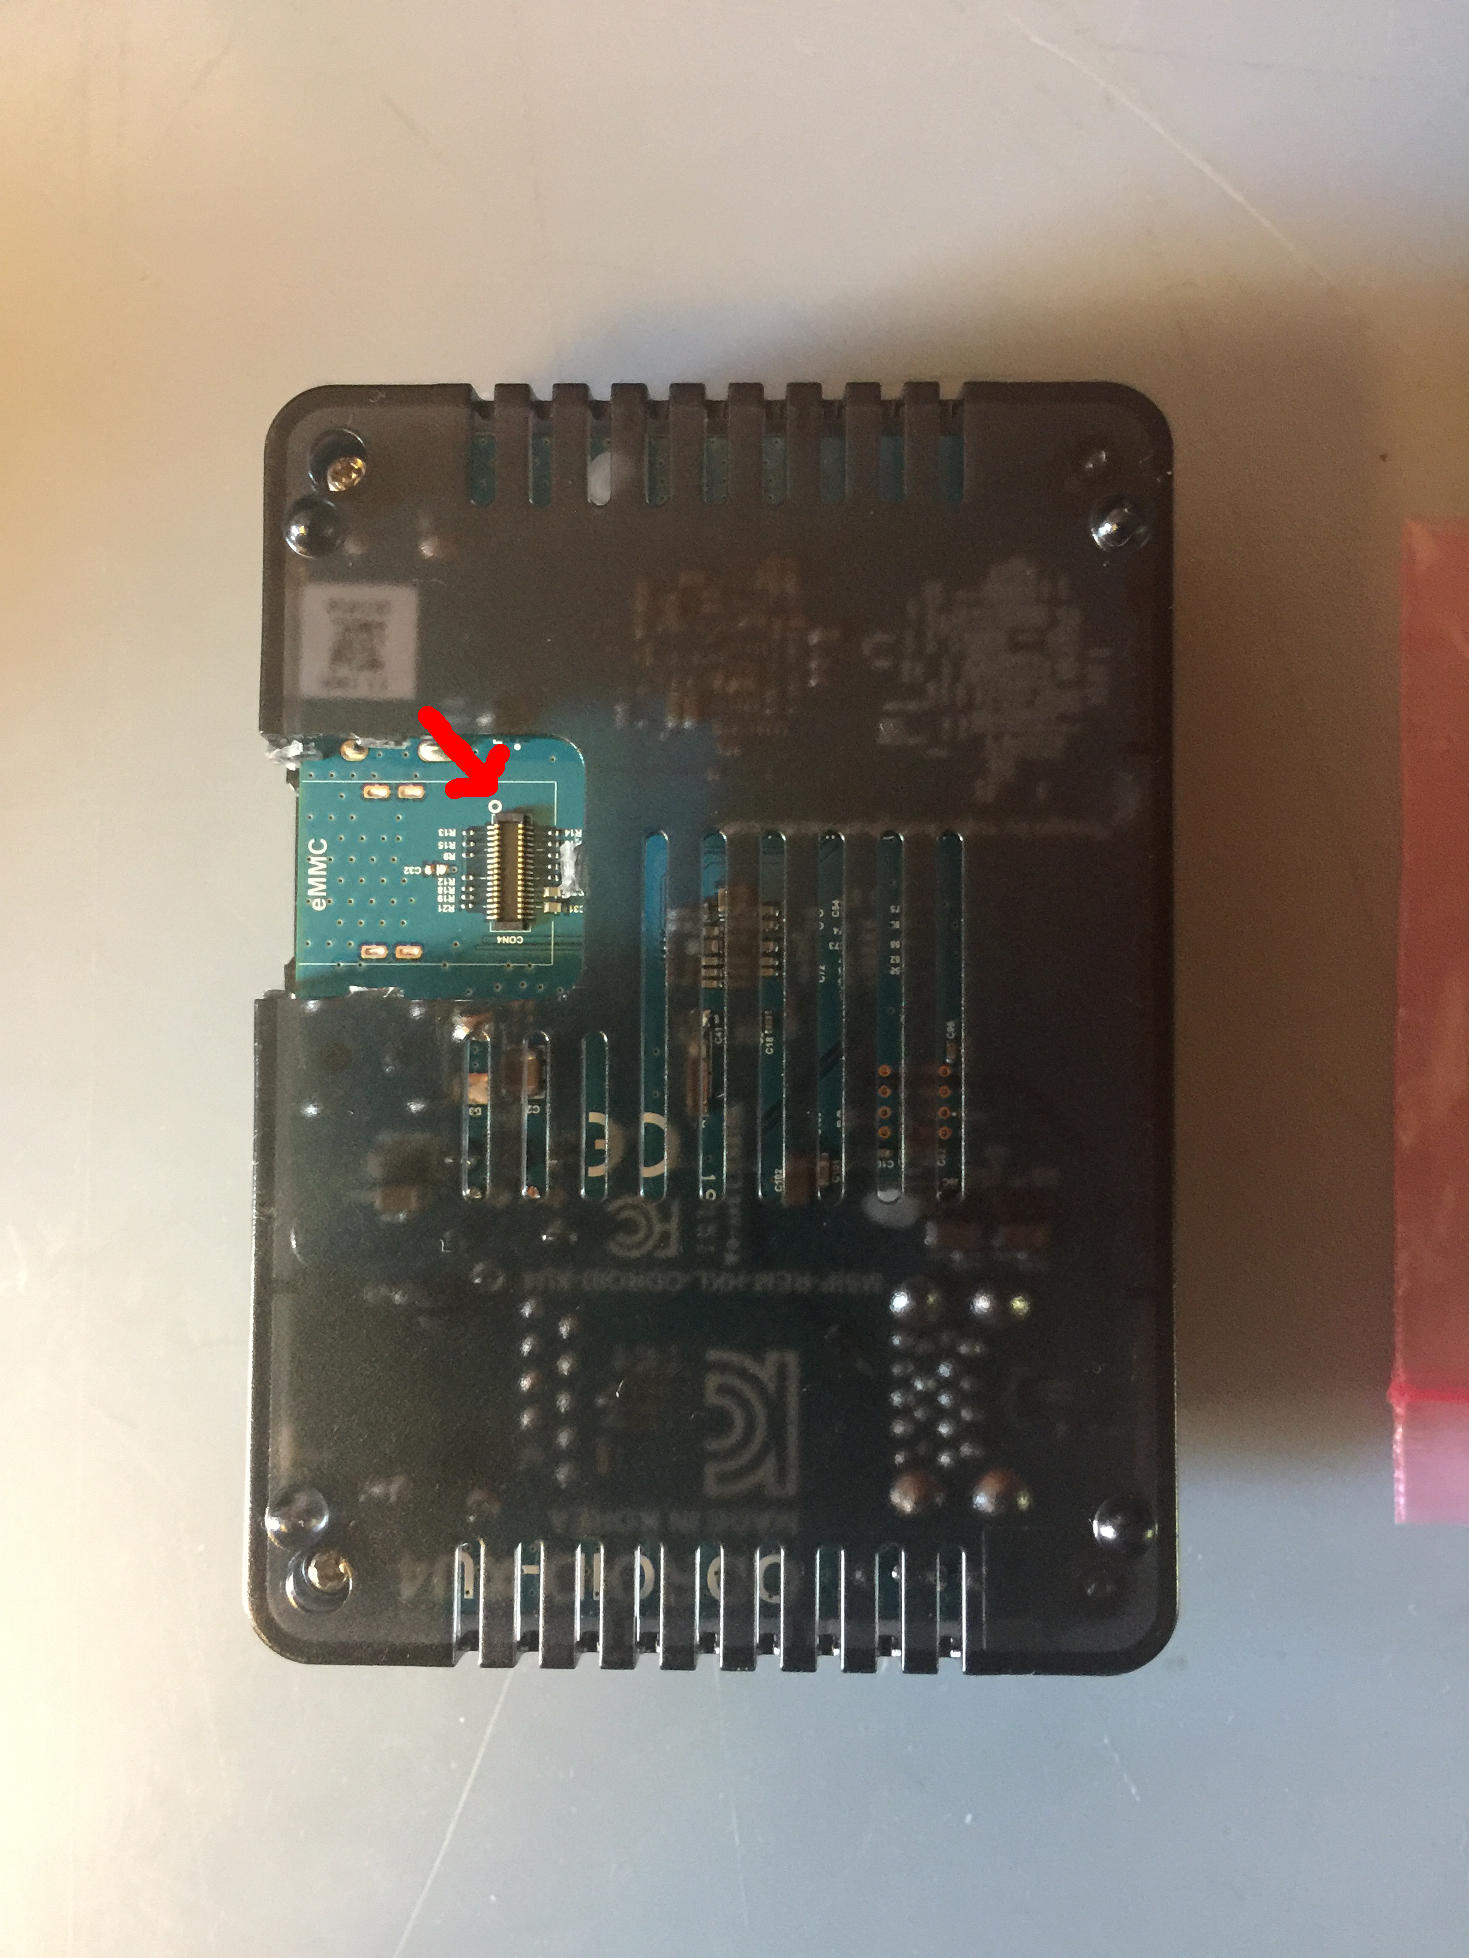
Take a closer look at the spot on the ODROID-XU4 where the eMMC module goes. It requires that you either take apart the case, or that you have cut out the eMMC module door from the case. If you are working on a test unit I recommend taking a sharp razor and scouring the eMMC door connections until the plastic separates. Then you have direct access to the eMMC module's connector. It makes things much easier especially if you plan on frequently changing eMMC modules. Again notice the little white circle on the board, it's next to the red arrow.
Figure 10
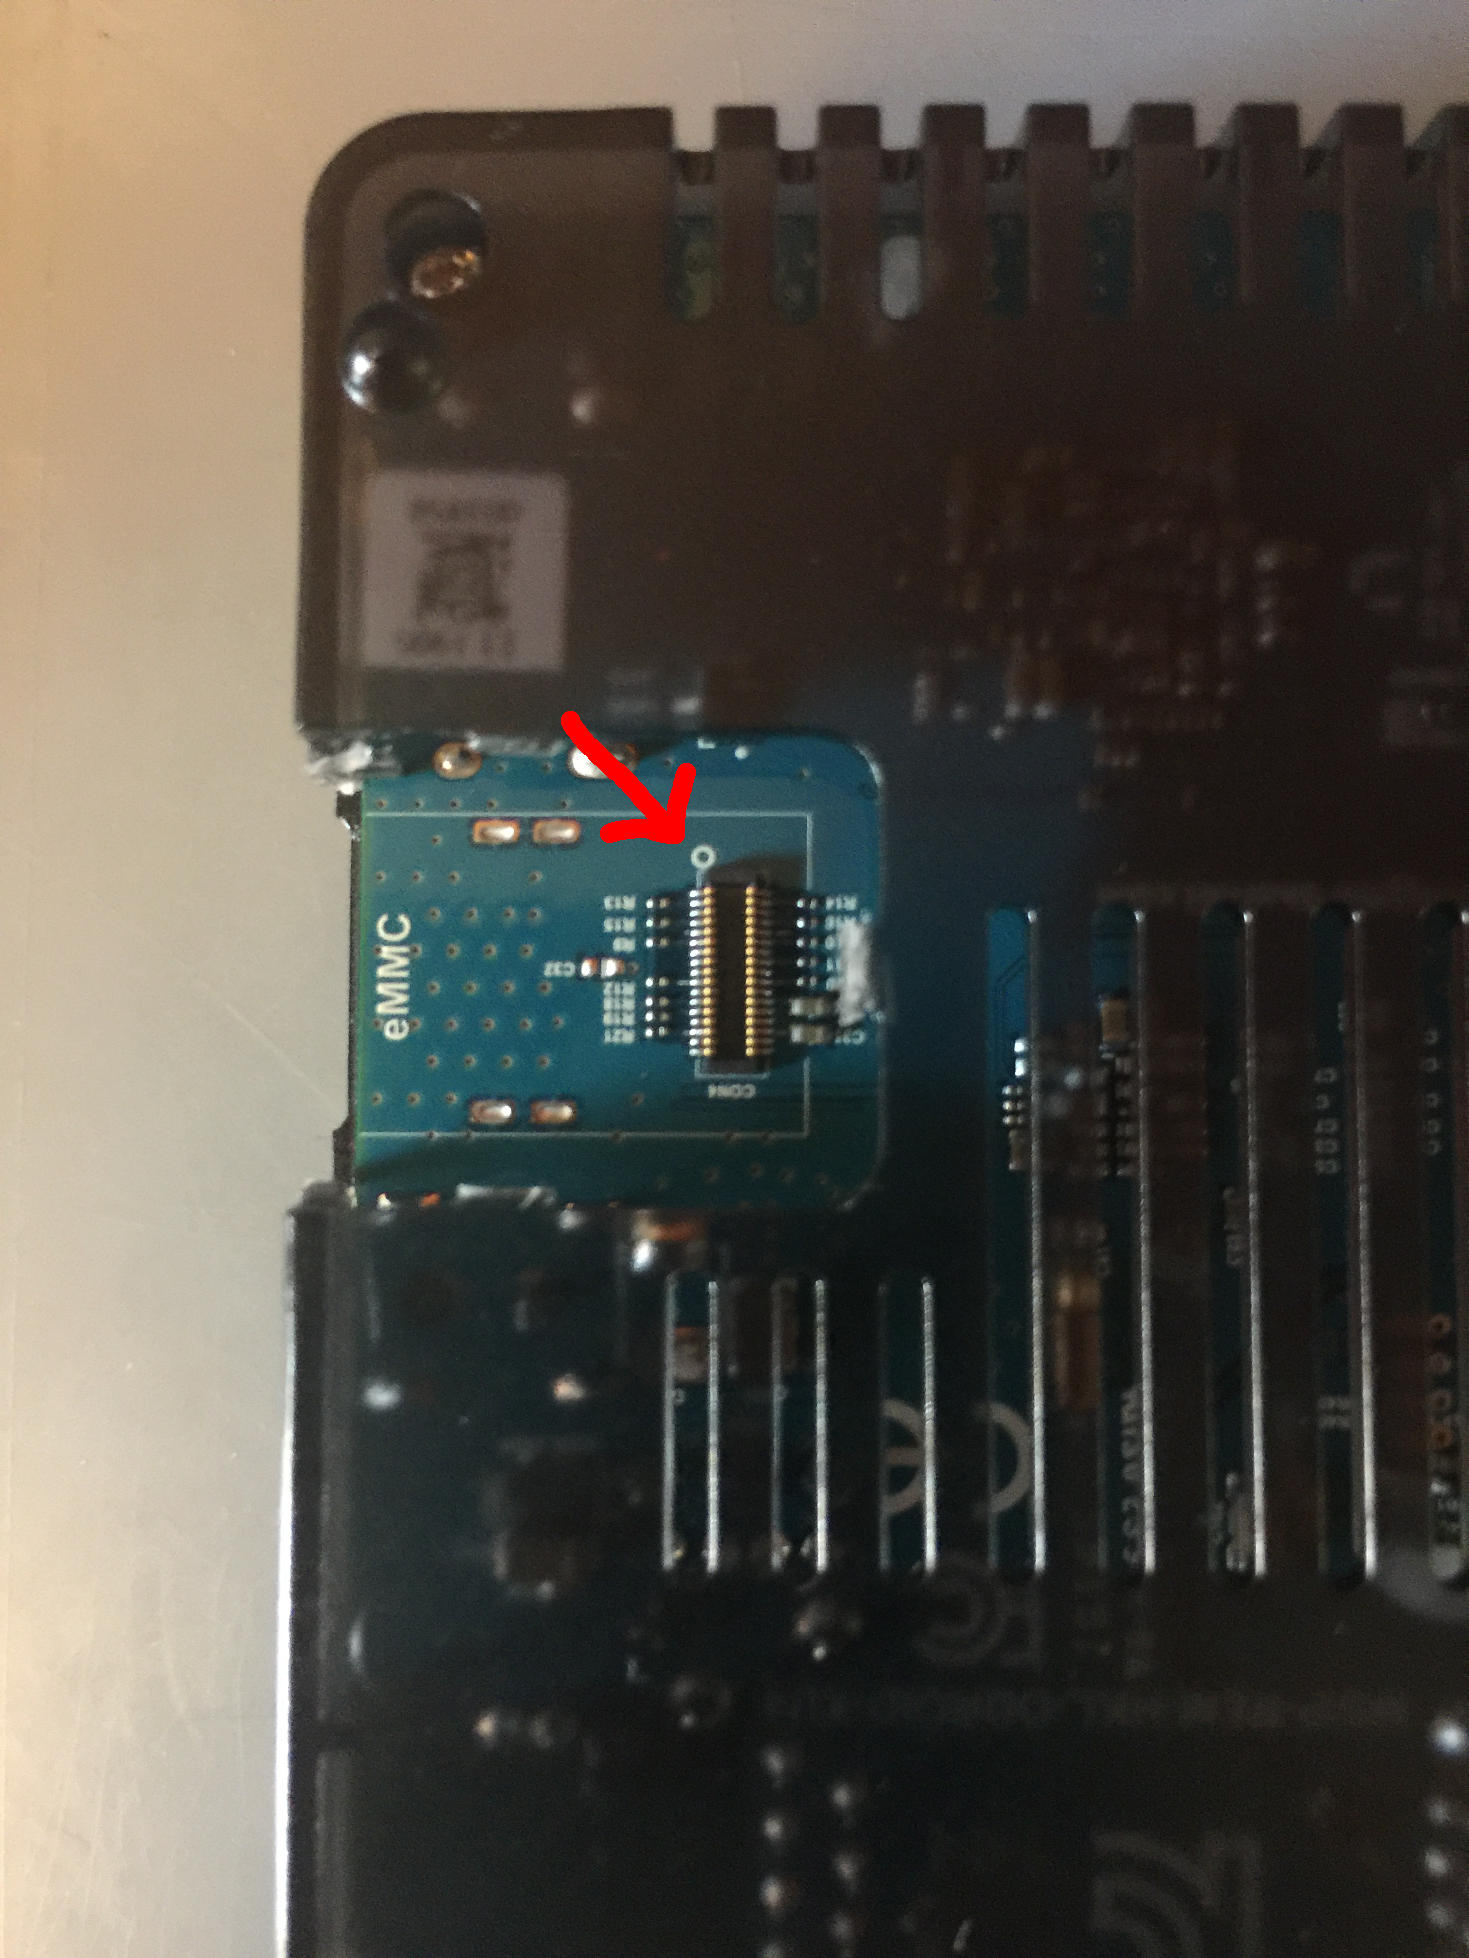
It is still a little small, let us zoom in a bit more.
Figure 11
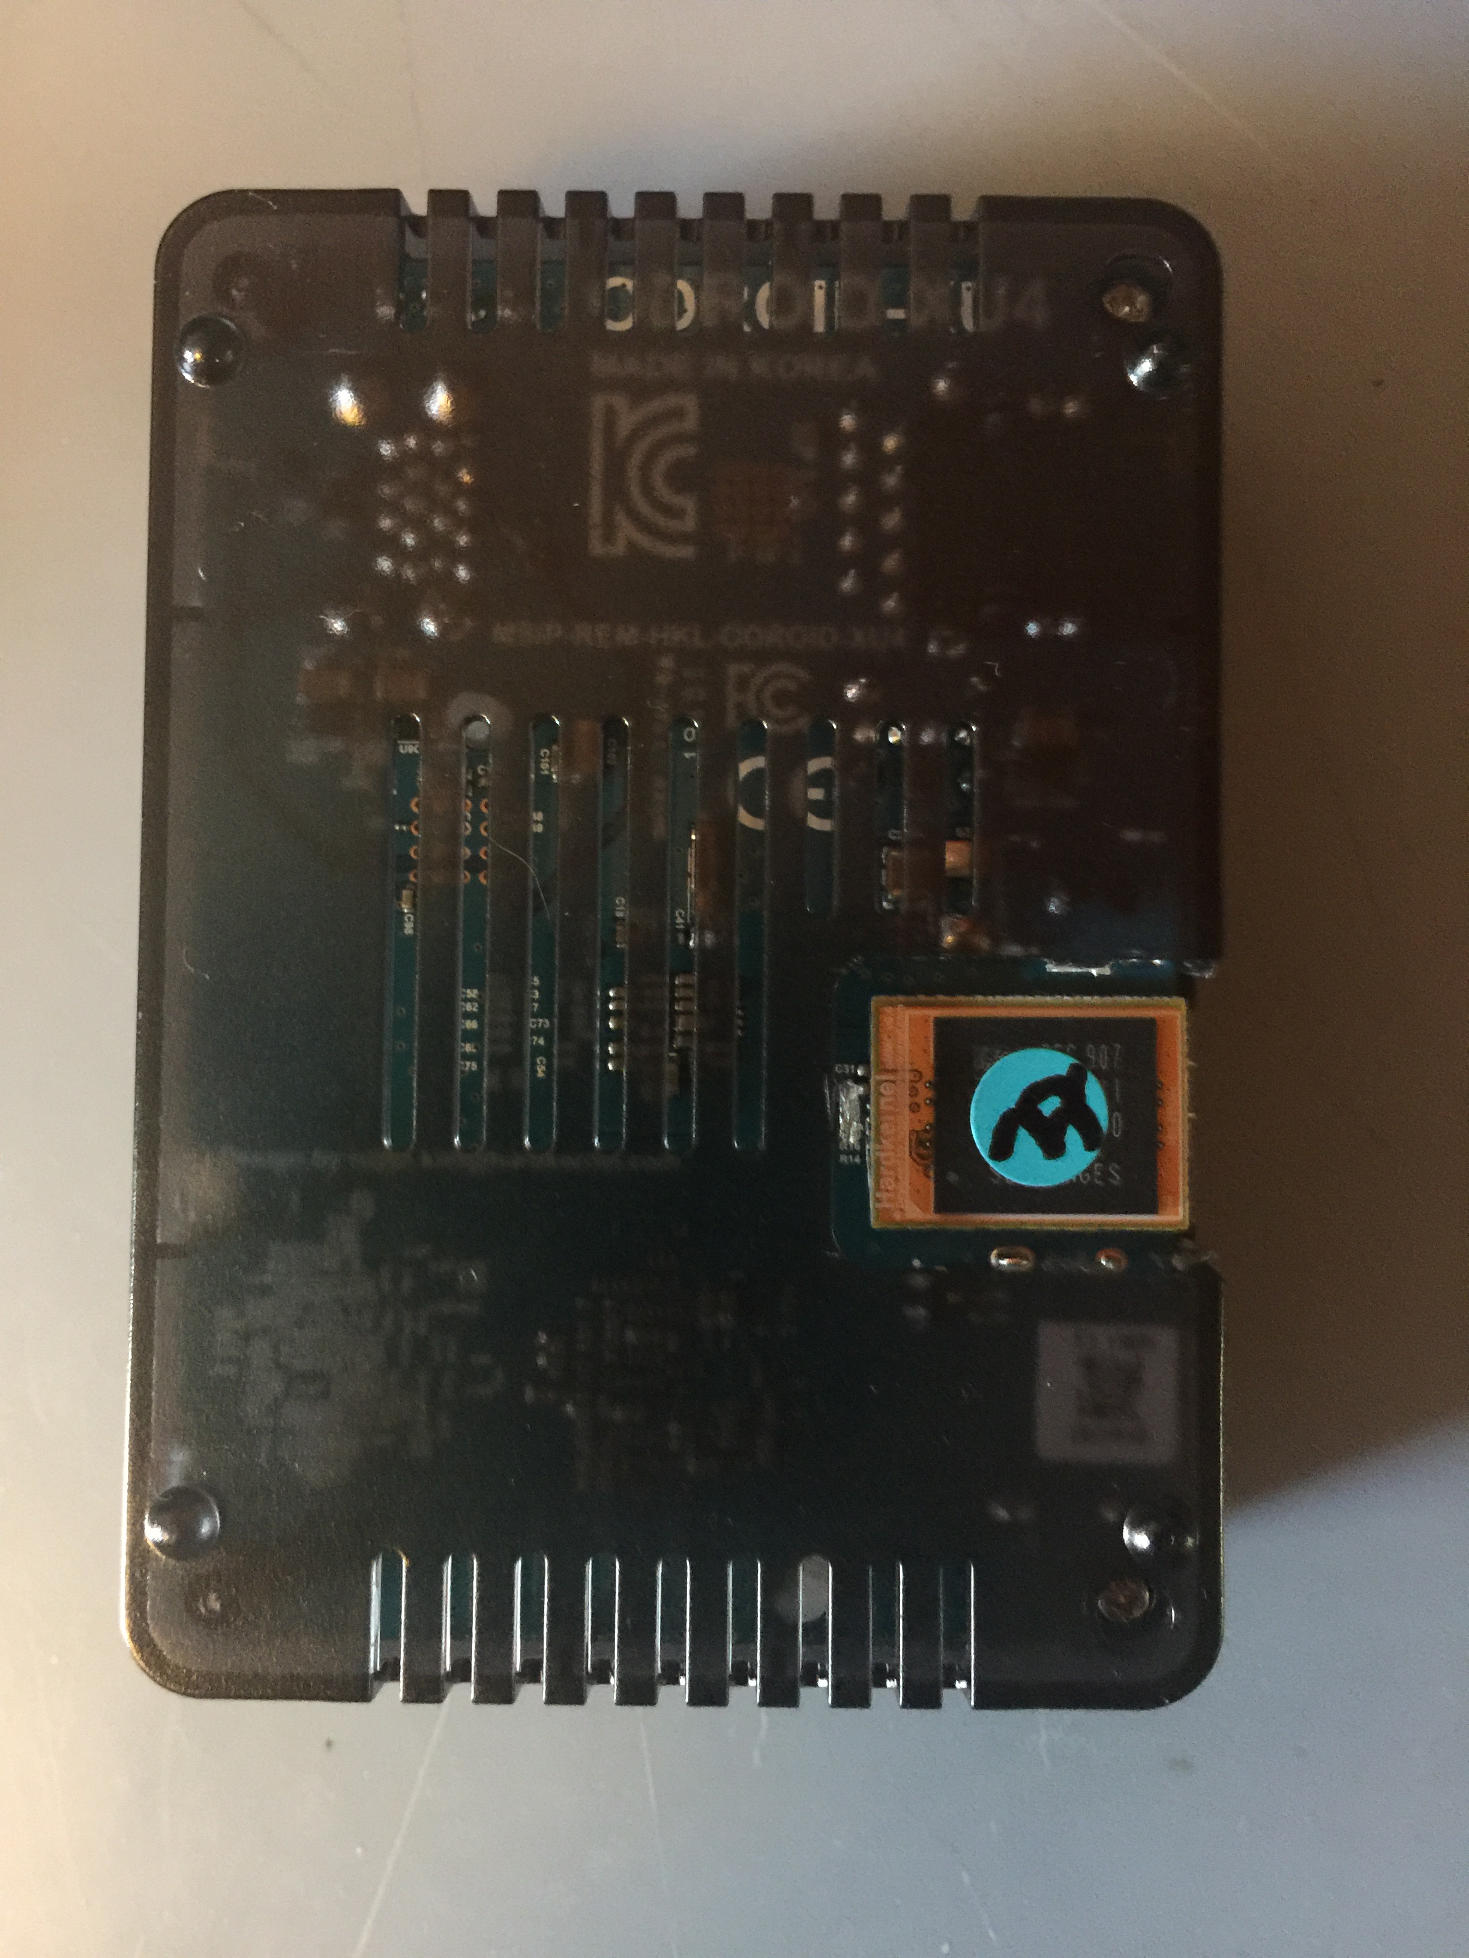
Carefully line up the white circle and the white triangle so that they are on the same side. Use the same angled approach to let the connectors meet then sort of push them together with a rolling motion. If you are using an eMMC adapter door, meaning you still have the case on, be careful not to let the eMMC module slip into the case. Once you have the chip connected you should have something similar to the following.
Figure 12
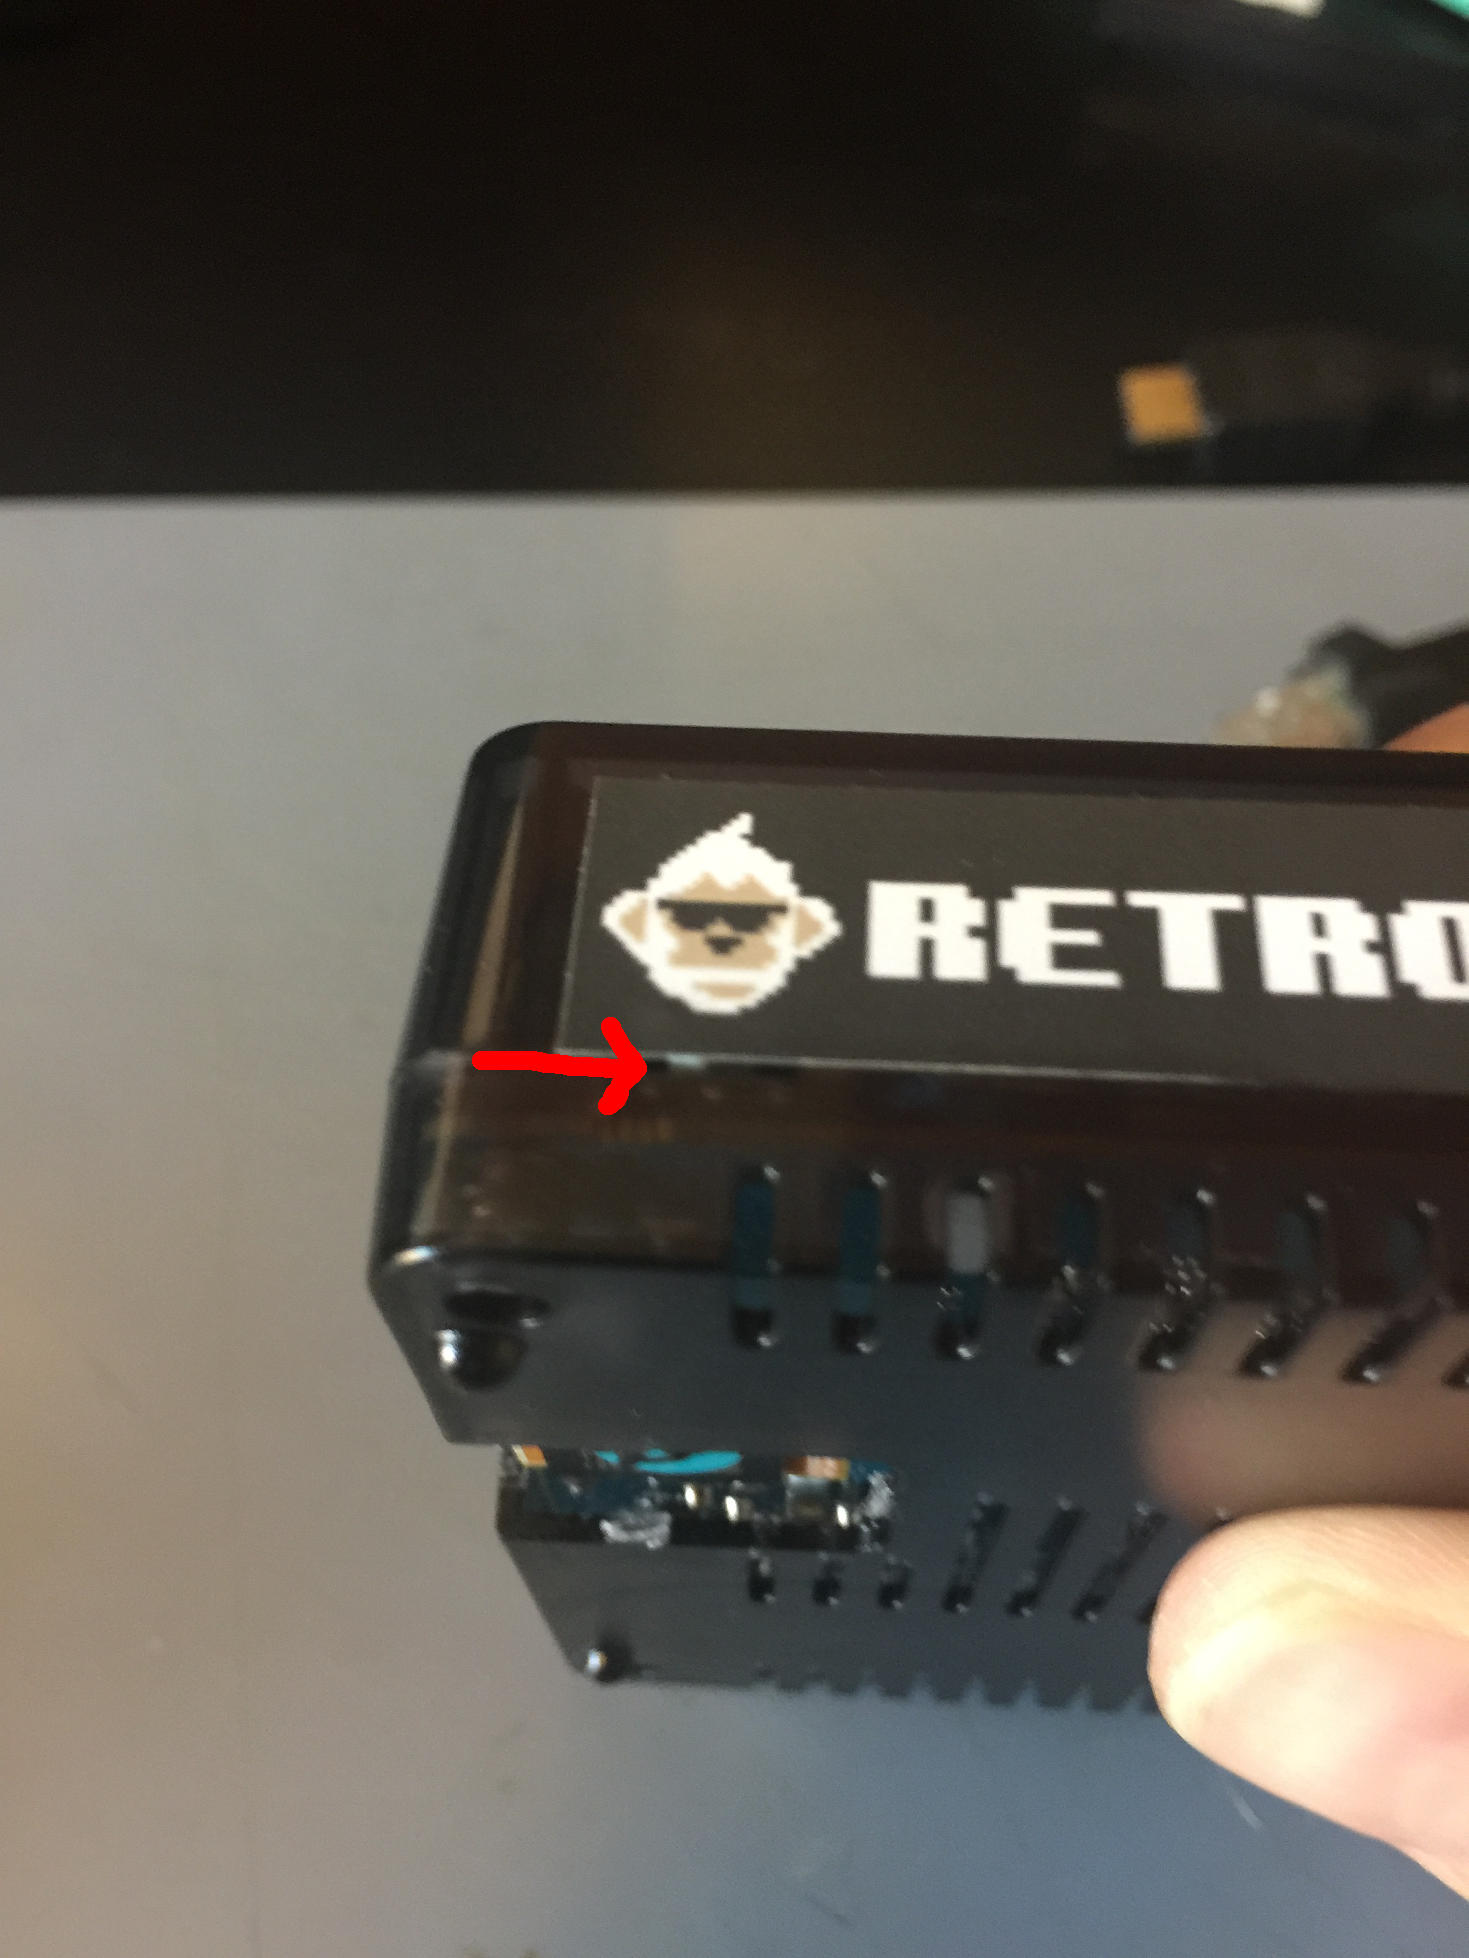
We are almost done. You will have to check how your particular device interacts with eMMC but on the ODROID-XU4 you have to set the boot mode selector switch. Notice the little white switch on the back of the case? Use a paperclip to push the switch to the position farthest from the edge of the case. In other words towards the middle.
Figure 13
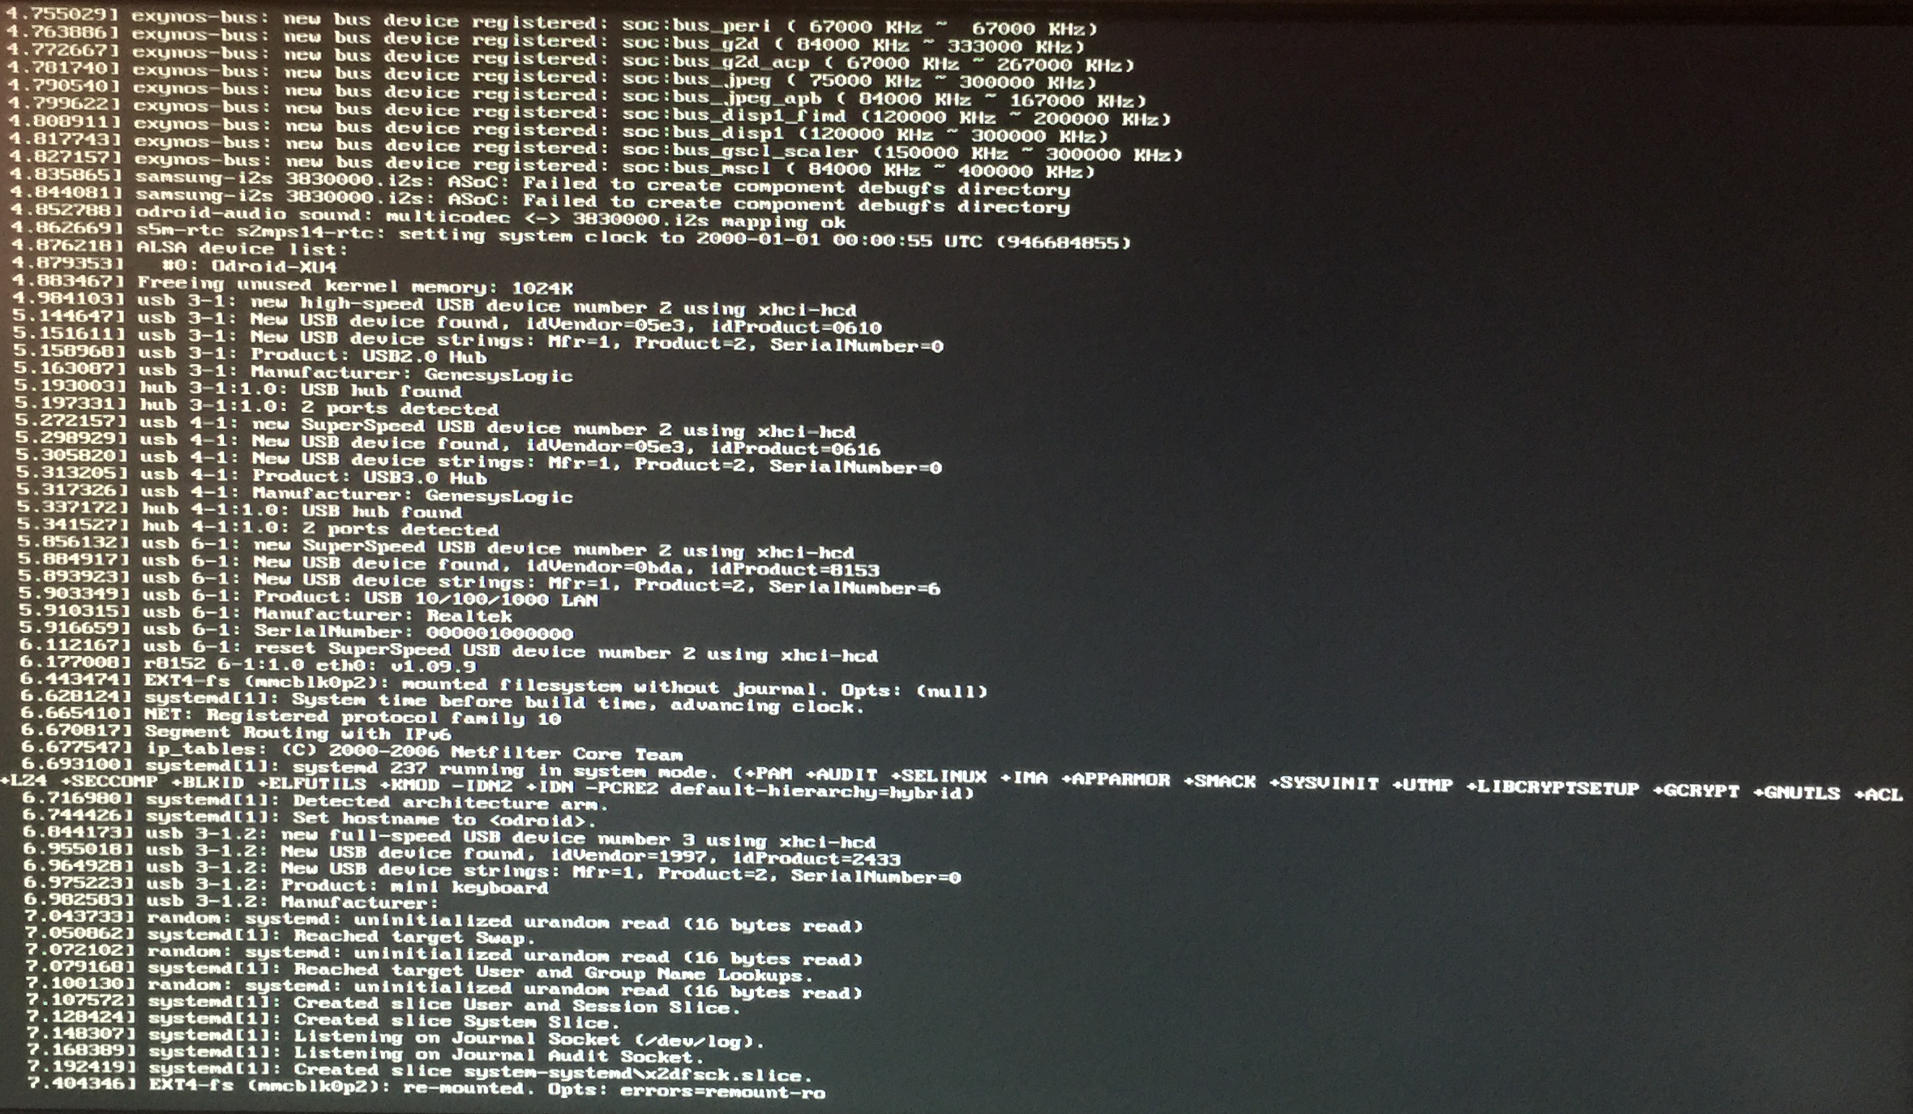
Now it is time to test things out. You should get a boot, possibly followed by a quick reset or shutdown. Do not worry some versions of Ubuntu will do a partition resize then shutdown on their first boot. As long as you see something post to the screen you are golden.
Figure 14
Figure 15
Well, that is it. Enjoy using eMMC modules without fear and I hope you enjoy the performance upgrade! For comments, questions, and suggestions, please visit the original article at http://dev.middlemind.com/tutorials/odroid_go/emmc.html.
Ogo Shell
November 1, 2019By @paspartoutODROID-GO, Tutorial
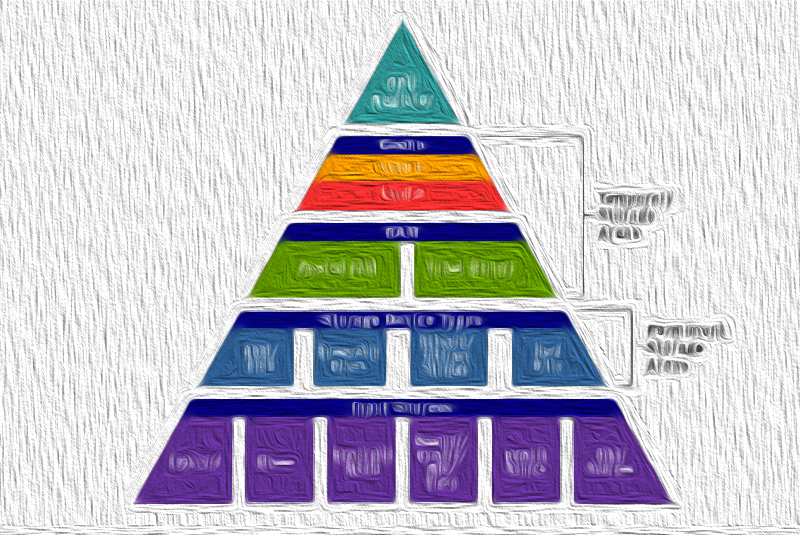
The ogo-shell utility is a file-browser, audio player and image viewer for the ODROID-GO. I mainly use it to listen to music using the odroig-go headphone hat from the backofficeshow. You can checkout the Github Project and the forum post if you want to give it a try yourself. What follows is the history of its development until now. Hope you like it!
The idea
Ever since I received my ODROID-GO last year I had fun developing small programs for it. I like the challenge to write programs for embedded devices with limited resources. It forces you to understand much more about the hardware and software stack than the usual high level programming I’ve done.
One day I read a forum post by Cralex about [Feature/App Requests][forum-post] that mentions an on-device file manager and links to the 3DShell Project. The README of the project describes the purpose of 3DShell as follows:
3DShell (pronounced 3D-Shell) - is a multi-purpose file manager for the Nintendo 3DS that aims towards handling media files.
And so the idea for ogo-shell was born. It should be a file browser or manager that I can extend with more and more functionality like playing various media files.
Development until now
Because testing small program changes on the ODROID-GO takes some time I chose to implement the hardware related functions again using the SDL2 Library. (SDL2 is a popular C library used mostly in games and provides cross platform access to graphics, audio and input hardware.) That makes it possible to run ogo-shell locally on my computer so I can iterate quickly and debug the application logic more easily.
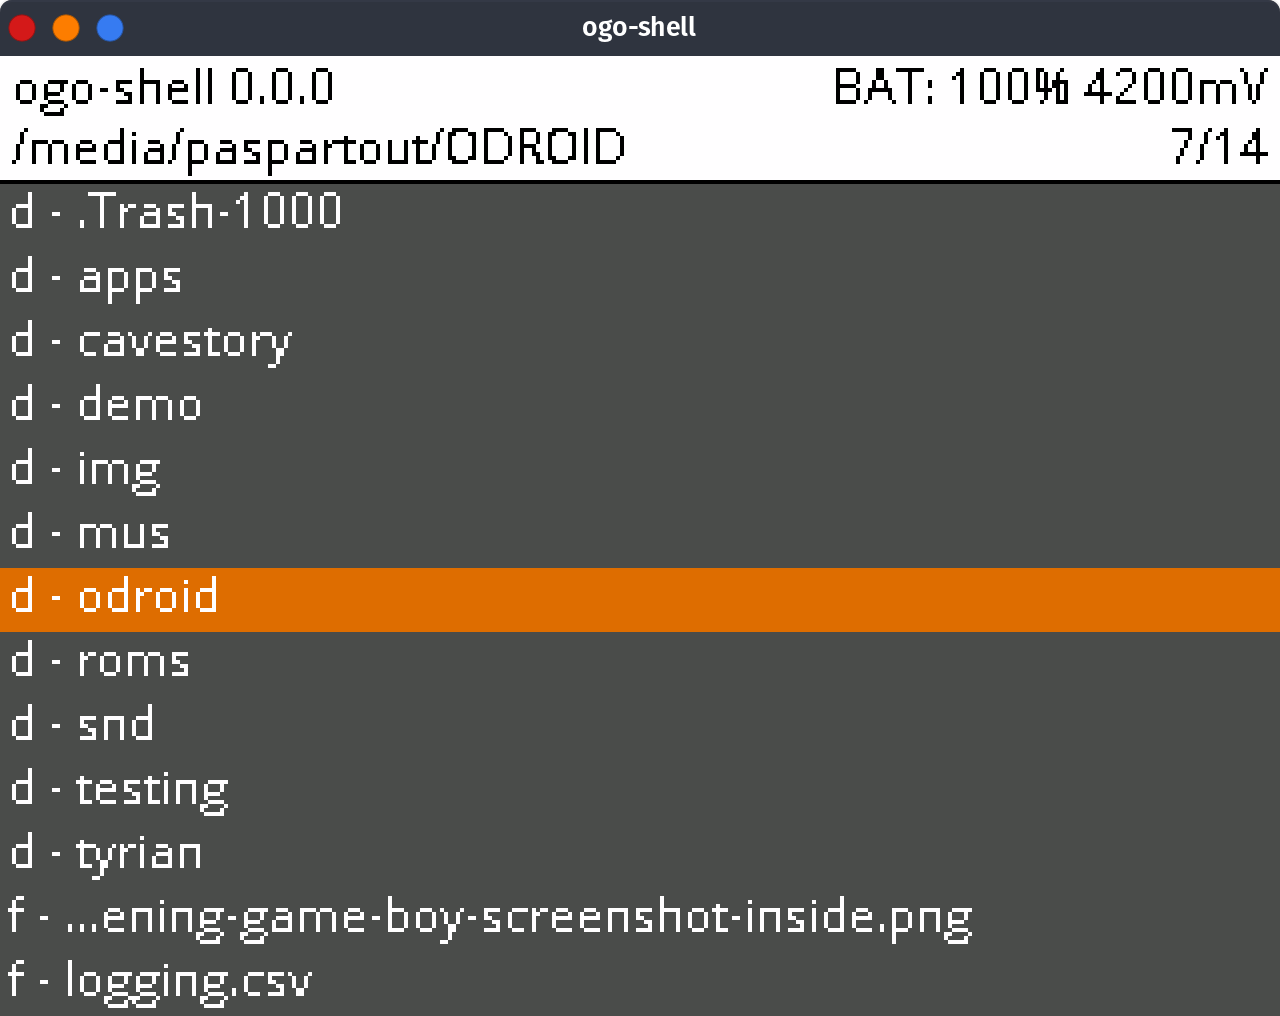
Figure 1 - Screenshot of the ogo-shell running on Linux
File Browsing
After implementing the simulation I began working on the file browser. I had already made an ftp server for the GO, so I was familiar with the file system APIs. The rover file browser for terminals served as an inspiration and also has very clean C code that was delightful to read. At this point I want to thank all the people out there that publish their work as open source. Only their efforts make it possible to develop projects like this one.
Audio Player
Once basic file browsing was done, I wanted to see how easy it would be to play various audio files. Getting them just to play was relatively easy but for an audio player that is convenient to use I faced some challenges.
Figure 2 - ODROID-GO and music player
One reason for that is concurrency. The player not only has to play music, reading your encoded music from the SD card but also react to your input while doing so. Implementing this nicely in C for both the simulation and the ODROID-GO was not easy, but made me learn more about mutexes, queues and how they work.
Another obstacle is the result of the ODROID-GOs hardware. The ESP32 in the ODROID-GO uses the same SPI connection to communicate with both the display and the SD card. That means you can’t update the display and read from the SD card at the same time. By patching the underlying SDK using a mutex I made sure that the program can’t access the SD card until the display is finished updating.
The rest was gluing together open source libraries that handled audio decoding and getting the user interface right. The player supports the usual MP3, OGG, FLAC and WAV audio formats. In addition to that it also support modules in the MOD, XM, IT and S3M formats. There is quite a big scene for music modules and a lot of nice tracks can be found on The Mod Archive.
Image Viewer
The second version after the public release(0.3.0) includes a crude image viewer. It can only display small images though because of the small amount of RAM the ODROID-GO has. Let me explain why.
Figure 3 - Screenshot of the image viewer
If you want to display a big image, let’s say one with the dimensions 1000x1000 pixels, the usual approach is to first decode the image file into memory and then resize it from there into another part of the memory. You can calculate the amount of space needed by multiplying the amount of pixels by the color depth of the image. Most images are using a color depth of 24-bit in the RGB format. That means we have three color channels for the colors red, green and blue and each channel is saved as an integer of 8 bits. To save our 1000x1000 image we then need 24 bits or 3 bytes multiplied by a million(1000 times 1000) which is already 3 million bytes. The amount of RAM you can easily access on ODROID-GO is 4 MB so anything much larger that 1000x1000 won’t fit into the memory. Since the usual approach doesn’t work one would have to come up with a more clever way of decoding only parts of the image and directly resizing it on the fly without the need of the large image buffer in RAM. These optimization can take a lot of effort that I didn’t want to spend on this project yet.
What I learnt is that getting a first prototype of a feature running is usually quite easy and fun. But polishing the software by fixing bugs, considering edge cases and adding quality of life features we take for granted usually takes much more time and effort and is not as fun. This is probably why there so much bugs in today’s software. The more complex your software gets the effort one has to invest to make it work perfectly.
Upcoming features
I am currently working on support for chiptunes using the game-music-emu library that can emulate sound chips from old game consoles and computers. I really like the sound and creativity these old tunes have. What is also in the works is the ability to launch the go-play emulators from within ogo-shell. All in all, there are still lots of ideas for features to implement and bugs to fix.
That said is was quite fun to develop ogo-shell and learn new things while doing so. The satisfaction you get when you first see or hear your creation working as intended can be really addicting. I hope I have encouraged you to not only use programs but also learn to create new ones, and hope that ogo-shell may be useful to you.
Multiscreen Desktops using VNC
November 1, 2019By Adrian PopaLinux, ODROID-C2, ODROID-XU4
About two years ago I had a wild idea: would it be possible to create a "dual-screen" desktop system by using two ODROIDs, each driving a different screen, but acting as a unified desktop? The idea was to have a "master" odroid that is more powerful and runs your apps (like an XU4 or N2) and a "slave", ideally cheaper board that acts only as a dumb terminal (a C1/C2). I did some research and found xdmx, which is a distributed window manager that could do the job, but it has been abandoned a decade ago, so it is a no-go.
Next I experimented a lot and created a convoluted system that basically worked by using Xpra (https://xpra.org) in a way it was not designed to function. It did work, but performance was abysmal - about 0.5 fps for the whole desktop, which is very noticeable (details here: https://forum.odroid.com/viewtopic.php?t=35710). I then got an idea to experiment with vnc, and this time I got a much better overall solution.
The idea
The idea is deceptively simple. On the master system start a regular X11 session, with lightdm and all. Use xrandr to extend the desktop (once logged in) so that the new desktop size covers both screens (I used identical screens, but it should work for screens of different resolutions with some tweaks). Next start a X11vnc session that connects to :0 and that has a fixed resolution which is the sum of both screens.
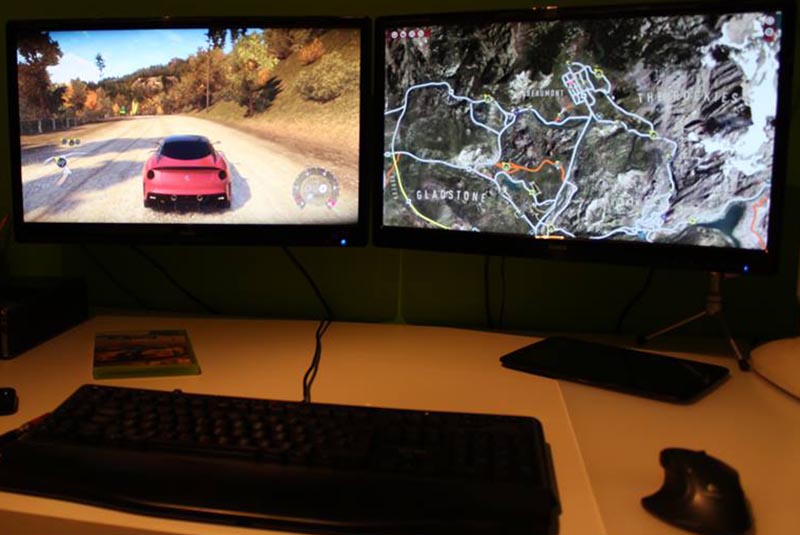
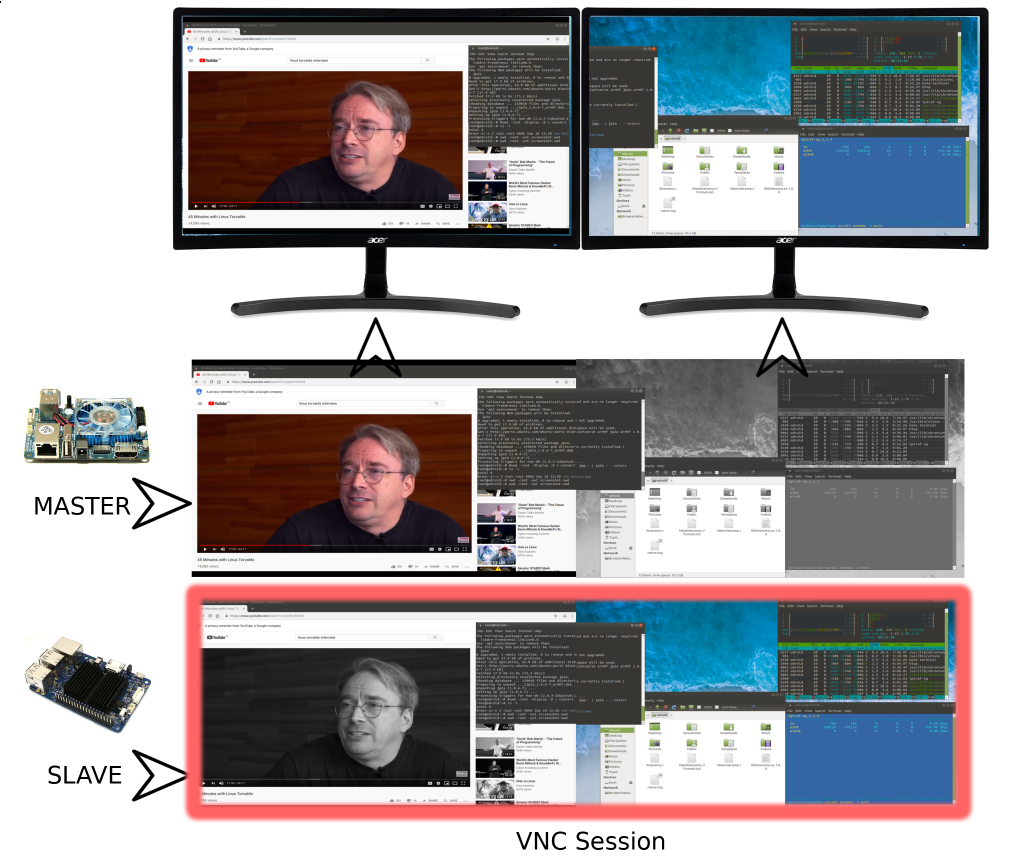
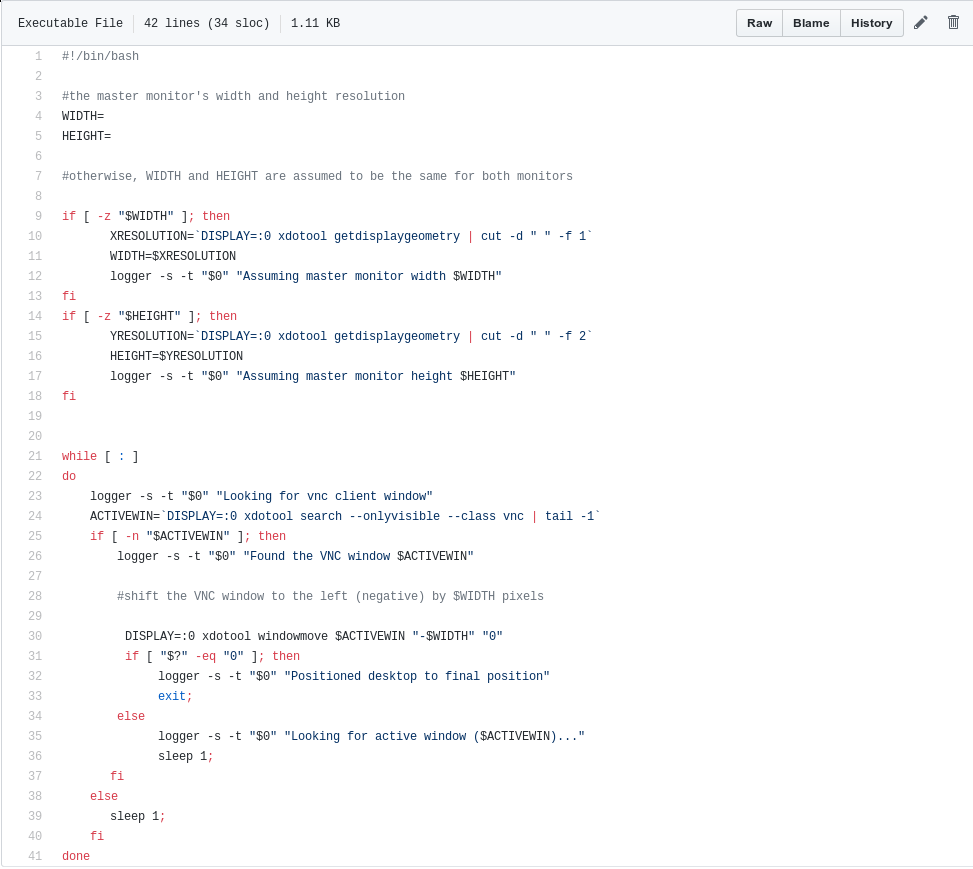
The slave can run a minimal, or a desktop image, but needs to have Xorg and needs to support the target monitor resolution. It will start a standalone Xorg session that reads its startup commands from /root/.xinitrc. The file points to a script that will try to start a vncviewer in an infinite loop, connecting to the master session. If all goes well, you end up with two mirrored screens -- which is not the same as a dual-screen setup. Here is where the magic kicks in. Once vncviewer is started, it is moved with the help of xdotool to the left by a screen's width. This causes what would be normally the left part of the desktop to be rendered off screen (and would logically overlap with what's on the left screen), leaving room for the right screen contents. Confusing? Here's a diagram:
Figure 01 - The grayed-out parts are not visible physically on their respective screens
Remember that the master system renders both displays, but only the left part is physically visible, and the slave system renders both displays as well (via VNC), but only the right part is physically visible. The end result is the illusion of a dual-screen setup.
Main Setup
My test bed consists of an ODROID-XU4 running Ubuntu 18.04 Mate as the master system and an ODROID-N2 running Ubuntu 18.04 Mate as the slave. As I said previously, the slave can be a less powerful board (even of the fruity variety), but I had the N2 on hand for the experiment. The master drives the left-hand monitor in the setup while the slave is connected to the right-hand monitor (this order is important). In my case both monitors have 1680x1050 resolution. You should be able to go up to 1080p per screen, but I am not sure whether you can have two 4K screens because the desktop seems to be limited at 4096x4096 pixels (though there might be a way around it: https://bit.ly/2JsDWMc.
The sound should be connected to the master, but keyboard and mouse can be connected to either system once VNC is started. Note that connecting keyboard and mouse to the slave can result in jerky movements when there is a lot of activity on-screen, so for best performance connect them to the master too.
Regarding networking, both systems should be in the same LAN, connected via ethernet and with static IP addresses. Peak network usage observed by me was about 40Mbps of VNC traffic when playing back video, so fast ethernet should not be a bottleneck.
Let us start with the master configuration:
$ sudo su -
# apt-get install x11vnc pwgen git
We will create a 20 character random password for VNC (though documentation says only the first 8 characters are actually used), and we will copy it over ssh to the slave system. I am assuming your slave has an unprivileged account, like odroid.
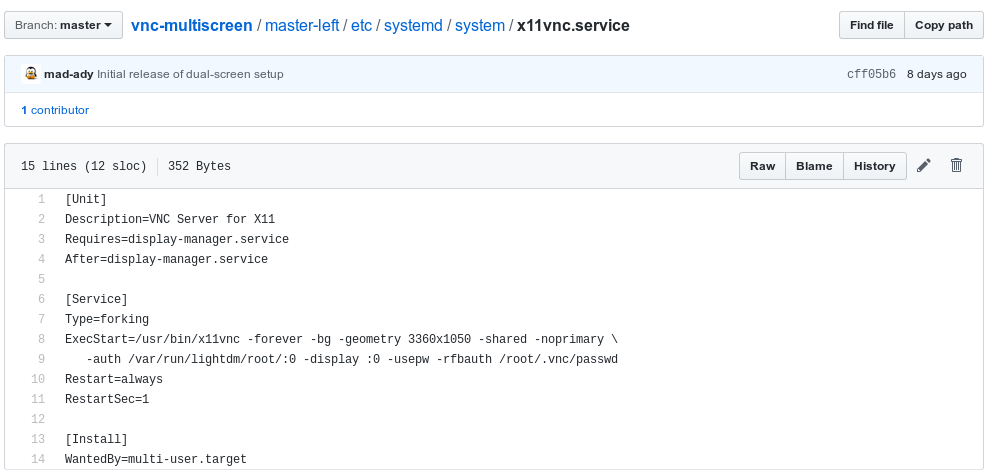
Next let us create a systemd service to start x11vnc on boot. You can grab and tweak an example configuration from my git page (https://github.com/mad-ady/vnc-multiscreen.git). You will need to change the combined resolution to match your own case (for me it was 3360x1050):
Figure 02 - The X11vnc service, customized with the composed screen resolution
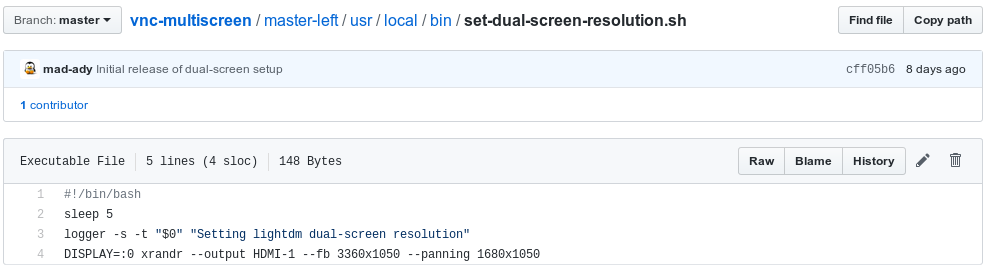
Next we need to add a script that runs once you log in (again, I am presuming you are using the user odroid for GUI login) and that uses xrandr to resize your desktop. We could have run the script from lightdm (before login), but for some reason the desktop background would span only one screen. Run the commands below as the user you log in as (on the master):
Figure 03 - The set-dual-screen-resolution script (on the master) that extends the desktop
You will need to edit the /usr/local/bin/set-dual-screen-resolution.sh script and set your total resolution for the fb parameter (that will be the size of the desktop) and set your left screen's resolution for the panning parameter. Setting it like that causes the desktop not to start scrolling when you move the mouse to the edge of the screen.
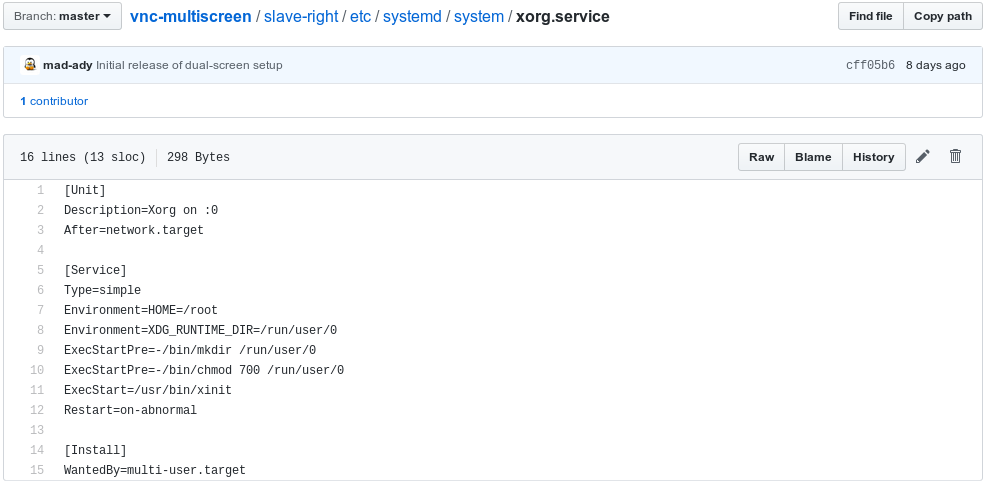
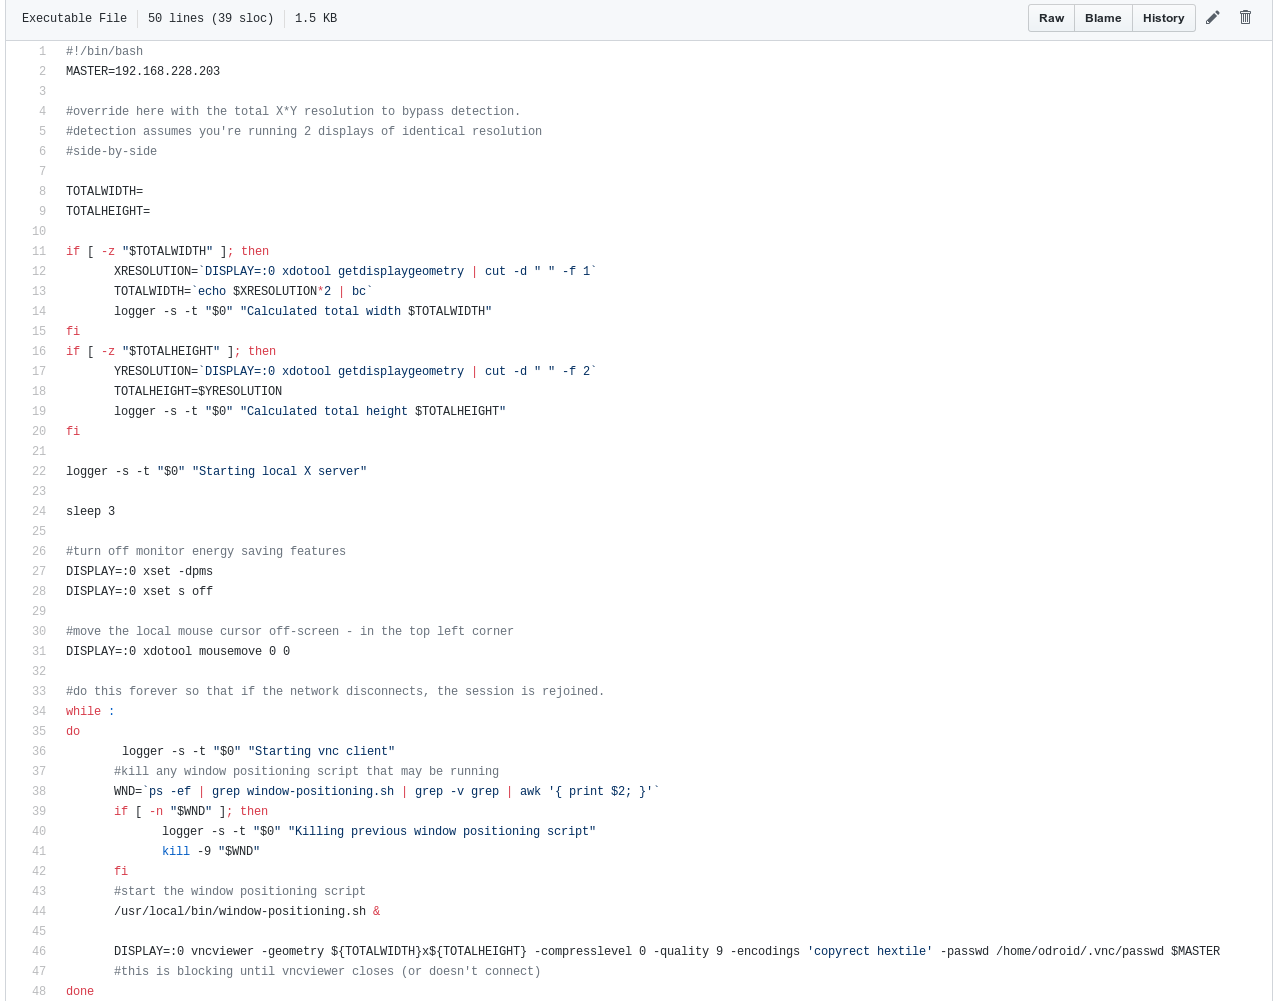
That is it for the basic setup on the master, and next comes the slave. We will disable GUI mode and create and enable an xorg service that starts a plain X11 server and a script to connect to vnc:
If you are not using identical screens, you will need to edit the two scripts above and set the correct offsets for your displays.
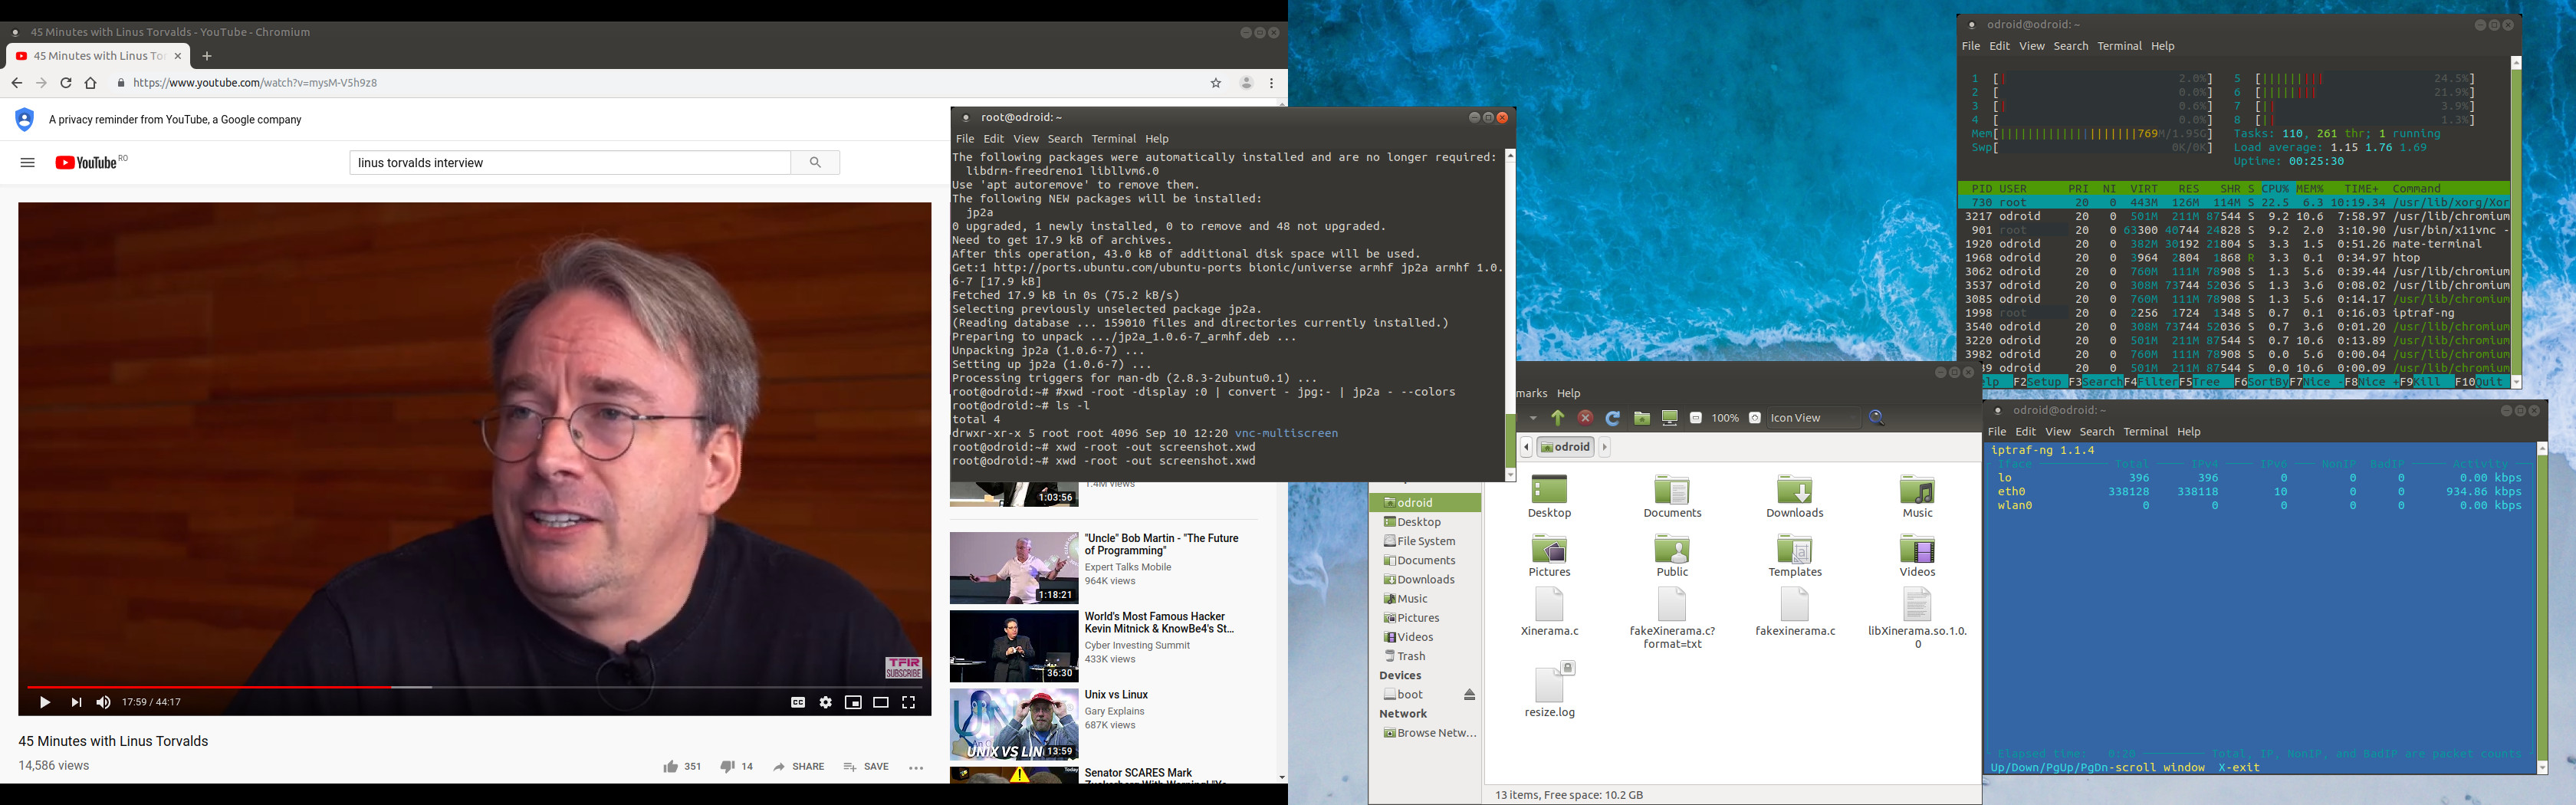
Now the basic steps are done. You can restart both systems and after lightdm login you should have an extended desktop. However, there are some things that do not work as expected and you need to make some tweaks.
Figure 07 - How your desktop should look
Tweaks (only on the master)
You should disable MATE window tiling (and compositing while you are at it), because when you try to maximize a window on the right screen by dragging its title bar at the top, the window will jump on the left screen. You can do this from Menu -> Control Center -> Windows -> Placement -> Disable window tiling.
Next you should disable window contents while moving, so that you get a smoother experience: Menu -> Control Center -> Mate Tweaks -> Windows -> Do not show window content while moving windows.
Since you have two screens, it would be nice for windows to know where the division between the screens is and allow you to maximize windows on each screen. For this you need to tweak what the xinerama library tells your X server about available screens. Luckily there is a "fakexinerama" library that you can install on the master (https://www.xpra.org/trac/wiki/FakeXinerama).
If you are running on a different architecture on the master (arm64, x86_64), adjust the path to the library file. You can find what it is with:
$ find /usr/lib -name libXinerama.so
Fake Xinerama reads the screen configuration from your GUI user home dir ~/.fakexinerama. The file starts with the monitor count (which is 2 in our case) and lists each monitor per line with offsets and resolution:
$ cat ~odroid/.fakexinerama
2
#left screen, starts at x=0 and y=0 and has a size of 1680x1050 pixels
0 0 1680 1050
#right screen, starts at x=1680 and y=0 and has a size of 1680x1050
1680 0 1680 1050
Once you restart your desktop session, windows should be behaving as if you had two physical screens and maximize on each screen.
One more integration that is missing is - the screensaver only activates on the master screen. It probably cares only about screen size, not desktop size, so you're left with an exposed right screen. You could use gdbus (or polling) to see when screensaver activates and you can ssh into the slave and turn off its screen with xset dpms force off. When you hear the screensaver deactivate, you can re-enable the right screen.
To do this, first you need to be able to ssh from the master to the slave without a password. For this we will create a key and copy the public part to the slave. Skip the first step if you already have keys.
Next copy the script that watches screensaver status and start it as part of the user desktop session. Thankfully, systemd can handle user services as well (again, on the master):
Make sure to edit (and test) the screensaver-sync script, so that it points to the correct slave IP address.
Pros and cons:
The master (left) does all the hard work, but has the most fluent performance
The slave (right) is used to render half a screen, but it needs to transfer and render the combined screen (even if you only see half), so heavy activity on the left screen causes tearing/lag on the right screen
You need to turn on and off both devices independently. It is possible to automatically turn off the slave then the master is shuts down, but needs tweaking (e.g. a systemd service that ssh-es into the slave to power it off)k
You can easily turn back the slave into a stand-alone system by disabling the xorg service and re-enabling graphical target. The master can remain as is without affecting usability.
Performance is native on the master/left screen and ranging from a couple of FPS to ~15 FPS on the slave/right screen, depending on screen activity. The right screen is best suited for static content, like a web page, code or a terminal.
Ideally, all of this would be greatly simplified if only there were a way for X11VNC (or maybe a different remote desktop technology) to copy only half a screen of data instead of the full desktop. That way you reduce the processing both on master and slave and can get rid of the window movement tricks. You could display the second screen on any system (e.g. in a browser on a TV) without much trouble.
You may get better performance if the master is a PC (e.g. an ODROID H2) and the slave is an ARM/ARM64 ODROID. That is because the framebuffer read speed on a XU4 is about 45MB/s (N2 reports it as 443MB/s), while my Intel GPU has about 961MB/s. More speed results in faster refresh rate, but it will consume more network bandwidth.
One more thing - the technique above can be extended to more than 2 monitors because you can attach two VNC clients to the same server. However, performance will drop considerably. Let me know if you find ways to improve this on the support thread at https://forum.odroid.com/viewtopic.php?f=52&t=36411.
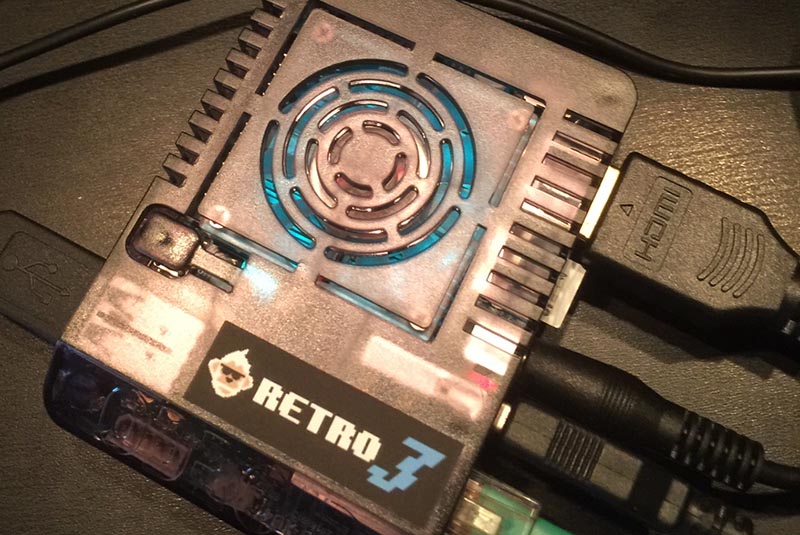
Monku R3: Building The Ultimate ODROID-XU4 / XU4Q Gaming Console - Part 2
November 1, 2019By Brian ReeGaming, ODROID-XU4
Hello and welcome to the last tutorial in this series. I hope that you’ve found this series helpful. Part 1 of this tutorial which details the hardware and initial software configurations can be found at http://middlemind.com/tutorials/odroid_go/mr3_build.html. This article will show you in detail how to polish off your Monku Retro 3 (ODROID-XU4) video game console. We will be optimizing Ubuntu MATE, the Linux desktop environment, setting up retroarch in kiosk mode, and boot.ini configuration scripts. Ok let’s dive in!
This tutorial does not require any new parts or tools. We will just be configuring the console you have already built (Part 1 article), adjusting things to really make it shine.
Finalizing MATE... Almost
The first thing we are going to do in this part is get rid of that pesky authentication prompt that pops up when you try and open a browser for the first time after logging in.
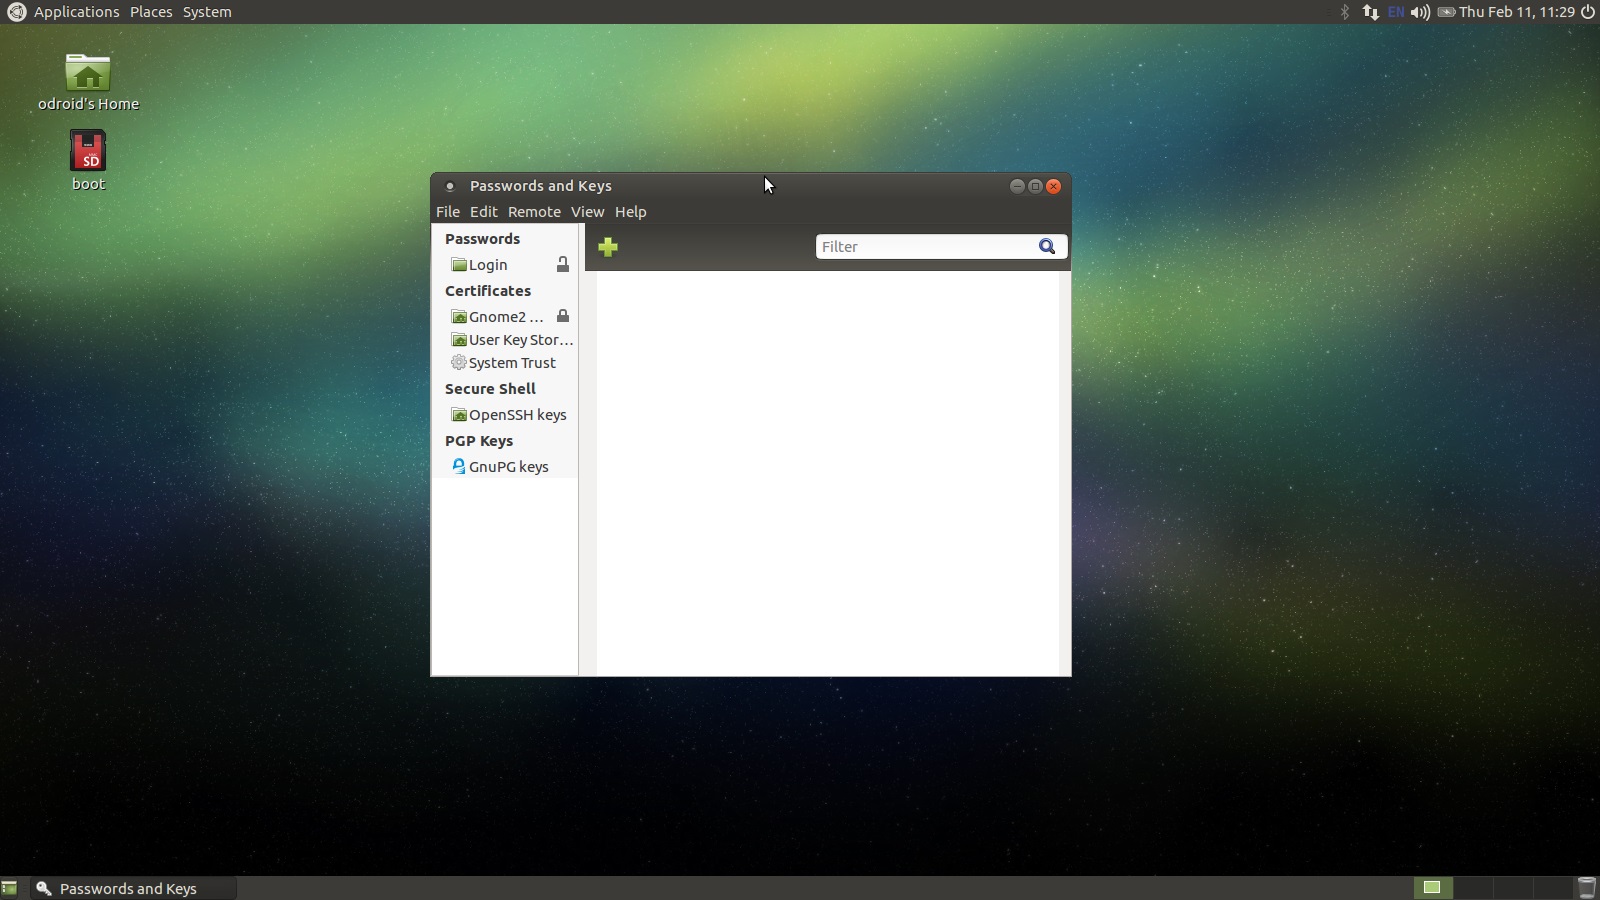
This is not a high security setup, we are purposely lowering the security level here to make it easier to use as a game console and web browsing set top box. Go to the following menu location: Applications -> Accessories -> Passwords and Keys and you should see a window popup similar to the one depicted below.
If at any time you are prompted for a login when working with the terminal use the password, k
Figure - 01
Locate the Login entry in the list on the left hand side of the window. If the authentication popup I mentioned references a different Password keychain then find that entry in the list on the left hand side of the window. Follow the steps below to unlock the target keychain.
Right click on the target entry and select Change Password.
You will be prompted to enter the old password, type in odroid and click Continue.
You will now be prompted to enter a new password, leave both fields blank and click Continue.
Another dialog will popup and ask you if it is ok to7 allow the keychain to be unlocked, click Continue.
Close out of all the dialogs and close the Password and Keys window, we are all set.
Next thing we will do with the Ubuntu MATE environment is configure the panels and widgets a bit. You can do whatever you like here, I will just show you how I configure things. First off we are expecting to interface with this system and, at least some of the time, with a gamepad. It works great but it is not a mouse, also we are not really going to be doing any rigorous Linux computing so there are a few things we do not need. The second benefit to this configuration step is that is does slightly lower the memory overhead.
Follow these instructions to remove the bottom panel. We will be adding controls to the top panel to offset some of the functionality loss but we will not be adding in the desktop selection widget. It is just a bit of overkill for our needs. Again if you want it, it will not harm anything to keep it. Follow these instructions to clean up the panels and widgets just a bit.
Go to the bottom panel and right click on it, then 6select Delete This Panel, then click Delete again when prompted.
Go to the top right hand side of the screen and right click the power button, select Remove From Panel.
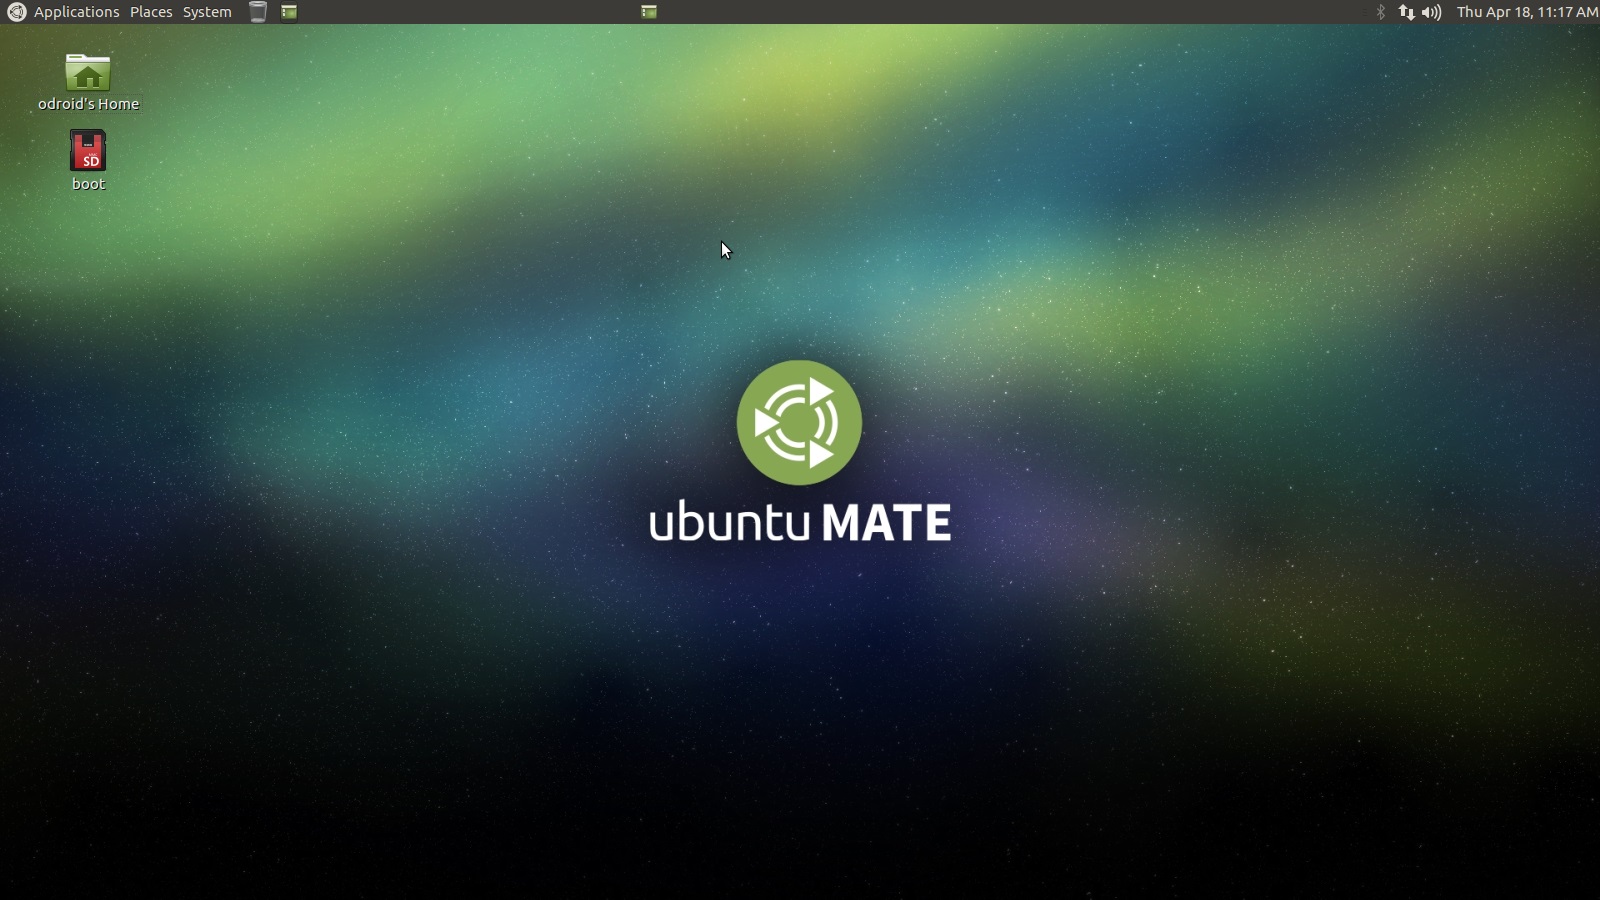
What we are going to do is add some of the widgets back to the top panel making the top panel a more centralized point of control. This makes using the gamepad to control things much easier. Your desktop should look like the screenshot below.
Figure - 02
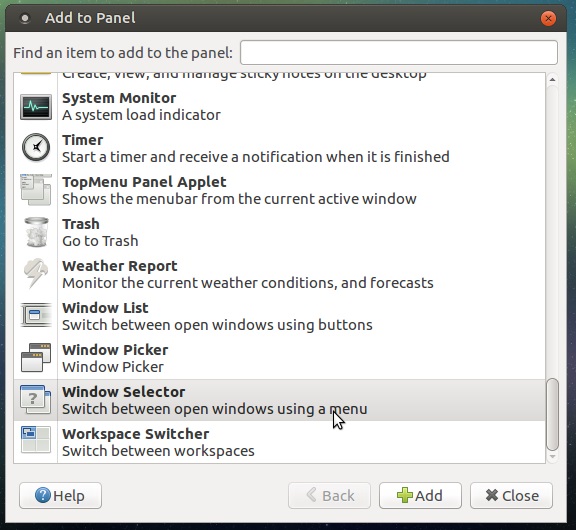
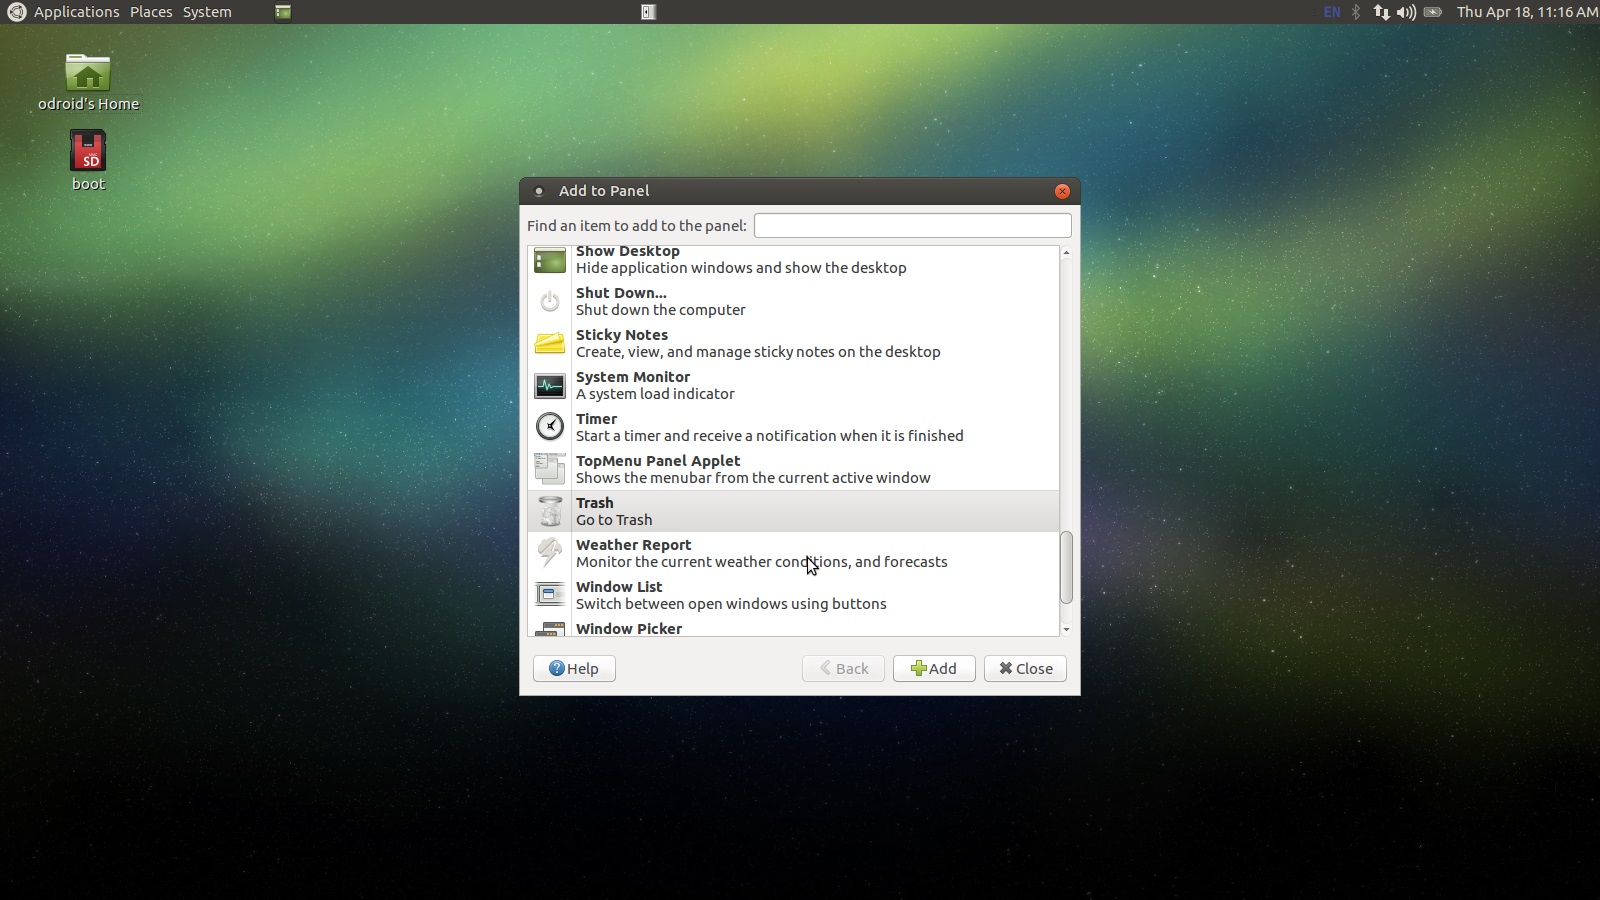
Since we got rid of our open window selection buttons when we deleted the bottom panel, let us add a new widget to the top panel that does the same thing but is better suited for a gamepad since it requires less cursor movement to utilize. Right click on the top panel and select Add to Panel. Scroll down the list of options until you see the entry depicted below and then click Add.
Figure - 03
We have a few more steps to get through here regarding the tray apps and the date and time configuration but we are almost done. Your desktop should now look something like this.
Figure - 04
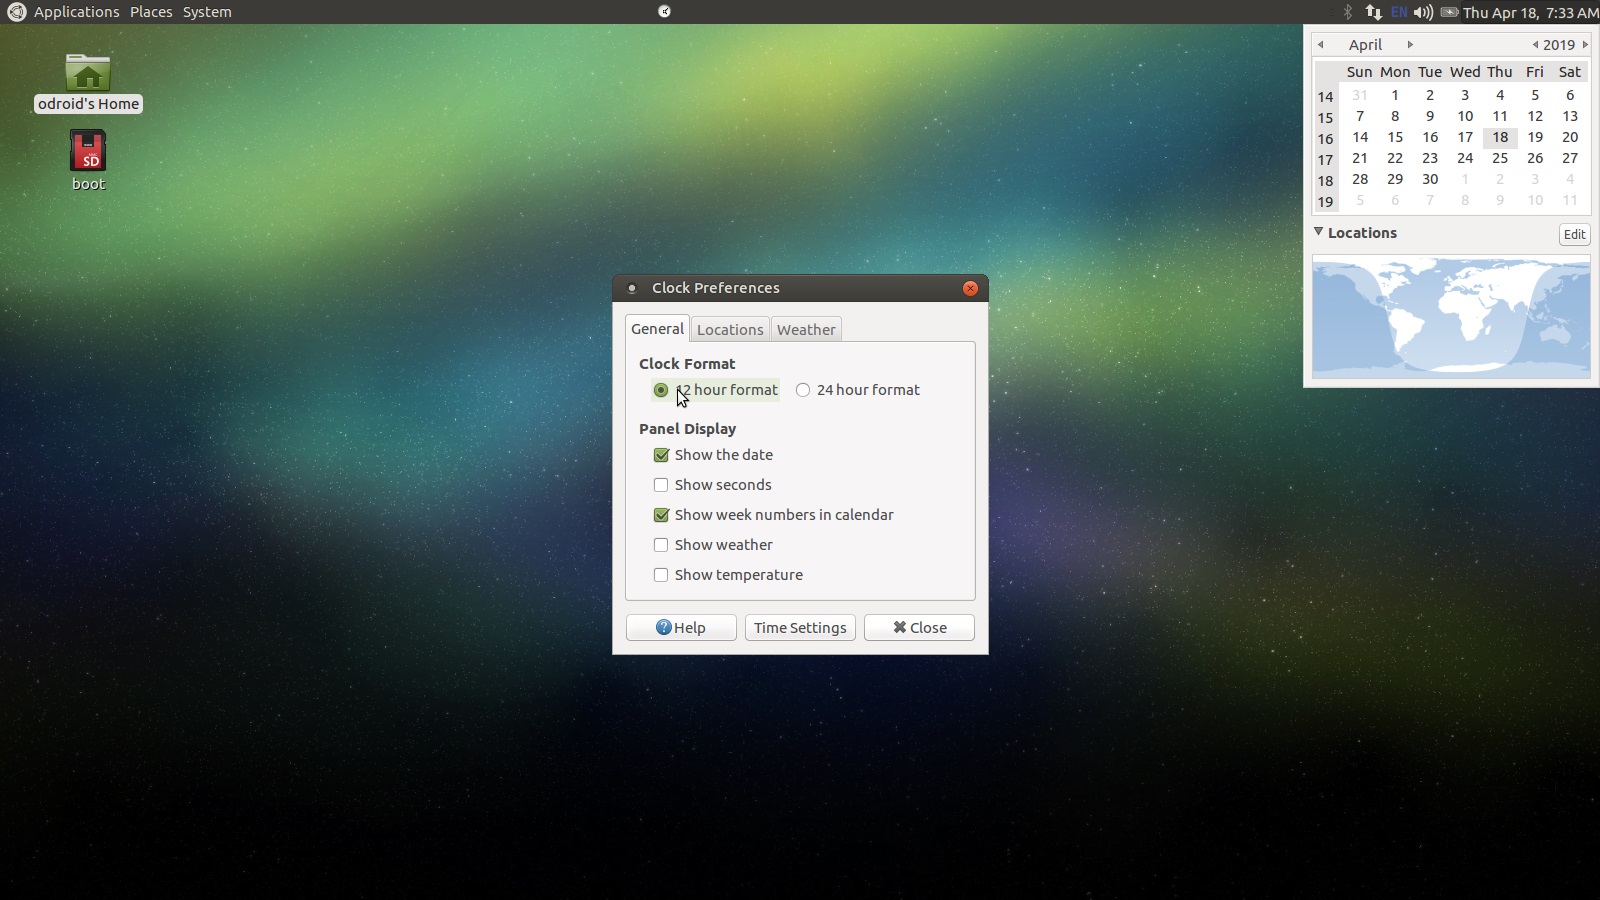
Next let us click on the Date and Time string in the top right corner. A calendar drop down should appear. Expand the Locations section and click the Edit button. Configure the General tab as depicted below or as you see fit.
Figure - 05
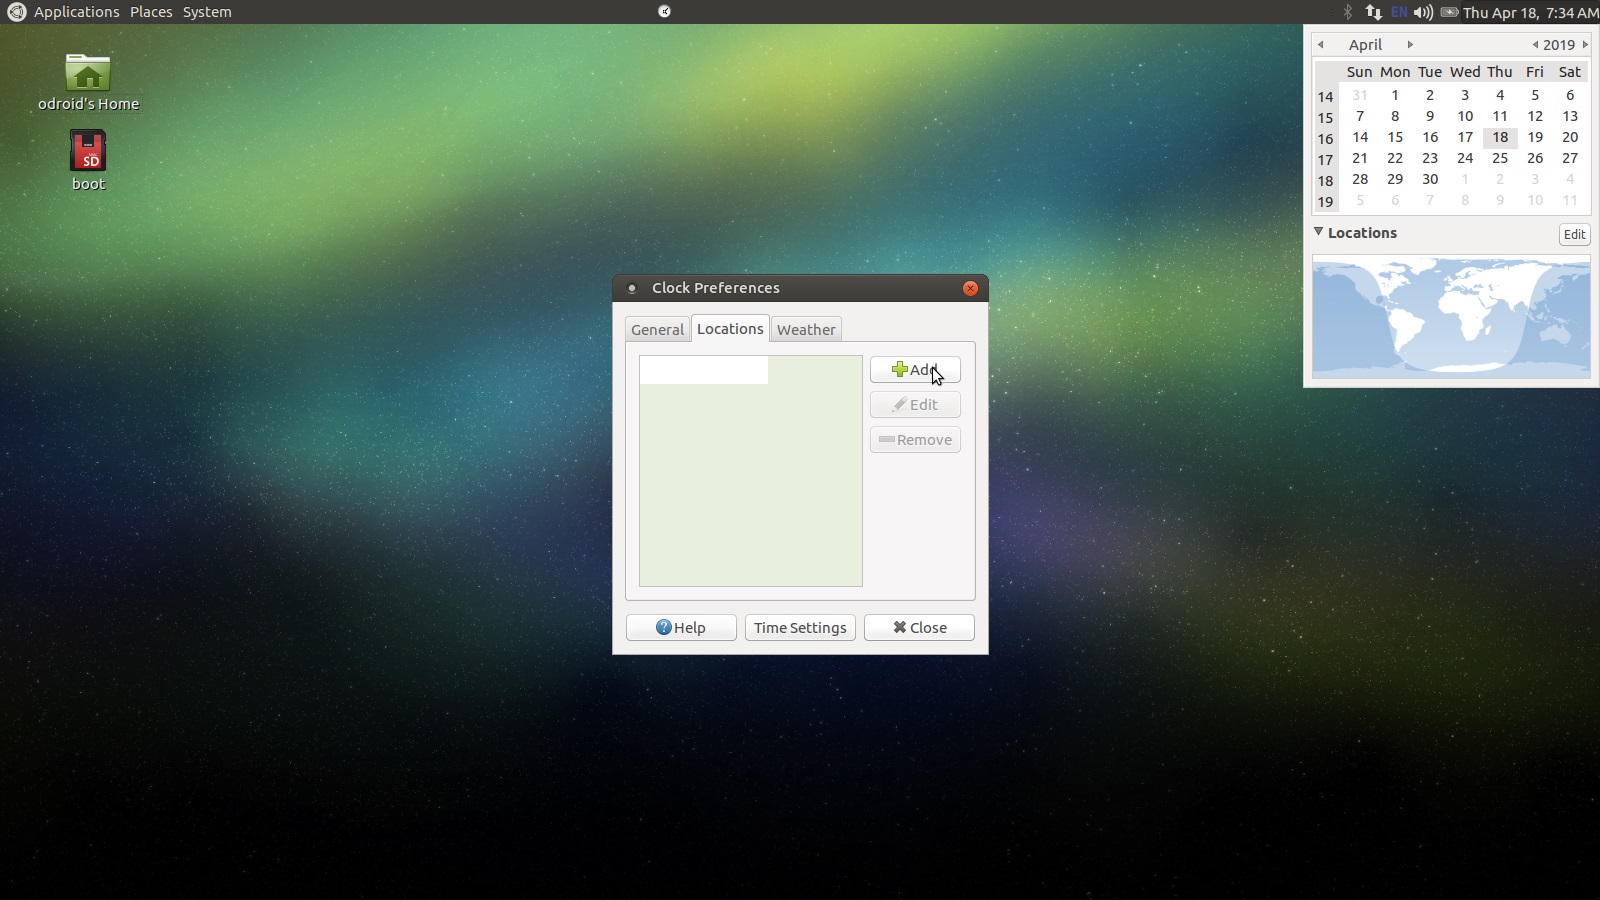
Let us add some location information so the time will be correct when we have an internet connection and sync with ntp (Network Time Protocol). Click on the Locations tab then click the Add button.
Figure - 06
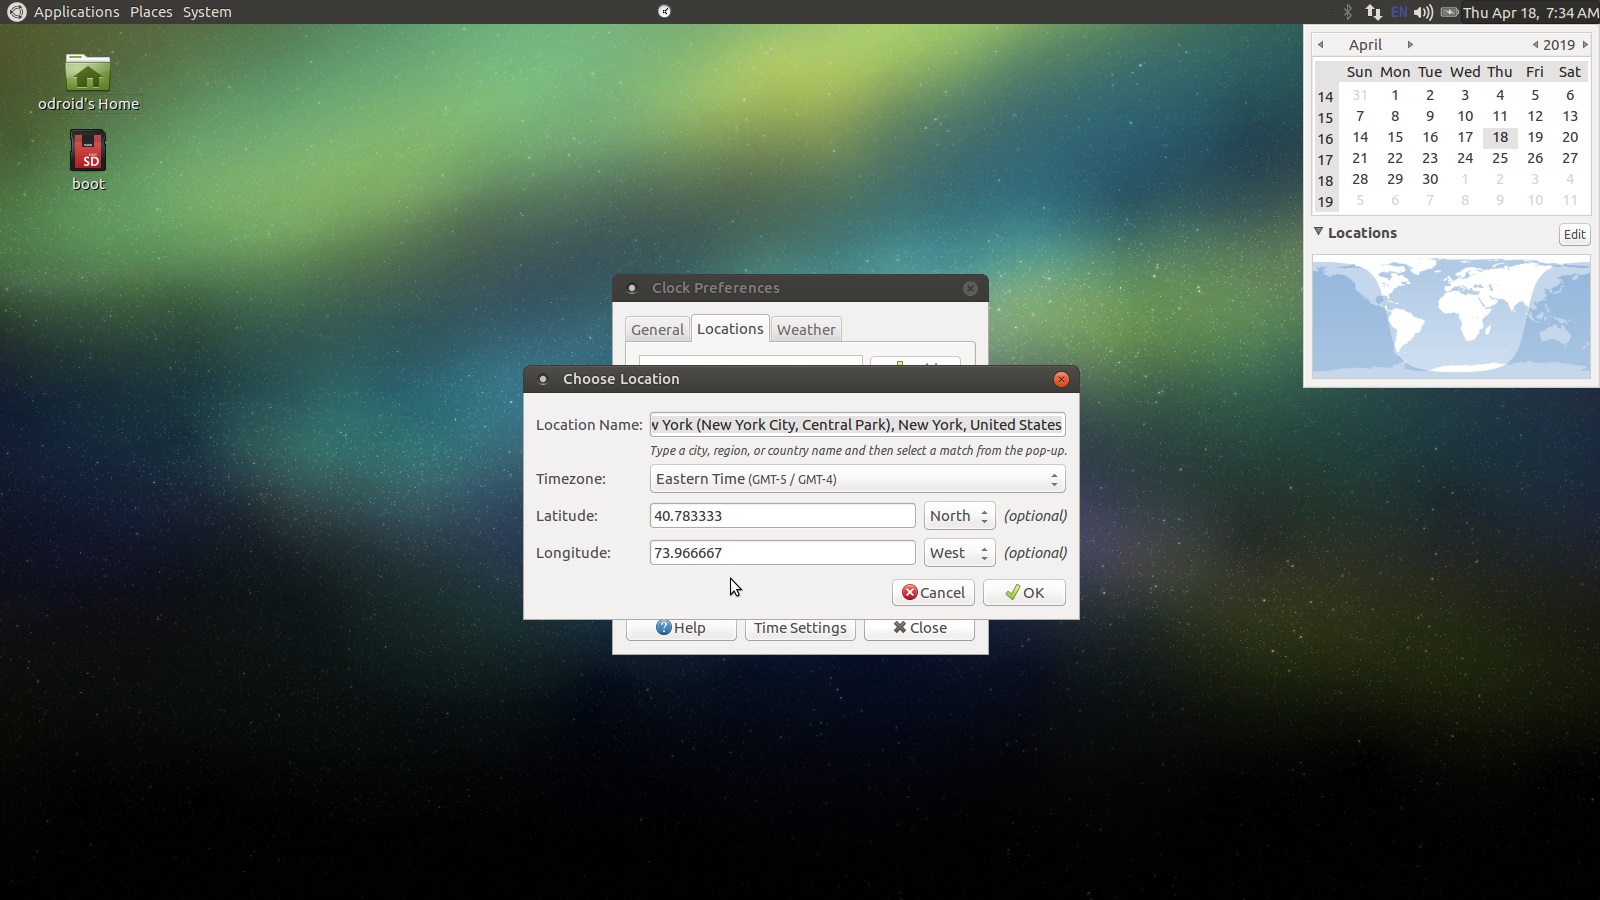
Start typing the nearest major city into the Location Name text box. If it does not work try another major city or try the city representative of your time zone, for instance mine is New York. Select a location from the list that pops up. Mine would be Central Park, NY. Click Ok once you have found something suitable.
Figure - 07
Now you will see a location entry in the locations list as depicted below.
Figure - 08
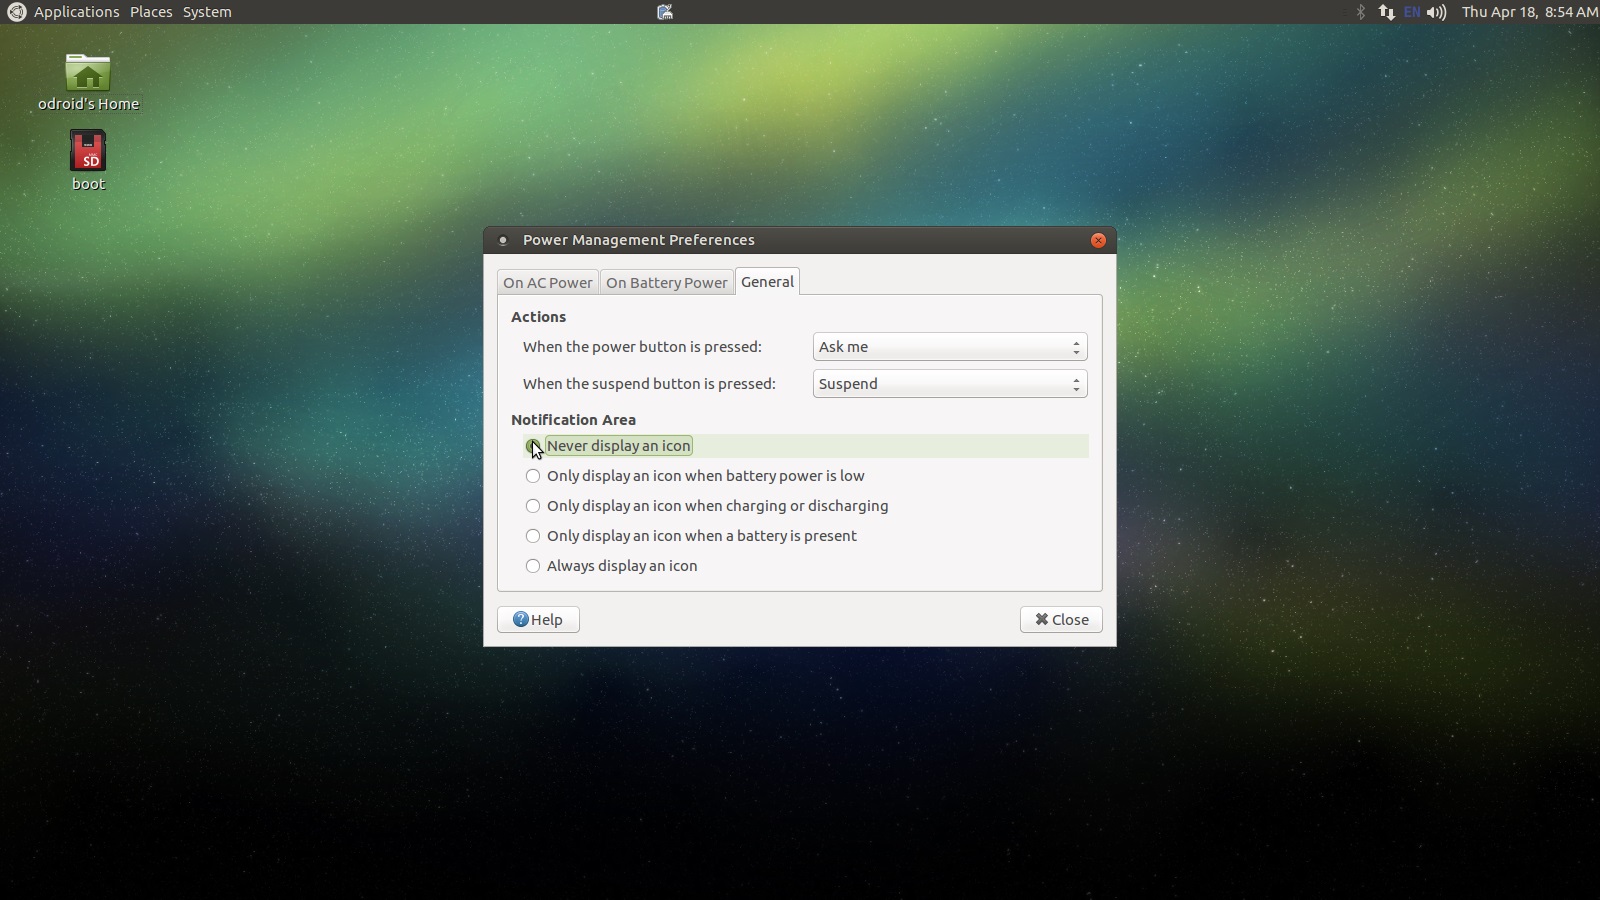
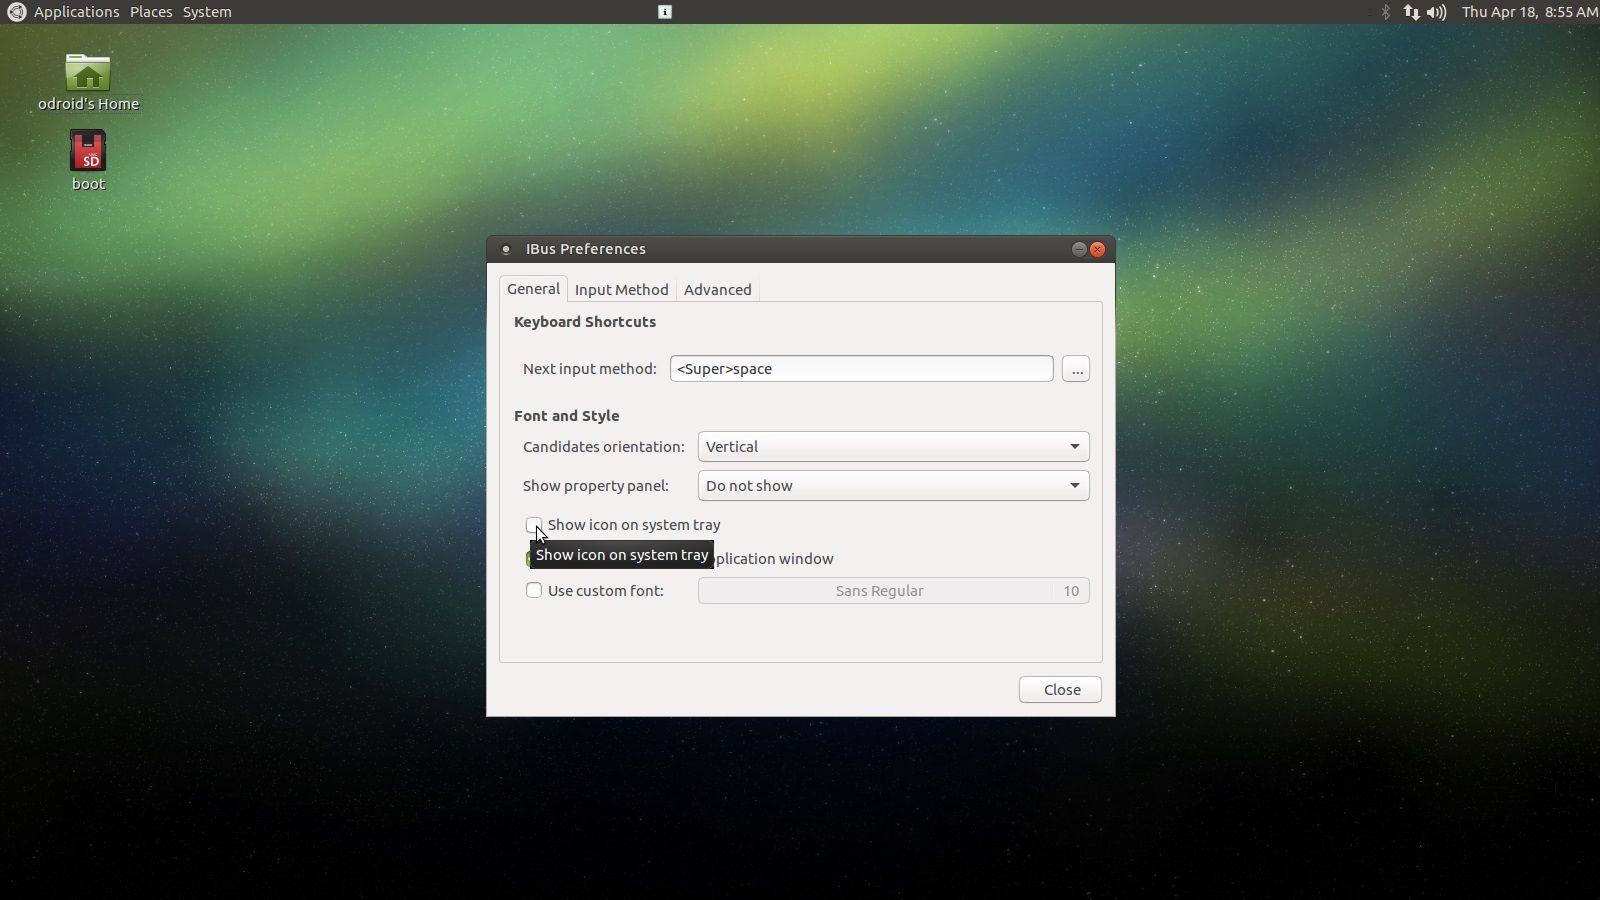
Just a few more things left to do here. right click the battery icon in the top right and select the Preferences option. Click on the General tab and toggle Never display an icon. If you have an EN or UK string in the system tray right click on it and select Preferences. On the General tab uncheck Show icon. We will not really be worrying about switching the keyboard language. If you need this you can turn both in the system tray icon back on by using the System -> Control Center menu option and clicking on Power Management and iBus Preferences respectively. The screenshots below show the forms we just discussed.
Figure - 09
Figure - 10
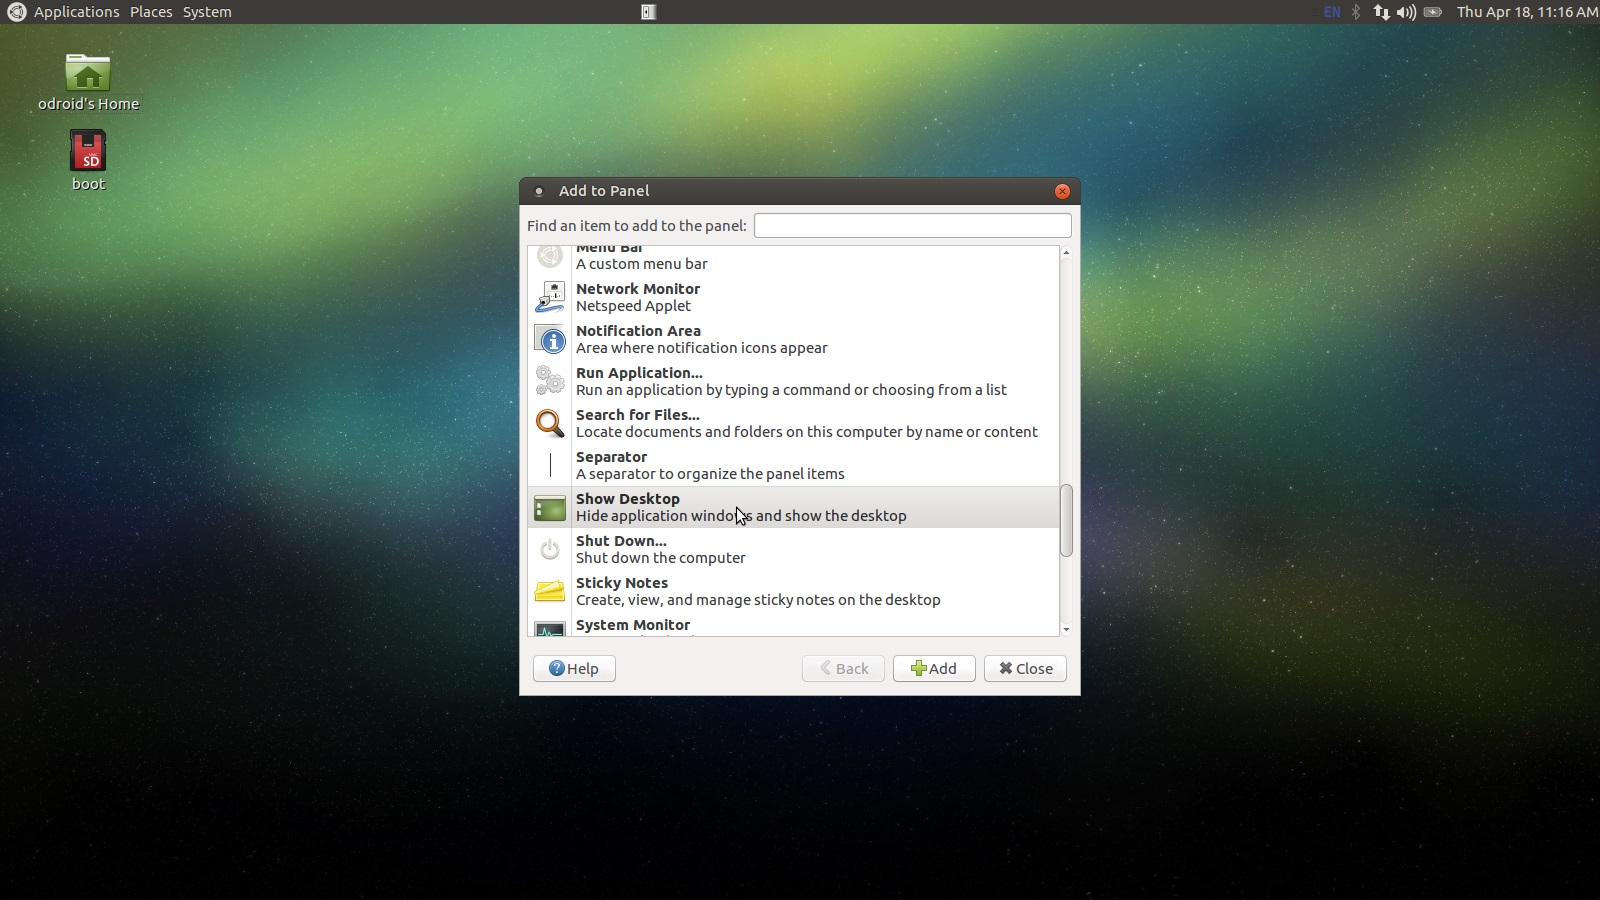
Just two little things left in this part and we will be moving onto the custom control button and scripts! Move the mouse to the top panel and right click on it. Select Add to Panel then scroll down until you see the Show Desktop option as shown below. Do the same thing for the Trash option also shown below.
Figure - 11
Figure - 12
Use the center mouse button, or the mouse wheel button if you have that instead, to move the widget icons on the top panel. Let us drag these two new widgets a little closer to the System menu. Also separate them a little bit. Nice! Now we are ready to start adding custom scripts. These scripts will automatically start retroarch on boot, and start antimicro when retroarch closes returning mouse control to the gamepad. We will also be setting up some boot.ini control scripts. Your desktop should look like the one depicted below.
Figure - 13
Scripts and Custom Control
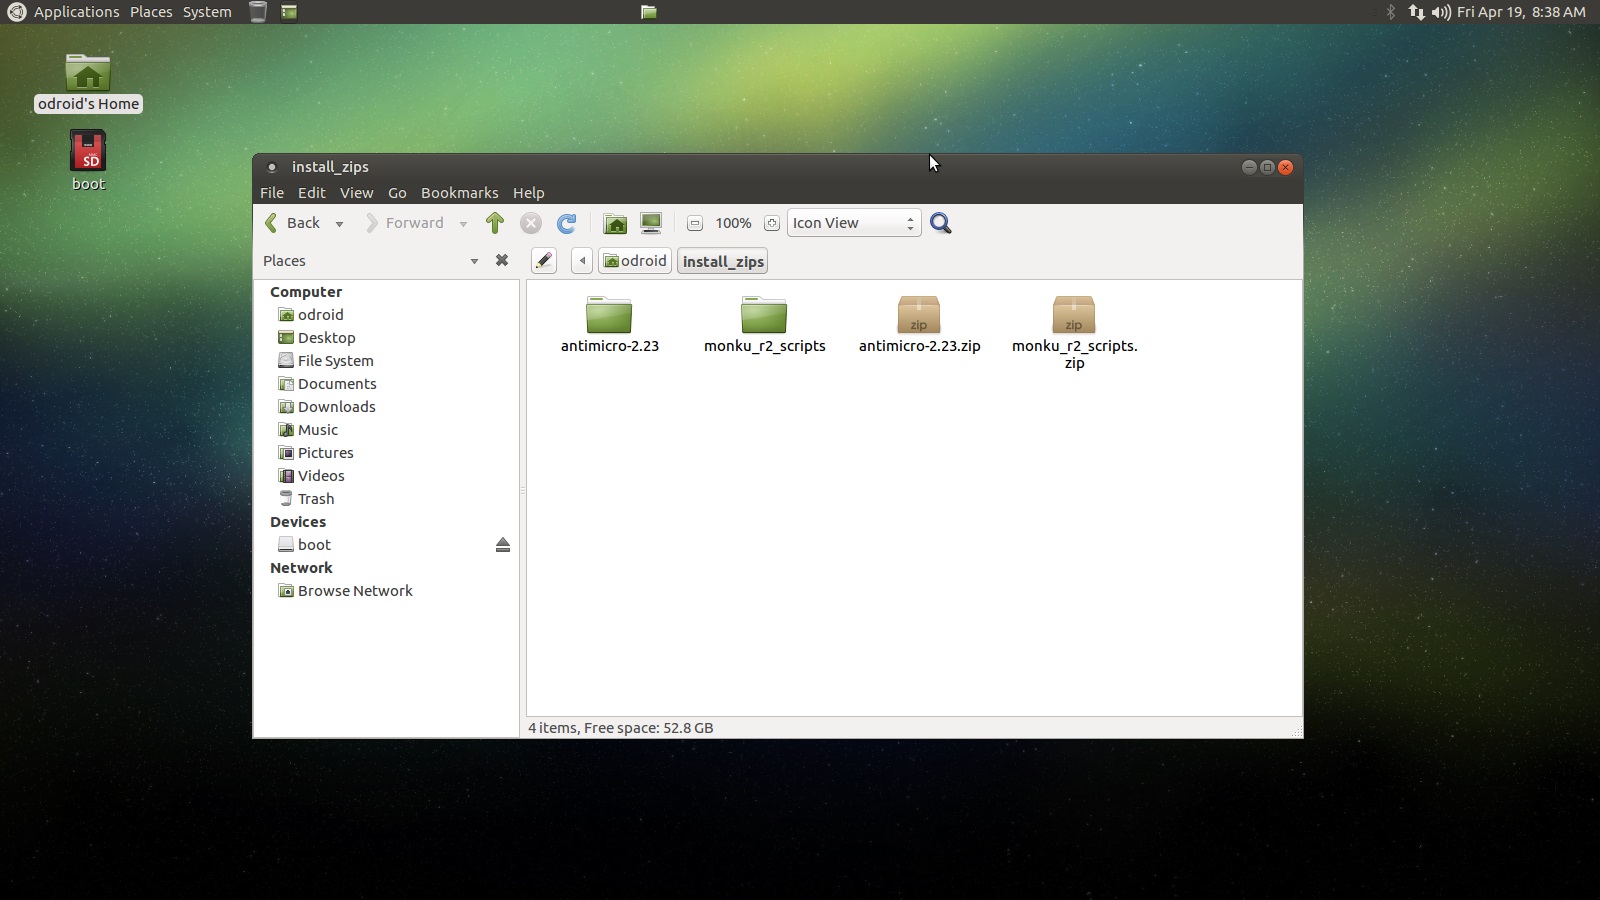
In this part we are going to set up some custom scripts to control the software we installed and configured. This will bring the experience up from a Linux desktop experience to more of a game console experience. Download the script bundle below and then copy and paste it into the install_zips folder you created in the previous tutorial. It is located in the odroid user's home directory.
Monku R3 Scripts
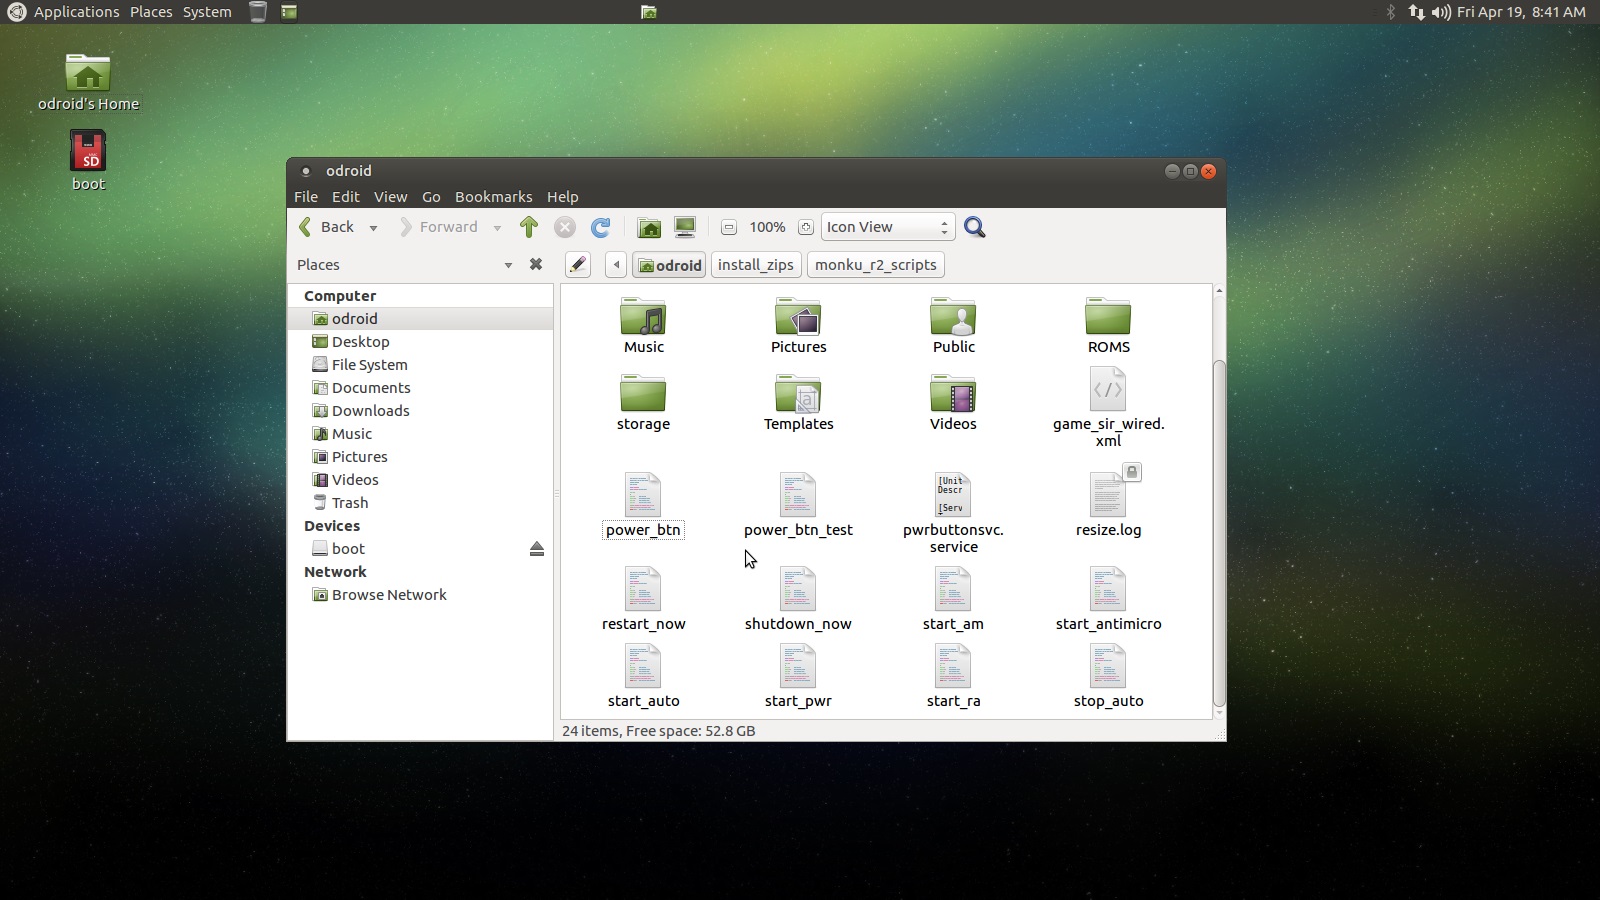
Once you have downloaded and copied the zip file into the install_zips folder, right click on it and select Extract Here. Seven files should appear in a sub directory, open it and select them all and copy them into the odroid user's home directory. The odroid user's home directory is the default location of the file browser, you can also access it from a link on the desktop or from the left hand side of the file browser where the folder shortcuts are listed.
Figure - 14
Figure - 15
Let us make sure these scripts have the correct permissions and can be executed. Open up a terminal, Applications -> System Tools -> MATE Terminal, and run the following commands.
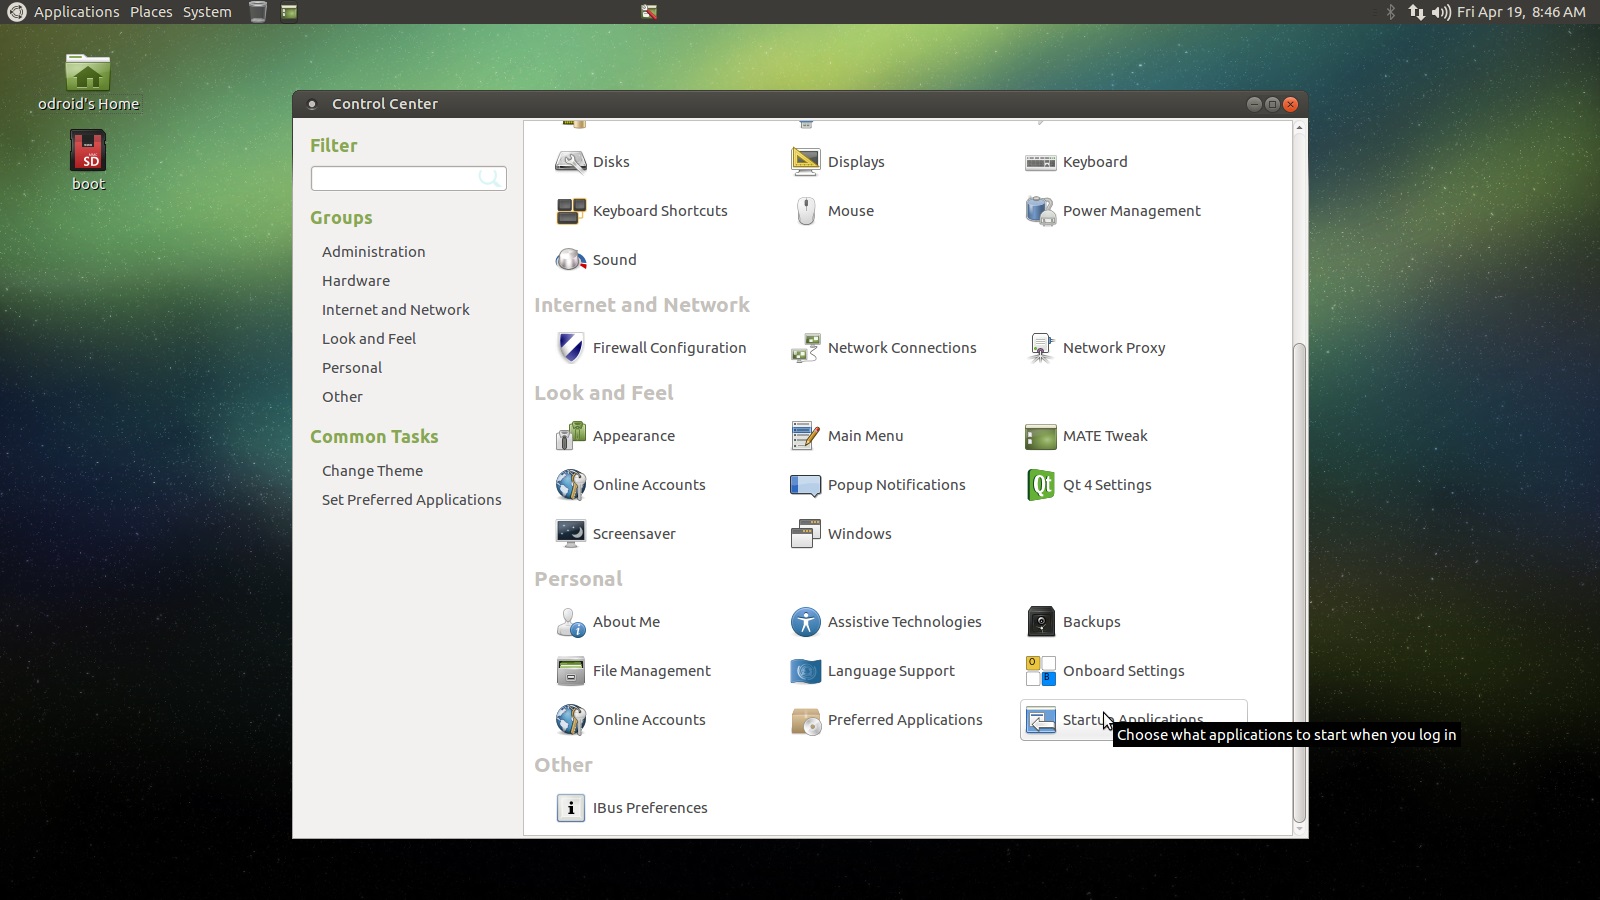
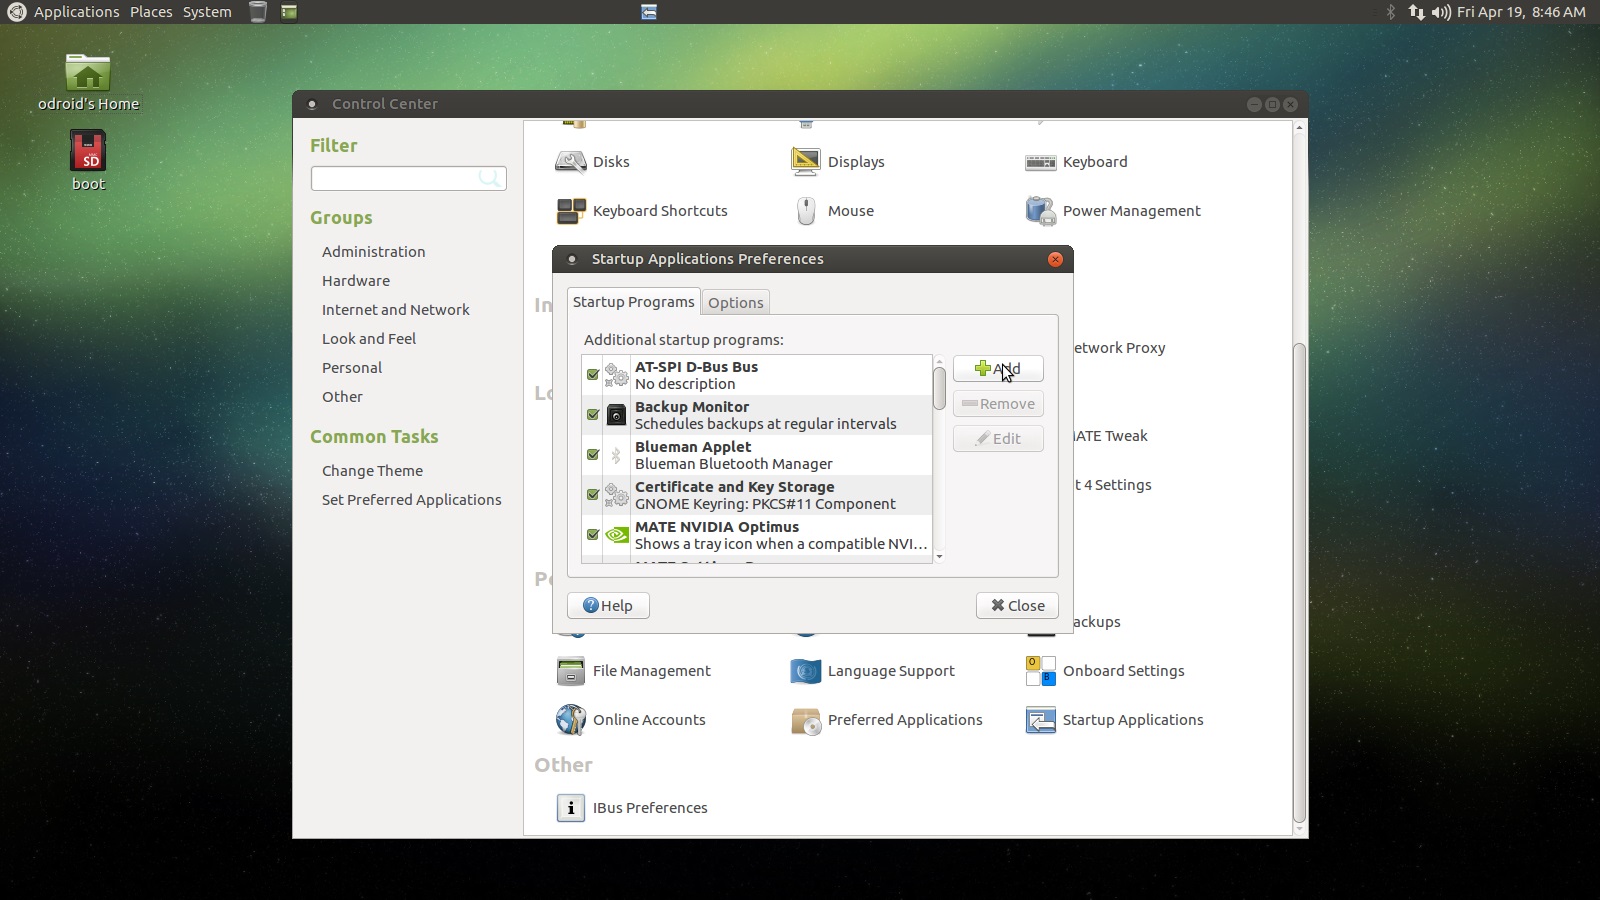
Now close the terminal and go to System -> Control Center in the menus. Find and select the Startup Applications option. You should see something similar to what is depicted below.
Figure - 16
Figure - 17
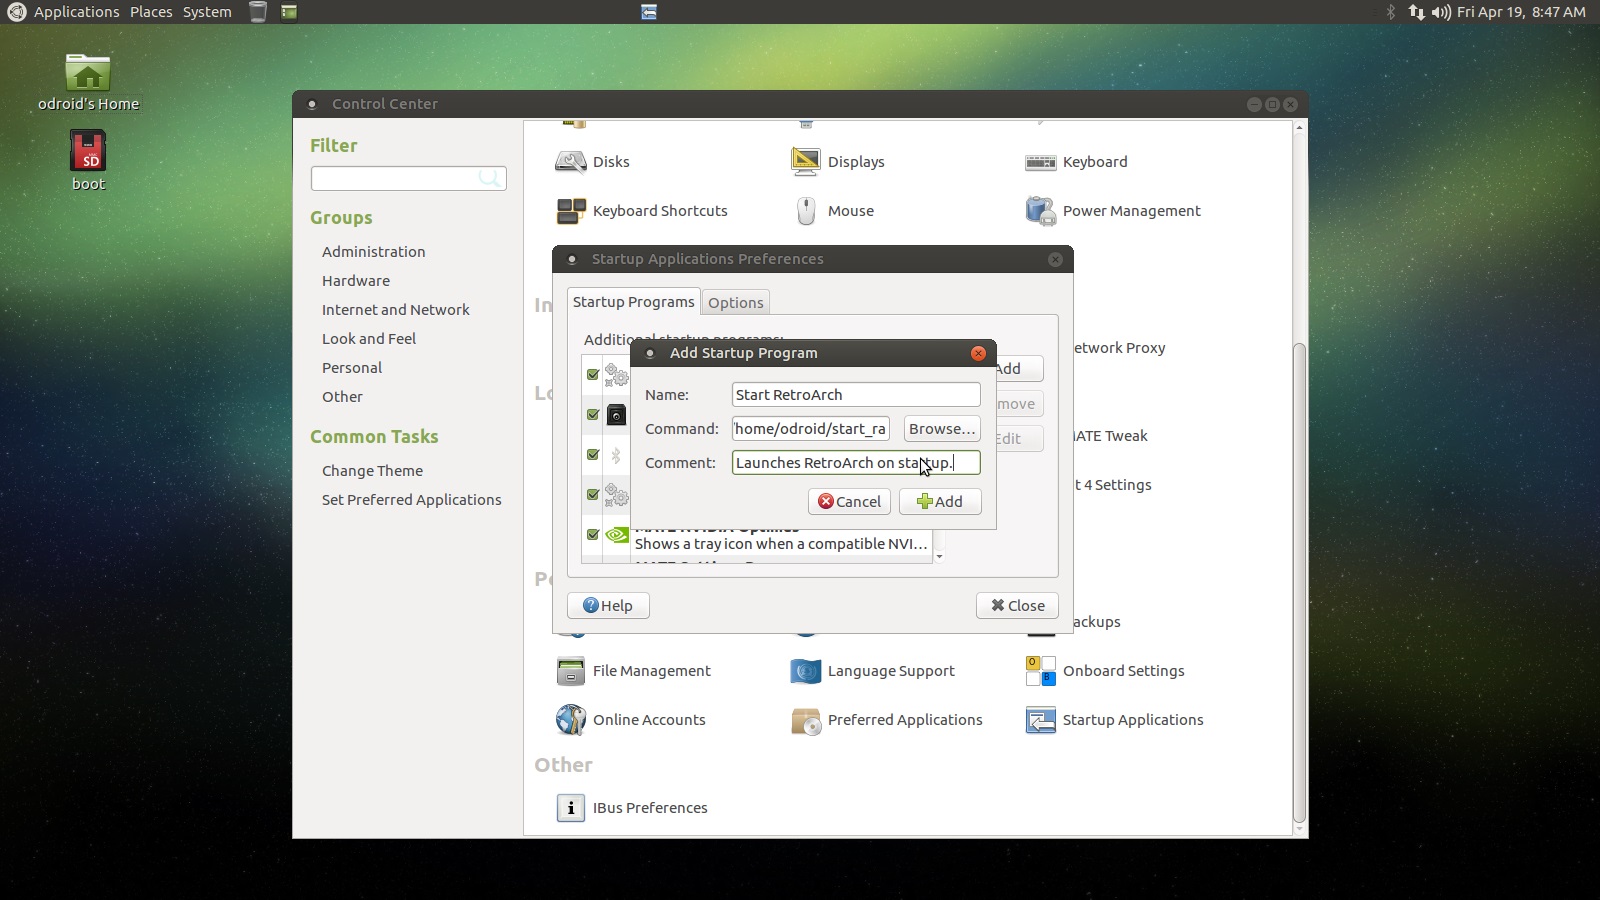
Click the Add button and fill out the form as depicted below, I will put the exact text here also.
Name: Start RetroArch
Path: /home/odroid/start_ra
Description: Launches RetroArch on startup.
Now, we also want to start a special AntiMicro script. So let us do the same thing for that script, also shown below. Again I will list the values used here.
Name: Start AntiMicro
Path: /home/odroid/start_am
Description: Launches AntiMicro on startup.
Figure - 18
Figure - 19
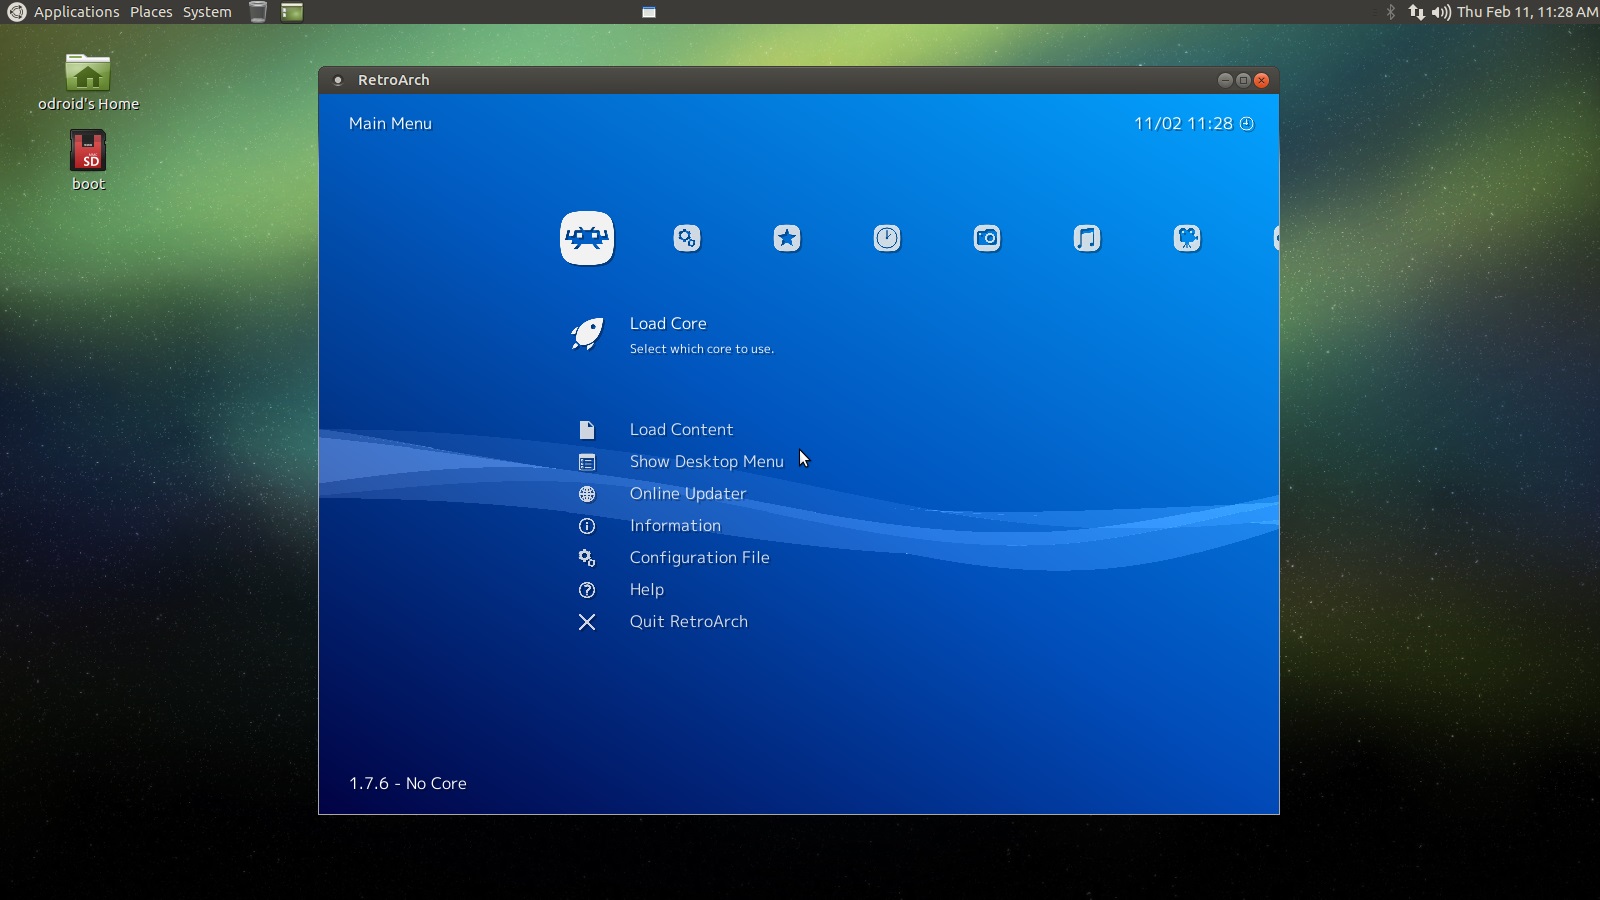
Shutdown the device: System -> Shut Down. Then use the hardware reset button to turn it back on. You should see retroarch launch automatically as shown below. Now if you close retroarch and wait about 5 seconds you should see antimicro popup into the system tray and restore gamepad control of the device, also shown below.
Figure - 20
Figure - 21
Things are shaping up nicely now. Our beautiful ODROID is looking more and more like a great retro gaming console.
Finalizing MATE ... Really This Time
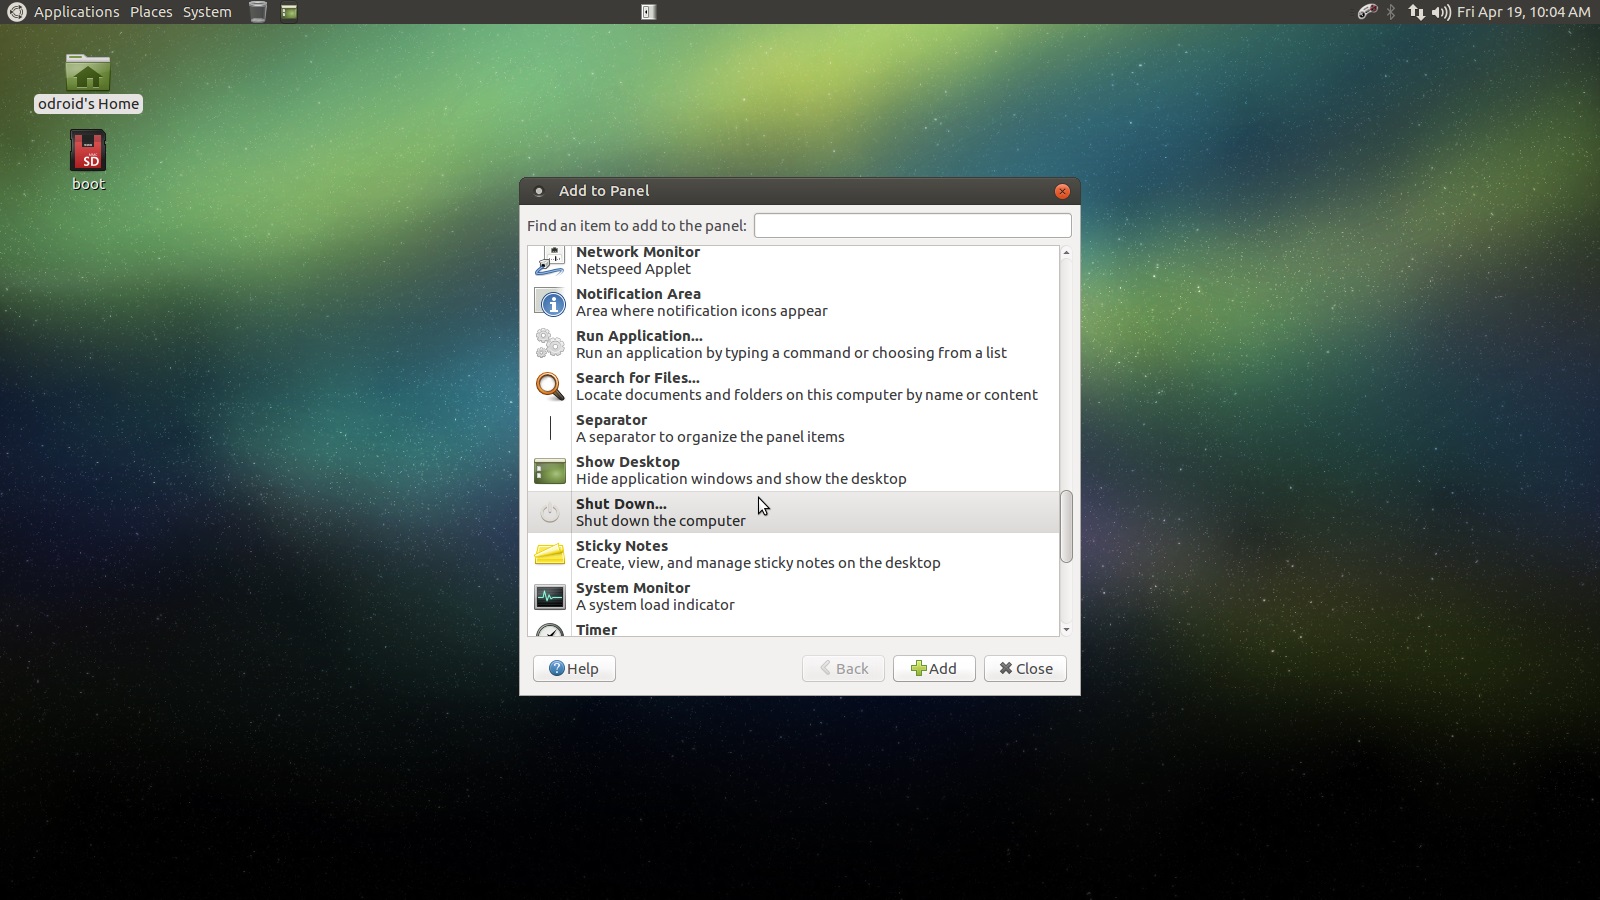
We have a little bit more work to do with MATE. Right click the top panel and select Add to Panel, scroll down through the list of options until you find the Shut Down entry. Click Add and then use the middle mouse button or mouse wheel button to grab the new widget and position it so that it is about an inch or so away from the open programs widget. By keeping all the controls in a tight group we greatly enhance the user experience when controlling things with the gamepad.
Figure - 22
Figure - 23
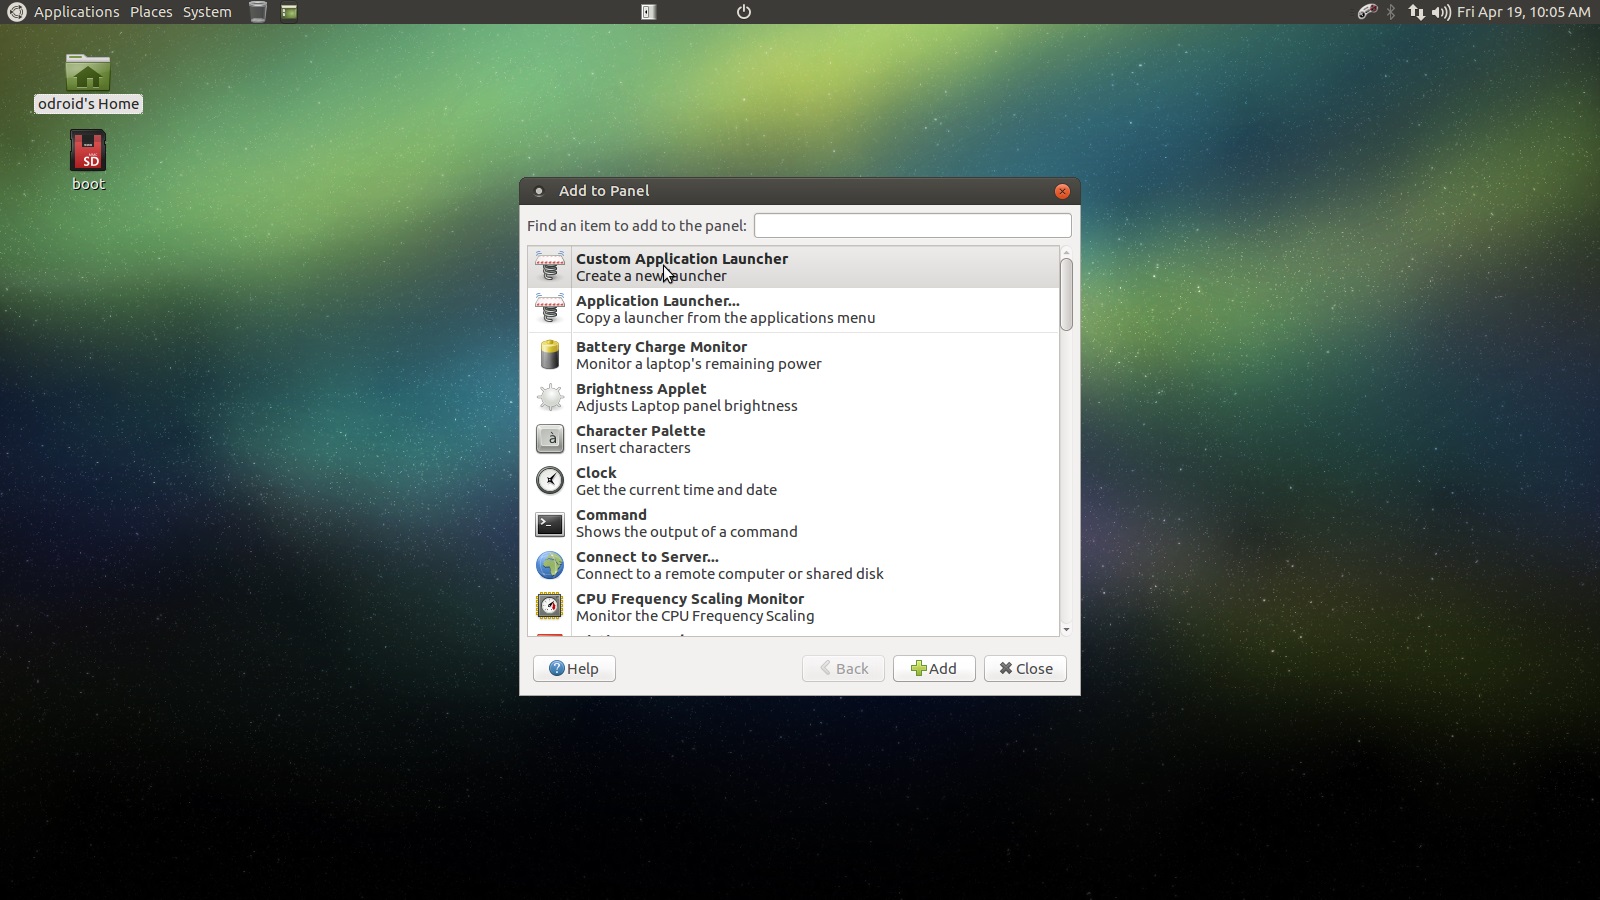
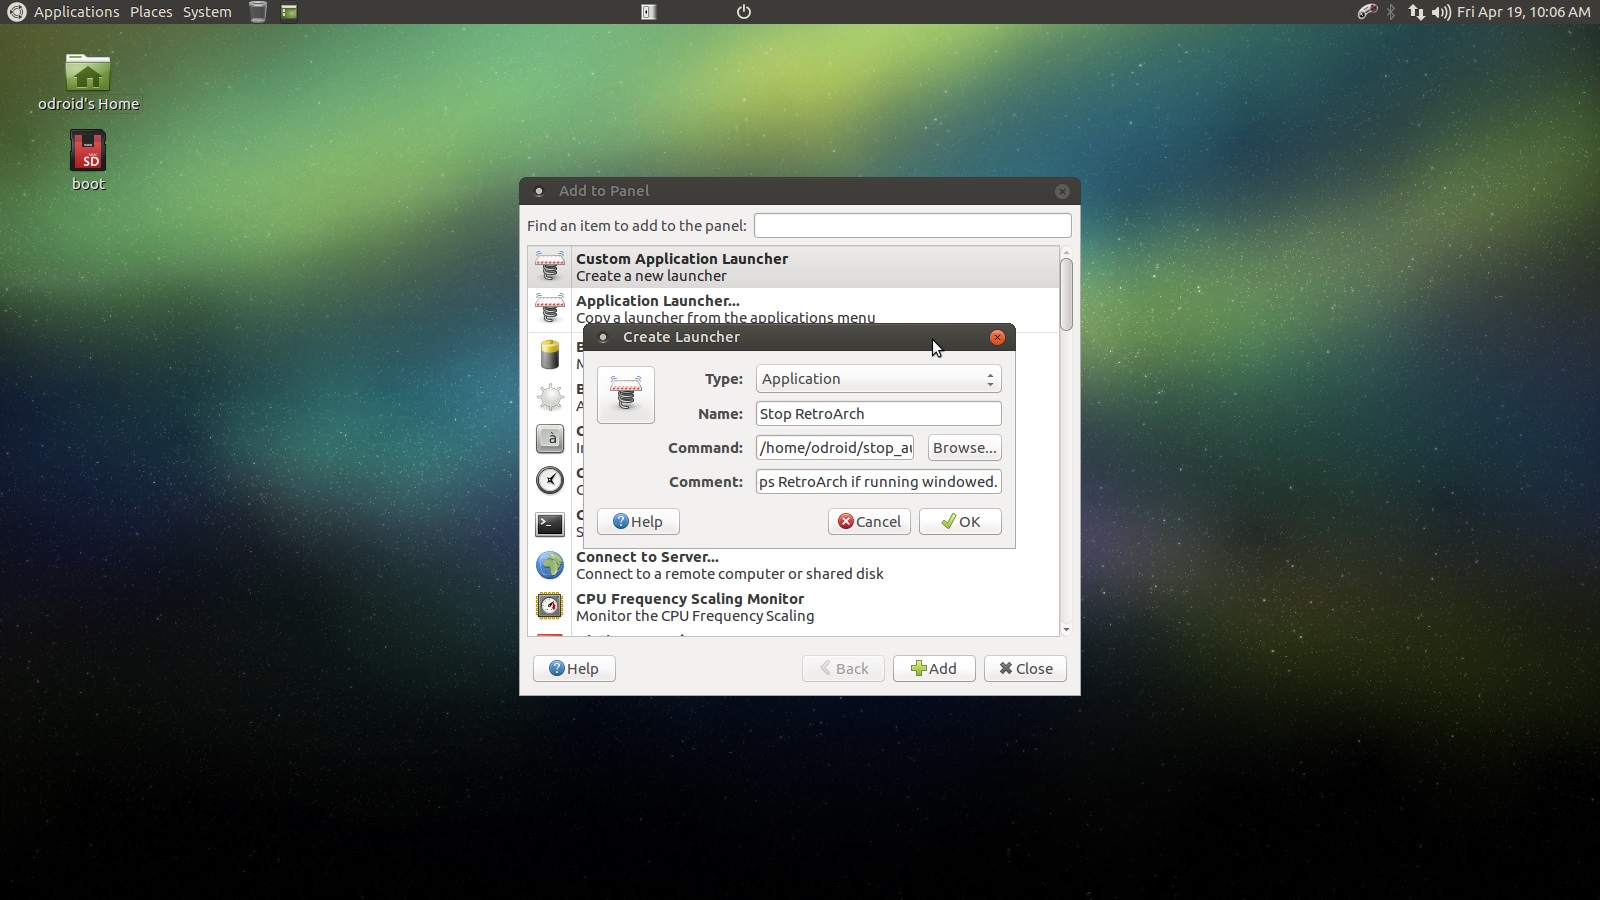
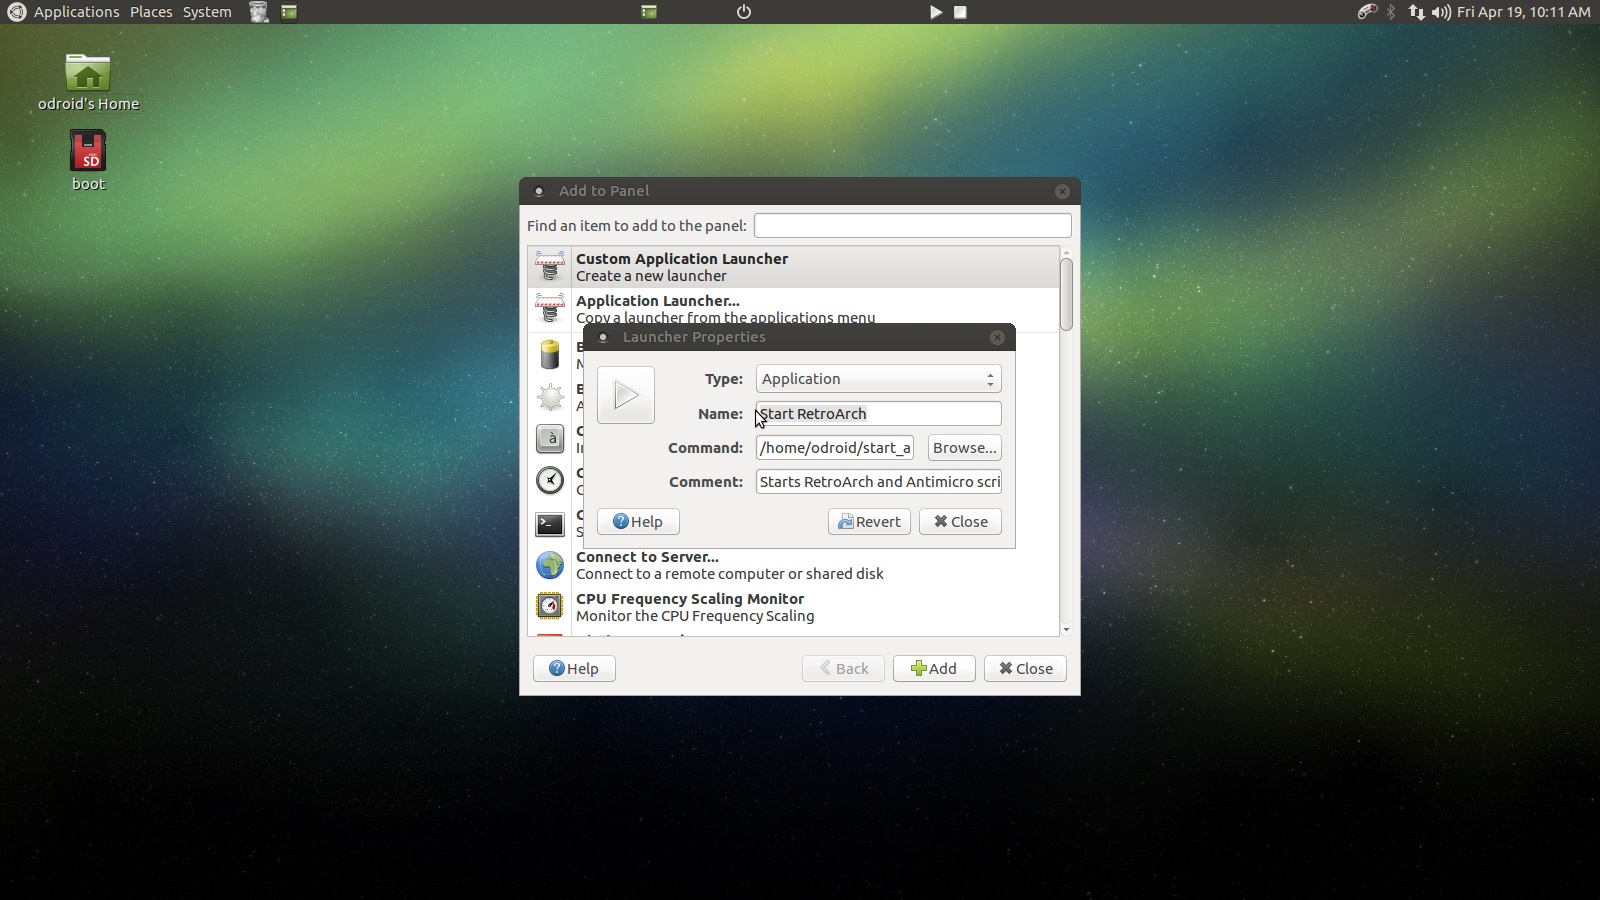
Next up we are going to add two custom buttons to the top panel. Right click the panel and select Add to Panel, choose the very first option Custom Application Launcher, depicted above. We will add the stop button first and then the play button. The form field values are listed below. Use the screen shots to navigate to the proper icon. You can see the path in the screen capture near the top of the window.
Stop Button Values:
Type: Application
Name: Stop RetroArch
Command: /home/odroid/stop_auto
Comment: Stops RetroArch if running windowed. (Really just stops
RetroArch and resets AntiMicro)

Start Button Values:
Type: Application
Name: Start RetroArch
Command: /home/odroid/start_auto
Comment: Starts RetroArch and AntiMicro scripts.
The screenshots below depict this step. Use them to help with finding the right icon if need be.
Figure - 24
Figure - 25
Figure - 26
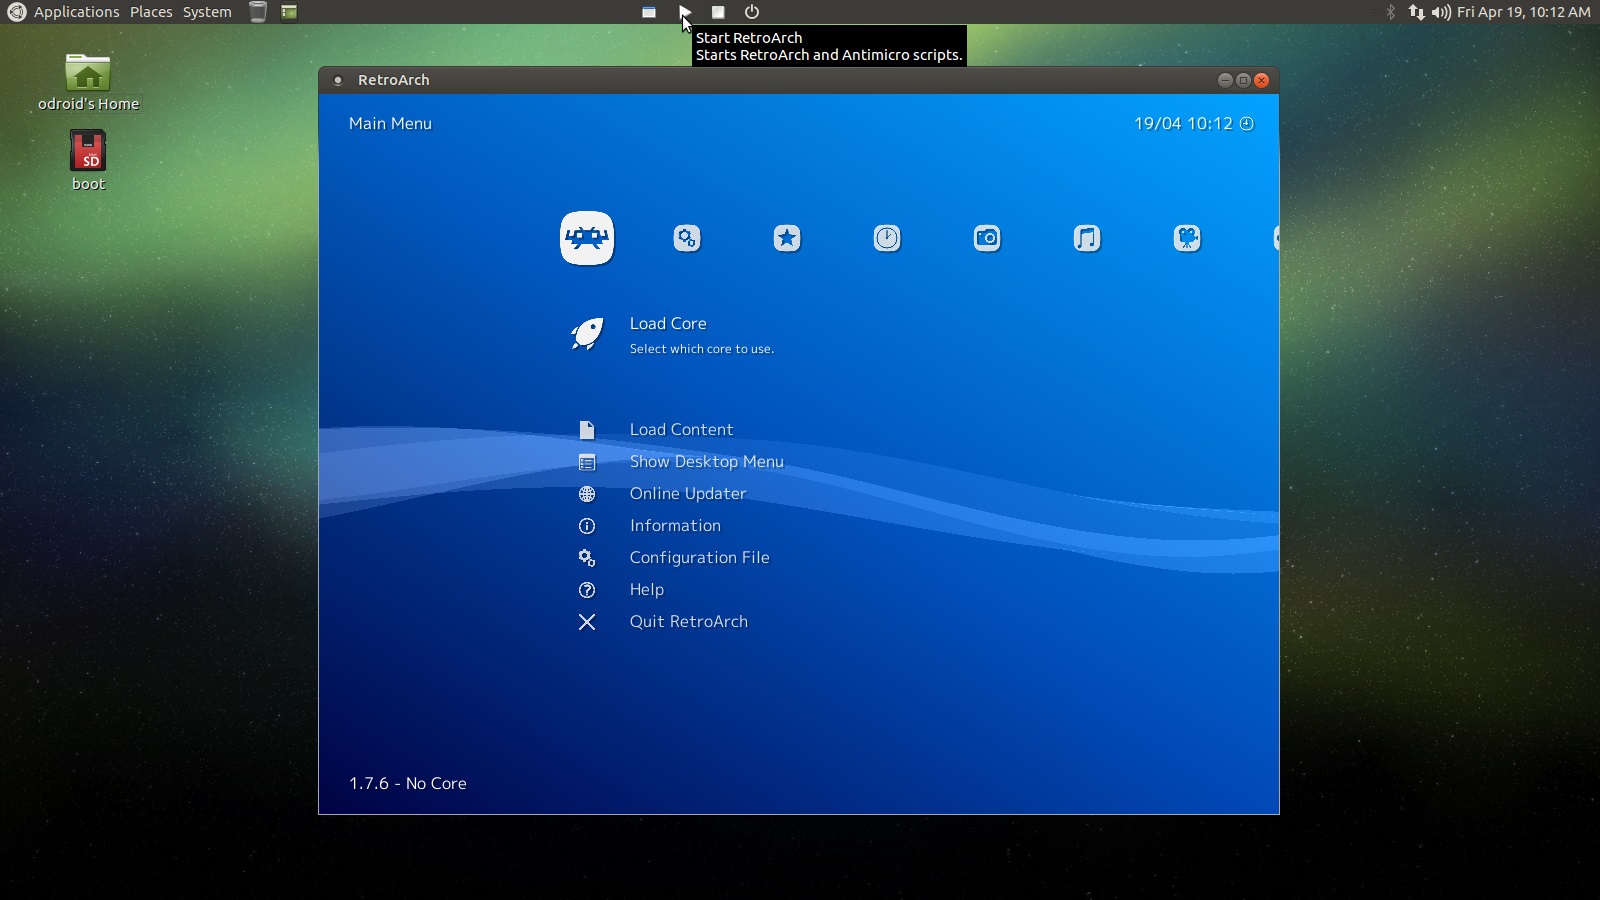
Now let us test the new controls. Close retroarch and any other open window. Click on the play button and you should see retroarch popup. Click the stop button and retroarch will close, wait about 5 seconds, and you should see antimicro in the system tray giving us back full gamepad control.
Figure - 27
Figure - 28
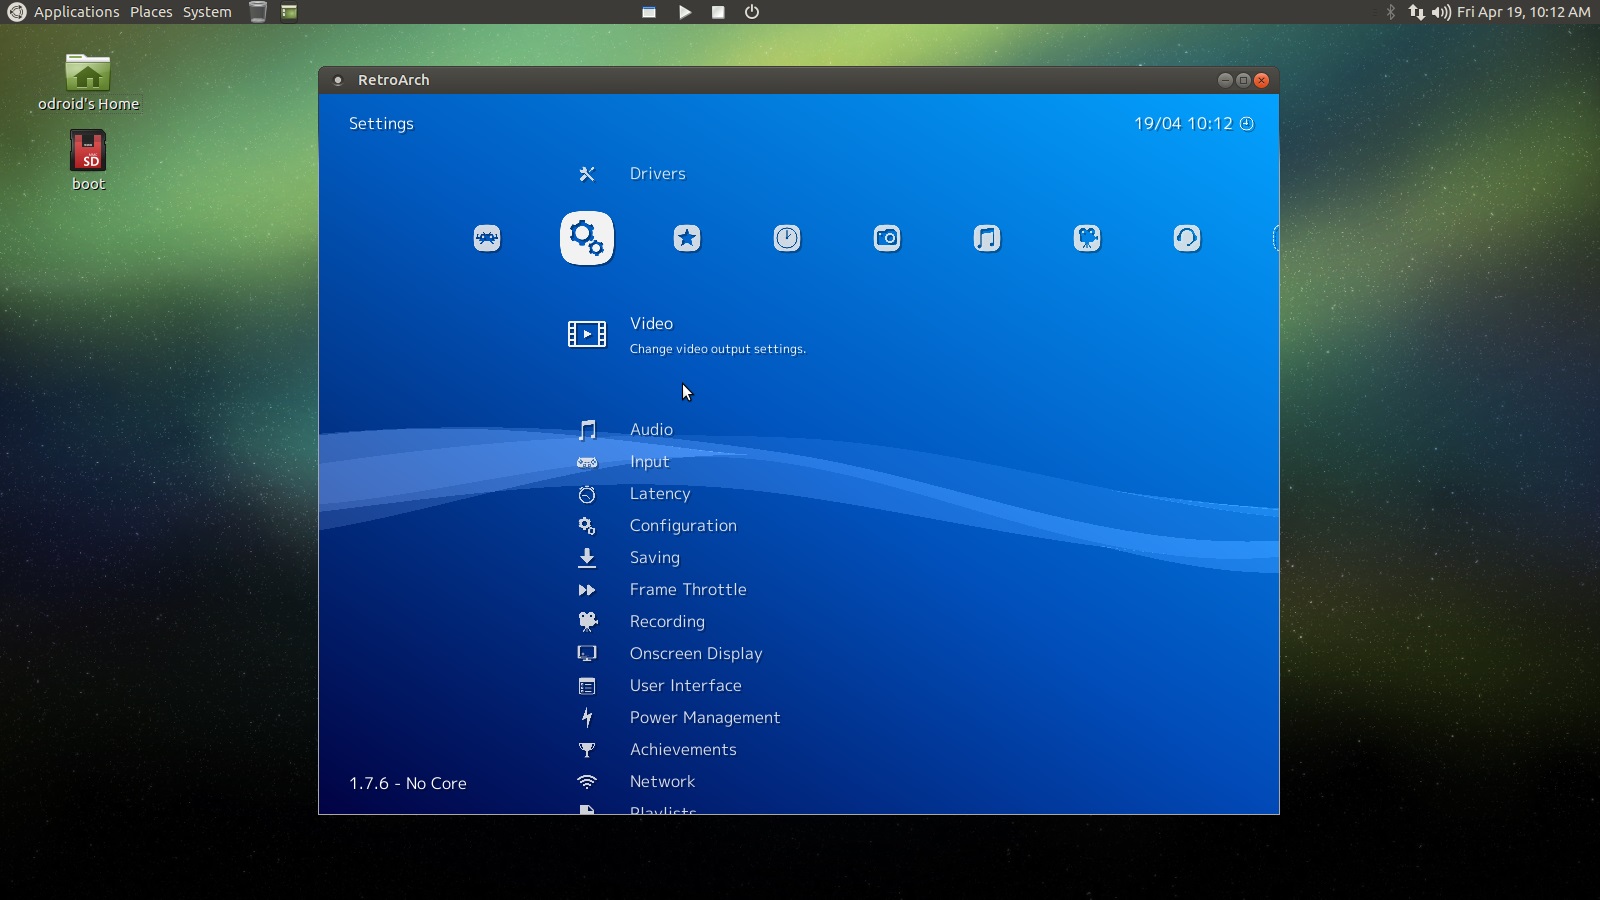
We have basically customized our ODROID hardware and software to create a retro gaming console with retroarch kiosk mode and also full Linux environment if needed. This is so cool! Next thing we will do is make retroarch run in fullscreen mode and adjust a few video settings. I will not go into advanced configuration here. This tutorial is about as long as I like to make them so I will push advanced retroarch and emulator errata to a small follow up tutorial.
Start retroarch, you can use the little widget you just made! Scroll right to the Drivers section find the Video entry.
Figure - 29
Apply the following settings listed below in the order they have been listed. The application may close and re-open for some of the settings you change, that is normal.
Windowed Fullscreen Mode: Off
Show Window Decorations: Off
Threaded Video: On
Bilinear Filtering: Off
Start in Fullscreen Mode: On
Tip: Use ESC to close retroarch when it is in fullscreen mode or use the keyboard/mouse to navigate to the Main Menu section and select Quit RetroArch.
Figure - 30
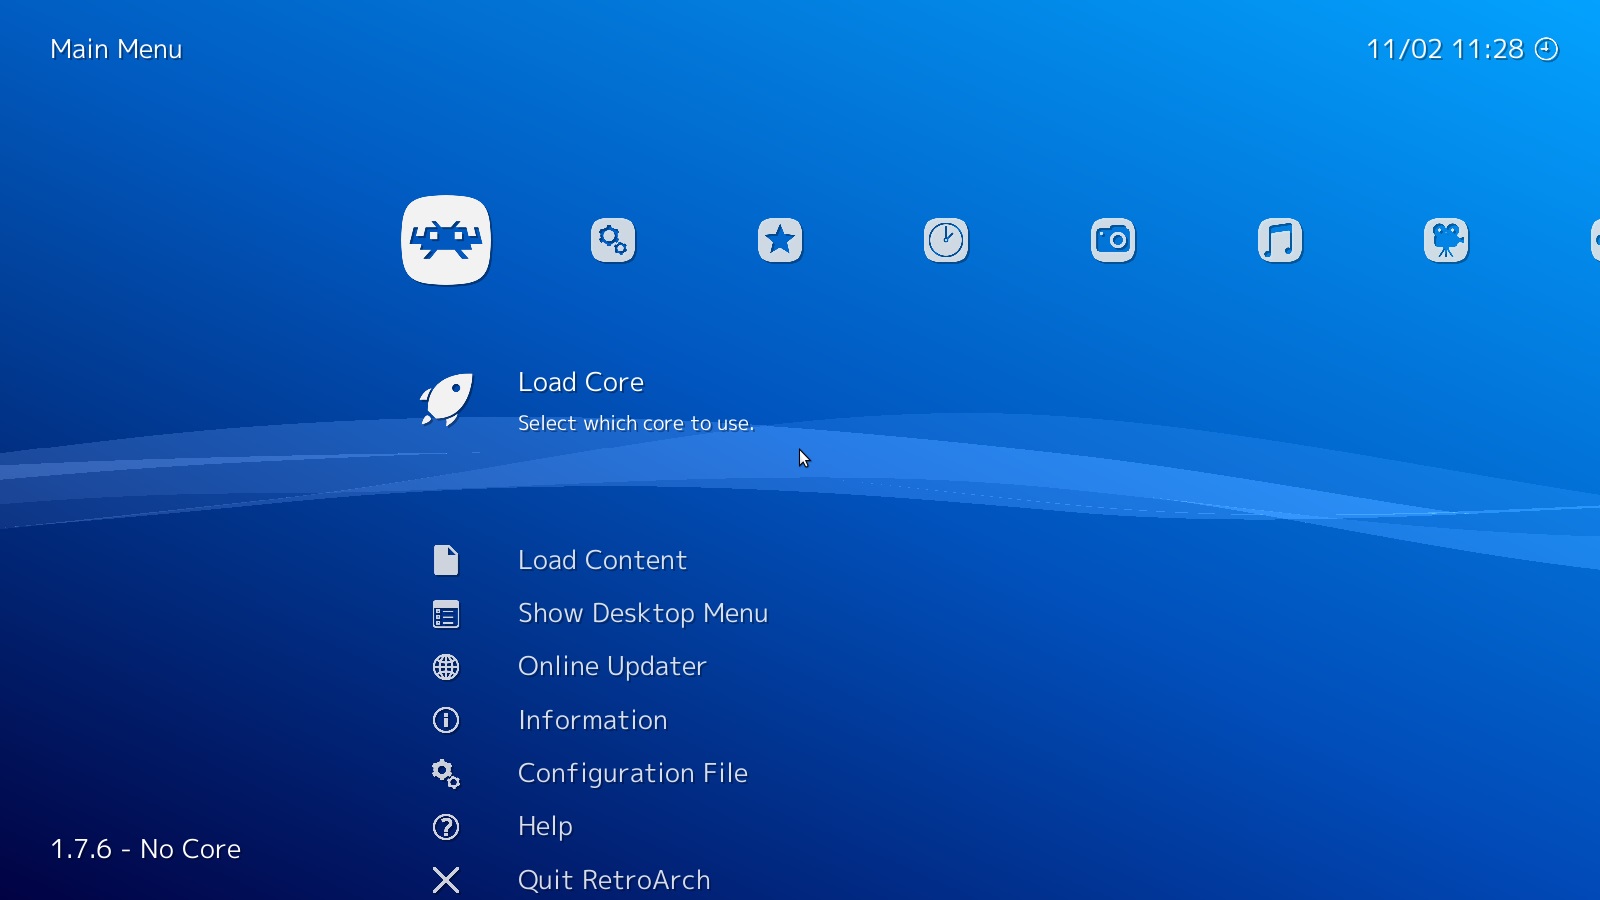
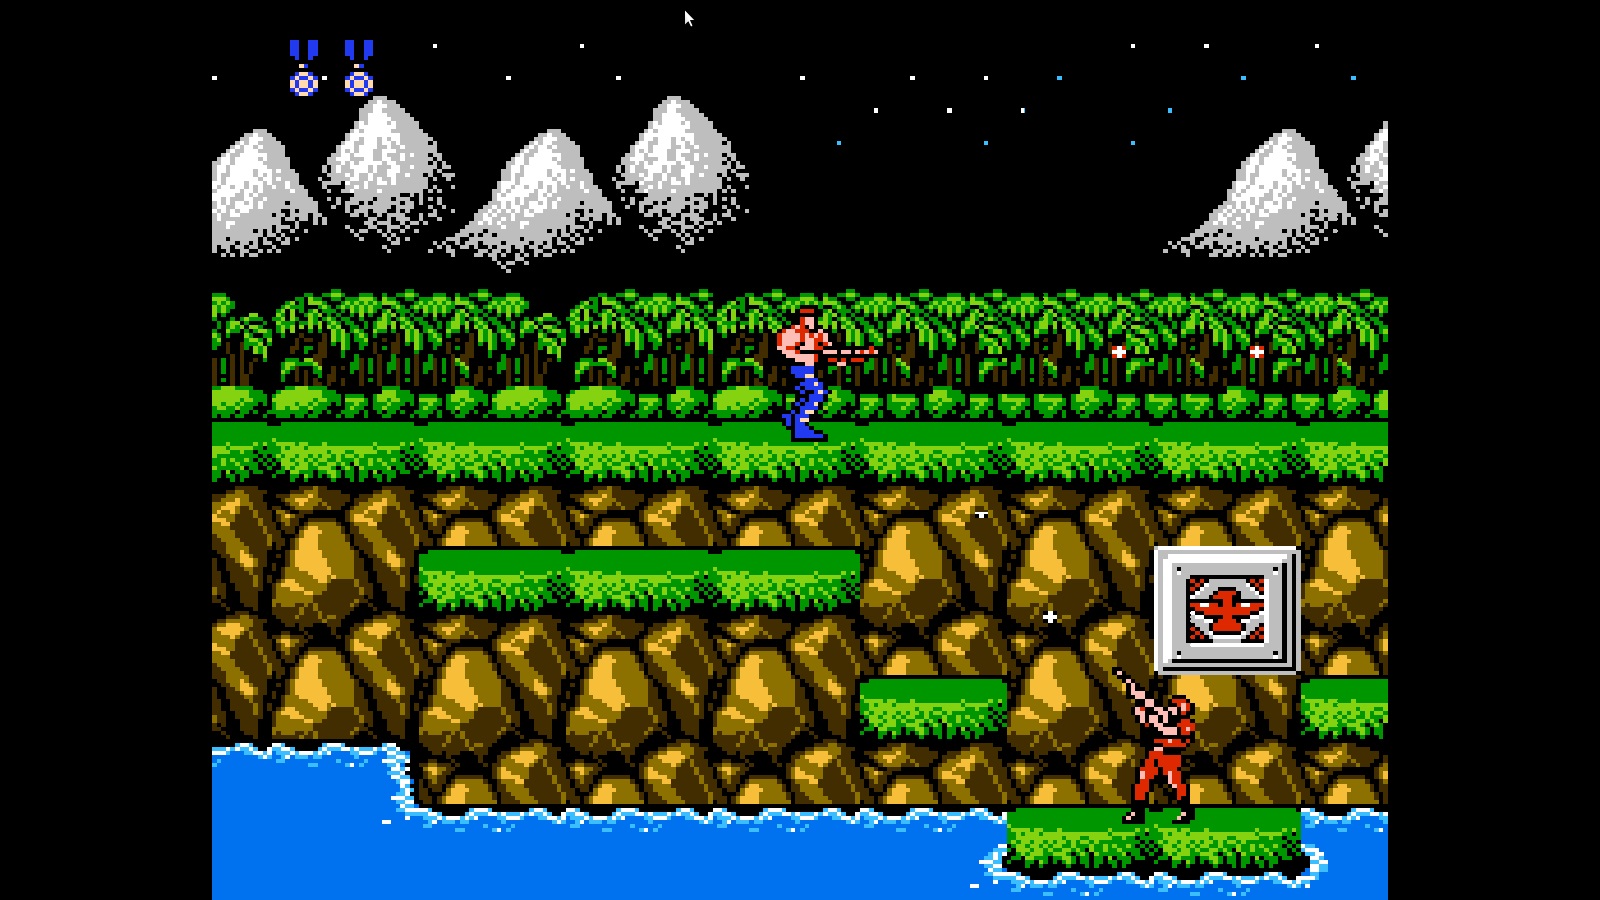
Reboot the system, there is an option from the shutdown popup dialog. When it comes back up, you should see a full retroarch screen as depicted below. Scroll over to your ROMs with the gamepad and fire one up. Game on!
Figure - 31
Figure - 32
boot.ini
This part is optional for the ODROID-XU4 and ODROID-XU4Q line of devices since they have enough power to handle 1080p and still provide great system emulation. However, if you are interested in having a little more control over the video output feel free to follow along.
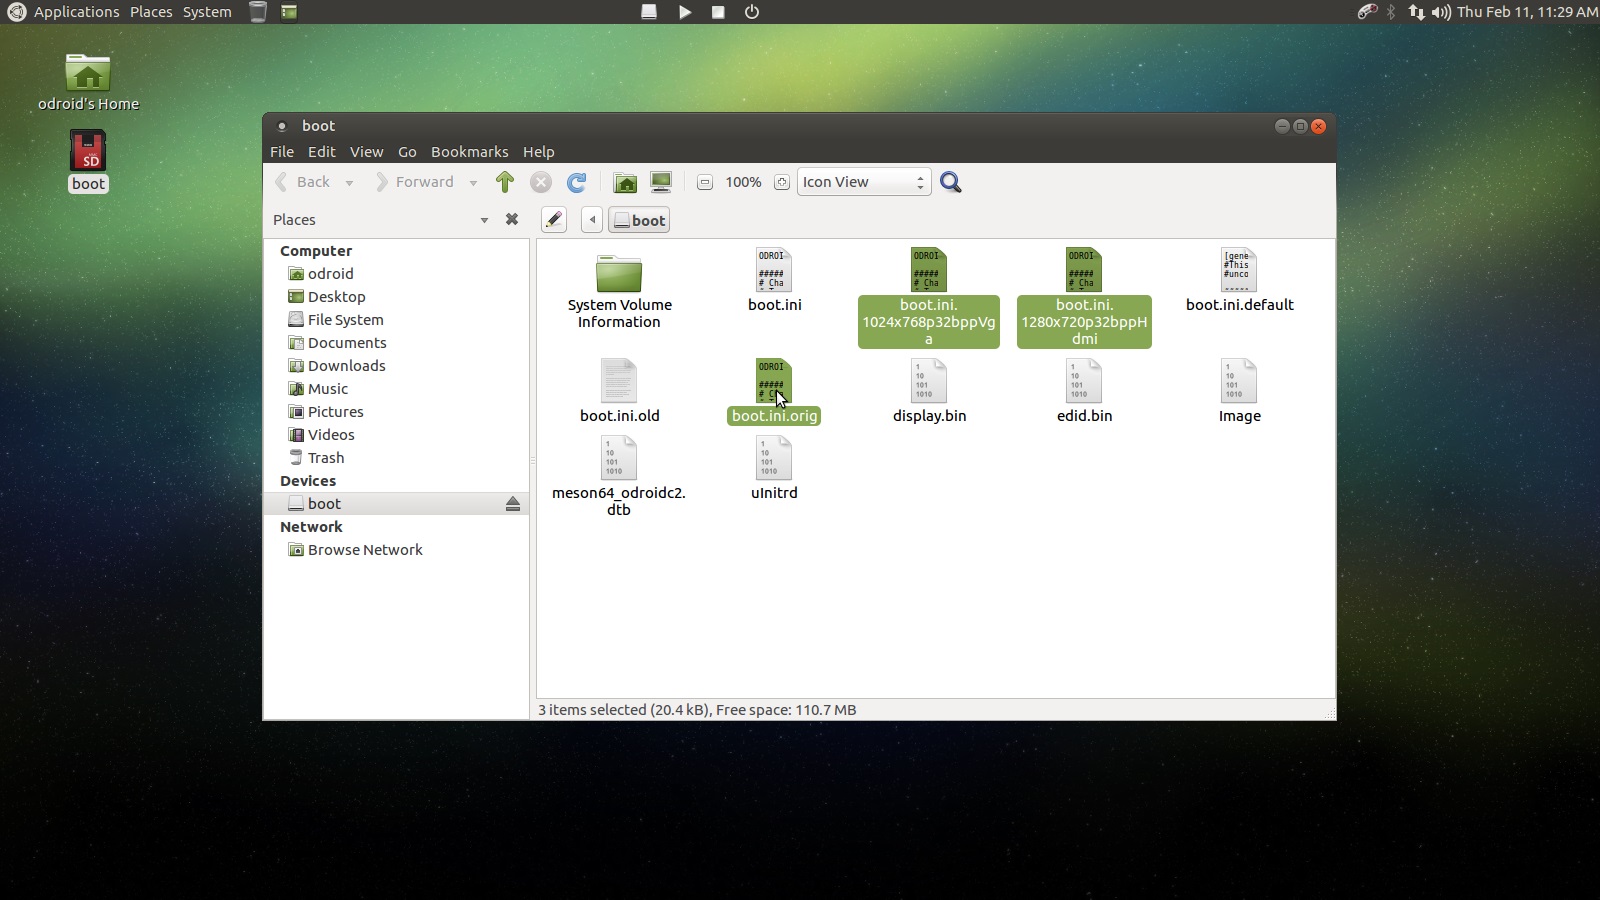
For this part, the first thing we will do is make a backup of the boot.ini file. Open the boot icon on the desktop and copy boot.ini to boot.ini.orig. We are also going to make two more copies one you will name boot.ini.1024x768p32bppVga and one you will name boot.ini.1280x720p32bppHdmi. We will get to editing them in just a bit. You should have something similar to what is depicted below.
Figure - 33
From my experience, these video settings work really well. The VGA resolution of 1024x768 is supported on most if not all recent computer screens and the resolution of 720p is supported on most if not all recent TVs. Of course you can make your own choices here as you see fit. The idea is if we are plugging our device into a TV we can run a custom script to either set the video output to HDMI 720p, or set the video output back to the original auto-detection mode. If we bring the device with us to work and we want to play some awesome games at lunch we run a custom script to set the video output to 1024x768 VGA.
Let’s boot up our ODROID device and close retroarch by hitting escape on the keyboard or navigating to the exit option using the controller. Open up a terminal, Applications -> System Tools -> MATE Terminal, and type the following command.
nano set_1024x768_vga
Enter the following lines into the file.
#!/bin/bash

sudo cp /media/boot/boot.ini.1024x768p32bppVga /media/boot/boot.ini
sudo shutdown now
Save and exit the file. Next run the following command.
nano set_1280x720_hdmi
Enter the following lines into the file.
#!/bin/bash

sudo cp /media/boot/boot.ini.1280x720p32bppHdmi /media/boot/boot.ini
sudo shutdown now
Save and exit the file. Next run the following command.
nano set_auto_hdmi
Enter the following lines into the file.
#!/bin/bash

sudo cp /media/boot/boot.ini.orig /media/boot/boot.ini
sudo shutdown now
Save and exit the file. These scripts will be setup to change the boot.ini to the desired video output then shutdown the device so that when you plug it into the target device, a TV or computer monitor, it boots up with the desired video output.
Be sure to set execution permissions on your scripts using the sudo chmod +x terminal command followed by the script name. You should also make sure the scripts have the correct permissions by running the following command, sudo chmod 755, followed by the script name. You have to be in the same directory as the files you are adjusting or have the full path to the file. If you have the boot folder open in the file browser you can right click and select Open in terminal to open a terminal that is already at the proper file system location. Once this step is done we will be adjusting the copied boot.ini file you made to reflect the proper output and resolution.
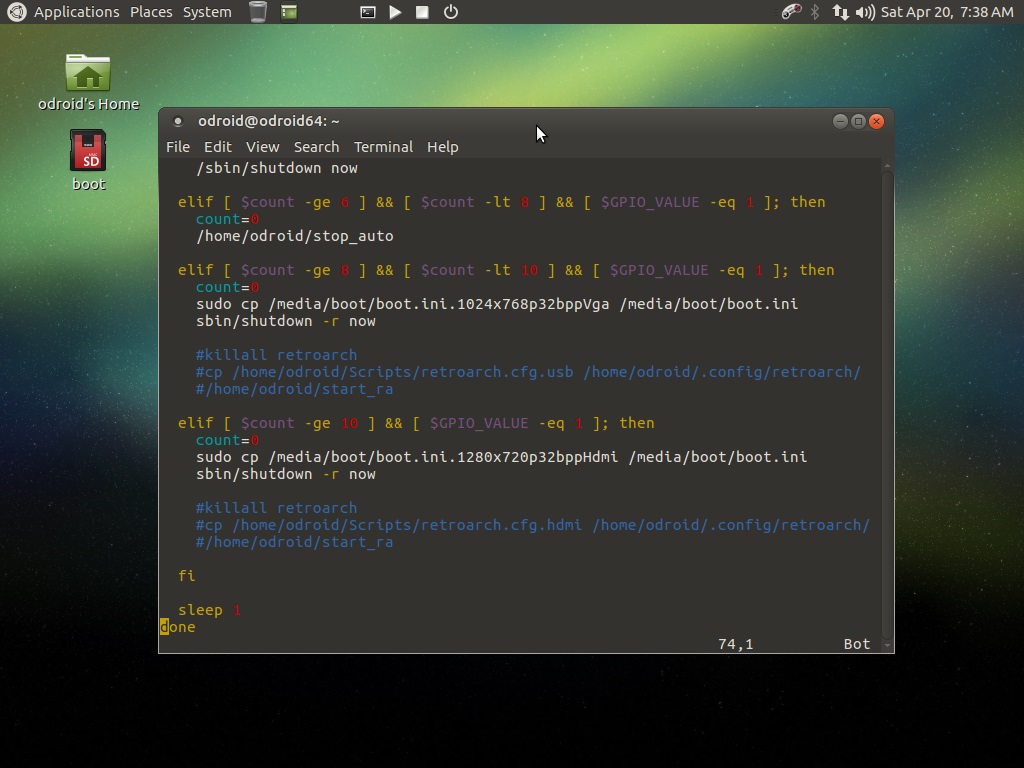
Figure - 34
There is a slight typo in this image, the lines that read sbin/shutdown -r now should read sudo shutdown -r.
Essentially we are copying over the boot.ini file with a pre-configured version that is set to a certain screen resolution, then we reboot the device. I will cover the changes we need to make to each file for the ODROID-XU4, but I will also provide a download for them to make things a bit easier. let us take a look.
Open a terminal and type in the following commands. We will do the 1024x768 VGA mode first.
cd /media/boot/
nano boot.ini.1024x768p32bppVga
We want to set the video output to be 1024x768 VGA. Comment the line listed below.
If you make a mistake just restore the boot.ini.orig copy you made earlier. Any Windows or Mac computer should be able to see the boot partition of your ODROID SD card because it is a FAT32 partition. You can use that to fix your boot.ini if the device is not booting up properly.
Next we will do the 720p HDMI mode. Open up a terminal and type the following commands.
cd /media/boot/
nano boot.ini.1280x720p32bppHdmi
We want to set the video output to be 720p HDMI. Uncomment the line listed below.
Many computer screens do not support 720p. If that is the case, you will likely end up booting into a blank screen. Make sure you have a TV ready to use at this resolution. You can restore the boot.ini using a Windows or Mac PC by mounting the micro SD card's boot partition. This will mount automatically on both Windows and Mac because it is a FAT32 partition. Restore the boot.ini file from the boot.ini.orig copy you made earlier.
An archive with the necessary boot.ini files that have been already prepared is listed below. You can follow the steps above and set things up by hand or you can use the link at Monku R3 / XU4 boot.ini to speed things up a bit.
Ok well that wraps up this tutorial. You should have a pretty decent retro gaming console setup at this point. You will need to do a little bit more work setting up some of the emulators that require more advanced configuration but I will cover that in a follow up tutorial.
Linux Gaming: Anbox - Android In A Box
November 1, 2019By Tobias SchaafAndroid, Gaming, ODROID-H2
Although I normally only talk about the ARM based ODROID boards I want to talk about the ODROID-H2 today and something that you can do on it. Since the ODROID-H2 is a standard x86_64 (amd64) board you can do exactly the same configuration steps that you perform on every other x86_64 PC or Laptop running Linux.
This is my experience with a software package called Anbox, an Android “emulator” for Linux, I will explain how to set it up, what I did with it, and what problems I encountered and how I solved them. Consider this more of a journey than a quick step by step guide, as I explain how I discovered various installation and configurations secrets.
Anbox
Anbox is a new form of Android emulation, where you can run Android directly on your Linux OS rather than booting Android directly on the system or running it in a VM.
There are other existing tools already that can do the same thing but, those are normally rather huge, several GB of storage just to start the emulator, for example Android Development Studio.
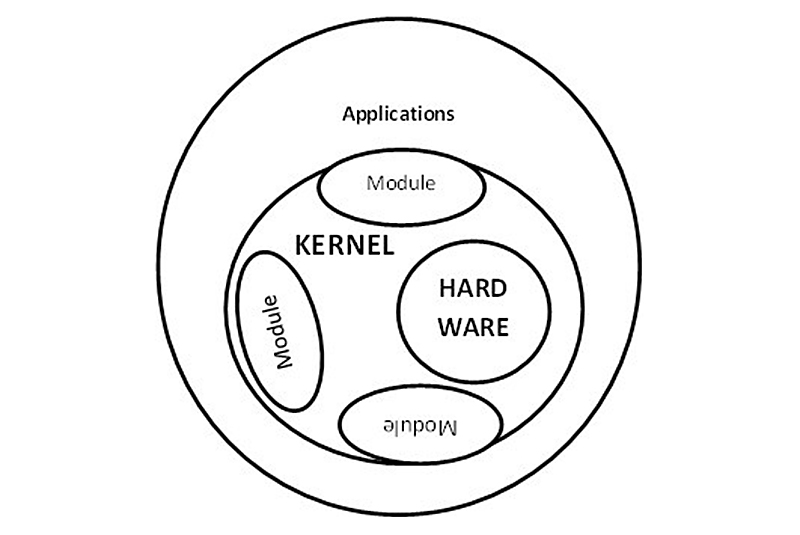
Anbox uses LXC so called Linux Containers a technique similar to Docker, where you can run an OS in an encapsulated environment but still share the system’s Kernel and resources. This also means, if you’re ODROID-H2 has 16GB RAM technically your Android runs with 16 GB RAM as well.
To do this, there is a feature available in both the Kernel of Linux and Android that is needed for this, it’s called Ashmen and Binder, these are two modules available for the Kernel.
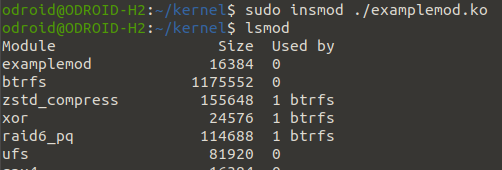
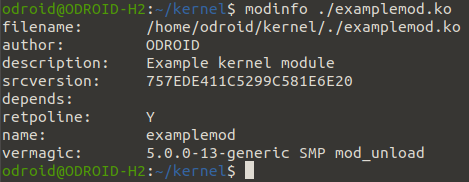
Installing Kernel Modules
Rarely any Kernel comes pre-compiled with it, but luckily there are DKMS modules available for this.
I suggest using the PPA or to create your own deb file as it will automatically install all files you need and put them in the correct location.
The Kernel modules will create /dev/binder and /dev/ashmem as new devices which are required for Android to access the resources of our host system. Do not be alarmed if you don’t see them right away.
Either you have to load the Kernel modules manually or have to wait until we install Anbox itself.
Installing Anbox
The main distribution of Anbox is via snap packages, which is widely available on many Ubuntu systems and some other Linux distributions, as well.
The second option is to install deb packages directly from your OS repository.
Starting from Debian Stretch (backports) or Ubuntu 19.04 aAbox exists as official package in your repository. I tried it on my ODROID-H2 on Debian Buster but also got it to work on my Laptop using Ubuntu 18.04.
As I said earlier, it's only officially available on Ubuntu 19.04, but if you know how, you can build it on Ubuntu 18.04 as well (which is what I did).
Since the ODROID-H2 comes with Ubuntu 19.04 though you should not have any issues installing it.
Either way, you should make sure you have enough space under /var/. If you have your system partitioned and not using a single partition for the entire OS, make sure you have enough space under /var/ for all the applications you want to install. This can easily stack up to 20 GB or more depending on what you want to try.
Why you should prefer deb packages over snap packages
The reason why you should use the deb packages for Anbox is simple, same as with the Kernel modules, if you install Anbox as a deb package it comes with a lot of stuff already installed and prepared for you. You have a service called Anbox-container-manager which is managed by systemd and takes care of all the little background tasks for you. It will automatically start the kernel modules for /dev/binder and /dev/ashmem as well as a virtual network adapter for your Android box so you have access to the Internet.
It’s very convenient and allows for easy manipulation later on if you want to try new things.
Snap packages on the other hand have some major issues.
The biggest benefit of the snap package is that it comes with an Android.img file right away, while if you install the deb file you will have to download the Android.img file yourself (I’ll explain that later).
While snap packages generally work, I advise against using them as snap packages are inflexible and can cause major issues if you want to add Google Apps, for example, or if you want to try out patches.
I first started off with snap packages and it worked “ok-ish” but when I tried to install Google Apps (Gapps) via a script the system failed to start and it took me a day or two to figure out that the issue was with snap packages in general and not the version of Anbox, or the Gapps I was using.
Snap packages are a locked containers, you can not change them in any way, means you can’t change settings, update applications, exchange the Android image and so on unless you install a new snap package of this application.
In order to alter the snap package and add Gapps for example, you need to work with a “overlay-fs” for the snap package, where it will combine a folder you created with the data provided by the snap package. For me the moment I turned on the overlay-fs, even without any changes, most of my applications no longer worked.
With the deb package you do not have these restrictions and you can change the Android.img file directly, as well as manipulate the rootfs or data folder of the Android image if you need to. This allows you to place files directly in your virtual file system or in the img file itself, which is impossible with the snap packages.
So my advice: although it’s their main focus for distribution of Anbox; stay away from the snap packages!
First start
What do you need to start your first Android experience with Anbox?
Well with the snap packages nothing at all you can start it right away, but since we said we don’t want to use snap packages we need an Android image to work with.
Some technical background
You’re running Anbox in a LXC container this means it’s not “emulated” it’s also not really “virtualization” although that’s very close to it. You use the same hardware and Kernel that you have on your main OS. Which means your Android OS must match the configuration of your PC.
Obtaining an Android image
This means we need an x86_64 (amd64) Android Image. This may sound complicated, but don’t worry, others have already done all the work and you only need to download an image from here:
https://build.Anbox.io/Android-images/ as you can see there are several images available. You can choose anyone that has “amd64” in its name. Let’s go with the latest one for now: https://build.Anbox.io/Android-images/2018/07/19/Android_amd64.img.
All of these images are Android 7.1.1 as this is used by most emulators.
Download the above image and rename it to Android.img copy the file on the system where you installed Anbox (via deb or from your repository) to /var/lib/Anbox/
Remember the Anbox-container-manager service from earlier?
On start it checks if an Android.img file is present in that folder and if so it will automatically start the kernel modules and the network bridge needed for internet access in Anbox.
Since we now have an Android.img placed under /var/lib/Anbox/ it’s time to start the service:
$ sudo service Anbox-container-manager restart
Please note I used restart as you might have to use the command later on again, and so you already have it in your command history.
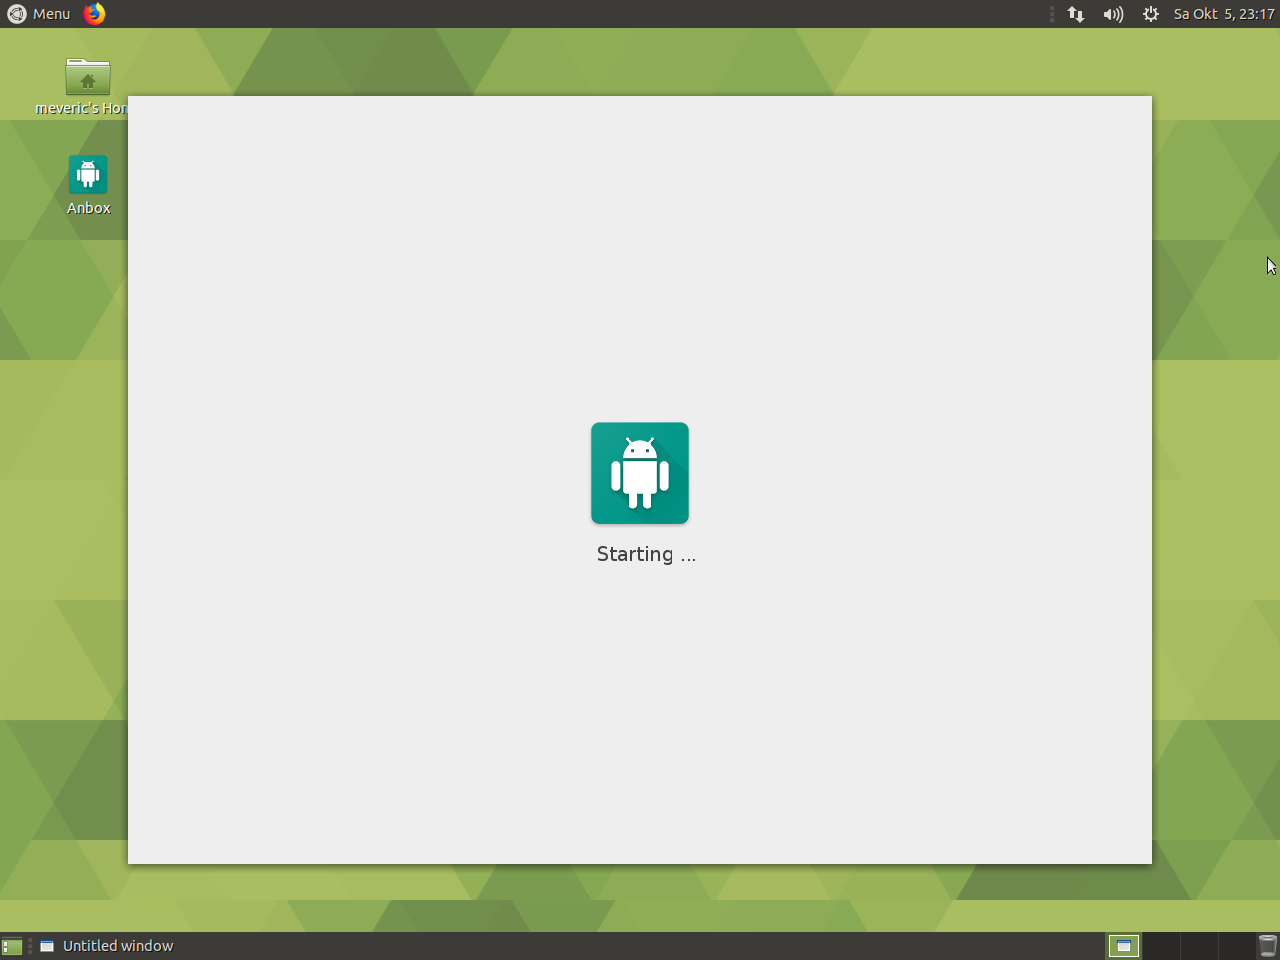
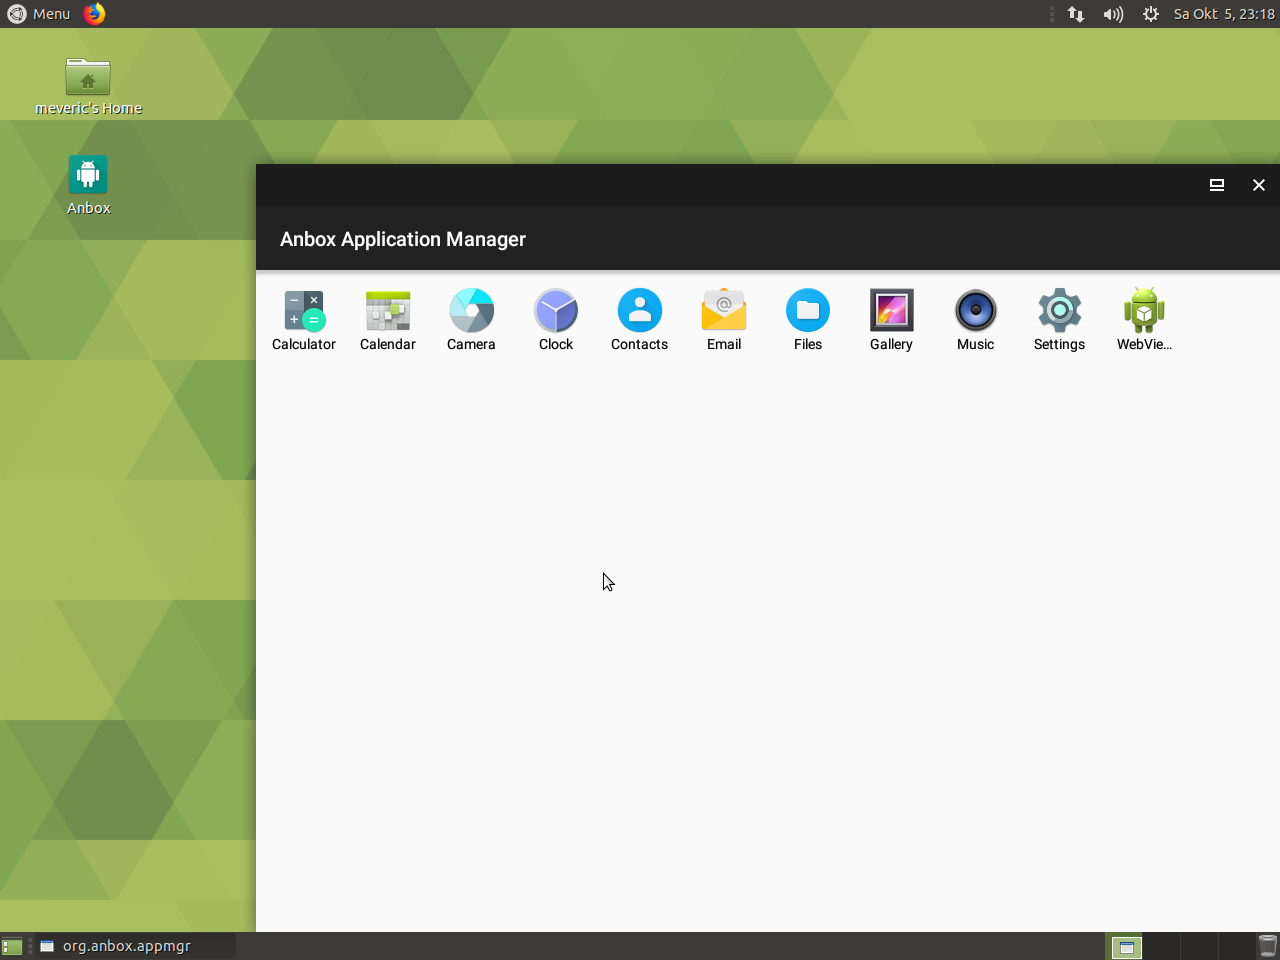
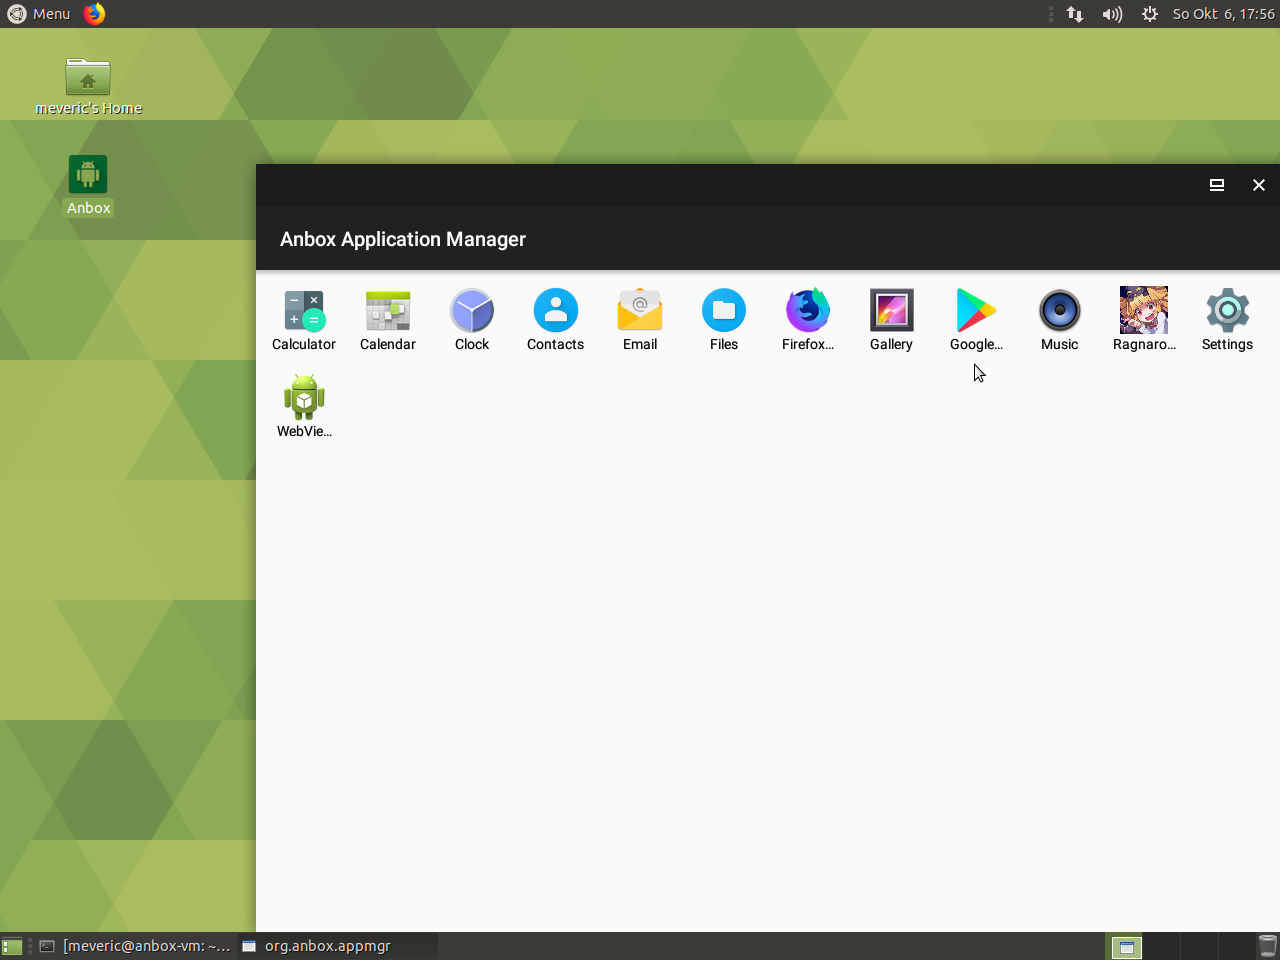
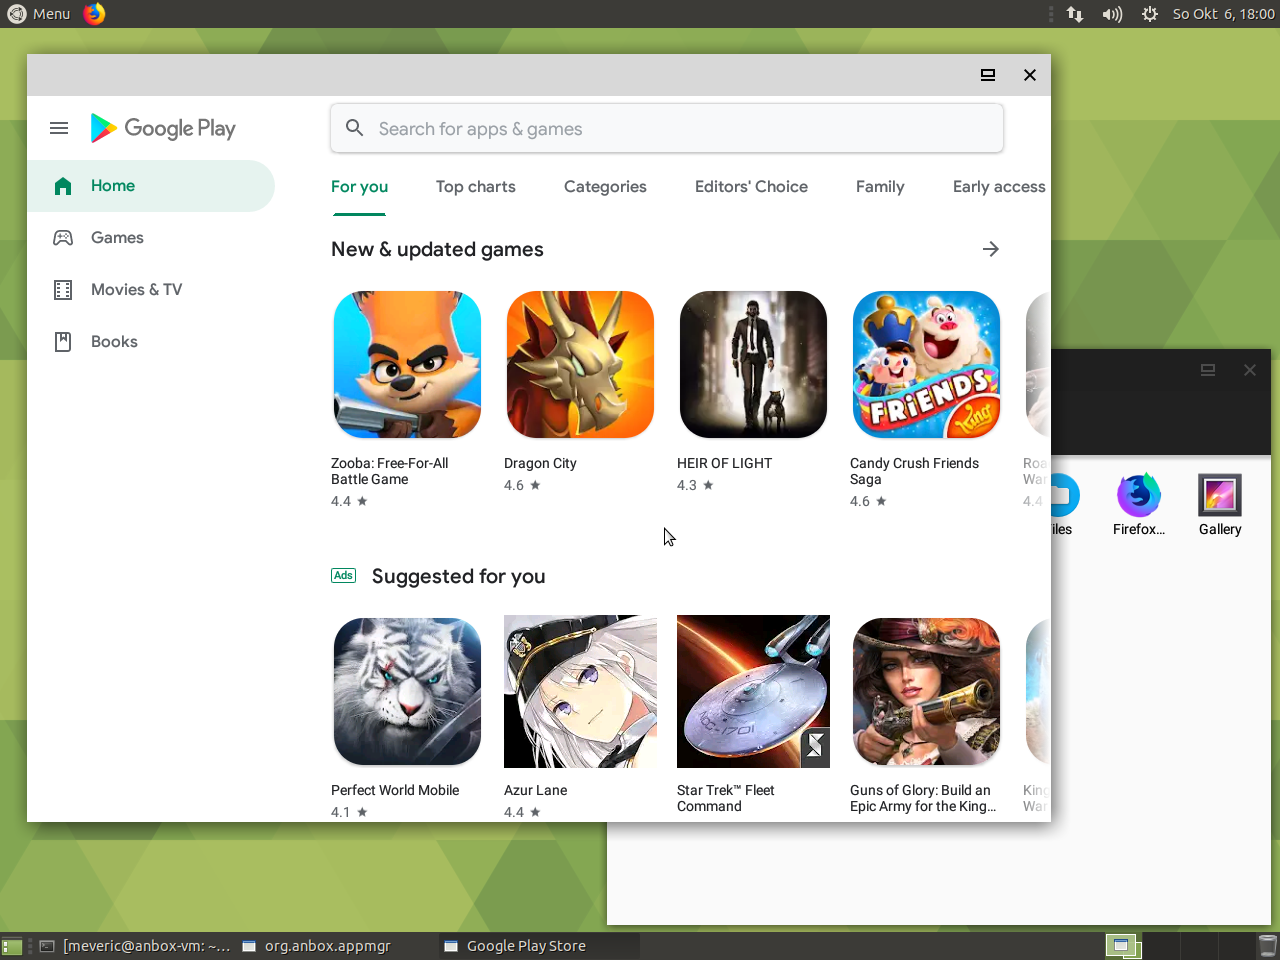
If you check your start menu and search for Anbox (under accessories) you should see a very minimalistic home screen with only a few applications.
Calculator, Calendar, Clock, Contacts, Email, Files, Gallery, Music, Settings and WebViewer are probably the only applications you can see. And although they all work fine except for “Settings” you probably never gonna need any of the other applications. Still if you see this screen that means Anbox is up and running.
Figure 01 - Anbox Running with Android
Figure 02 - Anbox’s Application Manager
Starting Anbox for the first time (may take some seconds) Anbox application menu with default applications
Installing applications - part 1
Having “Android” up and running is nice and dandy but if you can only run your calendar or the clock, this will get boring rather quickly. So what we need is a way to install applications.
There are several different ways to do this.
Let's start with the easiest one, which requires you to already have .apk files available.
First we need to install Android-toolbox which is available on your OS:
$ sudo apt install Android-tools-adb
With that you can install applications easily by typing:
$ adb install
Android toolbox is meant for ALL Android systems not specifically for Anbox.
It searches any connected device and allows you to interact with it.
If Anbox is up and running you can use adb to install application into the system.
Please Note: If you have an Android device, such as a smartphone or tablet, connected on your Linux PC/Laptop/ODROID H2 you might end up installing applications on this device, so make sure you use it only when the Anbox is running (unless you know what you do).
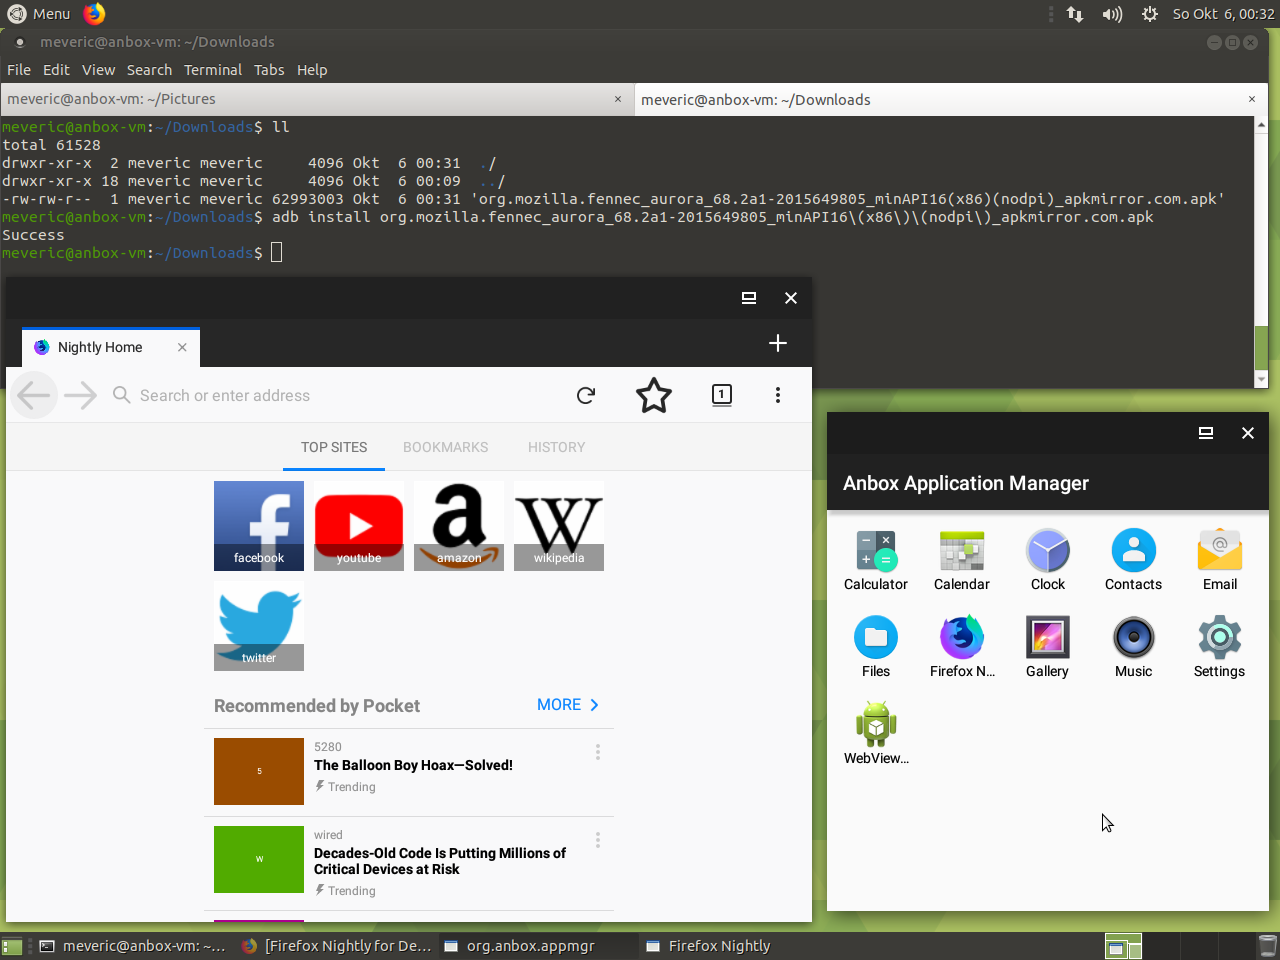
You may wonder where you can get apk files for installing? There are several different locations where you can download apk files, often programs or games have download links on their website and there are also sites like APKMirror (https://www.apkmirror.com/) which allow you to download apk files directly for your system.
Important Note
Remember you downloaded the Android_amd64 image? This means you have an x86_64 based Android image and you can only run x86 or x86_64 Android applications, or applications that do not require a specific binary format. If you look at APKMirror you can see what architecture packages have before you download them. Make sure to download x86.
Figure 3 - Installing and running FireFox Nightly (x86) on Anbox via adb install from APKMirror
With this you can already install the first few applications and test around with Anbox.
To be honest my goal when I started using Anbox was it to run Ragnarok M – Eternal Love.
So, my first real test was to download the APK file from their website and to install it.
So I downloaded the apk from their website, and 1.3 GB later I installed it via adb:
$ adb install 155603_20190.1563284609.apk
Thanks to the wonders of SSD a few seconds later the game was installed, I pressed the button and the game started, which I later found out was not only impressive for the first application I tried, but in fact very lucky (more to that later).
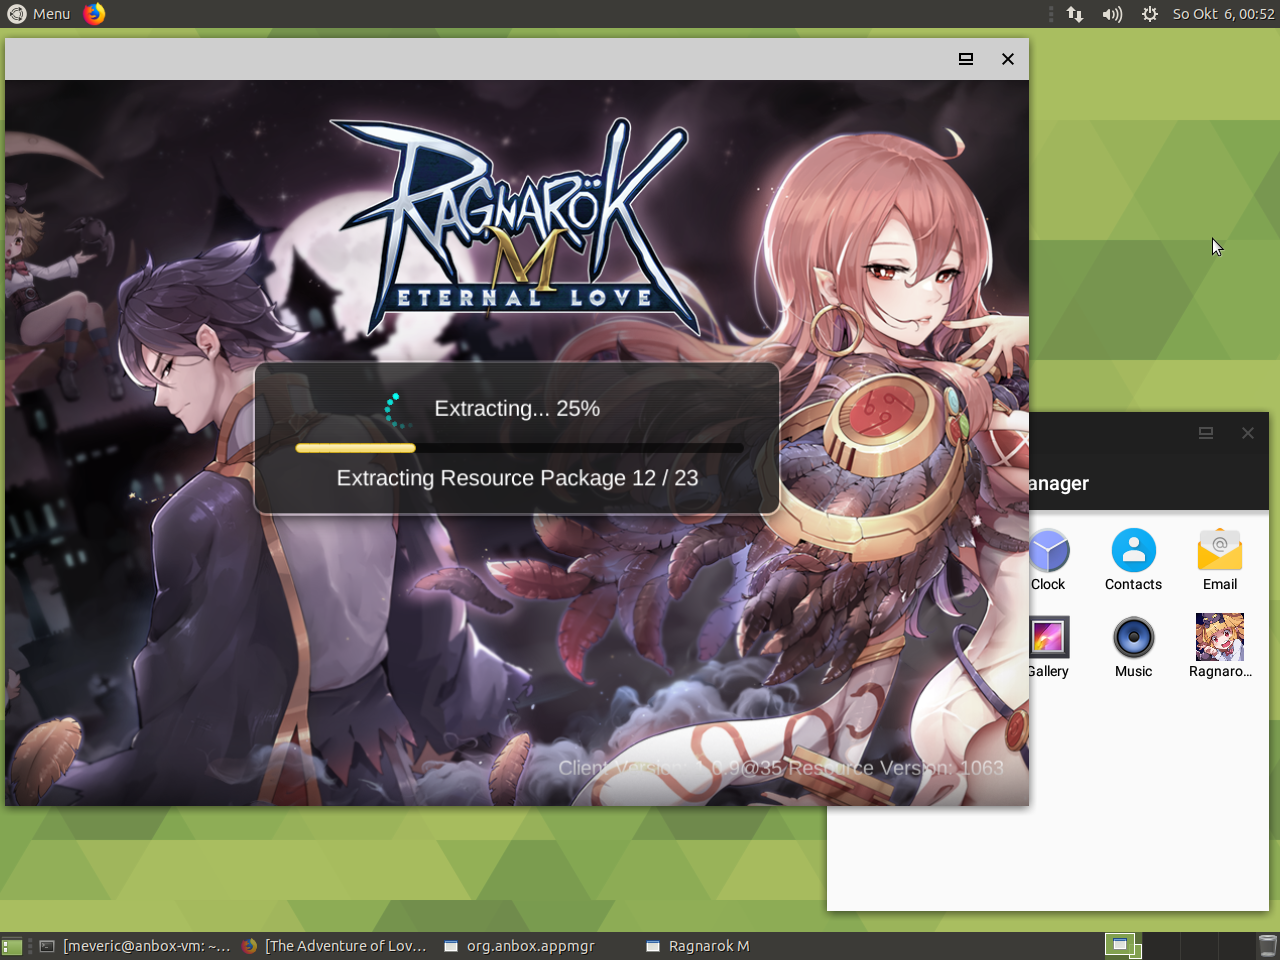
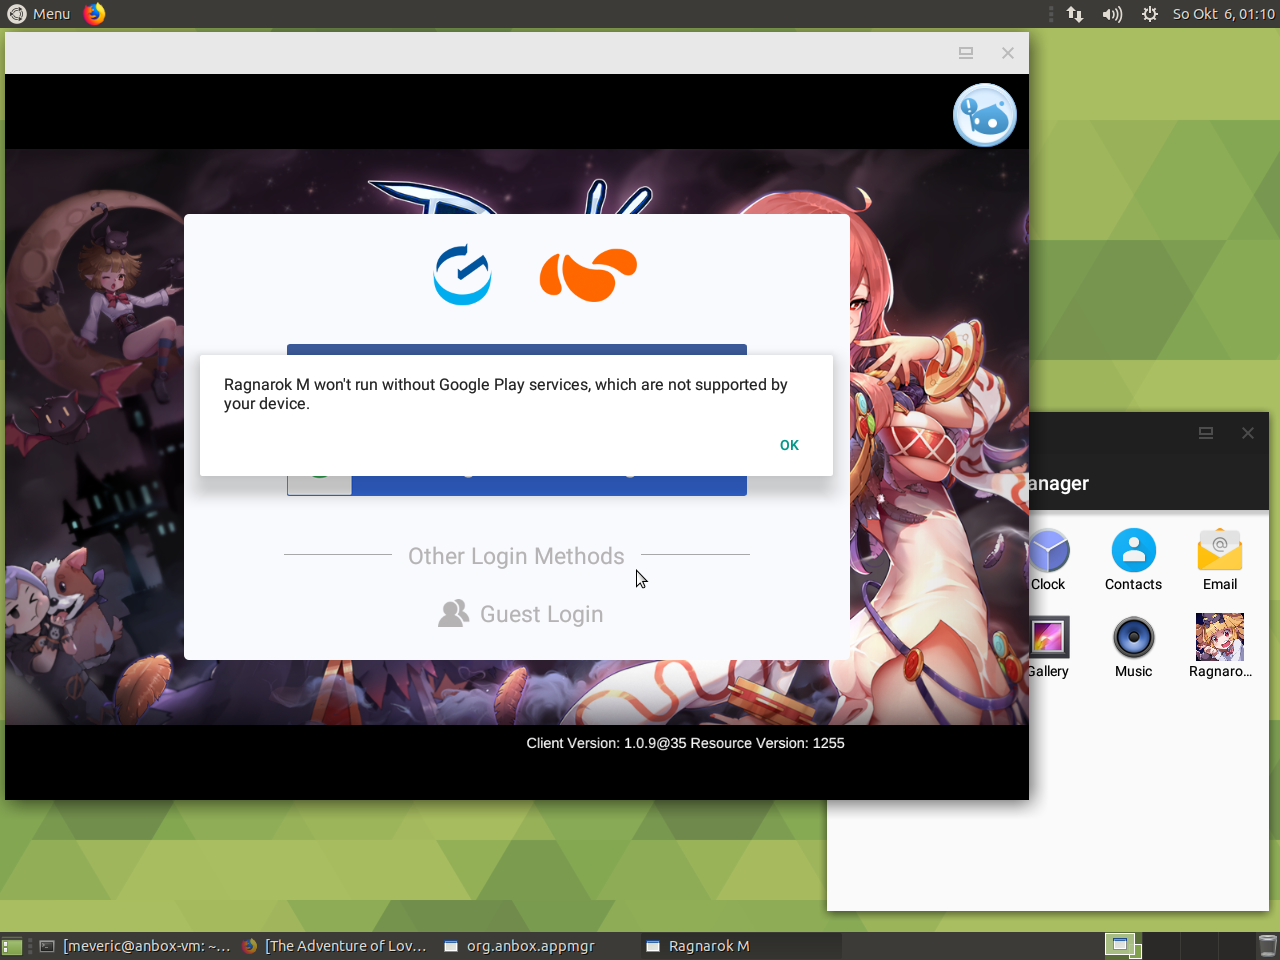
Figure 4 - Ragnarok M starting on Anbox and installing updates
The game started and as it’s the case with these online games started downloading and installing updates, which was fine with me, so I sat down and waited, happy to see the game was a lot faster than on my tablet (no surprise here).
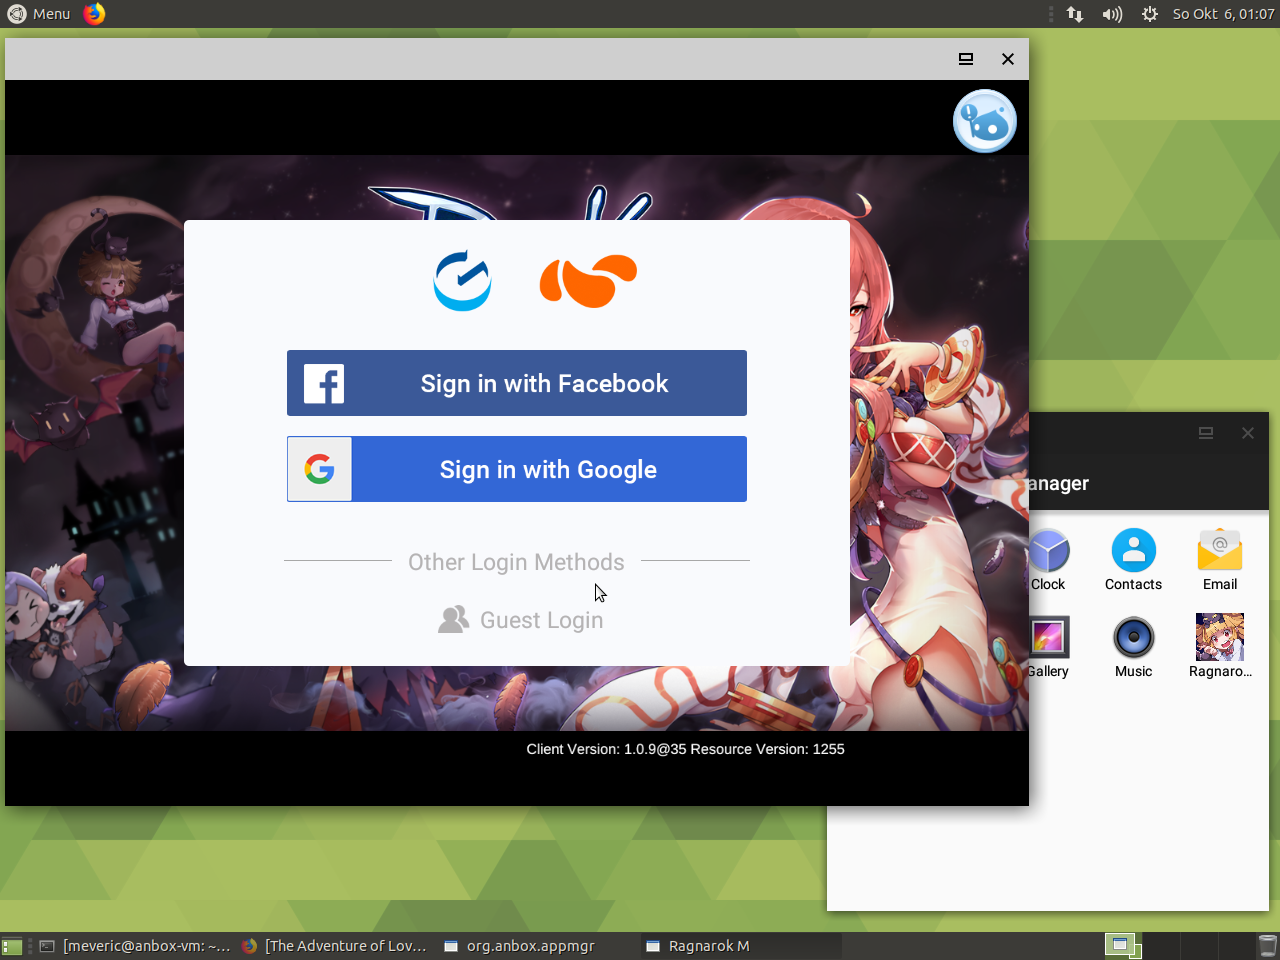
After the updates I was greeted by the login screen and this is where my problems started.
Figure 5 - Only thing left to do is sign in and start playing right?
Figure 6 - Google Play services? Ah yes, I knew there was something different
This is where my ordeal started and where I wasted an entire day to figure out the problem was the snap packages. But before we go into details and how to solve this some general observations which we are about to fix
Installing applications part 2 – Gapps and other packages
If you headed over to APKMirror you probably noticed that most applications and games are only available for arm or arm64 (armeabi-v7a, armeabi, arm64-v8a) very few are available for x86.
This is true, as most games and applications are written for smartphones and tablets and those devices normally have an ARM processor. Therefore the selection of application directly running on x86 Android is very limited.
Aside from that you will have a hard time finding your favorite games on APKMirror in fact I had a hard time finding anything working as is.
Most games will only be available once you installed Gapps and the google play store, but even then with x86 the selection would be very little. Many applications rely on Google Play services, even if you have the apk file for installation the programs require Google Play services to work, therefore installing Gapps is very important.
Installation of Gapps and Houdini
There are several ways to install Gapps for Anbox, but they are not very easy and therefore we should trust other people that already did make all the work for us and wrote a script for this.
There are currently two that are important for us:
For those interested in what it does here:
It will download open-gapps from sourceforge as well as houdini_y and houdini_z from the Android-x86 project. They will be extracted, and added to the image. Houdini are wrapper libraries that allow you to run arm and arm64 Android binaries in an x86 environment. The script will alter the Android.img so it no longer only serves as a x86 and x86_64 image but also as an arm and arm64 image. Which means after that you can install and run all the other applications previously not available or only for arm and arm64 on the system as well, it will add some optimization and configuration so it is working correctly.
Afterwards, it creates a new Android.img file and replaces the original one with the new one that has gapps and arm and arm64 support.
The entire process only takes a couple minutes for downloading extracting and repacking the image.
The sudo command is only required to place the new image file into /var/lib/Anbox, where only root has access, if you run it without sudo it will still create the Android.img file and you can later on manually copying the file.
$ sudo install-playstore.sh --clean
will remove the Anbox-work directory that was created during the process, but you can also remove that path manually as it’s no longer required.
Setting up Google Play Services
After a reboot if we start Anbox we now have an additional symbol for the Google Play Store which will allow us to install applications and games directly from the store, but before we can do this we need to setup the permissions for the Google Play Services and Store.
Figure 7 - Starting Anbox after installing Gapps
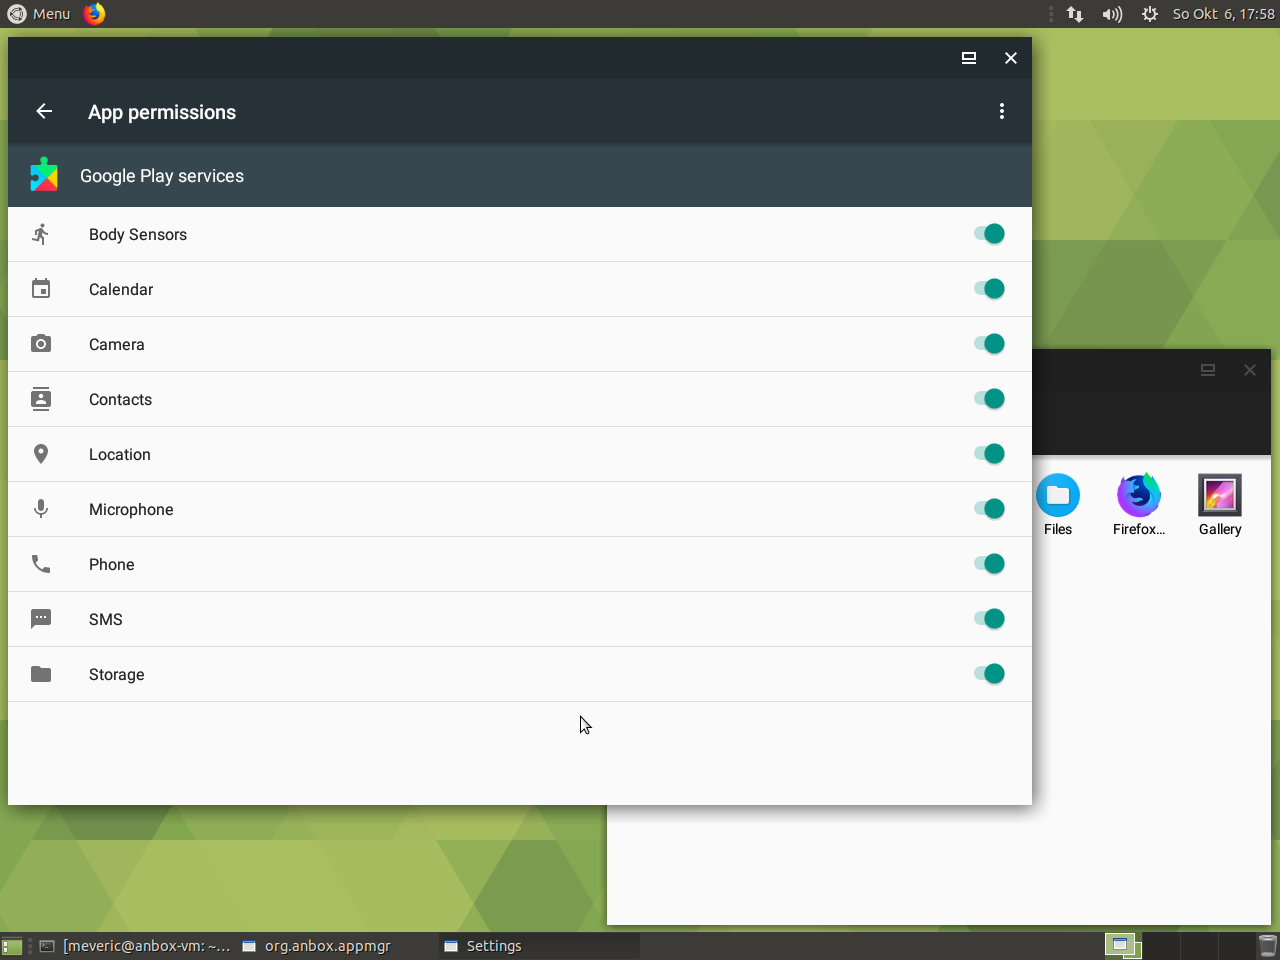
Figure 8 - Setup permissions for Google Play Services and Google Play Store
For this open your Settings, go to Apps, search and click on Google Play Services.
Below the buttons you see Storage, and after that you see Permissions, which are either empty or a rather short list. Click on permissions and grand Google Play Services all permissions on the list (see figure 8). Repeat the same with the Google Play Store.
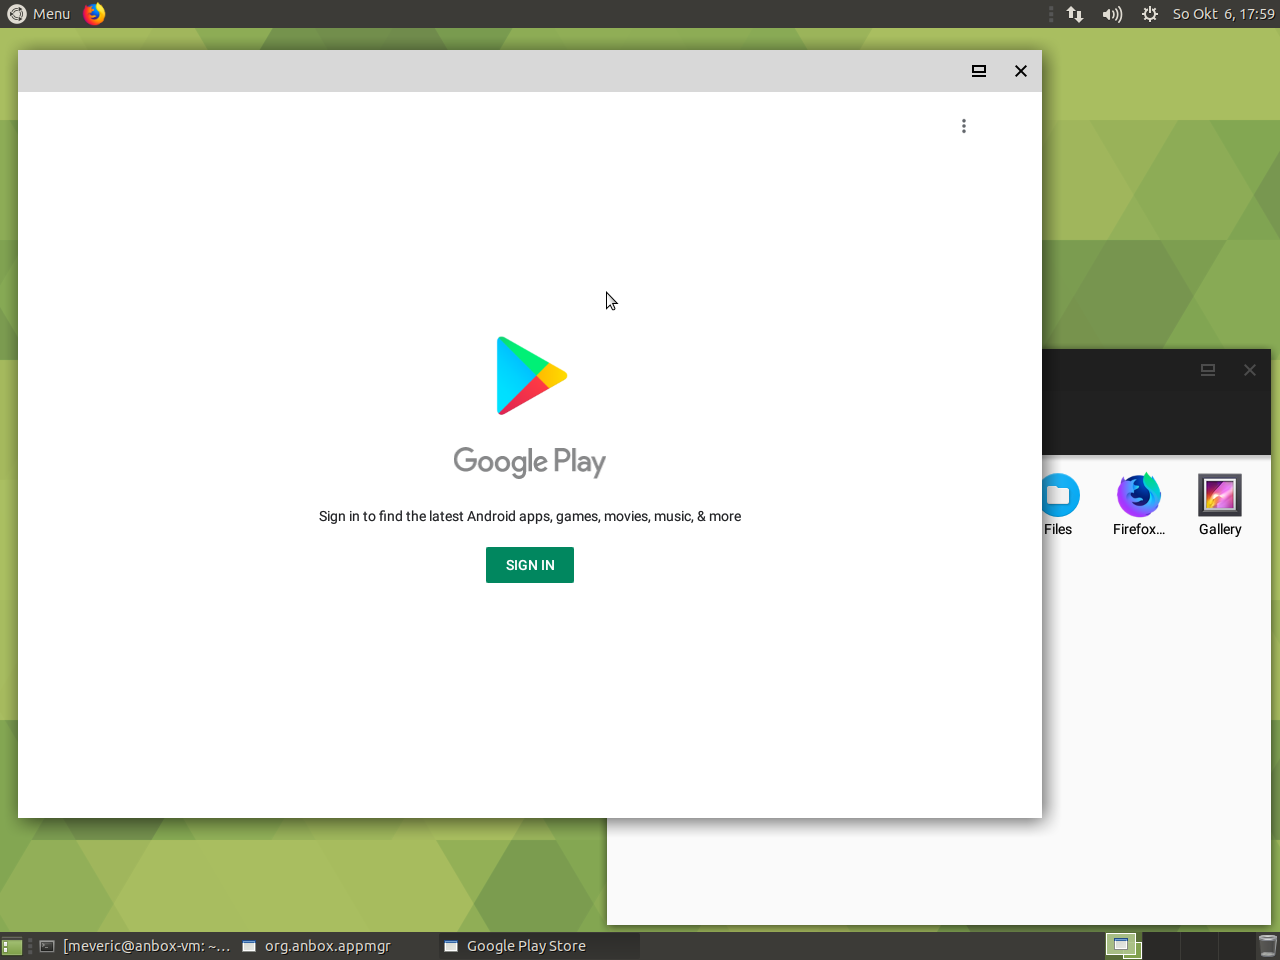
Figure 9 - Google Play Store on Anbox – we just need to login
Figure 10 - After the login we have the Play Store to install Games
If you’ve done everything right you should be able to start the Google Play Store and are greeted with a SIGN IN button. Once you logged in with your Google Account you can see the play store and can start installing software.
And just to prove it’s working:
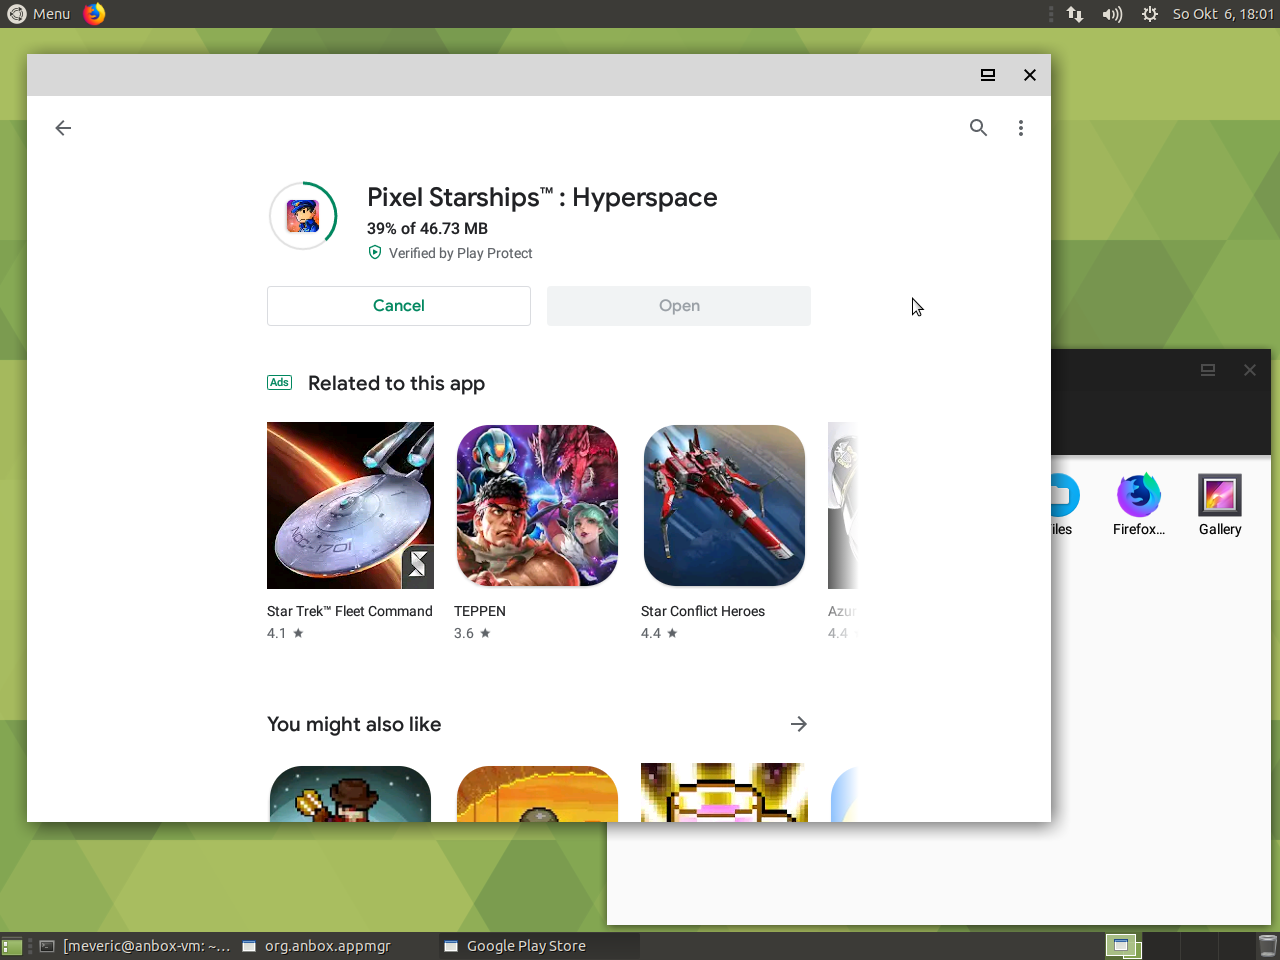
Figure 11 - Downloading and installing a game in Anbox
Figure 12 - Guess what? We can even PLAY games on Anbox
Getting to hear and being able to do the same should be rather easy to follow and did not involve too much knowledge. It took me a while to figure this out but I guess my infos should speed up the process if you want to try this yourself.
But although at this point you’re able to use and explore Anbox, my journey was not over yet as my original goal was to run Ragnarok M on the PC instead of my tablet. Which I haven’t achieved yet.
Touch Support
When I first booted up Ragnarok after I added Google Play Services and could finally log into the game, I kinda expected finally being able to play the game, but I had trouble with logging into my character. In fact I had trouble doing anything. If I clicked something, nothing happened. After some investigation it became clear what was the issue.
As I said earlier, most games are developed with cellphones and tablets in mind. These devices normally don’t have a mouse attached and therefore many games are written only to support touch input. The version of Anbox that comes with Ubuntu 19.04 and Debian Stretch/Buster supports both mouse and touch input. This means if you have a mouse connected it will react as a mouse, if you have a screen that has touch input it will use the touch. Since not everyone has a screen with touch support mouse will most likely be the default input for your use-case, as it is with me.
Since the game I wanted to play did not have mouse support, I did some more research and ended up with a patch that allows for mouse input to act as touch instead of a mouse.
At this point we have two options and I will explain both to you.
Patching the Debian package
One way is to create our own deb package based on one of the OS with a patch that will allow us to use the mouse as a touch input.
Please note: this step requires you to recompile the software as well as installing development headers and compiler on your system. If you do not want to do this, I provide already patched versions of these packages under: https://oph.mdrjr.net/meveric/other/Anbox/ where you can download the package for your OS.
I also included a package for Ubuntu 18.04 in case you’re using the LTS release, as I do on my Laptop.
In order to start this step make sure you have activated the source lists activated for your OS repository.
Go to Software and Updates, inside your Control Center for example, and make sure the “Source Code” box is checked.
For those who want to build the Software themselves here are the steps required:
Please Note: the actual version (Anbox_0.0~git20190124) may differ depending on what OS you use so adjust this part accordingly.
This will build and install Anbox with touch support. Once you restart Anbox and use the new binary to start your games touch support will work.
Building latest version of Anbox from Github
Instead of patching an older version of Anbox, you can also build the latest version available on Github from Anbox. You won’t need the patch for touch support as this is already included in the latest version.
$ mkdir -p ~/sources
$ cd ~/sources
$ sudo apt install git libdw-dev libdwarf-dev binutils-dev libboost-serialization-dev libboost-thread-dev libboost-test-dev
$ git clone https://github.com/Anbox/Anbox
$ cd Anbox
$ sudo apt build-dep Anbox
$ mkdir build
$ cd build
$ cmake -DCMAKE_BUILD_TYPE=Release ..
$ make -j4
$ sudo make install
This will build and install the latest version of Anbox. Since this version will be installed to /usr/local/bin and not to /usr/bin you can install the deb package from your OS and the version from github side by side and can switch back and forth between them.
This is why we installed the deb version of Anbox as this allows us to easily change from one version to another by simply editing one file, which is /etc/systemd/system/multi-user.target.wants/Anbox-container-manager.service (you might remember this from earlier)
When you edit the file with sudo and your favorite text editor you’ll find a line:
So it starts the binary you’ve just build. Then just restart the system.
After that it uses your newly compile version of Anbox.
If at a later point in time (after a couple of weeks or so) you want to build the latest version of Anbox again, just do:
$ cd ~/sources/Anbox/build
$ git pull
$ make -j4
$ sudo make install
That’s all and you’ll always have the latest version.
Does that mean it works now?
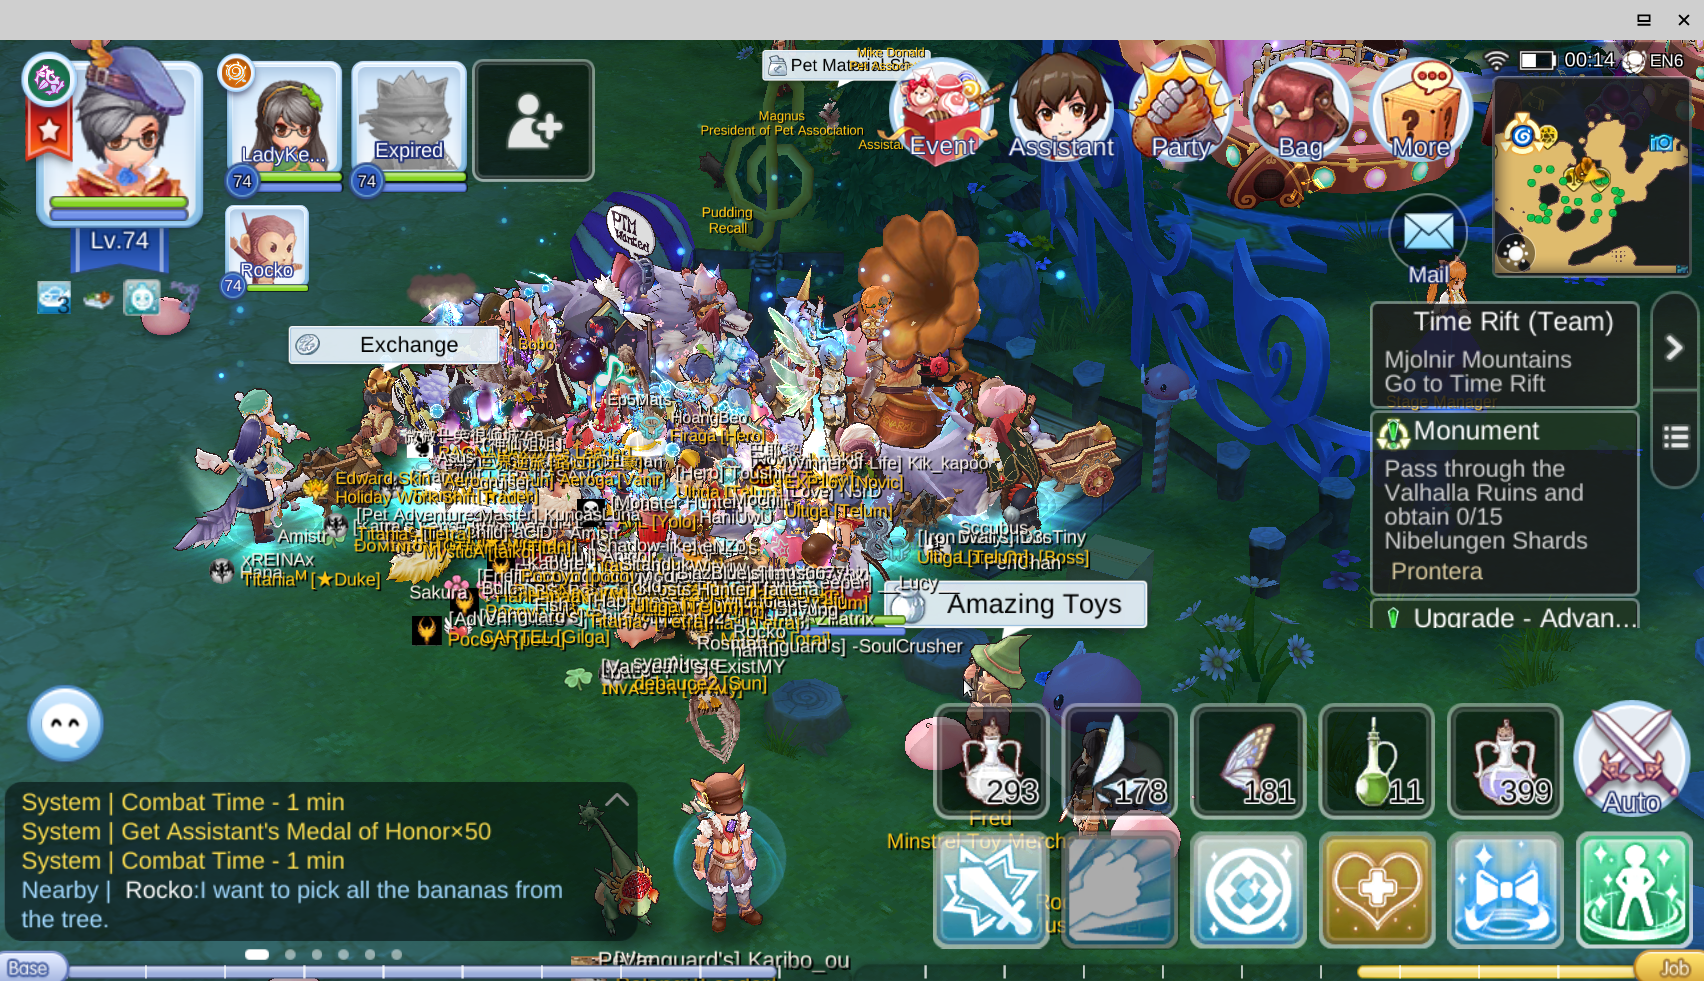
With this I was finally able to play Ragnarok M on my Laptop (or ODROID-H2) and let me tell you it’s working mighty fine! It’s surprisingly stable which I did not expect.
Figure 13 - Playing Ragnarok M – Eternal Love on my Laptop this is so much easier than the tablet and doesn’t need charging all the time!
With this you’re now prepared to try out Anbox and play Android games directly under Linux, and yes this is currently the best I can give you for Anbox, no more improvements from my side for now.
But not everything is nice and shiny
Ok, let’s be honest, although it’s already impressive that doesn’t mean you can throw your Android tablet away just yet. Remember when I said earlier that I was very lucky that the first game I tried (Ragnarok M) was running at all?
That’s sadly something you should keep in mind. The number of applications and games that DO work are VERY limited. If you get one out of ten to work, than that’s a GOOD intersection.
I have about 75 Android games on my Humble Bundle library as downloadable .apk files. Out of which less than 10 worked. This is not related to graphics issue, but more that the games don’t start at all. Which in return is actually an issue with the “graphics” I think, but on a different level.
When you try out applications and no new window opens, the game won’t work, you can stop trying.
Often the games hangs at this point even if you hear sounds, music or whatever, it won’t work. Sometimes it’s best just to restart the Anbox-container-manager service rather than waiting for the application to timeout so you can click something else.
If I understand it correctly this is mostly related to the way the Anbox works. It uses EGL calls to create a window in which the application runs. For this the application must support “Window Mode”, imagine it similar to the YouTube app, when you start it and then go back you have a tiny window on your mobile device that can be dragged around. If an application supports something similar to this, it will likely work. If it does not, then it won’t work.
This basically means most “older” applications won’t work as window mode was unheard off in their days. In fact, the newer an application is the more likely it will work.
Some apps are written in a way that they are compatible with emulators, such as my Ragnarok M that I wanted to get to work, and with that support window mode in one way or another. In fact I found quite a lot of these online games MMORPGs and others that do work quite well.
You’re also limited to OpenGL ES 2.0 applications. So if an application requires OpenGL ES 3.x it won’t work.
There’s also a sound issue, all sounds are delayed about 1 second. So you see things on the screen but hear them about one second later, which can be irritating. I’ve seen a patch to reduce this audio lag significantly but when I tried the patch, the games stopped working altogether when sound started.
But I guess they will fix this at some point.
What CAN you run
As terrible as it might sound, you can still run some really nice games on Anbox.
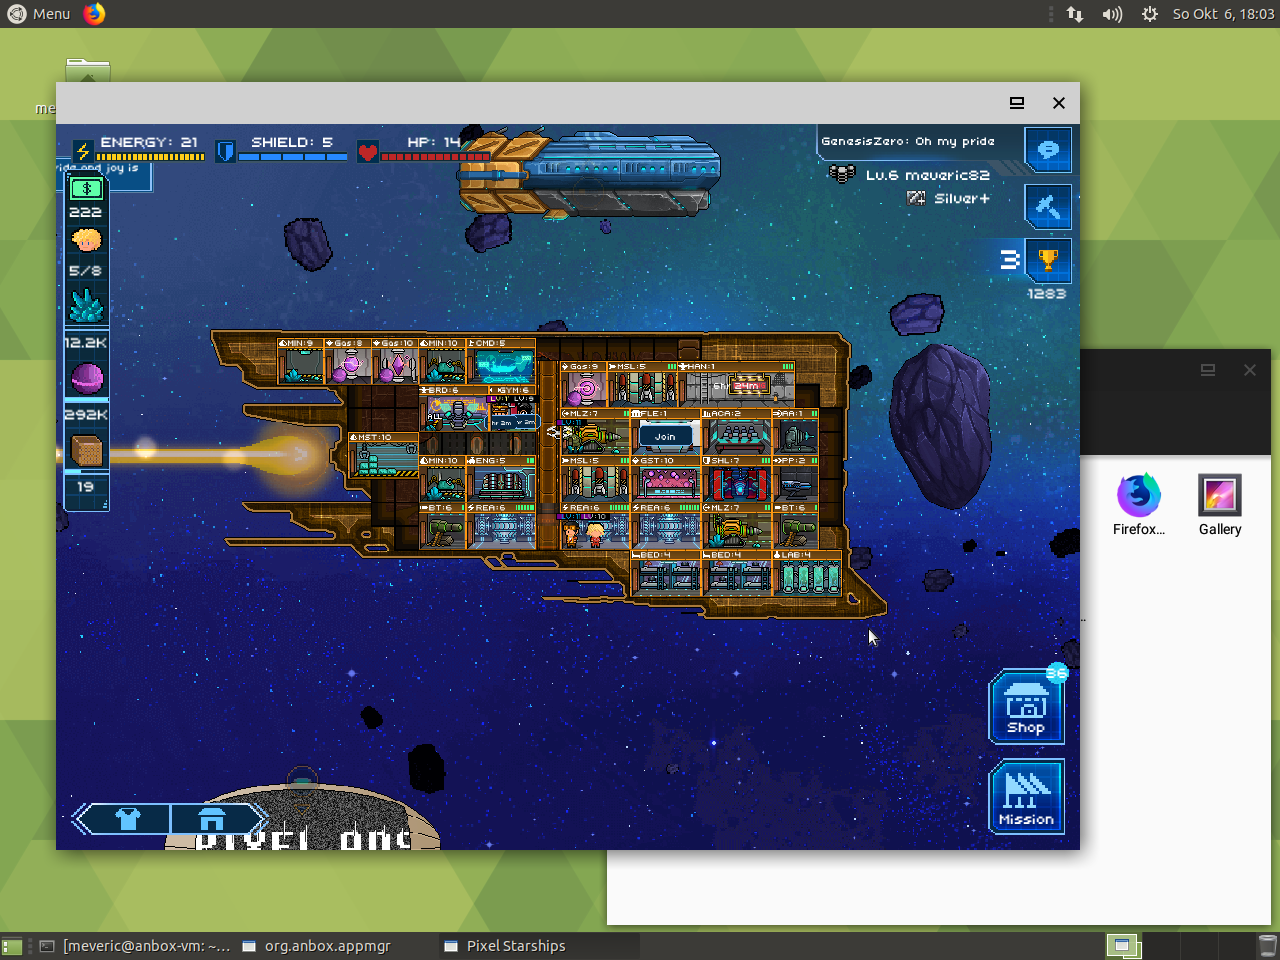
You’ve already seen Ragnarok M which looks actually quite nice and has high resolution graphics. It’s a really nice MMORPG and me as a fan of the original Ragnarok Online MMORPGs enjoy this game for months now. I’ve also shown pictures of Pixel Starships another game that I’m enjoying for some time now, although it’s more casual.
Anodyne is an old-school dungeon crawler where your main weapon turns out to be a broomstick.
Figure 14 - With a broomstick against monsters… Anodyne
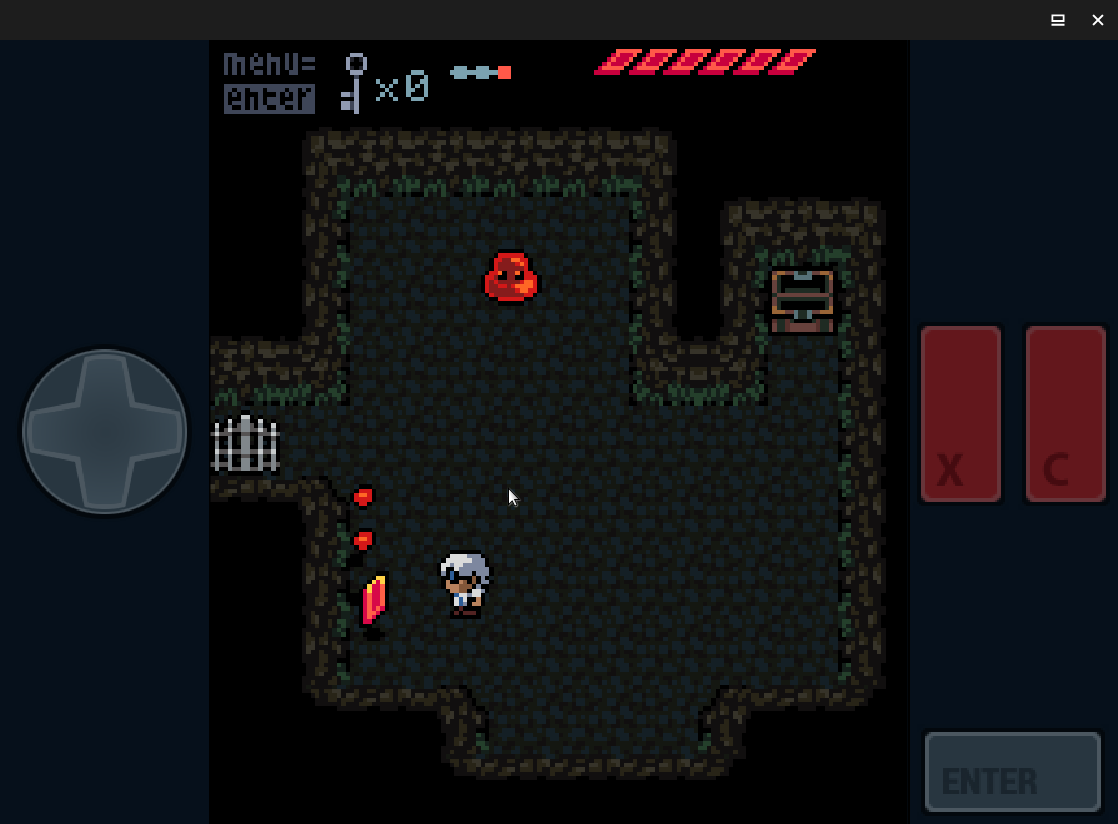
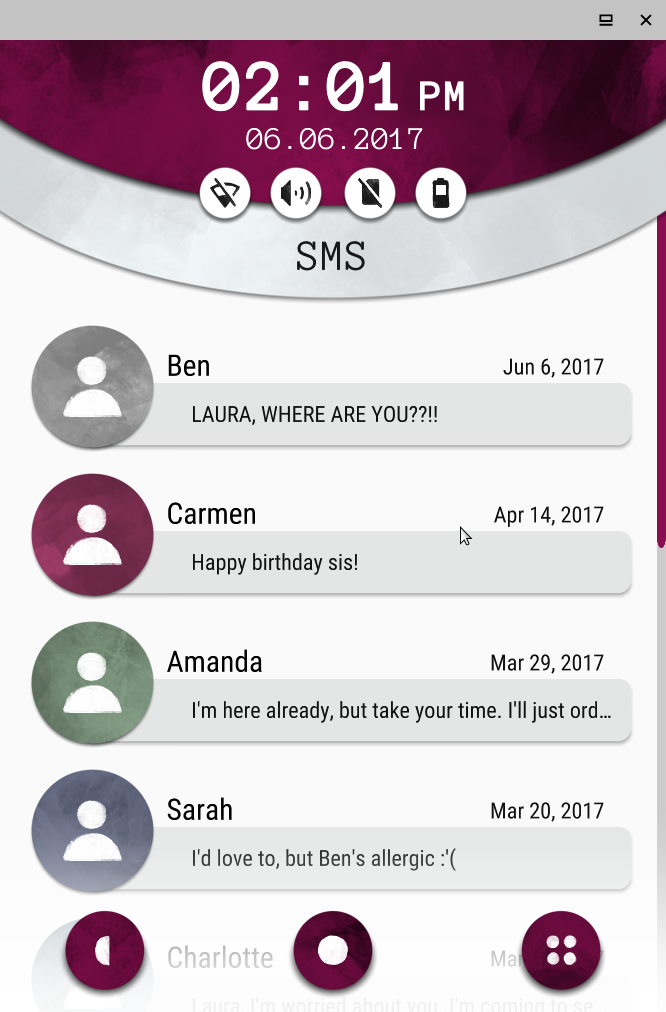
Figure 15 - Another Lost Phone: Laura's Story
It’s quite fun and is completely controllable by keyboard, means you don’t need to try to navigate with your mouse around the screen. It’s actually quite fun despite it’s minimalist graphics.
Another Lost Phone: Laura's Story is a game where you found the phone of someone called Laura and it seems something bad happened to her. You try to find out more about her by going through her phone, checking pictures, messages and so on. As the game progresses you have to guess passwords by combining clues, figure out who the persons in the pictures are and how they are related to Laura.
It might not look impressive but this is actually running on the Unity Engine. It’s interesting to solve the different little puzzles and find out who are the different people who contact you and who’s lying about what.
Figure 16 - Incredipede, colorful organic graphics for a nice puzzler
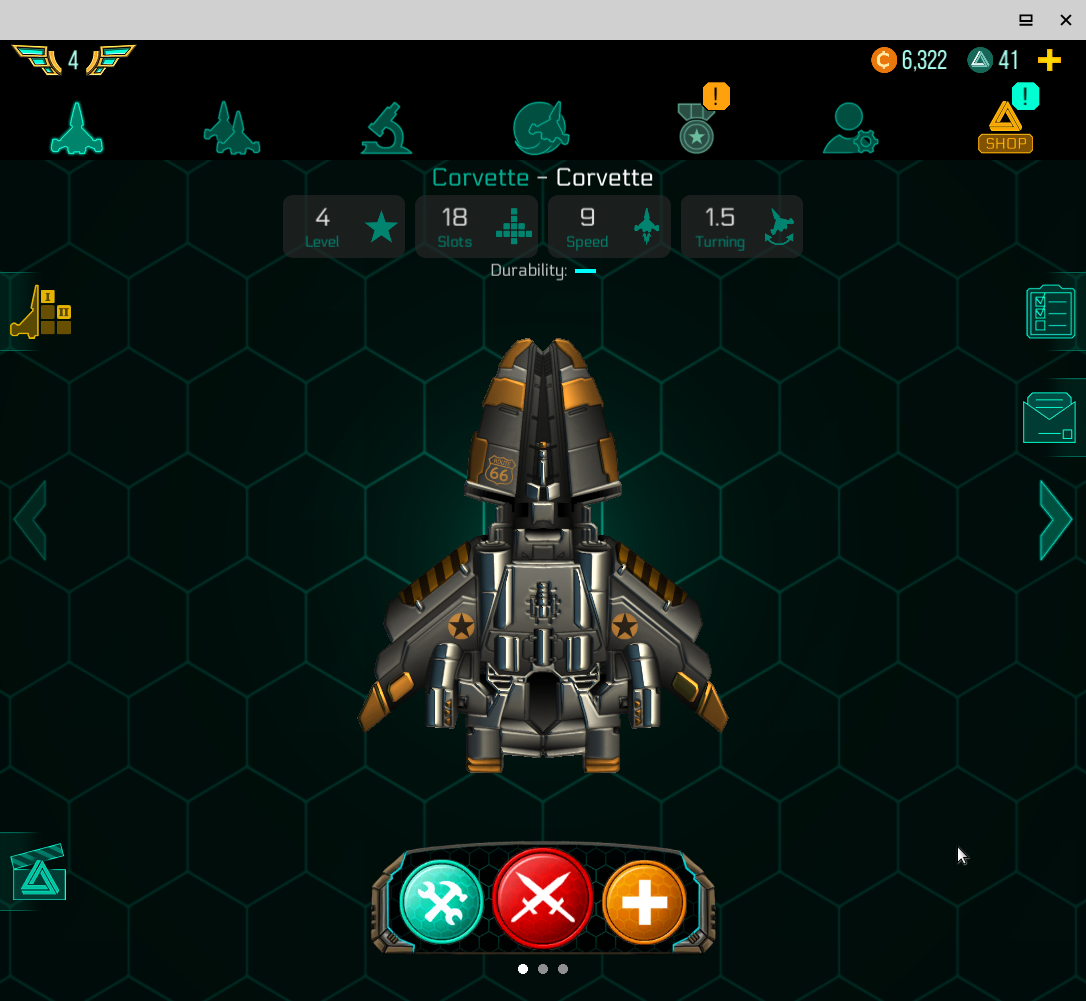
Figure 17 - Space Arena, build your own ships and fight against others
Incredipede is a nice puzzle game, you have two buttons that make your Quozzle move it’s muscles and legs and need to collect items and push them into a light than follow as well. It can be quite hard as it moves very strange. In harder modes you can actually build your own Quozzle to achieve your goal.
Space Arena is a game where you build your own spaceship, well, more like the internals.
You buy a layout plan and fill it with weapons, reactors, shields, propulsion system, etc. after that you send it against an opponent If you win, you get experience, and money which in return allow you to buy more stuff. Not very original but it can be fun for a while.
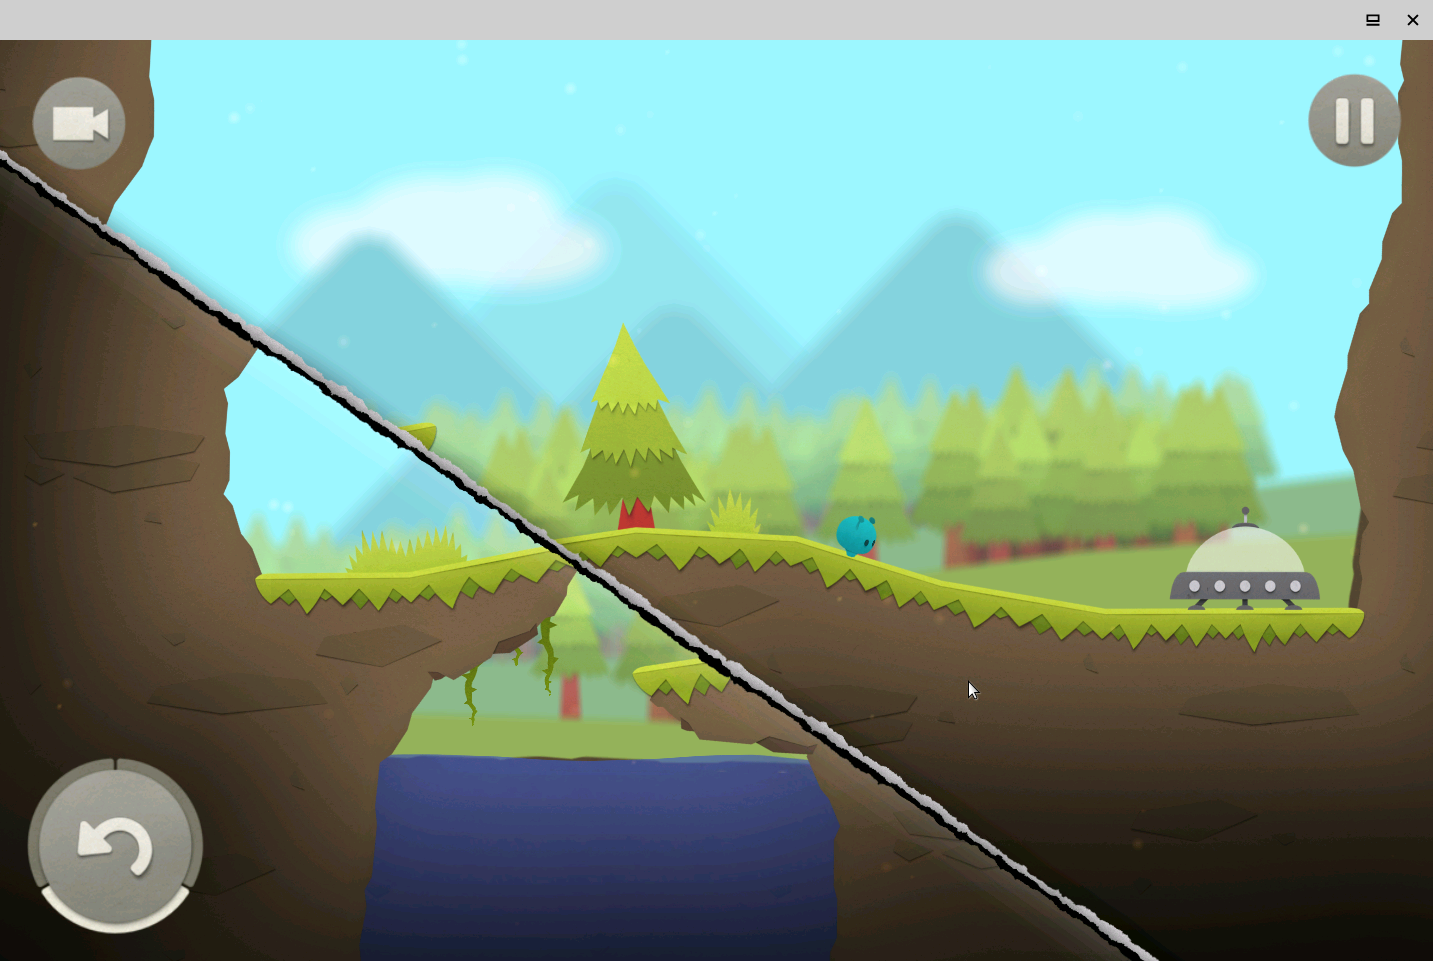
Figure 18 - If it doesn’t fit, fix it! Splitter Critter
In Splitter Critter you can cut the world into slices and then move them pieces to put them back together the way you need it. For this you can open new paths or move not your little guys to the ledge above, but the ledge above to down to your little guys.
This game is a really fun puzzle game, cute and colorful. You need to find a path to your space ship, to get to the next level, but not only do you need to make a path towards your ship, it also means you often have to avoid dangerous creatures or use the abilities of your little aliens to your advantage (jumping for example). It’s a really fun game and I can highly recommend it.
Figure 19 - Galaxy of Pen and Paper, a new level of RPG
Figure 20 - The Junkyard is where everything starts
Figure 21 - Increase the number of enemies while you can in order to get a bonus!
Galaxy of Pen and Paper is really a new type of RPG game as you play an RPG game in this RPG game. Confusing? The game starts with you creating a game master (G.M.) and some characters and he will tell the story that you play out like every good RPG starts.
This game is hilarious and really fun to play. I already played it on my smartphone on my last vacation and it’s really fun. You can create your own quests by selecting the monsters you want to fight and how many. You get quests from NPCs and can travel between stars. It makes fun of Star Wars, Star Trek and everything RPG and Space related. I had some graphical issues with Anbox, nothing serious just some glitches here and there, but the overall game is really fun. There is also a game called Knights of Pen and Paper which is pretty much the same in a fantasy setting, I haven’t tried that one but I imagine it to be working as well.
Another 2D game would be Space Life, where you hunt monsters, gather items buy weapons and ships. Fun for a little while but not too impressive.
You may wonder, does that mean you’re limited to 2D games like the ones above?
Certainly not! Ragnarok M is already a 3D game although you might not see it on the first glance but every character and most of the world is in 3D, you can swing the camera around your char or fly over the map in a flying whale or something. Believe me it’s real 3D.
But there is more:
Raid: Shadow Legends is a very impressive 3D game that works just fine on Anbox. It has amazing graphics and with hundreds of playable characters, weapons, and upgrades there’s a lot to explore.
Figure 22 - Raid: Shadow Legends has impressive graphics for a mobile game with lots of effects and detailed characters
There is a nice background story that helps with the fights of the game. The game also features a lot of commercials for in-app purchases, so it’s probably not for people that are easily influenced by this.
There’s another game that I haven’t had time to explore in detail yet it’s called Tales of the Wind and is an MMORPG in the Tales series.
This anime style MMORPG is very good looking even the starting screen is already impressive with nice large detailed characters. Same goes for the character creation screen. Both shows what kind of graphics you can expect.
In game there are quite some cut scenes in “In-Game graphics” which look rather good and are fun to watch. I only played it for a couple of minutes up to now as I am afraid I get myself too deep into it for the moment.
Anbox seems to run rather well with big titles or MMORPGs as they probably are build with emulators in mind to allow the use of a mouse and keyboard. Tales of Wind also allows you to walk around with ASWD which shows how much they planned ahead with this game.
Figure 23 - Tales of Wind a beautiful anime style MMORGP
Figure 24 - Character select screen of Tales of the Wind
Figure 25 - The in game graphics are really colorful and full of details
(Figure 23 - Tales of Wind a beautiful anime style MMORGP)
(Figure 24 - Character select screen of Tales of the Wind)
(Figure 25 - The in game graphics are really colorful and full of details)
Generally the software was built with x86 CPUs in mind. It relies on SSE for some features which is only available on x86 systems. Still since technically there is nothing much behind it that should prevent it from running on armhf or arm64 it should be possible to run it on other ODROIDs as well.
If you check Debian Stretch and Buster you’ll even find install packages readily available in the Debian Repositories for both armhf and arm64. If we dig further you’ll even find an Android_armhf and Android_arm64 image on the download page I showed you earlier:
So they even tested it out with armhf and arm64 at some point. I can tell you up front, if it would be that easy the article would not have been around the ODROID-H2 but, instead of how to run it on the XU4 or C2.
Still there are signs that indicate it should work.
This indicates it should be possible. I tried to follow this guide but I wasn’t able to get it working (yet).
The armhf image on the download site from Anbox itself has some issues and doesn’t work that way. skmp mentioned in his guide that he rebuild the armhf image, and so did I, but it’s very different from what he says. In his guide he said he needed to download about 40 GB for the build environment for Android, and a total of about 100 GB to build the software.
In his blog he does not explain how he did this, he only points to another link and said he followed that guide, but following the link there is no real guide but only another link which you should follow to download the build environment.
I did this and let’s say it did not download 40 GB but more like 130 GB, still in the end I was able to create an armhf image as well and it looks very similar to the one created by skmp.
But when I tried to use this instead of the one directly from Anbox I didn’t get much further. From what I can see it seems to have issues with the graphics and to be honest the graphics of the Mali GPU are a little bit special.
I also wasn’t able to compile a new arm64 image yet.
It’s also somewhat tricky to get /dev/binder and /dev/ashmem to run on ODROIDs. While the DKMS module should work it doesn’t work with each Kernel version so I ended up activating both by default in the normal Kernel images for ODROIDs as these are specific for each Kernel version. That way it should be available in the latest Kernels of all my images even without compiling the DKMS modules.
Maybe someone else has more luck in getting Anbox to work on armhf or arm64 ODROIDs I would very much appreciate it.
Final Thoughts
Anbox is a very nice project, I wished the arm and arm64 support would be better for it and we could run it on ODROIDs as it would open up even more possibilities on ODROIDs.
Anbox offers a lot of options to work with, for example running Anbox in a single window mode, which might help running certain applications that do not support opening windows.
Overall, I’m very excited about this project as it might well be that it allows us to run many more applications directly under Linux in the future and with a little luck even on arm and arm64 devices.
The G Spot: Your Goto Destination for all Things That are Android Gaming
November 1, 2019By Dave ProchnowGaming
If you’re like me, you’re scratching your head right now over Google’s recent introduction of Play Pass. Play Pass is a monthly subscription service that enables you to download and play a vast library of games and other productivity apps that are currently available on Google’s Play Store. This announcement couldn’t come at a more inopportune time. We’re just two months away from the official launch of Google’s massive game streaming service, Stadia. So what gives? Why would Google preemptively smother the lead-up to Stadia’s premiere by launching a decidedly inferior service?
A project manager at Google had this to say about Play Pass, “Games are super important … it [Play Pass] doesn’t just appeal to hardcore gamers.” OK, so Play Pass is being targeted against those Android users who might not opt into the Stadia ecosystem. Fair enough. Unfortunately, there are still several flaws in Play Pass that’ll give you some more head scratching.
Figure 1 - Google Play Pass might be targeted at the “casual” gamer - Image courtesy of Google Play Pass
Fueled by over 350 games and apps that are currently available on the Google Play Store, Play Pass will cost $4.99 per month for complete, unlimited, ad-free access to this library. What if you already purchased and played “Monument Valley,” for example. What benefit would Play Pass give you? Maybe very little or maybe the opportunity to play games that you would never purchase.
Subscriber beware, game developers use an “opt-in” application process for enabling a game or app to be included in the Play Pass library. The Google project manager neglected to say what will happen to Play Pass games when a developer abandons this subscription service. Additionally, this project manager also failed to mention details about the contract terms associated with monetary payments to developers for game subscriptions.
At the time of publication, Google is offering a nifty promotion of $1.99 per month for the first year of your subscription to Play Pass. Likewise, there is a 10-day free trial grace period. Finally, Google will let up to five family members share a single subscription. Regardless of how Play Pass “plays” out, the worst enemy to Android gaming might be Google, itself.
Come to the Dark Side
It was only a matter of time before the Google Play Store received the dark theme treatment. Following the release of Android 10 last month, Google apps have slowly, but surely, been enabling a dark mode theme. Like the Google app and Gmail, the Play Store is now sporting a dark theme. Supposedly, this dark theme is enabled with Play Store Version 16.7.21. Therefore, if you aren’t seeing the dark side, yet, hunt down the current Play Store update or if you’re an Android 10 user the change could be an automatic theme enabled in the new OS system settings.
Mario Kart Tour
It’s finally here: Nintendo’s Mario Kart Tour. This long-delayed title is available as a free download. Playing it for free, however, might be a different matter. Be advised, you will need a Nintendo account before you can play this game. Even worse, if you want full access to all of the game’s races, courses, and karts, you will have to pay a $4.99 per month subscription. Nintendo calls this subscription the “Gold Pass.” Gold for Nintendo and NOT for you.
Figure 2 - Could Mario Kart Tour be the Mario title that forces Android gamers to Switch - Image courtesy of Nintendo
Lacking controller support, Mario Kart Tour offers a rather lackluster game performance. Adding further pain to the game, this is a portrait-only game interface. Luckily, the game’s graphics are top notch. So while driving is next to impossible, it sure does look great while you’re poking along the race course. You can learn more about Mario Kart Tour from the video at https://www.youtube.com/watch?v=V-_s4oWV1cU.
Kernel Modules
November 1, 2019By Andrew RuggeriLinux
If you’ve been around the Hardkernel Forum long enough the word ‘kernel module’ should sound familiar to you. However, if you’re new to the Linux world the details about what exactly Kernel Modules are might be unclear. This article is intended to not only make you aware of what exactly a Kernel Module but how to interact and build your own.
What Is a Kernel Module?
The Linux kernel is monolithic, meaning everything the operating system needs is part of kernel space. This has the benefit of being faster than other kernel designs such as a micro-kernel, but comes at the cost of lacking modulatory and flexibility. Kernel Modules are designed to help fix this issue of modulatory. In order to add functionality into the kernel, such as a new driver or file system format, the code with that particular new functionality is compiled into a kernel module and then loaded into the Linux kernel.
Hello World Example
For the example code and the rest of the article I assumed the filename would be “examplemod.c”
The code was kept to a minimal “hello world”, as the focus of this article is about the definition and functionality of Kernel Modules. The example here uses the kernel logging functions to print a simple hello upon initialisation and goodbye when the kernel is removed. The code has two parts that stand out and I address below.
These macros help fill out information about the module, there are additional field types that can be used such as ‘MODULE_VERSION’, ‘MODULE_LICENSE’, etc. Later we will see commands on how to view this information for any given module.
module_init and module_exit functions register the simple_init and simple_cleanup functions that are defined earlier. These calls register which user created functions will be called for initialization and code exit.
printk(), while at first glance might seem similar or interchangeable with printf(), should be thought of differently. As mentioned earlier printk is a mechanism for kernel message logging and not for directly interacting or displaying information to the user. The log level, which range from 0 to 7 (7 least important) is placed before the string without a command as they form a single parameter passed to printk().
Compiling
After writing the module, there are a couple of notes before just calling ‘gcc’. Kernel modules are pretty persnickety about how they are compiled the following rules must be abided by:
Non-kernel headers cannot be included
The module shouldn’t be linked to any libraries
The compiler flags used for the module need to match the ones used for the kernel
To make things simpler, we can use the makefile below:
obj-m += examplemod.o

all:
      make -C /lib/modules/$(shell uname -r)/build M=$(PWD) modules

clean:
      make -C /lib/modules/$(shell uname -r)/build M=$(PWD) clean
The makefile is fairly straightforward but the part that is most important is the following line:
make -C /lib/modules/$(shell uname -r)/build M=$(PWD) modules
The path here points to a location where the kernel Makefiles and headers can be found. The Makefile here simply calls the one located there to provide the functionality for the build as well as clean. After running the Makefile, we should be left with a file named examplemod.ko, this is our compiled kernel module.
Commands
Now that we have created our Kernel Module it is time to load into the Linux kernel. The following command can be used to load a *.ko file. When the module is loaded, the function that was set by module_init will be called.
$ sudo insmod ./examplemod.ko
If we remove a Kernel Module that has been loaded, it will call the function set by module_exit. To remove our Kernel Module or any Module that has been loaded, we can use the following command.
$ sudo rmmod examplemod
While not a Kernel Module specific command, the following command allows us to view what has been logged by the kernel. If the previous two commands were run then we should see the two printk() statements near the bottom (more recent) of the log.
$ dmesg
Or to see just the last 2 lines that were printed.
$ dmesg | tail -2
Figure 1 - Loading and removing the kernel module, then printing the kernel log
This will list all currently loaded kernel modules. However, this information is pretty limited if we want to dig deeper we can use the name of a module from the list with the following command.
This will print of a more detailed view of the module. If we look at the information from the example module we made, we will see the information that we set at the beginning of our module code.
$ modinfo examplemod
Figure 3 - modinfo printout of the information for our kernel module
Conclusion
These are only the basics to understand what a Kernel Module is and how to create and interact with them. Future articles will take a look at more complex uses and applications of Kernel Modules and how to allow some level of interaction with them to provide meaningful functionality.
ODROID-N2 UART Custom Baud Rate for MIDI
November 1, 2019By @tony.hongODROID-N2, Tinkering
I needed my ODROID-N2’s UART port to operate at a non-standard baud rate so that I could use MIDI. I edited the UART driver code to set baudrate to 31250 when setting baud rate to 38400, then wrote test code using wiringPi, and measured the baud rate.
UART driver after editing
linux/drivers/amlogic/uart/meson_uart.c

static void meson_uart_change_speed(struct uart_port *port, unsigned long baud)
{
u32 val;
struct meson_uart_port *mup = to_meson_port(port);
struct platform_device *pdev = to_platform_device(port->dev);

while (!(readl(port->membase + AML_UART_STATUS) & AML_UART_TX_EMPTY))
cpu_relax();

#ifdef UART_TEST_DEBUG
if (port->line != 0)
baud = 115200;
#endif

// this part is added.
// trace_printk() is not neccesarry, it is just for debugging.
trace_printk("Your baudrate: %ld
", baud);
if(baud == 38400)
{
baud = 31250;
trace_printk("Change to %ld
", baud);
}
Linux kernel build Ref: https://wiki.odroid.com/odroid-n2/softw ... ing_kernel
Gaming on the ODROID-H2: Running Lakka on the ODROID-H2
November 1, 2019By @Synportack24Gaming, Linux, ODROID-H2
Last month’s issue of ODROID Magazine featured an article “Lakka: Building The Ultimate ODROID-XU4 / XU4Q Gaming Console”, available at https://magazine.odroid.com/article/lakka-building-the-ultimate-odroid-xu4-xu4q-gaming-console/. This article focused on gaming with a ODROID-XU4, however, there is a potentially even more powerful ODROID, the H2. While the ODROID-XU4 does an amazing job at retro gaming, pushing it to play games from new systems such as a Playstation or Dreamcast start to push it past its limits. This is where I wanted to see, can the ODROID-H2 pick up where the ODROID-XU4 leaves off?
For this, I installed a 64bit version of Ubuntu Mate 19.04 onto my H2 and then proceed to build and install Retroarch for emulation (libretro.com). My H2 was configured with 8GB of RAM and an Intel 660P SSD, so other configurations with more or less memory or running off of emmc might differ in results.
Installing Retroarch
There are a LOT of different programs and full operating system distributions (such as Lakka) focused around emulation. I picked Retroarch for this testing because it’s well documented and used in many other emulation programs as a backend of sorts. Installation is very simple on ubuntu and well document as found here: https://docs.libretro.com/development/retroarch/compilation/ubuntu/
After this you have the choice to install retroarch as a package, which does not guarantee the most recent version possible and the compilation from git is very simple, so that was the approach taken.
Sony - Playstation 2 (Play!) : this was downloaded but the results were unplayable
Dreamcast
I was very surprised at how well Flycast handled every game I tried. My game selection was done to pick games that focused on testing different aspects of emulation and playablity. Crazy Taxi 2 was selected since it is a heavy 3D focused game and should push H2. Similarly Marvel vs. Capcom 2, while not 3D, is a fast paced game where any stuttering should be noticed. Lastly, ChuChu Rocket was picked as it’s a less well known game and would test more ‘edge’ cases for the emulator. I noticed no stuttering, lag or peculiar graphic problems. During gameplay of Crazy Taxi 2 there would be the occasional horizontal tearing lasting 2-3 frames before going away. This was pretty limited and mostly seen when the camera would pan as a passenger would enter the taxi, running ‘runtime’ game play this was not seen.
Figure 1 - ChuChu Rocket
Figure 2 - Crazy Taxi 2
Figure 3 - Marvel vs Capcom
Figure 4 - Marvel vs Capcom
Playstation
Unlike with Dreamcast there are a couple of different emulators that can be used for Playstation. When reading the description of each it becomes easy to find the best pick, beetle psx. The documentation from libretro (docs.libretro.com/library/beetle_psx/) tell us the following:
“This emulator is supplied for people who are running RetroPie on more powerful x86 CPU systems. It is accurate and the best you could ask for when it comes to a PSX core for RetroArch. lr-beetle-psx is not available for systems with ARM CPUs (like the Raspberry Pi) due to its poor performance on ARM CPUs.”
After getting everything installed and setup for the Playstation emulator, I did notice that it was much more ‘selective’ in being able to load and run a rom. Several of the emulators that I had setup to tried would be result in load/run errors when I attempted to load them.
Of the games I tried (Crash Team Racing, Dino Crisis 2, and Resident Evil 2), I had no game play problems. Everything played smoothly with no stuttering or tearing. Halfway through the intro cutscene of Dino Crisis 2, the video became obstructed. However, when the actual gameplay started there were no problems.
Figure 5 - Crash Team Racing
Figure 6 - Dino Crisis 2 Opening Cutscene
Figure 8 - Dino Crisis 2 Gameplay
Figure 9 - Resident Evil 2
Conclusion
Overall I was very surprised at how well the ODROID-H2 handled some of the more modern gaming systems. If you’re a fan of retrogaming gaming looking to upgrade to something with a little bit more “horsepower” then the ODROID-H2 is definitely worth a look, as it would make a nearly ultimate media player and retro gaming device.