April 1, 2019By @AreaScoutCloudShell, Linux, Tutorial
I have created the Info and Monitoring Tool for CloudShell2 and wish to share it with the community. I use it with OpenMediaVault and thus it is only tested in Debian, however it should work also in Ubuntu.
Figure 1 - Cloudshell2 running OpenMediaVault in all it's glory
The image can be downloaded from the link listed below. You have to install all the latest updates which includes a kernel update from 4.9 to 4.14 via the admin interface.
The main focus was to provide a view in which information can be easily read by using a larger font like those used by other tools.
The RAID Status, current time, up time, average usage, current IP address and free space are just some of the information you can get. On the bottom you have four icons; from the left they are:
Ethernet cable connection status
Recognised Ethernet connection speed
Fan ON/OFF status
HDMI cable connection status
The CloudShell2_lcd tool monitors the Raid status and temperature. It has two temperature triggers, one which to switch the CloudShell2 off and send an email notification to the user if a certain temperature is reached for a certain time (default 85°C for 15 seconds). The second one regulates the case fan of the CloudShell2, by default it will switch the fan on if the XU4 reaches a temperature >65°C and off if a temperature <60°C (65-5) is held for a period of 5 minutes.
All relevant scripts for sending mail and startup are installed in /usr/local/bin
Within the admin interface of OpenMediaVault (OMV) you have to enable mail notification. In case of HW/RAID errors, they are reported along with everything else that is problematic or, alternatively, just information on the system will be reported.
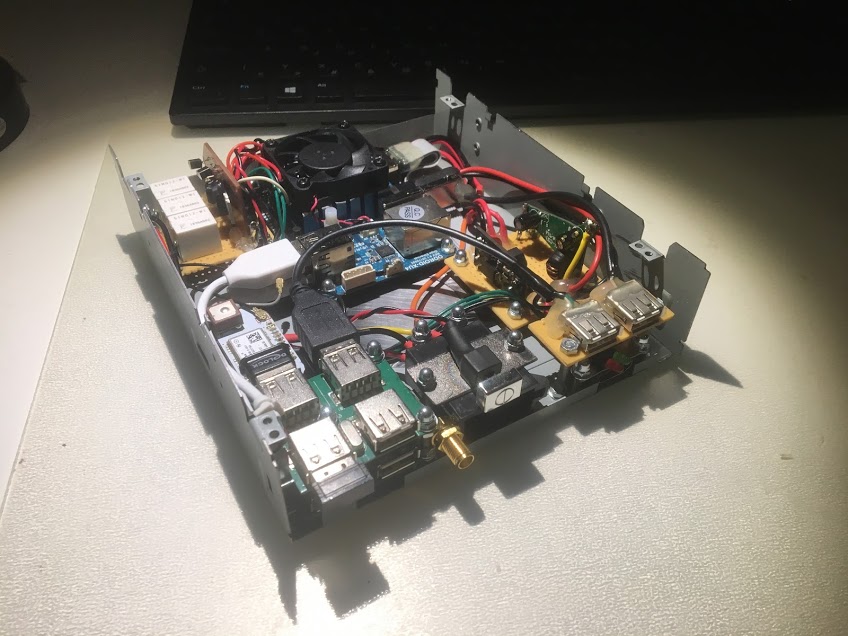
[caption id="attachment_11863" align="alignnone" width="790"] Figure 3 - CloudShell2 Illustration[/caption]
XU4 and XU4Q are different from here what values could be used, on an XU4 (without SoC fan) it could be that you are better by setting up the fan to be always on, but the default values should be good enough for average daily work.
You can now continue to setup the RAID controller with the DIP switches on front of your CloudShell2. After that you have to mount the newly created hard disk RAID set within the admin interface of OMV.
This will setup the fan to be always on, there are several ways to declare environment variables this is just one way:
$ sudo systemctl restart cloudshell2-monitoring
or a reboot could be needed
The tool also has a new command line option -i which you can invoke to get more information about your raid controller and disks connected; you can execute it at any time, even if the tool is already running:
$ CloudShell2_lcd -i
Have fun.
Disclaimer: I am in no way responsible for any damage to your cloudshell2. Please always keep in mind what you are doing it for tinkering/experimenting only!
April 1, 2019By Robbie FergusonLinux, ODROID-HC1, Tutorial
BitTorrent provides a means of crowd-sharing files; peer-to-peer via “torrent” files. At its heart, BitTorrent allows distributed hosting and sharing of files in such a way that the original uploader doesn’t have to provide all the bandwidth or storage space for people to be able to download the file. This is particularly helpful for open source developers because it allows them to distribute rather large project files with very little overhead--both in server resources and monetary cost. BitTorrent also has the effect of providing end users with faster downloads (once there are a number of seeds), since they will receive multiple pieces--chunks--from several sources simultaneously. These chunks are then reassembled into the original file on the user’s BitTorrent client. But BitTorrent has been given a bad rap: because it is a wonderful technology for distributing large files, it didn’t take long for software and video pirates to begin using it for the illegal distribution of copyrighted material.
Mainstream media tends to misreport on technology: the Internet just turned 30 years old* by the way. Misconception stems from a misrepresentation of technology when people who don’t really understand it are the ones explaining it. Think of the way Bitcoin or Blockchain are handled by network newscasts, or perhaps how Kodi has been blacklisted on some devices as a result of poor wording in journalism. In the eyes of the well-meaning readers and viewers, Bitcoin becomes a tool of ransomware attackers, the Blockchain; a mysterious digital realm where hackers of the future will do their bidding. Kodi is seen as an illegal streaming video platform and BitTorrent is where you’ll find illegal downloads. These wonderful tools get painted in a bad light making the average person afraid to use them. So BitTorrent itself has taken on an aura of being illicit to users who do not understand how it works.
When you download a file with BitTorrent, such as a Linux distro IMG or ISO, you can choose to leave it in your BitTorrent server. This makes your copy of the file a “seed,” which means other people can download chunks of the file from you with their own BitTorrent client for as long as you decide to seed the file. A file with many seeds will download very quickly and distribute the bandwidth usage across the network. It’s a subtle, but meaningful way to anonymously give back to a beloved Linux distribution because you are in essence donating download bandwidth to future downloaders. Ubuntu is officially available via BitTorrent, as are many other Linux distros including my own project, NEMS Linux. BitTorrent is beneficial all around: For me as the downloader wanting to get my IMG files quickly, and to the next user wanting to do the same. BitTorrent reduces the cost of distribution to the distro developer and gives me a small way to “give back” by providing a seed. It also ensures optimal uptime for downloads since if one seed goes offline, the others will pick up the slack seamlessly.
While you may install a BitTorrent client such as Transmission or Deluge on your computer, in order to remain seeding torrents you would need to keep that software running at all times. If you’re like me, you’d prefer a dedicated solution; something that doesn’t use a lot of electricity, but has the storage space and power to do a great job of downloading and seeding torrents 24/7 without having to leave anything running on the computer. This is where the ODROID-HC1 or ODROID-HC2 come in. These two offerings from Hardkernel are essentially an ODROID-XU4 SOC built into a nice home NAS box. You can think of them like a Linux-powered 8-core dedicated computer with 2 GB RAM and a single hard drive. There’s no video output, so it’s ideal for an always-on headless Debian server. Personally, I’ll be using an ODROID-HC1 because I want to use a SSD and make this tiny server entirely solid-state. If you’d prefer to use a 3.5” spinning drive you can opt for the ODROID-HC2, and follow the same directions below. Choose which model you’d like to go with based on the type of storage you’ll be using.
What you’ll need:
ODROID-HC1
Appropriate power Supply (e.g., 5V 4A barrel plug for HC1)
Case for ODROID-HC1
MicroSD Card for Operating System and Software
2.5” SSD Drive for Torrent Storage
Optional: RTC Battery
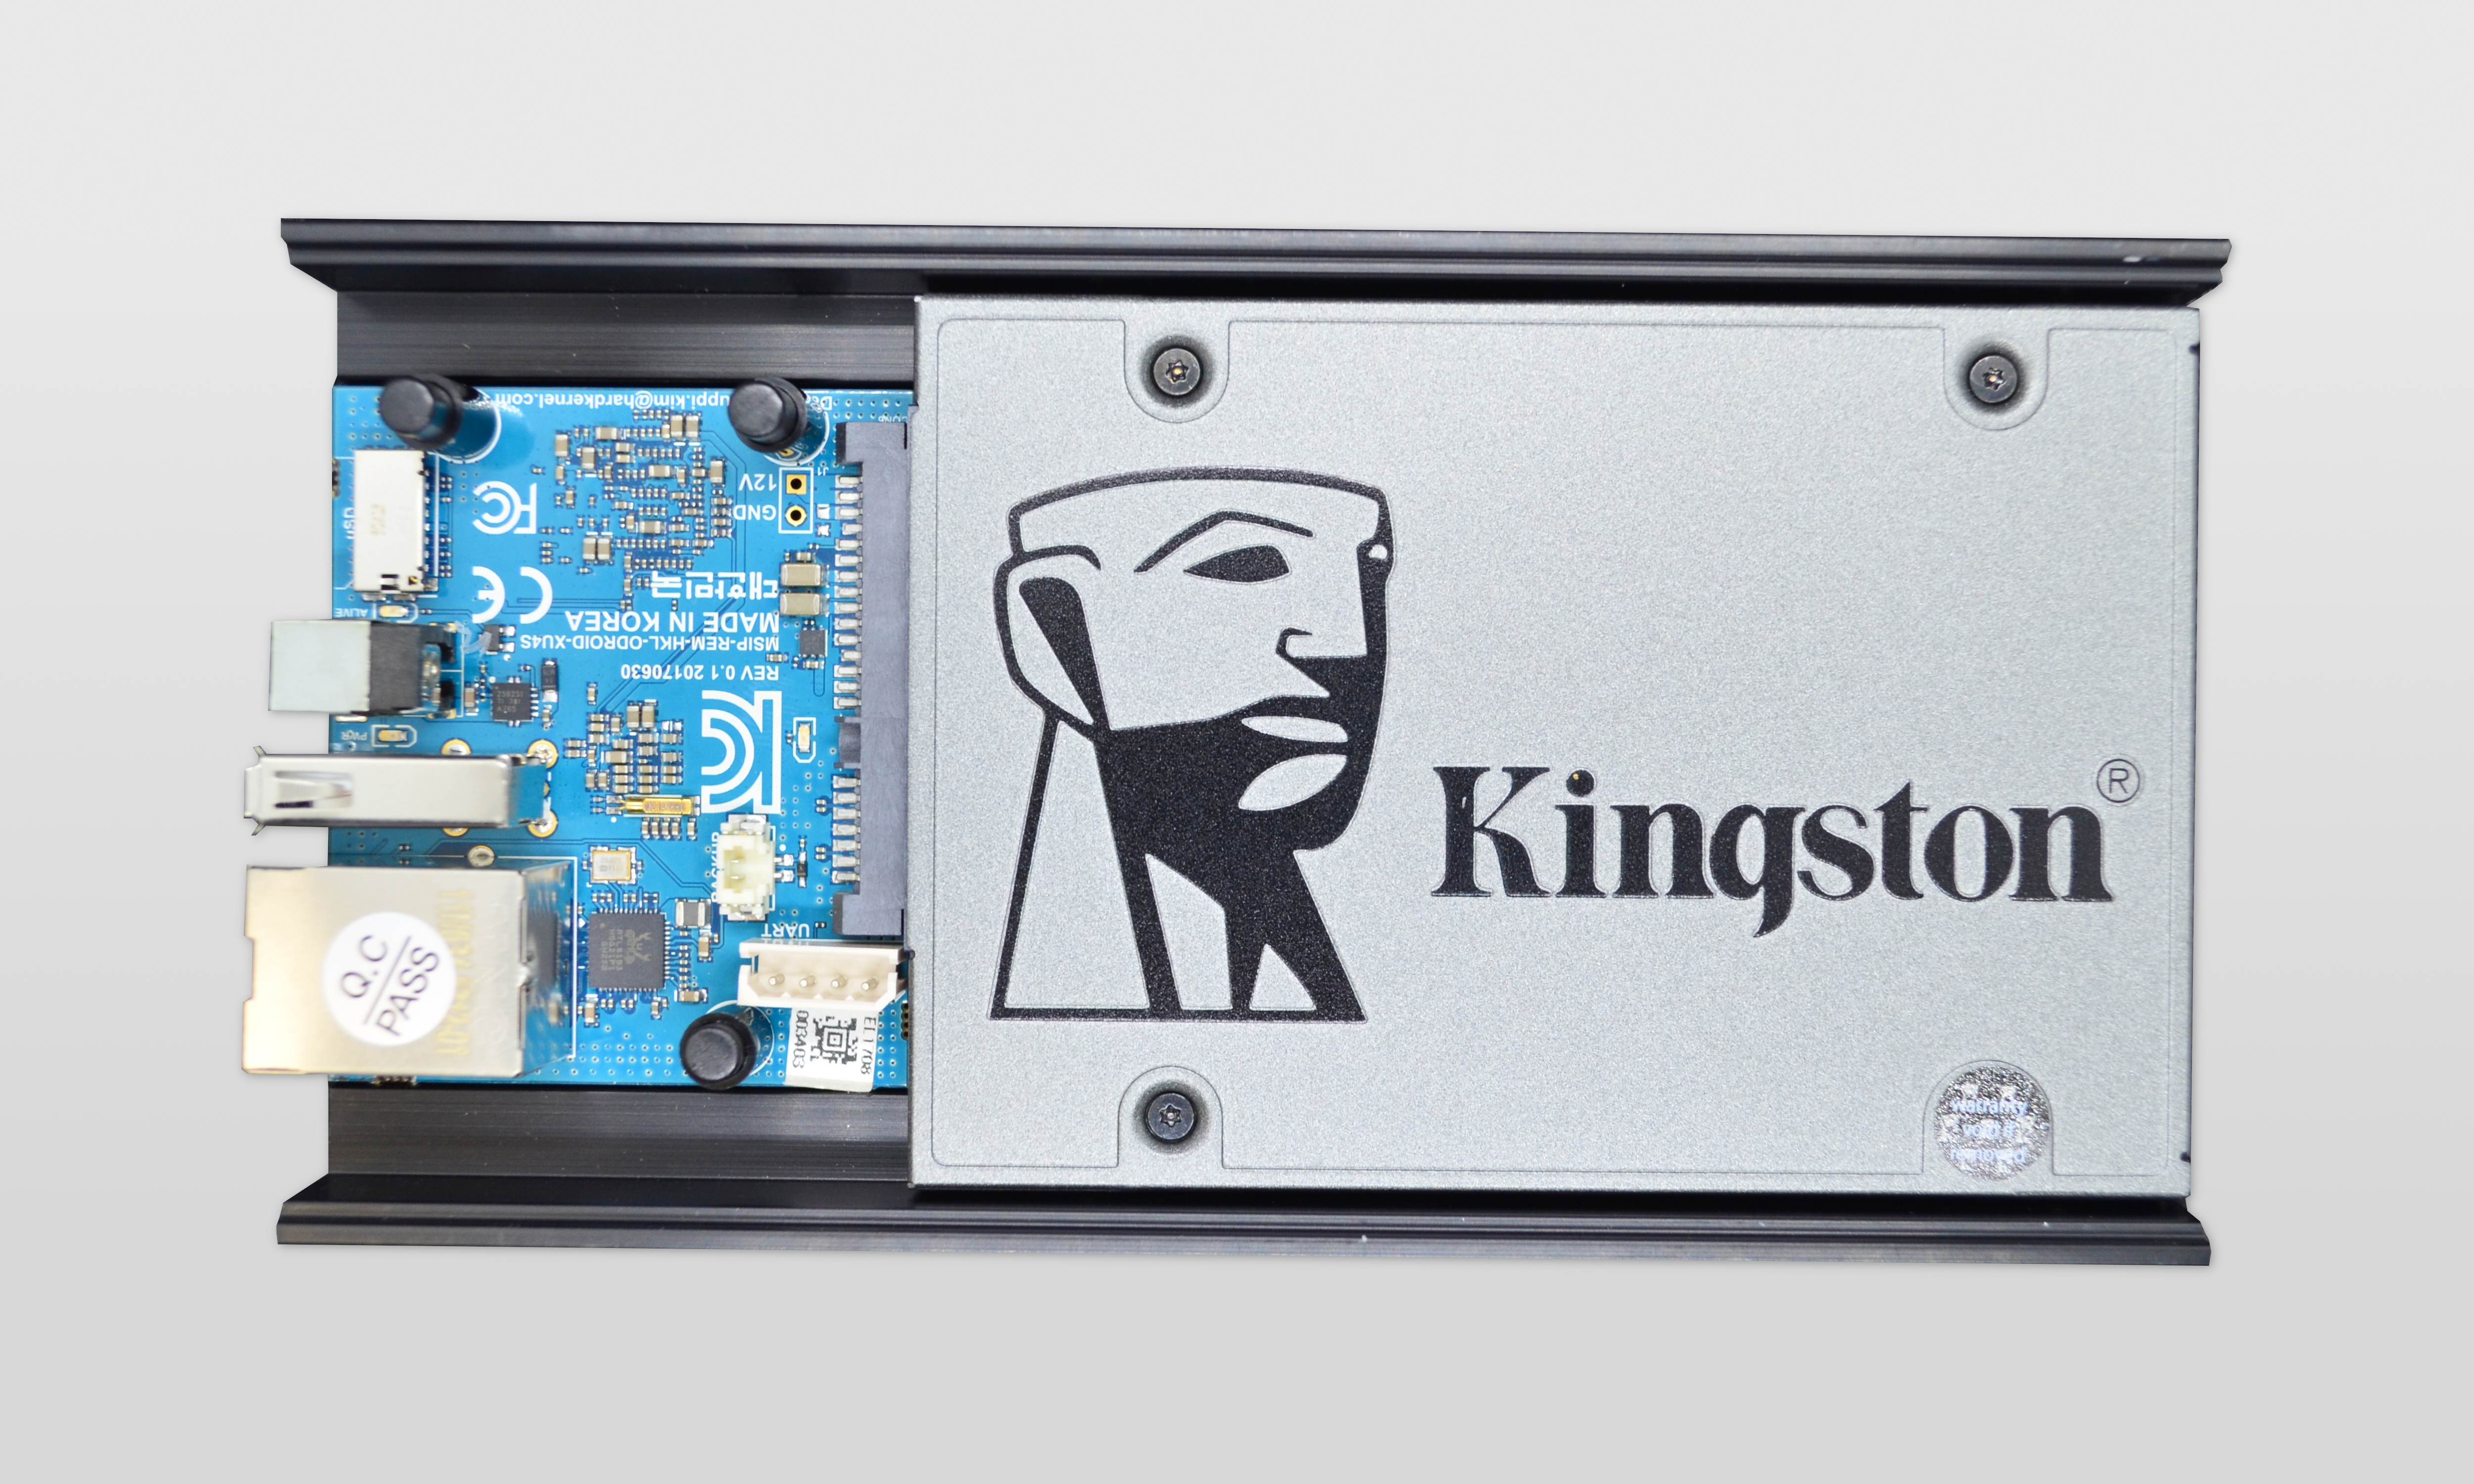
Figure 1 - My ODROID-HC1 BitTorrent Seed Server with a 960GB Kingston SSD
Step 2: Install your SSD into the HC1 chassis and add the case. Insert the MicroSD card and Ethernet cable and boot it up.
Step 3: Find the IP address of your device by checking your network’s DHCP pool. SSH to it using the default username/password: baldnerd/baldnerd Become root by typing: sudo su
Step 4: Check your date/time with the date command. If your date/time are incorrect, certificates will be rejected, which will mean apt will not work, and you’ll have all kinds of problems. So, first things first: you must check to ensure your date and time are correct. If incorrect, set it using the command generated by this helpful tool: https://baldnerd.com/nerdgasms/linuxdate/
And since the ODROID-HC1 has a realtime clock, I’d suggest adding a RTC battery. This will prevent hiccups if your HC1 is ever without power for an extended time, which would reset the system clock to November 2016.
Step 5: Your SSD is located at /dev/sda. I recommend you partition the drive first so it is just one partition using the whole drive. To do this, type the following commands to remove the existing partition(s) and create a new one, keeping in mind this will wipe the drive contents, so if this is not a new drive, please backup your files first:
fdisk /dev/sda
d [enter] If there is more than one partition, delete each
n [enter x 5]
If asked “Do you want to remove the signature?” answer: y [enter]
w [enter]
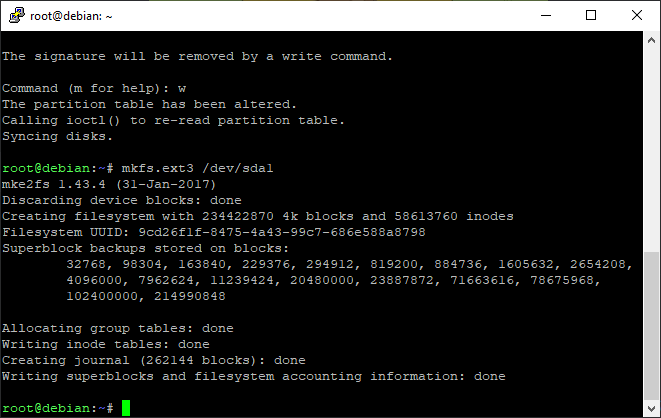
Step 6: Format your new partition: mkfs.ext3 /dev/sda1
Figure 2 - Formatting /dev/sda1
Step 7: Create a new Linux user. For this example I will create “robbie” - replace robbie with your own username:
Step 8: Create a folder where we’ll mount the SSD within that user’s home folder and make it immutable. I’ll call it “ssd”: mkdir /home/robbie/ssd && chattr +i /home/robbie/ssd
Step 9: You could have noted this in Step 6 after formatting the partition, but for good measure we’ll find the UUID with this command: blkid /dev/sda1
Figure 3 - Prepare your mountpoint and find your UUID
D)
Step 10: Make the SSD automatically mount on boot:
nano /etc/fstab [enter]
Add this line to the end of the file, replacing 3333… with your actual UUID from Step 9 and robbie with your actual username from Step 7:
UUID=33333-33333-33333-33333 /home/robbie/ssd ext3 errors=remount-ro,noatime,discard 0 1
Press CTRL-O, [Enter] to save.
Press CTRL-X to exit.
Step 11: Test to make sure the SSD drive mounts successfully:
mount -a [enter]
mount | grep sda1 [enter]
If the drive has successfully mounted, you should see something like this:
root@debian-stretch:~# mount | grep sda1
/dev/sda1 on /home/robbie/ssd type ext3 (rw,noatime,discard,errors=remount-ro,stripe=8191,data=ordered)
Figure 4 - Ensure your drive mounts to your new mount point
If it was not successful, be sure to fix or remove the line from /etc/fstab before you next reboot, otherwise you may not be able to boot the system.
Step 12: Now we are ready to setup the BitTorrent server. I’ll use the headless Transmission Daemon, which is available in the repositories:
apt update && apt install transmission-daemon
Step 13: Create a folder on the SSD to store downloads and give it the correct permissions:
Step 14: It’s time to stop Transmission so we can edit the config. If you forget to stop the daemon, your changes will not save: systemctl stop transmission-daemon
Step 15: Modify the configuration file.
Open the config file for editing: nano /etc/transmission-daemon/settings.json
Change the value of download-dir to /home/robbie/ssd/torrents
Since our BitTorrent server will be accessible on our LAN only (not opening it up for remote access), we can turn off IP whitelisting. Change rpc-whitelist-enabled to false
Save your config by pressing CTRL-O [Enter], followed by CTRL-X to exit.
Step 16: Start Transmission once again: systemctl start transmission-daemon
Step 17: Reboot your new server by simply typing: reboot
Figure 5 - Transmission is up and running, accessible from a web browser on our LAN
That’s it! We’re up and running. If all went well, you’ll be able to open the web interface by visiting http://ip:9091 from your computer, where ip is the actual IP of your new BitTorrent server. The default web interface username is transmission, and the password is also transmission. You can change this by stopping the daemon as you did in Step 14, editing the values within the config file before restarting the daemon.
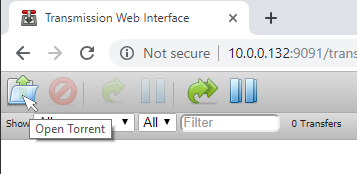
Figure 6 - Open a Torrent file
You can begin using your new ODROID-HC1 BitTorrent Seed Server. Within the web interface, press the “Open Torrent” icon in the top left.
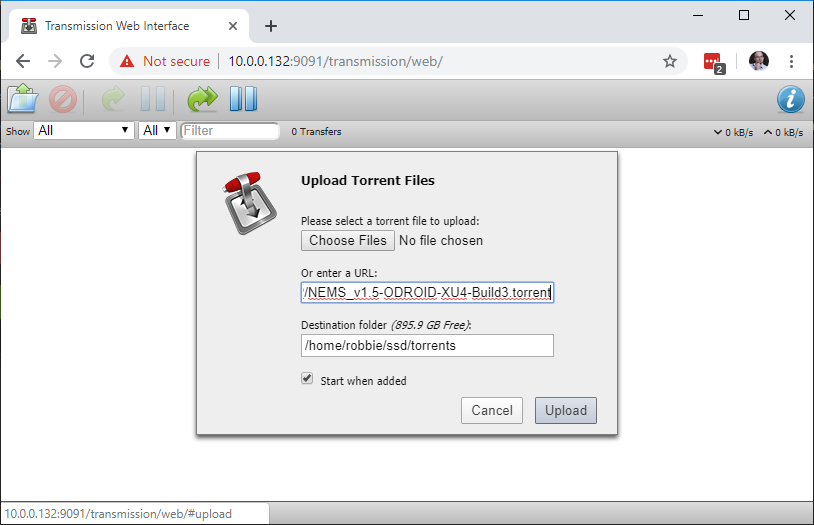
Figure 7 - Add the Torrent file or URL to download
Add the URL to the torrent file you wish to upload, or upload the .torrent file if you have it stored locally. If you’d like to test with the NEMS Linux torrent, please visit https://nemslinux.com/download/nagios-for-odroid.php and copy the link to any of the .torrent files. When the torrent begins downloading, it will be saved to /home/robbie/ssd/torrents, which is your /dev/sda1 partition on your SSD / HDD.
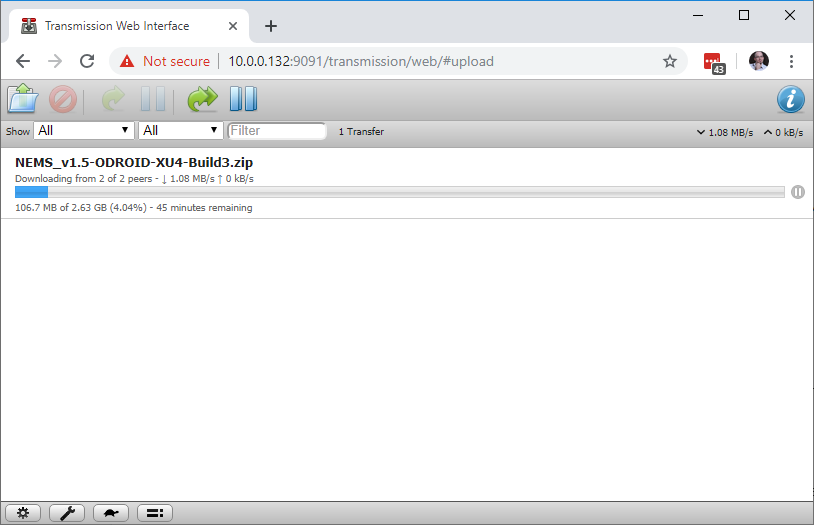
Figure 8 - Your BitTorrent Seed Server is complete and downloading its first Torrent
One final thought: Even though your new ODROID-HC1 BitTorrent Seed Server will only be visible to your internal LAN devices, it is never a good idea to have a system online using the default passwords. Reboot your server, and then login over SSH using the username and password you created in Step 7. If you’re able to login okay, delete the default user: userdel -f -r baldnerd
In next month’s issue of ODROID Magazine, we’ll take the next step together and learn to add and configure network file sharing so we can open our downloaded files directly from a computer on our network.
Footnote
* The Internet is 50 years old, having been invented 1969. It is the World Wide Web however which recently celebrated its 30th birthday. Some mainstream news outlets are reported to have confused the Internet with the World Wide Web, claiming the Internet is just 30 years old. To their credit, the word “Internet” has mistakenly been used synonymously with “World Wide Web” in modern vernacular. However they are two distinct services.
About the Author
Robbie Ferguson is the host of Category5 Technology TV and creator of NEMS Linux. His TV show is found at https://category5.tv/ and his blog is https://baldnerd.com/
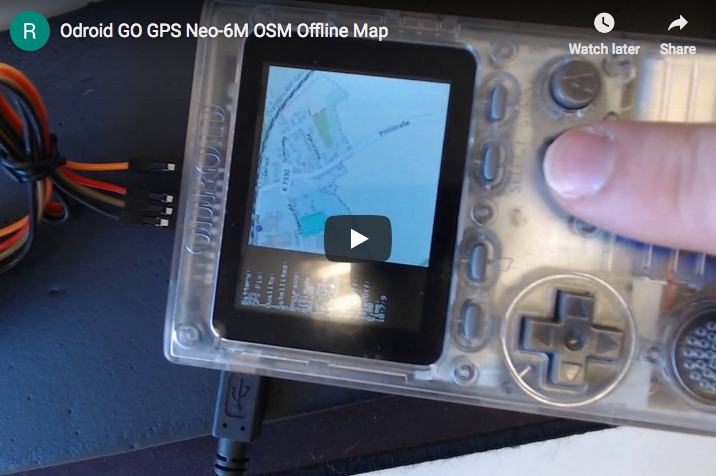
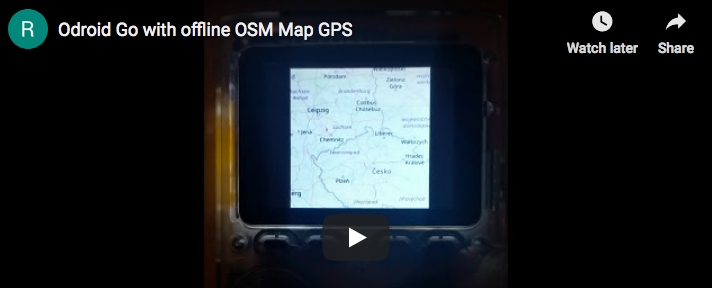
GPS Navigation with ODROID-GO
April 1, 2019By Stefan SchreiterODROID-GO, Tinkering
ODROID-GO is one of those small versatile extensible systems with which, given some imagination, you can create very useful and interesting projects. Here is one such project, that integrates a GPS sensor, to display GPS maps on an ODROID-GO.
A/B = Zoom in/out (Zoom Level goes from 5-16, depending on which tile zoom levels you have)
Select / Start = Brightness
Menu = Reset Movement
Generate tiles
As expected, the design limitations of the ODROID-GO do not permit live maps. So a map would have to prefetched and stored for later use. Tiles are essentially these offline maps.
Tiles can be downloaded on MS Windows system using the TileDownloader.exe application from:
https://bit.ly/2HDsLRh (EDITOR: google’s url shortener does not work for this link)
The single-line command (replace coordinates specific to your location) to create a tile and fetch it:
In both of the previous examples we have configured DHCP to tell a PXE client trying to boot to download the file named “pxelinux.0” from a specific server. This file is part of the pxelinux package of boot loaders. So go ahead and install pxelinux on the same system you will be installing tftp-hpa on. You can find the Syslinux homepage at https://www.syslinux.org/wiki/index.php ... ux_Project and the pxelinux docs at https://www.syslinux.org/wiki/index.php?title=PXELINUX If you ever have plans for expanding your PXE server beyond this little Clonezilla exercise consider studying it.
Setting up tftp-hpa and making Clonezilla bootable over the network
The tftp-hpa package is a very small, lightweight FTP server used almost exclusively for booting over a network. It is light on security so don’t deploy it in a hostile environment unless you have another layer or two of security covering it. Because it is so lightweight configuration is pretty simple but not very standardized. The most important option is setting the root folder for tftpd. A lot of people use some place like /var/lib/tftpboot or /srv/tftpboot or even /opt/tftpboot. I have seen example configs that just have the user create the directory /tftp but I think it’s better not to clutter / with more top level directories. In the end I chose /srv/tftp.root just because I wanted it to stand out in my mind. After you have it installed pick a location, create the directory, and then edit the config file. The config file location varies pretty widely depending on the disto you are using. It could be /etc/default/tftpd-hpa or /etc/xinetd.d/tftp, or even /etc/conf.d/in.tftpd so you will need to consult your distros documentation to make sure you have if configured right. For the purposes of this HOWTO I will use /var/lib/tftpboot as the root directory.
First, lets get pxeliunx.0 in place. It’s installed location will again depend on your distro but it will usually be somewhere is /usr/share or /usr/lib. After we copy it over we will create one directory to hold the files we extract from the Clonezilla .zip file and another directory to hold our boot parameters.
Then we create the PXE bootloader config file. For this HOWTO it will be nothing fancy, or even very pretty. It will just load what we tell it to after a 10 second countdown:
$ cd /var/lib/tftpboot/pxelinux.cfg
$ sudo nano default
Place the following in the “default” config file and don't forget to change the IP address in the last line. As a side note, I found this template somewhere online a while back and I don’t remember where or I would give credit:
# The default menu style - using vesa menu in this example
DEFAULT vesamenu.c32
# If you have a png image in the tftpr directory you can specify it here like so:
# Menu Background image.png
# Prompt user for selection
prompt 0

#Global label identifier
label Clonezilla
        # Set this entry as the default selection
        menu default
        # Actual viewable label text
        MENU LABEL Clonezilla
        # The timeout for the entry is a bit unclear, but 100 should be equivalent to 10 Seconds.
        TIMEOUT 100
        TOTALTIMEOUT 100
        # The kernel image to load.  This entry would actually reside at /var/lib/tftpboot/cz/live/vmlinuz
    #The path is relative to /var/lib/tftpboot or your tftp root directory
        kernel cz/live/vmlinuz
        # The initrd relative to the /var/lib/tftpboot directory and specifying the netboot server, protocol, and file
        # In this example the tftp protocol is used on server 192.168.123.1.  The file is filesystem.squashfs
        append initrd=cz/live/initrd.img boot=live username=user union=overlay config components quiet noswap edd=on nomodeset nodmraid locales= keyboard-layouts= ocs_live_run="ocs-live-general" ocs_live_extra_param="" ocs_live_batch=no net.ifnames=0 nosplash noprompt fetch=tftp://192.168.123.1/cz/live/filesystem.squashfs
Now restart the tftpd service and boot a client computer with PXE. It should work.
Part Three: Creating a File Server With the Network File System
The most common file sharing protocol in the entire *nix ecosystem has to be the Network File System. NFS is what you could call ancient technology. The first versions were developed in-house by Sun Microsystems in 1984. It will soon reach it’s 35th birthday and it’s last major revision was in 2016. So why is a file sharing protocol that old still in use? Well, for the same reason the wheel is still in use. It just works. You can use NFS to share your users’ /home directories from a single server so than no matter what *nix system they log into on your network they will have the exact same contents in /home/user-name. You can use NFS to store the root file systems of diskless workstations or virtual machine images. Basically, any part of a *nix computer’s file system can reside remotely on an NFS server. The network share can be mounted at boot time from an entry in /etc/fstab or by hand with the “mount” command.
NFS is not perfect. Back in 1980’s most software development efforts were focused of “works by default” and not on “secure by default.” Although there have been attempts add security to NFS over the last twenty years none of the solutions proposed has been both easy to set up and easy to maintain. So there really is no standard at this point for securing NFS by default. There is a cool proposal (https://tools.ietf.org/html/draft-cel-nfsv4-rpc-tls-01) that could make a huge impact if it gets adopted. For now I think you are safest installing your NFS file server behind a good firewall and restricting access to it with a sane configuration file. If you have the time to learn you can look into LDAP and Kerberos or even RPCSEC GSS.
Almost every modern Linux distro has the NFS server build into it’s kernel as a module. What is missing is the user-space interface to configure and control it. In Debian the package is called nfs-kernel-server and in most other distros it is named nfs-utils. Go ahead and install it now.
The next step is to decide where your File Server will store the backups and create the directory. For this HOWTO I will use /srv/backups as the shared directory. First we will create the directory and change it’s ownership to least privileged user and group:
The configuration file /etc/exports controls what directories are shared and in what ways users and/or computers can access them. A copy of the man page for /etc/exports is available by visiting https://linux.die.net/man/5/exports or by executing “man exports” in a bash shell.
The exports file has three section per line. It starts with the directory to be shared by the server, followed by who may access it and kind of share options and access that person will have. As an example:
/foo/bar lazlo(rw,sync,root_squash)
Means that I have read/write access to /foo/bar, the server will synchronize any pending disk writes before accepting a new one, and if anyone takes action on this share as root their uid and gid will be changed from root:root (0:0) to nobody:nogroup (65535:65535) for the given action.
Another example:

/home/lazlo    *(r,no_root_squash)
At this point you can restart the NFS service and mount your share on a remote system. Test it by creating some files and directories and then running “ls -al” to make sure that everything is owned by nobody:nogroup. To manually mount the share on Linux Client you will need to install the NFS client package "nfs-common" on Debian based systems. The "nfs-utils" package for most the distros includes both the client and server programs. Once you have installed in you can make a new subdirectory in your home folder and mount the share (don't forget change the IP address in the example):
The file owner should be nobody and the group should be nogroup. If that is the case, congratulations: you are ready to use your File Server with Clonezilla.
Extra Reading
If you have the desire or the need you can tune NFS in a wide variety of ways to best suit your environment. A simple search on Google for “nfs tuning guide” will give you a great foundation. Just remember that there are such a things as “over tuning” and “a point of diminishing returns.”
Dual Cores to GO: Dual Core Processing on the ODROID-GO
April 1, 2019By Dave ProchnowODROID-GO, Tutorial
Who would have guessed?! But, it’s there on page 1 of the Espressif ESP32 WROVER Datasheet:
“There are two CPU cores that can be individually controlled, ...”
And another dual core reference can be found on page 7:
“ESP32-D0WDQ6 contains two low-power Xtensa® 32-bit LX6 microprocessors.”
Well, that’s interesting to know, but how can these dual cores be used on the ODROID-GO? For example, how can a program written in the Arduino Integrated Development Environment (IDE) take advantage of the ESP32 dual cores?
It’s remarkably easy to use the dual cores inside the ODROID-GO, but first let’s gather some basic background information.
When a “traditional” Arduino sketch, meaning a program that contains the setup()and loop()function, runs it is only using one of the cores. That core is Core 1, the second core (starting from 0). You can prove this to yourself by adding the xPortGetCoreID()call to your setup and loop functions. When piped to the Serial Monitor of the Arduino IDE (see Figure 1), you should see the current core’s value, Core 1.
Figure 1 - The Arduino Serial Monitor is activated with this button.
Now the original code used for the discovery and implementation of the dual cores in this article came from an article by Rui Santos at randomnerdtutorials.com and via a blog on February 14, 2019, and a post on SparkFun Electronics at sparkfun.com. If you’d like to learn some additional information about programming dual cores in Arduino, start with these two resources. Then you can enable your ODROID-GO to do two things at once.
Step-By-Step Instruction
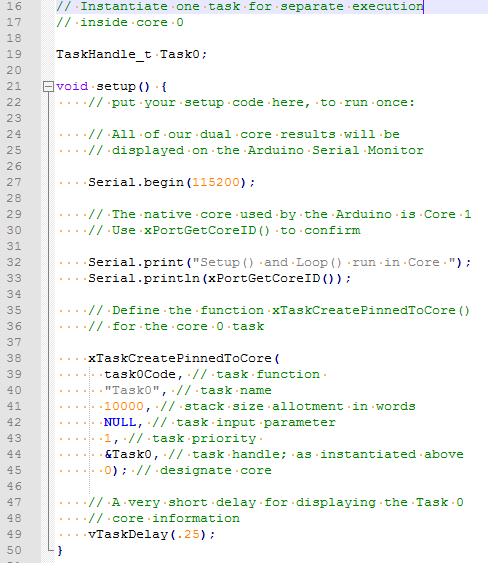
1. Enter this example Arduino sketch:
/*
* Dual Core Demonstration for
* ODROID-GO
*
* Derived from code by Rui Santos
* at randomnerdtutorials.com
*
* Mentioned in SparkFun Electronics
* blog on February 14, 2019
* at sparkfun.com
*
* ODROID Magazine
* by Dave Prochnow
*/

// Instantiate one task for separate execution
// inside core 0

TaskHandle_t Task0;

void setup() {
   // put your setup code here, to run once:

   // All of our dual core results will be
   // displayed on the Arduino Serial Monitor

   Serial.begin(115200);

   // The native core used by the Arduino is Core 1
   // Use xPortGetCoreID() to confirm

   Serial.print("Setup() and Loop() run in Core ");
   Serial.println(xPortGetCoreID());

   // Define the function xTaskCreatePinnedToCore()
   // for the core 0 task

   xTaskCreatePinnedToCore(
     task0Code, // task function
     "Task0", // task name
     10000, // stack size allotment in words
     NULL, // task input parameter
     1, // task priority
     &Task0, // task handle; as instantiated above
     0); // designate core

   // A very short delay for displaying the Task 0
   // core information
   vTaskDelay(.25);
}

// Create the core 0 task function; which will run
// forever

void task0Code( void * pvParameters) {
 Serial.print("This is Task0 running in Core ");
 // Label the core with xPortGetCoreID
 Serial.println(xPortGetCoreID());
 int x = 0;
 String xPreamble = "Core 0 - ";
 // You can create an infinite loop with for(;;)
 for(;;){
   Serial.println(xPreamble + x);
   x++;
 }
}

void loop() {
   // put your main code here, to run repeatedly:
   // This function will run in Core 1
 int y = 0;
 String yPreamble = "Core 1 - ";
 for(;;) {
   Serial.println(yPreamble + y);
   y = y + 2;
 }
}
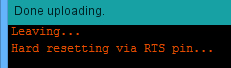
2. Compile this program and upload it to the ODROID-GO (see Figure 2).
Figure 2 - Your sketch has been properly compiled and uploaded to the ODROID-GO when this response is visible in the output monitor.
3. Leave the ODROID-GO connected to your PC and immediately, switch OFF the power switch.
4. Now open the Serial Monitor and set the baud rate to 115200 as shown in Figure 3.
Figure 3 - Ensure that the Serial Monitor baud rate is set at 115200.
5. Toggle the ODROID-GO power switch ON-OFF very quickly. This fast switching will enable just a short burst of dual core information to be sent to the Serial Monitor.
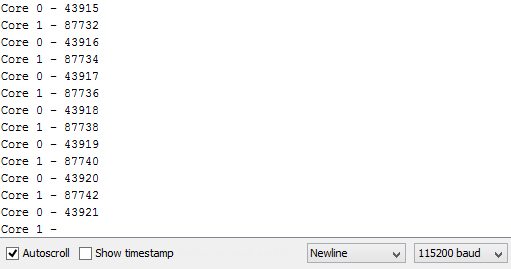
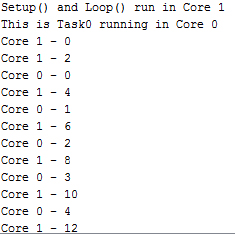
6. Scroll up to the top of the Serial Monitor print out and review the lines that are printed after the ESP32 startup information. You should see a couple of core IDs and a long list of incrementing values that are being calculated by each core similar to the display in Figure 4.
7. Now adapt this technique to your own Arduino challenges (see Figure 5) and teach your ODROID-GO how to walk and chew code and the same time.
Figure 5 - Adapt your own code to Core 0 tasks on the ODROID-GO
Google Home: Using the ODROID-C2 as a personal assistant
April 1, 2019By @codewalkerAndroid, ODROID-C2, Tutorial
This article describes how to install Google Home on the ODROID-C2. Google Home is a brand of smart speakers developed by Google. Google Home speakers enable users to speak voice commands to interact with services through Google's personal assistant software called Google Assistant. A large number of services, both in-house and third-party, are integrated, allowing users to listen to music, control playback of videos or photos, or receive news updates entirely by voice. Google Home devices also have integrated support for home automation, letting users control smart home appliances with their voice.
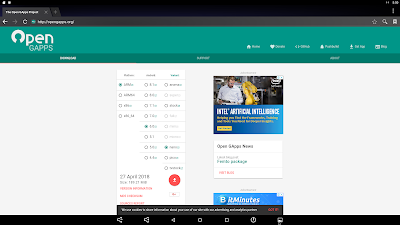
First, open a browser on the ODROID-C2 and visit http://opengapps.org.
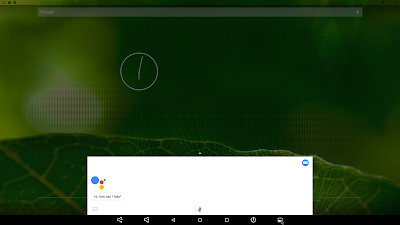
Figure 1 - Choose the “nano” variant and press Download
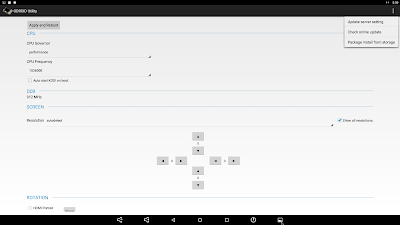
Next, open the ODROID Utility app.
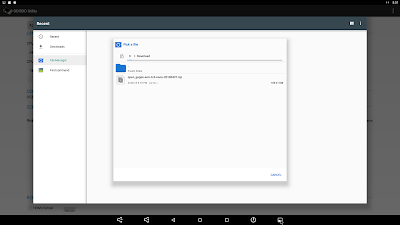
Figure 2 - Click the menu and select "Package install from storage"
Figure 3 - Select the zip file that was just downloaded
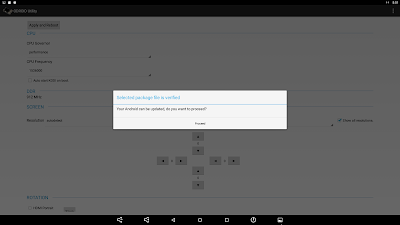
Figure 4 - The zip file has been applied
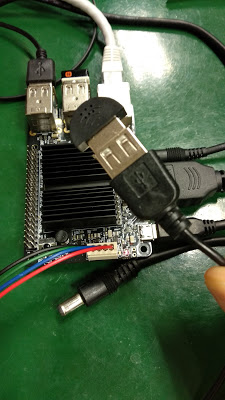
Figure 5 - Connect the USB microphone
Alternatively, the ODROID USB camera may be used (http://www.hardkernel.com/main/products/prdt_info.php?g_code=G146883099080)
Figure 6 - ODROID USB camera
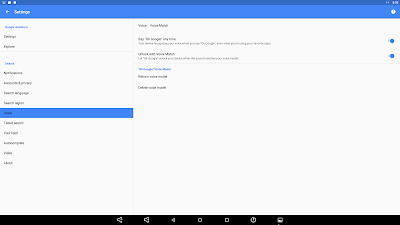
Next, open the Google app.
Figure 8 - Install Google Assistant
Currently, the ODROID-C2 only supports the English language. For comments, questions, and suggestions, please visit the original post at
https://codewalkerster.blogspot.com/2018/04/.
The G Spot: Your Go-To Destination for All Things Android Gaming
April 1, 2019By Dave ProchnowAndroid, Gaming, ODROID-C2, ODROID-XU4
These ODROIDs are alive with the sound of Android gaming! From C (e.g., ODROID-C2) to X (e.g., ODROID-XU4), gaming on your favorite console has never been more fun. So open your Google Play Store app and let’s get downloading.
Run Garfield, Run!
Recently updated and free to play, Garfield Rush is still trying to catch that rascally cat (Figure 1). Just like before, there are tons of things to collect, 18 new costumes to be unlocked, and--love ‘em or hate ‘em--more and more “free” reward videos to watch. The version 5.0 update is still free to own, so lace up your paws and move out.
Figure 1 - Garfield Rush is an endless running game with a cartoon flavor
Fortnite Free Forever
Mega-hit Fortnite has just received a new patch that purportedly brings 60 fps gameplay to select Android devices. Will ODROID devices be one of the few, one of the proud, one for the game? Along with the enhanced frame rate, Fortnite also returns to gifting with a free Season 8 Battle Pass. Not trying to “crack-your-toe-a”--a very poor pun reference to a legendary 1889 volcanic eruption in Indonesia--Season 8 includes a volcano, as shown in Figure 2, with a couple of lava vents. These vents lead to new adventures in “Lazy Lagoon” and “Sunny Steps.” Just watch out for the Pirate Cannon.
Figure 2 - Geesch, now lava, Fortnite just keeps getting more and more over the top
A little birdie told me that Human: Fall Flat could be coming to Android within the next one to two months. You’ll recall that this app from No Brake Games revolves around a physics-induced dream environment (Figure 3) with a game piece named Bob. Bob’s daily duties include puzzles, surprises, and naturally, dangers. In meeting these challenges, Bob must pull, push, carry, climb, and break his way to success. Already a hit release on consoles and PCs ($14.99 USD), Human: Fall Flat has over 5 million reasons to enter the Android market. But this birdie could be wrong: this is, of course, the same birdbrain that told me ODROID-N1 would be released soon!
Figure 3 - Bob, Bob, Bob—what have you gotten yourself into now?
It’s a Wild, Wild, Wild, Wild, Wild, and Wacky World
From Crescent Moon Games, the devs who brought us Morphite and Ravensword Shadowlands, comes an unreal platform game. Linn: Path of Orchards (Free; $2.99 USD in-app purchases) outwardly looks like any other platform puzzler. The only trouble is that the game world itself is playing against you, trying to pitch you off the world! As weird as that sounds, Linn moves and grooves in an attempt to make you fall off the world before you can complete each level (Figure 4). Your namesake in this animated M.C. Escher-like world is Aban, a self-described “exotic” guardian of nature. All you have to do is help her rejuvenate the ancient tree of light. Good luck doing that.
Figure 4 - Hang on Aban or it’s curtains in Linn: Path of Orchards
Does Freedom Fighter = Terrorist?
Holy cow, Ndemic Creations are back with a vengeance. The developers who made contagions fun with Plague, Inc. have launched a strategic game called Rebel, Inc. (Figure 5). Actually, mid-February saw the release of Rebel, Inc. (FREE; $2.99 USD in-app purchases) for Android and since then gamers have been downloading it in droves. Once you get your head wrapped around the concept, Rebel, Inc. could become as addictive as Plague, Inc. That’s an estimated +100 million downloads for that app. Ka-ching. In Rebel, Inc. there are five world regions, depicted in gorgeous graphic detail (Figure 6), that are experiencing unrest. Sounds pretty realistic, eh? Your role is to prop up governments, suppress insurgency, and become the people’s patriot. Just an average day at the office, right?
Figure 5 - Plan your next move very carefully or you could be toppled
Figure 6 - That helicopter landing pad is gonna cost you
Go Android, Go–ODROID Magazine’s March Top Ten
10. Plunder Kings - FREE--Cracking the top ten already!
9. Asphalt 9: Legends - FREE
8. Minecraft - $6.99 USD
7. The War of Mine - $14.99 USD/developer expansion pack $1.99 USD
6. Crashlands – $4.99 USD
5. Fire Emblem Heroes – FREE
4. The Escapists 1 and 2 - $6.49 USD & $6.99 USD; Who’d have thunk it, right?
3. Shadowgun Legends – FREE
2. Riptide GTP Series - $2.99 USD--This could be the best Android racer!
1. PUBG Mobile – FREE; +10M downloads can’t be wrong, right?
Finally, Auto Android
Apple CarPlay dominated the Consumer Electronics Show (CES) 2019, but Google is now making a strong catch-up play. At a special media event held in Mountain View, California on April 1st, Alphabet, the parent company of all things Google, dropped a bombshell announcement on a totally surprised select audience of news journalists and automotive industry executives.
Starting in the first week of April, all forthcoming Dodge/Chrysler/JEEP vehicles will shun Apple CarPlay in favor of a secretly developed Android OS product. According to Executive Vice President of Marketing, Ms. April Foole, "The presence of Android in an all-American automobile will be showcased with an incredible limited edition stainless steel vehicle."
"Today Alphabet, Dodge/Chrysler/JEEP, and Google are extremely proud to present the 2020 Dodge
RAM SS Pickup Truck powered by HemiRoid!"
"This is electrifying," screamed Elon Musk.
Happy April Fool's Day, folks!
PiHole
April 1, 2019By Dennis (blaumedia.com)ODROID-XU4, Tutorial
Since Docker added support for the Raspberry Pi, many other ARM boards got supported as well. The ODROID-XU4 is predestined for Docker because it has much more power and RAM than a Raspberry Pi. My first project, that I wrote about some weeks ago on my blog, was PiHole in combination with two DNS-over-TLS tunnels to Cloudflare and Google DNS.
But what is that? PiHole is a DNS blackholing tool that blocks requests to specific domains so your end-devices can’t even load the IP addresses of the supposed ad servers to connect. On a PC, it’s not even closely effective as an adblocker, but what about mobile apps, smart tvs or other devices where you can’t install an adblocker? PiHole has a great community and many help tutorials.
And what is DNS-over-TLS / DoT? The DNS protocol itself is quite old and, at the time when it was written, nobody cared about encryption. So, every time you visit a website, you basically send an unencrypted request to a DNS server that could be read by anyone between you and the DNS server. Doesn’t sound good right? DNS-over-TLS puts a TLS-Encryption-Layer onto your request so only you and the DNS server know what domain you’re requesting.
In this tutorial, I would like to show you how to install PiHole and two DNS-over-TLS tunnels to the Google DNS and Cloudflare DNS within Docker to easily administrate it.
Install Docker
The installation of docker and docker-compose is very simple. Open up an SSH connection and paste in the following:
$ sudo su
$ cd ~
$ curl -fsSL https://get.docker.com -o get-docker.sh # Docker repositories import of Docker, Inc.
$ sh get-docker.sh # Import repositories
$ apt install docker-ce python3-pip # install Docker and pip3
$ systemctl enable docker-ce # start Docker at startup
$ systemctl start docker-ce # start Docker now
$ pip3 install docker-compose # install Docker Compose
Docker-compose is needed to orchestrate multiple docker containers that belong together. It simplifies the whole management.
Install PiHole and DoT-Proxy
After installing docker and docker-compose, we can continue with the interesting parts. Both DNS servers, Google and Cloudflare, have an uptime of almost 99% to 99.99% percent. To prevent my network being down due an downtime of one provider, I’ve decided to choose multiple different providers. To setup the DoT-tunnel, I’ve found a great Docker image from qdm12 on github (https://github.com/qdm12/cloudflare-dns-server) that works flawless for many months now. The image supports also the DNS servers of Quad9, Quadrant and CleanBrowsing. Otherwise, you can edit the entrypoint.sh file and add your own DoT-providers. So, to install and start it, paste the following commands into a BASH terminal window:
$ apt install git
$ cd ~ && git clone https://github.com/qdm12/cloudflare-dns-server.git ./dns-server
$ cd dns-server
Now open the docker-compose.yml file and change the settings. I recommend setting the BLOCK_MALICIOUS option to off, because, in my opinion, it blocks too much, and I’ve experienced several false positives with it. You can add blocklists for malicious pages later in PiHole. To see the other possible settings, you can have a look at the github readme at https://github.com/qdm12/cloudflare-dns-server#environment-variables.
When you’ve finished, you can start it with the command “docker-compose up --build” (or “docker-compose up --build --d” to run it in the background). If you’ve changed the docker-compose.yml file, I always recommend building the compose stack again with --build. Otherwise a “docker-compose up --d” to start and “docker-compose down” to stop is enough. Just be sure to run the command in the directory of the project. Next, let’s test that the server is working:
$ apt install dig
$ dig blaumedia.com @ 127.0.0.1
The output should look like the following:
; <<>> DiG 9.11.3-1ubuntu1.3-Ubuntu <<>> blaumedia.com @127.0.0.1
;; global options: +cmd
;; Got answer:
;; ->>HEADER<<- opcode: QUERY, status: NOERROR, id: 42751
;; flags: qr rd ra; QUERY: 1, ANSWER: 1, AUTHORITY: 0, ADDITIONAL: 1

;; OPT PSEUDOSECTION:
; EDNS: version: 0, flags:; udp: 4096
;; QUESTION SECTION:
;blaumedia.com.            IN    A

;; ANSWER SECTION:
blaumedia.com.        86400    IN    A    159.69.38.130

;; Query time: 100 msec
;; SERVER: 127.0.0.1#53(127.0.0.1)
;; WHEN: Wed Feb 13 18:14:59 CET 2019
;; MSG SIZE  rcvd: 58
It’s working? Nice! Now let’s add another DoT-proxy and PiHole. First, I would like to show you my docker-compose.yml file and afterwards explain it. You can just copy and paste it into your docker-compose file.
At the beginning, you should add the IP address of your device in line 47, which you can find it out easily with the shell command “ip route get 1.1.1.1 | awk '{print $NF; exit}'”. Afterwards, set a password in line 51 for the pihole web interface.
But what are we doing exactly? To let the two DoT-proxies be accessible by PiHole, we have to give them static IP addresses. We’re adding a network bridge at the bottom of the file to accomplish this. We set the IPs of the proxies in line 49 and 50 as upstream servers for PiHole. In line 34 and 35, we set the upstream servers for the PiHole container itself. The first has to be 127.0.0.1, and the second should be a normal DNS server, which will be used for starting the container. I have chosen the IP address of my network router.
In lines 53 and 54, we mount the config directories of PiHole out of the container, so it’ll be persistent and won’t get deleted on every new build process of the container. If you’ve finished everything, you can start the compose stack again with a “docker-compose up --d --build” command.
Adding ad lists to Pihole
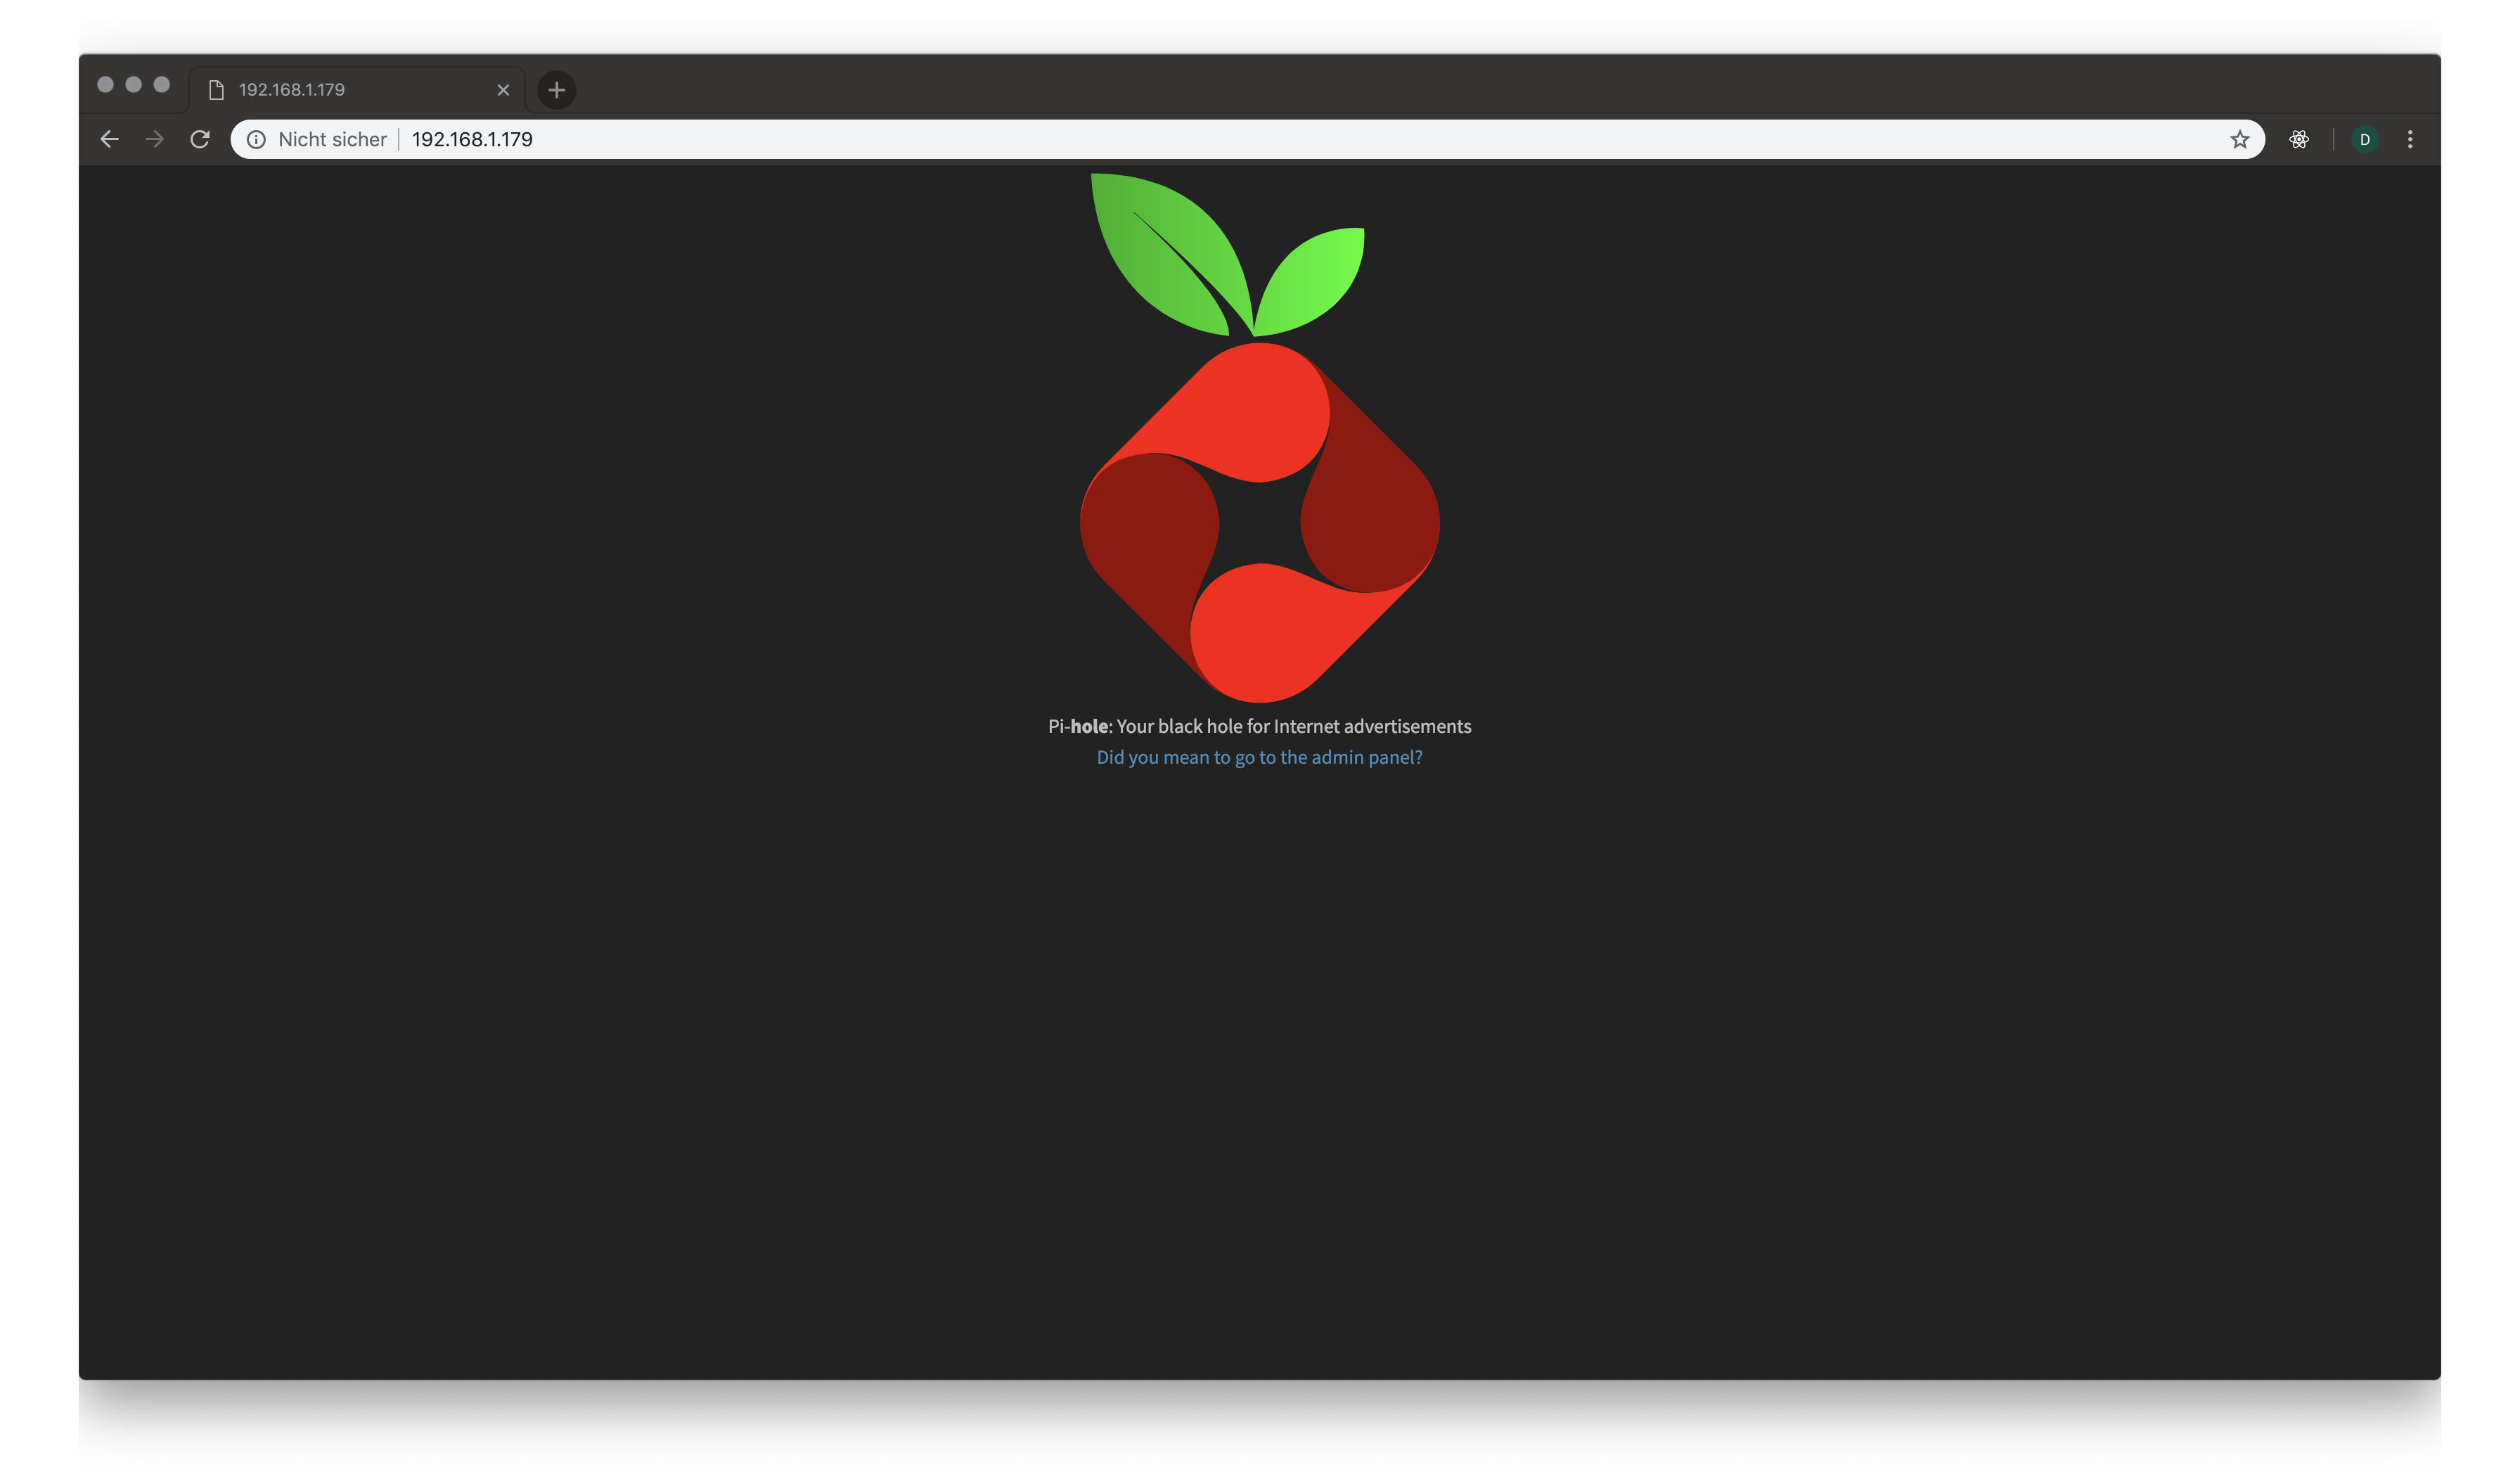
To open the web interface, you just have to put the IP address of your ODROID into your browser, as shown in Figure 1.
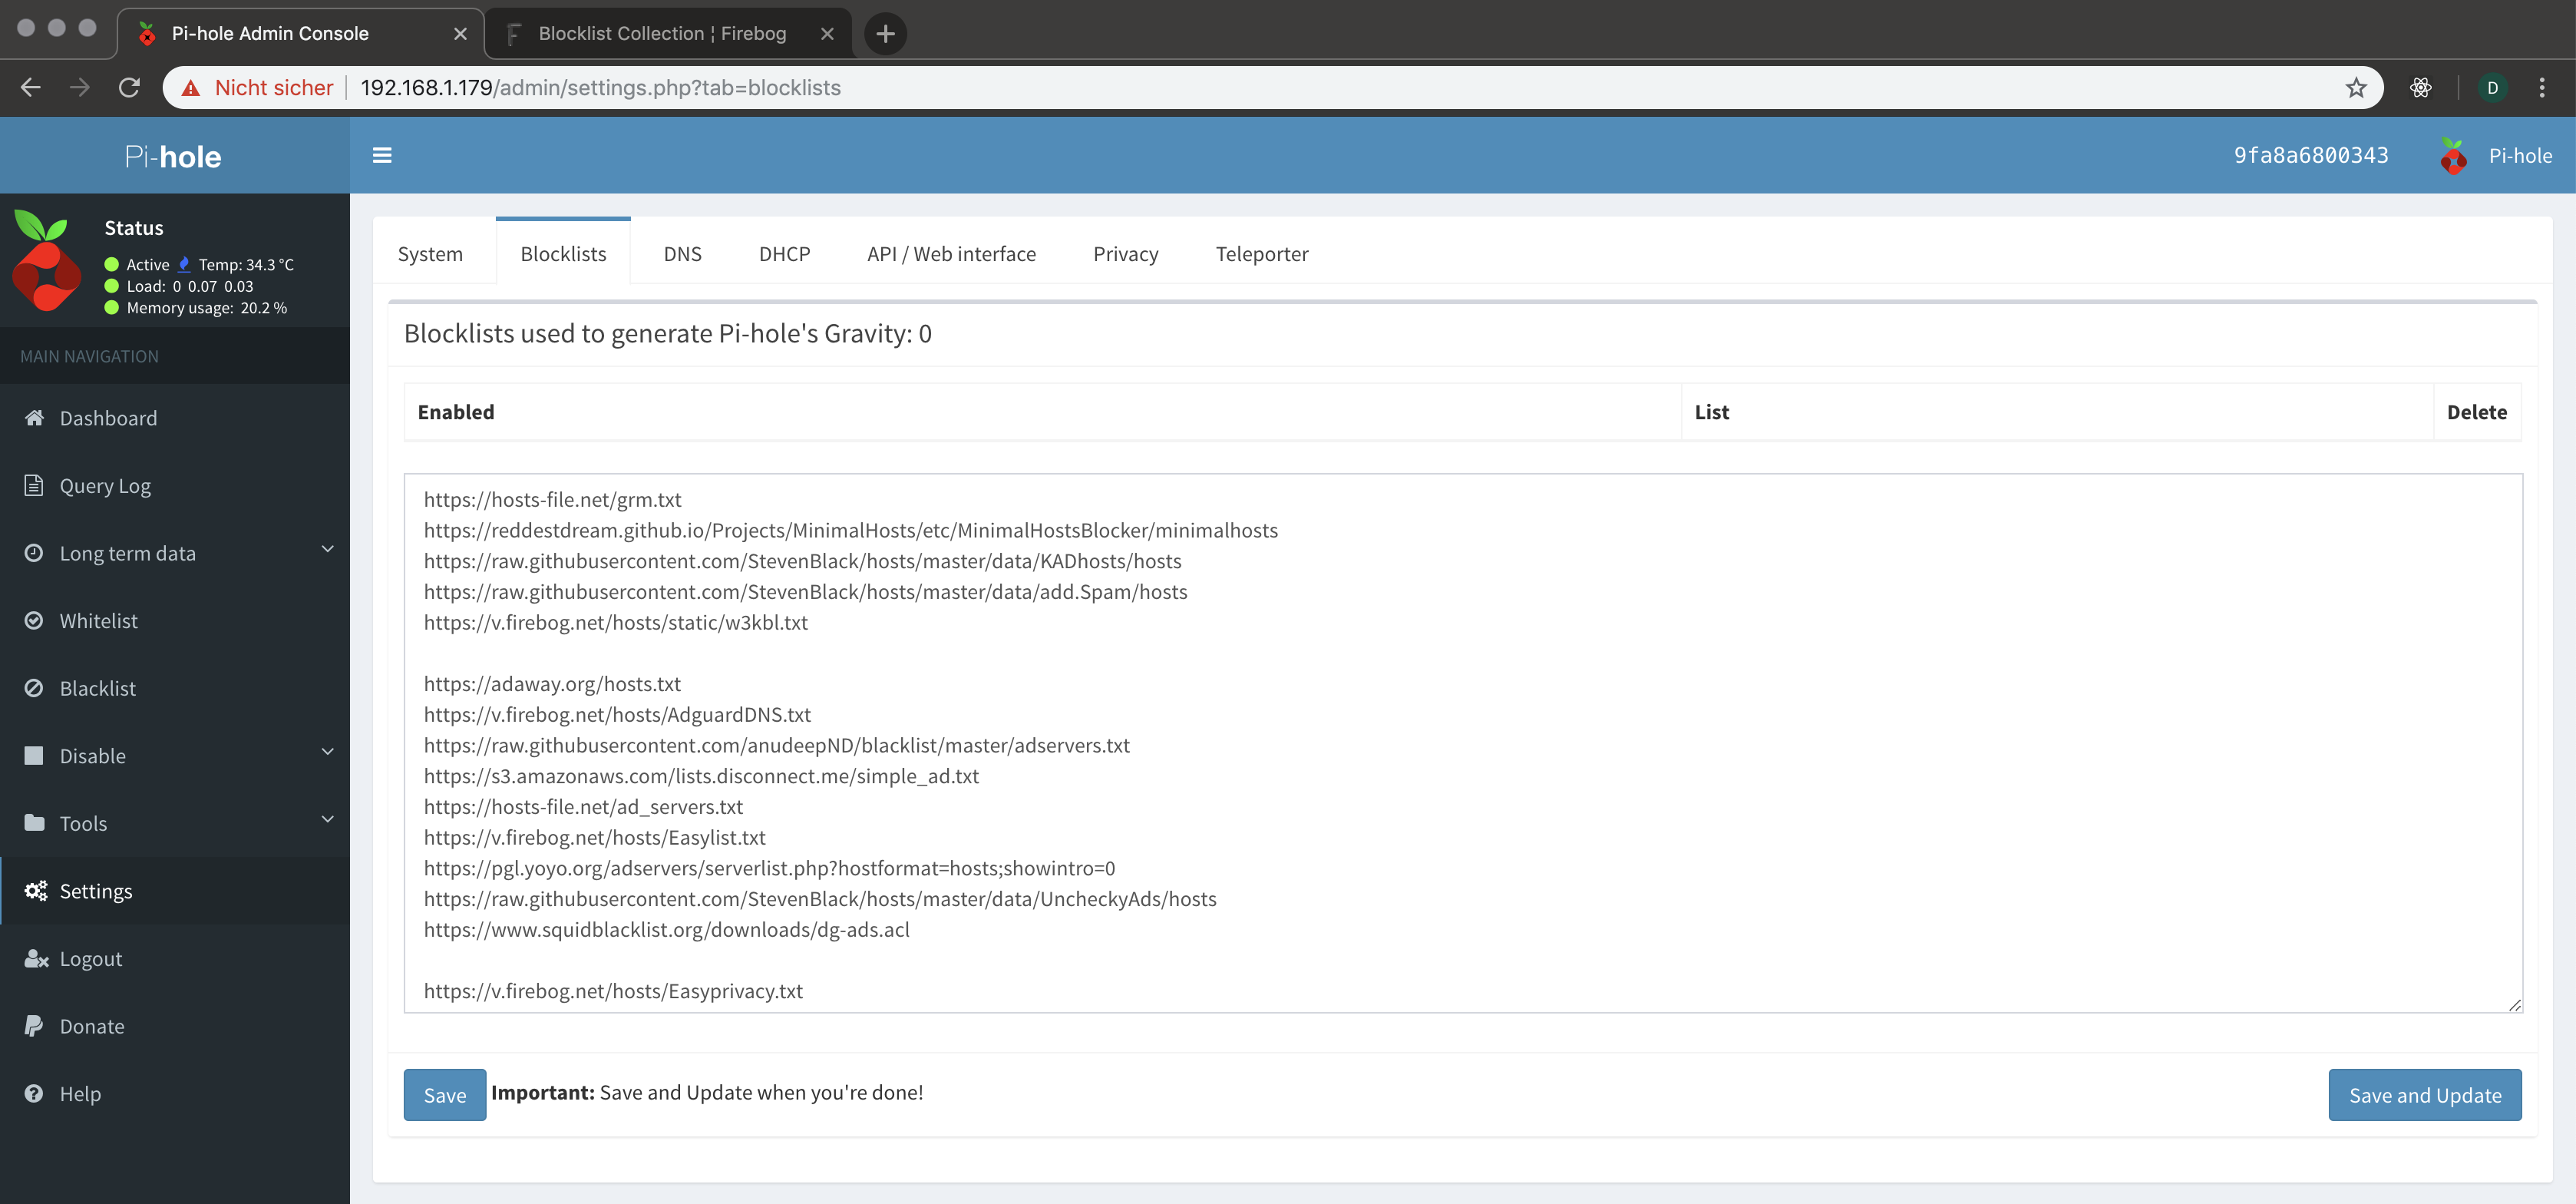
Now click the “Did you mean to go to the admin panel?” and click on “Login” to continue to the next page. Put your configured PiHole password and voilà, you’re in! You should check the DNS connectivity again with dig and if everything works correctly, you can continue with adding blocklists. I got my lists from https://firebog.net/, and insert them into PiHole via the “Settings” => “Blocklists” menu, as shown in Figure 2.
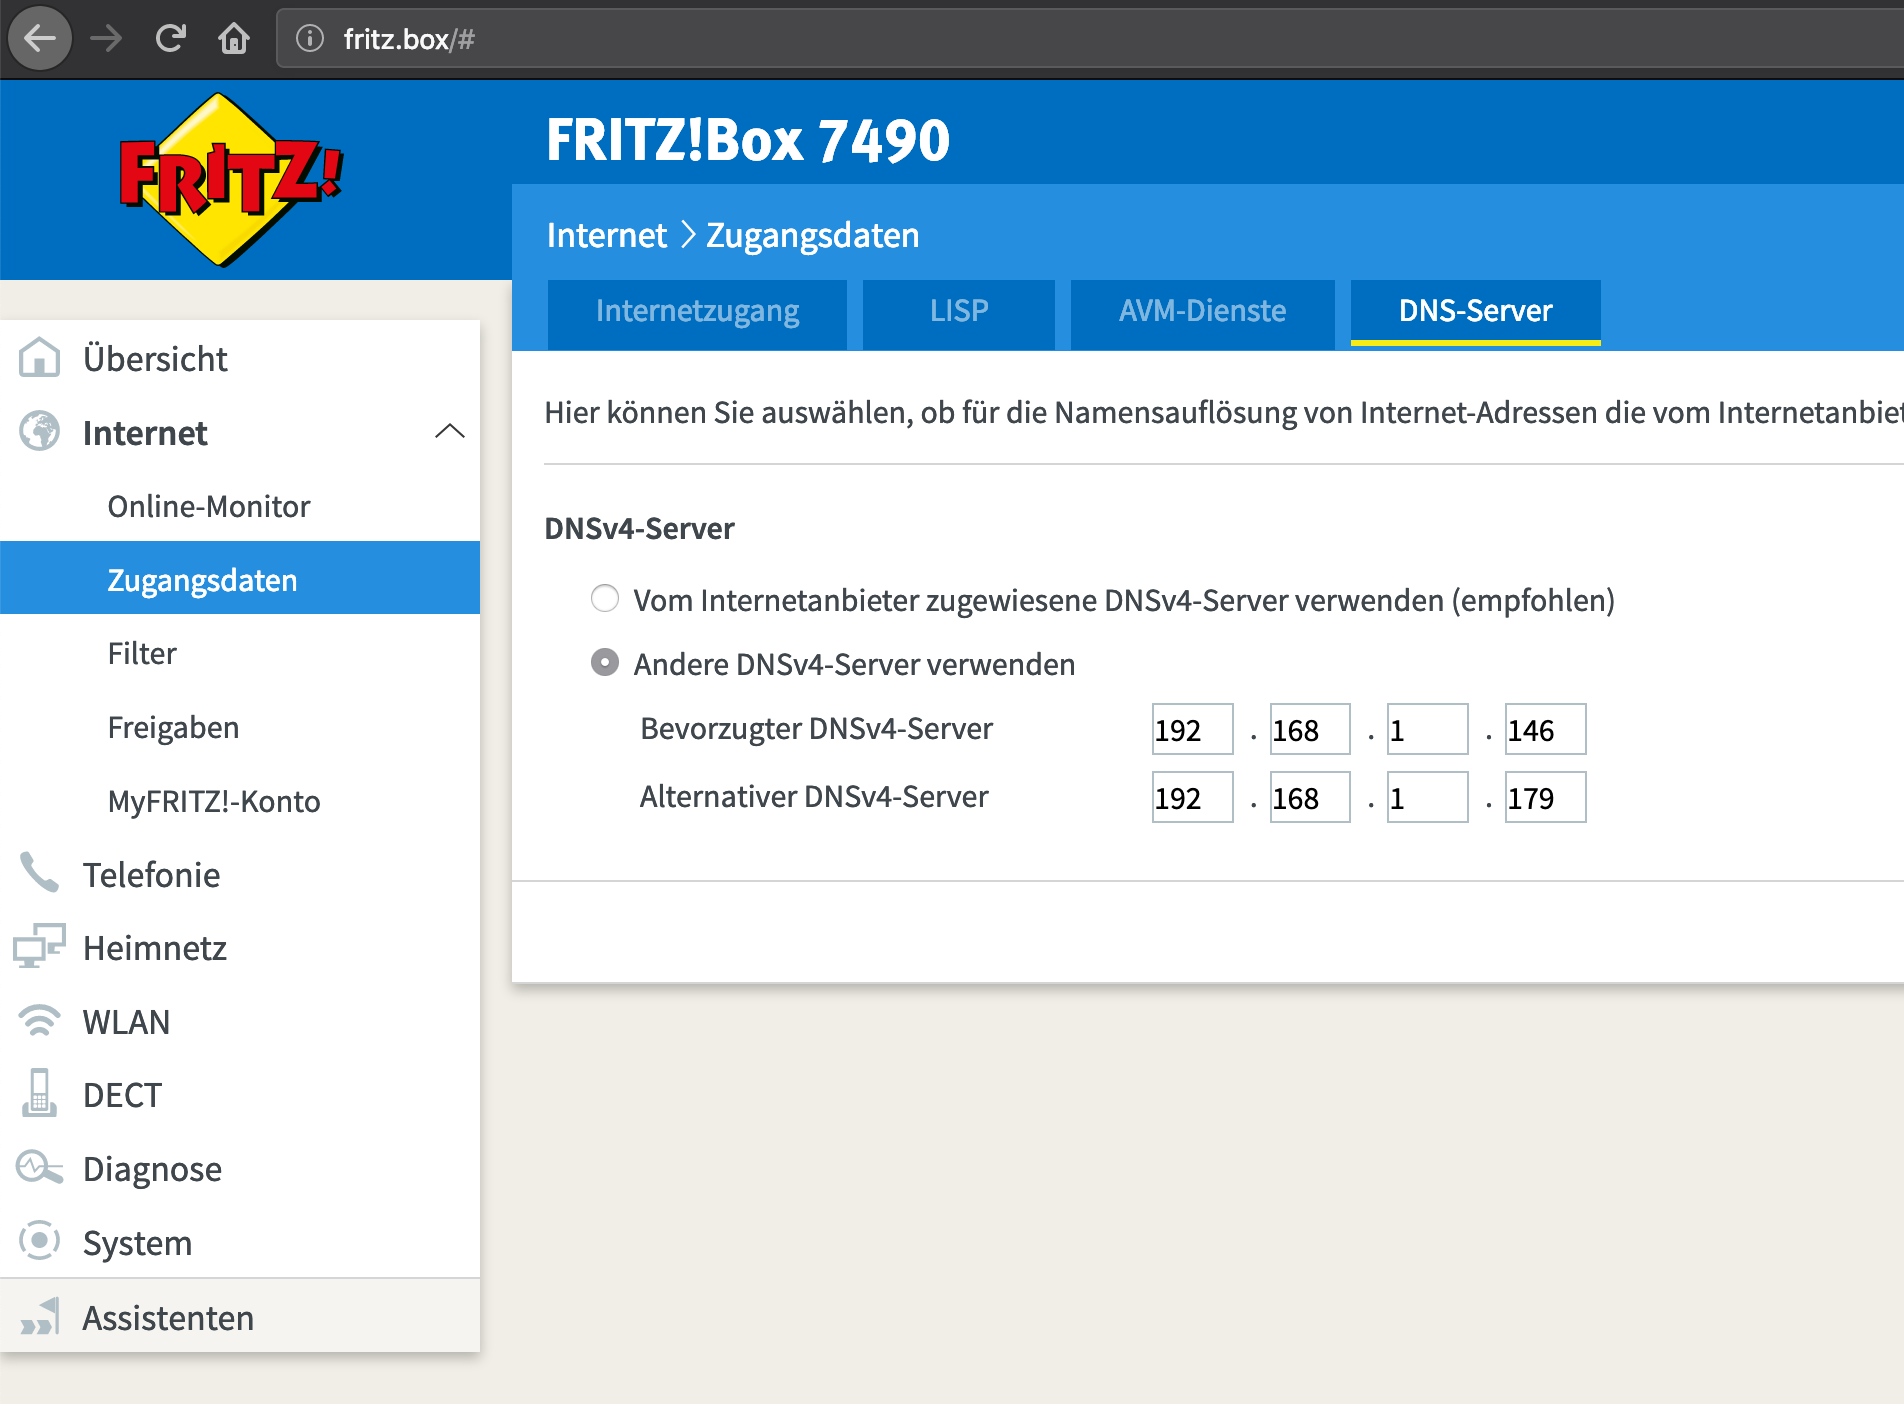
Now you have an encrypted, ad-blocking DNS server. When you’ve checked that everything works, you can set the DNS server of your network router to the ODROID so that every device in your network uses your PiHole . In my case, I have a Fritzbox, which looks like Figure 3.
I have 2 devices with PiHole to have a backup service if I’m updating one. Just paste your IP address there, and from then on, your network devices get ad-filtered DNS responses.
Do you have any questions or experience any problems? You can contact me in the comment section on the original German post at https://blaumedia.com/blog/odroid-raspberry-pi-pihole-dns-over-tls-docker/.
Linux Gaming: Box86- A New x86 Emulator for ODROIDs
April 1, 2019By Tobias SchaafLinux, Tutorial
This month, I’m throwing in something different for a change. Some of you may have already read about it in the forums at https://forum.odroid.com/viewtopic.php?f=91&t=34070, and I want to talk about it: Box86, which is a new kind of x86 emulator for ARM running on ODROIDs.
What is Box86?
Box86 is a x86 emulator that allows you to run x86 Linux applications on your ODROID. This enables you to run programs (or probably mainly games) that were not written for ARM boards and are not open source, which is the case with most commercial software. As these games most of the time do not exist for ARM, we are normally left out playing them on SBCs like the ODROID, although the device would be capable of running them if they would exist for ARM.
Are there other solutions for running x86 software on ARM?
Yes: qemu, for example, is capable emulating an entire x86 PC, and with that gives you the capabilities to run basically everything you want. It emulates, GPU, CPU, and other devices such as LAN and USB. The issue with this solution is that it is very slow since it emulates an entire PC, and, although it works, it’s so slow that it’s nearly unusable. I already had success with Windows 2000 and XP running on qemu (proving that it can really run nearly everything), but it took forever and was very slow.
Another example would be DOSBox, which also emulates a x86 PC, although a very old 286 - 486 style which has a reduced set of instructions. This solution runs rather well, and allows you to run old DOS based programs and games, or can even be used to run Windows 3.11. Although a lot faster, it’s very limited by the old architecture that it’s supposed to run, and therefore you will be limited to old DOS games, and maybe Windows 3.11 applications.
A solution that I explored already in the past was ExaGear, which allowed running of x86 applications on ARM by emulating the CPU instructions, but not the entire PC. It is a lot faster than qemu and is able to run x86 Linux applications, including “wine” which allows you to run Windows applications under Linux.
I explored the capabilities of ExaGear in depth and wrote a couple of articles about it, as well as making a compatibility list at https://oph.mdrjr.net/meveric/other/ExaGear/, which shows quite nicely how good ExaGear performs. In fact, it’s probably the most mature software that is currently in existence that allows you to run x86 applications on ARM. Sadly, Eltechs discontinued ExaGear for ARM Desktop devices which means you can’t obtain it anymore.
What’s the difference with Box86?
Qemu is too slow to be useful and DOSBox is too limited to run modern Windows/Linux applications. But if ExaGear is that good, what is the reason for getting a new type of emulator, aside from the fact that ExaGear was discontinued?
Well ExaGear, although quite good, had one very big flaw: it was running everything in the i386 (x86) environment, which also is the case for the GPU drivers, which limited the the software only for use with applications that did not require 3D acceleration. Basically, any game that used “modern” graphics did not work, since it required OpenGL, which our ODROIDs lack the necessary drivers for and especially not for i386.
This is where Box86 can shine. Many of the libraries required for an application are redirected to the libraries from your ARM board, which means, instead of using SDL2 from i386, Box86 is able to use SDL2 from your ARM host system. This includes the GPU drivers, as well. If an application requires OpenGL to run, it will no longer ask for i386 OpenGL drivers, but instead ARM OpenGL drivers, and although ODROIDs do not have native OpenGL, thanks to @ptitSeb, we have an OpenGL to OpenGL ES wrapper called gl4es which allows us to run many many OpenGL applications.
But it is not only OpenGL that is being used from the ARM system rather than the i386 system. There are many other libraries, such as SDL, OpenAL, X11 and so on, also being used from the native ARM environment rather than using everything from i386.
This also means that you need much fewer libraries from i386 than ExaGear, which required a full i386 environment. This, combined with the x86 emulation, opens up an entirely new field of applications which did not work before.
Is Box86 the holy grail for x86 on ARM?
It is possibly the holy grail for x86 on ARM and the fact that it’s open source allows the project to be developed by many people, which in time may result in a wonderful software package, indeed.
Currently Box86 is not there yet. It’s a very new project and still has a long way to go. A lot of stuff is not yet supported and it still has bugs, but the beauty is that you can see changes nearly on a daily basis and the software keeps getting better and better. Furthermore, being open source, this software could become famous, very quickly and, with that, more developers may fix bugs and improve the software.
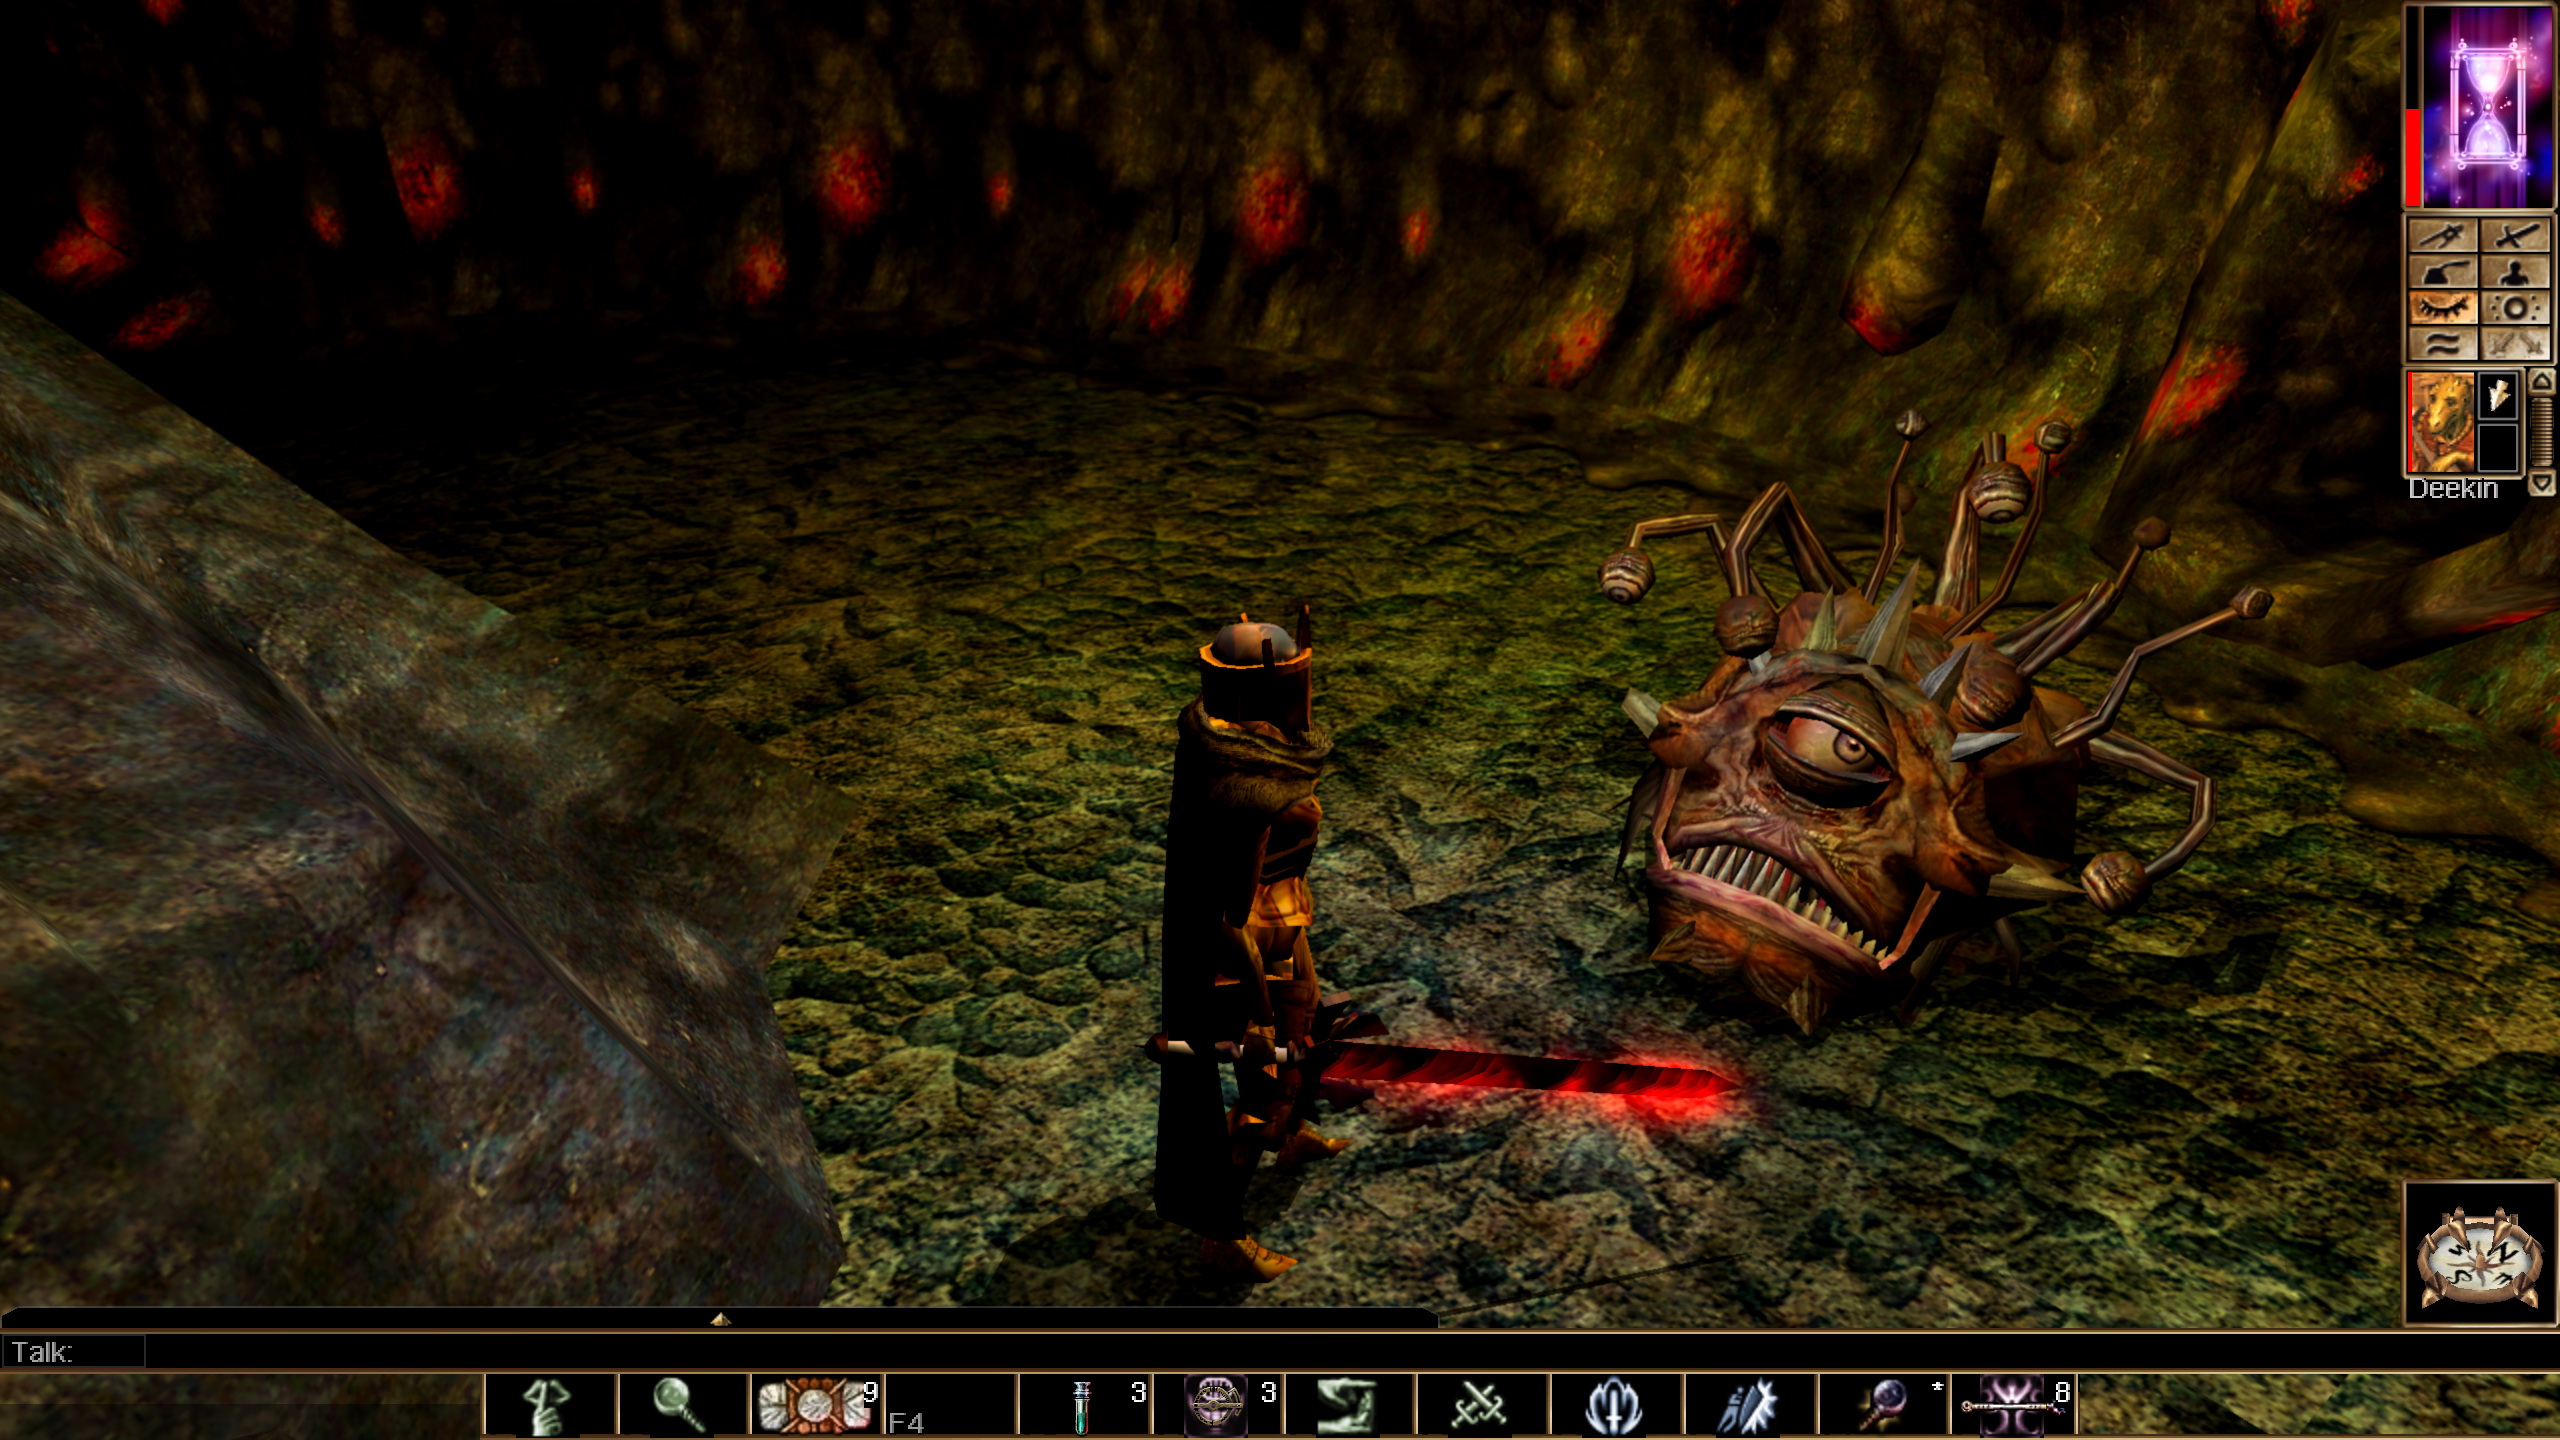
It already has some good games that it can run; some of which make good use of the OpenGL capabilities of the setup (most famously probably Neverwinter Nights) and I’m pretty sure new games will soon follow.
Figure 1 - Neverwinter Nights opening screen
Figure 2 - Neverwinter Nights gameplay
So what can it run right now?
The number of supported applications is still very low, and it’s a trial and error mechanism to find out if an application is supported or not. Still, there are already a few games that are working just fine on Box86. Airline Tycoon Deluxe, for example, should run full speed (https://www.gog.com/game/airline_tycoon_deluxe), which is a very interesting management game in the huge Tycoon series of game, which lots of charm and fun.
Figure 3 - Airline Tycoon Deluxe opening screen
Figure 4 - Airline Tycoon Deluxe gameplay
Neverwinter Nights Diamond Edition is a very deep RPG game in the Dungeon & Dragons universe. Currently, only the Enhanced Edition Pack can be bought on GoG https://www.gog.com/game/neverwinter_nights_enhanced_edition_pack. This is easily the most impressive graphical game for the system, as it uses @ptitSeb’s gl4es to convert the OpenGL graphics to OpenGL ES. It’s rather demanding, however, but should be fine in lower resolutions around 800x600 up to 720p.
Cook Serve Delicious (https://www.gog.com/game/cook_serve_delicious) is a nice time management/reaction game where you cook up the meals for your customers. Similar to Airline Tycoon Deluxe, it should run full speed even in 1080p, although it uses some OpenGL for effects, but thanks to @ptitSeb’s gl4es, it runs perfectly fine. UNDERTALE
Another impressive game is Freedom Planet (https://www.gog.com/game/freedom_planet) which feels and plays a little bit like Sonic, but with much more action. The game takes a long time to load, which currently is a the case with many applications, but once the initial loading is done, the game loads a lot faster. It suffers from some slight speed issues: intro and cutscenes are at full speed, but in game it’s a little bit slow, although still fully playable and quite impressive as well.
Another well known game is Faster than Light (https://www.gog.com/game/faster_than_light) which is working as well, but it suffers from long loading time at the start along with some sound issues. The speed is not 100%, but with this kind of game, it’s not required to have full speed. The game is nice, and I spend quite some time playing this on the ODROID. There are other games that work to certain degrees, as well, like most of the AGS (Adventure Game Studio) games (https://www.gog.com/games?devpub=wadjet_eye_games&page=1&sort=popularity) but they vary a lot in matter of game speed and performance, such as “Eschalon Books series” (https://www.gog.com/game/eschalon_book_i) which uses OpenGL in lots of places. And I wouldn’t even try it on ExaGear for that reason, although it’s also rather slow on Box86 at the moment. World of Goo (https://www.gog.com/game/world_of_goo) also seems to start but becomes too slow for me to play. DEFCON (https://www.gog.com/game/defcon) seems to work after a long period of loading, but it’s rather slow and laggy.
Figure 7 - World of Goo opening screen
Figure 8 - World of Goo gameplay
Inherit the Earth (https://www.gog.com/game/inherit_the_earth) seems to work fine, but it can run on ScummVM as well so that’s not a big deal. PixelJunk Shooter (https://www.gog.com/game/pixeljunk_shooter) starts, but is way too slow to play. So yes, there is already a selection of games you can run with Box86 and I’m sure there will be more to come.
What about Windows games and Wine?
ExaGear has the big advantage that it is able to run Wine under the i386 environment, which allows you to play windows games on your ODROID. This works quite nicely, as long as the games do not require 3D acceleration to run. So does Box86 offer the same? Unfortunately, no. You’re currently limited to Linux-only applications, although this may change in future, after all, wine is also “just” a Linux application.
If you haven’t got gl4es already repeat Steps 1-5 for gl4es as well.
Try to get things to work.
Steps 1 to 3 can already be a hassle, and Step 4 can be complicated if you don’t know how to get these libraries, and even Step 5 can be a little bit hideous as it will often include the same commands. To make things easier, I took the liberty of preparing a .deb file for you, which hopefully handles Steps 1 to 5 already, although this is not guaranteed that it will work. It has the binary inside, as well as the most commonly used i386 libs that I could find, which is a straight copy from the libs of Debian. I also wrote a little script in front of Box86 that will include the libraries that I included in the package, as well as set include paths for the most commonly used applications that have their own libraries. Many games come with a folder lib, lib32, x86 or something similar that will house libraries they use in their programs, and the script will automatically include these paths in the search path for libraries.
This means you should be able to simply go into a folder of the game that you’d like to play (for example: /home/odroid/GOG Games/Airline Tycoon Deluxe/game/ ) and run your game from a terminal by typing “box86 ” (for example: “box86 ATDeluxe”).
Still, this will not work for all applications, and you might have to use the commands in Step 5 to add your own libraries, or folders. If you find some libraries are missing, feel free to report them to me, and I will add them to my package for convenience.
The package can be installed on my Debian based OSes from my repository with the following command:
$ apt-get install box86-odroid
Please be aware that this is only available for armhf (32bit) operating systems at the moment, so you probably won’t be able to use it on the ODROID-C2 or ODROID-N2.
CarPC
April 1, 2019By @Bence9218Android, ODROID-XU4, Tinkering, Tutorial
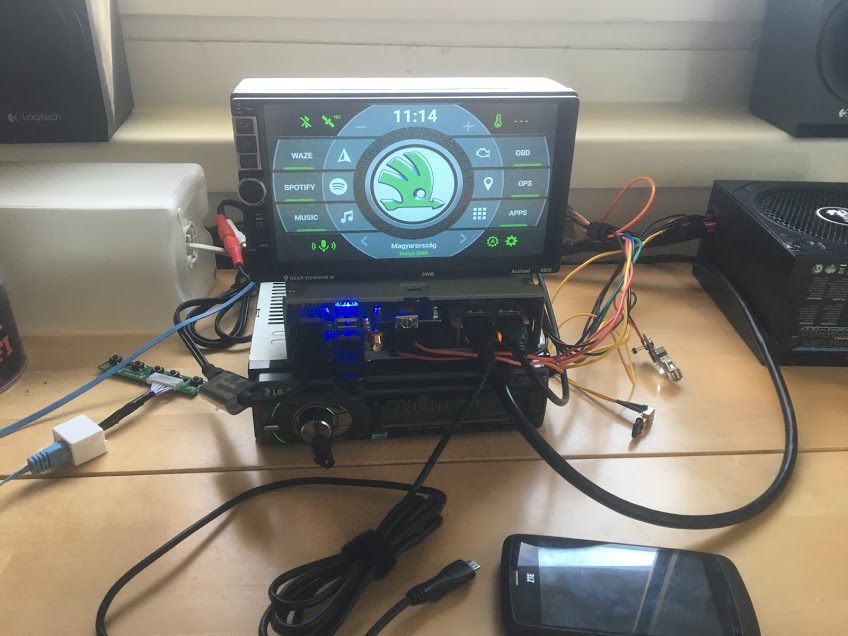
In this article, I'd like to introduce you to my CarPC project. This project is built from four main parts:
A custom display based on a 2 DIN Android head unit case
ODROID-XU4Q
ZTE Blade for 3G modem and GPS tracking when the car is shut off
LG LAC5900RN head unit for amplifier
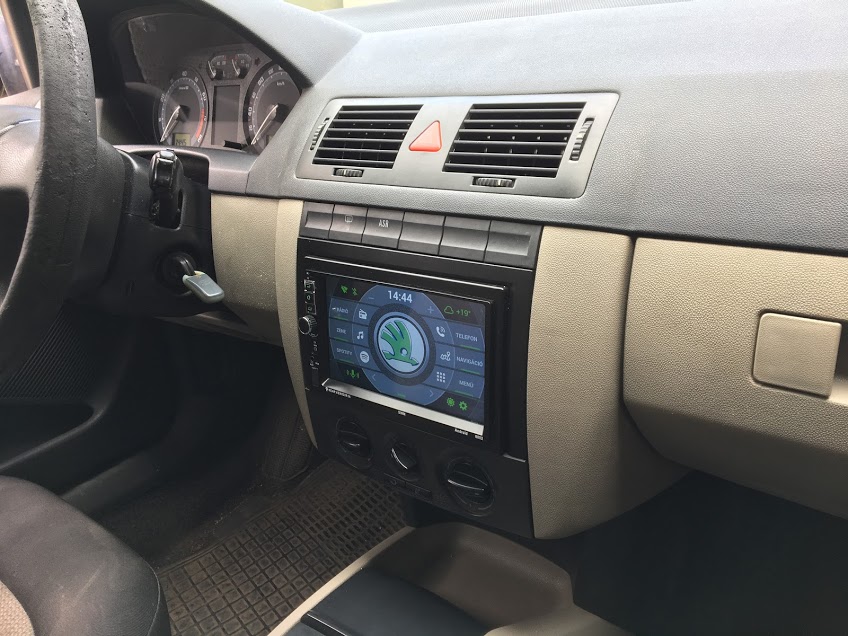
Figure 1 - The display as seen after installation
The main features of this finished project will include:
Android 7 (LineageOS 14.1)
Live traffic navigation
The ability to play music from local storage as well as Spotify
Engine diagnostics and live data through OBDII socket
There are a number of features that are still works in progress at this time, including Bluetooth Hands-free Profile (HFP) for hands free phone calling over Bluetooth (yes, I have a solution for this), and GPS tracking software for the ZTE Blade to track my car’s location at any time and warn me when the car is moving without me (without my phone's Bluetooth signal).
Display
I had a 2 DIN Android head unit which fits perfectly into my car dashboard. I recently used this unit, but bricked it when I tried to root the OS on it. So I bought a display panel with a better viewing angle, a touch panel, and an HDMI drive board.
The display case has three backlit buttons, a potentiometer (an encoder), and a USB socket. To get the buttons working I used a USB keyboard drive board, and I soldered the three buttons to F1, F2 and 0. The encoder is connected to the LG head unit (amplifier) master volume
and you can turn the display off or on by pushing the encoder. The USB socket is simply connected to the display's powered USB hub (which is connected to the ODROID).
On the software side, I needed to recompile the OS from source to fix the touchscreen calibration (eGalax 0eef 0001). It was an easier way to make the buttons work correctly. I created my own key layout map (.kl file) for "Home", "Back" and "App switch" functions.
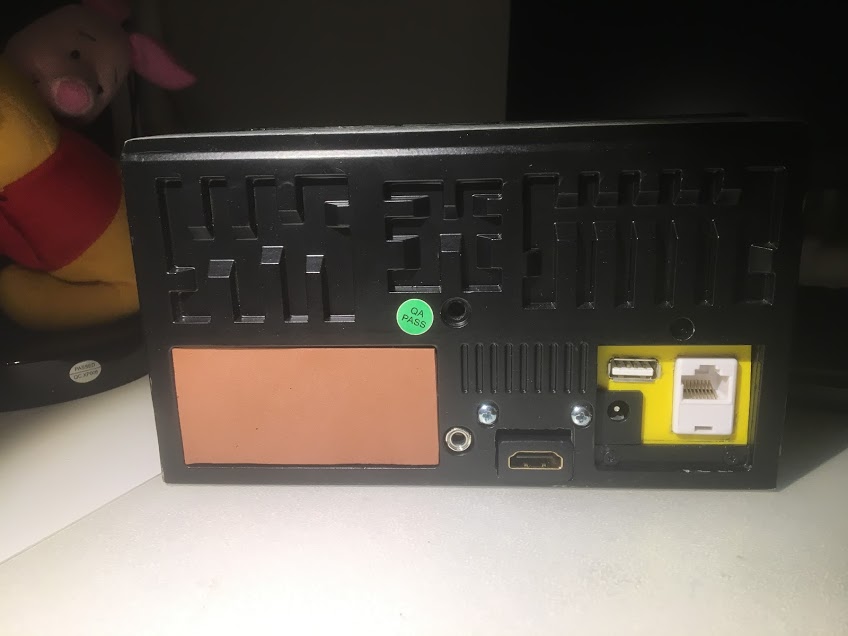
Lastly, the display case has five sockets:
Power In
HDMI
USB (Touch screen, front buttons, front USB socket)
RJ45 (HDMI display drive board buttons)
Jack (volume remote)
Figure 2 - Some of the outputs on the display module
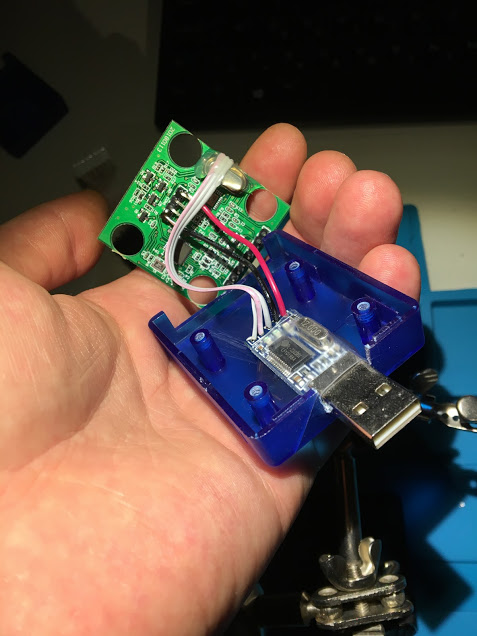
OBDII ELM327 USB cable
Of course, I had the wrong USB to RS232 converter interface, so I needed to fix this little problem. I converted it from the CH340 chip to the PL2303 chip which is compatible with the software.
Figure 3 - Switching out chips
ZTE Blade
The ODROID's production kernel does not contain the Remote Network Driver Interface Specification (RNDIS) kernel module which is needed to share your Internet connection from your Android phone to the ODROID via USB. I recompiled the kernel with this kernel module and created a userinit script on the phone, which automatically turns on the USB tethering function when the phone is connected.
Figure 4 - After the recompile
LG head unit
I also added a line-in RCA connection on the back.
Figure 5 - Line-in RCA jack
ODROID
The biggest challenge was making sure that the ODROID shuts down correctly when the ignition is turned off, and that afterwards the power also goes away. I created my own power supply and power control boards, which seemed to do the job. If the ignition is switched off, the system shuts down and then one minute later the power to the hardware is cut off. I have a special USB socket which stays powered when the car ignition is off that keeps the ZTE blade alive.
Meet An ODROIDian: Robert Millette (@Lix-Alpha)
April 1, 2019By Rob RoyMeet an ODROIDian
Please tell us a little about yourself.
My name is Rob, better known as Lix-Alpha on the ODROID Forums, and I am 43 years old. I have a wife, two kids, a siamese cat, and all of my teeth. I love playing old games from the 90s on my ODROID-GO, creating music on my Pocket Operators, and fine-tuning my son’s RC Car. I work as a freelance graphic designer creating 3D designs for publicity and printed media. My daughter is 5 and my son is 8, who are both Canadian-Japanese (Japanese from my wife side). My wife manages the office of a big tool rental company in Montréal.
Picture 1 - Rob's Kids
I was born in a region of the Province of Québec, in Canada, called Mont-Tremblant. For anyone that likes to ski, they will know about this location, for sure, since it was recently bought by the Aspen Group. But now I live in Montréal. I studied psychology, but quit before finishing and started my own graphic design company. Let me tell you that my studies were not a waste though, since I use psychology almost every day with some of my customers!
My mom always says that when I was young, I always liked anything with lots of buttons. When she first had a chance, she bought me a computer. My first experience was on a TRS-80. I remember spending hours and hours playing with BASIC, on the black and white screen TV that we had in the basement. It’s still at my mom’s home somewhere under tons of dust. Writing this, I think that I will try it out the next time I go visit her. For fans of BASIC:
10 PRINT "Go to question 2"
20 GOTO 10
What attracted you to the ODROID platform?
I always wanted a small portable device to play my favorites retro games. I looked everywhere on the web and found many solutions, but at a very high price. Also, I wanted to get a device that I could easily put in my pocket without being afraid to break it. It was then that I found the ODROID-GO. The device was inexpensive, small, and well built. I also loved the approach of Hardkernel, especially the way they marketed the product and how they talked about it. It was straight to the point and they did not try to exaggerate the capacity of the device. Everything was clear, and this is not the case with many other companies.
I own many other solutions (Waveshare GameHat, GPD Win, GPD Win 2, Clockwork GameShell), but they all have their problems: too fragile, too bulky, overheating, or too expensive. Hardkernel managed to find the right level of power and performance for a pocketable device and believe me, many have tried but failed. Of course, some of the aforementioned devices are way stronger but can you carry them without fear everywhere you go?
How do you use your ODROIDs?
I only have an ODROID-GO for now, but I use it every day. I am a gamer, but with my work, I do not have times to play games very often. I work 7 days a week, so the only moment I have is when I go to bed. So I lay down on my bed, get all comfy, and play some Wolfenstein 3D or Commander Keen until I fall asleep. This device is reliable, has a very good battery life, and I can count on it every time I need it.
Which ODROID is your favorite and why?
To be honest, the only one I used is the GO, so I guess it’s my favorite. I love this device! Having Commander Keen or Wolfenstein 3D in my pocket is a dream that I have had since the 90s.
What innovations would you like to see in future Hardkernel products?
As previously mentioned, I only have an ODROID-GO, so I'll talk about that one. I would love to see a little bit more power. It would be nice to be able to run GBA or SNES for exemple. Since I am a graphic designer, I would love it if the user interface was a bit more open source, so I could create my own UI.
What hobbies and interests do you have apart from computers?
I have 2 kids, so they are my hobbies most of the time! But, when I have a little bit of time, I love riding my mountain bike, playing around with my Pocket Operators, or going outside with my camera trying to get the perfect shot.
Figure X - Rob's Photo Work
What advice do you have for someone wanting to learn more about computers?
I am not really a programmer, so I can't give advice on the technical side of it, but I can certainly give advice on the learning curve associated with computers/programming. When I left university and decided to start my own design business, I had minimal knowledge of Photoshop or Illustrator, but I woke up every morning and worked on it. In the beginning, I doubted myself a lot, and even thought about quitting. But in the end, with discipline and perseverance, I mastered it.
Figure X - Rob's 3D modelling Work
The same happened when I began exploring 3D modeling with 3DS Max, Maya, C4D or Solidworks. Anyone can learn anything; it’s just a matter of time and work. Start from the beginning, try to master every aspect of the software package that you are learning, and above all, do not compare yourself with others. Some peoples learn fast, while others learn slowly. In the end, if you have fun, you are in the right place and should put all your energy into what you are doing.


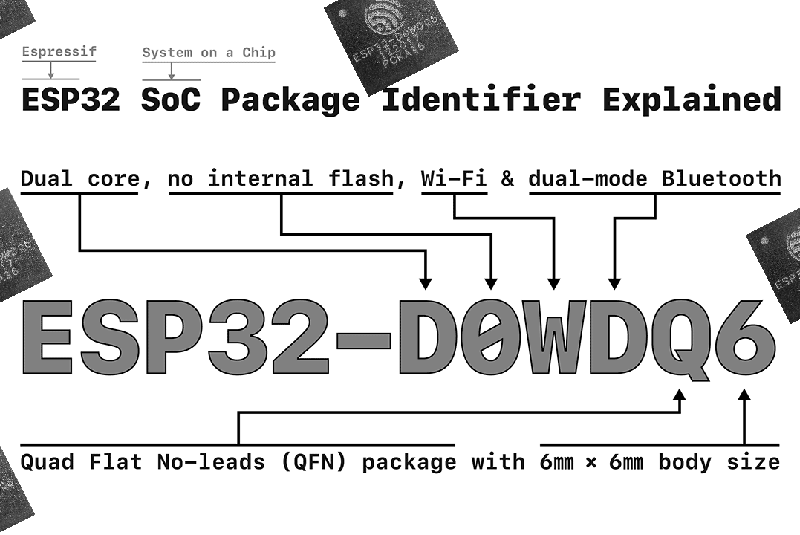

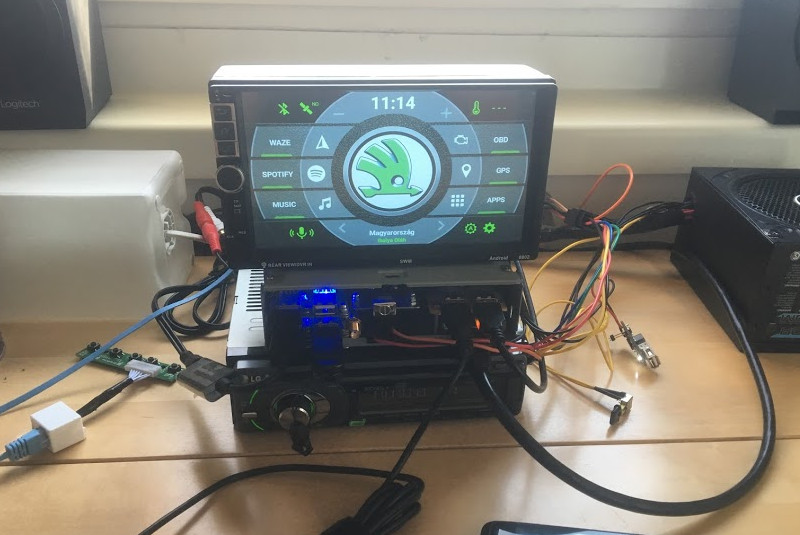

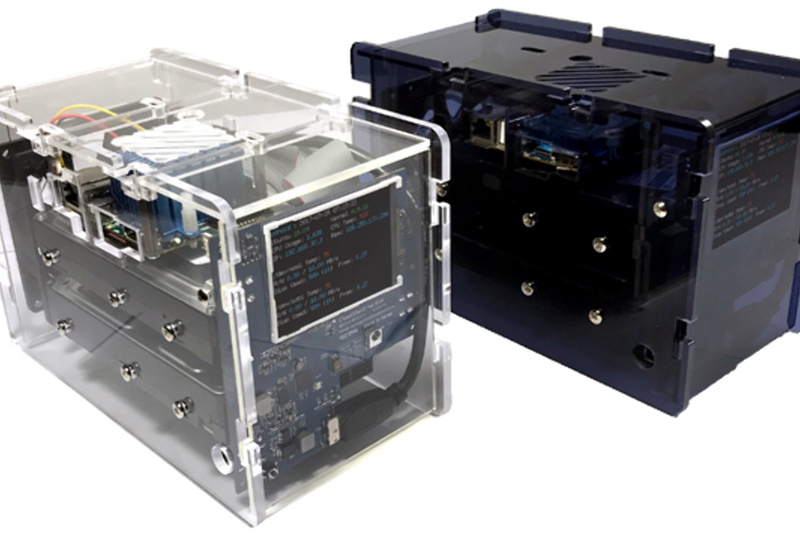
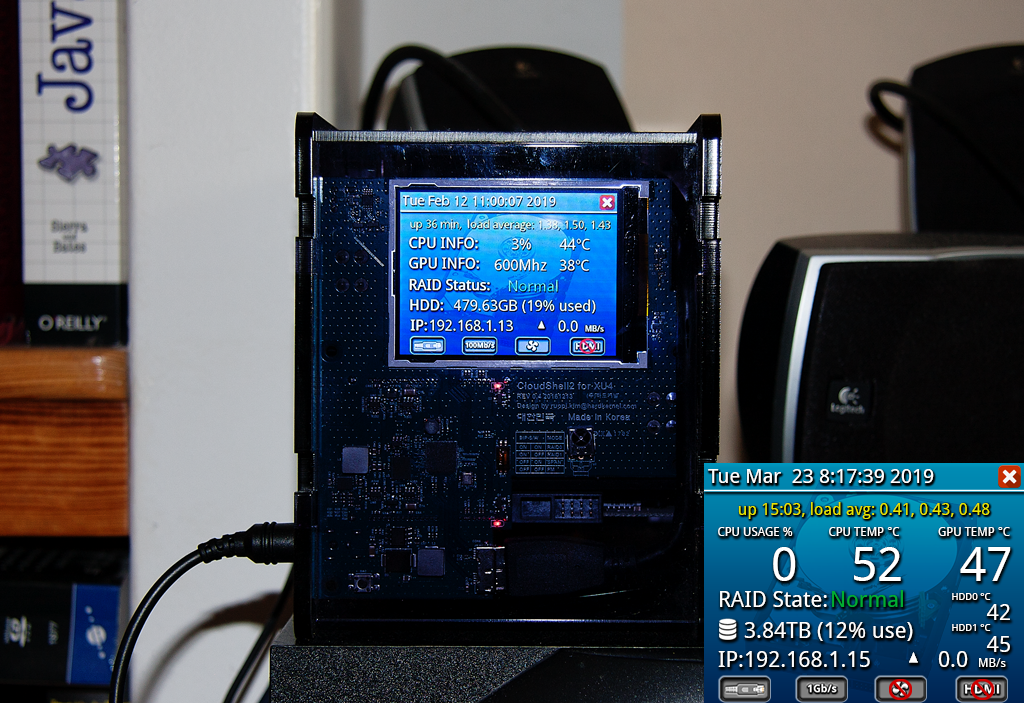

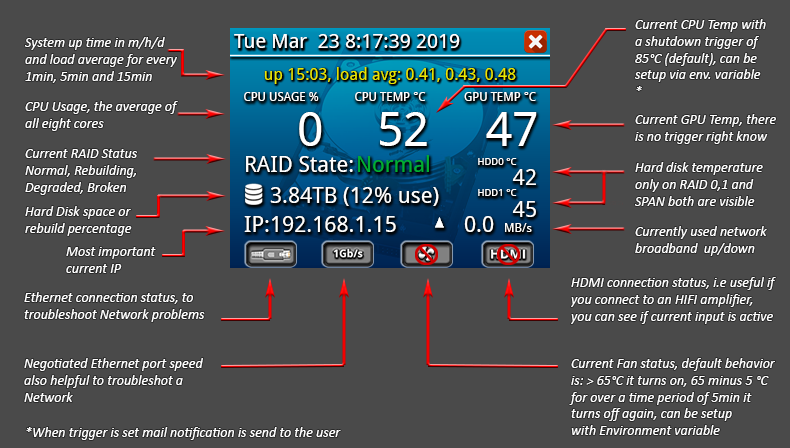 Figure 3 - CloudShell2 Illustration[/caption]


 Now click the “Did you mean to go to the admin panel?” and click on “Login” to continue to the next page. Put your configured PiHole password and voilà, you’re in! You should check the DNS connectivity again with dig and if everything works correctly, you can continue with adding blocklists. I got my lists from https://firebog.net/, and insert them into PiHole via the “Settings” => “Blocklists” menu, as shown in Figure 2.