February 1, 2019By @cheungbxODROID-GO, Tinkering, Tutorial
The ODROID-GO is a great invention from Hardkernel. It can function as a game console with many emulators. Though the number of emulators is small compared to those supported by RetroPie or Recalbox installed, I found the response much faster and smoother, while consuming a lot less power. Game saving by default is also very handy.
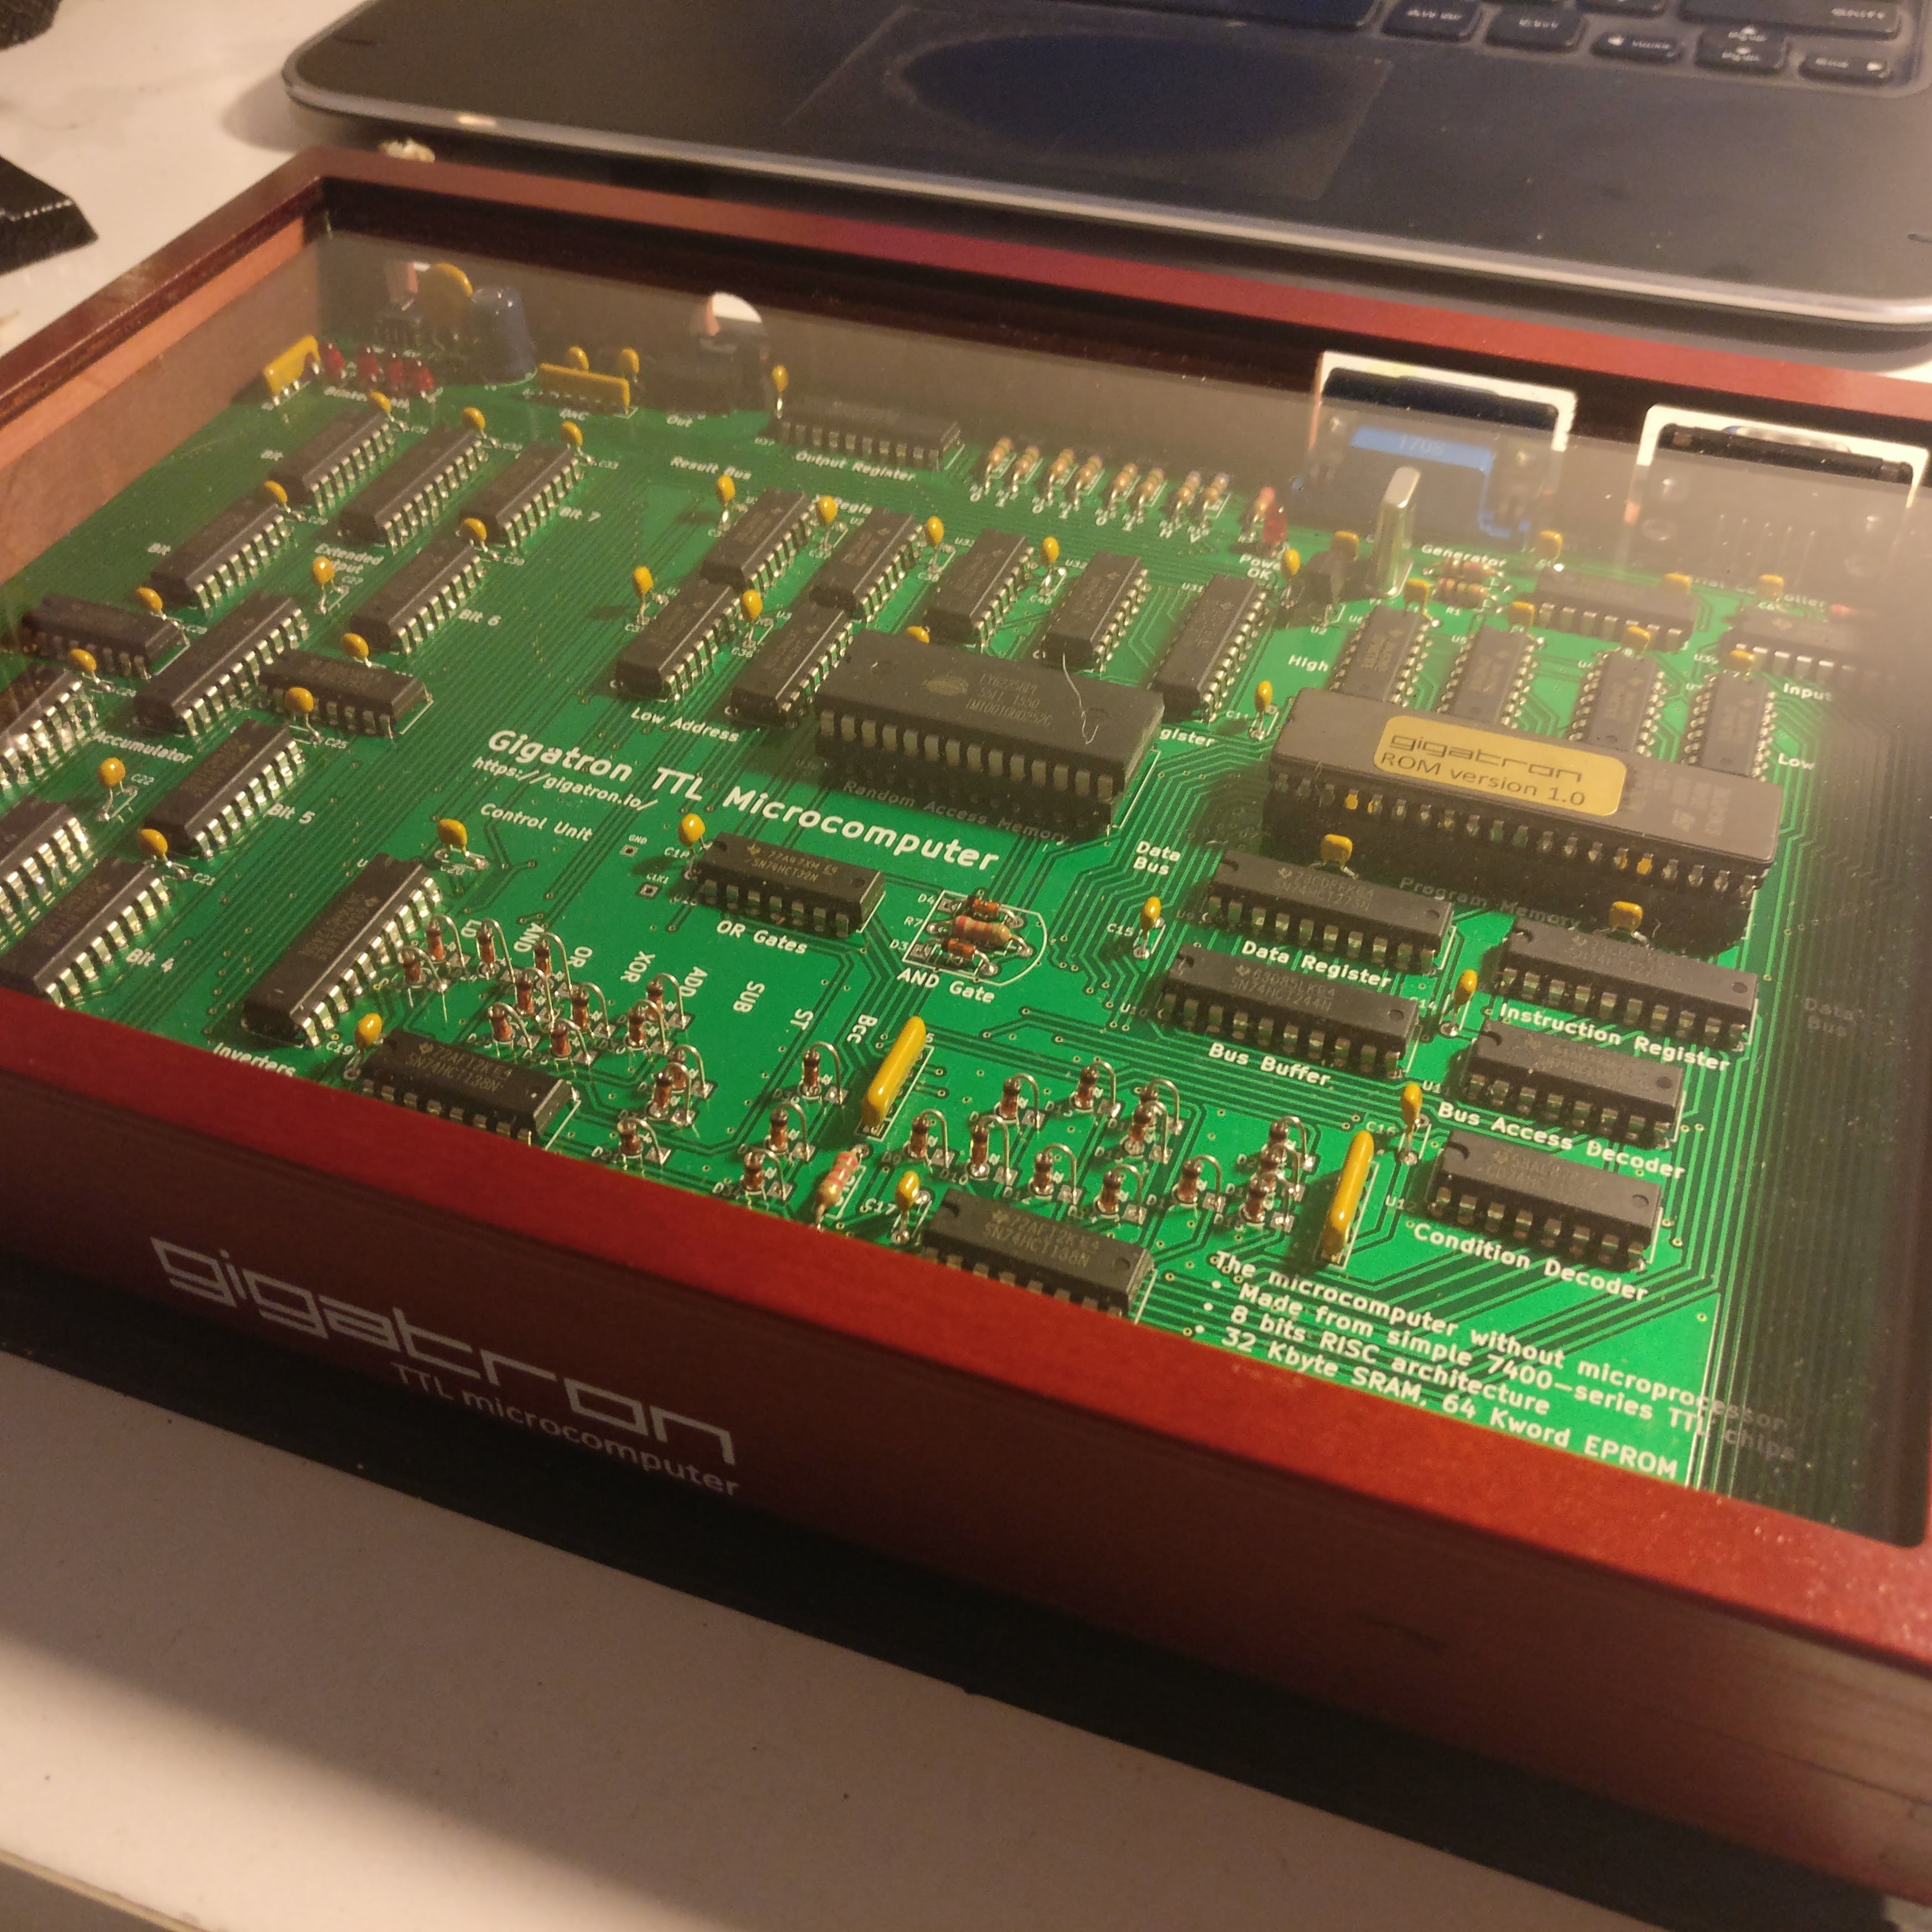
I was not able to buy the ODROID-GO at a reasonable price from Hong Kong, due to the high shipping cost to ship from US, hence I decided to create one myself. It is good that Hardkernel shared the design schematics and firmware on github and make it open source, so makers like me can challenge themselves to make their own design of the ODROID-GO.
By loading different firmware, you can use it to run Arduino designed binary codes, micropython codes and many other types of third party software. Although this article shows you the steps how to do it, not everyone can successfully build one, since it requires reasonable soldering and desoldering skills. I also recommend anyone who wants to own an ODROID-GO to order it from Hardkernel as the cost to build one (plus all the shipping) may be close to or even exceed that of buying directly from Hardkernel.
I intend to make it with a smaller 2.2" TFT LCD instead of the 2.4" one that comes with the originals. I also do not need such loud audio output and headphone jack output is already too loud for me, so I do not need the amplifier circuit. Just connect the GPIO 26 and ground of the ESP32 to the mini/speaker or headphone jack with a hardware volume control. That will be all I need. I kept the 10 pin extension header, but have to use my own set of silent buttons.
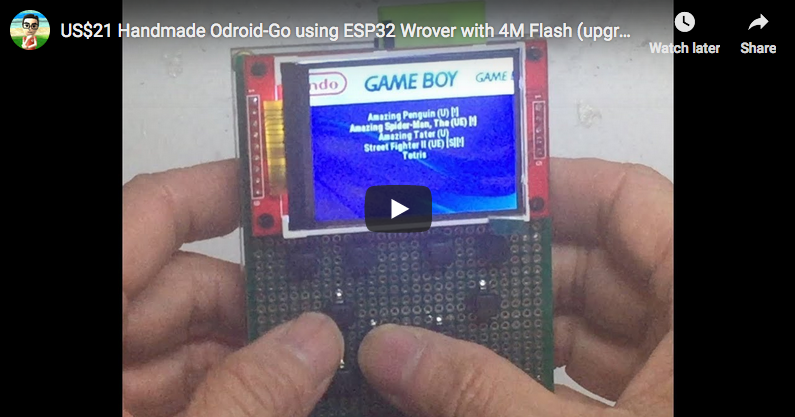
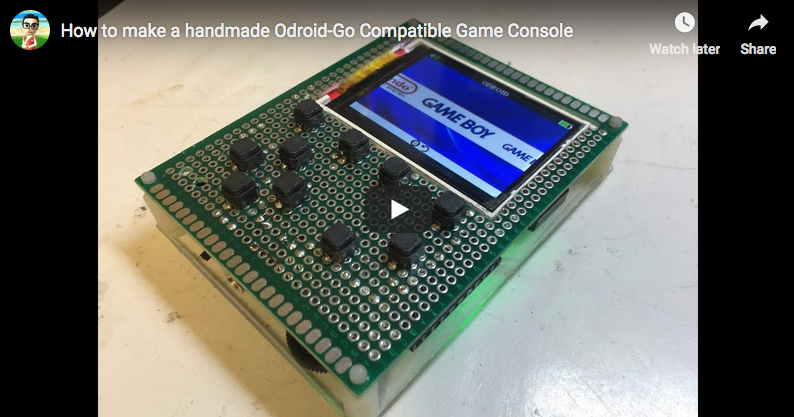
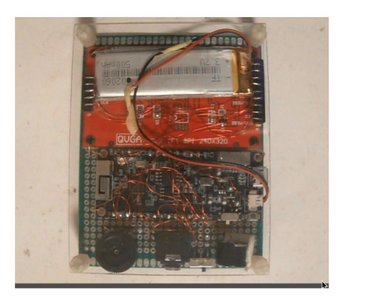
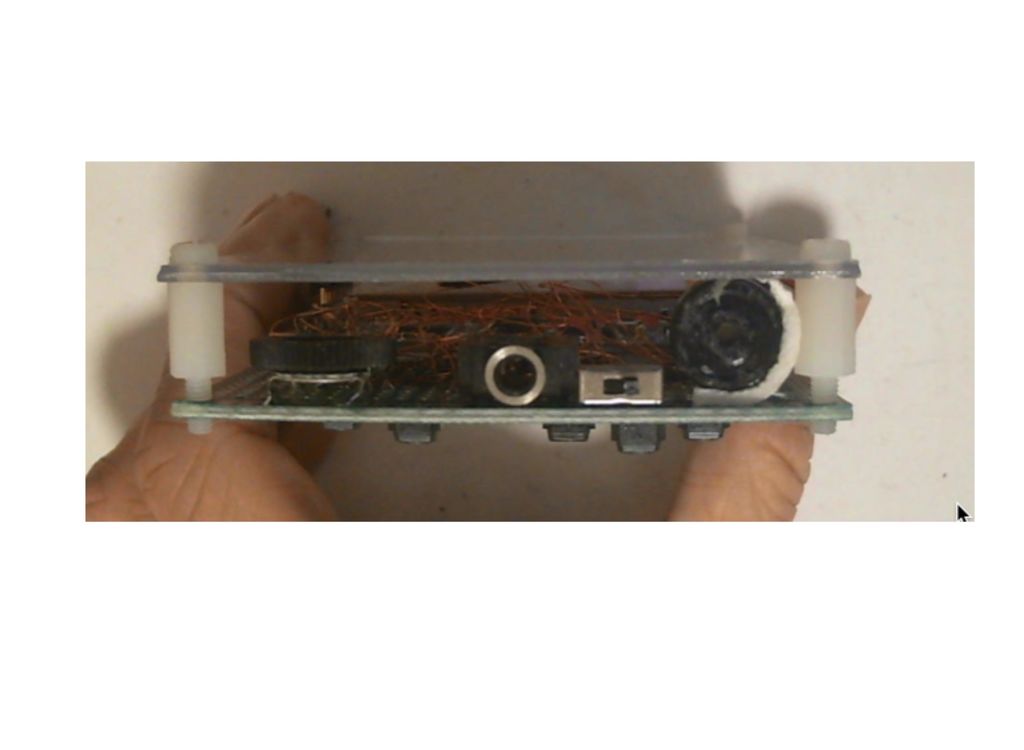
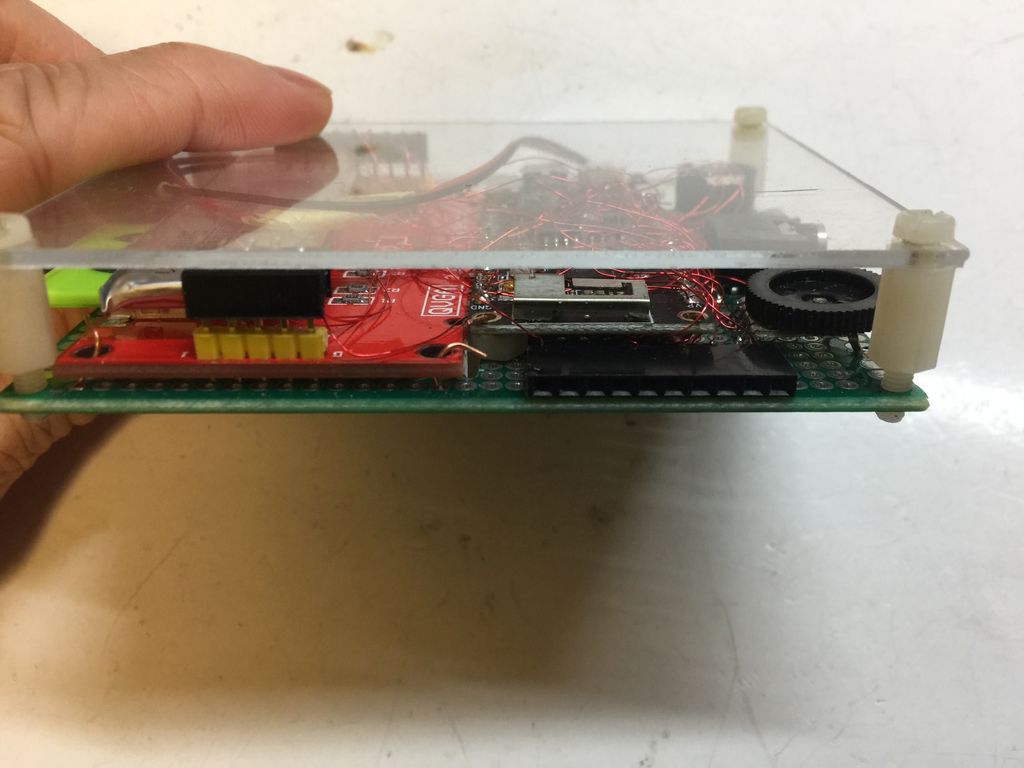
It is built on a prototype PCB as a frame, where I carved out a rectangular window to mount the LCD, so it will lay flat on the PCB on the front side. For the mcu board, I chose the TTGO T8 ESP32 WRover board ESP32 WRover board has an additional 4MB PsRam (pseudo static Ram) compared to the ESP VRoom board that has only 4MB flash RAM but no PsRam. The GO-Play firmware of ODROID-GO that drives all the retro-game emulation cannot work with just 4MB Flash RAM. The GO-Play firmware of ODROID-GO cannot be flashed into just 4MB flash, so I upgraded the surface mounted 4MB Flash RAM to 16MB. I ruined one board by using hot air gun to desolder the original 4MB RAM and accidentally blew off a few resistors and could not find that. I have to order a new one and this time I used the safer approach. Just cut-off the pins of the 4MB Ram , then put the new 16MB RAM on top and solder it up. It is much easier this way.
Please follow the steps below to build one if you have good soldering skills. If you cannot solder well, I recommend just buying the original.
Winbond W25Q128FVSIG SOP8 16Mb Serial Flash memory (for upgrading the ESP32 from 4Mb Flash ram to 16Mb)
16G TF card with SD card slot
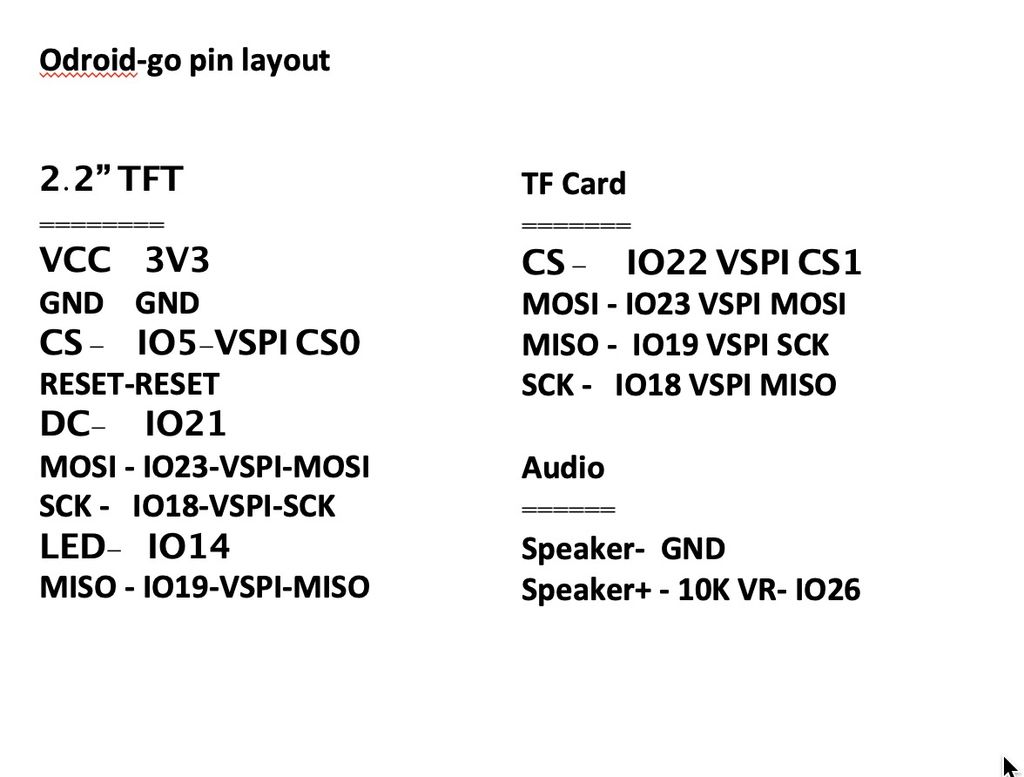
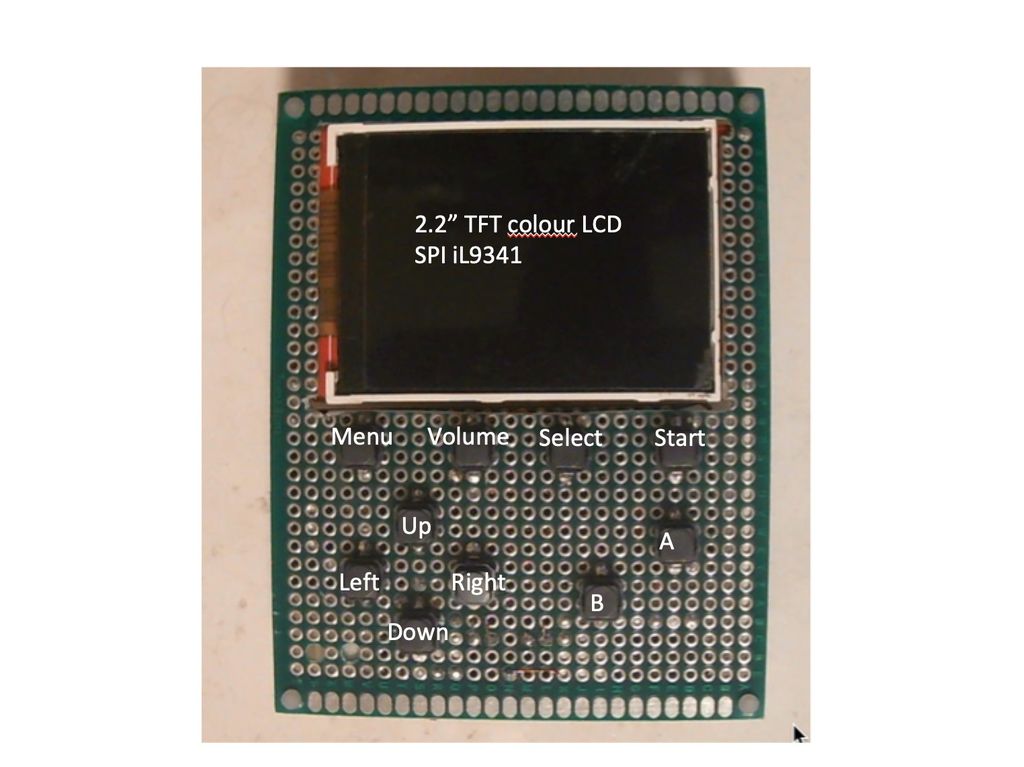
2.2" TFT LCD SPI il9341
3.7V 1500MaH LIPO battery
mini speaker
3.5mm headphone jack with switch
10 silent buttons
10K VR for volume control
10 pin header for expansion
5 pin and 9 pin header to connect the TFT LCD pins made from IC sockets
Mini Slide switch for power button
Double-sided 7cm x 9cm prototype PCB
7cm x 9cm Arglic board for back cover
Four 3mm x 20mm screws to hold the back cover
0.2mm or 0.3mm laminated (insulated) wire
Most of these are available at Amazon, AliExpress, or TaoBao in China.
Hardware Setup
This project uses a double-sided 7x9 cm prototype PCB as the frame of the game console. We shall refer to this as “the PCB“. The setup steps include:
Cut out a square hole on the PCB for the 2.2“ LCD
Solder the buttons as shown in the layout to the front side of the PCB
Desolder the existing 4Mb Flash ram from the TTGO T8 ESP32-Wrover board
Solder in a 16MB Flash Ram (Winbond W25Q128FVSIG)
Mount the TTGO T8 ESP32-Wrover board at the back side of the PCB
Mount the 2.2“ TFT LCD at the back of the PCB
Cut out 9 pins from an ic socket to plug into the TFT LCD‘s LCD pins
Cut out 5 pins from an ic socket to plug into the TFT 's SD card pins
Using 0.2 or 0.3mm Laminated (insulated) wires, start the soldering work
Solder up all the connections from the TFT LCD to the ESP32 board following the circuit diagram and the pin layout
Solder up all the connections from the SD CARD slot to the ESP32 board following the circuit diagram and the pin layout
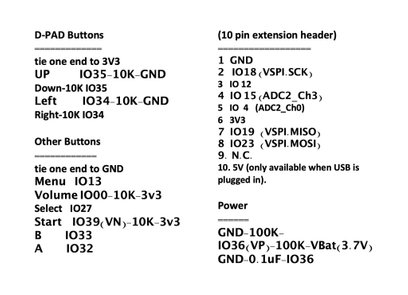
Solder one end of the D-PAD buttons to 3.3V (i.e., up/down/left/right), and the other end to the right GPIO pin of ESP32 following the pin layout
Solder one end of the other buttons to GND, and the other end to the right GPIO pin of ESP32 following the pin layout
Solder up the 10K Variable resistor, the headphone jack and the speaker as shown in the pin layout
Solder two 100K resistor and one 0.1uF and connect that to GPIO36 for battery level measurement
Solder the 10 pin extension header to the ESP32‘s pins according to the pin layout
Solder a cable to the battery and plug that into the ESP32 board‘s battery input
Cover up the back of the PCB with an acrylic board and secure it with screws
Burn SD card with firmware and ROMs
Follow these steps:
Browse to https://wiki.odroid.com/odroid_go/make_sd_card
Follow instructions there to download the SD Card skeleton files (without game ROMs), then format a blank 16G or 32G Flash card as FAT and copy the SD Card skeleton folders and files downloaded from step 2 to the
root directory of the SD card
Optionally you can also download and add other 3rd party software into the SD Card by following instructions at https://goo.gl/vr4YdQ
For game ROMs, you can search the different game rom hosting sites by searching for the game title, the game console name + rom. For e.g., "pinball nes rom". Once you downloaded, make sure you decompressed it to
get the original file, e.g., pinball.nes instead of pinball.zip. Then copy the game Roms to the roms folder of the SD card under the right folder of the game console, e.g., copy pinball.nes to e:
oms
es
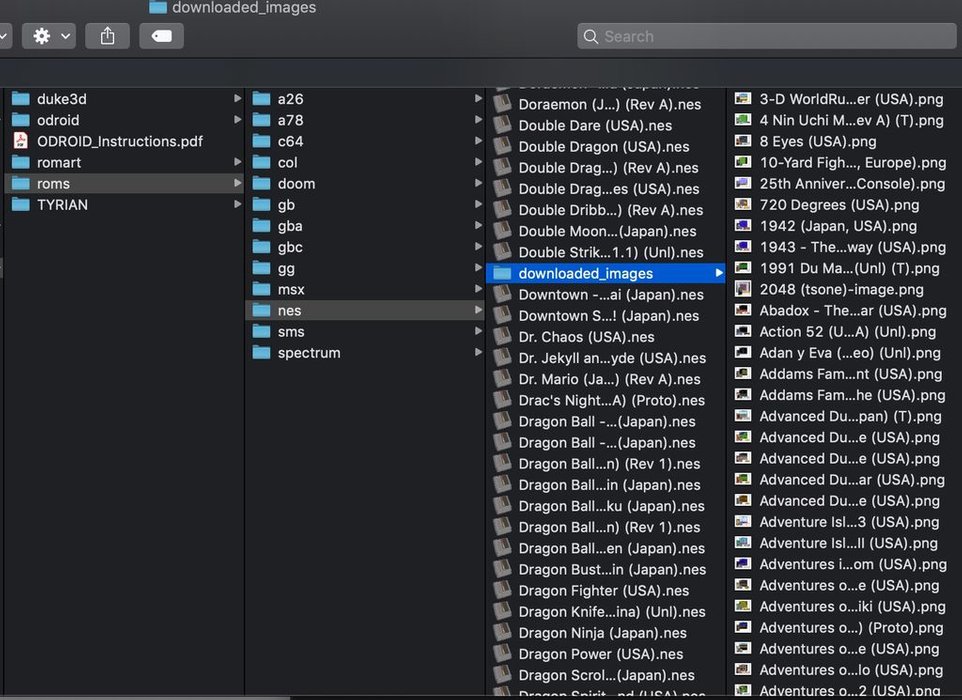
Just like in Retropie or Recalbox, ROM icon png files are stored in the downloaded_images folder under each game console folder
If you are copying game roms from RetroPie or Recalbox to the ODROID-GO, note that some of the folder names are different, e.g. instead of "atari2600", "a26" is used, and .zip files are not supported
Once all game ROMs are copied to the SD card, eject it safely from your computer (depends on which os you use, windows, linux, mac)
Insert the SD card into the homemade ODROID-GO
Flash boot image to Esp32
The steps to be followed for flashing the boot image include:
Make sure the SD card with all the firmware and game roms that you created in the previous step is already inserted to the ODROID-GO
On your workstation, browse to https://wiki.odroid.com/odroid_go/firmware_update
Follow instructions there to download the ESP32 flash tool and the Odroid-go boot image. Your tools and instructions to use will depend on whether you are using a Windows, Linux or OSX computer
There is no need to erase the flash entirely first. The corresponding partitions of the flash will be erased when a firmware file is loaded from the SD card to the ESP32
Flash the ODROID-GO boot image to ESP32 SPI ram according to the instructions. Refer to the sample commands and screen outputs below. Following are the sample commands and pertinent screen output from Mac OSX terminal app:
# ...
# check the ESP32 SPI serial flash memory size
# ...
$ python3 -m esptool --port /dev/tty.SLAB_USBtoUART flash_id
esptool.py v2.5.0
Serial port /dev/tty.SLAB_USBtoUART
Connecting........__
Detecting chip type... ESP32
Chip is ESP32D0WDQ6 (revision 1)
Features: WiFi, BT, Dual Core, 240MHz, VRef calibration in efuse
MAC: 3c:71:bf:03:50:40
Uploading stub...
Running stub...
Stub running...
Manufacturer: ef
Device: 4018
Detected flash size: 16MB
Hard resetting via RTS pin…
# ...
# burn the ODROID-GO-firmware into ESP 32 EEPROM
# ...
$ python3 -m esptool --chip esp32 --port /dev/cu.SLAB_USBtoUART --baud 921600
write_flash --flash_mode dio --flash_freq 40m --flash_size detect 0
ODROID-GO-firmware-20181001.img
esptool.py v2.5.0
Serial port /dev/cu.SLAB_USBtoUART
Connecting........_
Chip is ESP32D0WDQ6 (revision 1)
Features: WiFi, BT, Dual Core, 240MHz, VRef calibration in efuse
MAC: 3c:71:bf:03:50:40
Uploading stub...
Running stub...
Stub running...
Changing baud rate to 921600
Changed.
Configuring flash size...
Auto-detected Flash size: 16MB
Compressed 301920 bytes to 146523...
Wrote 301920 bytes (146523 compressed) at 0x00000000 in 2.3 seconds (effective 1039.5 kbit/s)...
Hash of data verified.
Leaving...
Hard resetting via RTS pin...
Once the flash is complete, the ESP32 will reboot and execute the ODROID-GO boot menu
Play Games with Go-Play & Emulators
You can use these steps to play the various games:
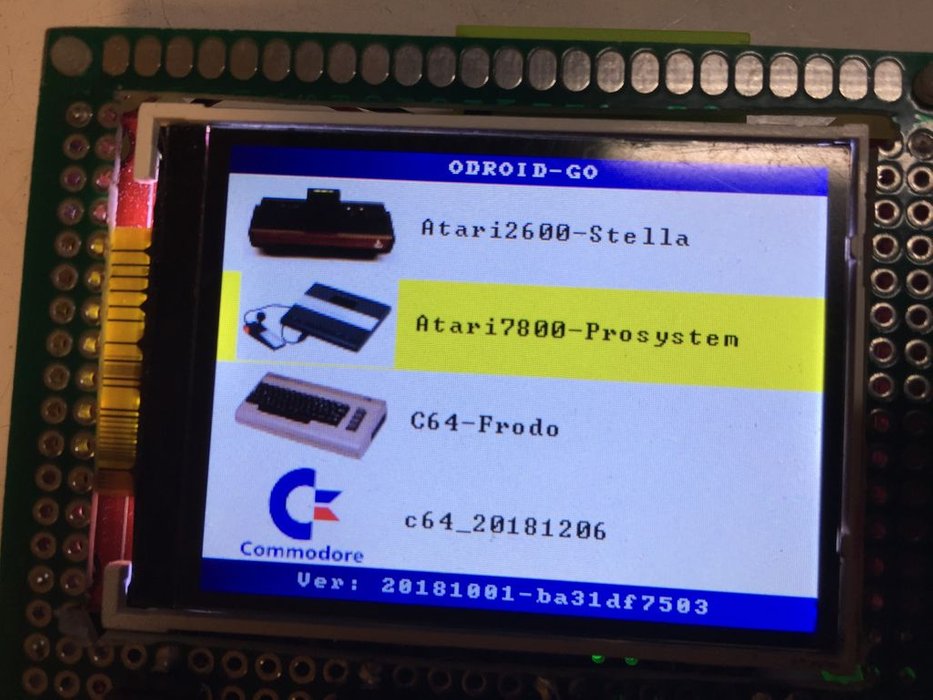
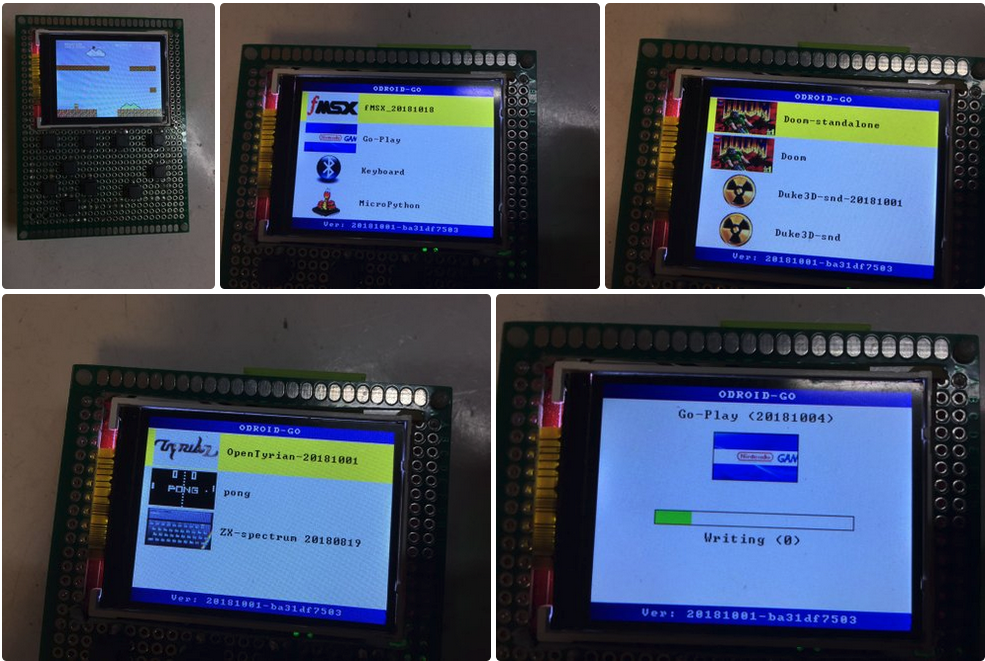
After boot up, you will see a list of firmwares. Choose the Go-Play and launch by pressing A button
The Go-Play firmware will be flashed to the ESP32 flash memory. There are total four partitions (0,1,2,3) to be flashed. For each file, the corresponding memory space (partition) of the 16M SPI serial flash memory will be first erased, then written into. It will take around one minute to flash all partitions. Luckily you will not need to do this every time you play a different game. As long as you are in Go-Play firmware, you can load and play a game in less than a few seconds
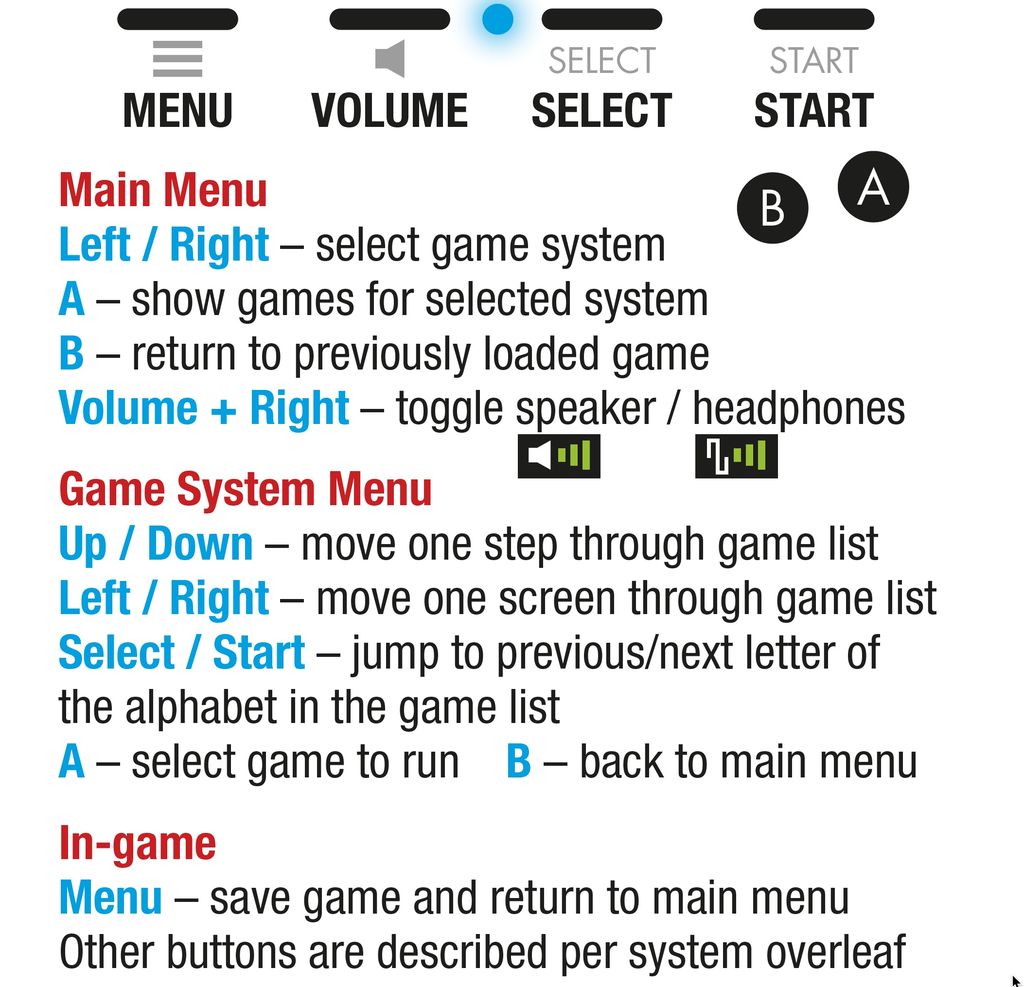
The Go-Play main menu will be launched, and you will see the list of game emulators to choose from. Use left and right button to choose the emulator you want. e.g., nes. In this main menu, you can press the volume button to tune up or down the audio volume. Or hold the start button and press the up/down button to adjust the brightness of the TFT LCD, or press B to go back to the previous game you had played before
Once you select one emulator, you will see all the game rooms you have listed arranged in alphabetical order. Use the up/down button to browse through the games, left/right to page up/down. Select and Start to jump to the previous letter or next letter of the game list that is sorted in alphabetical order. This is handy as I have thousands of games and very tiring to keep clicking down button hundred times
To launch a game, press the "A" button two times. or you can press the "B" button to go back to the game emulator menu to select a different game emulator. To exit a game, and go back to the main menu, press the menu button. While within the game, you can hold the start button while clicking the right button to adjust the display to scale it up or down. You will find that the graphics will be enlarged or shrunk a bit, instead of perfect pixel to pixel mapping of the original game. To put the ESP32 to sleep mode, press and hold the menu button for 2 seconds
To wake up the ESP32, press the menu button again. To recover from a crashed game, switch power off (using the hard sliding switch). Then hold the menu button before you switch on. To return to the firmware menu or to recover from a crashed firmware, switch off. Then hold the B button before you switch on. You can flash a new boot up image to the ESP 32 at any time without pressing any special buttons. However, if you cannot get it to work, switch off. Then hold the Volume button before you switch on. The screen will be fully lit. Then you can connect the esp 32 to the usb port of your computer to be flashed with a new boot up image.
February 1, 2019By Andreas LintermannLinux, ODROID-MC1, Tutorial
The ODROID-MC1 has become an interesting cluster system for experimenting, e.g., with Docker swarm implementations [1] and cryptocurrency mining [2-4]. A brief introduction to the ODROID-MC1 has been given in [5]. A single ODROID-MC1 consists of four slimmed-down ODROID-XU4 nodes, each equipped with a Samsung Exynos 5 Octa (5422). The Exynos 5 Octa is a two-socket ARM Big.LITTLE system consisting of quad-core Cortex-A15 and Cortex-A7 CPUs, clocked at 2GHz and 1.4GHz respectively. The CPUs feature heterogeneous multi-processing (HMP). Each node is equipped with 2GB of LPDDR3 RAM and with a Mali-T628 MP6 GPU, which supports OpenGL ES 3.1/2.0/1.1 and the full OpenCL 1.2 profile. Furthermore, the boards feature gigabit ethernet and is actively fan cooled.
In [6] a general introduction to cluster computing using several ODROID-XU4s is given and the concept of MapReduce topologies is briefly described. The discussion in [7] presents some first parallel examples of the computation of a Mandelbrot set with the MPJ Express message passing library that is implemented in JAVA. When it comes, to scientific computing, JAVA is not the optimal choice due to its performance limitations. In physics and engineering applications, C++, C, or FORTRAN are still the dominating languages for writing scientific code [8].
Common state-of-the-art simulations employ hundreds of thousands CPU cores on high-performance computing (HPC) systems [8,9] to solve big societal challenges. In this context, the scalability and the simulation kernel performance are key to efficient multi-core computations, i.e., it is not only essential to have highly optimized code at hand that runs efficiently on a single core, but also to allow for increasing computational efficiency under an increase of the number of computational cores. While the single core performance is in general enhanced by compute kernel tuning techniques such as loop vectorization, cache line miss avoidance, and intelligent programming, the parallel efficiency can be measured by means of strong scaling experiments. In such experiments the number of cores is continuously doubled for a given problem size. Ideally, the time-to-solution is bisected with every doubling. In such parallel computations, each of the processes solves a subset of the original problem. With an increasing number of cores, the network communication overhead increases as well, which leads to a decrease of efficiency. The best-scaling simulation codes are, able to scale up from a small number of cores to hundreds of thousands of processes [8-10].
The ODROID-MC1 can be seen as a small HPC system and is also well suited for the simulation of small to medium-scale scientific problems. Especially its low power consumption and its low price make it ideal for parallel code development and for procurement in smaller departments or companies, or at universities for educational purposes.
The following text will be described how to setup a cluster system with a shared file system using the Network File System (NFS) and the Message Passing Interface (MPI) together with the cluster job scheduler SLURM. Examples on how to run parallel computations on this system are given. An example from Computational Fluid Dynamics (CFD) corroborates the applicability of the ODROID-MC1 to solve scientific problems. The presented steps are the technical details that are behind the simulations and analyses discussed in [10].
Setting up the cluster system
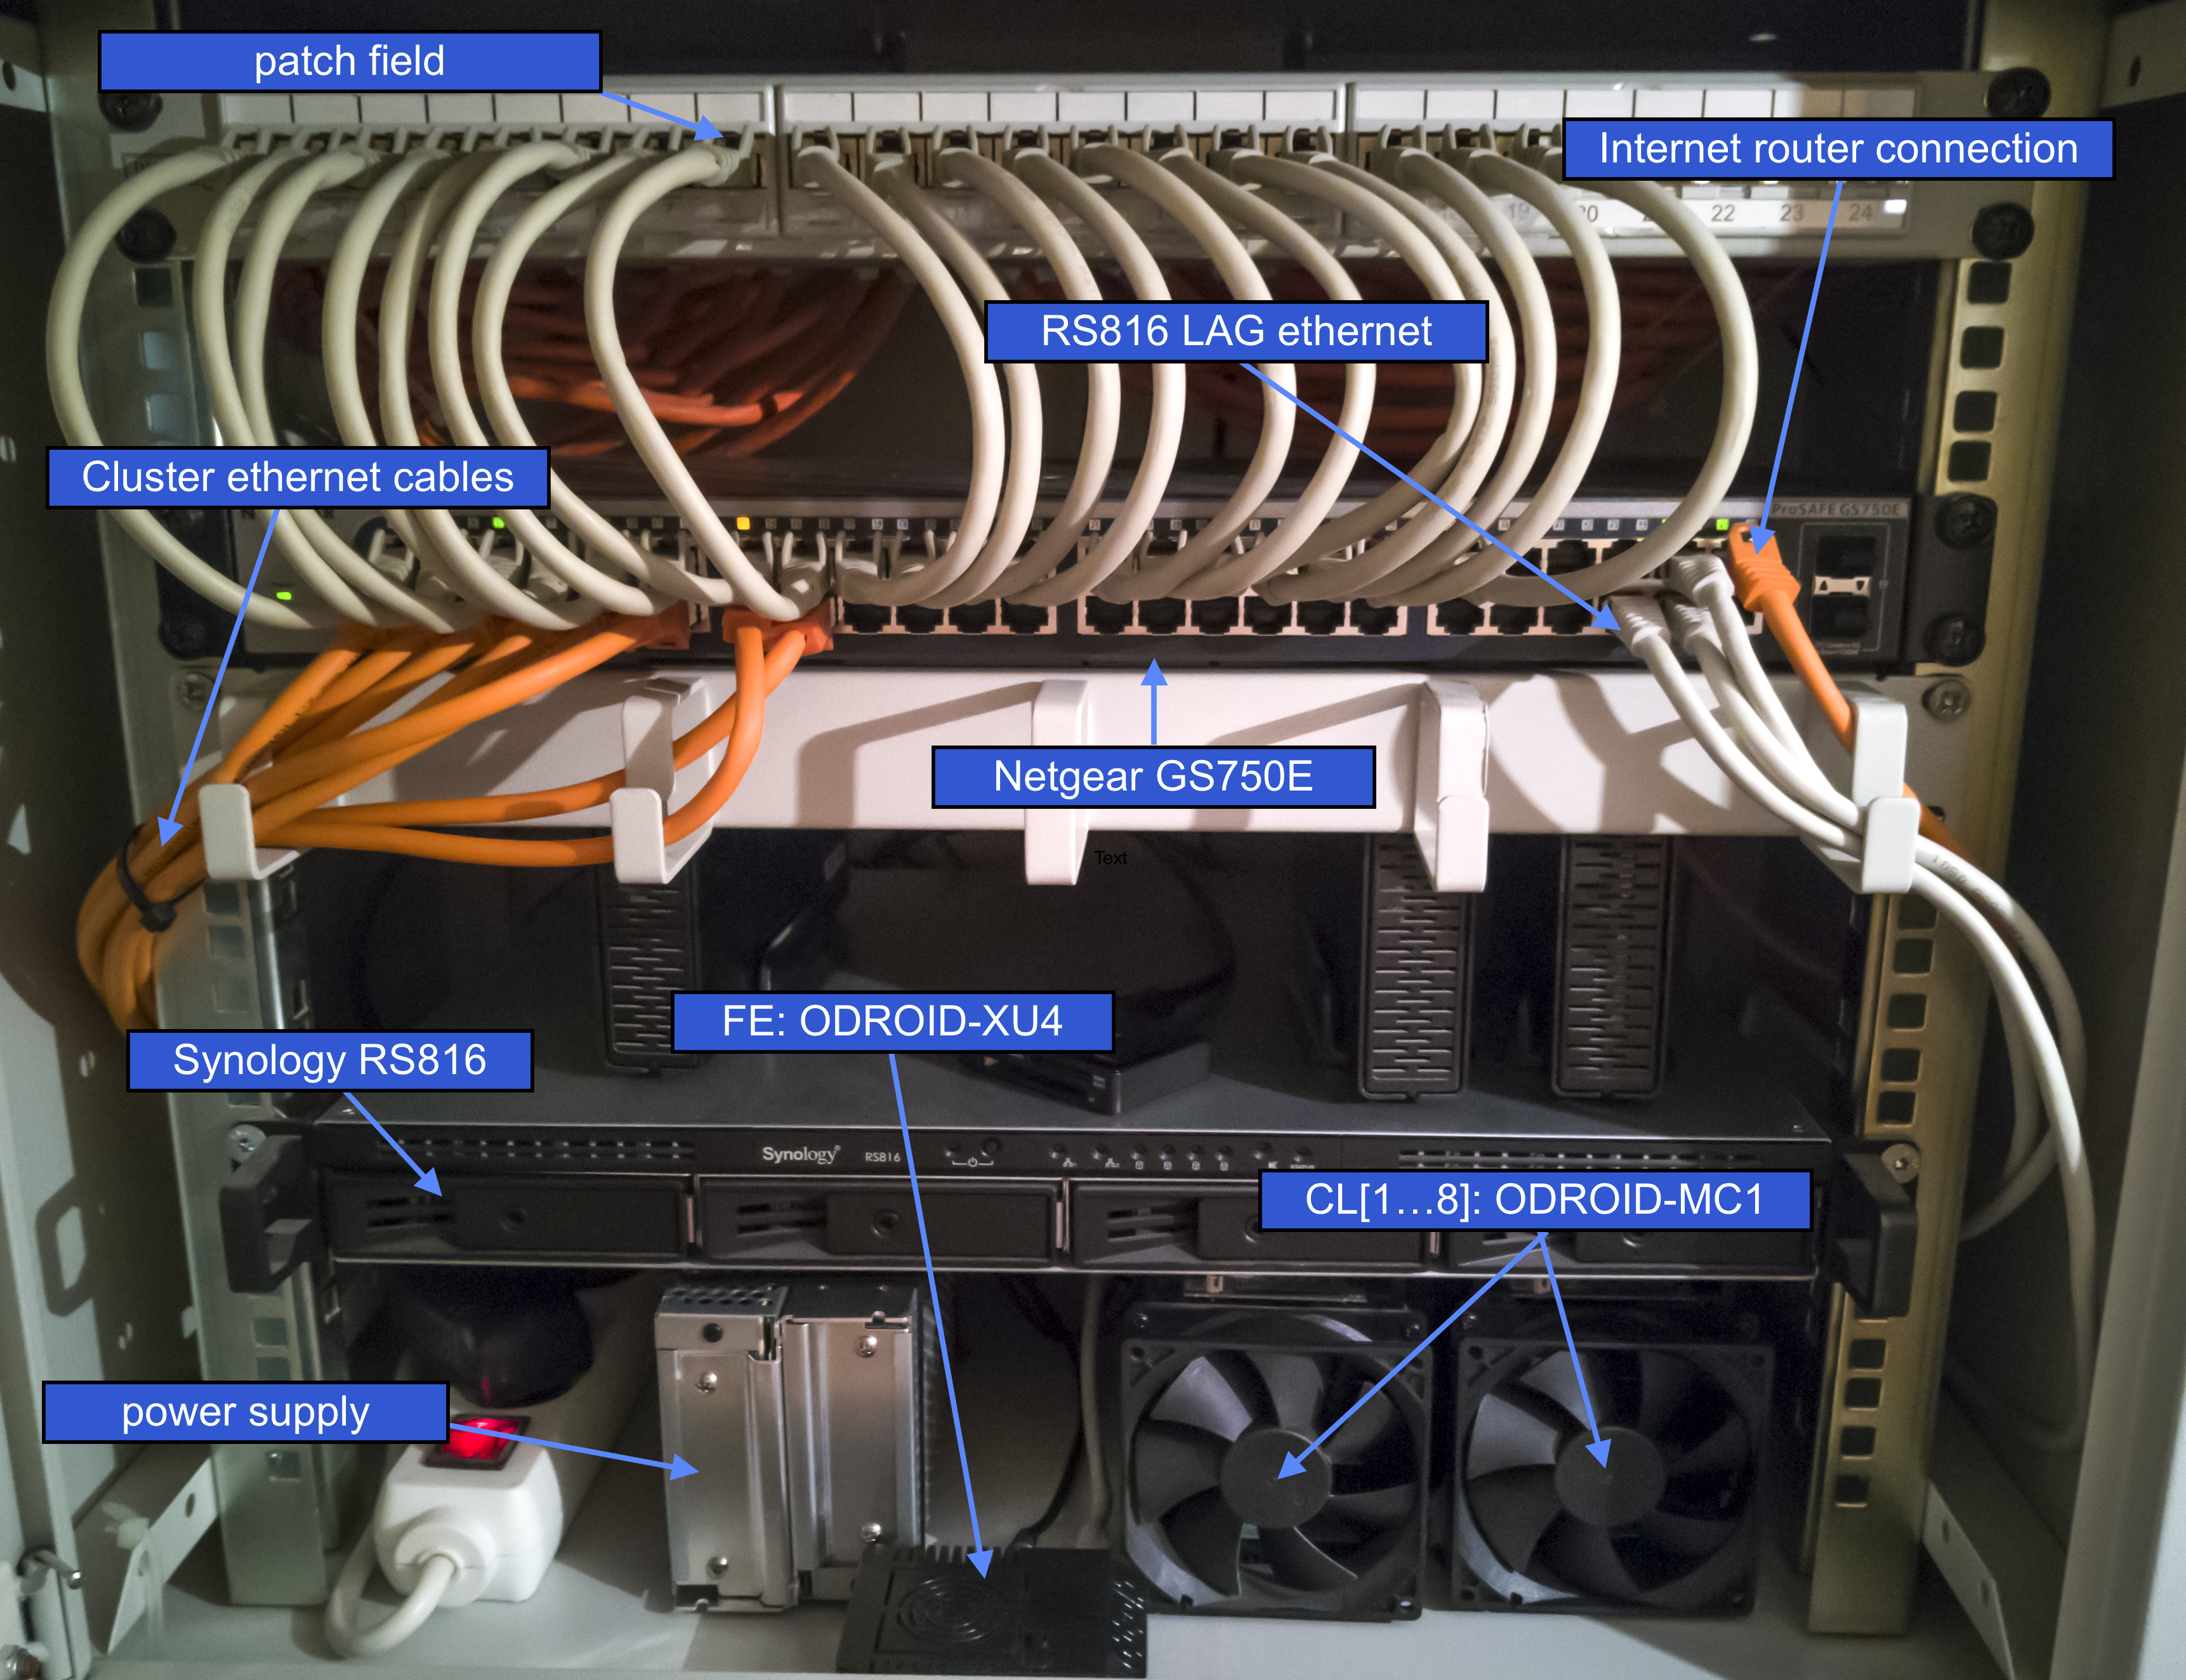
The cluster system consists of a front end node, which is a single ODROID-XU4 equipped with a 16GB eMMC 5.0 module, the ODROID-MC1, a Synology 4-bay Rackstation RS816, a GS750E ProSAFE Web Managed 50-port Gigabit Ethernet Switch, and an internet gateway. Figure 1 shows a photo of the current setup mounted in a 19" rack.
The RS816 serves as a DHCP and NFS server and is connected to the switch with a dual port link aggregation configuration. The switch connects the different components. Obviously, the RS816 and the GS750E can be replaced by any other server and switch with the same functionality, e.g., the front end node itself can serve as a DHCP and NFS server. For the following explanation it is assumed that access to the internet is granted via the gateway with the local IP 192.168.1.1, the server is named ‘FS’, is up and running, and has an IP address of 192.168.1.2. In the present example, the server exports the three directories via NFS:
/homes/ (will hold user home directories)
/netopt/ (will contain shared software)
/work/ (will be used as work space for computations)
The front end node will be identified by the name ‘FE’ and will be assigned the IP 192.168.1.100. The cluster nodes will be named CL[1...4] and will have the IP addresses 192.168.1.101 through 192.168.1.104. First, the configuration of the front-end node is presented before general software installation and the cluster node installation are discussed.
Figure 1 - Picture of the ODROID-MC1 setup (here, two MC1 systems are visible)
Front end node installation
First, the Ubuntu Linux image needs to be installed on the eMMC module of the ODROID-XU4 front end node or on an SD-card. A great step-by-step explanation can be found online under [11]. For the cluster nodes it is sufficient to install the minimal Ubuntu image. Note that the cluster installation has been tested for Ubuntu Linux 16.04 Xenial. Some details on installing the cluster system on Ubuntu Linux 18.04 Bionic can be found in Sec. 5.
To install the front end, the following tasks need to be performed as superuser. The first thing to do after login is set a new password and generate a key for easy login
$ passwd
$ ssh-keygen -t rsa
This will install the ssh-key for root in /root/.ssh/id_rsa. This key will in a later stage be copied to the cluster nodes to allow for easy administration.
IP address and hostname setup
On the system FE, a fixed IP 192.168.1.100 is assigned via updating the file /etc/network/interfaces to contain
auto lo
iface lo inet loopback

auto eth0
iface eth0 inet static address 192.168.1.100
gateway 192.168.1.1
netmask 255.255.255.0
dns-nameservers 192.168.1.1
The name of the system can be updated by adding
FE 192.168.1.100
to /etc/hosts and by replacing odroid in /etc/hostname by FE. To furthermore make the system aware of the cluster nodes, i.e., if your DHCP server does not assign the correct names to the nodes, add them, FS, and FE to /etc/hosts as well
Then, modify the file /etc/auto/master and add the following to the end of the file:
/nfs_mounts /etc/auto.nfs
Subsequently, create the file /etc/auto.nfs with the following content:
netopt -fstype=nfs,rw,soft,tcp,nolock,uid=user FS:/volume1/shares/netopt
homes -fstype=nfs,rw,soft,tcp,nolock,uid=user FS:/volume1/shares/homes
work -fstype=nfs,rw,soft,tcp,nolock,uid=user FS:/volume1/shares/work
This mounts NFS exports from the NFS server with the username user located at /volume1/shares on the server. Note that the username user must exist on both systems FS and the FE. Furthermore, create the corresponding directories:
$ mkdir /nfs_mounts
$ mkdir /netopt
$ cd /netopt
$ ln -s /nfs_mounts/netopt
$ cd /home
$ ln -s /nfs_mounts/homes/user
$ cd /home/user
$ ln -s /nfs_mounts/work
Note that the folders /nfs_mounts/netopt, /nfs_mounts/homes, and /nfs_mounts/work do not exist at this stage, will, however, become available upon starting the automounter. Therefore, execute
$ service autofs restart
It also makes sense for both the user and root to add the paths of the software that will be installed in the subsequent section to the path search directory environment variables. Therefore, add to the file ~/.profile
Software installation for parallel cluster computation
All shared software will be installed on the shared NFS resource /netopt. All sources will be downloaded and configured in the subdirectory /netopt/install. The following is performed on the front end FE and assumes that a compiler suite such as llvm or the GNU compiler suite is available.
Installation of MPICH
To allow for parallel software development, a parallel communication library needs to be installed. In this example the MPICH library version 3.2.1, which is available from www.mpich.org, will be installed with the following commands:
$ cd /netopt/install
$ mkdir mpich
$ cd mpich
$ tar -xvf mpich-3.2.1

$ cd mpich-3.2.1
$ ./configure --enable-mpi-cxx --prefix=/netopt/mpich-3.2.1
$ make -j 4
$ make install

$ cd /netopt
$ ln -s mpich-3.2.1 mpich
Installation and configuration of MUNGE
For the installation of the job scheduler SLURM, the MUNGE services (here MUNGE 0.5.13; available from https://dun.github.io/munge/) need to be installed. MUNGE is an authentication service for creating and validating credentials that is necessary for authenticated scheduling. To install MUNGE first do
$ apt-get install munge
This allows to have all necessary start scripts and run service scripts at hand. To install, however, the latest version of MUNGE, the aforementioned source code is downloaded and stored in /netopt/install. To compile MUNGE and install it run
$ cd /netopt/install
$ mkdir munge
$ cd munge
$ tar -xvf munge-0.5.13.tar.gz

$ cd munge-munge-0.5.13   .
$ /configure --prefix=/netopt/munge-0.5.13
$ make -j 4
$ make install

$ cd /netopt
$ ln -s munge-0.5.13 munge

$ cd munge
$ mv etc etc.old
$ mv var var.old
$ ln -s /etc
$ ln -s /var
Note that the logs of MUNGE will this way be written to the local file system /var and the configuration is performed in /etc. To configure MUNGE, a secret MUNGE key needs to be generated by:
Note that in a later stage (see Sec. 2.3.2) the file /etc/munge/munge.key is copied to the cluster nodes. Furthermore, since the compiled MUNGE installation replaces the previously installed version, the link to the MUNGE executable needs to be updated:
$ cd /netopt/install
$ mkdir pmix
$ cd pmix
$ tar -xvf pmix-2.1.0.tar.gz

$ cd pmix-2.1.0
$ ./configure --prefix=/netopt/pmix-2.1.0
$ make -j 4
$ make install

$ cd /netopt
$ ln -s pmix-2.1.0 pmix
Installation and configuration of SLURM
Finally the scheduler SLURM (here SLURM 17.11.3-2; available from https://slurm.schedmd.com) is installed. Similar to MUNGE, first the Ubuntu SLURM is installed via
$ apt-get slurm-llnl libslurm-dev
Then, the latest version is installed in /netopt via
$ cd /netopt/install
$ mkdir slurm
$ cd slurm
$ tar -xvf slurm-17.11.3-2.tar.gz

$ cd slurm-17.11.3-2
$ ./configure --prefix=/netopt/slurm-17.11.3-2 --sysconfdir=/etc/slurm-llnl --with-munge=/netopt/munge
                --with-pmix=/netopt/pmix
$ make -j 4
$ make install

$ cd /netopt
$ ln -s slurm-17.11.3-2 slurm
To configure SLURM, the file /etc/slurm-llnl/slurm.conf is modified to contain
The cluster nodes also use the Ubuntu Linux minimal image. The following is exemplarily shown for the first cluster node CL1 with IP 192.168.1.101 and needs to be applied to all cluster nodes.
General cluster node configuration
After installation of the SD-card make sure that the system is up-to-date:
Also be sure to copy the folder /root/.ssh from FE to CL1, i.e., on FE execute the following ((make sure that rsync is installed):
$ rsync -av /root/.ssh CL1:/root/
Then, follow the steps in Sec. 2.1.1 and Sec. 2.1.2 to have the correct IP address (192.168.1.101), hostname (CL1), and the automounter running.
Integration into the cluster system
Install all necessary packages on CL1:
$ apt-get install munge slurm-llnl libslurm-dev
Then, the MUNGE key generated in Sec. 2.2.2 and residing in /etc/munge/munge.key on FE and the SLURM configuration file found in /etc/slurm-llnl/slurm.conf need to be transferred to CL1 by running
on FE. At this stage it makes sense to restart the cluster node. After installing each node, the system is almost ready for cluster computation.
Cluster administration
To have the scheduler running, the following commands need to be executed on the nodes
$ sudo service munge start
$ sudo service slurmd start
and on FE:
$ sudo service munge start
$ sudo service slurmctld start
The node status can be checked by:
$ scontrol show nodes
or by:
$ sinfo -N --long
If one of the nodes is in state DOWN or UNKNOWN it can be resumed by
$ scontrol update NodeName=NAME State=RESUME
where NAME is the name of a node, e.g., CL1.
Job submission
Now that the cluster is fully functional, jobs can submitted to the scheduler, which need a job file such as:
#!/bin/bash -x
#SBATCH --nodes=4           // allocates 4 nodes for the job
#SBATCH --ntasks-per-node=2       // starts 2 MPI ranks per node
#SBATCH --cpus-per-task=4       // for each MPI rank per node 4 OpenMP threads are reserved
#SBATCH --output=mpi-out.%j       // location of the output file
#SBATCH --error=mpi-err.%j       // location of the error file
#SBATCH --time=00:20:00       // wall time of the job
#SBATCH --partition=batch        // the name of the partition

export OMP_NUM_THREADS=${SLURM_CPUS_PER_TASK}        // information for OpenMP

srun --mpi=pmi2 COMMAND      // runs the command COMMAND in parallel
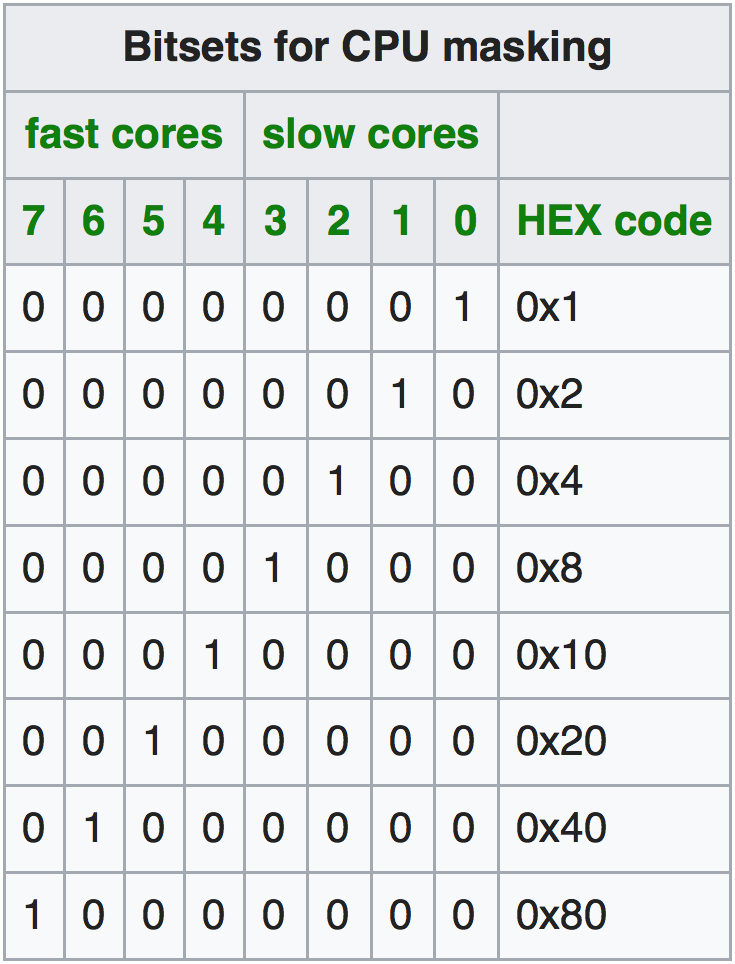
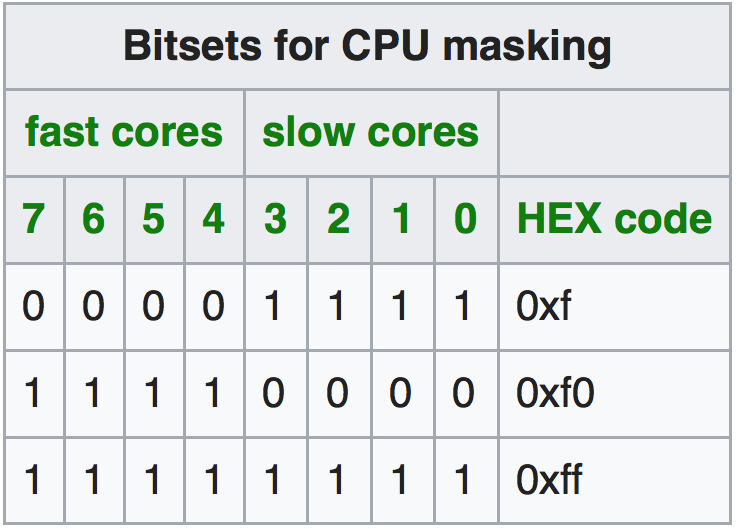
Jobs can be scheduled to the nodes differently, i.e., either individual cores, the Cortex-A7 (slow) or Cortex-A15 (fast) cores, or both can be used for computation. This is configured by the srun command in the job script:
srun --cpu-bind=verbose,mask_cpu:ABxCD --mpi=pmi2 COMMAND // uses mask ABxCD for scheduling
The mask_cpu option allows to specify the mask for execution. The masks for using a whole single Cortex system or both are show in Tables 1 and 2.
Table 1:CPU binding mask for individual cores.
Table 2:CPU binding mask for whole single or both Cortex.
Example: Flow simulation on the ODROID-MC1
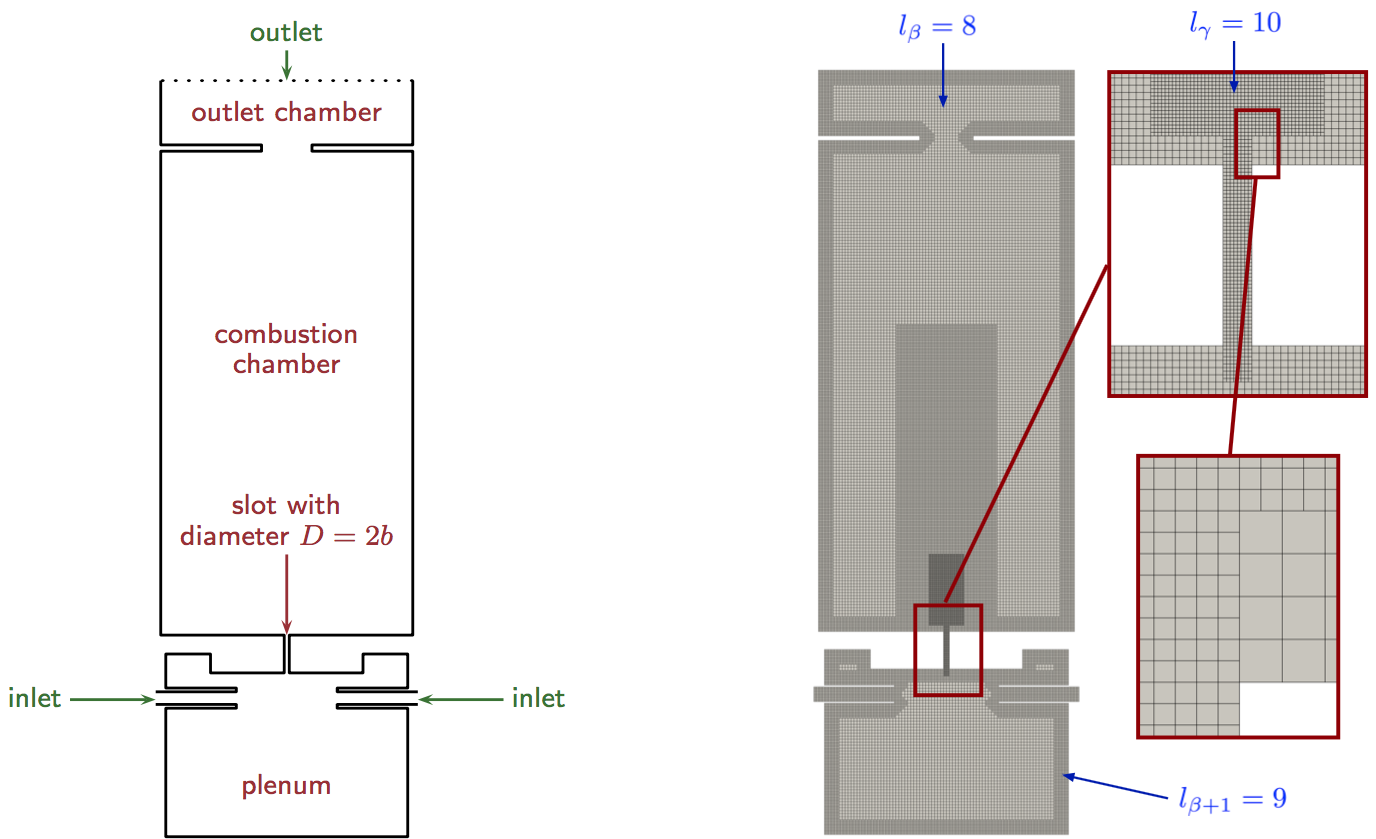
To show that the ODROID-MC1 system can be used for scientific simulations, an example of the simulation of the flow in a slot burner geometry [10], see Fig. 2; left side, is presented in the following. The simulation uses a lattice-Boltzmann code [12], which solves the governing equations of fluid mechanics on a space-discretizing Cartesian mesh, i.e., the Boltzmann equation is solved for all spatial location within this mesh in time.
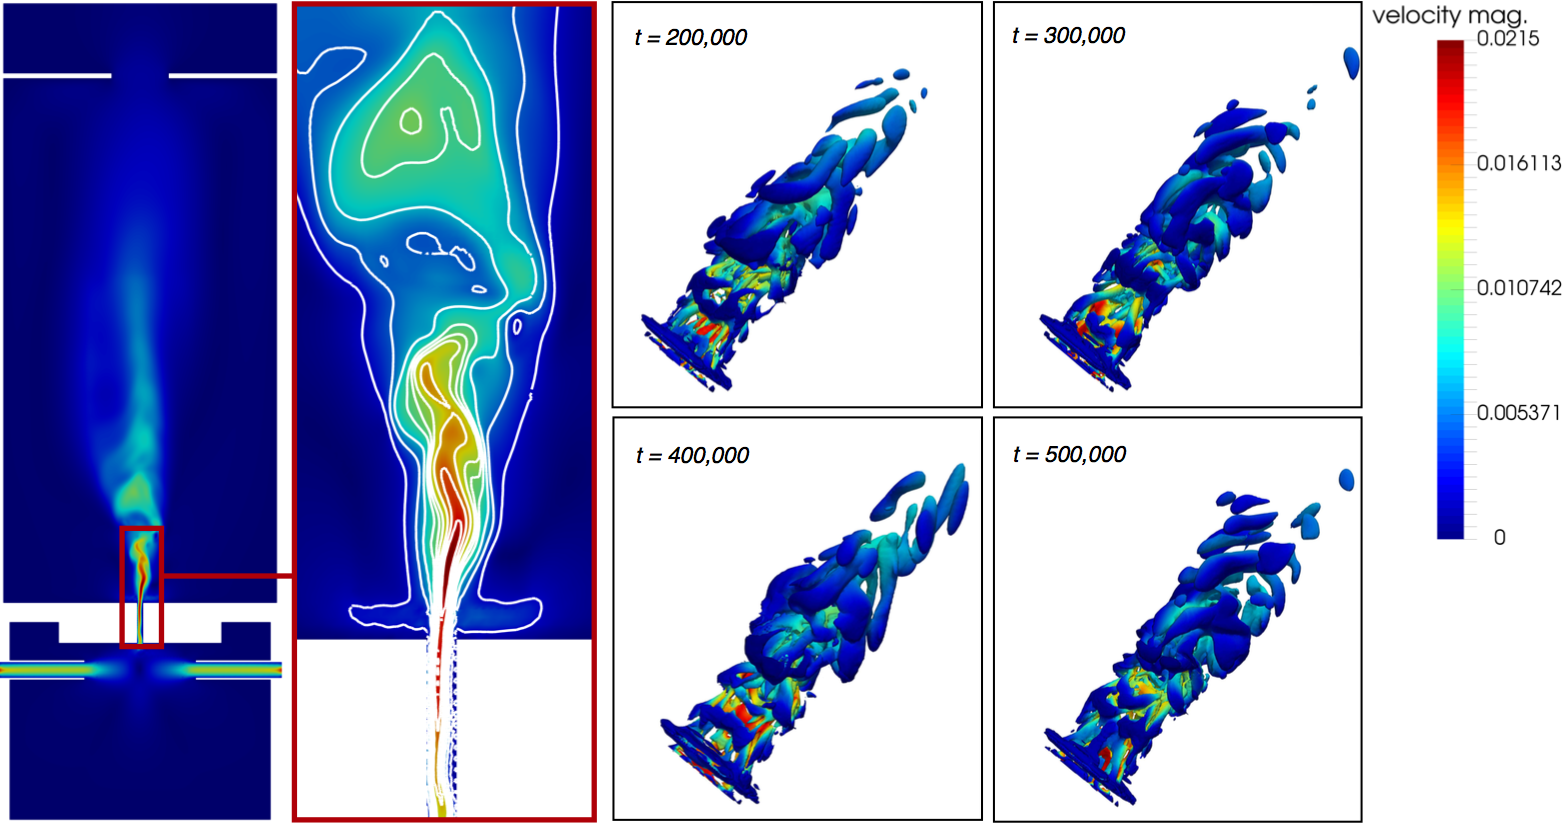
At each time step, at each location in the mesh, a velocity vector and the density is computed by a two-stage algorithm that locally simulates the collision of particles in a finite volume and transports collision information to neighboring locations. The mesh is generated by a parallel mesh generator [13] and is shown in Fig. 2 on the right side. Especially in the vicinity of the walls and in the burning jet region, the mesh is locally refined to have a sufficient resolution to capture the main flow features. Figure 3 shows the results of the computation, which is produced using only the fast Cortex-A15 cores of the ODROID-MC1. The simulation is run for 24 hours. Obviously, a jet develops in the slot region that reaches into the combustion chamber. On the left a cross-section in the slot region is shown with contours of the velocity magnitude. The right side shows three-dimensional contours of the vortical structures generated at different time steps of the simulation. As mentioned in the introduction, scalability is an important aspect in HPC simulations. Therefore, strong scalability measurements are performed for the whole system.
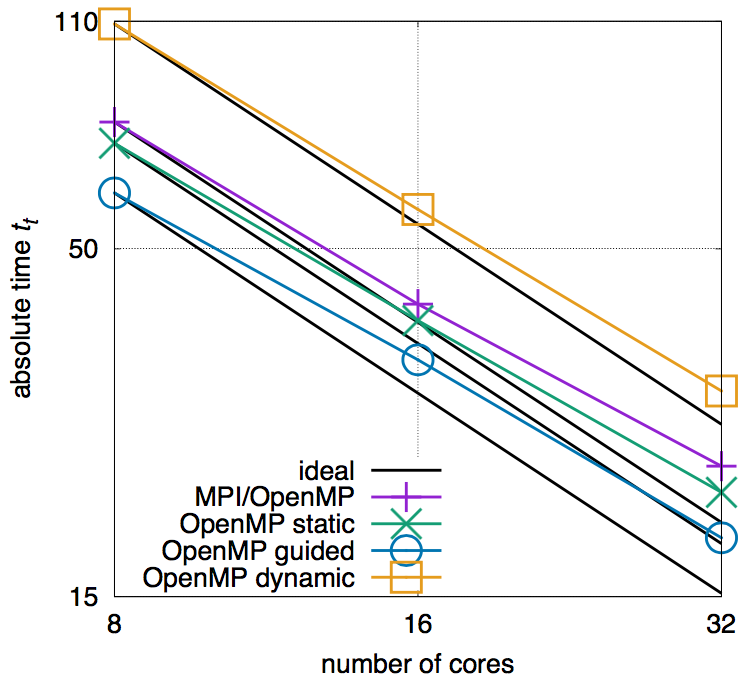
Figure 4 shows the scalability of the simulation using different parallelization strategies, i.e., using a pure MPI and hybrid MP/OpenMP parallelization strategies, latter with different OpenMP scheduling options for parallelized loops. The black lines represent the ideal scaling behavior. In Figure 4 it can be seen that among all cases, the hybrid MPI/OpenMP using the guided loop parallelization strategies performs best and is hence the method of choice for a simulation. The effect of the communication overhead is already visible from the discrepancy to the ideal black line. This configuration does, however, not outrun the performance of using only the fast Cortex-A15 cores (as used for the slot burner simulation). For more details, the interested reader is referred to [10] from where the results are taken and which furthermore discusses the energy consumption of the ODROID-MC1 and compares its performance to state-of-the-art German HPC systems.
Figure 2: Schematic view and computational mesh of a slot burner configuration [10]
Figure 3: Results of the flow simulation in a slot burner geometry [10]
Figure 4: Strong scalability of the lattice-Boltzmann code on the whole ODROID-MC1 cluster using different parallelization strategies [10]
Summary and conclusion
The ODROID-MC1 is a promising system for cluster operation and for the simulation of small to medium scientific problems. The corresponding software installation is straightforward. The present article has given a step-by-step manual on how to setup the cluster system for parallel computation using MPI with MPICH and PMIX. The scheduler SLURM uses MUNGE for authentication and allows job pinning for pure MPI and hybrid MPI/OpenMP job executions. An example of the simulation of the flow in a slot burner configuration shows the ODROID-MC1 to be a suitable system for the simulation of such problems. The scalability of the simulation software on the system is quite sufficient to compute solutions in a human-manageable time. That is, the ODROID-MC1 is for small departments or research groups a cost-effective alternative to x86-based HPC systems if large-scale simulations are not the main target.
Further remarks
Instead of installing each cluster node individually, it is also possible to install PXE boot and to have each node boot online over the network from TFTP. The root file system is then imported via NFS from a file server. A detailed guide on how to setup PXE boot on ODROID-XU4 can be found on the ODROID Wiki pages [14].
Using the latest Linux Ubuntu 18.04 Bionic, some changes in the installation process are necessary. First of all the network configuration has changed from a setup in /etc/network/interfaces to a configuration via netplan. That is, instead of modifying /etc/network/interfaces, the file /etc/netplan/01-networkd.yaml should be created with the following content (example for CL1)
[8] D. Brömmel, W. Frings, B. J. N. Wylie, B. Mohr, P. Gibbon, T. Lippert, The High-Q Club: Experience Extreme-scaling Application Codes. Supercomputing Frontiers and Innovations, 5(1), 59–78 (2018). doi:10.14529/jsfi180104
[9] A. Pogorelov, M. Meinke, W. Schröder, Cut-cell method based large-eddy simulation of tip-leakage flow. Physics of Fluids, 27(7), 075106 (2015). doi:10.1063/1.4926515
[10] A.Lintermann, D. Pleiter, W. Schröder, Performance of ODROID-MC1 for scientific flow problems, Future Generation Computer Systems (in press, first online: Jan. 04, 2019). doi:10.1016/j.future.2018.12.059
[12] R.K. Freitas, A. Henze, M. Meinke, W. Schröder, Analysis of Lattice-Boltzmann methods for internal flows. Computers & Fluids, 47(1), 115–121 (2011). doi:10.1016/j.compfluid.2011.02.019
[13] A. Lintermann, S. Schlimpert, J. H. Grimmen, C. Günther, M. Meinke, W. Schröder, W. Massively parallel grid generation on HPC systems, Computer Methods in Applied Mechanics and Engineering 277, 131–153 (2014). doi:10.1016/j.cma.2014.04.009
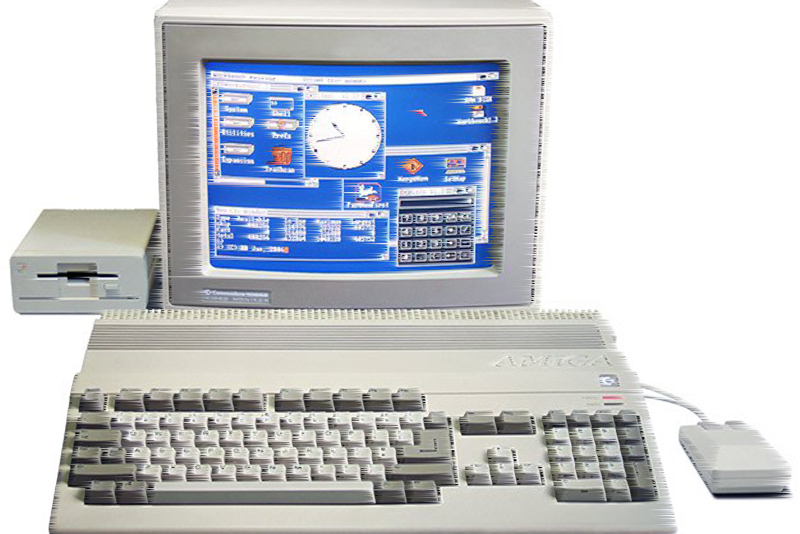
Amibian.js: Emulating a Commodore Amiga on an ODROID-XU4 Cluster
February 1, 2019By Jon L. AasendenODROID-XU4, Tutorial
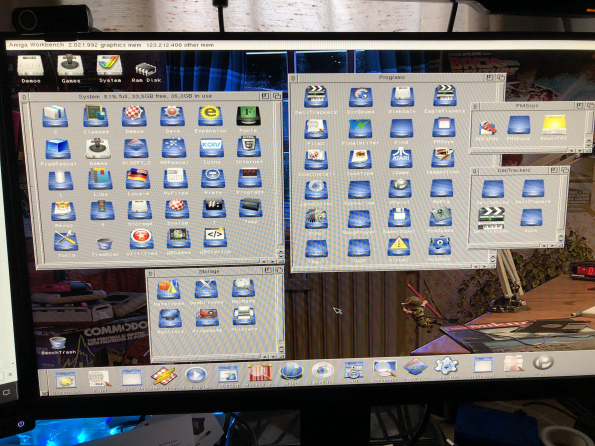
Amibian is what you need to transform your ODROID into an Amiga. It is a very lightweight SD card image that fits on SD cards from the size of 2GB and up. It is made to give you the best Amiga experience you can get without having an actual Amiga. Amibian allows you to remember, relive, and rediscover the joy of Amiga easily with cheap hardware and minimum effort.
Early this month I announced that the official hardware will be based around Hardkernel's ODROID-XU4 line of SBC's (single board computers) which deliver good performance, exceptional stability, and low power consumption at a reasonable price. I also availed that the first Amibian.js setup would consist of five ODROID-XU4 boards working together in a cluster, meaning that work is divided among these five boards for high efficiency and that they share resources.
Amibian.js is gaining momentum as more and more developers, embedded systems architects, gamers, and retro computer enthusiasts discover the project. I have to admit I’m pretty stoked about what we are building here myself!
However, as with any new technology or invention, there are two common traps that people can fall into: The first trap is to gravely underestimate a technology. JavaScript certainly invites this, because only a decade ago the language was little more than a toy. Since then, JavaScript has evolved to become the most widely adopted programming language in the world, and runtime engines like Google’s V8 runs JavaScript almost as fast as compiled binary code. “Native” means machine code like that produced by a C/C++ compiler, Pascal compiler, or anything else that produces programs that run under Linux or Windows.
It takes some adjustments, especially for traditional programmers that haven't paid attention to where browsers have gone, but long gone are the days of interpreted JavaScript. Modern JavaScript is first parsed, tokenized, and compiled to bytecodes. These bytecodes are then JIT compiled (“just in time”, which means the compilation takes place inside the browser) to real machine-code using state of the art techniques (LLVM). So the JavaScript of 2018 is by no means the JavaScript of 2008.
The second trap you can fall into is to exaggerate what a new technology can do, and attach abilities and expectations to a product that simply cannot be delivered. It is very important to me that people don’t fall into either trap, and that everyone is informed about what Amibian.js actually is and can deliver, as well as what it won't deliver. Rome was not built in a day, and it’s wise to study all the factors before passing judgement.
I have been truly fortunate that people support the project financially via Patreon, and as such I feel it’s my duty to document and explain as much as possible. I am a programmer and I often forget that not everyone understands what I’m talking about. We are all human and make mistakes. Hopefully this article will paint a clearer picture of Amibian.js and what we are building here. The project is divided into two phases: first, to finish Amibian.js itself; and second, to write a Visual Studio clone that runs purely in the browser.
What the heck is Amibian.js?
Amibian.js is a group of services and libraries that combined creates a portable operating system that renders to HTML5. A system that was written using readily available web technology, and designed to deliver advanced desktop functionality to web applications.
The services that make up Amibian.js were designed to piggyback on a thin Linux crust, where Linux deals with the hardware, drivers, and the nitty-gritty we take for granted. There is no point in trying to write a better kernel in 2018, because you are never going to catch up with Linus Torvalds. It’s much more interesting to push modern web technology to the absolute limits, and build a system that is truly portable and distributed.
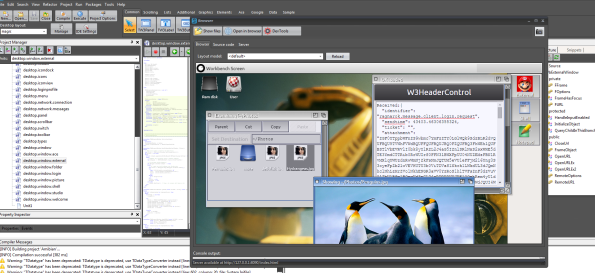
Figure 1 - Amibian.js is created in Smart Pascal and compiled to JavaScript
The service layer is written purely in node.js (JavaScript) which guarantees the same behavior regardless of host platform. One of the benefits of using off-the-shelves web technology is that you can physically copy the whole system from one machine to the other without any changes. So if you have a running Amibian.js system on your x86 PC and copy all the files to an ARM computer, you don't even have to recompile the system. Just fire up the services and you are back in the game.
Now before you dismiss this as “yet another web mockup” please remember what I said about JavaScript: the JavaScript in 2018 is not the JavaScript of 2008. No other language on the planet has seen as much development as JavaScript, and it has evolved from a “browser toy” into the most important programming language of our time.
So Amibian.js is not some skin-deep mockup of a desktop (lord knows there are plenty of those online). It implements advanced technologies such as remote filesystem mapping, an object-oriented message protocol (Ragnarok), RPCS (remote procedure call invocation stack), video codec capabilities and much more—all of it done with JavaScript.
In fact, one of the demos that Amibian.js ships with is Quake III re-compiled to JavaScript. It delivers 120 fps flawlessly (browser is limited to 60 fps) and makes full use of standard browser technologies (WebGL). So indeed, the JavaScript we are talking about here is cutting edge. Most of Amibian.js is compiled as “Asm.js” which means that the V8 runtime—the code that runs JavaScript inside the browser, or as a program under node.js—will JIT compile it to highly efficient machine-code, which is why Amibian.js is able to do things that people imagine impossible!
What does Amibian.js consist of?
Amibian.js consists of many parts, but we can divide it into two categories:
A HTML5 desktop client
A system server and various child processes
These two categories have the exact same relationship as the X desktop and the Linux kernel. The client connects to the server, invokes procedures to do some work, and then visually represent the response This is identical to how the X desktop calls functions in the kernel or one of the Linux libraries. The difference between the traditional, machine code based OS and our web variation, is that our version doesn’t have to care about the hardware. We can also assign many different roles to Amibian.js. More about that later.
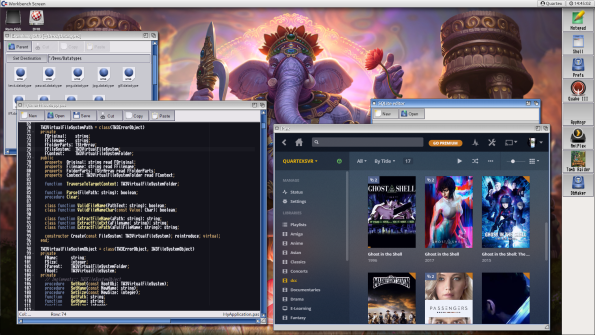
Figure 2 - Enjoying other cloud applications is easy with Amibian.js. Here is Plex, a system very much based on the same ideas as Amibian.js
For the record: I’m trying to avoid a bare-metal OS, otherwise I would have written the system using a native programming language like C or Object Pascal. So I am not using JavaScript because I lack skill in native languages, I am using JavaScript because native code is not relevant for the tasks Amibian.js solves. If I used a native back-end I could have finished this in a couple of months, but a native server would be unable to replicate itself between cloud instances because chipset and CPU would be determining factors.
The Amibian.js server is not a single program. The back-end for Amibian.js consists of several service applications (daemons on Linux) that each deliver specific features. The combined functionality of these services make up “the Amibian kernel” in our analogy with Linux. You can think of these services as library files in a traditional system, and programs that are written for Amibian.js can call on these to a wide range of tasks. It can be as simple as reading a file, or as complex as registering a new user or requesting admin rights.
The greatest strength of Amibian.js is that it’s designed to run clustered, using as many CPU cores as possible. It’s also designed to scale, meaning that it will replicate itself and divide the work between different instances. This is where things get interesting, because an Amibian.js cluster doesn’t need the latest and coolest hardware to deliver good performance. You can build a cluster of old PCs in your office, or a handful of embedded boards. An ODROID-XU4, Raspberry Pi or a Tinker Board are brilliant candidates.
Why not just stick with Linux?
That is a fair question, and this is where the roles I mentioned above comes in. As a software developer, many of my customers work with embedded devices and kiosk systems. You have companies that produce routers and set-top boxes, NAS boxes of various complexity, ticket systems for trains and busses; and all of them end up having to solve the same needs.
What each of these manufacturers have in common is the need for a web desktop system that can be adapted for a specific program. Any idiot can write a web application, but when you need safe access to the filesystem, unified API’s that can delegate signals to Amazon, Azure, or your company server, things suddenly get more complicated. Even when you have all of that, you still need a rock solid application model suitable for distributed computing. You might have 1 ticket booth, or 10,000 nationwide. There are no systems available that are designed to deal with web technology on that scale. Yet.
Let’s look at a couple of real-life scenarios that I have encountered. I’m confident you will recognize a common need. Here are some roles that Amibian.js can assume to help deliver a solution rapidly. It also gives you some ideas of the economic possibilities.
Please note that we are talking about JavaScript here, not native code. There are a lot of native solutions out there, but the whole point here is to forget about CPU, chipset, and target and have a system floating on top of whatever is beneath.
When you want to change some settings on your router, login to your router. It contains a small apache server (or something similar) and you do all your maintenance via that web interface. The web interface is typically skin-deep, annoying to work with, and a pain for developers to update since it’s connected to a native apache module which is 100% dependent on the firmware. Each vendor ends up reinventing the wheel over and over again.
When you visit a large museum notice the displays. A museum needs to display multimedia, preferably on touch capable devices, throughout different exhibits. The cost of having a developer create native applications that display the media, play the movies, and give visual feedback is astronomical. This is why most museums adopt web technology to handle media presentation and interaction, once again reinventing the wheel with varying degree of success.
Hotels have more or less the exact same need but on a smaller scale, especially larger hotels where the lobby has information booths, and each room displays a web interface via the TV.
Shopping malls face the same challenge, and depending on the size they can need anything from a single to a hundred nodes.
Schools spend millions on training software and programming languages every year. Amibian.js can deliver both, allowing schools to pay only for maintenance and adaptation–the product itself is free. Kids get the benefit of learning traditional languages and enjoying instant visual feedback! They can learn Basic, Pascal, JavaScript and C. I firmly believe that the classical languages will help make them better programmers as they evolve.
You’re probably starting to see the common denominator here: they all need a web-based desktop system, one that can run complex HTML5 based media applications and give them the same depth as a native operating-system, which is pretty hard to achieve with JavaScript alone.
Amibian.js provides a rich foundation of more than 4000 classes that developers can use to write large, complex, and media-rich applications (see Smart Mobile Studio below). Just like Linux and Windows provide a wealth of libraries and features for native application development, Amibian.js aims to provide the same for cloud and embedded systems.
As the name implies, Amibian.js has roots in the past with the machine that defined multimedia, the Commodore Amiga. The relation is more than just visual: Amibian.js uses the same system architecture because we believe it’s one of the best systems ever designed.
If JavaScript is so poor, why should we trust you to deliver so much?
First of all, I’m not selling anything. It’s not like this project is something that is going to make me a ton of cash. I ask for support during the development period because I want to allocate proper time for it, but when done Amibian.js will be free for everyone (LGPL). And I’m also writing it because it’s something that I need that I haven't seen anywhere else. I think you have to write software for yourself, otherwise the quality won't be there.
Secondly, writing Amibian.js in raw JavaScript with the same amount of functions and depth would take years. The reason I am able to deliver so much functionality quickly is because I use a compiler system called Smart Mobile Studio. This saves months and years of development time, and I can use all the benefits of OOP (object-oriented programming).
Prior to starting the Amibian.js project, I spent roughly 9 years creating Smart Mobile Studio. Smart is not a solo project–many individuals have been involved. The product provides a compiler, IDE (editor and tools), and a vast run-time library of pre-made classes (roughly 4000 ready to use classes, or building-blocks).
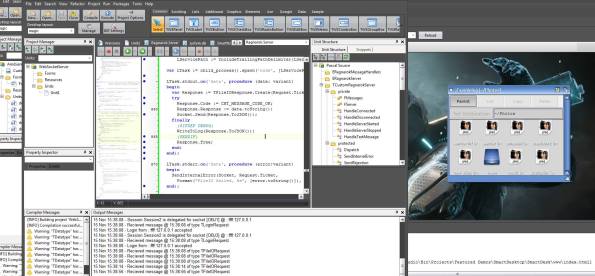
Figure 3 - Writing large-scale node.js services in Smart is easy, fun and powerful!
Unlike other development systems, Smart Mobile Studio compiles to JavaScript rather than machine code. We have spent a great deal of time making sure we could use proper OOP, and we have spent more than three years perfecting a visual application framework with the same depth as the VCL or FMX (the core visual frameworks for C++ builder and Delphi).
The result is that I can knock out a large application that a normal JavaScript coder would spend weeks on in a single day.
Smart Mobile Studio uses the Object Pascal language, a dialect which is roughly 70% compatible with Delphi. Delphi is exceptionally well suited for writing large, data driven applications. It also thrives for embedded systems and low-level system services. In short, it’s a lot easier to maintain 50,000 lines of object pascal code, than 500,000 lines of JavaScript code.
Amibian.js, both the service layer and the visual HTML5 client application, is written completely using Smart Mobile Studio. This gives me as the core developer of both systems a huge advantage–who knows it better than the designer right? I also get to write code that is truly OOP (classes, inheritance, interfaces, virtual and abstract methods, partial classes etc), because our compiler crafts something called a VMT (virtual method table) in JavaScript.
Traditional JavaScript doesn’t have OOP, it has something called prototypes. With Smart Pascal I get to bring in code from the Object Pascal community, components and libraries written in Delphi or Freepascal–which range in the hundreds of thousands. Delphi alone has a massive library of code to pick from. It’s been a popular toolkit for ages (C is three years older than pascal).
But how would I use Amibian.js?
Amibian.js can be setup and used in four different ways:
As a true desktop, booting straight into Amibian.js in full-screen
As a cloud service, accessed through any modern browser
As a NAS or Kiosk front-end
As a local system on your existing OS. A batch script will fire it up and you can access it on https://127.0.0.1:8090 using your browser.
So the short answer is yes, you install it. But it’s the same as installing Chrome OS. It’s not like an application you just install on your Linux, Windows, or OSX box. The whole point of Amibian.js is to have a platform independent, chipset agnostic system. Something that doesn’t care if you are using ARM, x86, PPC or Mips as your CPU of preference. Developers will no doubt install it on their existing machines. Amibian.js is non-intrusive and does not affect or touch files outside its own ecosystem. However, the average non-programmer will most likely setup a dedicated machine (or several) or just deploy it on their home NAS.
The first way of enjoying Amibian.js is to install it on a PC or ARM device. A disk image will be provided for supporters so they can get up and running ASAP. This disk image will be based on a thin Linux setup, just enough to get all the drivers going (but no X desktop). It will start all the node.js services and finally enter a full-screen web display (based on Chromium Embedded) that renders the desktop. This is the method most users will prefer to work with Amibian.js.
The second way is to use it as a cloud service. You install Amibian.js like mentioned above, but you do so on Amazon or Azure. That way you can login to your desktop using nothing but a web browser. This is a very cost-effective way of enjoying Amibian.js since renting a virtual instance is affordable and storage is abundant.
The third option is for developers. Amibian.js is a desktop system, which means it’s designed to host more elaborate applications. Where you would normally just embed an external website into an IFrame, but Amibian.js is not that primitive. Hosting external applications requires you to write a security manifest file, but more importantly: the application must interface with the desktop through the window’s message-port. This is a special object that is sent to the application as a hand-shake, and the only way for the application to access things like the file-system and server-side functionality, is via this message-port.
Calling “kernel” level functions from a hosted application is done purely via the message-port mentioned above. The actual message data is JSON and must conform to the Ragnarok client protocol specification. This is not as difficult as it might sound, but Amibian.js takes security very seriously so applications trying to cause damage will be promptly shut down.
You mention hosted applications, do you mean websites?
Both yes and no: Amibian.js supports 3 types of applications:
Ordinary HTML5/JS based applications, or “websites” as many would call them. But like I talked about above they have to establish a dialog with the desktop before they can do anything useful.
Hybrid applications where half is installed as a node.js service, and the other half is served as a normal HTML5 app. This is the coolest program model, and developers essentially write both a server and a client and then deploy it as a single package.
LDEF compiled bytecode applications, a 68k inspired assembly language that is JIT compiled by the browser (commonly called “asm.js”) and runs extremely fast. The LDEF virtual machine is a sub-project in Amibian.js
The latter option, bytecodes, is a bit like Java. A part of the Amibian.js project is a compiler and runtime system called LDEF.
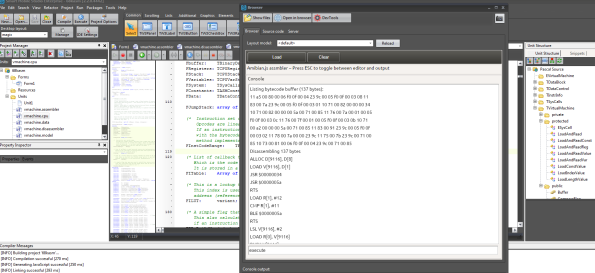
Figure 4 - The Amibian.js LDEF assembler, here listing opcodes and disassembling a method
The first part of the Amibian.js project is to establish the desktop and back-end services. The second part of the project is to create the world’s first cloud based development platform. A full Visual Studio clone if you like, that allows anyone to write cloud, mobile, and native applications directly via the browser.
Several languages are supported by LDEF, and you can write programs in Object Pascal, Basic and C. The Basic dialect is especially fun to work with, since it’s a re-implementation of BlitzBasic, with a lot of added extras. Amiga developers will no doubt remember BlitzBasic as it was used to create some great games back in the 80s and 90s. It’s well suited for games and multimedia programming and above all–very easy to learn.
More advanced developers can enjoy Object Pascal (read: Delphi) or a subset of C/C++. Please note: This IDE is designed for large-scale applications, not simple snippets. The ultimate goal of Amibian.js is to move the entire development cycle to the cloud and away from the desktop. With Amibian.js you can write a cool “app” in BlitzBasic, run it right in the browser, or compile it server-side and deploy it to your Android Phone as a real, natively compiled application. Any notion of a “mock desktop for HTML” should be firmly put to the side. I am not playing around with this product and the stakes are very real.
But why don’t you just use ChromeOS?
There are many reasons, but the most important one is chipset independence. Chrome OS is a native system, meaning that it’s core services are written in C/C++ and compiled to machine code. The fundamental principle of Amibian.js is to be 100% platform agnostic, and “no native code allowed.” This is why the entire back-end and service layer is targeting node.js. This ensures the same behavior regardless of processor or host system (Linux being the default host).
Node.js has the benefit of being 100% platform independent. You will find node.js for ARM, x86, Mips, and PPC. This means you can take advantage of whatever hardware is available. You can even recycle older computers that have lost mainstream support, and use them to run Amibian.js.
A second reason is this: Chrome OS might be free, but it’s only as open as Google wants it to be. Chrome OS is not just something you pick up and start altering. It’s dependence on native programming languages, compiler toolchains, and a huge set of libraries makes it extremely niche. It also shields you utterly from the interesting parts, namely the back-end services. It’s quite frankly boring and too boxed in for any practical use–except for Google and its technology partners, that is.
I wanted a system that I could move around, that could run in the cloud on cheap SBC’s. A system that could scale from handling 10 users to 1000 users–a system that supports clustering and can be installed on multiple machines in a swarm.
A system that anyone with JavaScript knowledge can use to create new and exciting systems, that can be easily expanded and serve as a foundation for rich media applications.
What is this Amiga stuff, isn’t that an ancient machine?
In computing terms yes, but so is Unix. Old doesn’t automatically mean bad, it actually means that it has adapted and survived challenges beyond its initial design. While most of us remember the Amiga for its games, I remember it mainly for its elegant and powerful operating system. A system so flexible that it’s still in use around the world–33 years after the machine hit the market. That is quite an achievement.
Figure 5 - The original Amiga OS, not bad for a 33-year-old OS! It was and continues to be way ahead of everyone else. A testament to the creativity of its authors
Amibian.js, as the name implies, borrows architectural elements en masse from Amiga OS. Quite simply because the way Amiga OS is organized and the way you approach computing on the Amiga is brilliant. Amiga OS is much more intuitive and easier to understand than Linux and Windows. It’s a system that you could learn how to use fully with just a couple of days exploring and no manuals.
But the similarities are not just visual or architectural. Remember I wrote that hosted applications can access and use the Amibian.js services? These services implement as much of the original ROM Kernel functions as possible. Naturally I can’t port all of it, because it’s not really relevant for Amibian.js. Things like device-drivers serve little purpose for Amibian.js, because Amibian.js talks to node.js, and node talks to the actual system, which in turn handles hardware devices. But the way you would create windows, visual controls, bind events and create a modern, event-driven application has been preserved to the best of my ability.
How does this thing boot?
If you have set up a dedicated machine with Amibian.js then the boot sequence is the same as Linux, except that the node.js services are executed as background processes (daemons or services as they are called), the core server is initialized, and then a full-screen HTML5 view is set up that shows the desktop.
But that is just for starting the system. Your personal boot sequence which deals with your account, your preferences and adaptations–that boots when you login to the system.
When you login to your Amibian.js account, no matter if it’s just locally on a single PC, a distributed cluster, or via the browser into your cloud account, several things happen:
The client (web-page if you like) connects to the server using WebSocket.
Login is validated by the server.
The client starts loading preferences files via the mapped filesystem, and then applies these to the desktop.
A startup sequence script file is loaded from your account, and then executed. The shell-script runtime engine is built into the client, as is REXX execution.
The startup-script will set up configurations, create symbolic links (assigns), mount external devices (Dropbox, Google drive, FTP locations and so on).
When finished the programs in the ~/WbStartup folder are started. These can be both visual and non-visual.
As you can see, Amibian.js is not a mockup or “fake” desktop. It implements all the advanced features you expect from a “real” desktop. The filesystem mapping is especially advanced, where file data is loaded via special drivers; drivers that act as a bridge between a storage service (a hard disk, a network share, a FTP host, Dropbox, or whatever) and the desktop. Developers can add as many of these drivers as they want. If they have their own homebrew storage system on their existing servers, they can implement a driver for it. This ensures that Amibian.js can access any storage device, as long as the driver conforms to the driver standard.
In short, you can create, delete, move, and copy files between these devices just like you do on Windows, OSX, or the Linux desktop. And hosted applications that run inside their own window can likewise request access to these drivers and work with the filesystem (and much more!).
Can Amibian.js really run actual programs?
Amibian.js has a JavaScript port of UAE (Unix Amiga Emulator). This is a fork of SAE (scripted Amiga Emulator) that has been heavily optimized for web. Not only is it written in JavaScript, it performs brilliantly and thus allows us to boot into a real Amiga system. So if you have some floppy-images with a game you love, that will run just fine in the browser. I even booted a 2 gigabyte hard disk image.
But Amiga emulation is just the beginning. More and more emulators are ported to JavaScript; you have NES, SNES, N64, PSX I & II, Sega Megadrive and even a NEO GEO port. So playing your favorite console games right in the browser is pretty straightforward!
But the really interesting part is probably QEmu. This allows you to run x86 instances directly in the browser too. You can boot up in Windows 7 or Ubuntu inside an Amibian.js window if you like. Perhaps not practical at this point, but it shows some of the potential of the system.
I have been experimenting with a distributed emulation system, where the emulation is executed server-side, and only the graphics and sound is streamed back to the Amibian.js client in real-time. This has been possible for years via Apache Guacamole, but doing it in raw JS is more fitting with our philosophy: no native code!
I heard something about clustering?
Remember I wrote about the services that Amibian.js has? Those that act almost like libraries on a physical computer? Well, these services don’t have to be on the same machine—you can place them on separate machines and thus its able to work faster.
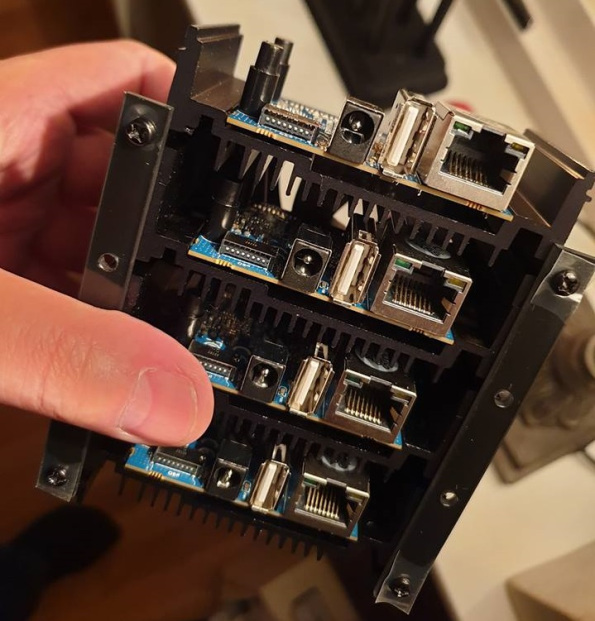
Figure 6 - The official Amibian.js cluster, 4 x ODROID-XU4 SBC’s in a micro-rack
A cluster is typically several computers connected together, with the sole purpose of having more CPU cores to divide the work on. The cool thing about Amibian.js is that it doesn’t care about the underlying CPU. As long as node.js is available it will happily run whatever service you like with the same behavior and result.
The official Amibian.js cluster consists of five ODROID-XU4/S SBC (single board computers). Four of these are so-called “headless” computers, meaning that they don’t have a HDMI port and they are designed to be logged into and software setup via SSH or similar tools. The last machine is a ODROID-XU4 with a HDMI out port, which serves as “the master”.
The architecture is quite simple: We allocate one whole SBC for a single service, and allow the service to copy itself to use all the CPU cores available—each SBC has eight CPU cores. With this architecture, the machine that deals with the desktop clients doesn’t have to do all the grunt work. It will accept tasks from the user and hosted applications, and then delegate the tasks between the four other machines.
Please note that the number of SBC’s is not fixed. Depending on your use, you might not need more than a single SBC in your home setup, or perhaps two. I have started with five because I want each part of the architecture to have as much CPU power as possible. So the first “official” Amibian.js setup is a 40 core monster shipping at around $250.
But as I mentioned, you don’t have to buy this to use Amibian.js. You can install it on a single spare X86 PC you have, or daisy chain a couple of older PC’s on a switch for the same result.
Why Headless?
The headless SBC’s in the initial design all have a GPU (graphical processing unit) as well as audio capabilities. What they lack is GPIO pins and 3 additional USB ports. So each of the nodes on our cluster can handle graphics at blistering speed—but that is ultimately not their task. They serve more as compute modules that will be given tasks to finish quickly, while the main machine deals with users, sessions, traffic and security.
The 40-core cluster I use has more computing power than Northern Europe had in the early 80s. That’s something to think about. And the pricetag is under $300! I don't know about you, but I always wanted a proper mainframe, a distributed computing platform that you can login to, and that can perform large tasks while I do something else. This is as close as I can get on a limited budget, yet I find the limitations thrilling and fun!
Part of the reason I have opted for a clustered design has to do with future development. While UAE.js is brilliant to emulate an Amiga directly in the browser, a more interesting design is to decouple the emulation from the output. In other words, run the emulation at full speed server-side, and just stream the display and sounds back to the Amibian.js display. This would ensure that emulation of any platform runs as fast as possible, makes use of multi-processing (read: multi threading), and fully utilizes the network bandwidth within the design (the cluster runs on its own switch, separate from the outside world-wide-web).
I am also very interested in distributed computing, where we split up a program and run each part on different cores. This is a topic I want to investigate further when Amibian.js is completed. It would no doubt require a re-design of the LDEF bytecode system, but this something to research later.
Will Amibian.js replace my Windows box?
That depends completely on what you use Windows for. The goal is to create a self-sustaining system. For retro computing, emulation, and writing cool applications Amibian.js will be awesome. But Rome was not built in a day, so it’s wise to be patient and approach Amibian.js like you would Chrome OS. Some tasks are better suited for native systems like Linux, but more and more tasks will run just fine on a cloud desktop like Amibian.js.
Until the IDE and compilers are in place after phase two, the system will be more like an embedded OS. But when the LDEF compiler and IDE is in place, then people will start using it en masse and produce applications for it. It’s always a bit of work to reach that point and create critical mass.
Figure 7 - Object Pascal is awesome, but modern, native development systems are quite demanding
My personal need has to do with development. Some of the languages I use installs gigabytes onto my PC and you need a full laptop to access them. I love Amibian.js because I will be able to work anywhere in the world, as long as a browser and normal internet line is available. In my case, I can install a native compiler on one of the nodes in the cluster, and have LDEF emit compatible code. Voila, you can build app-store ready applications from within a browser environment.
I also love that I can set up a dedicated platform that runs legacy applications and games, and that I can write new applications and services using modern, off-the-shelf languages. Should a node in the cluster break down, I can just copy the whole system over to a new, affordable SBC and keep going. No super expensive hardware to order, no absurd hosting fees, and finally a system that we all can shape and use in a plethora of systems. From a full-fledged desktop to a super advanced NAS or router that uses Amibian.js to give its customers a fantastic experience.
And yes, I get to re-create the wonderful reality of Amiga OS without the absurd egoism that dominates the Amiga owners to this day. I don’t even know where to begin with the present license holders–and I am so sick of the drama that rolling my own seemed the only reasonable path forward.
I hope this helps clear up any misconceptions about Amibian.js, and that you find this as interesting as I do. As more and more services are pushed cloud-side, the more relevant Amibian.js will become. It is perfect as a foundation for large-scale applications, embedded systems, and indeed, as a solo platform running on embedded devices. I can't wait to finish the services and cluster this sucker on the ODROID rack!
Coding Camp - Part 11: Control the LED from your smartphone via WiFi
February 1, 2019By Justin LeeODROID-GO, Tutorial
This article will show you how to build a WiFi AP mode web server that blinks a LED from your web browser remotely.
Figure 1 - Example of wifi controlled LED
Before starting, there are two important things to read first:
Refer to the Arduino official documents. This tells us useful common functions with great instructions, available here: https://www.arduino.cc/reference/en/
Refer to the ESP32 official programming guide. Most of ESP32 specific functions introduced here: https://esp-idf.readthedocs.io/en/v3.0/
WiFi in AP Mode
ESP32, which is used on ODROID-GO, supports WiFi 802.11b/g/n, so we can program WiFi features with helpful libraries on Arduino. In this guide, we're going to use the wifi.h library:
This is the basic code for WiFi in AP mode. As you know what AP mode means, this code makes ODROID-GO generating its on WiFi signal and you can access to that AP on your WiFi connectable device. To do that we've defined the AP information for SSID and password, and gave the gateway IP address and subnet mask. These IP addresses should be created as an instance of IPAddress class. So with this code, it will be on 192.168.4.x IP addresses, and you can connect to that by accessing to 192.168.4.1. This AP activates with a WiFi.softAP() function.
To provide a web page, define an WiFiServer instance as a global variable. This begins when the WiFi activates successfully in AP mode. Next, add code for setting the blue status LED up and some debugging messages shown on the serial monitor. This should be very helpful to show how the code flows.
Finally, create a client listener in the loop() function. This listener code loops and will respond only when the client accesses. We're not providing a description for this web code, since the important thing is that you can respond as a packet containing your intended contents:
#include

#define PIN_STATUS_LED 2

const char *apSsid = "ODROID_GO_AP";
const char *apPasswd = "12345678";

WiFiServer server(80);

void setup() {
Serial.begin(115200);

pinMode(PIN_STATUS_LED, OUTPUT);
digitalWrite(PIN_STATUS_LED, LOW);

IPAddress gateway(192, 168, 4, 1);
IPAddress subnet(255, 255, 255, 0);

if (WiFi.softAP(apSsid, apPasswd)) {
Serial.println("WiFi AP established.");
Serial.print("WiFi AP IP: ");
Serial.println(WiFi.softAPIP());
Serial.print("AP SSID: ");
Serial.println(apSsid);
Serial.print("AP Password: ");
Serial.println(apPasswd);

server.begin();
} else {
Serial.println("WiFi AP establishing failed.");
}
}

void loop() {
WiFiClient client = server.available();

if (client) {
Serial.println("New Client.");
String currentLine = "";
while (client.connected()) {
if (client.available()) {
char c = client.read();
Serial.write(c);
if (c == '
') {
if (currentLine.length() == 0) {
client.println("HTTP/1.1 200 OK");
client.println("Content-type:text/html");
client.println();

client.print("Click <a href="">here</a> to turn the blue status LED on.
");
client.print("Click <a href="">here</a> to turn the blue status LED off.
");

client.println();
break;
} else {
currentLine = "";
}
} else if (c != '
') {
currentLine += c;
}

if (currentLine.endsWith("GET /H")) {
digitalWrite(PIN_STATUS_LED, HIGH);
}
if (currentLine.endsWith("GET /L")) {
digitalWrite(PIN_STATUS_LED, LOW);
}
}
}
client.stop();
}
}
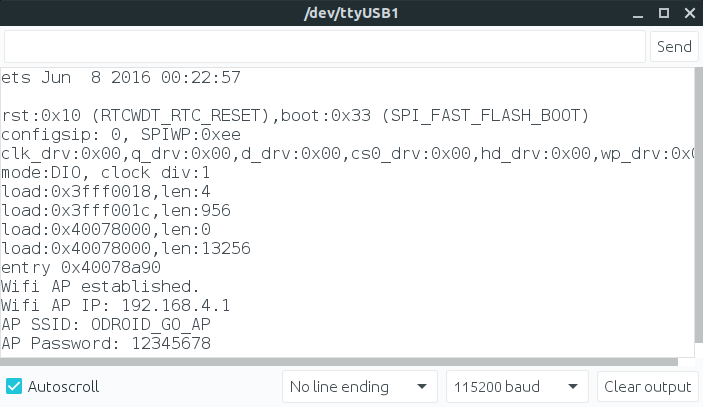
Compile and upload to your ODROID-GO and you can see the debugging code at the Serial monitor.
Figure 2 - AP serial debug information
Connect to ODROID-GO and toggle the LED
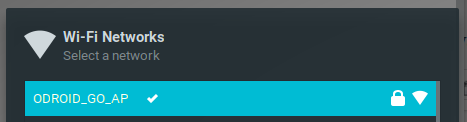
You can connect to ODROID-GO on your WiFi connectable device.
Figure 3 - Our ORDOID-GO Access Point
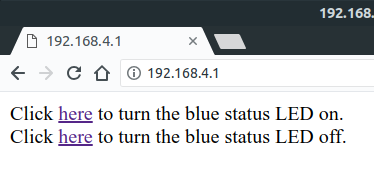
Access the ODROID_GO_AP with password 12345678, then visit 192.168.4.1 on your web browser.
Figure 4 - The demo LED webpage
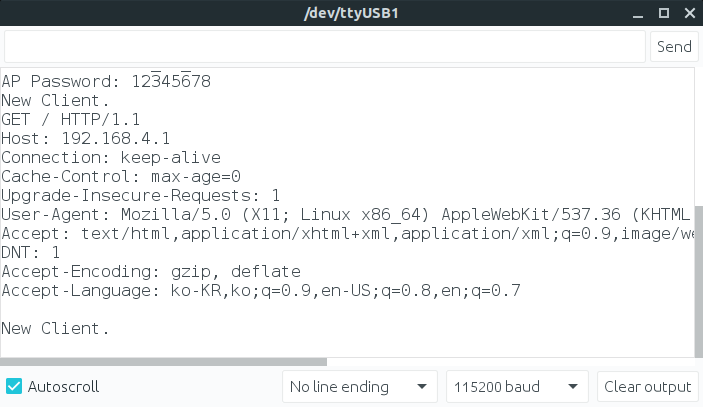
If you click the text, you can see the status LED turns on or off. The behaviors may be monitored on the Serial monitor.
Figure 5 - Webpage Debug Information Show on Serial
The complete example is available by clicking on Files → Examples → ODROID-GO → WiFi_AP menu to import, then press CTRL-U to compile/upload. This guide was taken from the ODROID wiki which is available at https://wiki.odroid.com/odroid_go/arduino/08_wifi_ap.
OGO-FTPD: An FTP Server for the ODROID-GO
February 1, 2019By @PaspartoutODROID-GO, Tutorial
In this article, I will introduce you to an FTP server for the ODROID-GO. It is a rather minimal implementation that currently does not support authentication and passive mode operation. The use case I aimed for is one to transfer and manage your ODROID files on a trusted WiFi network, for which it already works quite good.
The reason for developing this application was that I recently got the ODROID-GO, but could not find my SD card reader. Since I could still flash the ODROID-GO using the USB cable, I thought it might be a good idea to implement an FTP server for the ODROID-GO. It was a nice learning experience, but took much longer than buying a new card reader, which I did later. Once I started working on the server, I wanted to finish a usable version. Later, I read in the Project Suggestions post in the forum (https://goo.gl/6wzxFv) that someone actually would like to use the odroid as a FTP Server. So I hope this will be helpful to you.
The maximum speed I got is around 500 KB/s, but I am not sure if the SD card or WiFi connection is the bottleneck. The tests were performed on Linux using FileZilla (https://filezilla-project.org) as a client. I would love to hear your impressions and bug reports on it.
In order to configure the WiFi access point that the ODROID should use, you have
to place a file named wifi.json into the root folder of your SD card. The contents should follow this pattern:
You can also add multiple networks by adding them to the json array. I may add the ability to configure the wifi using an on screen keyboard like the odroid-go-launcher does (https://github.com/jkent/odroid-go-launcher). I found the odroid-go-launcher to be an interesting project, especially the ability to install and use multiple apps without reflashing every time. The server uses some code from Jeff Kent, who created the launcher, so I want thank him for that.
For secure transferring of files over the Internet, even more things like encryption will be needed. Passive mode and authentication should not be difficult to implement, and maybe even FTPS (https://en.wikipedia.org/wiki/FTPS) might be easy to add, because the esp-idf already provides a TLS implementation. Pull requests are very welcome.
Hello there my dear readers, long time no see, right? Well, that is if you just skipped our last edition where I just did a retrospective of our 5 years of ODROID Magazine, or as I call it fondly: ODROIDMAG. On that article we just teased that we often talk about games, and this is indeed true. So Rob promptly asked if I didn't have a pool of games I just played on my ODROID running Android and for a miraculous stroke of luck I did have it! Who could imagine that I play games on my spare time?
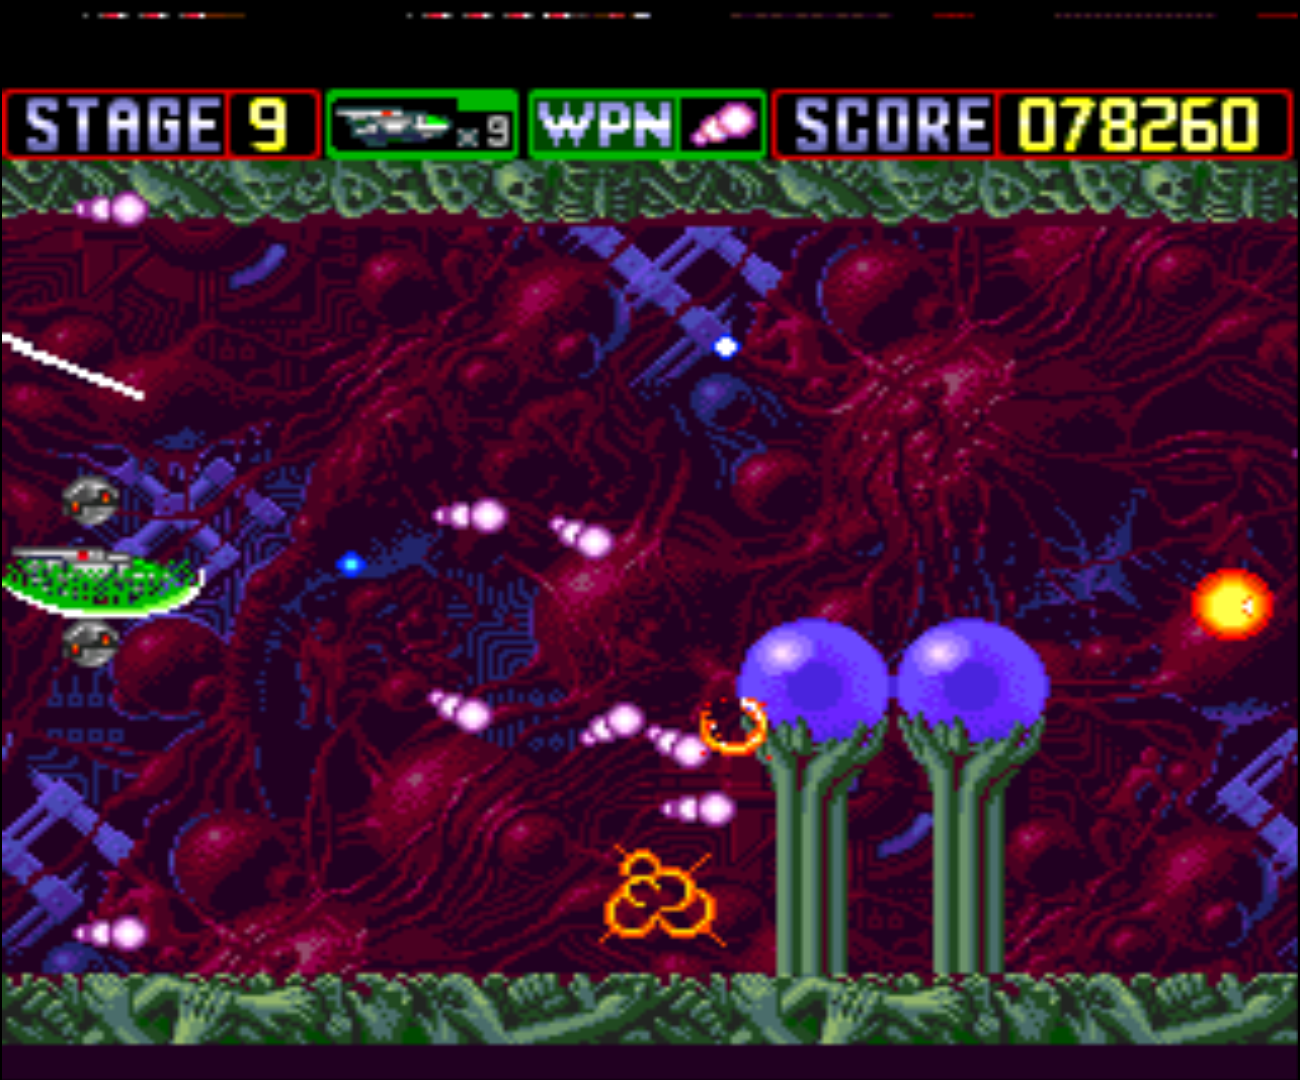
So, without further ado, let's see what I can show you guys:
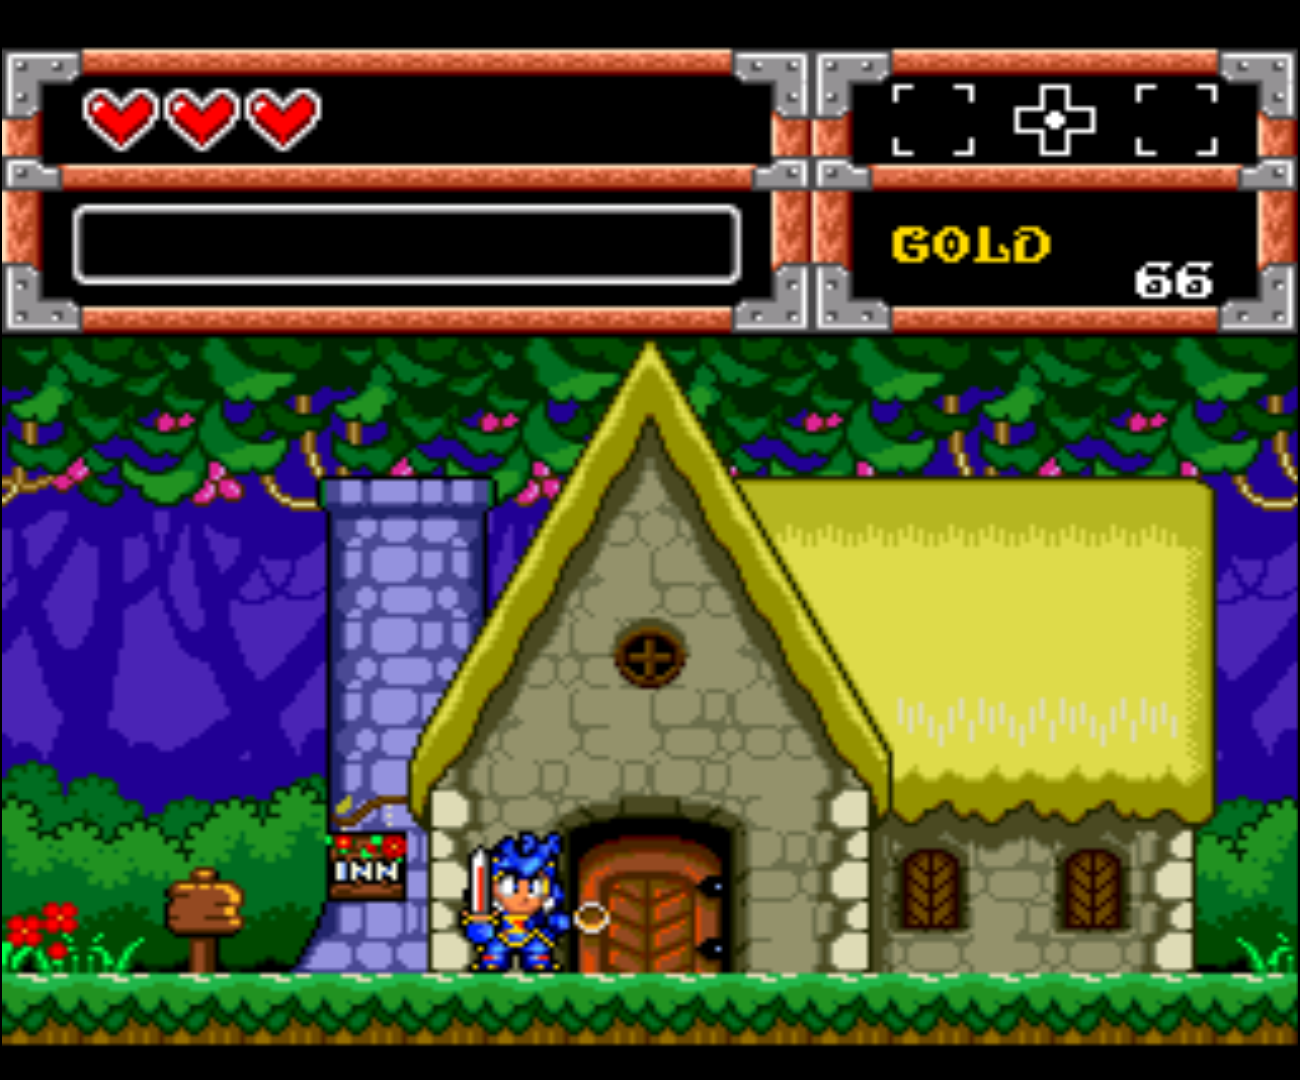
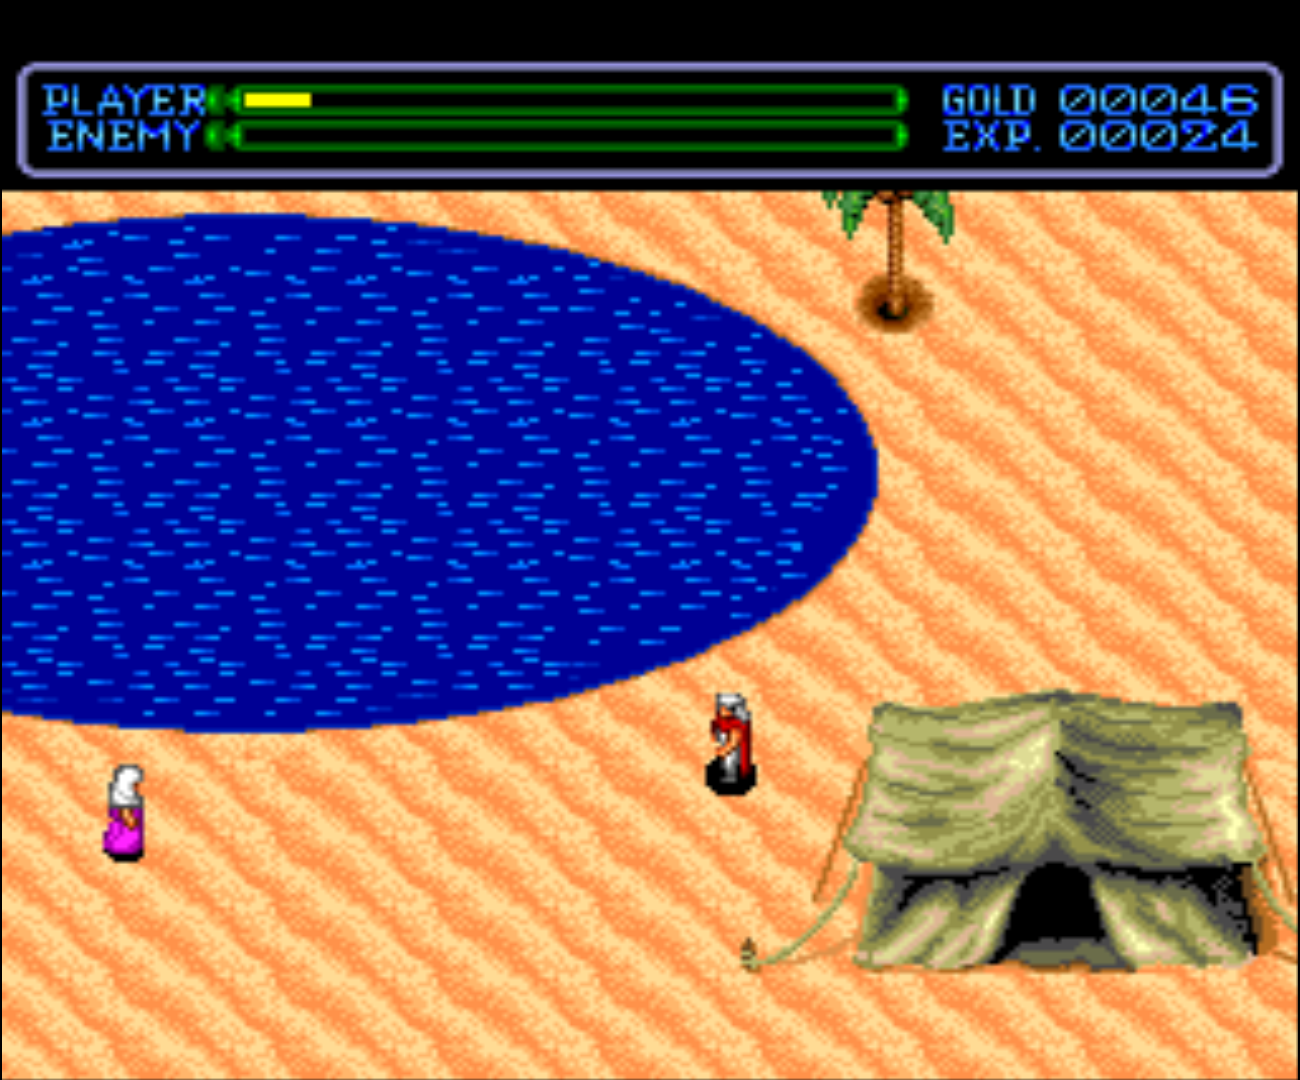
Sonic Dash
Download
My daughter keeps playing without stopping on her cellphone Temple Run-like games, and being this (sorta jealous) kind of guy, I looked for something on this same vein, who would wonder that Sega would make a Sonic endless runner game? I personally am hooked on endless runners since the flash player classic: canabalt. They are easy to play, and hard to master. If you by any way skipped the fun that is to play an endless runner game, and by any chance played a Sonic game during your youth years (or is still living your youth years), download this one, you will certainly love it.
Picture 1 - Sonic Dash
CrossFire: Legends
Download
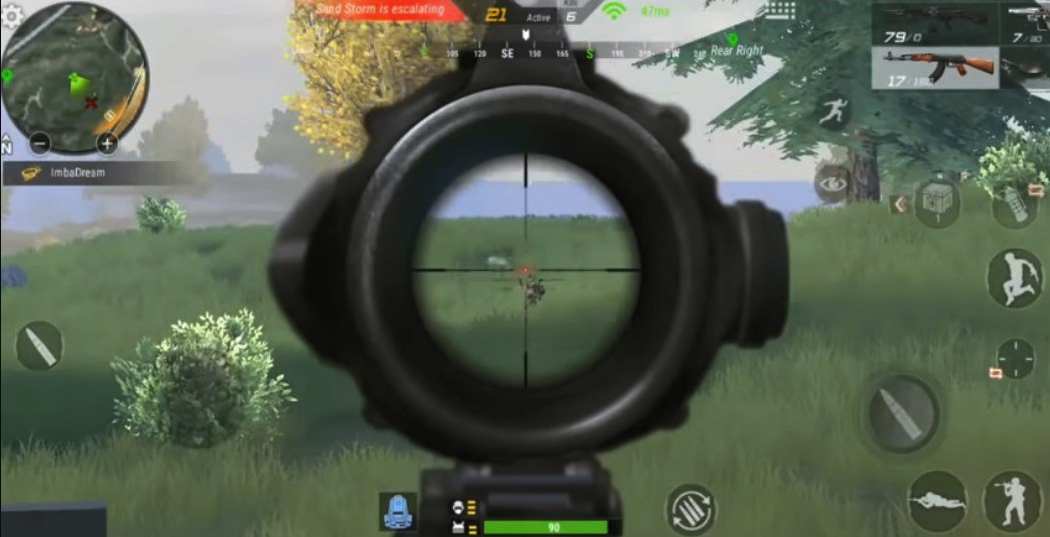
I do have Justin Lee to blame for me playing this game, last year he did an article on how to play PUBG on the XU-4 and while looking for the Tencent Games page, I stumbled on this one. With the twist of a PVE mode, It is a perfect companion for those moments where you still want to play a modern shooter and hone your PUBG skills but is in a more introspective mode. I usually get this one and a good synthwave playlist on the background and I can chillax during a good sunday afternoon.
Picture 2 - Crossfire: Legends
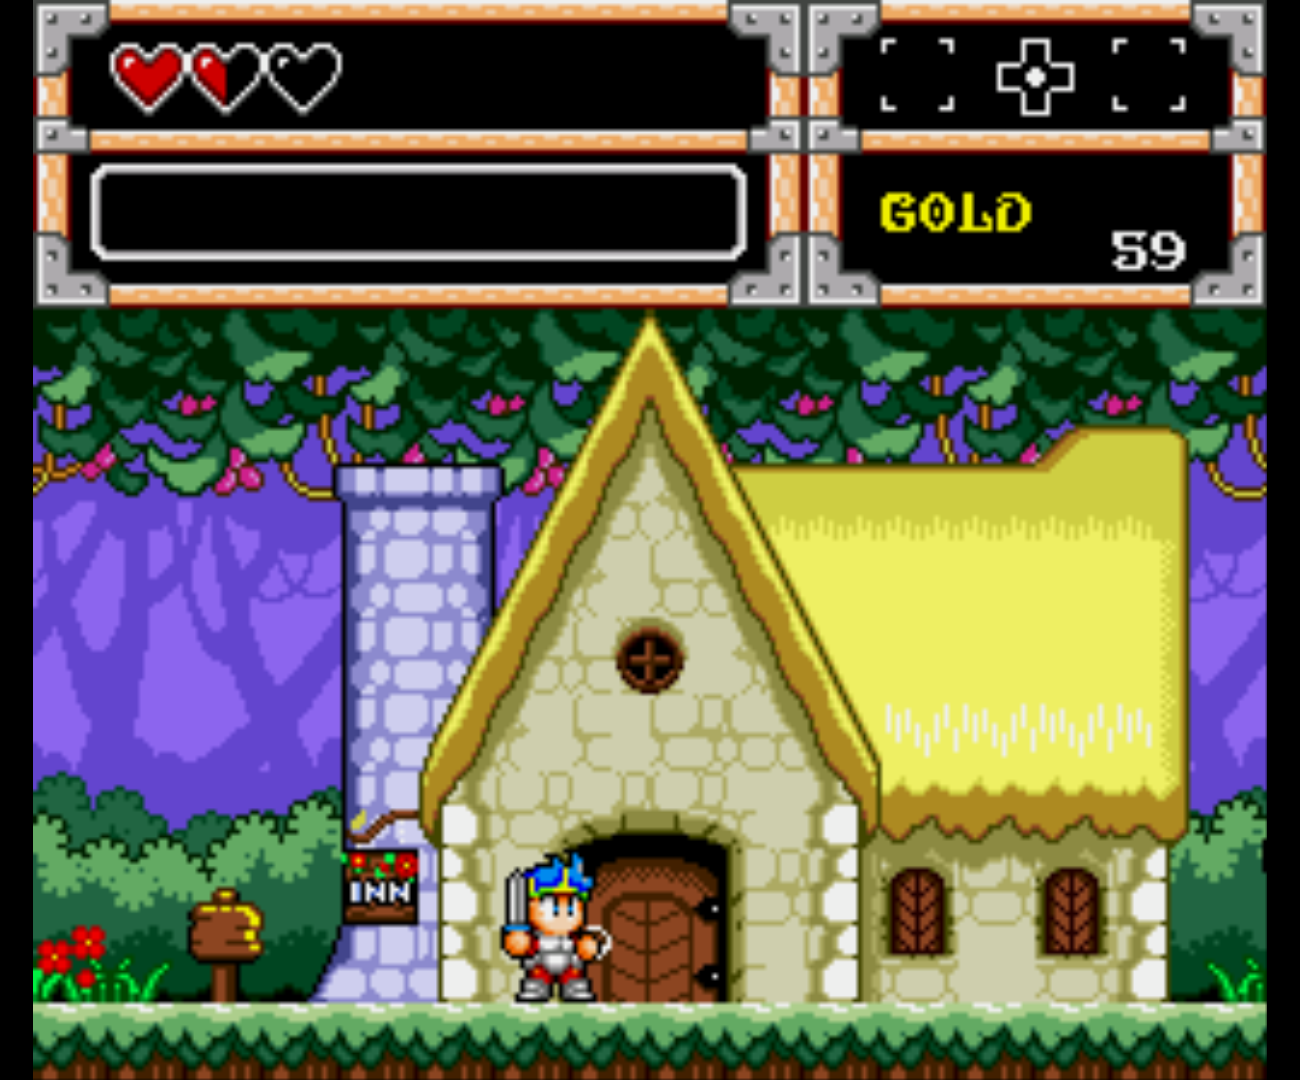
Lamplight
Download
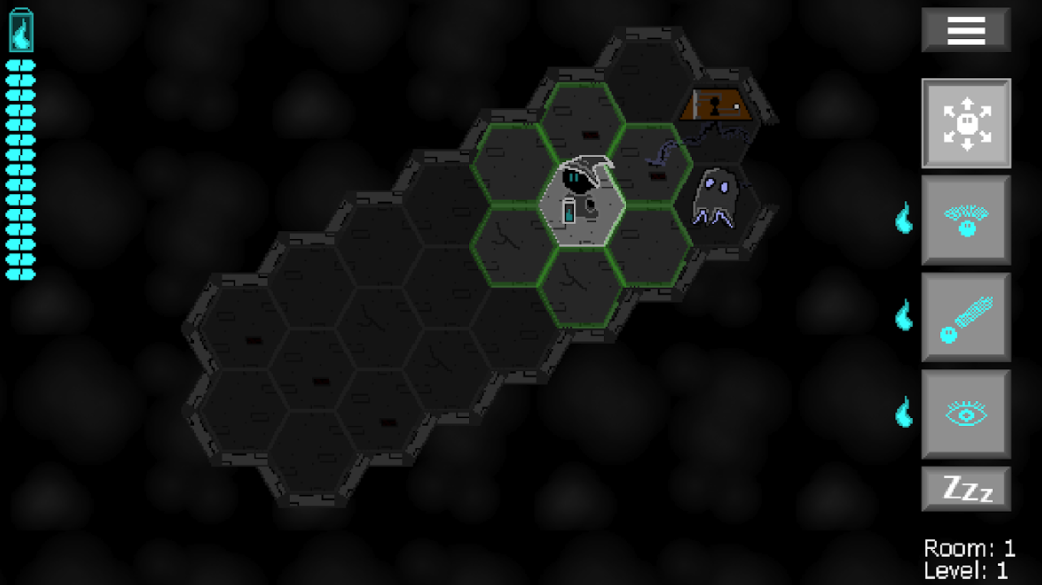
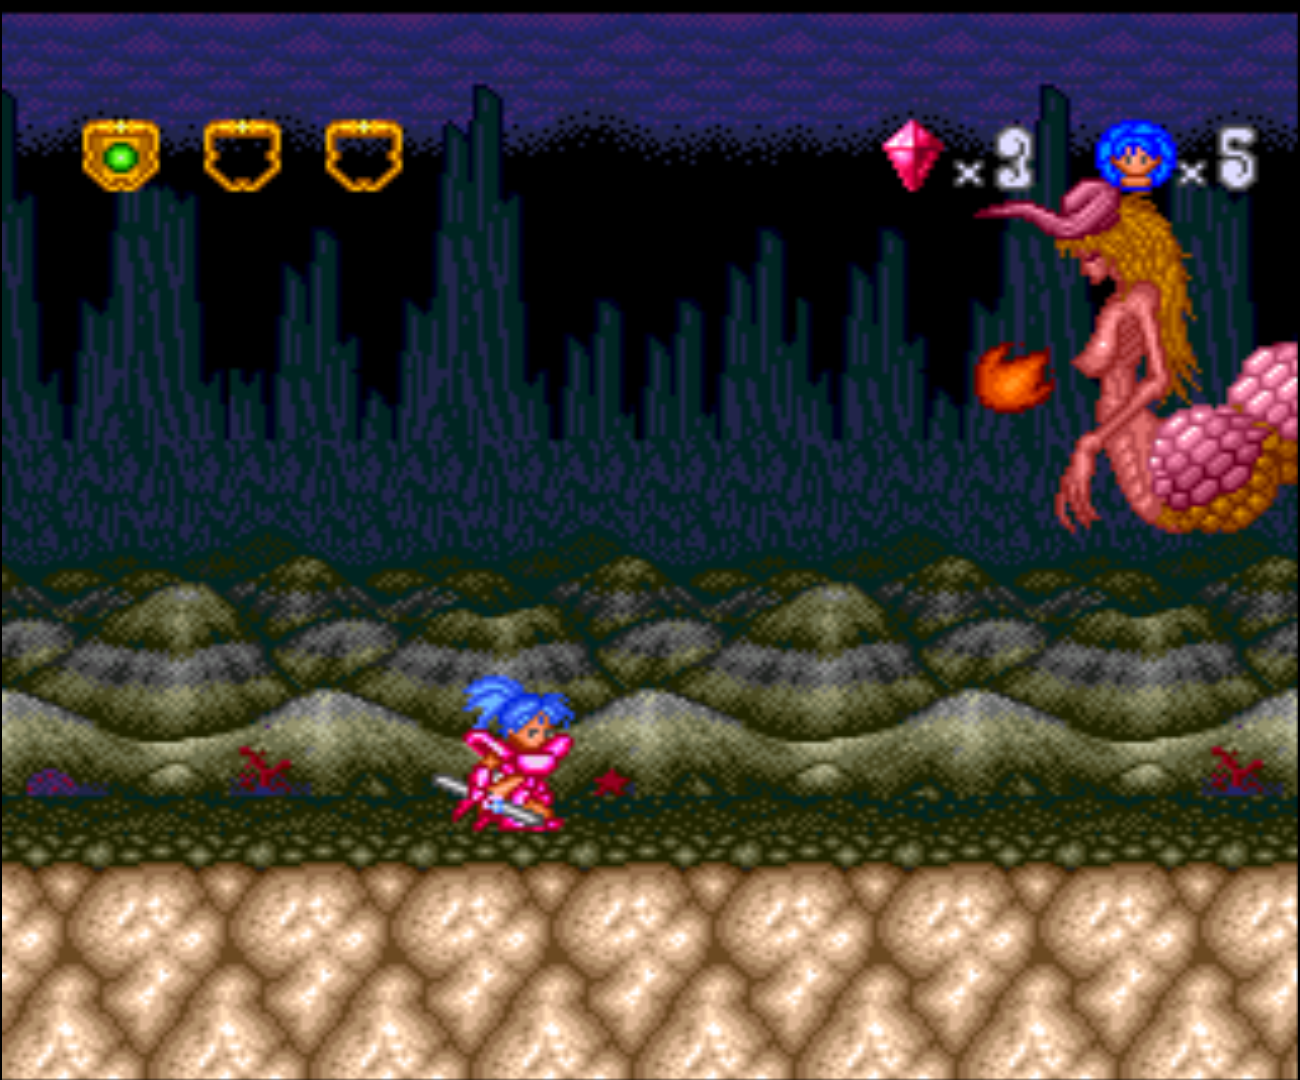
After two hectic games, we present Lamplight, a turn-based game. It is in fact a game that was produced during a game jam, and it is so catchy. The best part of digging those indie games is that you get a pure to the bones gaming experience, and for the rush on development you get a bunch of things that can be seen as a bonus. Such as: It is a fully unlocked game, without ads, and no internet required. So go ahead, explore dark rooms and defeat enemies using your magic lamp's abilities. Choose your path through the depths encountering unique enemies in varied environments. Find artifacts that will help you and defeat bosses to steal their powers to upgrade your lamp. Make difficult decisions as you face progressively tougher and numerous enemies. Can you make it to the end?
Picture 3 - Lamplight
OutRush
Download
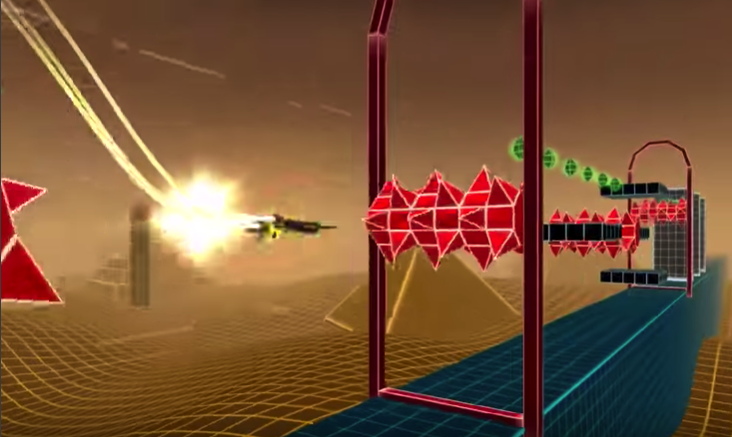
Wait a second? Did I read on the CrossFire: Legends part of this article about chillaxing (chill + relaxing) at the sound of cool synthwave songs? Well, than nothing is fairer than indicating OutRush, that alongside the synthwave soundtracks, it comes with the complete package of this so nostalgic 80's visuals that are so good looking. It reminds me a mix playing REZ on my old PS2 and viewpoint on a Neo Geo.
Picture 4 - OutRush
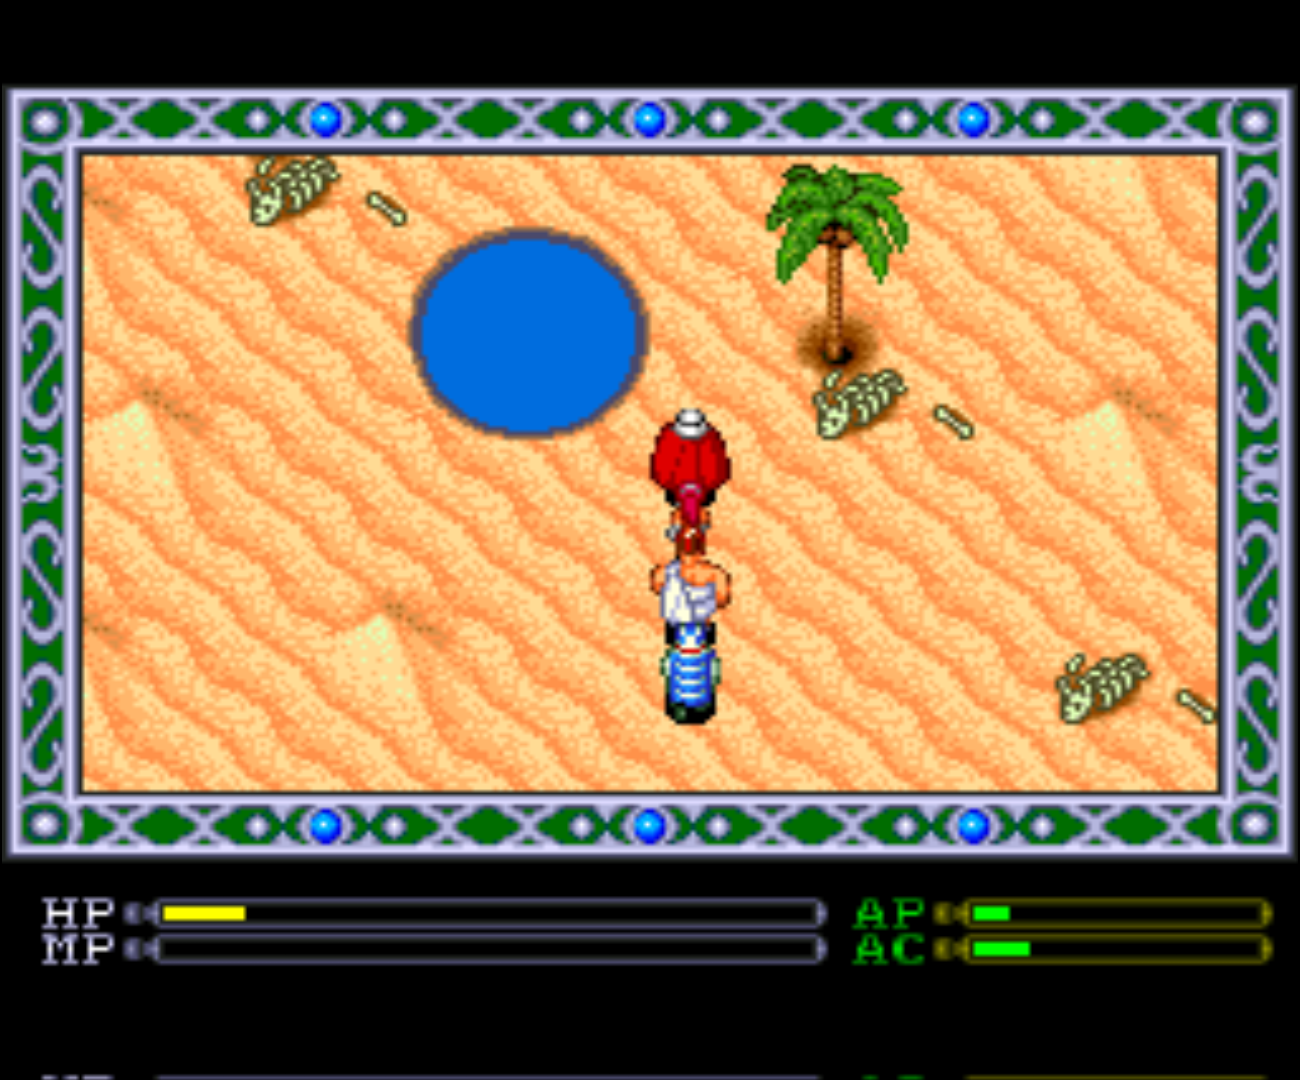
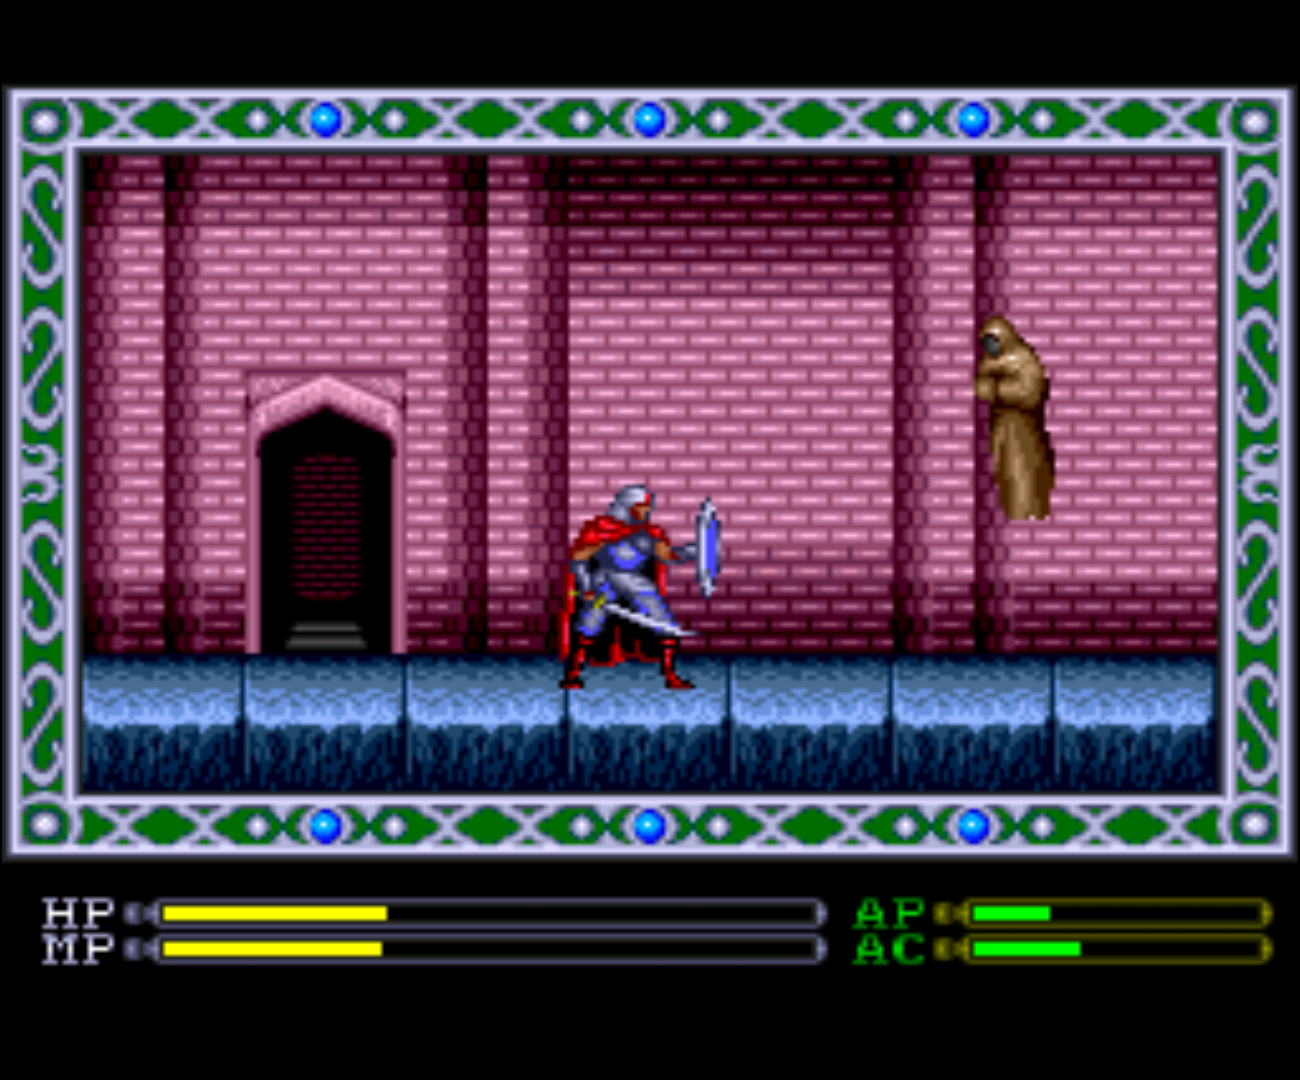
Alite
Download
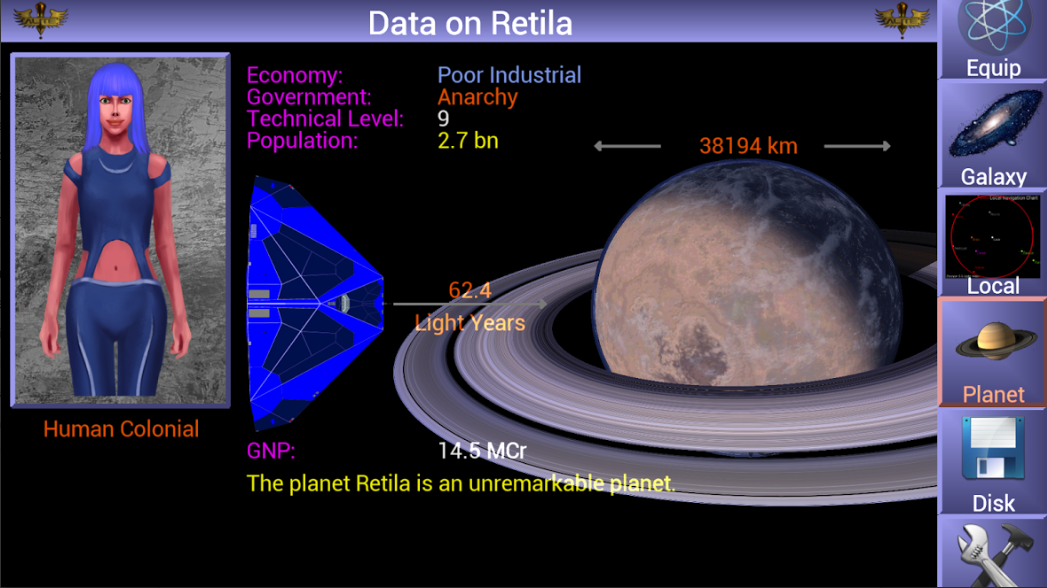
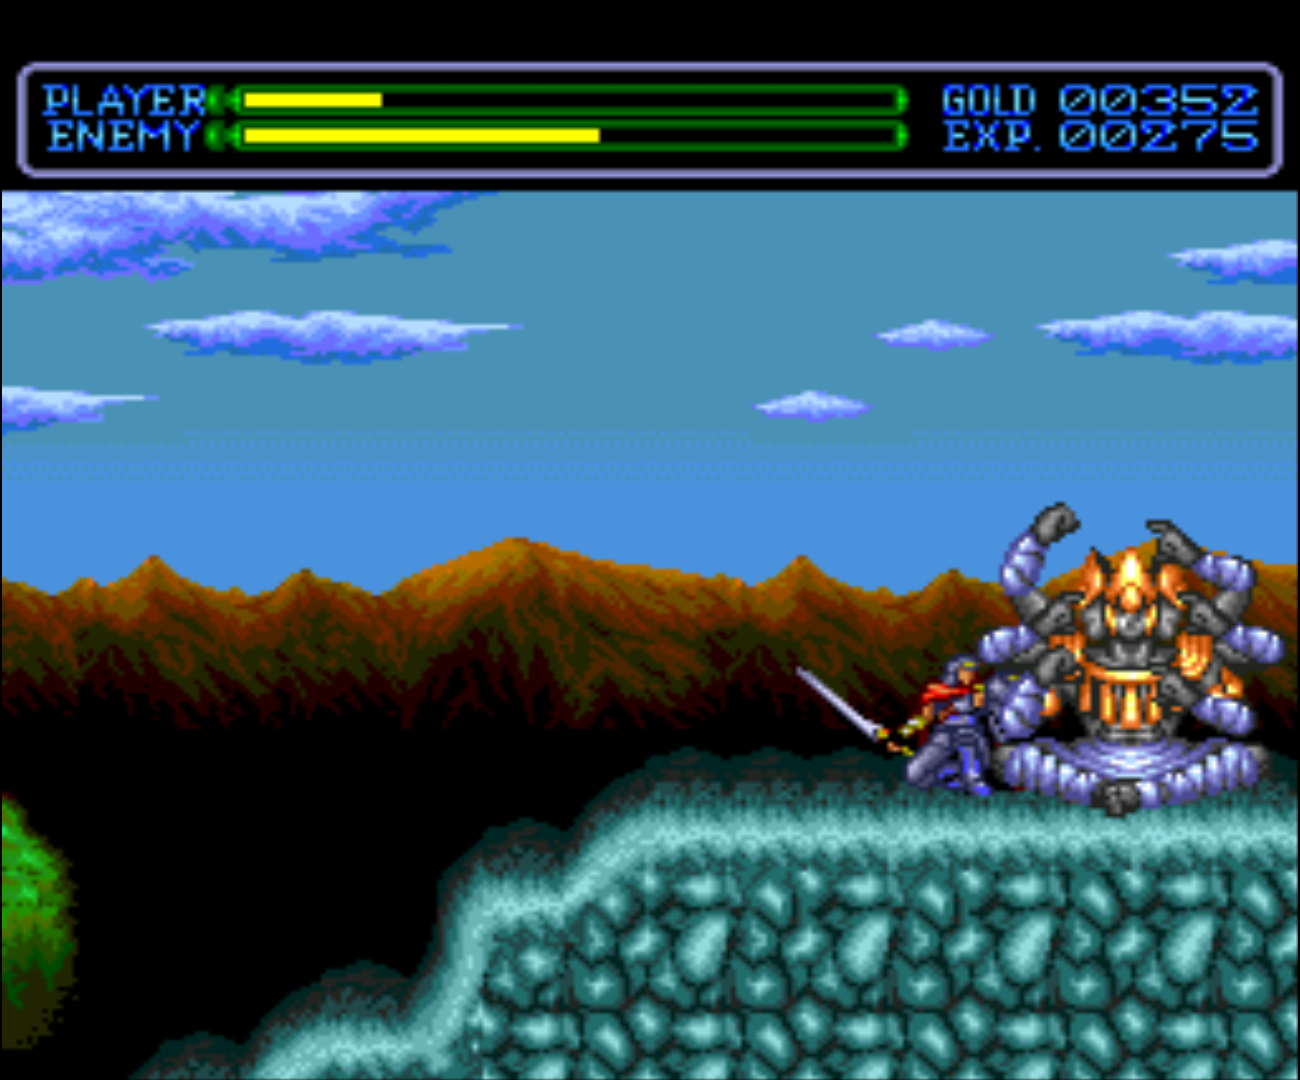
A competent clone of the classic Elite game, you can't go wrong on this. If you don't have the Elite:Dangerous installed on your PC/Xbox/PS4 but still miss the ropes of playing a procedurally generated galaxy where you are a space trader that has to deal with pirates, this game is for you. Get your notepad, start plotting your trading charts and go to the void, space calls!
Picture 5 - Alite
Coding Camp - Part 12: Serial communication over Bluetooth
February 1, 2019By Justin LeeODROID-GO, Tutorial
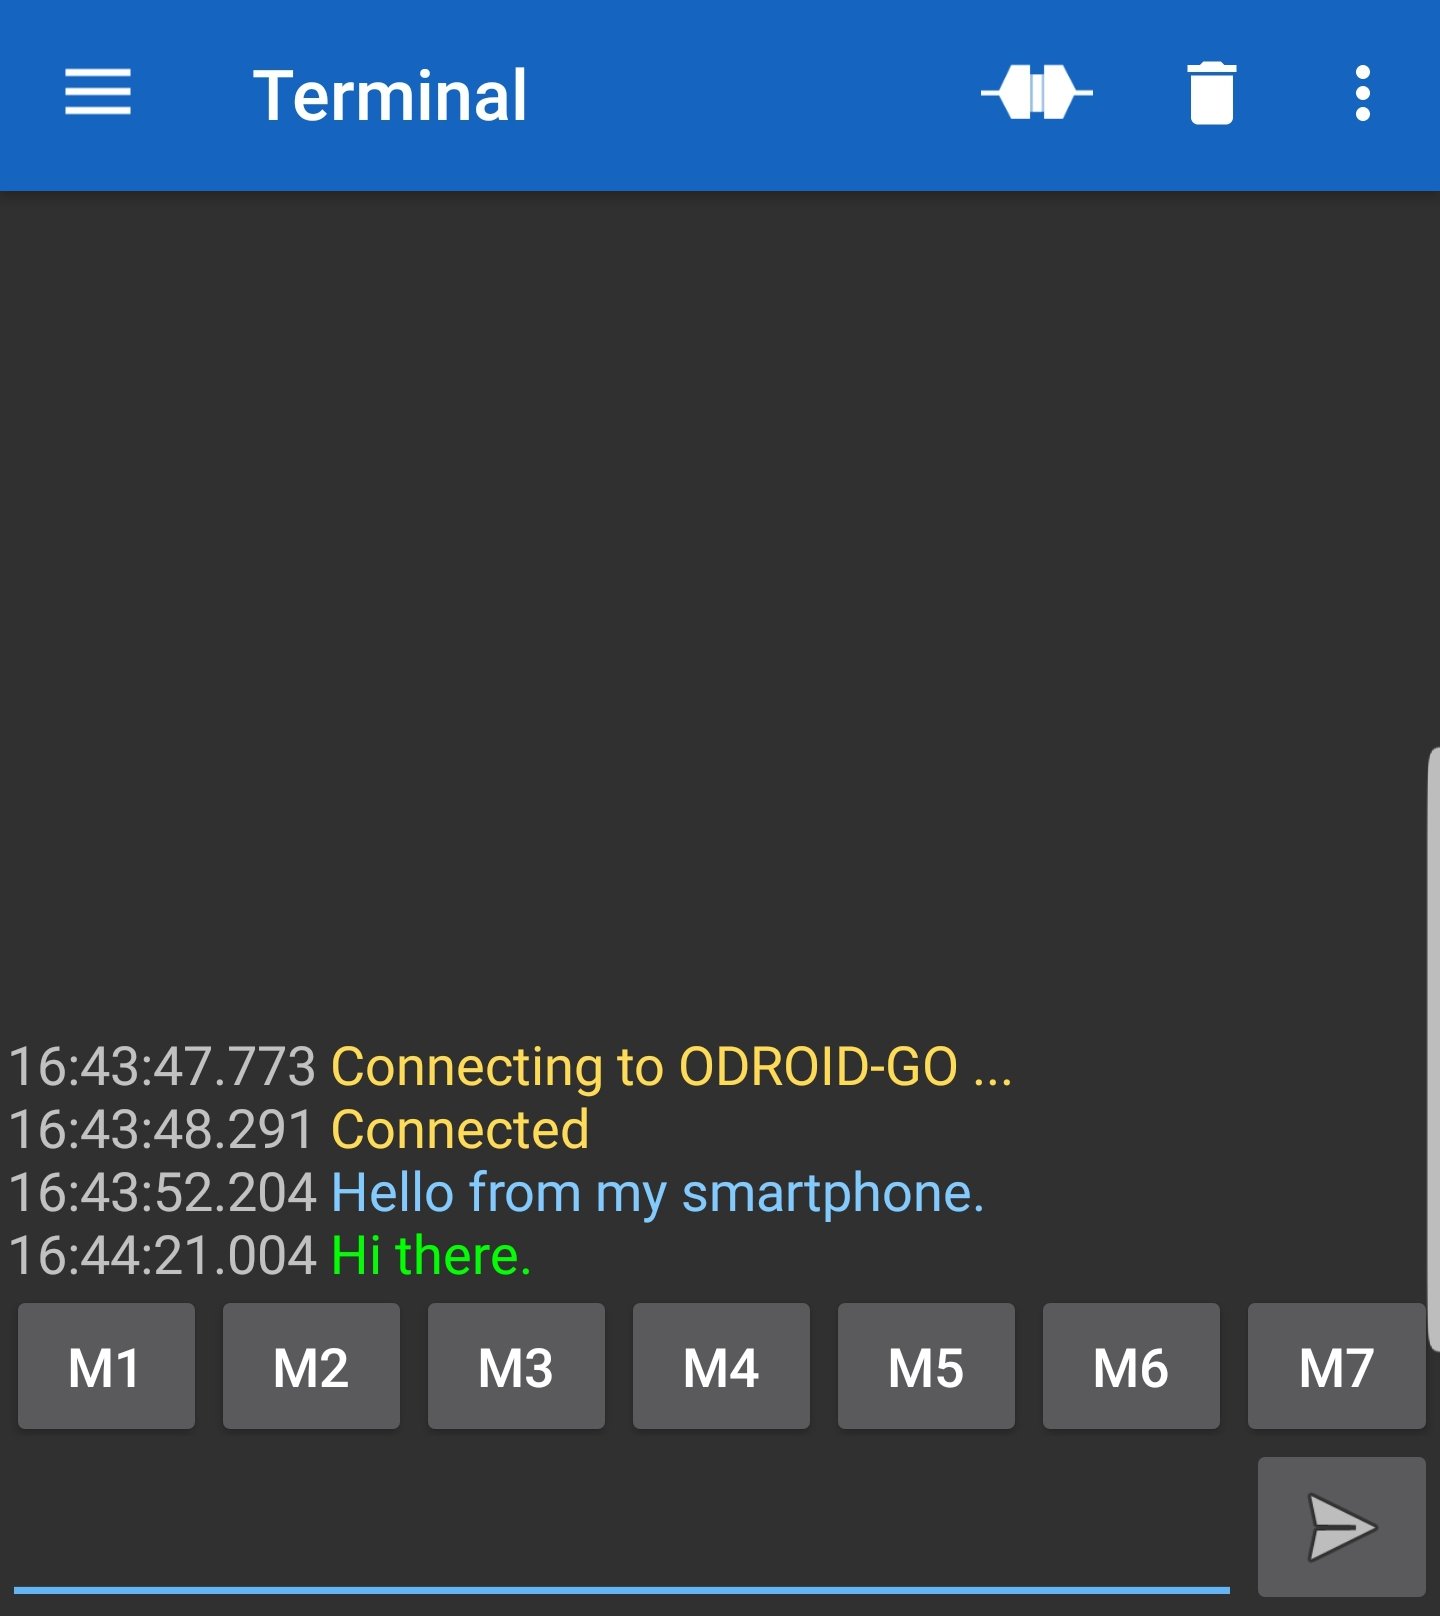
In this article, we will make a wireless bridge to our smartphone using the Bluetooth RFCOMM protocol stack.
(Figure 1 - Send Message to the ODROID-GO)
(Figure 2 - Receive Message from the ODROID-GO)
The ESP32, which is used on ODROID-GO, supports Bluetooth 4.2, so we can program Bluetooth features with helpful Arduino libraries. In this guide, we're going to use the BluetoothSerial.h library:
#include "BluetoothSerial.h"

BluetoothSerial serialBT;

void setup() {
Serial.begin(115200);

serialBT.begin("ODROID-GO");
Serial.println("The device started, now you can pair it with bluetooth!");
}

void loop() {
if (Serial.available()) {
serialBT.write(Serial.read());
}
if (serialBT.available()) {
Serial.write(serialBT.read());
}
delay(20);
}
Define an instance for BluetoothSerial as a global variable called serialBT. To set it, we use begin() function having a parameter indicates the name of the Bluetooth device for the Bluetooth scanners and name it ODROID-GO. In the loop() function, if a message from the Serial monitor available, send that message to the connected device via Bluetooth serial. On the other hand, if a message from the Bluetooth serial available, send that message to the host.
Serial Monitor
You can use a Serial monitor to watch the debug messages from the Serial port, which can be fund in the Tools → Serial Monitor menu. Alternatively, you can press CTRL-SHIFT-M to open it more quickly. To show the message properly, you should set the bandwidth to 115200 baud. This would be very helpful debugging tool for you. In this guide, we're using this tool to communicate with the connected device.
Figure 3- The Serial Monitor
Connect and communicate
We tested with the Serial Bluetooth Terminal application on Android Playstore, on a Galaxy Note 8. It finds a Bluetooth device named ODROID-GO and can connect to that.
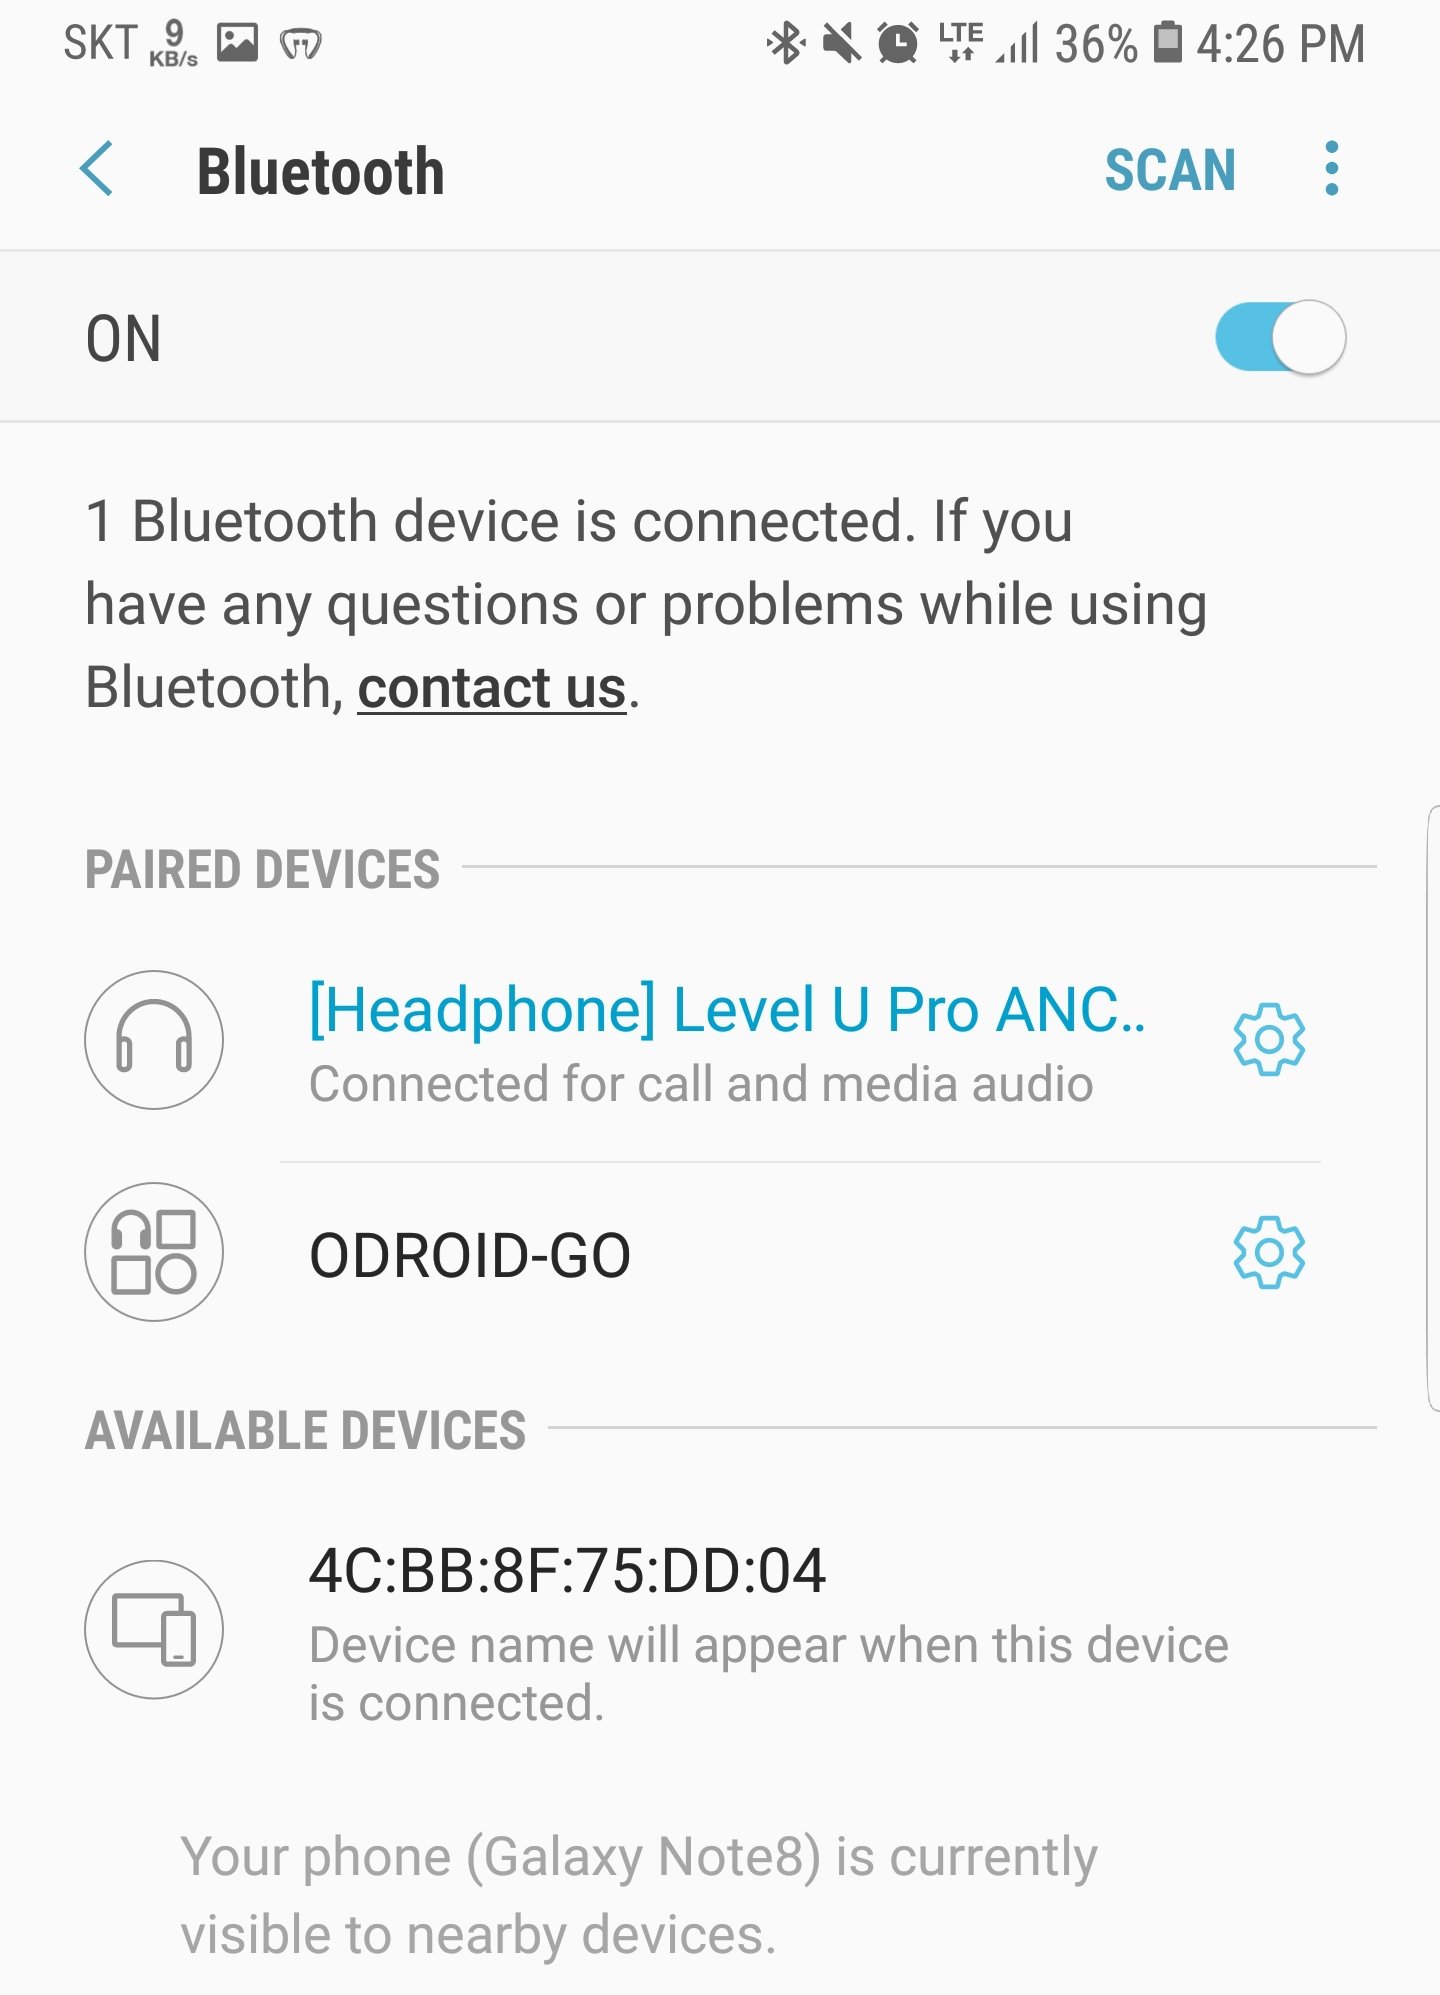
Figure 4 - Bluetooth Pairing with a Smartphone
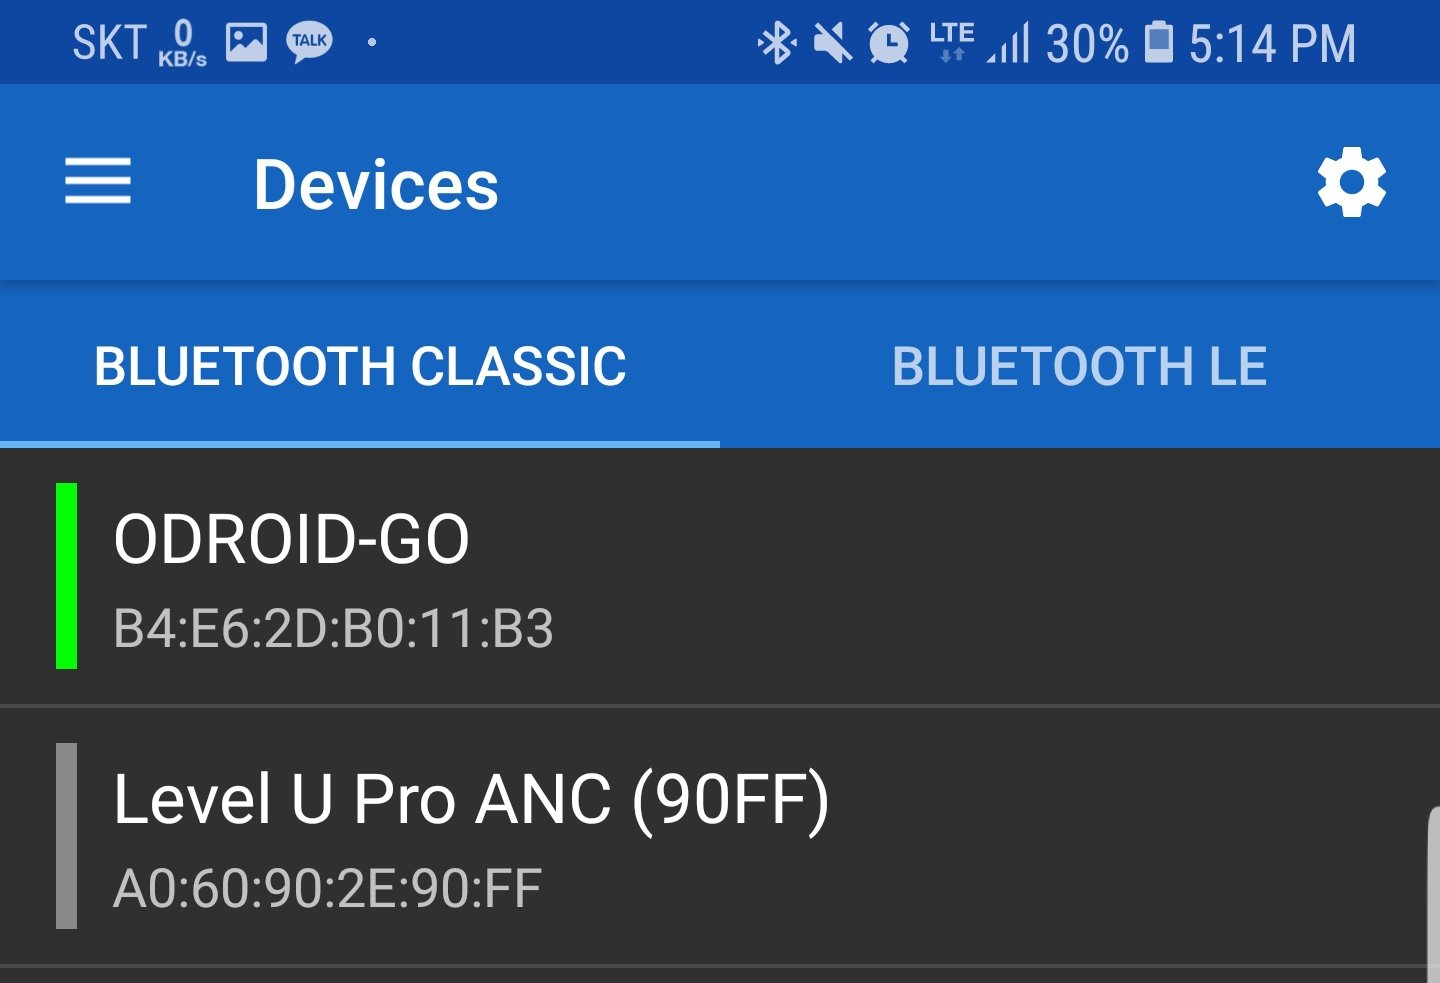
And in the app, select ODROID-GO on the Devices tab.
Figure 5 - Bluetooth Serial App Pairing
Push the connect button on the top of the screen at the Terminal tab, then these can communicate each other.
Figure 6 - Serial App After Pairing
Figure 7 - Serial App Showing Text To and From the ODROID-GO
Of course you can do also do this using iOS or a PC/laptop if it has Bluetooth capabilities.
A completed example
The complete example is available as by clicking the Files → Examples → ODROID-GO → BT_Serial menu to import the code, then pressing CTRL-U to compile/upload.
Figure 8 - Loading the Bluetooth Example
ODROID-GO Gaming Pack: 3rd Party Apps and Games Download Pack
February 1, 2019By @jutleysGaming, ODROID-GO, Tutorial
This article provides all of the third party apps and games that have been released so far for the ODROID-GO by their contributors. To stay up to date with the latest releases, please view the original article at https://forum.odroid.com/viewtopic.php?f=159&t=31716. Thanks to all the developers and contributors for the apps and games!
February 1, 2019By Tobias SchaafGaming, ODROID-XU4
I have really enjoyed trying out all these games for the PC-Engine / TurboGrafx CD. Some of the games I even played all the way through. I’m looking forward to trying out more of them. I this article, I will test each one the same as last time: by playing each and every one of them for a period of time and then deciding if I like them or not. I will only concentrate on CD-based games for now.
Games I liked
Doraemon - Nobita no Dorabian Night
This game starts off rather childish but turns out to be a nice platformer. You travel through time to save your friends and collect different weapons and power ups during during each level, which you can select and switch in game by using the select button to access the menu. The graphics are okay, although the main characters are rather simple. I guess this is due to the style of the TV series this game is based on. Overall, I rather enjoyed this game. Althodaugh it’s completely in Japanese you can figure things out rather quickly.
As you travel through different stages, a door waits for you at the end of each level that leads to the next stage. On the stages you can collect your bonus items, often found inside doors or caves. Occasionally you’ll find a mini game where you can get one of four items, including an extra life which is quite handy.
Double Dragon II - The Revenge
This really brings back memories of old times. I used to love Double Dragon games and played them all the time. I really like this one. The game has nice graphics, supports two player cooperative play, and the music and sound effects are also okay. In between levels and before the game starts, you have nice cut-scenes and although they are completely in Japanese you should understand what is going on. The cut-scenes give the game a nice touch. After them, it’s back to some good old kicking and punching.
Figure 1 - Good old Double Dragon beat ‘em up action
Figure 2 - A boss waits for you at the end of each level
Download 2
Figure 3 and 4 - Download 2 has a lot of different levels that never look alike
Download 2 is the first shooter on these systems that I really sank a lot of time into. The graphics are nice with a lot of parallax scrolling in all levels, and even the scenes between levels. The game is completely in Japanese which means I don’t understand a single word of what is being said in the cut-scenes, but that doesn’t diminish the overall fun. The sound is good; I like that the music is fitting for a shooter game (although not ground-breaking). You have a total of 4 different weapons: a very fast pea shooter that will spread to a three directional shoot when upgraded; a laser type weapon that goes straight through all objects, and ranges from one to five lines of laser, depending on your upgrades; homing “missiles”--they look like balls, so I’m not sure if they’re supposed to be missiles--that can fly in any direction and auto attack all enemies on screen (the higher the power-up you have, the more you have you fire at once), and last is a very short but extremely strong electric shock, which does the most damage but it’s reach is so short that you often get killed if you try to use it. However, it can be very handy in boss fights.
Aside from weapon power-ups, you can collect speed-ups which let you move your ship faster. This can also be negative, as some levels require you to navigate very precisely. Being to fast can make you hit objects by accident. There are also satellites to collect which shoot homing attacks and protect you from taking hits. You can collect a shield that can absorb different kinds of bullets from your enemies. The game is very good, and I highly recommend it if you like shooters.
Dragon Ball Z - Idainaru Son Gokuu Densetsu
I have to admit that I’m a huge Dragon Ball Z fan and probably know all the Dragon Ball Z episodes by heart. When I first started this game I was instantly amazed! This game has some of the best graphics I have ever seen in a Dragon Ball game from that era. The cut-scenes are AMAZING! They even included the complete series intro in PC Engine graphics which is VERY, VERY close to the original intro despite only being standing pictures and animated sprites. You really feel that the developers put a lot of effort in this game.
Some scenes are so well-animated that you think you’re watching the TV series. Of course, everything is in Japanese, but this time my passion for the series was all I needed to know exactly what’s going on. You instantly recognize every character, and I think they even used all the original voice actors of the Japanese original.
The music is everything you would expect--the same tunes you know from the TV series. The cut-scenes are a huge highlight of the game and strive to replicate the TV series as close as possible without being an actual full motion video.
The gameplay took me a while to figure out. It was quite frustrating at the beginning. Once I figured out the basics it got a lot easier, but I still don’t know everything about this game. Since it took me a little while to figure out what I found, I’d like to share it, as I think it’s a game worth playing.
Figure 5 - Main battle field in Dragon Ball Z - Idainaru Son Gokuu Densetsu
Figure 6 - Special attack chance the second phase of the fight
If you look at the first picture, you will see the game’s standard battlefield. Your character can move on three planes back and forth during the fight. A fight can be drawn out for quite a long time, although at first it won’t see so, as you will probably get beaten down quite fast and quite often, but you and your enemy have plenty of health and it takes a while deplete.
Let’s talk about the different bars and icons:
The pulsating orange and blue gauge at the bottom: This is your advantage bar. It fills to one side or the other depending on who has the upper hand in a fight. If the gauge fully goes to one or the other side the respective player has an attack chance, as seen in the second picture.
Above the advantage gauge is your health bar. Currently you only see yellow blocks in the picture. If you get damaged, they will turn red and after red they become black. That is when the game is either won or lost. As I said, this will take a while.
Above that, the blue gauge is your power meter. It represents the amount of Ki you currently have. This bar is diminishes during battles and special attacks, but can be refilled by pressing and holding both buttons on the controller.
Underneath your picture there is a colored icon. It has 3 colors: green, red, and black, which have different properties and can be changed by pressing up or down on the controller.
A. Red is your attack stance. If you are on red and attack the enemy, the advantage gauge is likely to fill more in your favor.
B. Green is your charging stance. If you are on green and hit both buttons to refill your Ki, it will regenerate MUCH faster than on red or black. If you’re fighting in that stance you won’t get any advantage over your enemy. In fact, as seen in the picture, it will be the other way around as I have nearly full Ki using green in this situation doesn’t help.
C. I haven’t figured out what black stands for yet, but I’m positive I will find out eventually.
When you completely fill the advantage gauge in your favor, you get a screen similar to the one in the second picture, which is your attack chance. You’re on the left side of the screen and the enemy is on the right (no matter who had upper hand).
If you have the upper hand you can select a Japanese symbol which represent a different type of attack. Then adjust the bar at the bottom which indicates how much Ki you want to use for the attack. The combination out of these three will create different kind of attacks which can do different damage.
If you’re the one being attacked you can only adjust your Ki bar, which you can use to counter your enemy’s attack. If you use more energy than your enemy and he attacks you, there’s a chance you can counter the attack or simply avoid it. A successful attack will reduce the health bar, deciding the outcome of the match. It’s a little bit complicated, and compared to the Bodukai series, it doesn’t really count as “real combat”, but it’s quite fun once you get the hang of it.
Dragon Slayer - The Legend of Heroes
Another of the system’s few RPG games that play similar to the old Dragon Quest games. It is also completely in English, and even comes with cheesy voice acting. Although the graphics are not as impressive as other games, the gameplay and the music totally compensate. There is a lot of grinding involved but luckily the game also has an auto battle feature which speeds the fights up and you to do other things on the side--like writing articles for the ODROID Magazine. At some point the game even tells you how much you should grind by telling you what level you need to a certain mission to accomplish. The level-ups are also quite nice: not only do you get better stats, you can also fill up your HP and MP each time. The number of monsters that attack you adjust to your strength and the size of your party. This is quite neat, as it also increases the amount of Gold and Exp you get out of fights. Meanwhile, the enemy’s strength does not increase greatly. I personally found having good armor is almost, if not more important than having a good weapon, as it greatly reduces the amount of damage from enemies. I would rather hit an enemy three times to kill him and get 1 damage for each round than kill an enemy in one or two hits, and receive 20 damage each hit.
All your party member have a healing spell right from start which makes grinding even more easy. You have a limited number of spell slots so you might have to exchange spells later in the game. If an enemy turns out to be to strong and your party dies in battle the game is not over; you can restart the fight or return to the last town you visited. I suggest restarting the fight as this also allows you to run from a fight and replenishes your health to it’s pre-fight state. Returning to town will give you a party with 1 HP per character and there is no guarantee that there is an Inn to sleep for the night. I have enjoyed playing the game so far and have spent several hours grinding already, getting my party some nice equipment, all while writing on this article.
The Dynastic Hero
This is a port of a game better known as “Wonder Boy in Monster World.” It is very much the same as other games found on consoles under that name. In fact, it looks nearly identical to the Genesis/Mega Drive version, with some minor changes.
The main character gets a minor redesign and the colors are a little bit darker on the PC Engine compared to the Sega Genesis/Mega Drive. I’ve also noticed a slight difference in aspect ratio. The PC Engine has slightly wider graphics than the Sega version. I’ve also seen some parallax scrolling on the Genesis/Mega Drive version, which doesn’t seem to be included in the PC Engine version. These are all just minor changes, the game itself is pretty much the same on both systems. It looks very good; in my opinion, one of the best action platformers for the PC Engine.
Figure 7 and 8 - Side by Side comparison of Dynastic Hero on the PC Engine (Left) and Wonder Boy in Monster World on the Mega Drive (right)
Figure 7 and 8 - Side by Side comparison of Dynastic Hero on the PC Engine (Left) and Wonder Boy in Monster World on the Mega Drive (right)
The PC Engine version comes with a very nice intro and a lot of CD quality music in the game. It’s up to you which one you prefer--they are somewhat different and many people prefer the rough sounds of the Mega Drive over other consoles. This is definitely a recommendation of mine. If you want to see more about the two games in comparison, I recommend watching the YouTube video at https://www.youtube.com/watch?v=R7D2bYgA5IA.
Exile
When I first tried this action-RPG I was not very impressed. After a long and mostly good-looking intro with English voice-over, it started off with a top-down view of your character in a town. The graphics were far from impressive, even if not as bad as other games.
Figure 9 - Top down view of the map where you talk to people and walk around
Once I gathered my party and went to an Oasis, I found myself in a trap which changed the game from an RPG style game to an action platformer with significantly better graphics. Instantly, I found the game much better than before. Sadly, this didn’t last very long as I soon found out I was weak, enemies took many blows to kill, and they were approaching very, very fast. Even if I managed to kill them, there were spots where enemies just kept spawning and no sooner did I finish a fight than I was in another one. Just one untimely hit with my sword and I got damaged. After a few minutes it was already game over.
Figure 10 - The action part of the game is actually quite fun, once you reach a certain level
This was where I stopped trying during my first effort. However, for this review, I forced myself to continue through with it. Thanks to some saving and loading, I got past the very first dungeon with much frustration. After, I went back to down, looked a little bit around, and bought some better equipment for my character. This improved things slightly, but not much. The next section started off hard as well, with enemies taking four to eight hits to kill, while I still went down after three or four. While fighting and jumping through the level, I suddenly had enough exp to gain a level up, and everything changed drastically. Where it first took four to eight hits, it now took only one or two hits to kill an enemy. I got more HP as well and could withstand a lot more hits myself. Since experience points came in fast, I soon had another level up and everything went up again, allowing me to kill every enemy I encountered with just one hit. I found a sweet spot where enemies spawned constantly and got another level or two.
I soon felt very confident and ventured on. The second boss I encountered was easy compared to the one in the first dungeon. The first boss I had to kill required constant jumping and precision hits. After about 25 hits or so--please remember, three or four hits got me down, so this was very hard--the enemy was down. The second boss was so much easier. By the time I could easily withstand 15 or 20 hits, fighting a boss that went down after 10 hits or so, the game got a lot more interesting and fun to play. Later enemies offered still more of a challenge. Eventually, I came to enjoy the game a lot and was looking forward to trying the second game in the Exile series. Inside the game, a girl advertised the sequel, stating it was coming out in Super CD format for the PC Engine.
Exile II - Wicked Phenomenon
Although announced as Exile II – The Revenge as an Easter egg within the first game, Exile II was released under a different name. “What else is different?” you may ask. I’m looking into that.
First of all, the graphics have improved quite a bit, both on the top-down part of the game as well as on the side-scrolling action scenes, which now offer some parallax scrolling which is quite nice. The gameplay is l similar to the first game, but with a few changes.
Traveling between places will always put you into the side-scrolling action part, where in the past it was more like a dungeon system where the side-scrolling bit only took place when you entered certain buildings or places. The game now starts off even harder than the first game. Two hits is all it takes to kill you.
Learning from my experience playing Exile, I took my time to make sure I got a level and sure enough, things got better although not to the same extent. I could take more hits, but the damage I inflicted was still pretty low at this point. You can now see how much HP the enemy has when you them, which shows you how much longer you need to bash an enemy before he goes down, which especially nice to have when battling bosses. This game got a lot harder though, since as good as level-ups are, they are not as powerful as before and there is no easy way to grind, as all monsters are dangerous to you.
Figure 11 and 12 - Improved graphics for Exile 2 both in top down view as well as side-scrolling view
Figure 11 and 12 - Improved graphics for Exile 2 both in top down view as well as side-scrolling view
A nice change is that you can now control all four characters (which also appeared in the first game) in the action side-scrolling part of the game. Each character has its own advantages and disadvantages. Rumi is very fast and agile and has a ranged attack throwing daggers. She is not very strong though. Kindin is a huge man, and fights with his fists. He is very strong but has almost no reach so he can be hit easily by enemies. Fakhyle uses ranged magic to attack. Both he and his attacks are rather slow, but his auto-aim means he can hit the enemy even if they’re above or below you. This provides some nice tactical options in fights, but also means you need four times the items to equip your party. Luckily, they all share the same exp so you don’t need to level them separately. Although I found Exile II a lot harder than Exile, I still recommend them both.
Fantasy Star Soldier / Star Parodier
This classic cute-em-up is one of many shooters for the PC Engine. I enjoyed the vivid graphics, with parallax scrolling and all types of effects. It comes with three playable characters, one of which being Bomberman, and another being the PC Engine itself. The developers clearly had fun making this game. Fantasy Star Soldier is the American version for the Turbo Graphix and Star Parodier is the Japanese version. Although essentially the same game, the Japanese version has an intro that was removed from the American version, so if you want to have the full experience I suggest trying Star Parodier, as the game really doesn’t need any explanation. It’s not that hard of a shooter and you’re looking for something fun and kid-friendly, this is one of the best games out there. I highly recommend it.
Faussete Amour
This Japanese action platformer features a female main character in a pink armor that goes out to defend the land and people from evil. For this she has some kind of flail that she can use to attack in different directions, as well as a rope to reach higher places. When you jump, if you press down and hit the attack button she swings her weapon around in a circle around her. It’s also the only way to launch the three special attacks that you can collect via green, red, and blue orbs dropped by fairies provide all your items in the game.
Figure 13 - One of the boss monsters in the game. Most of them can only be beaten with special attacks
The green orb will shoot three bubbles in an arch in front of you, hitting in a wide angle. The red orb will shoot three blasts straight ahead from where you started the attack. The blue orb will spawn three wide-spread blasts from the ground which go straight up over the entire screen. The graphics are nice, the music good, the controls are spot on, and the fighting is fun. The developers were a little bit on the naughty side, as the main character loses her armor when hit (like in Ghouls and Ghosts or Ghosts and Goblins), but when hit again, she’s completely naked. Then she dies. Overall, the game is fun to play and if you are a fan of action platformers and not too offended by some naughty pictures, this is probably a nice game for your library.
Fray CD Xak Gaiden
Figure 14 - Cute comic-style graphics in Fray CD Xak Gaiden really fit the game’s setting
This game came out in 1994, very late in the system’s lifetime, and this is probably the reason why it looks rather good. This action game features Fray, who is fighting through the levels with her magical weapon, killing monsters, collecting gold to buy better equipment, and finding items in treasure chests. Sadly, it’s completely in Japanese again, but I could always find a way to proceed even without understanding what was being said. The presentation is nice and a little bit on the cute side, as the main character is an anime girl with quite some funny faces now and then. Cut-scenes are rendered nicely and overall the sound, graphics, and music are superb. The game is also quite funny. I just wished I could understand enough to get all the jokes in the game.
Games I found OK
Davis Cup Tennis
This tennis simulation is okay; the graphics are nice, it supports up to four players, the voices in this game are superb, but for my taste it’s way too hard. I got frustrated with it after about 10 to 15 minutes of playtime, as I only won a single match when the enemy hit the net with every serve. I guess it’s not the worst sports game I ever played, but I much prefer Virtual Tennis on the Dreamcast over this version.
Dekoboko Densetsu - Hashiru Wagamanma
This racing game is interesting and supports up to five players. It’s a kind of crash-rally game that is quite hard, especially if you play against the PC. If you press select on the start screen you can cycle through the game difficulty. I’d suggest starting at beginners level, as this game can be hard.
Hitting an enemy from behind will take a hit point from the enemy. But if you hit an enemy at the wrong angle you will lose a hit point yourself. You can try to push them off the track or into obstacles which are plentiful. It looks a little bit like micro machines. The enemy sadly is rather perfect, so for beginners it’s hard to get the hang of, but I think this could be a very nice party games with your friends.
Downtown Nekketsu Monogatari
Also known as River City Ransom is a very interesting fighting game similar to Double Dragon. I especially like it since it shares the character style of my favorite NES game “Nintendo World Cup” (aka Nekketsu Koukou Dodgeball Bu - Soccer Hen). It has but one very big downside. It’s completely in Japanese and I can’t really understand what I’m doing. There are things I can buy and use, but I don’t understand what they are for, so this is very annoying, as I have the feeling I’m wasting my hard earned money on things I don’t need. The game itself is fun to play. The controls are okay, with one button for kick, another for punch and both buttons to jump. Still, it’s not easy and you can go down faster than you expected if you’re not careful. It’s still fun, I just wish I knew what I’m doing.
Dungeon Explorer II
This game starts off with a very nice animated intro and English voiceover that tells you the backstory as well as showing you some scenes from the first game.
The graphics in the intro are beautiful and detailed, but in the game it’s not as detailed. Dungeon Explorer II is a dungeon crawler in the style of Gauntlet. The most interesting part is that you can play it with up to five players in total. It’s an action-RPG with some nice music, thanks to the CD format. Aside from that I can’t say much about it. It was fun for a little while, but I would probably have had more fun playing it with some friends.
Dungeon Master - Theron's Quest
This game is a typical first-person dungeon crawler like Eye of the Beholder, Elvira Mistress of Darkness, and the like. I’m normally not a big fan of these, as they often require a lot of backtracking and a good notebook to write down all the hints and notes you find, as your inventory is always to small and any information you find doesn’t help for another hour or two. It’s not a bad game and runs fine, it’s just not my type. It has a lot of ambient sounds, but no music from what I could tell.
F1 Circus Special - Pole to Win
This racing game starts off on an interesting note with some digitized photographs of Formula 1 racing history. It’s quite cool to see, although I did not understand what they were saying, as it was completely in Japanese.
The game itself is not bad on the eye but also not very impressive either. One thing for sure is that this game is FAST! Maybe I’m too old or I never really was in these kind of games, but this game is way too fast for me. I constantly came off the track or bumped into things. Do that hard or often enough and it’s over. The game also has a simulation aspect to it where you can modify your car for different improvements just like in the real Formula 1. It’s a nice game but simply not my type. There’s actually a 3-D variant of this game available directly for the ODROID called F1-Spirit (https://www.youtube.com/watch?v=M7I4K3-DlW34) which apparently I have forgotten to publish and should do that in the near future.
Fiend Hunter
When you first start the game you’re greeted with a very lengthy, looping intro with lots of naked skin and detailed graphics. When you hit the start button and begin a new game, you have a second type of intro, shown in in-game graphics with a lot of people talking to you and each other, some of which are voiced very nicely.
(Figure 15 - One of the first fights in Fiend Hunter. This guy can be pretty tough, but once you figure out his pattern, the fight gets quite easy)
There is but one issue with this: everything is in Japanese, and I have no clue what’s going on or what I’m suppose to do. After fifteen minutes in the game ,I’m completely lost, so I decided just to go straight to one end of town just to see what happens. Sure enough, I left town and found myself in a very good looking 2D action platformer. I have no clue if I’m ever suppose to go back to town or what all these people said to me, but I’m slowly figuring out the action part of the game. I found I could walk around, climb on ledges, jump between gaps and the like, but I couldn’t do much further than that. At one point I reached an area and suddenly a fight started. Now I had a sword, and the little companion that was flying around me the whole time and I were able to attack this enemy. I could take a lot of hits so I went for it and killed the enemy, losing about a fourth of my HP in the process. Not bad, I’m assuming.
After killing an enemy, that enemy drops a crystal. This crystal can be used to increase your stats, vitality, mental ability, the power of your psycho blade, psycho arrows, and psycho spark. The latter two I assume appear later in the game, as I haven’t seen either of them yet. You can also upgrade “Exy the Photon Fiend”--the little companion of yours that follows you around and also attacks the enemy. Exy also has abilities you can use. You can fly him around, or use him as a source of light in dark dungeons. The fights are not that easy and I admit I used the save and load feature quite a bit, but every enemy has a pattern that allows you to defend yourself from their attacks and wait for your turn to counter-attack. Exy is very helpful here, as he will attack the enemy as well which can often save your hide. I probably would have put this in the “Games I Like” section, but since I don’t understand what’s going on, I think I’m missing some important things.
Final Zone II
This is a mix of a run-and-gun, like the old Commando or Ikari Warriors games, and a vertical shooter. The cut scenes are completely in English and though they are well-drawn, I wouldn’t say they are “good”. In fact they are quite cheesy and the voice acting is rather terrible. They don’t make much sense, nor do they develop any story or characters. However, the shooting action is rather fun and reminds me of early shooters like Ikari Warriors. Each of the different characters you can play have the same main weapon--a vulcan gun--and a different secondary weapon. You start off as a guy with a bazooka which does minor area damage. The second character has some kind of laser instead. No splash damage, but it can shoot through objects. The third one in the horizontal shooter scenes was flying a helicopter with “missiles” that do a lot of damage, but are rather short. Maybe later in the level there are other characters and weapons, but I’m not sure yet. I’m looking forward to finding out.
Some enemies drop power ups, either a “H” for health which restores your health, or an “B” for the secondary weapon. This just restores your weapon; it doesn’t give you more than what you started with. Later levels give you a chance to pick up either a “P” which will increase your maximum health or an “S” that will restore your health to the maximum. The game only has seven stages and is over rather quickly. In later levels you can choose which character you want to take to battle, which is nice. Overall the game is average at best.
Flash Hiders
This game starts off rather strange with an intro that has a lot of voiceover but little in the way of animation and graphics. Some of the graphics are good, but many others are rather simple. When you press start, the game has a black screen for several seconds, which is apparently just a very long loading screen. This was nothing I had ever encountered before on the system. The menu gives you three options:
A one-on-one battle mode lets you play either against another player or a computer, or lets you view a demo mode where computer fights against computer. Before you start you can distribute some attribute points like offense, defense, and speed and then it starts.
There is also a “Scenario” mode, which is your story mode of the game--and damn, did they put a lot of story in there. Before each fight you have a lengthy cut-scene with people talking to each other, which sounds hilarious but since it’s completely in Japanese I don’t understand a word. Since most of it is just static pictures with little to no animation you can’t even guess what they are all about. I ended up skipping them all together. In Scenario mode you have a series of fights, and can again distribute your points over offense, defense, and speed, but after a couple of fights your character levels up, and you have higher base stats. You already start rather high, on level 8 or 9 character, so you probably won’t see much difference.
The last option you have is “Advance.” Here you start with a level 1 character of your choice, pick the battles you want to fight, and earn money and experience. When you have enough money you can buy items from a shop to further increase your character. This mode I found most interesting and played the longest.
A rather strange option for this fighting game is the option to choose between Auto and Manual mode in both Advance and Scenario mode. This means the computer is taking over your character and fights against another computer opponent. Odd, but it works, so you can just watch instead of fighting yourself if that’s what you want. The graphics and animations in a fight are rather good, with some mild parallax scrolling on the battlefield.
Forgotten Worlds
This was kind of a mediocre side-scrolling shooter with very little variety, bad voice active, and a lot of repetition. It has an auto-fire function, so you only need to “turn” your weapon to shoot in the direction you want to fire. There is a shop where you can go and buy upgrades like health, armor, or weapons, but that’s the most exciting part of the game. The graphics are okay. There is no parallax scrolling and in some areas not even a background. It’s fun for a short while though.
Games I disliked
Daisenpuu Custom
This shooter was really not one of my favorites. In fact, I think it’s quite buggy. There are some trucks that when drop weapon upgrades or special attacks when you shoot them, but sadly half of the time they weren’t working at all. The entire second stage was completely empty for me and I just flew through. The game was not very fun. I didn’t like that I could gather some weapon upgrades, but no different weapons. It’s blunt and not very entertaining.
Faceball
This game is hard to describe. You are a ball with a face on it (hence the name), and you’re thrown into a 3D maze and have to either hunt other faces (Battle mode) or collect eggs (no clue where they come from) and bring them to a wall that blinks to get points for it (Race mode). Neither mode is very fun in my opinion, and although the music is nice and seeing 3-D graphics on the PC Engine is kind of interesting, this game just couldn’t keep me entertained enough to keep playing it.
Fighting Street
Ever wondered why the Street Fighter series started with “Street Fighter 2”? What happened to “Street Fighter 1”? There really was such a thing and believe it or not, Fighting Street for the PC Engine is pretty much an exclusive port of this game to a home console. Sadly, the game itself was never really good to begin with. The controls are terrible and the voice acting was copied 1:1 from the arcade which is even worse. The soundtrack got an upgrade and is CD quality but that doesn’t fix an overall not so great game. If you ever want to know what the original Street Fighter looked like you can try it, but there are much better fighting games out there.
Meet An ODROIDian: Chris Lord
February 1, 2019By Rob RoyMeet an ODROIDian
Please tell us a little about yourself.
I am a software engineer and musician, making most of my living from the former. Currently, I am working on a real-time motion capture system for embedded devices (https://github.com/glimpse-project/glimpse), but I have worked on all sorts of things over the last decade or so. My areas of interest have been, in no particular order: embedded systems, hardware-accelerated user interfaces, web browser backends and most recently, machine learning. I am based in South London, where I have lived all of my life, though I studied at Southampton University, where I achieved a first-class masters degree in Computer Science.
Figure 1 - Meeting with Ralph Stanley II at Vine Grove Bluegrass Festival in Kentucky
How did you get started with computers?
I was interested in computers and electronics from a very early age, since my dad was a computer programmer, and my mother also spent a significant amount of time doing accounting on PCs and writing COBOL for a living. I remember having computers all of my living memory, starting off with an Epson QX-10, before upgrading to an Amstrad 8086 machine and then various other PCs over the years. I always showed an interest in computers and my dad was keen to oblige, so I had the advantage of being taught programming from about 4 years of age, starting in MF-BASIC, before progressing to C and dabbling some in Z80 assembler.
During my late childhood, my mother also worked at what was then called Cable (then United Artists, then Telewest, then BlueYonder, and now Virgin Media) and that let us get cheap internet, which I took full advantage of. This was quite unusual for the time, having access to the internet, and being able to use it for long periods was pretty rare in the early 90’s in England. Though I spent a lot of time playing games, I also spent quite a bit of time programming them too, and learning more about programming in general. It was not long before I realised that I enjoyed the periphery of game programming a lot more than programming games though, so that was never a career path I pursued.
What attracted you to the ODROID platform?
I had been researching Pi-based portable games devices, but it always irked me that using a Pi generally meant using Linux and dealing with lengthy boot times. As far as I am aware, the Pi does not support any suspend states, which makes it a pretty poor choice for such a use. I was reading an article on Engadget about someone's Pi-based portable retro gaming kit, and someone in the comments section, happened to mention ODROID-GO. Pretty much immediately, I knew it was quite close to what I wanted; a device that can boot instantly into an application and that has the power to emulate the systems from the 80s. Not to mention insane battery life. I also enjoy the kit aspect of it, it was not long ago that I built a gigatron TTL kit, which I found to be a very fun and informative process. I am looking forward to modding my ODROID-GO with a headphone socket, and who knows what other upgrades people might think of down the line.
How do you use your ODROIDs?
I mainly use my ODROID-GO to play NES games during my work commute, or while watching TV. Specifically, I am a big fan of the NES version of Tetris, and after spending some time improving the screen-update code, it is an excellent device to practice on. I have probably spent more time writing code for it than I have actually playing on it, but hopefully the disparity is not too large. Having GPIO pins neatly accessible on the outside of the device is a really nice touch that would be fun to take advantage of sometime, maybe to enable Gameboy link cable functionality.
Figure 2 - An IKEA-enhanced 3D printing setup, featuring an M3D Pro
Which ODROID is your favorite and why?
The ODROID-GO is my favourite, as it is the only ODROID I have 🙂 Looking at the rest of the range though, the H2 looks interesting. Having that sort of power and the x86 architecture is a huge boon for a lot of use-cases. I would be interested in knowing how its power consumption compares to contemporary Pi SoCs.
What innovations would you like to see in future Hardkernel products?
I would love to see more ultra-portable designs, like the GO. Customisable portable gaming is very attractive to me, especially in the sort of ultra-small profile of the GO. Somewhere the GO is a bit hamstrung that I would love to see addressed in a later model (11-year anniversary celebration, perhaps?) is using SPI for screen output. Or at least, using SPI for screen output coupled with a screen that requires at least 16-bit pixel data. There just is not enough bandwidth for a 60Hz output without performing some clever tricks (which is what I have been working on, with mixed success). If it was coupled either with an LCD controller that could do palette-based 8-bit updates, or a controller that could run at the full 80Mhz of the bus, this would not be an issue. Alternatively, a chipset that could more finely control the speed of the SPI bus would help solve this issue too, currently the ESP32 offers either 40Mhz or 80Mhz, and reports show that the chosen LCD controller tops out at about 70Mhz. This is really a limitation of the ESP32 chip, but I think it could be worked around with some thought.
Figure 3 - A finished build of the Gigatron TTL microcomputer
Figure 4 - The Gigatron TTL microcomputer displaying a demo image
What hobbies and interests do you have apart from computers?
When I am not working on computers, I spend most of my time playing music. I am a keen banjo player and play in a band called The Vanguards (http://thevanguards.uk/). When we are not gigging, I like to play in open sessions around London, and I have made two musical pilgrimages to the southern states over the last couple of years. I particularly like playing bluegrass, which is quite niche in this country. I have played music for most of my life, starting with piano when I was 6, and moving through euphonium, trombone, bass guitar, electric guitar, drumkit, banjo, acoustic guitar and double bass, with varying levels of proficiency. Banjo is my main instrument at this point, but I still enjoy playing piano and I can fill in on rhythm guitar in a pinch. For me, music is an escape from computers, which dominate most of the rest of my life. I like to keep them separate as much as possible.
Figure 5 - Chris’ band The Vanguards after recording a promotional video
What advice do you have for someone wanting to learn more about programming?
I have had the privilege of being in positions to interview other programmers during my career, and something that I think can really separate people is a basic knowledge of how computers actually work. It is far too much to expect people to understand modern CPUs with their various micro-architectures and ludicrous long pipelines, but certainly basic concepts can still apply very successfully to coding today. You can tell the difference between someone that started on JavaScript or Python and never went any lower, versus someone that is done some systems programming in C or assembly, even for high-level jobs. I would suggest that people try to reach the lowest level they're comfortable with. For me, that was assembler programming on a TI-83 graphing calculator, and then the same for the Gameboy. I think the Arduino platform now can teach similar lessons and it is never been easier or cheaper to dive in.
Figure 6 - Achieving a new high score on NES Tetris on the ODROID-GO