Playing Modern FNA Games on the ODROID Platform

FNA (http://fna-xna.github.io/) is an open source re-implementation of XNA. XNA is a game framework created by Microsoft Corp., and is quite popular. A few notable games have been written with XNA (which is for MS Windows only) and later ported to Linux and MacOS using FNA and/or MonoGames.

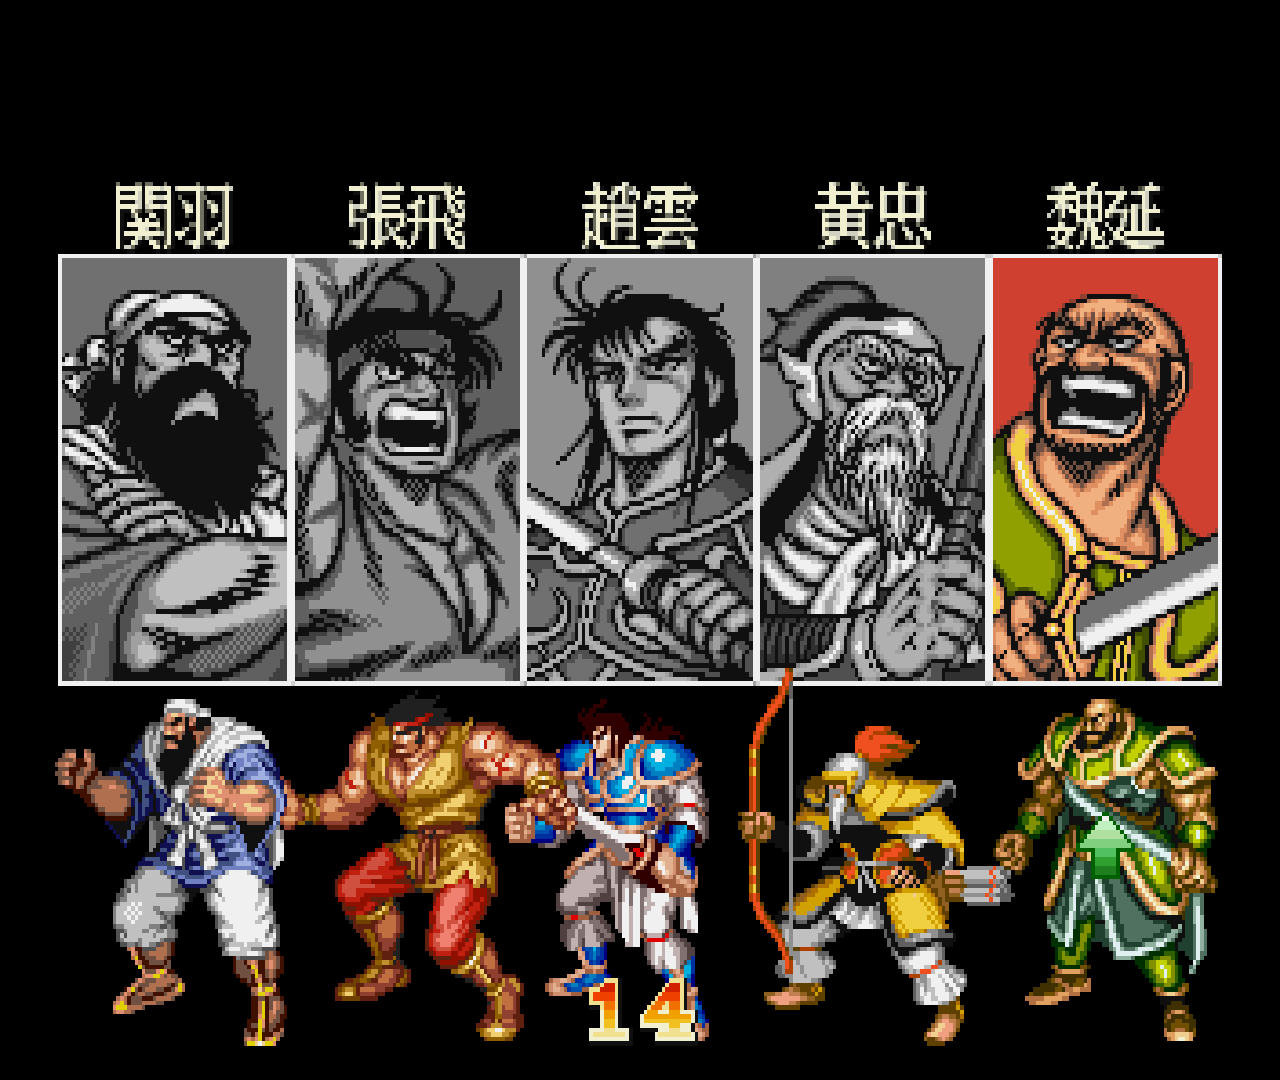
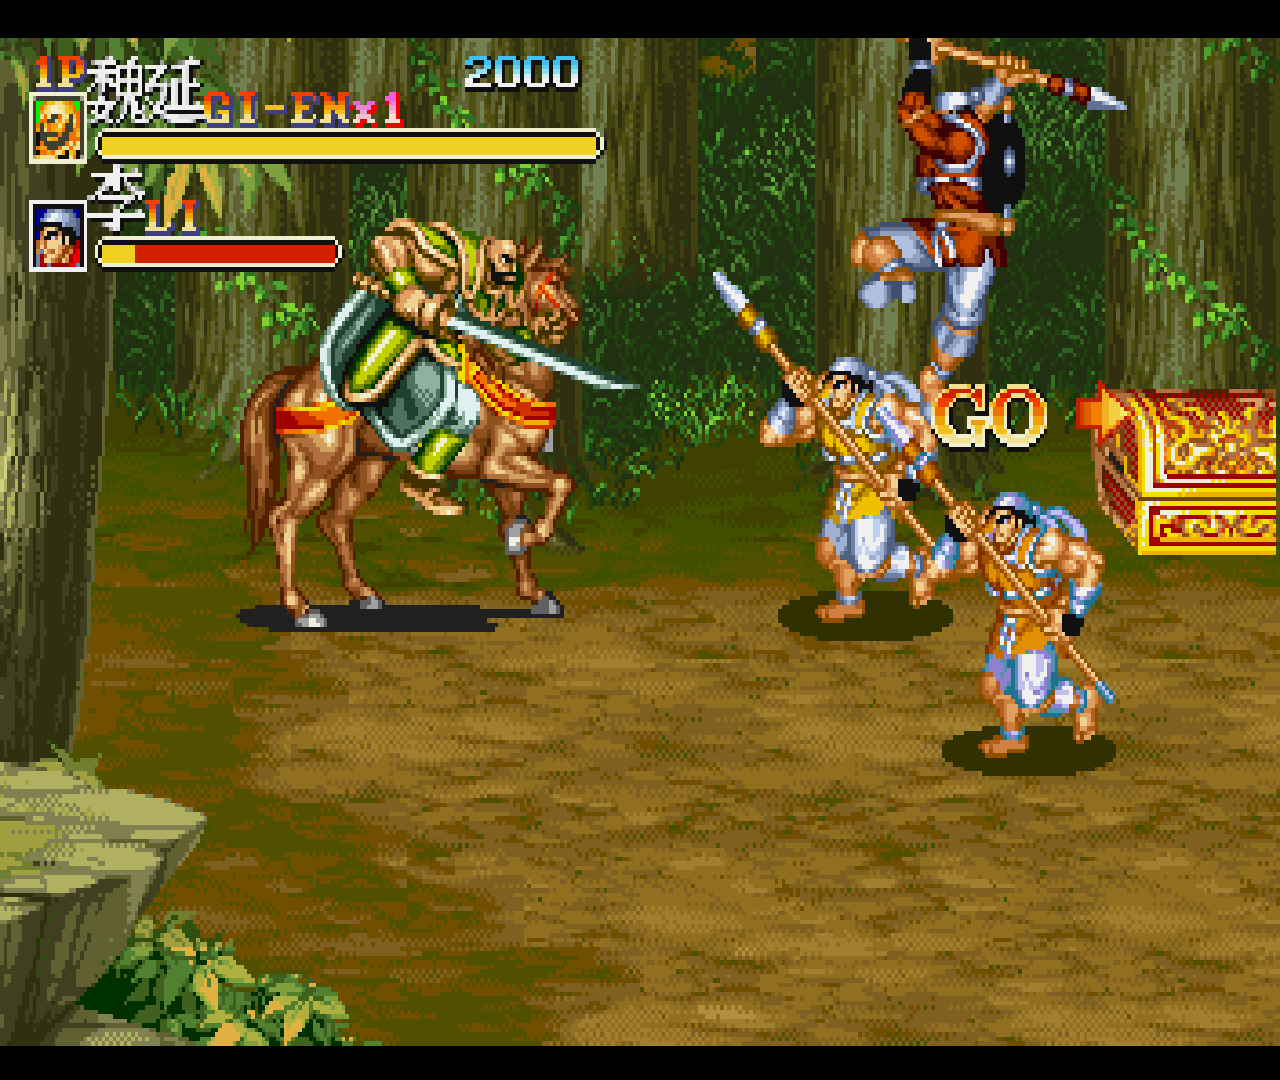
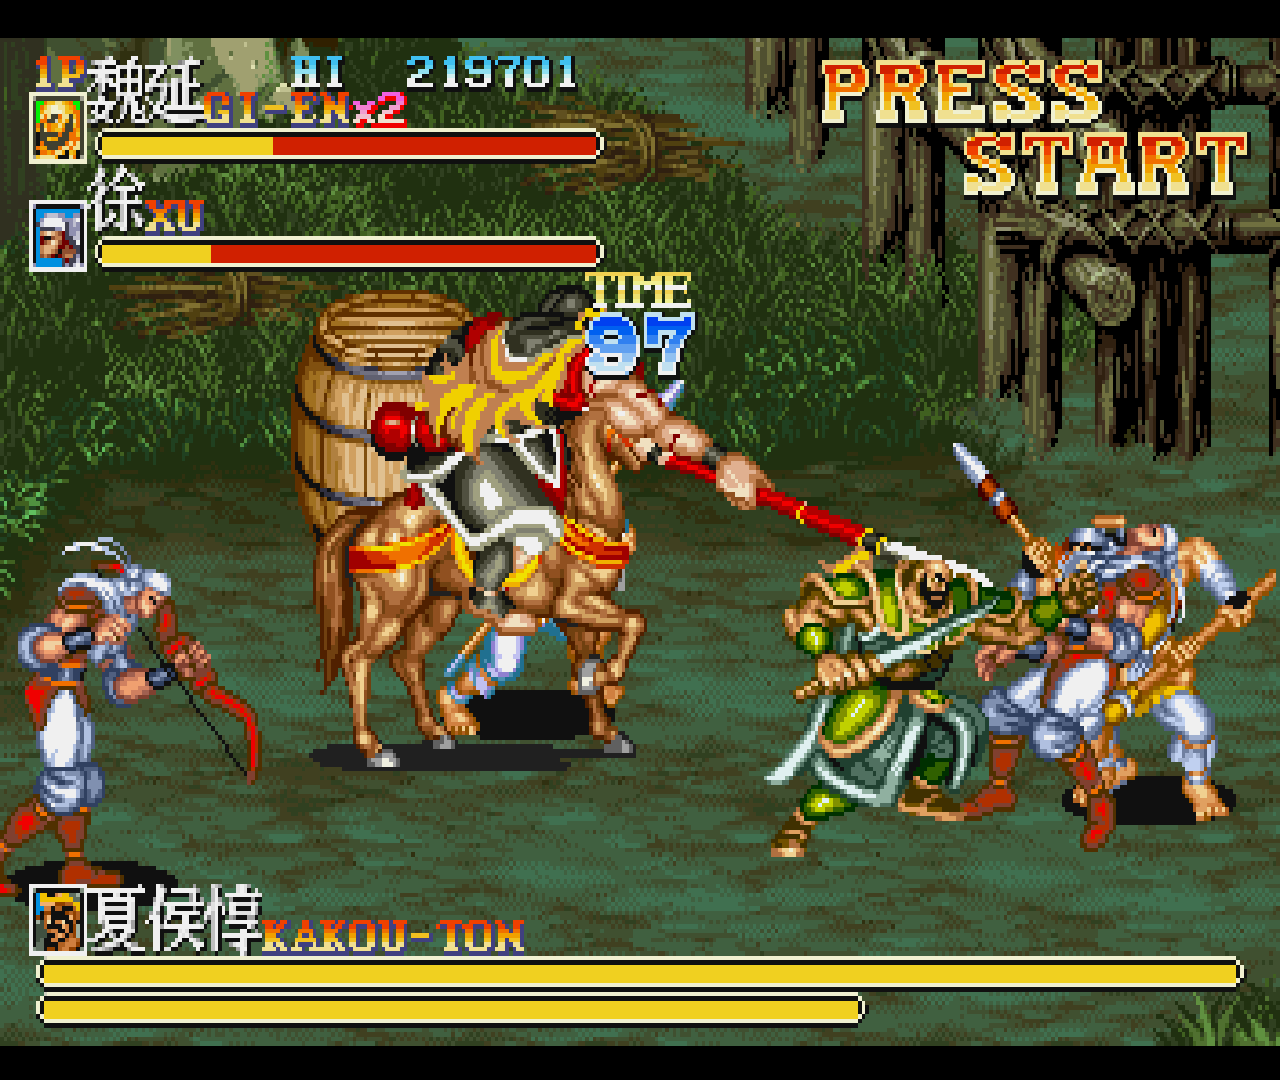
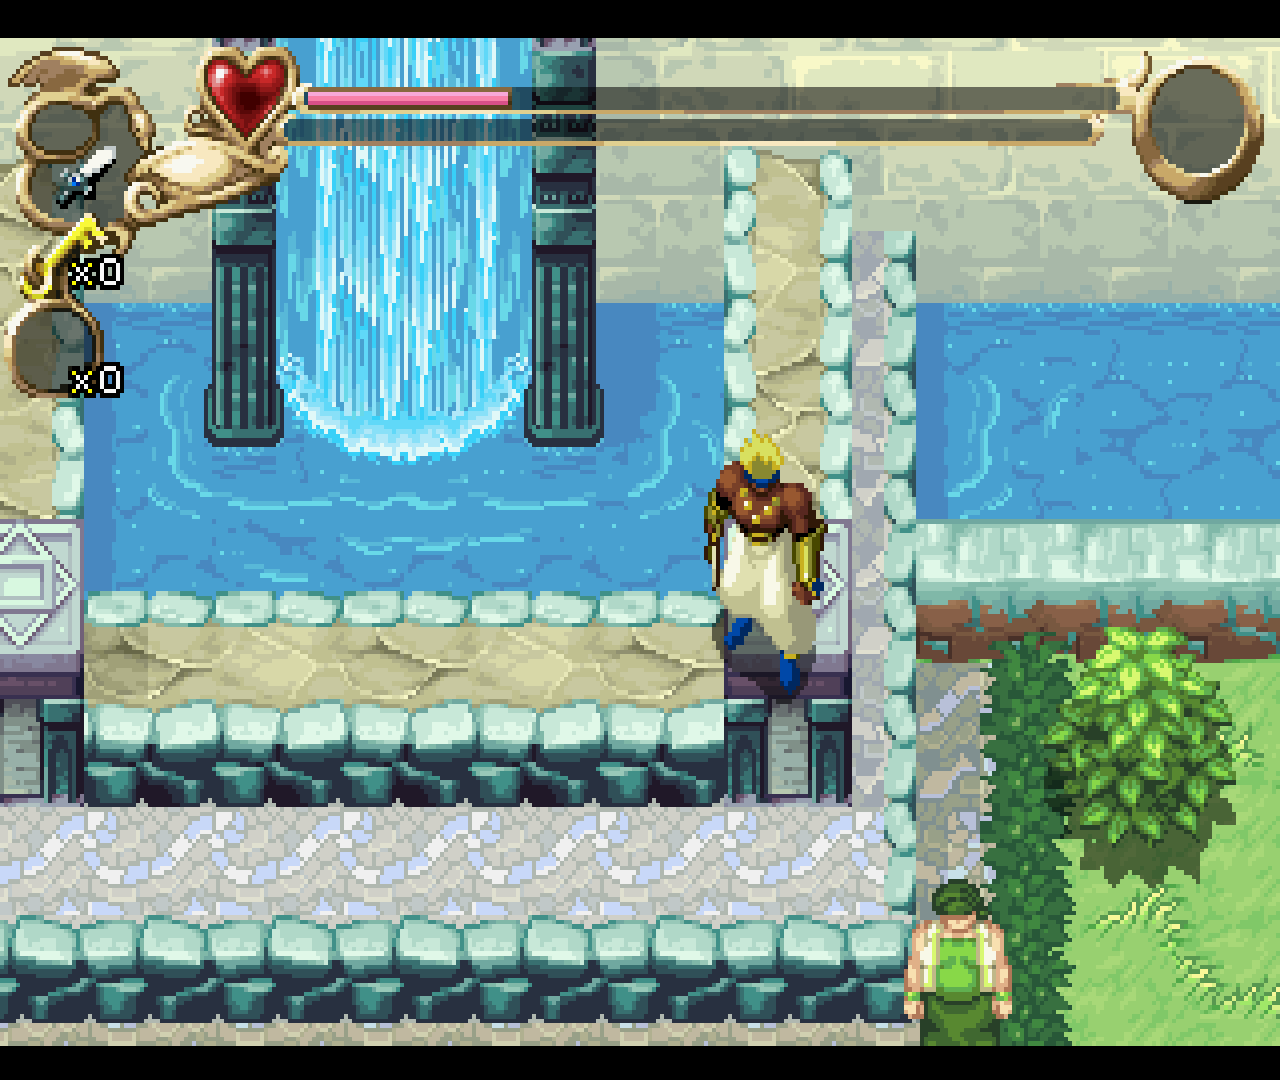
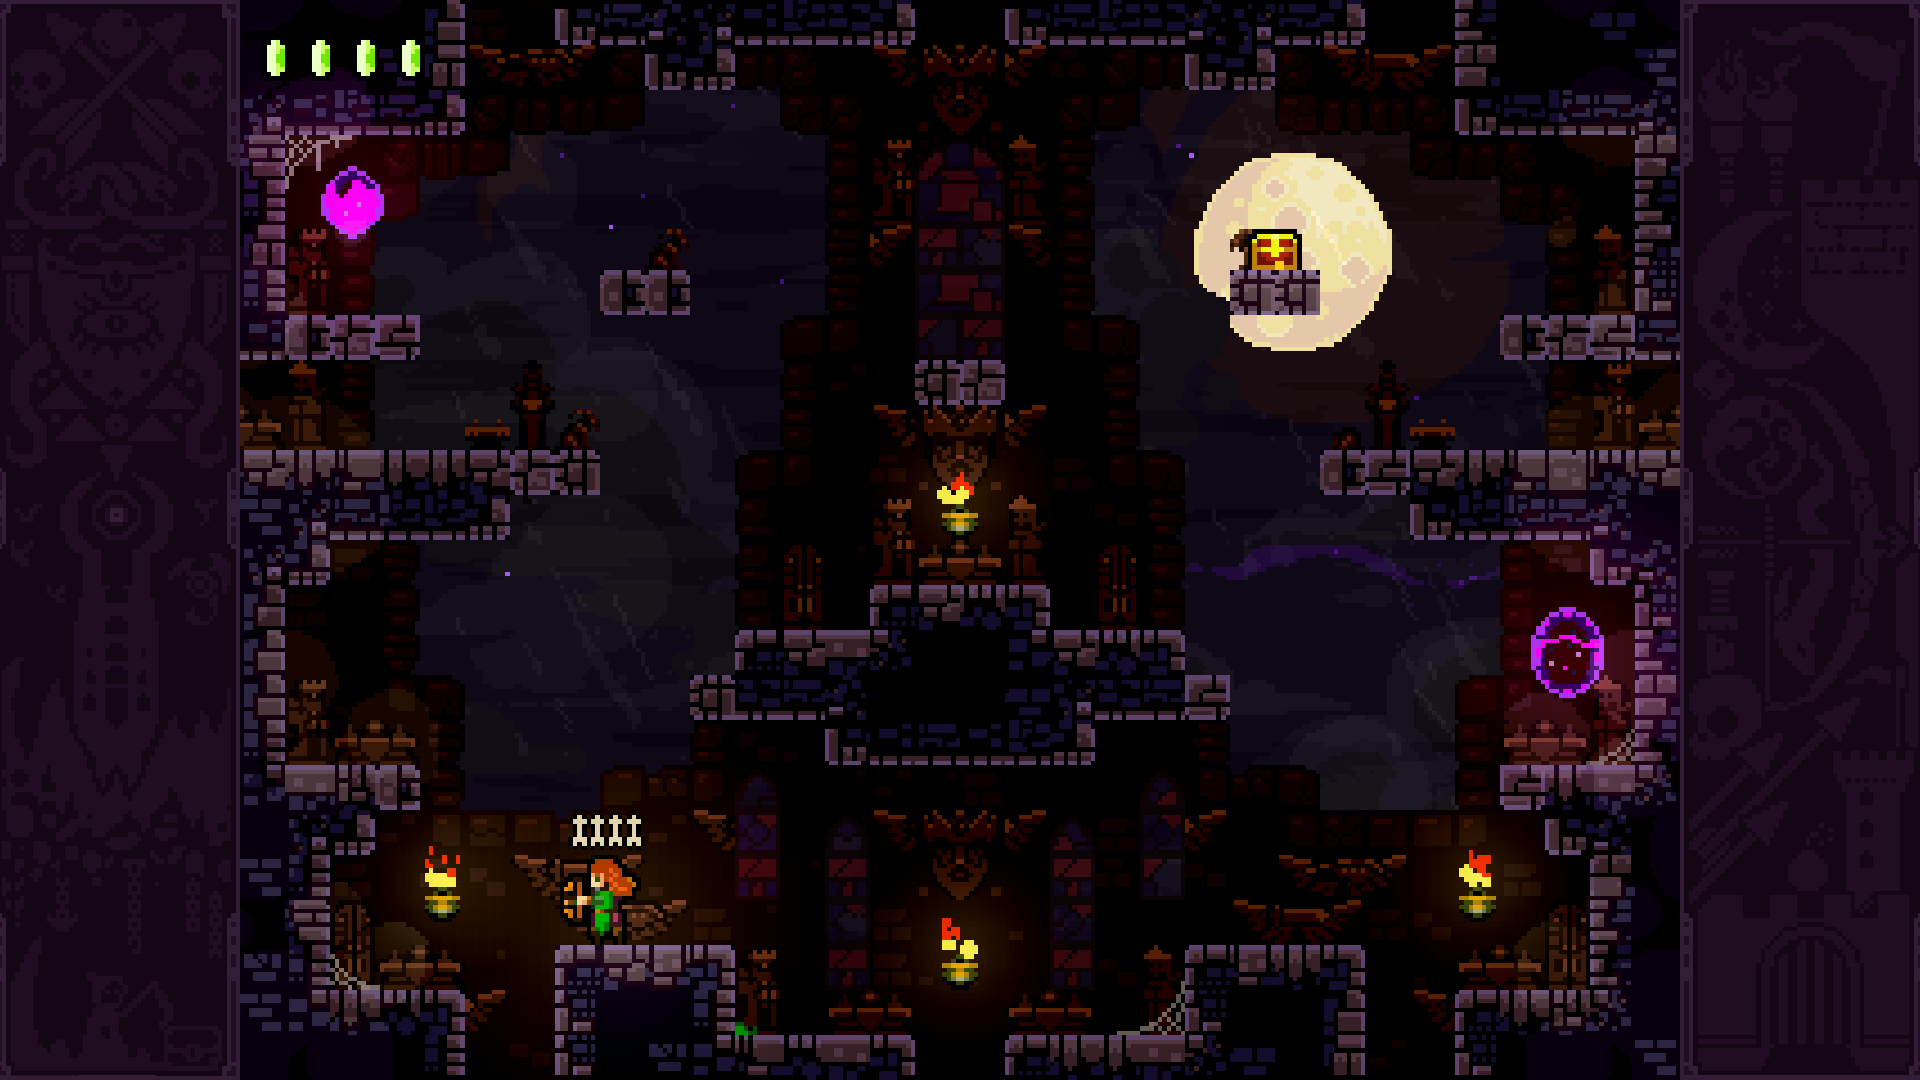
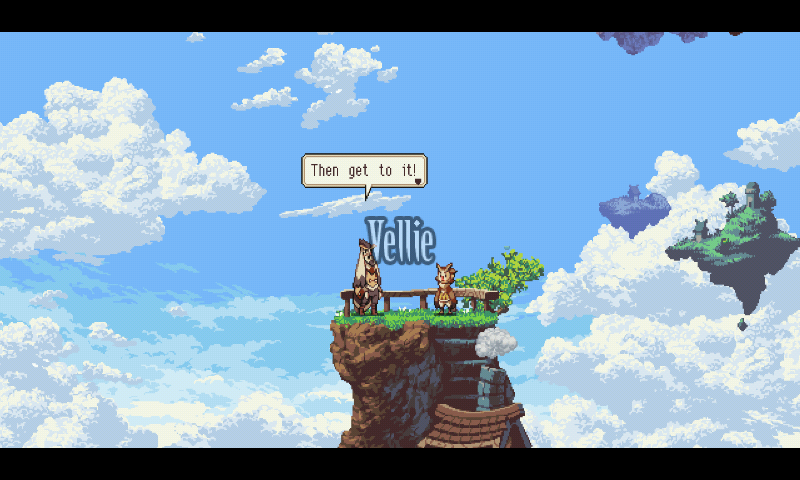
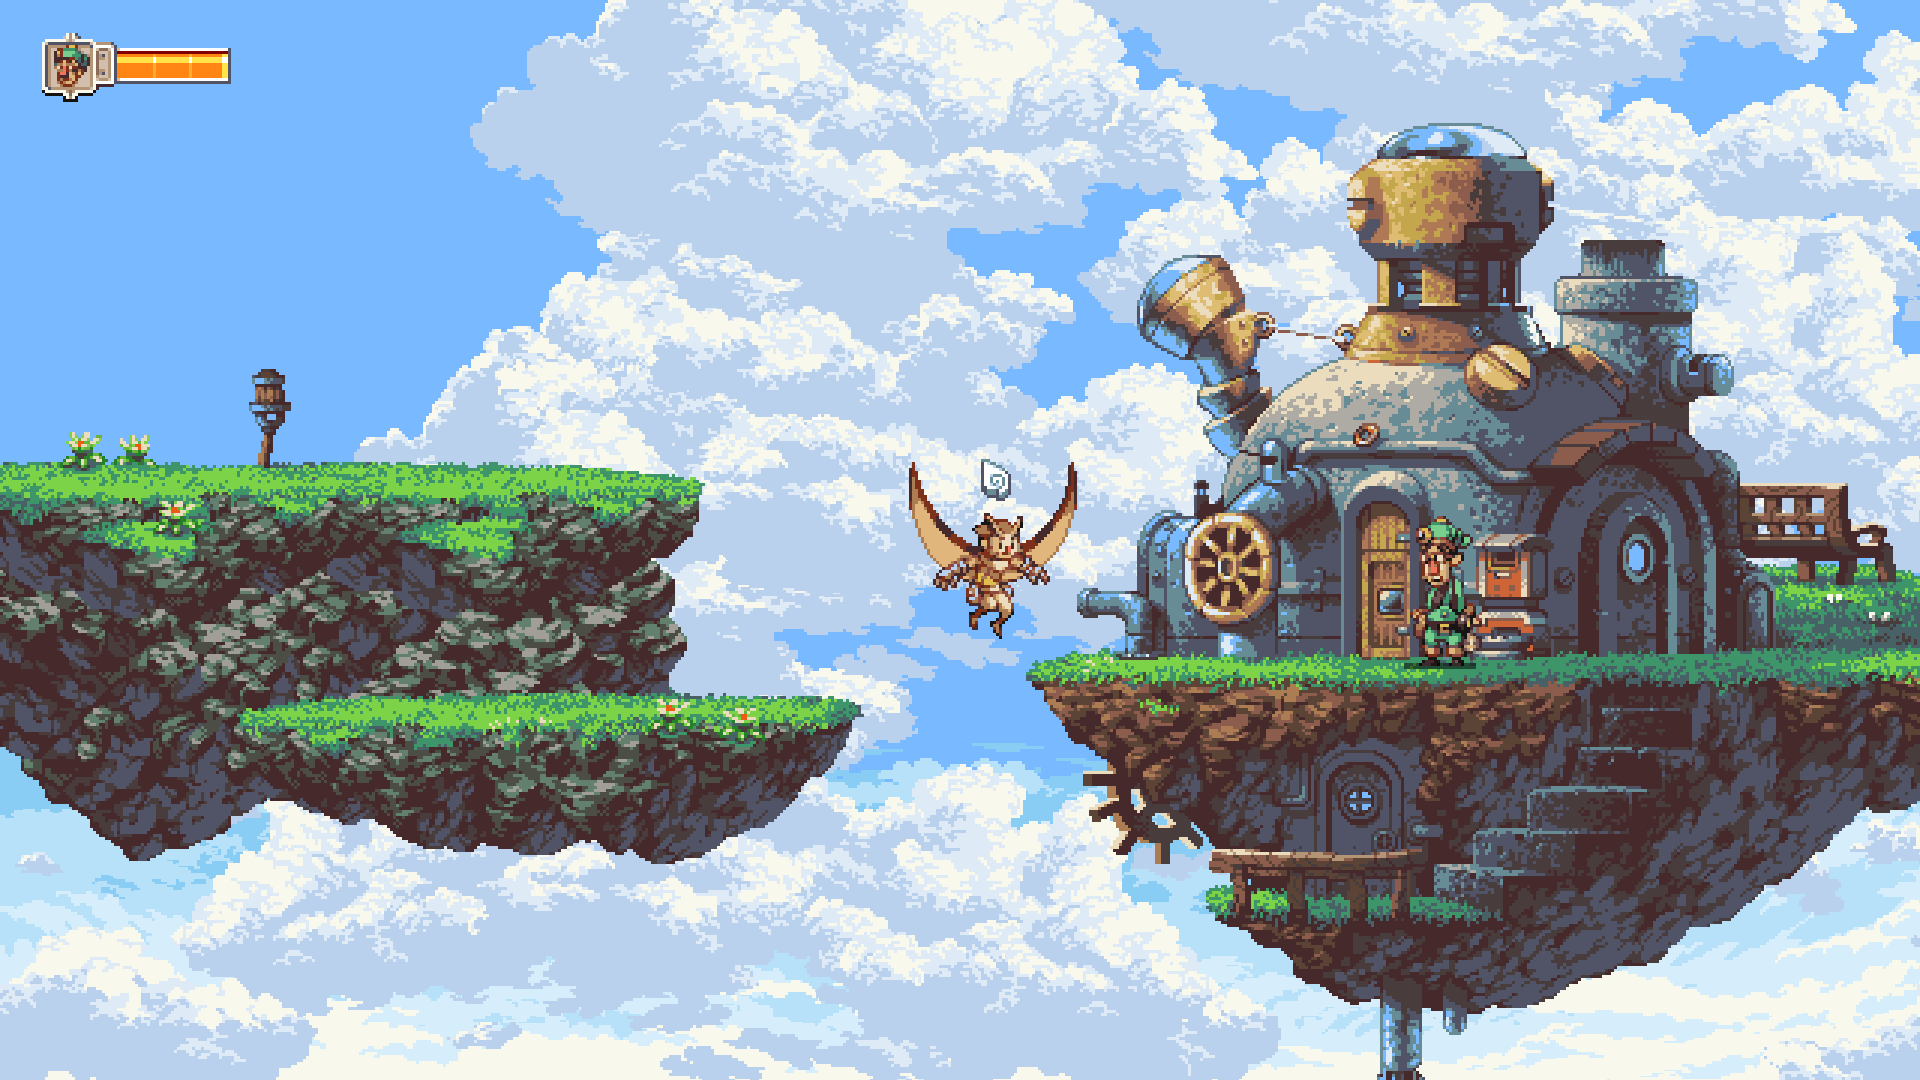
Amongst those games, you can find some gems like Bastion, FEZ, Stardew Valley, Owlboy and Terraria, to list just a few. To have a better idea of what game use this framework, go to https://goo.gl/4MGnys or http://www.monogame.net/showcase/

Figure 01 - Stardew Valley

Now, this framework is interesting for ODROID SBCs, because it is not based on C or C++, but on C#. The big advantage of games compiled with C# is that they can run on any Linux variant (any CPU architecture) as long as Mono is supported and running on it. With a bit of work, most of those games can be made to work without having the source code of the game. It is suffice to just use binaries built for x86 Linux.

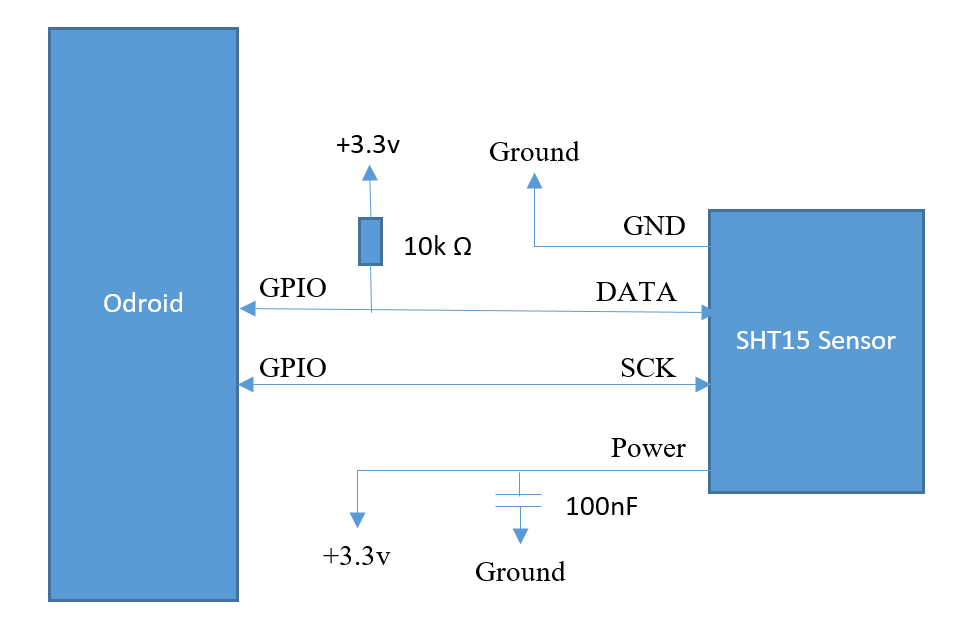
Pre-requisites Of course, to launch those games, some preparation and compilation will be needed. Along with Mono, we will need some libraries to support the games, like SDL2 and also a few specific libraries required by the games. We cannot use them here because of the ARM architecture of the ODROID. We will also need a fresh version of GL4ES because all those games use OpenGL 2.1+ extensions at the minimum. This guide should work with the default HardKernel image or with ODROID GameStation Turbo (OGST).  First, let us make sure everything is up to date (do not forget to answer ‘Yes’ if asking to upgrade):

$ sudo apt update && sudo apt upgrade
Now that latest version of everything is installed, let’s install the standard libraries we will use. Start with SDL2 and related libraries:
$ sudo apt install libsdl2-2.0 libsdl2-net-2.0 libsdl2-mixer-2.0 libsdl2-ttf-2.0
To install Mono, run the following command:
$ sudo apt install mono-complete mono-xbuild
After those installations, we are almost ready. The problem is that SDL2 may not be compiled for OpenGL support, and some other libraries are missing from repo and needs to be built from sources. So, just to be on the safe side, lets install a few development stuff (you may already have most or all of them installed):
$ sudo apt install build-essential git mercurial cmake libgl1-mesa-dev
$ sudo apt install libtheora-dev libvorbis-dev
If you use OGST and do not want to build all those libraries, you can simply use the one built by @meveric for you with the following command:
$ sudo apt install monolibs-odroid
For the others who want to build needed components themselves, get ready for some serious building. Build some libraries We will build some libraries and put them in a easy to find folder, so we can direct the search of those libraries with the LD_LIBRARY_PATH trick, so let us create that folder, named monolibs in your ~home folder:
$ mkdir ~/monolibs
Now, let us build the libraries we need, namely: gl4es, SDL2 with OpenGL support, mojoshaders and libtheroaplay.

GL4ES This library allows the use of many OpenGL 1.x and 2.x software/games on GLES hardware. It is the central piece of software, along with Mono, that allows all those game to run on the ODROID. The sources are on my github account, so let us get the latest sources:

$ cd ~
$ git clone https://github.com/ptitSeb/gl4es.git
Once you have cloned the repo, to get latest sources, you simply go inside the repo and type “git pull”. Now, configure the build for the ODROID:
$ cd gl4es
$ cmake -DODROID=1  -DCMAKE_BUILD_TYPE=RelWithDebInfo .
and build the libraries:
$ make -j2
Then, simply copy it in the “monolibs” folder for later use: $ cp lib/libGL.so.1 ~/monolibs/

SDL2 We already have SDL2 installed, but it may be the version that only supports GLES and not OpenGL. So it is safe to build a new version. It is not that complicated anyway. Let us use the version that is on my GitHub account. Any other version will work, and it is just for convenience to use mine:

$ cd ~
$ git clone https://github.com/ptitSeb/SDL2.git
Now configure the build for OpenGL (we will do out-of-tree build this time):
$ cd SDL2
$ mkdir build
$ cd build
$ cmake -DCMAKE_BUILD_TYPE=RelWithDebInfo.
The configure step will run for a bit. You should see, among a lot of other things: “--VIDEO_OPENGL (Wanted: ON): ON”. So now, let us build this library (it will take a bit longer than gl4es):
$ make -j2
We can now copy the freshly built library to the monolibs directory:
$ cp libSDL2-2.0.so.0 ~/monolibs/
mojoshaders That library is one of the utility libraries made by Icculus to help porting windows code to Linux. This particular library converts shaders written for DirectX to GLSL shaders for OpenGL (or Metal). This library is used by FNA to transparently use the DirectX shaders on OpenGL. We will get the source directly from the Icculus’s repo, using mercurial this time:
$ cd ~
$ hg clone http://hg.icculus.org/icculus/mojoshader
Let us configure (to produce a shared library, because by default, it does not)
$ cd mojoshader
$ cmake -DCMAKE_BUILD_TYPE=RelWithDebInfo -DBUILD_SHARED=ON 
-DDEPTH_CLIPPING=ON -DFLIP_VIEWPORT=ON
and make the lib:
$ make -j2
We will copy this library also and go to the next:
$ cp libmojoshader.so ~/monolibs/
XNAFileDialog Some games use this library. Let us build a version of the native part just in case.
$ cd ~
$ git clone https://github.com/flibitijibibo/XNAFileDialog.git
$ cd XNAFileDialog/native
$ make
$ cp libXNAFileDialog.so ~/monolibs/
LibTheoraPlay Some games use libtheoraplay for the videos (“A Virus Named TOM” for example). This lib is a bit tricky because it comes in 2 parts - the C part and the C# part, but the C# part needs some adjustment to run on ARM, as there is a workaround for some issue on Mono/x86 that does not apply here (and breaks things).
$ cd ~
$ git clone https://github.com/flibitijibibo/TheoraPlay-CS.git
The patch is simple: open TheoraPlay.cs from ~/TheoraPlay-CS with your favorite text editor and go to around line 155. Search for the following line: /* This is only a problem for Mono. Ignore for Win32 */ if (Environment.OSVersion.Platform != PlatformID.Win32NT && IntPtr.Size == 4) and replace the big “if” that is split in 2 lines with a simple if ( false ) Now, let us build the C part of the lib and copy in monolibs:
$ cd TheoraPlay-CS/TheoraPlay
$ cmake -DCMAKE_BUILD_TYPE=RelWithDebInfo .
$ make
$ cp libtheoraplay.so ~/monolibs/
Now, let us build the C# part of the library (it is an MS Windows dll) and copy the dll to the same place, for future use. We can safely ignore the .dll.config file, we will not need it:
$ cd ..
$ xbuild /p:Configuration=Release 
$ cp bin/Release/TheoraPlay-CS.dll ~/monolibs/
TheoraFile Some games use this library. Let us build a version of the native part just in case.
$ cd ~
$ git clone https://github.com/FNA-XNA/Theorafile.git
$ cd Theorafile
$ make
$ cp libtheorafile.so ~/monolibs/
Other libraries Some games may ask for other libraries that are more difficult to build or not opensource. For example, Hacknet will ask for libcef (that is basically “Chrome in a lib”), or Bastion will ask for FMODex (that is closed source). For those games, you are on your own, but if you have a working solution, do not hesitate to go to the ODROID forum and add a post about that. FMOD can be downloaded for ARMHF, but does not seem to exist for ARM64 (so I could not test on my N1). To get FMOD, you need to register at http://www.fmod.com and download fmodstudioapi for linux (you will get an archive like, fmodstudioapi11006linux.tar.gz). Extract and copy libfmod to monolibs with:
$ cd ~
$ tar xf fmodstudioapi11006linux.tar.gz
$ cp api/lowlevel/lib/armhf/libfmod.so ~/monolibs/
For FMODex, you can then use the little wrapper I wrote:
$ cd ~
$ git clone https://github.com/ptitSeb/fakemodex.git
$ cd fakemodex
$ cmake -DCMAKE_BUILD_TYPE=RelWithDebInfo .
$ make -j2
$ cp lib/libfmodex.so ~/monolibs/
Extract games Now, we need to install some games on the ODROID. The games need to use FNA or MonoGames here, coming from GoG, HumbleBundle, or even Steam for some of them. They all need to be the Linux version of the game. Most of the time, the Windows version will not work. You should note that the Steam version of some games will also not run without Steam launched (DRM), and because we do not have Steam on the ODROID, that will simply prevent us to run the game on the ODROID. Use the GOG or HB (or any other DRM-free) version for games you want to run on your ODROID.

Steam or other Linux installed version If you have an installed Linux version of the game, simply copy the entire folder of the game and you are ready to go. The Steam version of FEZ or Owlboy, for example, can be used.

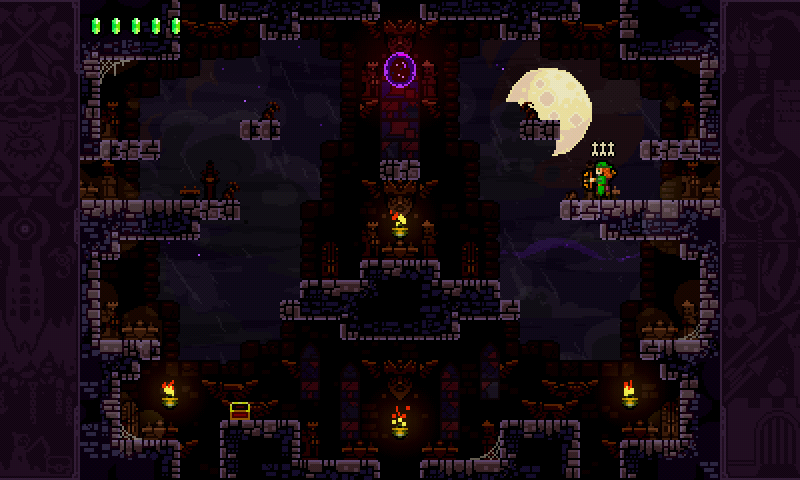
Humble Bundle version Many games now come as a large single file ending with “-bin”. These games can be easily extracted from this - there a zip file embedded and all games is inside the “data” folder. For example, “A Virus Named TOM” comes as “avnt-10192013-bin”, and “Towerfall:Assension” is “towerfall-07212016-bin”. Also, because some game have a “data” that will conflict with extracted “data” folder, let us temporarily renamed it to “ODROID”. To prepare A Virus Named TOM, you can do:

$ cd ~
$ mkdir AvirusNamedTOM
$ cd AVirusNamedTOM
$ unzip ~/avnt-10192013-bin data/*
$ mv data ODROID
$ mv ODROID/* .
$ rm -r ODROID
GOG version Games packages by GOG are quite similar to extract. For bastion, I have a ”gog_bastion_2.0.0.1.sh” that also contains a zip file:
$ cd ~
$ mkdir Bastion
$ cd Bastion
$ unzip ~/gog_bastion_2.0.0.1.sh data/noarch/game/*
$ mv data ODROID
$ mv ODROID/noarch/game/* .
$ rm -r ODROID
Figure 02 - FEZ01

Launch the games Finally, we are ready for some action. We need to remove a few libraries from the install first. Because we will use the version of Mono that comes with the ODROID, and not the one embedded in the games, there is some cleanup to do first:

$ cd ~/AvirusNamedTOM
$ rm mscorlib.dll
$ rm System.*dll
$ rm Mono.*.dll
Now, some games (like A Virus Named Tom), use TheoraPlay. It can be under 2 names: “TheoraPlay-CS.dll” or “TheoraPlay#.dll”. If you see any of this, be sure to replace with the one we built earlier or you will have crashes when video start (only on 32bits, 64bits are safe). For the HB version of A Virus Named TOM, that will be:
$ cd ~/AvirusNamedTOM
$ cp ~/monolibs/TheoraPlay-CS.dll TheoraPlay#.dll
Figure 03 - TwerFall04

Now we can run the game. We need to setup a few things to have GL4ES emulating OpenGL2 and we also need to use all the libraries in monolibs. Locate the “.exe” file and simply run it with mono. For “A Virus Named TOM” the commands are:

$ cd AvirusNamedTOM
$ LC_ALL=”C” LIBGL_ES=2 LIBGL_GL=21 LIBGL_DEFAULTWRAP=2 
LIBGL_FBOFORCETEX=1 LD_LIBRARY_PATH=~/monolibs mono CircuitGame.exe
We can go further, with additional components.

Resampling Audio You may notice some games take some time to initialize and use quite a lot of memory. Most of the time, this is due to the sound part of the game, where everything is loaded into memory at start. If you have the memory issue or simply want to experiment, I have developed a small tool that can be used to resample the data. The tool is easily built using the following commands:

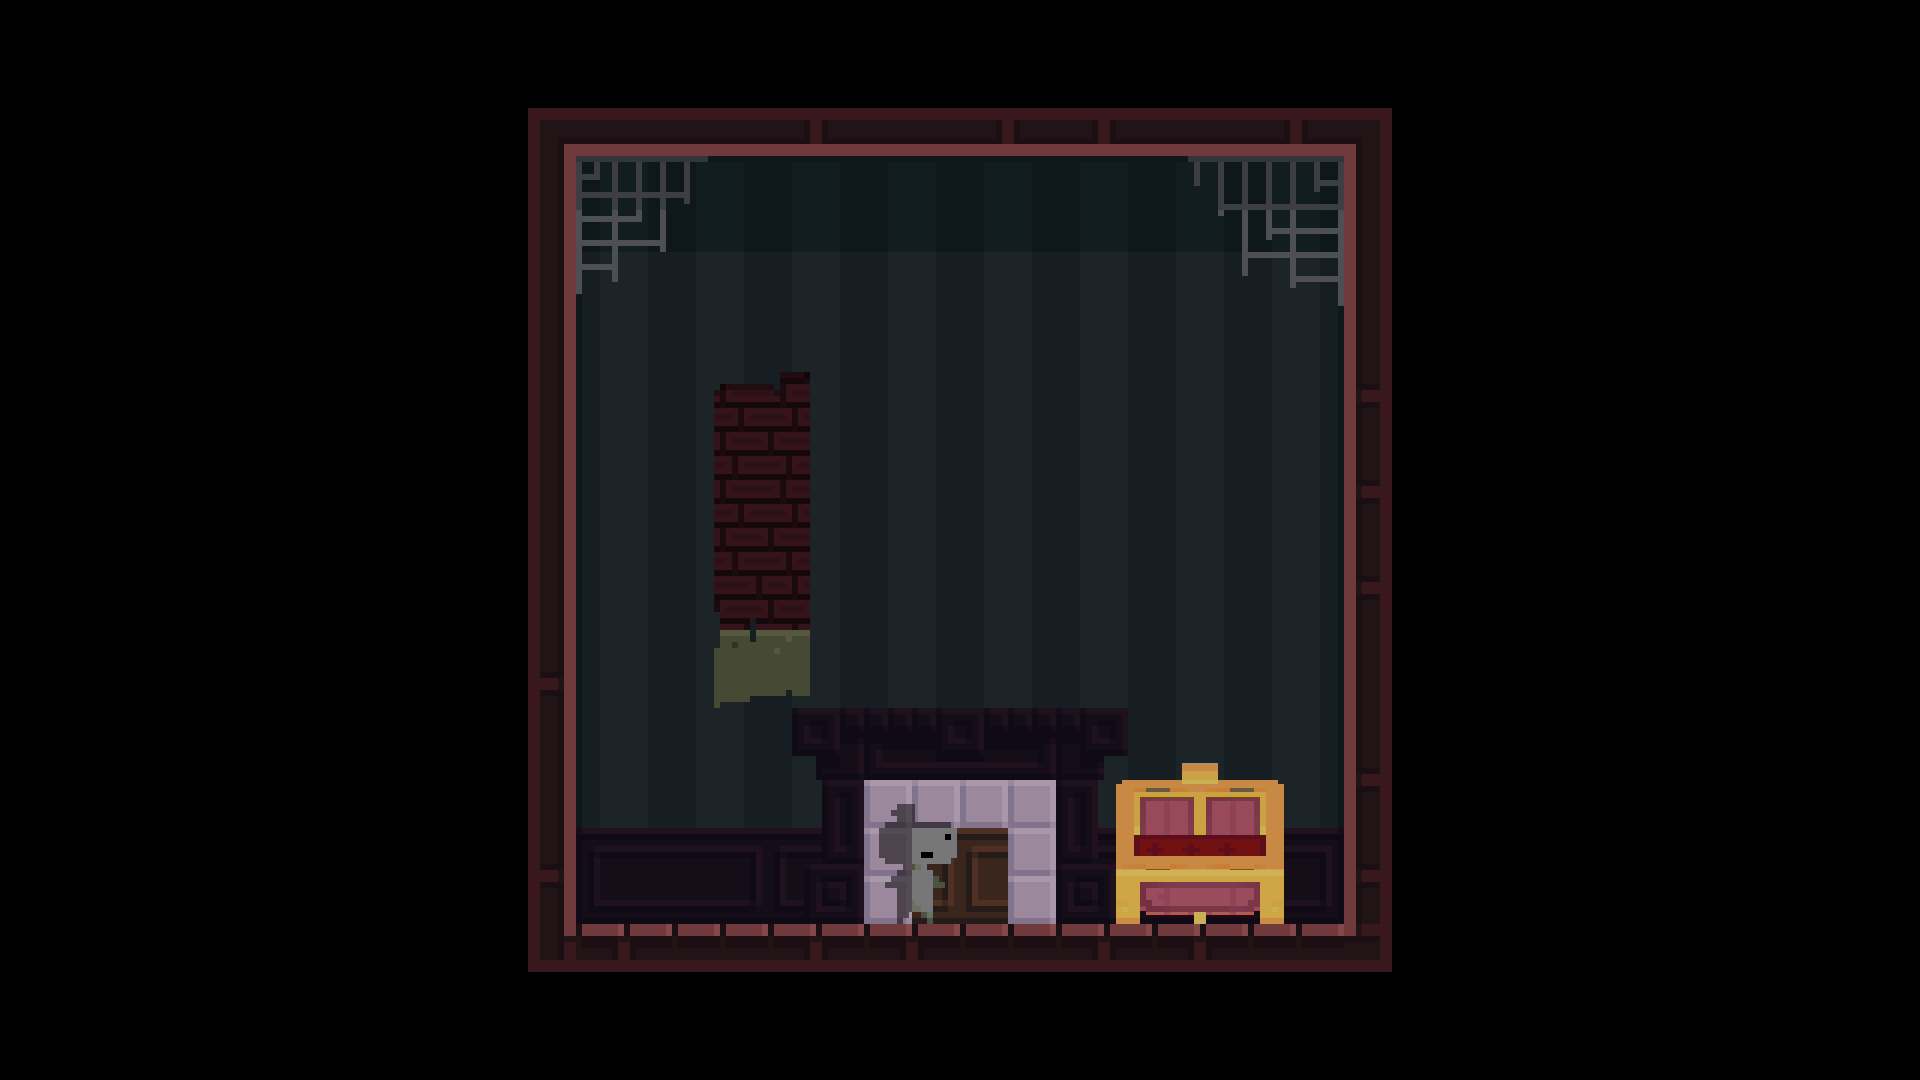
$ sudo apt install libsox-dev
$ cd ~
$ git clone https://github.com/ptitSeb/rexwb.git
$ cd rexwb
$ cmake -DCMAKE_BUILD_TYPE=RelWithDebInfo .
$ make
Using the tool is fairly easy. You have to understand “xwb” WaveBank is likely sampled at 44kHz, using MSADPCM compression. While this is pretty efficient in Windows, most versions on Linux expand the MSADPCM to classic PCM format (so size * 4), leading to having large chunks of the sound file in memory. Resampling the sounds in wavebanks to Mono (instead of Stereo) and resampling to 22kHz (or lower) lower the memory pressure. Games that have xwb include “A Virus Named TOM” and “Stardew Valley”. You will find the wavebanks inside Content/Audio. Note that rexwb always work on a copy of the wavebanks. To resample TOM’s wavebank (this games has 2 wavebanks, only the BGM one can be resample, or both, depend on individual choices) to mono/22kHz you will use the following commands:
$ cd ~/AvirusNamedTOM
$ cd Content/Audio
$ mv BGMwaves.xwb BGMwaves.xwb.sav
$ ~/rexwb/rexwb BGMwaves.xwb.sav BGMwaves.xwb 22050 -f -m
$ mv SFXwaves.xwb SFXwaves.xwb.sav
$ ~/rexwb/rexwb SFXwaves.xwb.sav SFXwaves.xwb 22050 -f -m
FEZ On FEZ, I had an issue on my N1 prototype with “Hardware Instancing”. This is certainly some bug in GL4ES I have to track down (I did not have those issues on OpenPandora), so if you have a crash at start, simply disable Instancing in option menu. Also, this game uses a huge drawing list of more the 400,000 triangles to draw those stars in the Menu screen and a few game screens. While some power beast ODROIDs like the N1 can handle that, some other models may have issue with that kind of drawing. You can activate a special hack in GL4ES to avoid this draw. With your preferred text editor, go into the gl4es folder and edit src/gl/drawing.c. Look for “#if 0” in that file (around line 207) and change it to “#if 1”. Rebuild the library and copy it to monolibs to have a version that will not draw the starfield for a smoother main menu.

Figure 04 - FEZ

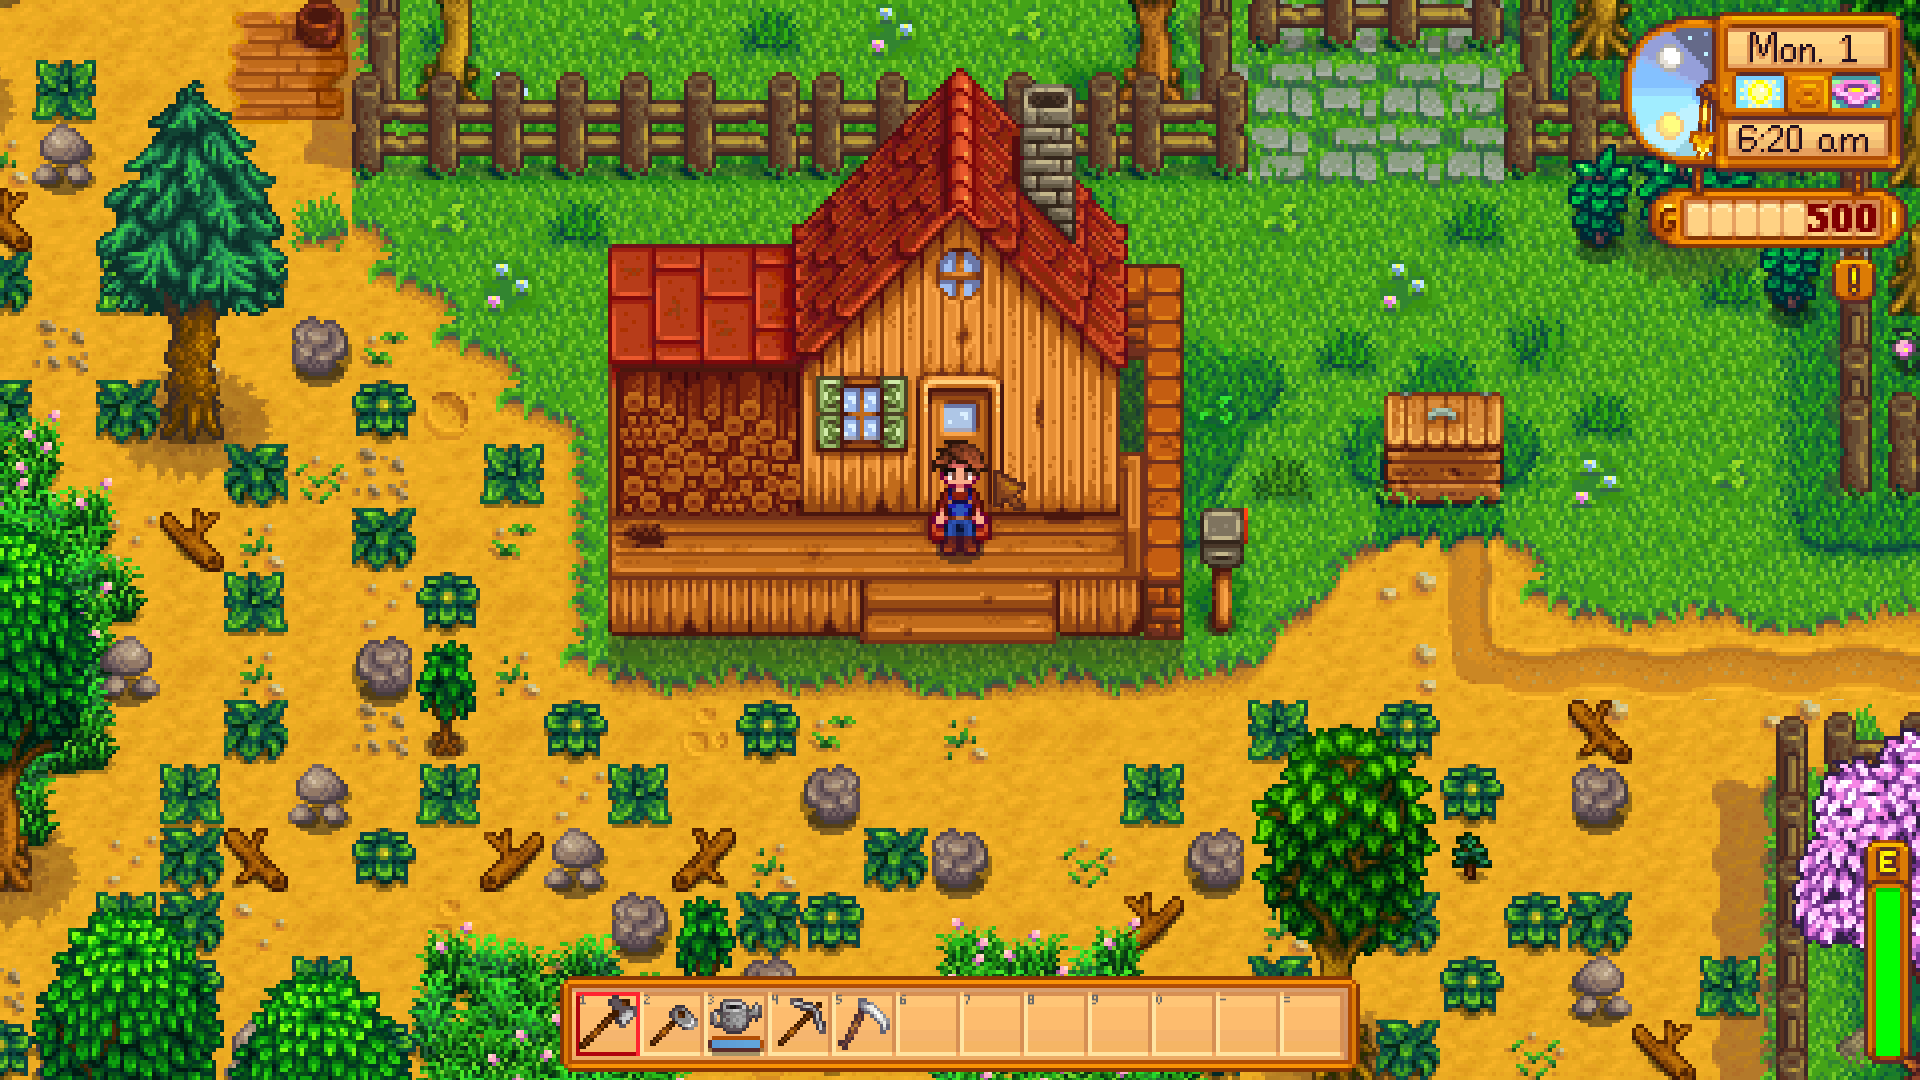
Stardew Valley I have noticed a few graphics issue with Stardew Valley, but nothing serious using the Steam version. One thing to note is that some dll’s want to load “oal_soft.dll”. It should be redirected to “libopenal.so” but somehow, it is not. Easier way is to create a symlink inside Stardew valley folder to “libopenal.so” named “liboal_soft.so” and it will work. On my N1, which is ARM64, the command would be:

$ cd ~/StardewValley
$ ln -s /usr/lib/aarch64-linux-gnu/libopenal.so libsoft_oal.so
But it will be similar on 32-bit ARM:
$ cd ~/StardewValley
$ ln -s /usr/lib/arm-linux-gnueabihf/libopenal.so libsoft_oal.so
Figure 05 - Stardew Valley

A Virus Named TOM I have tested this game on the ODROID-N1. I had some graphical issues with this game, where the image is limited to a subpart of the whole picture. It is probably a bug of gl4es, but it may also be a bug in GLES driver of the N. I have not seen any issue with the OpenPandora during my testing.

Figure 06 - TOM

Bastion This one basically needs FMODex. So you probably need to download FMOD and build the fakemodex wrapper to play this one.

Hammerwatch While it is not an FNA game, Hammerwatch use a custom engine and is also done in C#. Hammerwatch can be run in the same way. However, note that the latest version (1.32) uses FMOD for music and sound, so you need to get the native version of it (FMOD, not FMODex). THe older version (without the dlc) does not use fmod.

Other games

Figure 07 - Dust: An Elysian Tail

Figure 08 - Towerfall

Figure 09 - Owlboy

Figure 10 - Owlboy

Do not hesitate to go to the ODROID forums and create some posts to discuss about your successes and failures with FNA.

Reading Temperature and Humidity from an SHT15 Sensor: An Introduction to the GPIO Interface

This project’s goal is to use an ODROID to read temperature and humidity data from an SHT15 sensor, as well as explaining how an ODROID communicates with an SHT15 over GPIO pins. SHT15 sensors are manufactured by Sensirion and measure both the temperature and the humidity of their surroundings. Communication with a sensor occurs via an ODROID’s GPIO pins. One GPIO pin connects to the sensor’s SCK pin, which controls how quickly communication occurs. The second GPIO pin connects to the sensor’s DATA pin, which is used to send commands and read results. Once everything has been set up, the ODROID will send a request to measure the temperature or the humidity via the DATA pin, wait for the sensor to complete its measurement, then read the result over the DATA pin.

Connecting the SHT15 sensor

The following diagram outlines how to connect an SHT15 sensor to an ODROID.

Figure 1 - SHT15 Diagram

There are two things to note. First, data-sheets are a great place to get information on how to use electronic parts. The circuit in Figure 1 was copied from the sensor’s data-sheet. It’s recommended by the manufacturer as a set-up that yields good measurements. Second, soldering an SHT15 is difficult. To make things easier, this tutorial uses a pre-manufactured SHT15 sensor board.

Required Supplies

To get started, the following parts and tools are needed:

Once you have the SHT15 sensor board, make the following connections after soldering wires to it:

  • Connect VCC to the ODROID’s +3.3V power source
  • Connect DATA to the ODROID’s GPIO pin #100
  • Connect SCK to the ODROID’s GPIO pin #97
  • Connect GND to the ODROID’s GND

You should end up with something that looks like Figure 2.

Figure 2 - SHT 15 Connections

Reading and Writing GPIO values

GPIO pin stands for general-purpose input/output pin. How many of them your ODROID has depends on the model, but in all cases, they’re used to read and write binary data. Binary data is data with only two states, commonly referred to as HIGH and LOW, or 1 and 0. Physically, a HIGH value means the pin voltage is +3.3 volts, and a LOW value means the pin voltage is +0.0 volts. Note that the voltage level depends on the device. For example, an Arduino operates from +5.0 volts to +0.0 volts. If the ODROID is writing data to a GPIO the pin, it will change the voltage between +3.3 volts and +0.0 volts depending on if HIGH or LOW has been written. If the ODROID is reading data, it will measure HIGH when +3.3 volts is applied to the pin, and LOW when +0.0 volts is applied to the pin. For this project, we’re going to read and write data to and from two GPIO pins. At a high level, this involves the following steps:

  • Connect your ODROID GPIO pins to the sensor
  • Login to Linux on the ODROID and navigate to the GPIO directory
  • Initialize a connection with the two connected GPIO pins (one for DATA and one for SCK)
  • When needed, set the pins to write mode and write data
  • When needed, set the pins to read mode and read data

To get started, login to your ODROID and open up a command line terminal. Some of the following commands need to be executed as root, which can be done with the following command:

$ sudo su -
GPIO pins are located in the /sys/class/gpio directory:
$ cd /sys/class/gpio
A program called “export” is in this directory, which initializes connections with GPIO pins. A pin needs to be initialized before data can be read from it or written to it. To initialize a connection, pass the identification number of the pin. In this tutorial, we connected the SHT15 sensor’s DATA pin to GPIO pin 100, and the sensor’s SCK pin to GPIO pin 97. These two connections are initialized with the following two commands.
$ echo 100 > /sys/class/gpio/export
$ echo 97 > /sys/class/gpio/export
After these commands complete, you should find the following newly created directories:
/sys/class/gpio/gpio100
/sys/class/gpio/gpio97
These directories contain everything needed to read and write data from their corresponding GPIO pins. The first important file to take note of is “direction.” For GPIO pin 100, it’s found in the file /sys/class/gpio/gpio100/direction. The “direction” file changes a pin between read mode and write mode. You cannot simultaneously read and write data at the same time on a single pin. You can, however, have multiple pins where some are reading data and others are writing data. A pin can be changed to write mode by writing a value of “out” to the “direction” file. Likewise, a pin can be changed to read mode by writing a value of “in” to the “direction” file. For example, the following command changes GPIO pin 100 to write mode:
$ echo out > /sys/class/gpio/gpio100/direction
The next command changes GPIO pin 100 to read mode.
$ echo in > /sys/class/gpio/gpio100/direction
To determine which mode a GPIO pin is in, you can read the “direction” value. For example, the following command determines whether GPIO pin 100 is in read mode or write mode.
$ cat /sys/class/gpio/gpio100/direction
The second important file to take note of is “value”. For GPIO pin 100, it’s found at /sys/class/gpio/gpio100/value. Reading and writing binary data is done using the “value” file. If the pin is in write mode, the “value” file is used to output binary data. If the pin is in read mode, the “value” file is again used, but in this case it reads binary data from the pin. To demonstrate this, we can run a small test to see if the circuit board is connected correctly. When initially connected, the DATA pin should be HIGH and the SCK pin should be LOW. To determine if this is the case, first change both pins to read mode.
$ echo in > /sys/class/gpio/gpio100/direction
$ echo in > /sys/class/gpio/gpio97/direction
Second, read the GPIO value for each pin.
$ cat /sys/class/gpio/gpio100/value
$ cat /sys/class/gpio/gpio97/value
Pin 100 (DATA) should print a value of “1”, and pin 97 (SCK) should print a value of “0”. If this is not the case, possible places to troubleshoot the problem are double-checking your wire connections by using the wire diagram above for reference, and double-checking that the GPIO pins are set to read mode by checking the “direction” file values:
$ cat /sys/class/gpio/gpio100/direction
$ cat /sys/class/gpio/gpio97/direction

Communicating with the SHT15 sensor

At a high level, the following steps result in humidity or temperature data being read from a sensor:

  1. The ODROID sends a request to the sensor to record either the temperature or the humidity. Note that the sensor cannot read both the temperature and the humidity simultaneously. If both measurements need to be taken, measurements must be done sequentially.
  2. The sensor begins taking a measurement, and the ODROID waits.
  3. Once the measurement is completed, the ODROID reads the result from the sensor.
  4. The ODROID converts the measurement into a human-readable form.

To request that a measurement be taken, the ODROID sends a binary number to the sensor. For example, the number 00000011 requests that the temperature be measured, and the number 00000101 requests that the humidity be measured. The numbers themselves are sent one bit at a time over the DATA pin. The SCK pin controls how quickly values are sent. Take a look at Figure 3, which shows the GPIO pin values when transmitting the number 00000101 (humidity measurement request).

Figure 3 - Humidity Measurement Request

There are three sections of note in Figure 3. The first is the transmission start sequence. This is a combination of HIGH and LOW values transmitted over DATA and SCK that signal the sensor a command is about to be sent. The second section of note is the request number section. In it, the DATA pin transmits each bit 0-0-0-0-0-1-0-1 and the SCK pin varies between 1 and 0. The SCK pin controls the timing of how quickly data is transmitted. When SCK is 0, it indicates that nothing is ready to be read. When SCK is 1, it indicates something is ready to be read. Alternating SCK between 1 and 0 while transmitting each bit over DATA allows the ODROID to send measurement requests to the sensor.

The last section of note in the diagram above is the ACK section, also known as the acknowledgement section. In this section, the ODROID changes the DATA pin to read mode. This causes it to read values written by the sensor. If the SHT15 sensor correctly received the command, it will write a value of 0 to DATA during the ACK section, then change DATA to 1. The ODROID continues to control the value of SCK in write mode, and it takes a moment for the sensor to record a measurement. When a measurement has been completed, the sensor changes the DATA pin to 1. This indicates that the ODROID is free to read the result back from the sensor. Results consist of two bytes, for a total of 16 bits. Figure 4 shows the ODROID reading an example measurement result.

Figure 4 - Measurement Reading

As seen in Figure 4, the ODROID reads the number in two pieces, 00000100 and 00110001. Each of these pieces are called a byte. This occurs over three sections. The first and thirds sections transmit the actual bytes. These transmissions occur bit by bit as the ODROID alternates SCK between 0 and 1 while reading DATA. The second section is another ACK signal. After the first byte is sent, the sensor changes DATA to 1. To send an ACK signal, the ODROID needs to change DATA to 0 and cycle SCK between 0 and 1. This tells the sensor that the ODROID is ready to read the second byte. The number read from the sensor is in binary and needs to be converted to a base 10 number system. Later in this tutorial, we will use software to do this. But for now, note that 00000100 00110001 equals 1073. After a measurement has been recorded and converted to a base 10 number system, it must be plugged into an equation to get the final result. If a temperature measurement was taken, the following equation is used:

T = -39.7 + 0.04x
In this equations, x is the base 10 number recorded from the SHT15 sensor and T is the final result. For example, a value of 1617.5 recorded from the sensor after a temperature measurement indicates a temperature of 25oC. If a humidity measurement was taken, the following equation is used.
H = -2.0468 + 0.0367x – 0.0000015955x2
In this equation, x is the base 10 number recorded from the SHT15 sensor and H is the final result. For example, a value of 1073 recorded from the sensor after a humidity measurement indicates a humidity of 35.5%

Using PHP to read humidity and temperature data

After glancing through the previous section, the idea of controlling SCK and DATA pins through the Linux command line to request and read measurements might not sound very appealing. If that’s the case, I wholeheartedly agree with you! To make this more manageable, I wrote two PHP scripts to do the hard work. To download these scripts, navigate to a directory where you want them to be saved, and run the following commands:

$ sudo apt-get install git php5
$ git clone git@github.com:jon-petty/shtx_php_example.git
The first command installs PHP, which is required to run the scripts. The command also installed a program called git, which can be used to download code repositories. The second command uses git to actually download the scripts. If you wish to examine the scripts before you download them, they can be viewed at http://bit.ly/1OGGK5Q. To execute these scripts, first change directories, then follow the instructions in the README.md file. It contains the most up to date instructions on how to execute the scripts:
$ cd shtx_php_example
$ less README.md

Future projects

At this point, you’ve connected an SHT15 sensor to your ODROID and are able to record the humidity and the temperature. You also have an understanding of how GPIO pins are controlled in Linux, and what communication protocol is used with an SHT15 sensor. If you’re curious and want to learn more, I encourage you to take a look at the PHP scripts and match up the code to the communication protocol and equations. You can also take a look at the data-sheet and learn additional things out of scope of this article. For example, if temperatures vary greatly from 25oC, the recorded humidity needs to be run through a compensation equation to make the results more accurate.

References

Datasheet SHT1x. Sensirion, Dec. 2011. http://bit.ly/1x0FfqK

KeePass: Password Manager

If you're like me, you've been on the Internet for over 20 years, and in all these years you kept making a capital sin: reusing the same passwords on different sites for convenience, as illustrated in the cartoon here https://xkcd.com/792/. However, you have no way of knowing how these sites secure their passwords, maybe they are stored in clear, or hashed without salt which makes them easy to crack with rainbow tables, or debugging messages expose passwords in server logs.

Recent disclosures have shown that even big companies like Yahoo, Apple, and LinkedIn have suffered from data breaches and have had their password data stolen. The infamously long list can be found here, https://en.m.wikipedia.org/wiki/List_of_data_breaches. The only protection you have is frequent password changes and avoiding password reuse, so that a compromised account doesn't turn into a compromised identity.

As you know, humans are notoriously bad at choosing and remembering lots of changing passwords, frequently used ones can be found here, https://en.m.wikipedia.org/wiki/List_of_the_most_common_passwords. So we need the computer's help to remember and generate all those passwords and we need one strong master password to protect them all. In short - we need a password manager. There are lots of password managers out there, but I will focus on a well supported open source program called KeePass, https://keepass.info, which has a backend for a lot of operating systems.

Linux (GUI) client

KeePass is natively a Mono application, written in .NET, but because of unexpected support from Microsoft, Mono can run quite well on Linux systems, even armhf/arm64. You can install KeePass2 directly from apt on your ODROID device:

$ sudo apt-get install keepass2
Once started, you will need to create a new database to store your passwords (File -> New…). Select a suitable name, I used ‘NewDatabase.kdbx’, and you will be asked to set a strong Master Password, and optionally a key to unlock the database. If you use a key, you can create it from the dialog box by moving the mouse around, or with dd, from /dev/random. For this article we're not going to use a key, only a Master Password, so make sure to use something difficult to guess, here's a suggestion: https://security.stackexchange.com/questions/62832/is-the-oft-cited-xkcd-scheme-no-longer-good-advice. I'm going to use "odroid" just an example password 🙂

Figure 1 - Database creation - use a strong password!

In the second step you will be asked for a name for the database (e.g. "work stuff"), a default username, encryption algorithm, AES is set by default, and the number of transformation rounds. This means how many times it should re-encrypt the master password in order to generate the actual key. The higher the number the harder it will be to brute-force, but also the longer it will take to open or save your database. The GUI offers a "1 second delay" option that calculates the number of rounds based on your current PC, but for an ODROID-C1 this is 78,000, while for an Intel it goes to the tens of millions. If you select too high number, it will take longer to open on weaker devices, 100,000 should be ok. You can always adjust this number later, or change the master password. Make sure to save the database once opened.

Figure 2 - Main window

From the main window you can use the toolbar to create new entry, search for existing entries, and open entries. You can also group entries in folders. A typical entry has a title, username, password, URL and notes. You can also add files and KeePass keeps a history of your changed attributes for an entry, e.g. old passwords - which can be handy.

In order to use a saved password you have several options. Either use CTRL+B to copy username and CTRL+C to copy the password (or double-click on the user/password entry) and paste them in your desired application/form, or use the autofill option (CTRL+V) like this:

  • Navigate to the desired resource, for example https://forum.odroid.com/ucp.php?mode=login
  • Change focus to KeePass2 and select the desired entry and type CTRL+V
  • KeePass will switch back to the previous application and paste the username, use Tab to navigate to the next field and paste password and press Enter. The sequence can be changed per entry or per group should you need to use other key presses for the login sequence.

Note that, for security reasons your copied data is kept in the clipboard only for 12 seconds and afterwards it is replaced with "--" in order to keep your passwords secret. You can change this in Tools -> Options -> Clipboard auto-clear time. If the application is not to your liking and reminds you too much of Windows, you can use other GUI clients for Linux as well, such as KeePassX, but you will not have as many plugins/import options as with KeePass2:

$ sudo apt-get install keepassx
Figure 3 - KeePassX on ODROID-C1

Web client

KeeWeb is a Web app written in JavaScript that can manage your passwords in a browser, and can also run offline. The idea is you can host it on your ODROID, keep the password file on the ODROID as well and connect to the app whenever you need to manage your passwords, without having to use other clients, https://github.com/keeweb/keeweb/wiki/FAQ. You can get the latest version from Github: https://github.com/keeweb/keeweb/releases. You will need to run Apache, or NGINX, to serve static files:

$ sudo apt-get install apache
$ cd /var/www/html
$ sudo wget https://github.com/keeweb/keeweb/archive/gh-pages.zip
$ sudo unzip gh-pages.zip
$ sudo mv keeweb-gh-pages/ keeweb/
$ sudo service apache2 start
$ sudo systemctl enable apache2
At this point, you can browse to https://odroid-ip/keeweb and, after accepting the self-signed certificate, you should be prompted with the page in figure 4. Here you can upload, it's only uploaded into the browser, a local KeePass file and you can view it.

Figure 4 - KeeWeb initial view

If you want to make persistent changes, we'll need to host the file server-side and enable WebDAV. WebDAV is a standard for managing files on a web server. First we'll make a directory to store your password database server-side and then copy it there:

$ cd /var/www/html
$ sudo mkdir kppassword
$ sudo cp /path/to/NewDatabase.kdbx /var/www/html/kppassword
$ sudo chown -R www-data /var/www/html/kppassword
Make sure to input the correct path to your password file. Also, if you're adding new files later on make sure that the kppassword directory and all the kdbx files within are owned by the www-data user, so that apache can save changes. Next, we'll create a HTTP auth account that will be allowed to access this file while encrypted. Make sure to supply your desired username and password, make sure it's not the same as the master password since these credentials might be cached in less secure ways:
$ sudo htpasswd -c /etc/apache2/kppassword.access adrianp
We can now enable WebDAV for the kppassword web directory by creating /etc/apache2/conf-available/keeweb.conf and enabling a few apache modules, details here: https://github.com/keeweb/keeweb/wiki/WebDAV-Config:
$ sudo vi /etc/apache2/conf-available/keeweb.conf
RewriteEngine on
RewriteCond %{REQUEST_METHOD} OPTIONS
RewriteRule ^(.*)$ blank.html [R=200,L,E=HTTP_ORIGIN:%{HTTP:ORIGIN}]

< Directory "/var/www/html/kppassword" >
AuthType "Basic"
AuthName "Password Manager"
AuthBasicProvider file
AuthUserFile "/etc/apache2/kppassword.access"
Require valid-user

DAV On
Options Indexes
Header always set Access-Control-Allow-Origin "*"
Header always set Access-Control-Allow-Headers "origin, content-type, cache-control, accept, authorization, if-match, destination, overwrite"
Header always set Access-Control-Expose-Headers "ETag"
Header always set Access-Control-Allow-Methods "GET, HEAD, POST, PUT, OPTIONS, MOVE, DELETE, COPY, LOCK, UNLOCK"
Header always set Access-Control-Allow-Credentials "true"
< /Directory >

$ sudo a2enconf keeweb
$ sudo a2enmod dav
$ sudo a2enmod dav_fs
$ sudo service apache2 restart
Now, if you were to reload KeeWeb in your browser you can press on the "More" button and select WebDAV. You need to supply the following:

Figure 5 - Loading the database from the server

Now you should be able to make changes and save them, when there are unsaved changes there is a blue dot next to the database name. Click on it, and it will prompt you to save and show you save status. If you're making simultaneous changes on the same database from multiple clients, you should be aware that the file is overwritten, so changes from multiple clients might get lost. Also, you might want to close and restart the tab with KeeWeb from time to time to make sure it loads the latest version of the file, and not an older cached version. Having periodic off-site backups of your password file is also mandatory.

Figure 6 - Accessing an entity

That's it - you can now access and manage your passwords from any browser with Javascript enabled. But maybe you're looking for something terminal base...

CLI client

Sometimes you may only have shell access and still need to be able to get to your passwords. In this case you can use kpcli:

$ sudo apt-get install kpcli
You can connect to your password database, as a file, and navigate inside by using commands similar to the Linux shell, like ls, cd, show.
$ kpcli --kdb myPasswordDB.kdbx
Please provide the master password: *************************
kpcli:/> ls
=== Groups ===
NewDatabase/
kpcli:/> cd NewDatabase/
kpcli:/NewDatabase> ls
=== Groups ===
eMail/
General/
Homebanking/
Internet/
Network/
Windows/
=== Entries ===
0. Sample Entry keepass.info
1. Sample Entry #2 keepass.info/help/kb/testform.
kpcli:/NewDatabase> show -f 0

Title: Sample Entry
Uname: User Name
Pass: Password
URL: https://keepass.info/
Notes: Notes
More usage examples can be found here: https://www.digitalocean.com/community/tutorials/how-to-use-kpcli-to-manage-keepass2-password-files-on-an-ubuntu-14-04-server

Android KeePass clients You have a wide selection of clients under Android/iOS as well, https://keepass.info/download.html, and though I haven't tested many, I liked KeePass2Android, available at https://play.google.com/store/apps/details?id=keepass2android.keepass2android, because of the following features:

  • open source
  • quickly unlock a previously unlocked database with just 3 characters from the passphrase
  • WebDAV support
  • offline database with automatic sync when online
  • auto login into sites via "share" feature

You can install the client from the Play Store and select Open file -> HTTPS (WebDAV). Enter the URL and user/password you defined when installing keeweb and you will be prompted for the master password.

Figure 7 - KeePass2Android

Once unlocked you can search or manage your passwords normally. When you navigate to a page where you’re required to log in, you can use these steps:

  • share the page from the browser to KeePass2Android: Find. It will then list all saved accounts for that site
  • select the desired account and you will return to the browser. The username/password will be available for a while either in a notification, or as buttons in KP2A keyboard. You can use these buttons to copy the credentials and paste them in the browser.

Importing passwords from Firefox

If you're using Firefox, possibly on many systems, without synchronization, you can export the passwords saved in its password manager using this script: https://github.com/unode/firefox_decrypt. There used to be several extensions that could do it from within Firefox, but since they moved to Quantum, the extensions lost the ability to read your passwords, which should be a good thing. Firefox is also moving to a new password manager called Lockbox, https://www.bleepingcomputer.com/news/software/firefox-to-get-a-better-password-manager/. so this method might not work when that switch happens.

$ git clone https://github.com/unode/firefox_decrypt.git
$ cd firefox_decrypt
$ ./firefox_decrypt.py -f csv -d , > /dev/shm/firefox-passwords.csv
You will be asked which profile you want to export and also what is the master password (press enter if none). You can also select a custom path for your profile, if, for example you are importing passwords saved on a Windows system or from a remote mount. Your passwords will be written to a ram disk, /dev/shm, to prevent leaving traces on the filesystem while in-clear.

Before doing the import we need to improve a bit the data we are going to import. The problem is that the exported data has only the URL, user, and password and lacks a title. Also, the URL does not contain subdirectories, e.g. www.domain.com/example, so we will be missing some information which needs to be manually sorted out later. We're going to try to visit all sites in the list and scrape the page title and add them to a new list, so I wrote a little script to do that:

$ sudo apt-get install curl libtext-csv-perl
$ wget -O /usr/local/bin/enrichFirefox.pl https://raw.githubusercontent.com/mad-ady/enrichFirefoxPasswords/master/enrichFirefox.pl
$ sudo chmod a+x /usr/local/bin/enrichFirefox.pl
$ /usr/local/bin/enrichFirefox.pl /dev/shm/firefox-passwords.csv | tee /dev/shm/firefox-passwords-enriched.csv
Next, you can use keepass2 and import the password file with File -> Import -> Generic CSV Importer. Navigate to /dev/shm and select the enriched file and press ok. You will be prompted with a preview of the file. Select the tab "Structure" and check "Ignore first row" because it's a header. Now, we need to map the fields in the CSV with the fields in KeePass in the section below. Delete the first "URL"entry and the "(Ignore)" entry and add "Title" to the top and "Group" to the bottom and select Next. You should now see your passwords parsed correctly and you can press Finish to import them.

Figure 8 - Import settings

Once imported, make sure to delete the exported password file and save your database:

$ rm -f /dev/shm/firefox-passwords*.csv
You can redo these steps to import data from other Firefox profiles from multiple systems.

Importing passwords from Chrome

In order to export passwords from Chrome, you need to navigate to chrome://flags and search for "password export". You will need to set it to "Enabled" and restart Chrome. Once restarted, navigate to Menu -> Settings -> Advanced -> Manage Passwords. Under the Saved passwords list click the three dot menu and select Export Passwords and save it under /dev/shm as well.

Figure 9 - Exporting passwords from Chrome

If you don't see any passwords saved locally, then your passwords are available at https://passwords.google.com and are synchronized between multiple browser instances. You can then import them the same way as Firefox passwords, but the CSV structure is now Name, URL, Username, Password. Once you're done, remember to delete the exported file and disable the "Export passwords" flag.

Replace Firefox/Chrome password manager - Tusk

Copy/pasting passwords may be ok for occasional access, but using a password manager integrated with KeePass is necessary for regular browser use. For this we need to use an extension in the browser to fetch passwords from the web server. For Firefox and Chrome, one such extension is KeePass Tusk, https://addons.mozilla.org/en-US/firefox/addon/keepass-tusk/?src=search, https://chrome.google.com/webstore/detail/keepass-tusk-password-acc/fmhmiaejopepamlcjkncpgpdjichnecm. It can connect to a KeePass database stored over WebDAV and doesn't need a local keepass client. You can install the extension by going to about:addons -> Extensions and searching for "tusk". Select the addon and click "+ Add to Firefox". For Chrome it can be installed from the link above. Once it is installed, it will add an icon next to the search bar where you can configure it and connect to a password database. You will need to select "Cloud storage setup" and activate "WebDAV". You can ignore the warning for storing the WebDAV username and password on disk.

You will need to fill in the path to the kppassword directory over http, sadly it doesn't like my self-signed certificate, but not the path to the database because it will discover all databases in that directory. Also add your WebDAV username and password.

Figure 10 - Tusk Configuration

You can now close the Tusk tab and when you click on its icon it will ask you which database you want to load and ask for the master password and for how long to keep it open. Once you unlock your database and navigate to a site you have in your database, Tusk will automatically search for it in your database, but will not auto-fill it for you. You can click on the Tusk icon and on the "Autofill" icon next to the desired entry to do the fill. If you enable the hotkey navigation in Tusk's settings you can use the following combination to do the same thing: CTRL+ALT+Space Tab Enter.

In order to fully benefit from this you will need to disable Firefox’s built-in password manager by going to Menu -> Preferences -> Privacy and security -> Uncheck Remember logins and passwords for websites. You should also delete logins.json from your profile folder. You should do the same thing for Chrome.

One limitation of Tusk is that it's read-only. If you need to update a password you will need to use a different client for the update.

Replace Firefox/Chrome password manager - chromeIPass/KeePassHelper

If you don't want your plugin to connect to your password database directly, and potentially expose your master password to the browser, you can use a different approach and proxy requests through KeePass2. Plugins which do this: chromeIPass https://chrome.google.com/webstore/detail/chromeipass/ompiailgknfdndiefoaoiligalphfdae/, KeePassHelper for Firefox https://addons.mozilla.org/en-US/firefox/addon/keepasshelper/) connect via HTTP locally to the KeePass2 instance to retrieve passwords. In order to do this you need to install the KeePassHTTP plugin inside KeePass2, https://keepass.info/plugins.html#keepasshttp.

You can do this on the system where you run KeePass2 in the following way:

$ cd /usr/lib/keepass2/Plugins
$ sudo wget https://raw.github.com/pfn/keepasshttp/master/KeePassHttp.plgx
$ sudo apt-get install mono-complete
Next you will need to restart KeePass2 and open your password database and you can proceed to install the plugin in browser. Once the plugin is installed it will connect automatically to KeePass2 and it will generate an encryption key that you need to approve. Afterwards, connecting to a known site with the browser will autocomplete the username/password in the login fields (for Chrome).

Figure 11 - Chrome login with chromeIPass

Maintenance

Now that you have all your passwords in one place you can run various reports from KeePass2, like Edit -> Show entries -> Find duplicate passwords and you will see a report of your password reuse addiction. You will need to find the time and take action and reset those passwords and replace them with some more random to actually become more secure.

One last thing you need to consider - which is very important - is backup. Your password database holds all your digital identities and if it gets lost or corrupted will cause you to have a very bad day. This is why you need to set up a backup strategy and copy backups of your database on different physical disks and also in different physical locations, to add geo-redundancy, so that if an asteroid destroys your city your passwords will still be safe.

In order to do this I created a script that listens for file changes, compares the current file with its previous version, to see if there was a change and if needed copies the file to other drives and other systems via network mounts.

You will need inotify to trigger synchronizations:

$ sudo apt-get install inotify-tools
$ sudo wget -O /etc/systemd/system/password-backup.service https://raw.githubusercontent.com/mad-ady/password-backup/master/password-backup.service
$ sudo wget -O /usr/local/bin/password-backup-detect.sh https://raw.githubusercontent.com/mad-ady/password-backup/master/password-backup-detect.sh
$ sudo wget -O /usr/local/bin/password-backup-execute.sh https://raw.githubusercontent.com/mad-ady/password-backup/master/password-backup-execute.sh
$ sudo chmod a+x /usr/local/bin/*.sh
$ sudo systemctl enable password-backup
$ sudo systemctl start password-backup
The code consists of two bash scripts - one to detect changes and one to perform the backup, and a service file to help with starting on boot.

Let's take a second to analyze the password-backup-detect script. On line 2 we set the path to the password database location, next we start an infinite loop. We use inotifywait to listen for a change in existing files and when a file is closed we use find to get a list of files modified in the last 4 seconds and for each file we call the backup script with the filename as an argument. Once the password-backup-execute.sh script finishes we return to listen for changes.

Figure 12 - password-backup-detect

The password-backup-execute script takes a file to be backed up as argument, checks if a backup is needed and performs the backup to potentially multiple locations. In the beginning we set how many older versions of the backup we want to keep and set the paths for the backup files, you can use autofs to mount a remote share on demand for example. Next we define a doBackup() function that iterates through the list of destination folders and does the actual copy and a cleanup() function that uses a combination of ls, tail and rm to delete older backups while preserving some newer versions. The backed-up files contain a timestamp in their name, but sorting is done based on last modified time.

Figure 13 - password-backup-execute

The main code checks if there is an older md5sum hash of the previous backup, and if there is, it gets compared to the current hash. If the hashes differ, or there was no previous hash, backup and cleanup are done. The check is done to prevent backing up the same file multiple times, e.g. you click save in KeePass2 without making changes.

You will need to modify this code and add your backup destinations.

The code, perfect as it may look, has two shortcomings, "bug" is such a nasty word. First of all, inotifywait will not react to new files until it's restarted, or an old file gets changed or touched. Secondly, during the backup phase, file changes are not detected. If a file takes a minute to be saved in all the remote destinations (due to network latency or hard disk spin up time), other file changes that happen during this time will not be picked up and won't be backed up. So, the script is suitable for few concurrent users with infrequent changes.

I hope this has been informative enough to persuade you to take charge of your passwords and have better security practices. Regarding security, keepass protects you from having your password exposed when an online service gets hacked, but does not necessarily protect you from a malware infected computer or a keylogger. Malware or attackers that can arbitrarily read your computer's memory can access the passwords once decrypted or can sniff your master password. The reason I recommended using an ODROID with WebDAV instead of using Dropbox (which is supported as well) was to minimize your exposure. Keeping your encrypted file on somebody else's computer (a.k.a. "the cloud"), may be fine now, but your passwords may reach into the wrong hands and the master password may be more easily cracked in the future, again leaving you vulnerable.

BASH Basics - Part 4: Variables, Tests and Loops

This part covers the most basic introduction to scripting: variables, tests, and loops. The one-liner for making archives out of different folders also gets some company by other nifty one-liners now. But first, we are going to have some quick shortcuts to make working with BASH more enjoyable.

BASH shortcuts

If you want to run just one command as a different user, use the following command:

$ su - otheruser -c "command argument"
For having two commands execute one after each other, connect them with ‘;’ for example:
$ ls /home/odroid/Music; ls /home/odroid/Videos
If you want the second command executed only when the first command is successful, use ‘&&’:
$ apt update && apt full-upgrade
Rarely used is ‘||’, where the second command is executed only when the first command is NOT successful.

In day-to-day work, there are certain steps which we do very often in different contexts. One example is, executing a command as root after we tried as normal user and failed due to insufficient privileges.

After we do cp somefilewithverylongname.conf /etc to copy a background configuration to the /etc directory and fail, we can repeat this as root with just the ‘sudo !!’ command - most of you know this already. The !! stands for a repeat of the last command and can be used with sudo, without or in other combinations. Modified with the print modifier, ‘!!:p’ brings up the last argument to the command line. Usually, you just use the up arrow key, though. But in cases where the arrow keys don't work, for instance sometimes over ssh, it can be a great relief! !-1 uses the next-to-last command, which is also sometimes useful. However, did you know that you can also reuse only the last argument of a command?

$ ls /very/long/path/to/a/directory
$ cd !$
expands to:
$ cd /very/long/path/to/a/directory
and can save a lot of typing.
$ ls /very/long/path/to/a/directory
ton of commands, none of which start with ls
$ !ls
also expands to
$ ls /very/long/path/to/a/directory
in case you want to repeat an older command. Use ‘!rm:p’ to examine the last rm command before executing it, likewise with other dangerous commands. If you want to change only details in the last command, you can do a find and replace of the arguments with the follow:
$ ls /very/long/path/to/a/directory
$ ^very^veryvery
changes and executes the last command to
$ls /veryvery/long/path/to/a/folder
To sum up what we’ve looked at in a list:

  • !! last command
  • !-1 next-to-last command
  • !$ last argument of last command
  • !command1 last line with command1
  • ^searchterm^replaceterm replaces first occurrence of searchterm with replaceterm

For movements on the command line, alt-f moves the cursor forward one word, alt-b backward one word, ctrl-w erases single words backwards, while ctrl-u erases from cursor position to the beginning of the line. You can move to the beginning of the line with ctrl-a and clear the line after the cursor with ctrl-k. A ctrl-t swaps the last two characters before the cursor in case you tend to make this typing error often.

If you want something to lighten you up and mistype sl instead of ls often, you can also install sl with apt install sl. I won't tell you what it does, just try. Most importantly, if you have a unique filename or command after typing the first letters, BASH expands them after you hit tab. Hitting tab twice even gives a helpful list of options if the first letters are not unique.

One last thing, for now, is the use of braces. If you have a file named abcde.conf and want to make a backup with the name abcde.conf.bak, all you have to do is cp abcde.conf{,.bak} which expands to cp abcde.conf abcde.conf.bak with the use of the braces. Everything in the braces expands to the listed options, so if you want to list the Videos directory of the users archie, bert, and claude. Then the filtering does the trick

$ ls /home/{archie,bert,claude}/Videos

Scripting basics

A BASH script is just a text file with the first line #!/bin/bash and made executable with:

$ chmod a+x scriptname.sh
If you make a directory named bin in your home directory, scripts in there can be executed from anywhere on Ubuntu. A special entry in ~/.profile takes care of that.

If you want to, you could even code the game "Tetris" in BASH in a little more than 500 lines, as shown in Figure 1.

Figure 1 - Tetris in BASH on the command line

A typical example of a script would be hello-world.sh - don't forget to execute chmod a+x hello-world.sh after you saved it from your test editor.

#!/bin/bash
# This script just puts out "Hello World".
echo "Hello World"
Except for special cases, all text following a # is a comment and not executed.

If you only have "Hello World" on the screen, or even any other fixed text output, this gets boring real quick. Now it’s time to introduce BASH variables to make the script do something different depending on the input. The simplest form is seen as follows in our hello-user.sh file.

#!/usr/bin/bash
# Greets currently logged-in user
echo "Hello," "$USER"
“Hello, odroid” is the result. We can also define the variable in the script instead of using an environment variable like USER. Here is our next script file, hello-user2.sh
#!/usr/bin/bash
# Greets currently logged-in user
user=$(whoami)
echo "Hello," "$user"
“Hello, odroid” is the same output, but a variable user gets defined by the result of the whoami function and then printed with the echo function. You can simulate this also step-by-step on the command line without writing the script in the text editor. If you define a variable $user, don't forget to use unset user afterwards to leave the system clean. We will talk more about variables in the next part. For now, let's get an example of each basic part done first to get a better overview of the typical script usage. The next building block needed are tests inside the script.

For a real-world example, let's look at a short script to test for Internet connectivity, outside-connected.sh:

#!/bin/bash
test=google.com
if
nc -zw1 $test 443
then
echo "we have connectivity"
else
echo "no outside connectivity"
fi
The script defines the variable $test as the google.com server, then uses netcat (nc) in port scan mode for a quick poke, -z is zero-I/O mode, with a quick timeout -w 1 waits at most one second. It checks Google on port 443 (HTTPS). The output is dependent on if you can reach Google's servers or not.

Now, let's look at loops. With variables, tests and loops, you have already 95% of normal script usage covered. A simple loop in a real world script would be to convert each flac file to mp3 in a directory:

flac2mp3.sh
#!/bin/bash
for i in *.flac
do
ffmpeg -i "$i" -acodec libmp3lame "$(basename "${i/.flac}").mp3"
done
This script loops, converts and renames for each flac file in the current directory. Take a look at how the basename function together with the variable changes the extension from .flac to .mp3 in this example. These are the most basic examples for variables, loops and tests; more to follow later. In the next part, we continue with scripting, and also take a look at BASH history.

References https://raw.githubusercontent.com/kt97679/tetris/master/tetris.sh https://www.tldp.org/LDP/abs/html/

Object Detection in Live Video: Using The ODROID-XU4 With GStreamer

Deep learning has become an important topic in the past years, and many companies have invested in deep learning neural networks, either in terms of software or hardware. One of the most used field for deep learning has become object detection - for example, the photos taken with our phones are not automatically classified in categories using deep learning object detection.

In this article, we investigate a new use for the ODROID-XU4: creating a smart security camera that is able to detect objects of interest in the camera feed on-the-fly and act accordingly. We will be using the dnn module of OpenCV to load a a pre-trained object detection network based on the MobileNets Single Shot Detector. The article was inspired by an excellent introductory series on object detection by Adrian Rosebrock on his blog, PyImageSearch. In Adrian’s tests, a low-power SBC such as the raspberry pi was not even able to achieve 1fps when doing real-time detection. Accordingly, I will not cover the basics of object detection and OpenCV, which you can read about in his posts, but instead focus on optimizations for the ODROID-XU4 SBC in order to achieve the highest real-time detection framerate for a live stream.

CPU vs GPU

The first thing to determine is if the ODROID GPU can help speed up detection by using OpenCL. ARM maintains the ARM Compute Library, an optimized vision and machine learning library for the Mali GPUs. However, my findings are that the quad-core 2Ghz A15 cores provide a much better performance than the 6-core 700Mhz Mali GPU for the ODROID-XU4. You can read more about these results on the forum postat https://forum.odroid.com/viewtopic.php?f=95&t=28177.

In my tests, using all 8 cores is also detrimental, since ARM little cores will slow down overall detection time. To make sure we are using only the powerful A15 cores, we need to run our detection program using taskset 0xF0. Adequate cooling is also recommended to maintain top frequency on the A15 cores.

OpenCV optimizations

Next, we want to compile the latest version of OpenCV, which provides a deep learning module, and optimize it for the ODROID-XU4. For this, we update the CPU_NEON_FLAGS_ON in cmake/OpenCVCompilerOptimizations.cmake to use -mfpu=neon-vfpv4 instead of -mfpu=neon, enable Threading Building Blocks (TBB) with the flags -DWITH_TBB=ON -DCMAKE_CXX_FLAGS="-DTBB_USE_GCC_BUILTINS=1" and make sure the following compile flags are used: -mcpu=cortex-a15.cortex-a7 -mfpu=neon-vfpv4 -ftree-vectorize -mfloat-abi=hard by setting C_FLAGS, CXX_FLAGS, -DOPENCV_EXTRA_C_FLAGS and -DOPENCV_EXTRA_CXX_FLAGS. We also need to make sure GStreamer library is available to OpenCV by using the flag -DWITH_GSTREAMER=ON. Prebuilt Ubuntu 18.04 packages for OpenCV and GStreamer are available from my repository at https://oph.mdrjr.net/memeka/bionic/.

With only CPU and OpenCV optimizations, we can already achieve 3fps using the same code that run on Raspberry Pi obtains only ~0.9fps. But let’s try and do better.

GStreamer

Instead of using OpenCV to connect to the camera, we can use instead GStreamer. This allows us several things: connect to wireless cameras on the network, use the ODROID hardware decoder, hardware encoder, and hardware scaler. We can use the hardware decoder to process H264 from a live stream or from a H264 camera, the hardware scaler to change image resolution and pixel format, and the encoder to output a H264 encoded stream, either to save in a file, or to stream. It showed also a small overall performance improvement. Some example GStreamer pipelines are:

Connect to H264 stream from camera:

$ v4l2src device=/dev/video1 do-timestamp=true ! video/x-h264, width=1280, height=720, framerate=15/1 ! v4l2h264dec ! v4l2video20convert ! appsink
Connect to MJPEG/YUV stream from camera:
$ v4l2src device=/dev/video0 do-timestamp=true ! video/x-raw, width=1280, height=720, framerate=15/1 ! v4l2video20convert ! appsink
Save output to mp4 file:
$ appsrc ! videoconvert ! v4l2h264enc extra-controls="encode,frame_level_rate_control_enable=1,video_bitrate=8380416" ! h264parse ! mp4mux ! filesink location=detected.mp4
Stream output on the web with HLS:
$ appsrc ! videoconvert ! v4l2h264enc extra-controls="encode,frame_level_rate_control_enable=1,video_bitrate=8380416" ! h264parse ! mpegtsmux ! hlssink max-files=8 playlist-root="http://0.0.0.0/hls" playlist-location="/var/www/html/hls/stream0.m3u8" location="/var/www/html/hls/fragment%06d.ts" target-duration=30

Multithreaded batch processing

With these improvements and a multi-threaded model where fetching the next frame runs independent in a different thread of the object detection, ODROID-XU4 is able to achieve up to 4fps: in one second, it can detect objects in 4 images. Since detection is the main objective, 4fps is actually enough to alert us on objects of interest. So we can have an input stream with higher framerate, and selectively select frames for object detection.

To maintain the illusion that each frame is processed, we do a simple trick: when an object is detected, we highlight its position both in the frame processed, and in the subsequent frames until the next detection. The position will lose accuracy when the object moves, but since we are capable or processing up to 4fps, the error will be quite small. We use a queue to read frames from the input stream, and process n frames at once time: first frame is used for detection, and subsequent processing is done for all n frames based on the objects detected on first frame. We choose n, the size of the batch, as a function of the input stream frame-rate, and the processing capabilities of the ODROID-XU4.

For example, for an input with 15fps, we can use n=4 (run detection for 1 in 4 frames) to maximize utilization. The code in Python for this is quite simple:

# function to read frames and put them in queue
def read_frames(stream, queue):
global detect
while detect is True:
(err, frame) = stream.read()
queue.appendleft(frame)

# start reader thread
detect = True
reader = threading.Thread(name='reader', target=read_frames, args=(vin, queue,))
reader.start()

# grab a batch of frames from the threaded video stream
frames = []
for f in range(n):
while not queue:
# wait for n frames to arrive
time.sleep(0.01)
frames.append(queue.pop())
frame_detect = frames[0]

Objects of interest

We define the objects of interest from the classes the MobileNets SSD can detect. These classes include “person”, “bird”, “cat”, “dog”, “bicycle”, “car”, etc. We want to be able to assign different detection confidence levels for each object, and also a timeout for detection: e.g. in the same object of interest is detected in the next frame processed, we don’t want to receive a new notification (i.e. we don’t want to get 4 emails each second); instead we use a timeout value, and we get a new notification when the timeout expires. The code in Python is:

# check if it's an object we are interested in
# and if confidence is within the desired levels
timestamp = datetime.datetime.now()
detection_event = False
if prediction in config['detect_classes']:
if not confidence > (float)(config['detect_classes'][prediction]):
# confidence too low for desired object
continue
else:
# we detected something we are interested in
# so we execute action associated with event
# but only if the object class was not already detected recently
if prediction in DETECTIONS:
prev_timestamp = DETECTIONS[prediction]
duration = (timestamp - prev_timestamp).total_seconds()
if duration > (float)(config['detect_timeout']):
# detection event (elapsed timestamp)
detection_event = True
else:
# detection event (first occurence)
detection_event = True
else:
if not confidence > (float)(config['base_confidence']):
# confidence too low for object
continue

Detection events and outputs

Lastly, we want to have two separate actions taken after a frame is processed: first action is independent of detection results, whereas the second action is taken only when the objects of interest are detected. In my example code, all frames are modified by having a box and a label around all detected objects (of interest or not). These frames are then saved in the output stream, which can be streaming video. Thus, when connecting remotely to the security feed, you can see the processed video instead, which includes color-coded squares around moving objects.

When objects of interest are detected, the frame is also saved as a jpeg file, and is made available to a user-defined script that is responsible for notifying the user. For example, the picture can be sent via email, used with IFTTT or sent directly to the user’s mobile phone.

The full example code is available at https://gist.github.com/mihailescu2m/d984d9fe3e3937573456c2b0423b4be9 and the configuration file in json format is at https://gist.github.com/mihailescu2m/42fdccd624dc91bb9e04b3adc39bc50f

Resources

https://www.pyimagesearch.com/2017/09/11/object-detection-with-deep-learning-and-opencv/ https://www.pyimagesearch.com/2017/09/18/real-time-object-detection-with-deep-learning-and-opencv/ https://www.pyimagesearch.com/2017/10/16/raspberry-pi-deep-learning-object-detection-with-opencv/

Linux Gaming: Saturn Games - Part 5

And we are back again with the ODROID XU3/XU4 running Sega Saturn games. This issue will cover the rest of the games (letter in the alphabet) I tried and really liked to play on my ODROID. Once again I found some really nice gems that I want to share with you. This will probably be the last of the series, although I might pick it up again when emulators get better and more games will be available or running on ODROIDs for the Sega Saturn. For example, the newest version of Yabause libretro core sometimes works quite nice now and it’s possible to play some games on this emulator as well and I took it into account here and there.

Tenchi Wo Kurao 2 / Warrior of Fate

This is an very good arcade port. For all I know it’s actually arcade perfect. You can find it also on MAME, CPS1 and PlayStation. While all versions are rather good, the Saturn version has it all in my opinion. Graphics and sounds are as it’s arcade counterpart and the CD quality music is just an upgrade to an already amazing title. It’s also running very good on ODROIDs which is why I can highly recommend it.

Figure 1 - Choose one out of five fighters all with different weapons and attacks

Figure 2 - Head out and hunt down the enemy

The game is your typical arcade brawler, with tons of enemies coming at you from left and right. You hit them enough times and they stay down, down enough of them and proceed to the next section. At the end of each section you’ll encounter a boss which has plenty more hit points and takes a long time and some tactics and skills to take down.

I like it and it plays amazingly good on the XU4 even if you need to use frame skipping. Still, the game does not slow down even with 10 or more enemies on the same screen. The sprites are big and colorful backgrounds are well drawn there’s really nothing to complain about. This port to the Saturn is solid, and if you like games like this, I suggest you look into it on the Saturn.

Figure 3 - Boss fight on the second stage, and the health bars keep getting longer

The Legend of Oasis / The Story of Thor 2

If you played Beyond Oasis on the Sega Genesis, you know exactly what you’re getting into. This game is suppose to be the “prequel” but plays pretty much like the Genesis version. But with improved graphics. In fact it’s one of the nicest looking 2D games of it’s time I’d like to say.

Figure 4 - Beautiful graphics in Legend of Oasis

Figure 5 - Lots of animation going on, waterfall, fish swimming around, water ripples

Your first quest is to head down into the dungeon and befriend the water spirit. Similar to Beyond Oasis, you find elemental spirits and use them to solve puzzles and fight enemies. You can collect different weapons which have all limited uses but you always have your dagger which does not expire like the other weapons you can collect. You also collect a lot of other items, especially food which you can use to refill your health bar.

However, they changed a lot of the game compared to Beyond Oasis. You no longer find items to increase your level or health, but instead you “train” your character: take enough hits and get healed and you get more health and things like this. It’s an interesting concept, but also a little strange. The level design can be hard at times as you often struggle to figure out where to go and how to get up or down a platform. It often looks like you can go a certain way but then you see it’s suppose to be much higher and you can’t reach it. It might not be the best game of its time, but it looks rather beautiful and runs well on the ODROID XU4.

Figure 6 - You can still use your attack moves from Beyond Oasis and swing around your character

Theme Park

Theme Park was one of these games that I played way too long as a child. I actually remember playing this game on my trusty Amiga and was very surprised to see a Sega Saturn port. As you control this game by mouse on the Amiga I was skeptical how it would work out on a console with a joystick/gamepad. I was pleasantly surprised to find out it’s actually working quite well. It took me a little while to figure out all controlls, but it’s working rather good. Everything is there and works as it was in the Amiga version I remember.

Figure 7 - Different attractions I build in my theme park

Figure 8 - The game has a big variety of different attractions and shops to choose from

What I also like are the render videos that you can watch for each attraction, allowing you to be the child in one of your rides and see how this attraction looks from a child's point of view.

You have to do a lot of micro-management in this game. Hiring staff distribute them through the park, select what rides you place where and what shops you want. You can manage the prices for shops or the amount of ice in your coke or salt on your fries. You have to select the right price of your entrance fee and so on.

Figure 9 - People coming and going at the bus stop

It’s an interesting and fun game, and yes, we all increase the speed of the roller coasters so high that the people started to throw up after the ride. One downside of this game is that I could only get it to work with the libretro core, it still plays in a very good speed, so I assume Yabause would work fine as well, but sadly the standalone emulator crashes. Maybe with a newer version this can be fixed.

Time Bokan Series – Bokan to Ippatsu! Doronboo Kanpekiban

I want to be honest with you, I have no clue what this game is all about, as it’s completely in Japanese. Still this game is very fun to play and offers a lot of anime cutscenes which looks like they are from a actual anime series of the 80s. It’s a fast paced vertical shooter with bright colors and tons of stuff going on on the screen.

Figure 10 - Select one out of 6 characters with different weapons

Figure 11 - This game offers mid-level bosses not only end-level bosses

This game is not easy but very fun to play it’s nothing that you should take serious but the bright colors and tons of enemies on the screen are just fun.

Figure 12 - Level up your fire-power and keep going

This is one of these casual shooters that you pick up play for half an hour and feel satisfied. It also exists for the PlayStation so I guess it’s up to you where you want to play it. Tryrush Deppy

I don’t even know where to start to describe this game. It has a very cartoon-ish style both in the game graphics but also in the intro of the game. You’re a cab (taxi) and you participate in a car racing, but not what you might expect. In this game cars act like humans and they are actually WALKING on their back tires (I’m not kidding).

Figure 13 - Tryrush Deppy, one of the strangest games I’ve played so far

The game itself turns out to be a fast-paced platformer similar to Sonic, but without the loopings. It’s very fast and you can run, jump or dash through the world. You have to collect “oil” to keep going but there are more items you can collect which give you temporary powers, like a shield so you can run through everything or you become a lot faster for a short time. The goal is always to run to the end of the level and hit the goal sign (sounds familiar?).

Figure 14 - The intro shows you and a bunch of other cars “standing” in line waiting for the race to start

Once again I really like the bright colors as well as the cartoon-ish design, since it really suits the game. You can also select your own license plate at the start of the game to save your in game progress.

Figure 15 - Create your own individual license plate

Figure 16 - Yes you walk on your back tires in this game

I haven’t played the game very far yet, but there’s lots of things going on aside from you running and jumping. There are cops chasing you for “speeding” there are villains that get chased by the cops and can run you over. Your dash can act as an attack and you can actually charge it so you run faster and dash further. Some enemies can be killed by jumping on their head or dashing through them. There are hard to reach objects, hidden paths and more.

All in all, it’s a very fun game and I rather enjoy playing it. I found one tiny issue with it, which is that the character sprite sometimes glitches for a frame or so and then becomes normal again. I’m not sure if that’s due to the emulator or a bad ROM. If you like platformers (games similar to Sonic or Mario) you should definitely check this game out. Also, did I mention that there are actual boss fights in this game as well? At some points you have to crash huge monster cars that you have to hit with your dash attack in certain spots.

Twinkle Star Sprites

Twinkle Star Sprites is a fun little game on the Saturn. I’ve the game also for Dreamcast but sadly it’s extremely slow on the reicast dreamcast emulator. Luckily for us the Saturn version works just fine.

Figure 17 - Twinkle Star Sprites on the Sega Saturn

In this anime styled shooting game, you can select between many different characters and fight against your opponent not by shooting at them, but by shooting at monsters and objects coming at you and avoiding getting hit. If you destroy enough things on the screen you cause extra stuff to spawn on your opponents screen making it harder for them to avoid things. If you or your opponent get hit often enough it’s Win or Lose.

Figure 18 - Twinkle Star Sprites is a very anime-styled game which can be seen on the loading screens

Figure 19 - Twinkle Star Sprites has many different characters to select

The gameplay is rather easy: shoot at everything and avoid what you can not destroy. It’s a lot of fun and looks very good. I love the bright color and yes even the sparkles and explosions going on all over the screen is nice to look at. I’m not quite sure why the Dreamcast version is running so much slower, but I’m happy to be able to play the Sega Saturn version, which the ODROID-XU4 can handle really well. You have a power meter which allows you to shoot a charged attack which does more damage and can hit more enemies at once. It also can have different level depending on your charging. You also have a limited number of bombs you can use to destroy a large number of enemies on the screen.

Figure 20 - Destroying a boss on your side launches a large attack on your opponent

Vampire Hunter Darstalkers’ Revenge

While I’m normally not a big fan of fighting games like Street Fighter and so on, this is one game I actually enjoy playing and I enjoy it on the Sega Saturn.

Figure 21 - Vampire Hunter has a good amount of fighters to choose from

Figure 22 - Vampire Hunter has very beautiful graphics and fast fighting action

I have to say I enjoy the brighter colors on the Sega Saturn a lot. Compared to the Genesis where everything seemed dark and muddy the Saturns games are much more vibrant when it comes to colors and I enjoy this a lot. So it also is with this fighting game paired with tons of animation on each character and with many different attacks it makes a really solid game experience. Like most good fighting games this one uses 6 different buttons which also makes it best on the Saturn as other consoles only use 4 action buttons most of the time. It also means you can pull off a lot of different moves and special attacks rather easily. It’s probably one of my favorite fighting games (also maybe cause I can actually beat the enemies). If you like fighting games, I highly recommend to try this game on the ODROID.

Waku Waku Puyo Puyo Dungeon

Unfortunately, I haven’t had time to play this as much as I would like yet, also it’s a little bit hard to understand for me as the entire game is in Japanese. Still I managed to get into a dungeon and figured out how to attack, cast spells and switch through different spells that I had, and for all I care I had a lot of fun.

Figure 23 - Restoring your health on pentagrams

Figure 24 - Different spells cost different amounts of MP per attack

Although the game seemed slightly laggy, it doesn’t really matter since you don’t need a fast reaction time in this game. You and the enemies take “rounds” even if it doesn’t feel like it. You walk a step the enemy does, you hit the enemy walks or attacks you as well. It’s just back and forth. Your character is automatically turning to the enemy when they attack you so you don’t have to figure out how to do diagonals. You find gold and other items in the dungeon, so I guess you can buy either new weapons and armors or just health items outside of the dungeon, but I haven’t figured that all out yet. I have also found two types of pentagrams in the dungeon yet. One restores your health, and the other restores MP. The one for MP disappears quickly though after one or two uses, while HP seems to stay.

From the start you have fire and ice attacks as skills and on deeper level in the dungeon you find enemies that get more damage depending on the element you’re using. Killing an enemy gives you Exp and Gold every now and then they also drop items like apples and such. The first couple of level ups go fast and your HP and MP goes up automatically also your attack and magic becomes stronger. You’ll find a stairway at some point in the dungeon leading to the next level, go deep enough and you encounter a boss fight.

Figure 25 - Onto the next level of the dungeon

Warcraft II – The Dark Saga

I was very much surprised seeing this game on the Saturn, but then again, I’ve seen other PC ports on the system as well. I was also surprised to see the game running rather well, although I found out it has a few issues. So the bad things first. On Yabause standalone, the videos are broken and you can’t see (but hear) them. It also has some issues with transparent graphics it seems as the game misses some elements. For example when you click on a character you do not see that you have him selected and if you open up the info screen the background is white instead of transparent/meshed. This is rather annoying, since you also don’t see how many characters you have selected or what health they have left, but still everything else works fine once you figured out the button layout of the game.

When you figured out the layout the game is actually quite enjoyable on Yabause standalone and fun to play even with the shortcomings. The libretro core has no graphical issues and looks rather good, videos work, transparent and mesh is there everything looks fine, BUT the speed is too slow to be enjoyable.

Figure 26 - Mission overview with level password fully voiced mission description

Figure 27 - A quick look on the in game graphics

Everything from the DOS version of the game seems to be there. The game even houses the expansion pack of the game. All Mission descriptions are fully voiced. Videos are all there (even if they don’t work on Yabause standalone), and the music is what you would expect.

Although the game uses passwords for the levels, there is a save option for the game as well. Although you probably won’t fit more than 2 save games on the internal memory of the Saturn as the save states are quite big. Still this allows you to save and restore on any point in the game. Still, you can easily play the DOS version of the game on ODROIDs as well, so it’s up to you how you want to play this masterpiece.

Willy Wombat

This game surprised me a little. In this 3D platforming game you play as Willy Wombat and jump and fight through different level. What is very interesting is that you can freely rotate the camera with the R and L buttons of the Saturn controller (for me mapped as L2/R2). This is very interesting as many objects only appear if you rotate the camera, they are strategically placed so you only see them from a certain angle. Although the 3D capabilities of the Saturn are very limited it works fine in this game, as it uses pre-rendered 2D sprites (similar to Donkey Kong) for the character and objects in a 3D environment.

Figure 28 - 3D graphics with minimal textures on the Saturn

Figure 29 - Collect five of these bubbles to increase you life bar

I haven’t dived far into the game yet, but it plays actually quite nice. The controls work good, although it’s sometimes a little hard to place your jump correctly due to the isometric viewing angle, but turning the camera often helps a lot. You have two types of attacks: a close range slash, and a boomerang attack that has limited range. It can also be used to collect items. Later you can also find some special attacks called forces that you can use to support you in your quest. These do massive damage to a lot of enemies on screen.

Figure 30 - Attacking the enemy with your trusty boomerang

Although the game is completely in Japanese, all voice acting is done in English, making it very easy to follow the story and understand the game. Also, the game is a Sega Saturn exclusive, so check it out you won’t find it anywhere else.

Wonder 3 Arcade Gears / Three Wonders

Wonder 3 Arcade Gears is a collection of 3 arcade games on one disc. Roosters, Chariot and Donburu are the three games on this disc. Roosters being a action orientated platformer, Chariot a arcade side-scroller shooter featuring the same characters as in Roosters and Donburu is an unrelated puzzle game. All games work actually quite nicely, with no slowdowns or anything.

Figure 31 - The game select screen of Wonder 3 Arcade Gear

Each game is fun in its own way, and it’s a really nice compilation of games on one disc. I did knew about Roosters before I got this compilation and already played it for the arcade or on the PS1. However, the other two games were new to me. Chariot instantly reminded me that on Roosters, it has the same characters and enemies, and the treasure chests are the same as in Roosters, although they now all fly.

You have your primary attack, which can be upgraded and switched through collecting power-ups, and you have your more powerful secondary attack which depends on the length of your “tail”. The longer the tail the stronger the attack but it also takes longer to recharge.

Figure 32 - Roosters Action Platformer

Figure 33 - Chariot Arcade Shooter

Figure 34 - Donburu “action” Puzzle

Donburu is a totally different game, and not connected to the former two. Your goal here is to push blocks around and with that, kill all of the enemies on the screen. Different blocks have different properties. For example, some explode and damage enemies in their surroundings. You get points depending on how fast you completed the level. All three games are very fun to play, have beautiful graphics, and run fluently on the ODROID-XU4. It’s worth having this disc for your Saturn or on your Saturn emulator of choice.

Worms

I remember the original Worms from my trusty Amiga. This game was the best of the best back then, and spawned many sequels and clones such as Hedgewars. The Saturn version of this game seems to be similar to the Amiga CD32 version, means it comes with all the video cutscenes music and voices that made the game fun and great. And although this game has tons of stuff going on in the background and with all the characters on the screen it’s working perfectly fine on the ODROID XU4.

Figure 35 - Worms Title Screen on the Sega Saturn

Figure 36 - As usual the computer drops the bomb.. umm grenade right on top of you

In this game, you have teams of worms fight each other with different weapons ranging from Bazooka, Shotgut, and Air Strikes, to the famous exploding sheep. There are tons of weapons to choose from. It’s brutal, it’s war, it’s fun! Weapons are affected by wind direction and strength. With enough wind strength you can shoot to the right to get around an object and still kill an enemy that is standing on your left.

Figure 37 - Supply drop from the sky grab it before someone else does

Figure 38 - If your health drops to zero your worm will blow itself up

This game has beautiful graphics, especially considering that it was created for the Amiga. It’s a very competitive game and fun to play against friends or the computer. This particular game is what started the series, which goes still on today with many, many different versions of the game. If you played Worms Armageddon, or World Party, you know how fun this game really is and here you have the chance to visit the roots of these amazing games.

Honorable Mentions

Terradiver

This is another rather generic shoot ‘em up vertical scroller. It has nice visuals and actually uses different planes where enemies are on, but not all your aircrafts can attack both planes which can be quite annoying. Still, I haven’t found anything special about it and it’s a little bit too slow for my taste to fully enjoy it, but worth if you like shmups.

Tetris Plus

What can I say: it’s Tetris and not the only one on the system, but it’s the better version in my opinion. There’s nothing bad about the game. It has different game mods, some anime characters, nice music, and a level system. It’s a very solid and enjoyable Tetris game.

The Lost World Jurassic Park

This one crashed when you load into the game on Yabause standalone but works on libretro, but sadly a little too slow. You play a dino this time and fight against other dinos and have to solve jumping puzzles and such. It uses a 3D world and characters and looks surprisingly good with it. I wish it would work on the Yabause standalone as it probably would run full speed there.

Three Dirty Dwarves

Unfortunately, this game has lots of graphics issues running under my current build of Yabause standalone emulator, but it runs without graphical issues under the libretro core, but as usual it runs way too slow here. This game is actually quite nice: you play 3 dwarves that fight against all kind of monsters. One uses a baseball and and bat as his main weapon, one uses a shotgun, and the last uses a bowling ball to fight off enemies. If you get hit, the guy goes down and the next in the line takes over, but you can revive your fallen comrades by kicking them in the butt, so to speak. It’s a fun action game with nice graphics. Hopefully I can get a newer version of Yabause running at some point, and that will fix this issue, since this is a really nice game.

Thunder Force Gold Pack 1, 2 and V

Thunder Force Gold Pack 1 consists of Thunder Force II MD and Thunder Force III. The first one is a top-down, and the second one a side scroller. Both are nice and fun to play with a little bit of parallax scrolling going on. Graphics are ok, but not impressive. You can switch between different weapon types back and forth to optimize the effect on your enemy. Especially in Thunder Force III you’re doing this a lot.

Thunder Force Gold Pack 2 houses Thunder Force AC and Thunder Force IV. The former is pretty much the same as Thunder Force III, but with much more lagging. I guess they upped the graphics with an additional layer of parallax scrolling background, but the performance took a serious hit. It’s easier than III though, but also removed the level select from III.

Thunder Force IV has better graphics lots of parallax scrolling and is much better performance wise, and the level select is back. The map is much bigger this time, and you can go far up and down on the screen, which means you don’t see what’s up or below you if you don’t go up and down. I like it the most, although it’s quite hard.

Thunder Force V goes to 3D this time. It looks nice, but the lagging is back and the graphics have tons of glitches. I never knew if I hit the boss or not, as I don’t see any indicator for it, and the boss glitches all over the place. If Thunder Force IV was a standalone title I would recommend it, but together with the others, it’s not really worth it.

Ultimate Mortal Kombat 3

I like this game: it’s very fast and you have a lot of characters to choose from. It’s not very easy, but I don’t think any of the Mortal Kombat games are. It’s a really good arcade port and plays rather well on the ODROID-XU4. If you like the Mortal Kombat series, you should try this version and see how you like it.

Virtua Fighter 2

It works, and the 3D graphics are actually quite good. Textures and backgrounds are fine. I’m just not a fan of it. The speed is ok if you use frame skipping.

Wakumon / Waku Waku Monster

This game is actually fun to play for a little while. It’s one of these games where you drop items and have to match the same color, and if you have 3 or more together, you pop them and you get points. Have enough points, and you attack your enemy, if the enemy attacks, you press a button to counter the attack and minimize the damage. Be faster than your opponent and win. Each time you win, your “Monster” evolves. You start with an egg, and every time you win, your pet grows and changes form, which is funny to see. It’s great in small doses, and I actually like it quite a bit.

Whizz

Whizz is an interesting platformer where you play a rabbit with a hat that looks like it came straight out of Alice in Wonderland. The colors are bight, the music is very nice, and the game controls are rather good. It’s also fast enough on the XU4 to enjoy it. There is just one issue: the game freezes after a couple of seconds.

Using the libretro core instead helps in that the game doesn’t freeze, although it’s too slow to play. While currently the game is not working as it should, I’m wondering if newer versions of Yabause fixed that issue, and if so, we can probably play this game in the future.

Wipeout 2097

Currently, this game only works on the libretro core, where it’s way too slow to be fun to play. However, you can see what the potential is, and I think I would probably enjoy it better than the PS1 version of the game. Unfortunately, it’s not really playable at the moment.

WolfFang

This game is another side-scroller, which is not bad, but not impressive either. You can build your own “mech” by selecting secondary weapons, close range weapons, leg types, and such, or you can choose one of the pre-configured options. The controls are not the best in my opinion, but if you hold the fire button, you will keep looking in one direction, but still have to aim up and down, if you don’t hold the button you can turn around and kill enemies from behind you. Although your weapon is widely spread, there is no angle from which you can hit all enemies, and even altering the two heights you can select back and forth won’t allow you to hit all enemies. You need to jump with the hope of hitting the other enemies before they hit you.

When your health goes to zero, your mech is destroyed and you jump out of it. The resulting character has only a tiny gun and the slightest hit will kill you, which is not really fun at all. On Yabause standalone it has some graphical issues, and libretro has some speed issues, but is probably good enough to play.

Z

Z was a surprise to me. I love Z, and this version seems to have everything in that the PC version has, with all videos, music, and levels included, and that’s very positive. The graphics are fine as well, but this game requires speed, and lots of it. If you don’t know what and when to do things, you will lose. This game is very hard, and just to be honest, without a mouse, playing this game is not fun at all. You have a couple of shortcuts to jump to the next unit, next flag, and next enemy, but that doesn’t help much. Still, the game works perfectly fine.

Final recap of Sega Saturn on ODROIDs

It’s been a long journey. I’ve tested hundreds of Saturn games and picked the games that I liked the most. Not every game worked: some games were unbearably slow, and others crashed before I could even try them. It was a rollercoaster of emotions. There are a few games that I would have loved to play on the ODROID but that simply wouldn’t work. The emulation of Sega Saturn is very difficult, and often fails. The development is also very slow, and not much has changed in a very long time. I’m still using a very old version of the Yabause standalone emulator, but newer versions simply didn’t work.

However, there’s hope! New versions of Saturn emulators are still in development, and there’s even an Android version that runs on OpenGL ES. In fact, I’ve even seen videos that show this emulator working on the ODROID-XU4 as well.

I hope that in the future, we can see more Saturn games running on the ODROID, and I might pick the topic up once again when this happens. For now I’m quite satisfied with Saturn on the ODROID-XU4. I have a collection of over 50 games for the Saturn that I really enjoy playing, and which will take me quite a while to finish. I hope you too will have fun with the Sega Saturn on your ODROID-XU4 and that this series gave you some ideas on what you can play.

Transcode DVB Enigma2 Receiver: Using ffmpeg on the ODROID-XU4

When I stay in hotels during my travels, I notice some channels are not available on TV. Using NAT (mapping the external ip to the internal device ip) and http flux, I can see some of those TV channels on my cell phone or my laptop. If the bandwidth is low, you could use 3G or higher (350Kbs rate) access.

In my first test, with a Raspberry Pi 3, using the hardware decoder, we can transcode to just 320*240. I discovered the ODROID-MC1 at a resale website, so I got it. It uses the Exynos 5520, which is more powerful. Using it, we can transcode to 512*384.

Price comparisons

  • Raspberry Pi 3 Model B+ Desktop Starter Kit (16Gb) costs 60 € (US $70)
  • ODROID-HC1 (sd 16Gb + PSU) = 70 € (US $82)
  • ODROID-XU4 (sd 16Gb + PSU) = 85 € (US $100)

The ODROID SBCs could be a good choice, but for the moment the hardware decoder may have some bugs in the MPEG4 processing, so, we use only H.264 video format at this moment). The MPEG4/MPEG2 video decoding is very unstable, so we are forced to use the software encoder/decoder.

Raspberry Pi 3 Model B+ is good, but the CPU is less powerful. However, with the hardware decoder/encoder, its performance is acceptable. In any case, do not use the WiFi network, but use the wired network (RJ45 ethernet jack). With either board, we cannot decode 4K video, which is only available on the ODROID-C1.

Install on ODROID-XU4 or ODROID-HC1

We will use Ubuntu 18.04 (Version: 20180531 - https://goo.gl/LKPL9F). Install the software at https://goo.gl/A9gbkD. Read the Release Notes at both links for useful information. After this we install the e2transcoder software (the web GUI) and ffmpeg using the steps at https://goo.gl/p9c4Pi. The steps include:

$ su
# apt-get install mali-fbdev
# apt-get install ffmpeg
# apt-get install apache2
# apt-get install libav-tools
# apt-get install zip
# apt-get install mc
# apt-get install zip
# apt-get install php
# apt-get install libapache2-mod-php
# apt-get install sqlite
# apt-get install php-sqlite3
# apt-get install php-xml
Fetch the e2transcoder zip file using:
$ wget http://e2transcoder.sharetext.net/wp-content/uploads/files/enigma2_transcoder_072.zip
Expand the zip file and copy the contents of
repertories/DB/*.*
to
/var/www/html/
You would now see the following files and directories in the /var/www/html/ folder:
/admin
/stream
index.html (original )
Index.php
Run the following commands:
$ rm /var/www/html/admin/config.php
$ cp /var/www/html/admin/config_linux.php /var/www/html/admin/config.php
Edit the /var/www/html/admin/config.php file to contain the following information:
// if enigma2 receiver is not used must be 0, but it is not mandatory if receiver is used
$conf["callreceiver"] = 1;
// full path of stream dir
$conf["stream_dir"]="/var/www/html/stream/";
// path of avconv or ffmpeg executable, if avconv of ffmpeg installed $conf["command"] = "/usr/bin/ffmpeg";
from package only need executable name
// web url folder of stream enigma2 receiver configuration
$conf["stream_web_dir"] = "/stream/";
// enigma2 user name
$conf["db_username"] = "root";
// enigma2 password
$conf["db_password"] = "YYYYYY";
// enigma2 IP
$conf["db_ip"] ="192.168.ZZZ.ZZZ";
$conf["parameters"] = "-threads 16 -vcodec h264 -i {stream_url} -s 512x384 -vf fps=21 -maxrate:v 400k -bufsize:v 60000k -ac 1 -ar 22050 -vbr 1 -sn {stream_dir}ystream.m3u8";
// full path of avconv or ffmpeg log
$conf["stream_log"] = "/var/log/stream.log";
Folders /admin/db and /stream/ should be writable by the web server. In case of Apache, this is user “apache” for nginx www-data.
$ chown -R www-data /var/www/html/
$ chmod -R 755 /var/www/html/
$ touch /var/log/stream.log
$ chown www-data /var/log/stream.log
There is a small issue with slqlite. Locate the sqlite3.so library. In the Raspberry Pi, it is at /usr/lib/php/20151012/sqlite3.so. Locate php.ini typically at /etc/php/7.2/apache2/php.ini. In this file, find the section [sqlite3] and change to:
[sqlite3]
sqlite3.extension_dir =/usr/lib/php/20170718/sqlite3.so
Now, on your web browser, access http://ip_of_your_receiver/index.php. Enter the login information (also in config.php). Go to the "Settings" section and click on "Reload E2 Playlist". Return to "Channels". Select your Channel by clicking on it, and at the top you should see “TV:channel-name”. Be careful, you can not show TV and transcode another channel if it is not in the same transponder.. You should see the status change from, "Preparing" to “Running" (you can also check using: $ tail -f /var/log/stream.log). Go to the "Live" section and click on the play icon or enter the link in the vlc player.

Figure 01 - Login
Figure 01 - Login

Figure 02 - Main Page

Figure 03 - HTML5 player in Chrome on SmartPhone

Figure 04 - Settings

Figure 05 - EPG
Figure 05 - EPG

For comments, questions, and suggestions, please visit the original article at https://forum.odroid.com/viewtopic.php?f=95&t=31358.

Coding Camp Part 1: Getting Started with Arduino

In this article, you will learn how to download and install Arduino IDE and ODROID-GO specific libraries and examples. There are official step-by-step guides for the supported platforms which are maintained by community members.

Install ODROID-GO libraries

Windows Execute a Git Bash program from the Start Menu and enter the following commands:

$ git clone https://github.com/hardkernel/ODROID-GO.git 
$ USERPROFILE/Documents/Arduino/libraries/ODROID-GO
Linux Open a Terminal by pressing CTRL-ALT-T and enter the following commands:
$ git clone https://github.com/hardkernel/ODROID-GO.git ~/Arduino/libraries/ODROID-GO
Select a target device Arduino IDE has to know which board will be used for compiling and sending a data.

Select Tools → Board → ODROID-ESP32.

Figure 1 - Selecting a target device

Select a proper serial port Arduino IDE has to know which port the device is connected to. The port number depends on your system. You might need to install CP2104 VCP drivers on your host computer if you can't open the serial port.

Windows

Figure 2 - Selecting a proper serial port in Windows

Select Tools → Port: “COM#” → COM#.

Linux

Figure 3 - Selecting a proper serial port in Linux

Since ODROID-GO always connects to the host PC via USB cable, select a USB device file.

Select Tools → Port → /dev/ttyUSB#.

Let's code with ODROID-GO Now you're ready to write your source code. To learn how to write source code, refer to Part 2 of the Coding Camp series in this issue. For comments, questions, and suggestions, please visit the original article at https://wiki.odroid.com/odroid_go/arduino/01_arduino_setup.

Thundroid - Part 2: Migrating From Bitcoin Testnet to Mainnet

Remember Part 1 of this guide? We set up a Bitcoin full node with Lightning from scratch, went to quite some length to secure our box, and started testing Bitcoin on testnet. If you did not catch Part 1, please read it first as this part won't make much sense without it. The goal of this guide is to switch our Thundroid from Bitcoin testnet to mainnet and to transact with real money.

Financial best practices Bitcoin is a bearer asset like physical cash, so transactions cannot be reversed. Controlling your bitcoin actually means controlling the private keys that allow you to use them. This means that if someone has access to your private keys, this person has full control over your bitcoin. Once they are sent to a different address, there's nothing you can do to get them back.

To manage your bitcoin, you need a wallet. This is an application that manages the private keys for you. There is an important distinction:

  • Hot wallet: an application that manages your private key and is exposed to the internet. It is a very convenient mobile application, but could potentially be hacked. This type of wallet is used for smaller amounts and everyday use.
  • Cold storage: your private key is never been exposed to any network. Examples are paper wallets which are created and/or printed using an offline computer, or hardware wallets like a Ledger or Trezor. This is how you secure your savings in bitcoin.

By definition, this project is a hot wallet as it is connected to the internet. That said, do not store large amounts of money on your Thundroid!

  • Bitcoin: don't use the wallet built into Bitcoin Core at all. The way to go is to use a small hardware wallet to secure your private keys with Thundroid as your trusted backend to send / verify transactions. More on that later.
  • Lightning: as the whole network is still in beta, it goes without saying that you should not put your life savings into it. Experimenting with small amounts is fine, but do it at your own risk.

Please be aware that while Bitcoin has been battle-tested for almost a decade and is used to move billions of US dollars every day, the Lightning Network is still in beta and under heavy development. This guide also allows you to set up your Bitcoin node while ignoring the Lightning part.

Moving to Mainnet The current setup of your Thundroid runs on Bitcoin testnet. Make sure that your box running smoothly so that we can move on to copy the mainnet blockchain that you already downloaded on a regular computer (see Part 1) to the box.

On your regular computer, check the verification progress in Bitcoin Core. To proceed, it should be fully synced (see status bar). Shut down Bitcoin Core on Windows so that we can copy the whole data structure to the Thundroid. This takes about 6 hours.

NOTE: If you get stuck, please check out my GitHub repository. You can search for answers among solved issues, or open a new issue if necessary.

Temporarily enable password login In order to copy the data with the user "bitcoin", we need to temporarily enable the password login. As user "admin", edit the SSH config file and put a # in front of "PasswordAuthentication no" to disable the whole line. Save and exit.

$ sudo nano /etc/ssh/sshd_config
# PasswordAuthentication no
Restart the SSH daemon.
$ sudo systemctl restart ssh
Copy mainnet blockchain using SCP We are using "Secure Copy" (SCP), so download and install WinSCP, a free open-source program. There are other SCP programs available for Mac or Linux that work similarly. Do not use rsync as this can lead to issues later on.

With WinSCP, you can now connect to your Pi with the user "bitcoin". Both protocols SCP and SFTP work, in my experience SCP is a bit faster.

Figure 1 - Sign in with username "Bitcoin"

Accept the server certificate and navigate to the local and remote bitcoin directories:

  • Local: d:itcoinitcoin_mainnet\
  • Remote: mnthdditcoin\

You can now copy the two subdirectories blocks and chainstate from Local to Remote. This will take about 6 hours.

Figure 2 - copy the two subdirectories blocks and chainstate from Local to Remote

NOTE: The transfer must not be interrupted. Make sure your computer does not go to sleep. Disable password login again As user "admin", remove the # in front of "PasswordAuthentication no" to enable the line. Save, exit the config file and restart the ssh daemon.

$ sudo nano /etc/ssh/sshd_config
PasswordAuthentication no

# Restart the SSH daemon.
$ sudo systemctl restart ssh
Send back your testnet Bitcoin To avoid burning our testnet Bitcoin, and as a courtesy to the next testers, we close all our channels and withdraw the funds to the address stated on the website of the Bitcoin Testnet Faucet.
$ lncli closeallchannels
Wait until the the channel balance is zero and the funds have been returned to our on-chain wallet.
$ lncli channelbalance
$ lncli walletbalance
Send the amount provided by walletbalance minus 500 satoshis to account for fees. If you get an "insufficient funds" error, deduct a bit more until the transaction gets broadcasted.
$ lncli sendcoins 2N8hwP1WmJrFF5QWABn38y63uYLhnJYJYTF [amount]
Adjust configuration Stop the Bitcoin and Lightning services:
$ sudo systemctl stop lnd
$ sudo systemctl stop bitcoind
Delete LND wallet. Edit "bitcoin.conf" file by commenting ‘testnet=1’ out, then save and exit.
$ sudo nano /home/bitcoin/.bitcoin/bitcoin.conf
# remove the following line to enable Bitcoin mainnet
#testnet=1
Copy updated "bitcoin.conf" to user "admin" for credentials (the command bitcoin-cli looks up the "rpcpassword")
$ sudo cp /home/bitcoin/.bitcoin/bitcoin.conf /home/admin/.bitcoin/
Edit "lnd.conf" file by switching from bitcoin.testnet=1 to bitcoin.mainnet=1, then save and exit.
$ sudo nano /home/bitcoin/.lnd/lnd.conf
# enable either testnet or mainnet
#bitcoin.testnet=1
bitcoin.mainnet=1
Delete the LND authorization files (*.macaroon). They are linked to the currently active wallet and need to be created when we create a new wallet for mainnet.
$ sudo rm /home/bitcoin/.lnd/*.macaroon
$ sudo rm /home/bitcoin/.lnd/data/macaroons.db
Restart bitcoind & lnd for mainnet NOTE: Do not proceed until the copy task of the mainnet blockchain is completely finished. Start Bitcoind and check if it's operating on mainnet:
$ sudo systemctl start bitcoind
$ systemctl status bitcoind.service
$ sudo tail -f /home/bitcoin/.bitcoin/debug.log  (exit with Ctrl-C)
$ bitcoin-cli getblockchaininfo
Wait until the blockchain is fully synced. "blocks" = "headers", otherwise you might run into performance / memory issues when creating a new lnd mainnet wallet. Start LND and check its operation. It will wait for the wallet to be created.
$ sudo systemctl start lnd
$ systemctl status lnd
Create mainnet wallet Once LND is started, we need to create a new integrated Bitcoin wallet for mainnet. Start a "bitcoin" user session and create a new wallet
$ sudo su - bitcoin
$ lncli create
If you want to create a new wallet, enter your password [C] as wallet password, select n regarding an existing seed and enter the optional password [D] as seed passphrase.

Figure 3 - Create a new integrated Bitcoin wallet for mainnet

The 24 seed words that are displayed, combined with your optional passphrase, is the backup for your on-chain Bitcoin. The current state of your channels, however, cannot be recreated from this seed, this is still under development for LND.

NOTE: This information must be kept secret at all times. Write these 24 words down manually on a piece of paper and store it in a safe place. This piece of paper is all an attacker needs to completely empty your wallet! Do not store it on a computer. Do not take a picture with your mobile phone. This information should never be stored anywhere in digital form.

Exit the "bitcoin" user session. To use lncli with the "admin" user, copy the permission files and the TLS certificate. Check if it's working.

$ exit
$ sudo cp /home/bitcoin/.lnd/tls.cert /home/admin/.lnd
$ sudo cp /home/bitcoin/.lnd/admin.macaroon /home/admin/.lnd
Check if it works by getting some node infos
$ lncli getinfo
Restart lnd and unlock your wallet (enter password [C] )
$ sudo systemctl restart lnd   
$ lncli unlock
Monitor the LND startup progress until it has caught up with the mainnet blockchain (about 515k blocks at the moment). This can take up to 2 hours, after which you will see a lot of very fast chatter. Exit with Ctrl-C.
$ sudo journalctl -f -u lnd
This command will return "synced_to_chain: true" if LND is ready.
$ lncli getinfo
Improve startup process It takes a little getting used to the fact that the LND wallet needs to be manually unlocked every time the LND daemon is restarted. This makes sense from a security perspective, as the wallet is encrypted and the key is not stored on the same machine. However, for reliable operations this is not optimal, as you can easily recover LND if it has to restart for some reason (such as a crash or power outage), but then it's stuck with a locked wallet and cannot operate at all.

This is why a script that automatically unlocks the wallet is helpful. The password is stored in a root-only directory as plain text, so it’s clearly not as secure, but for reasonable amounts this is a good middle-ground. You can always decide to stick to manual unlocking or implement a solution that unlocks the wallet from a remote machine.

As user "admin", create a new directory and save your LND wallet password [C] into a text file:

$ sudo mkdir /etc/lnd
$ sudo nano /etc/lnd/pwd
The following script unlocks the LND wallet through its web service (REST interface). Copy it into a new file.
$ sudo nano /etc/lnd/unlock
#!/bin/sh
# LND wallet auto-unlock script
# 2018 by meeDamian, robclark56

# Delay is needed to make sure bitcoind and lnd are ready.  You can still 
# unlock the wallet manually if you like.  Adjust to your needs:
/bin/sleep 300s

LN_ROOT=/home/bitcoin/.lnd

curl -s 
        -H "Grpc-Metadata-macaroon: $(xxd -ps -u -c 1000 ${LN_ROOT}/admin.macaroon)" 
        --cacert ${LN_ROOT}/tls.cert 
        -d "{"wallet_password": "$(cat /etc/lnd/pwd | tr -d '
' | base64 -w0)"}" 
        https://localhost:8080/v1/unlockwallet > /dev/null 2>&1

echo "$? $(date)" >> /etc/lnd/unlocks.log
exit 0
Make the directory and all content accessible only for "root"
$ sudo chmod 400 /etc/lnd/pwd
$ sudo chmod 100 /etc/lnd/unlock
$ sudo chown root:root /etc/lnd/*
Note: I encountered the issue that curl was not running correctly on my machine and I had to reinstall a library before I got it working again:
$ sudo apt install --reinstall libroken18-heimdal.
Create a new systemd unit that starts directly after LND.
$ sudo nano /etc/systemd/system/lnd-unlock.service

# Thundroid: system unit for lnd unlock script
# /etc/systemd/system/lnd-unlock.service

[Unit]
Description=LND wallet unlock
After=lnd.service
Wants=lnd.service

[Service]
ExecStart=/etc/lnd/unlock
Type=simple

[Install]
WantedBy=multi-user.target
Edit the LND config file to enable the REST interface on port 8080:
$ sudo nano /home/bitcoin/.lnd/lnd.conf
# add the following line in the [Application Options] section
restlisten=localhost:8080
Reload systemd and enable the new unit. Restart your Thundroid and watch the startup process to see if the wallet is automatically unlocked.
$ sudo systemctl daemon-reload
$ sudo systemctl enable lnd-unlock.service
$ sudo shutdown -r now
---- reconnect ----
# Unlocking the wallet will take several minutes due to the build in delay
$ sudo journalctl -u lnd -f
Note: a more elegant way were to run the script with ExecStartPost=+/etc/lnd/unlock in the lnd.service unit. This would enable it to unlock the wallet if LND service is restarted outside the startup process. The =+ is necessary to run LND with user "bitcoin" and the unlock script with root privileges. Unfortunately, this is only supported starting with systemd version 331, but we are using version 229. Start using the Lightning Network Fund your node Congratulations, your Thundroid is now live on the Bitcoin mainnet! To open channels and start using it, you need to fund it with some bitcoin. For starters, put only on your node what you are willing to lose, and treat it as monopoly money. Generate a new Bitcoin address to receive funds on-chain:
$ lncli newaddress np2wkh
> "address": "3.........................."
From your regular Bitcoin wallet, send a small amount of bitcoin to this address, or ask your one annoying Bitcoin friend to send you a few bucks. Next, check your LND wallet balance:
$ lncli walletbalance
Monitor your transaction on a Blockchain explorer as described at https://smartbit.com.au. LND in action As soon as your funding transaction is mined and confirmed, LND will start to open and maintain channels. This feature is called "Autopilot" and is configured in the "lnd.conf" file. If you would like to maintain your channels manually, you can disable the autopilot.

You can use the same commands that were listed in Part 1 of this guide or use, go to LND API reference or just type lncli --help. Try it out and explore Lightning mainnet There are a lot of great resources to explore the Lightning mainnet in regards to your own node.

What's next? You now have your own Bitcoin/Lightning full node. The initially-stated goals were as follows and we achieved them all:

  • A fully validating Bitcoin Full Node that does not require any trust in a 3rd party
  • Runs reliably 24/7
  • Supports the decentralization of the Lightning network by routing payments
  • Can be used to send and receive personal payments using the command line interface.
  • Usability? Not so much...

Is it the perfect Bitcoin Lightning node yet? It's clunky and the command line does just not cut it. In Part 3 of this guide we will therefore go on to extend the Thundroid with additional applications that use it as our own private backend.

  • The Electrum desktop wallet is the perfect power-user wallet to handle regular on-chain Bitcoin transaction. Because it supports a wide variety of hardware-wallets, you private keys never need to be exposed to any (possibly compromised) online computer. With the Electrum Personal Server running on Thundroid, you have full control to send, receive, and verify Bitcoin transactions with great security and privacy.

Figure 4 - The Electrum desktop wallet

  • The Shango lightning mobile wallet is perfect for small, instant payments on the go. It connects to your Thundroid and provides a neat user interface on your iOS / Android phone to send and receive payments, and manage peers and channels. While still in closed beta, I hope it will be public just in time.

Figure 5 - The Shango lightning mobile wallet

Join me in part 3 of the guide "The perfect Bitcoin Lightning node" and discover some cutting edge applications that work on top of our own Bitcoin full node!

eMMC Recovery: Resetting the ODROID-XU4 eMMC Module To Fix Boot Issues

The Exynos series boot loader is placed on a hidden boot partition in the eMMC memory for all models except the ODROID-C1/C2. When it is corrupted, or you want to use the eMMC with a different board, you must install the proper boot loader in the eMMC. Note that you must have a blank micro SD card to run the recovery process.

Recovering with recovery image

  • Download Recovery Image file.
  • Prepare a micro SD card and flash the downloaded image
  • Connect both the eMMC and micro SD card to the ODROID-XU3/XU4
  • Set the DIP switches or slide switch on the XU3/XU4 to “SD boot mode” (if you have an ODROID-XU3, refer to this link)
  • Connect power and observe the LED status
  • The blue and red LEDs should remain steadily on, which may take from 40 seconds to 3 minutes
  • After the recovery process, the blue LED will be flashing like a heartbeat, at which point you can remove the power supply
  • Set the DIP switches or slide switch back to eMMC boot mode
  • Remove the micro SD card
  • Proceed with normal power up with your peripherals attached

After verifying that Android boots on the eMMC module, you can flash another OS image, such as image, on the eMMC, and the bootloader will load the new OS

Recovering eMMC with micro SD card and USB-UART kit

    This instruction requires a USB-UART and terminal application on your desktop.

  • Set the DIP switches or slide switch on the XU3/XU4 to “SD boot mode”
  • Insert the micro SD flashed with the booting image into its slot and power on, stopping at U-boot once the board has powered up
  • Type the “run copy_uboot_sd2emmc” command to copy the boot loader image from micro SD to eMMC
  • Once copying is done, set the DIP switches or slide switch back to eMMC boot mode
  • Proceed with normal power up with your peripherals attached
  • After verifying that Android boots on the eMMC module, you can flash another OS image, such as image, on the eMMC, and the bootloader will load the new OS

The ODROID-XU4 has a slide switch to choose the boot media, as shown in Figure 1. The boot configuration switch must be set to boot from SD card if you do not have an eMMC attached. The device does not automatically fallback to the SD card if no eMMC is present.

Figure 1 - Location of boot mode selector switch on the ODROID-XU4

Coding Camp Part 2: How to Display “Hello, ODROID-GO” on an LCD Screen

In this article, you will learn how to display a string, change colors, and change font size. By following this guide, you will be able to write code to display “Hello, ODROID-GO” on your ODROID-GO.

Basic code structure for Arduino When you first run the Arduino IDE, you will see a screen similar to the one shown in Figure 1.

Figure 1 - Sketch for Arduino

That editor is called Sketch, and it is your playground. The default source code is:

void setup() {
  // put your setup code here, to run once:
 
}
 
void loop() {
  // put your main code here, to run repeatedly:
 
}
There are two functions with some comments that let you know what each function performs in the code. We will use this simple structure.

Arduino for ODROID-GO We will provide the library for Arduino development: odroid_go.h. The library helps you to control components on the board such as LCD, buttons, speaker, etc. This library should be included first.

To prepare the board for use, it should be initialized. To initialize the board, use the GO.begin() function. If you want to control the buttons or the speaker on the board, you have to use the GO.update() function to apply the changes from the code.

The GO.update() function isn't used in this guide since we will only need to use the LCD to display a simple string.

#include 
 
void setup() {
  // put your setup code here, to run once:
  GO.begin(); 
}
 
void loop() {
  // put your main code here, to run repeatedly:
 
}
The GO.begin() function has to be included in the setup() function since it is called only once. The GO instance has not only the two core functions, but also a lot of helper functions that let you control the components on the board. Now, let's use the GO.lcd functions to show “Hello, ODROID-GO”.

Hello World We will use the GO.lcd.print function to show a string:

#include 
 
void setup() {
  // put your setup code here, to run once:
  GO.begin();
 
  GO.lcd.print("Hello, ODROID-GO");
}
 
void loop() {
  // put your main code here, to run repeatedly:
 
}
The sketch looks fine, but the text on the LCD will be too small to see. Let's increase the font size to 2 by using the GO.lcd.setTextSize() function.
#include 
 
void setup() {
  // put your setup code here, to run once:
  GO.begin();
 
  GO.lcd.setTextSize(2);
  GO.lcd.print("Hello, ODROID-GO");
}
 
void loop() {
  // put your main code here, to run repeatedly:
 
}
You can also change the text color with GO.lcd.setTextColor(). Change the text to green.
#include 
 
void setup() {
  // put your setup code here, to run once:
  GO.begin();
 
  GO.lcd.setTextSize(2);
  GO.lcd.setTextColor(GREEN);
  GO.lcd.print("Hello, ODROID-GO");
}
 
void loop() {
  // put your main code here, to run repeatedly:
 
}
As an advanced feature, we've also added a function called displayGO() which includes several effects. New functions introduced include:

  • GO.lcd.setRotation(): rotates output screen. The rotation parameter can be 0 to 7.
  • GO.lcd.clearDisplay(): resets all texts on the screen.
  • GO.lcd.setTextFont(): sets font style after calling this. A given font name is specified by a number.

#include 
 
uint8_t idx;
uint8_t rotate;
 
void setup() {
  // put your setup code here, to run once:
  GO.begin();
 
  GO.lcd.println("Hello, ODROID-GO");
  delay(1000);
}
 
void displayGO() {
  GO.lcd.clearDisplay();
  GO.lcd.setRotation(rotate + 4);
  GO.lcd.setCursor(30, 40);
 
  if (idx) {
    GO.lcd.setTextSize(1);
    GO.lcd.setTextFont(4);
    GO.lcd.setTextColor(MAGENTA);
  } else {
    GO.lcd.setTextSize(2);
    GO.lcd.setTextFont(1);
    GO.lcd.setTextColor(GREEN);
  }
  GO.lcd.print("Hello, ODROID-GO");
 
  idx = !idx;
  rotate++;
  rotate %= 4;
 
  delay(1000);
}
 
void loop() {
  // put your main code here, to run repeatedly:
  displayGO();
}
You can verify, compile, or upload a sketch from the toolbar or Sketch menu. Here are some helpful shortcuts you can use:

  • CTRL-R: Verify and compile.
  • CTRL-U: Upload.

Before uploading the binary, you have to select the proper port at the Tools - Port menu. If the procedure goes well, you can see “Hello, ODROID-GO” on your device.

Figure 2 - ODROID-GO

A completed example The complete example is available by clicking the Files → Examples → ODROID-GO → Hello_World menu to import and pressing CTRL-U to compile/upload.

Figure 3 - A completed example

For comments, questions, and suggestions, please visit the original article at https://wiki.odroid.com/odroid_go/arduino/02_hello_world.

How to Setup a Minecraft Server

Almost everyone loves playing games, especially Minecraft! It’s been enjoyed by over 14 million people worldwide for its addictive gameplay and customizable maps. Although the official package from Mojang Software is closed-source, several open-source Java versions of Minecraft Server are also available for the ODROID platform. Programming a virtual world using a free Minecraft Server package such as Spigot, Bukkit or BungeeCord is also a great way to learn Java while having fun too! This article details how to install a basic Minecraft server on your ODROID, so that you can play online games with a few of your friends in a world of your own creation. Using the ODROID as an inexpensive sandbox is also a great way to test out maps, upgrades and modifications before uploading them to a public server.

Requirements

  • 1. An ODROID from the X, U or XU series
  • 2. An 8+ GB eMMC or Class 10+ MicroSD
  • 3. A custom Ubuntu, Debian or similar image (13.04 or higher), available from the ODROID Forums (http://forum.odroid.com/)
  • 4. Java version 1.8 (OpenJDK8 or Oracle JDK8)
  • 5. Local Area Network (LAN) connection, including a router with port-forwarding feature

Install Java

If Java version 1.8 isn’t already installed on your system, please refer to the article in this issue of ODROID Magazine called Installing Oracle JDK8. Mojang publishes a Java version of the Minecraft software for compatibility with other operating systems such ARM Linux.

Install Minecraft

First, download the latest Minecraft Server software from the official site at https://minecraft.net/download, making sure to get the Java-based .tar version.

Create a minecraft directory in your home directory for storing the downloaded minecraft_server.jar. Once the tarball is downloaded, type the following commands to start the server:

$ cd ~/minecraft
$ java -Xms1536M -Xmx1536M -jar minecraft_server.jar nogui
The Minecraft server should be up and running now! The final step is to get the server’s IP address so that our players can connect to it via their Minecraft clients. Obtain the internal IP address

Find out the internal (local) IP address of your server by typing ifconfig in the Terminal window and locating the tag inet addr. On my ODROID, the IP address was listed as 192.168.1.10. Make sure this address has a long lease issued by the local DHCP server or router in order to avoid frequent configuration updates. Setup port forwarding

Minecraft uses the TCP port 25565, which should be forwarded to the server’s IP address by your local router using port forwarding. Refer to the user manual for assistance with setting up the router to forward port 25565 to the IP address obtained in the previous step. Obtain the external IP address

The public IP address that identifies your LAN to the outside world can be discovered by visiting http://www.whatismyip.com. The address will be in the form aaa.bbb.ccc.ddd, which means that the fully-qualified URL for connecting to the Minecraft Server on your LAN would be http://aaa.bbb.ccc.ddd:25565. Note the additionof the relevant TCP port at the and of the URL.

Iif your external IP is dynamic (typically changed periodically by your ISP), you can use services like No-IP. You can create an account on their website, then download and install the Dynamic DNS Update Client (DUC) at http://www.noip.com/download. Detailed instructions on setting up Dynamic DNS can be found at http://bit.ly/1ggmo2n. In this case, the fully-qualified Minecraft Server address would be http://youracctusername.no-ip.com:25565.

To make sure everything’s working, you can test that your server is visible online by going to http://www.canyouseeme.org. You can also quickly check its status at http://dinnerbone.com/minecraft/tools/status/.

System performance will be acceptable under normal wireless ethernet conditions, but a wired connection will decrease latency and increase game responsiveness.

Joining the Game

Start your Minecraft client on a Windows or OSX machine by entering the public IP address from the previous step (http://aaa.bbb.ccc.ddd:25565) when adding a new server to the client’s server list. At the time of this writing, the Minecraft Client software unfortunately does not yet run on the ODROID platform. There is a Minecraft Pocket Edition available for Android, but it is not compatible with the full version of Minecraft Server.

A successful connection to the ODROID Minecraft Server will bring the user into our virtual world as seen in Figure 1.

Additional Server Configuration

The server options in Minecraft are configured by editing the server.properties file located at /home/yourusername/minecraft/server.properties:

#Minecraft server properties
#Mon Dec 24 09:23:18 EST 2012
#
generator-settings=
level-name=world
enable-query=false
allow-flight=false
server-port=25565
level-type=DEFAULT
enable-rcon=false
level-seed=
server-ip=
max-build-height=256
spawn-npcs=true
white-list=false
spawn-animals=true
hardcore=false
texture-pack=
online-mode=true
pvp=true
difficulty=1
gamemode=0
max-players=20
spawn-monsters=true
generate-structures=true
view-distance=10
motd=A Minecraft Server
The three settings useful in changing maps and improving performance include:

  • level-name: If you want to add another map or world to your server, just unpack the world file inside your minecraft folder and then change the level-name setting to the name of that folder. For example, if your extracted world folder is odroid then change the level-name value to odroid instead of the default world value.
  • view-distance: Can be reduced to 7 to improve server responsiveness
  • max-players: Performs best when set between 2 and 5

Please note that Minecraft relies heavily on floating point operations. Unlike x86 architecture based CPUs, ARM based SOCs are not optimized for floating point operations, so the server options need to be tuned down to compensate for the heavier load.

If you’d like to further improve performance, several open-source versions of Minecraft Server are available that significantly decrease the server’s computations, providing a smoother experience and allowing more players to join the game. Craftbukkit

Create a folder for Craftbukkit by typing mkdir ~/craftbukkit in a Terminal window, then visit https://dl.bukkit.org/downloads/craftbukkit/ to download the latest version of Craftbukkit to the newly created directory. Once the download has completed, run the server to build your world.

java -Xms1536M -Xmx1536M -jar craftbukkit.jar
cd ~/craftbukkit/plugins
wget http://dev.bukkit.org/media/files/674/323/NoLagg.jar
wget http://dev.bukkit.org/media/files/665/783/PTweaks.jar
wget http://dev.bukkit.org/media/files/586/974/NoSpawnChunks.jar
Spigot

An alternative to Craftbukkit is Spigot, which provides more configuration options and is optimized for performance and speed. Following the same procedure as listed above, downloading the Spigot package instead, found at http://www.spigotmc.org/.

mkdir ~/spigot
cd spigot
wget http://ci.md-5.net/job/Spigot/lastSuccessfulBuild/artifact/Spigot/target/spigot.jar
java -Xms1536M -Xmx1536M -jar spigot.jar
Spigot is very stable, and since it is based on Craftbukkit, the Bukkit plugins NoLagg, PTweaks and NoSpawnChunks above will also work with Spigot. MineOS

MineOS is a Web-based administrative panel that offers easy management of Minecraft servers. It can handle Vanilla, Bukkit, Tekkit and Canary by default, but you can install any other server system and configure it to automatically download a new version whenever available.

Copying your server to an external hosting service

Using an open-source version of Minecraft allows you to change any aspect of the server, including fixing bugs and installing addons. Since Minecraft for ODROID is written in Java, it’s easy for beginners and experts alike to improve the software and customize it to their own needs.

Once you have your world ready, you can migrate your Minecraft creation to a high-traffic server so that it can accommodate more players. Simply upload all of the server files from the minecraft, spigot or craftbukkit directory on the ODROID via the web hosting service’s administration panel.

Enjoy your new ODROID Minecraft Server, and remember to stay out of the lava! For additional information or questions, please visit the original forum thread at http://forum.odroid.com/viewtopic.php?f=52&t=84.