

It is my pleasure to share my experience creating a home CCTV video monitoring system using the ODROID-HC2 and Shinobi CCTV software. Hopefully this helps someone out there who is looking to have a video monitoring system of their own.
In my opinion, traditional home alarm systems generally just cause a nuisance for neighbours, and they must be armed to be effective. In comparison, a CCTV system is quiet, but also provides records, which in my experience is a more effective deterrent to potential criminals. A good CCTV system records 24/7 and flags motion events.
Other benefits of a CCTV system include, its usefulness in telling you when packages have been delivered to the front door; lets you know who is at the door; and monitor the BBQ smoker outside while playing video games inside.
Warnings and Disclaimer
To honor others’ privacy, install cameras with only a view of your property, and not that of the neighbour’s. It is also wise to review your local rules to understand any additional requirements covering signage, restrictions on audio recording, and such. Although I only recommend installing the cameras outside your home, one exception may be to use a camera internally as a baby monitor. However, as one of my friends found, it is important to make sure your access/security to this camera is watertight!
System fundamentals
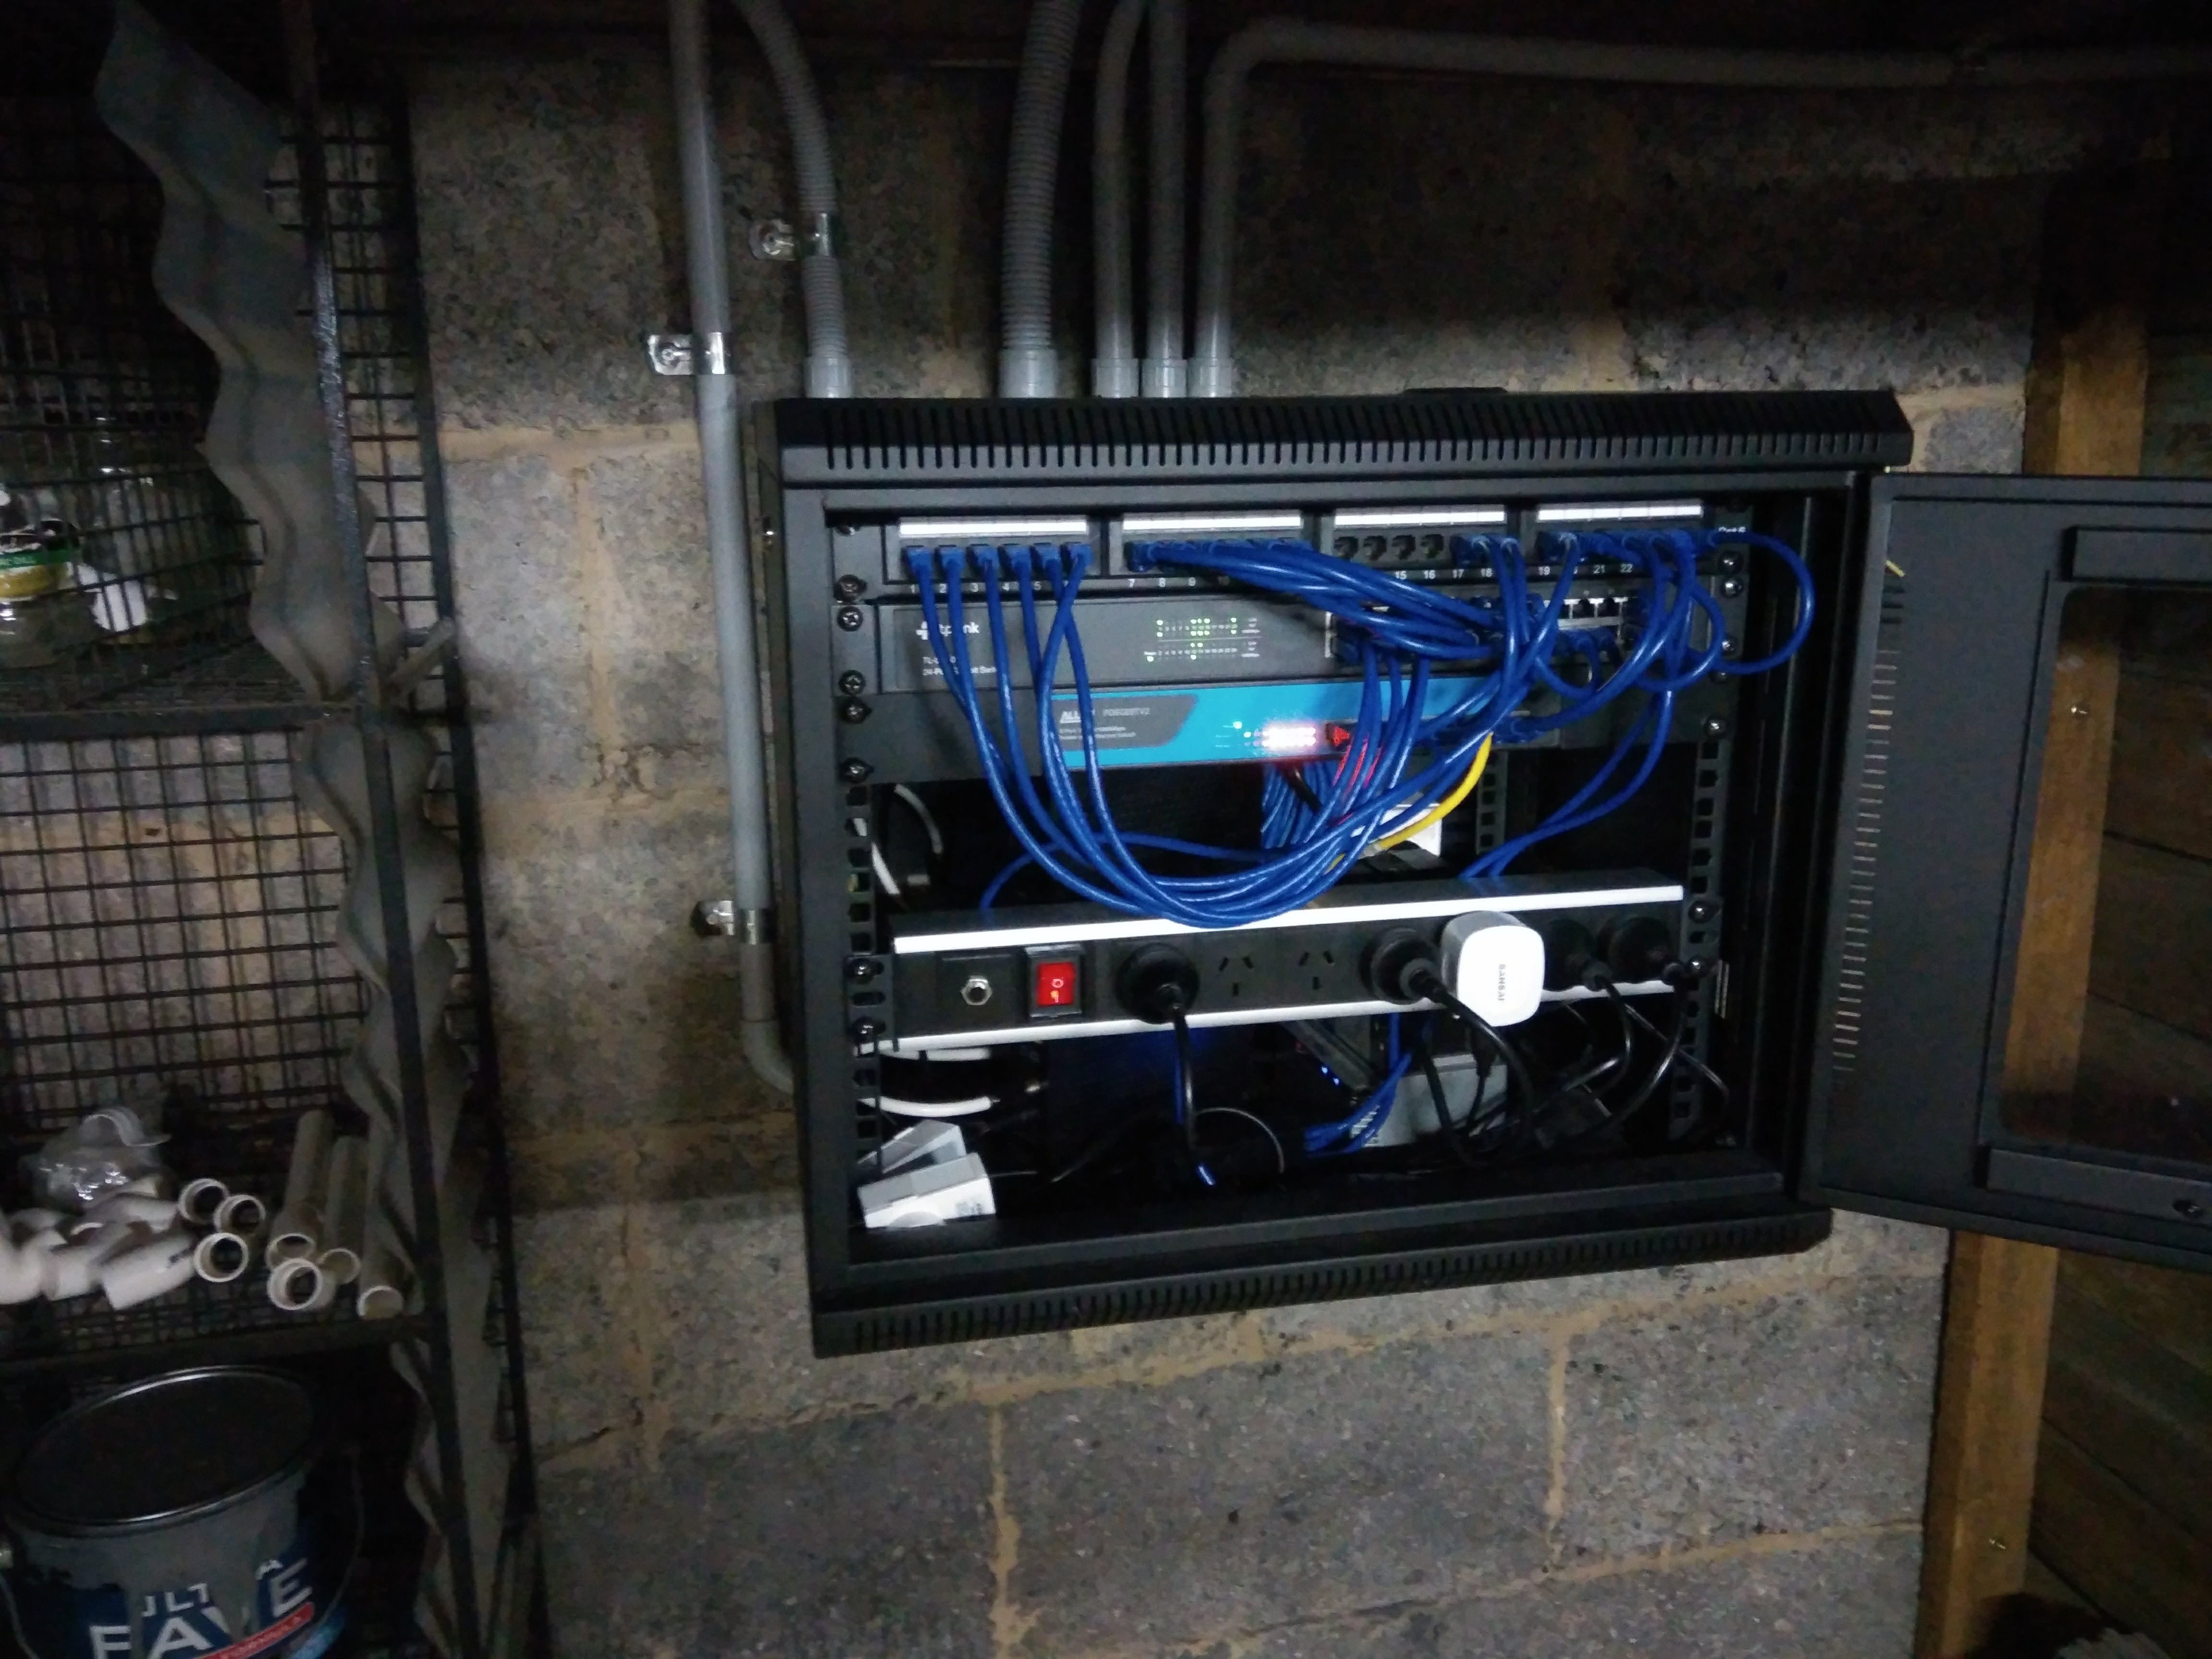
Structured Cabling in the form of wired CAT6 or better will provide robust, secure communications for your CCTV system. I installed 20 ethernet outlets throughout my home with eight in the ceiling void for the purpose of connecting cameras. Structured cabling is normally something installed by an electrician, but with patience and research you can safely do this yourself. Numerous online resources are available to research the topic.
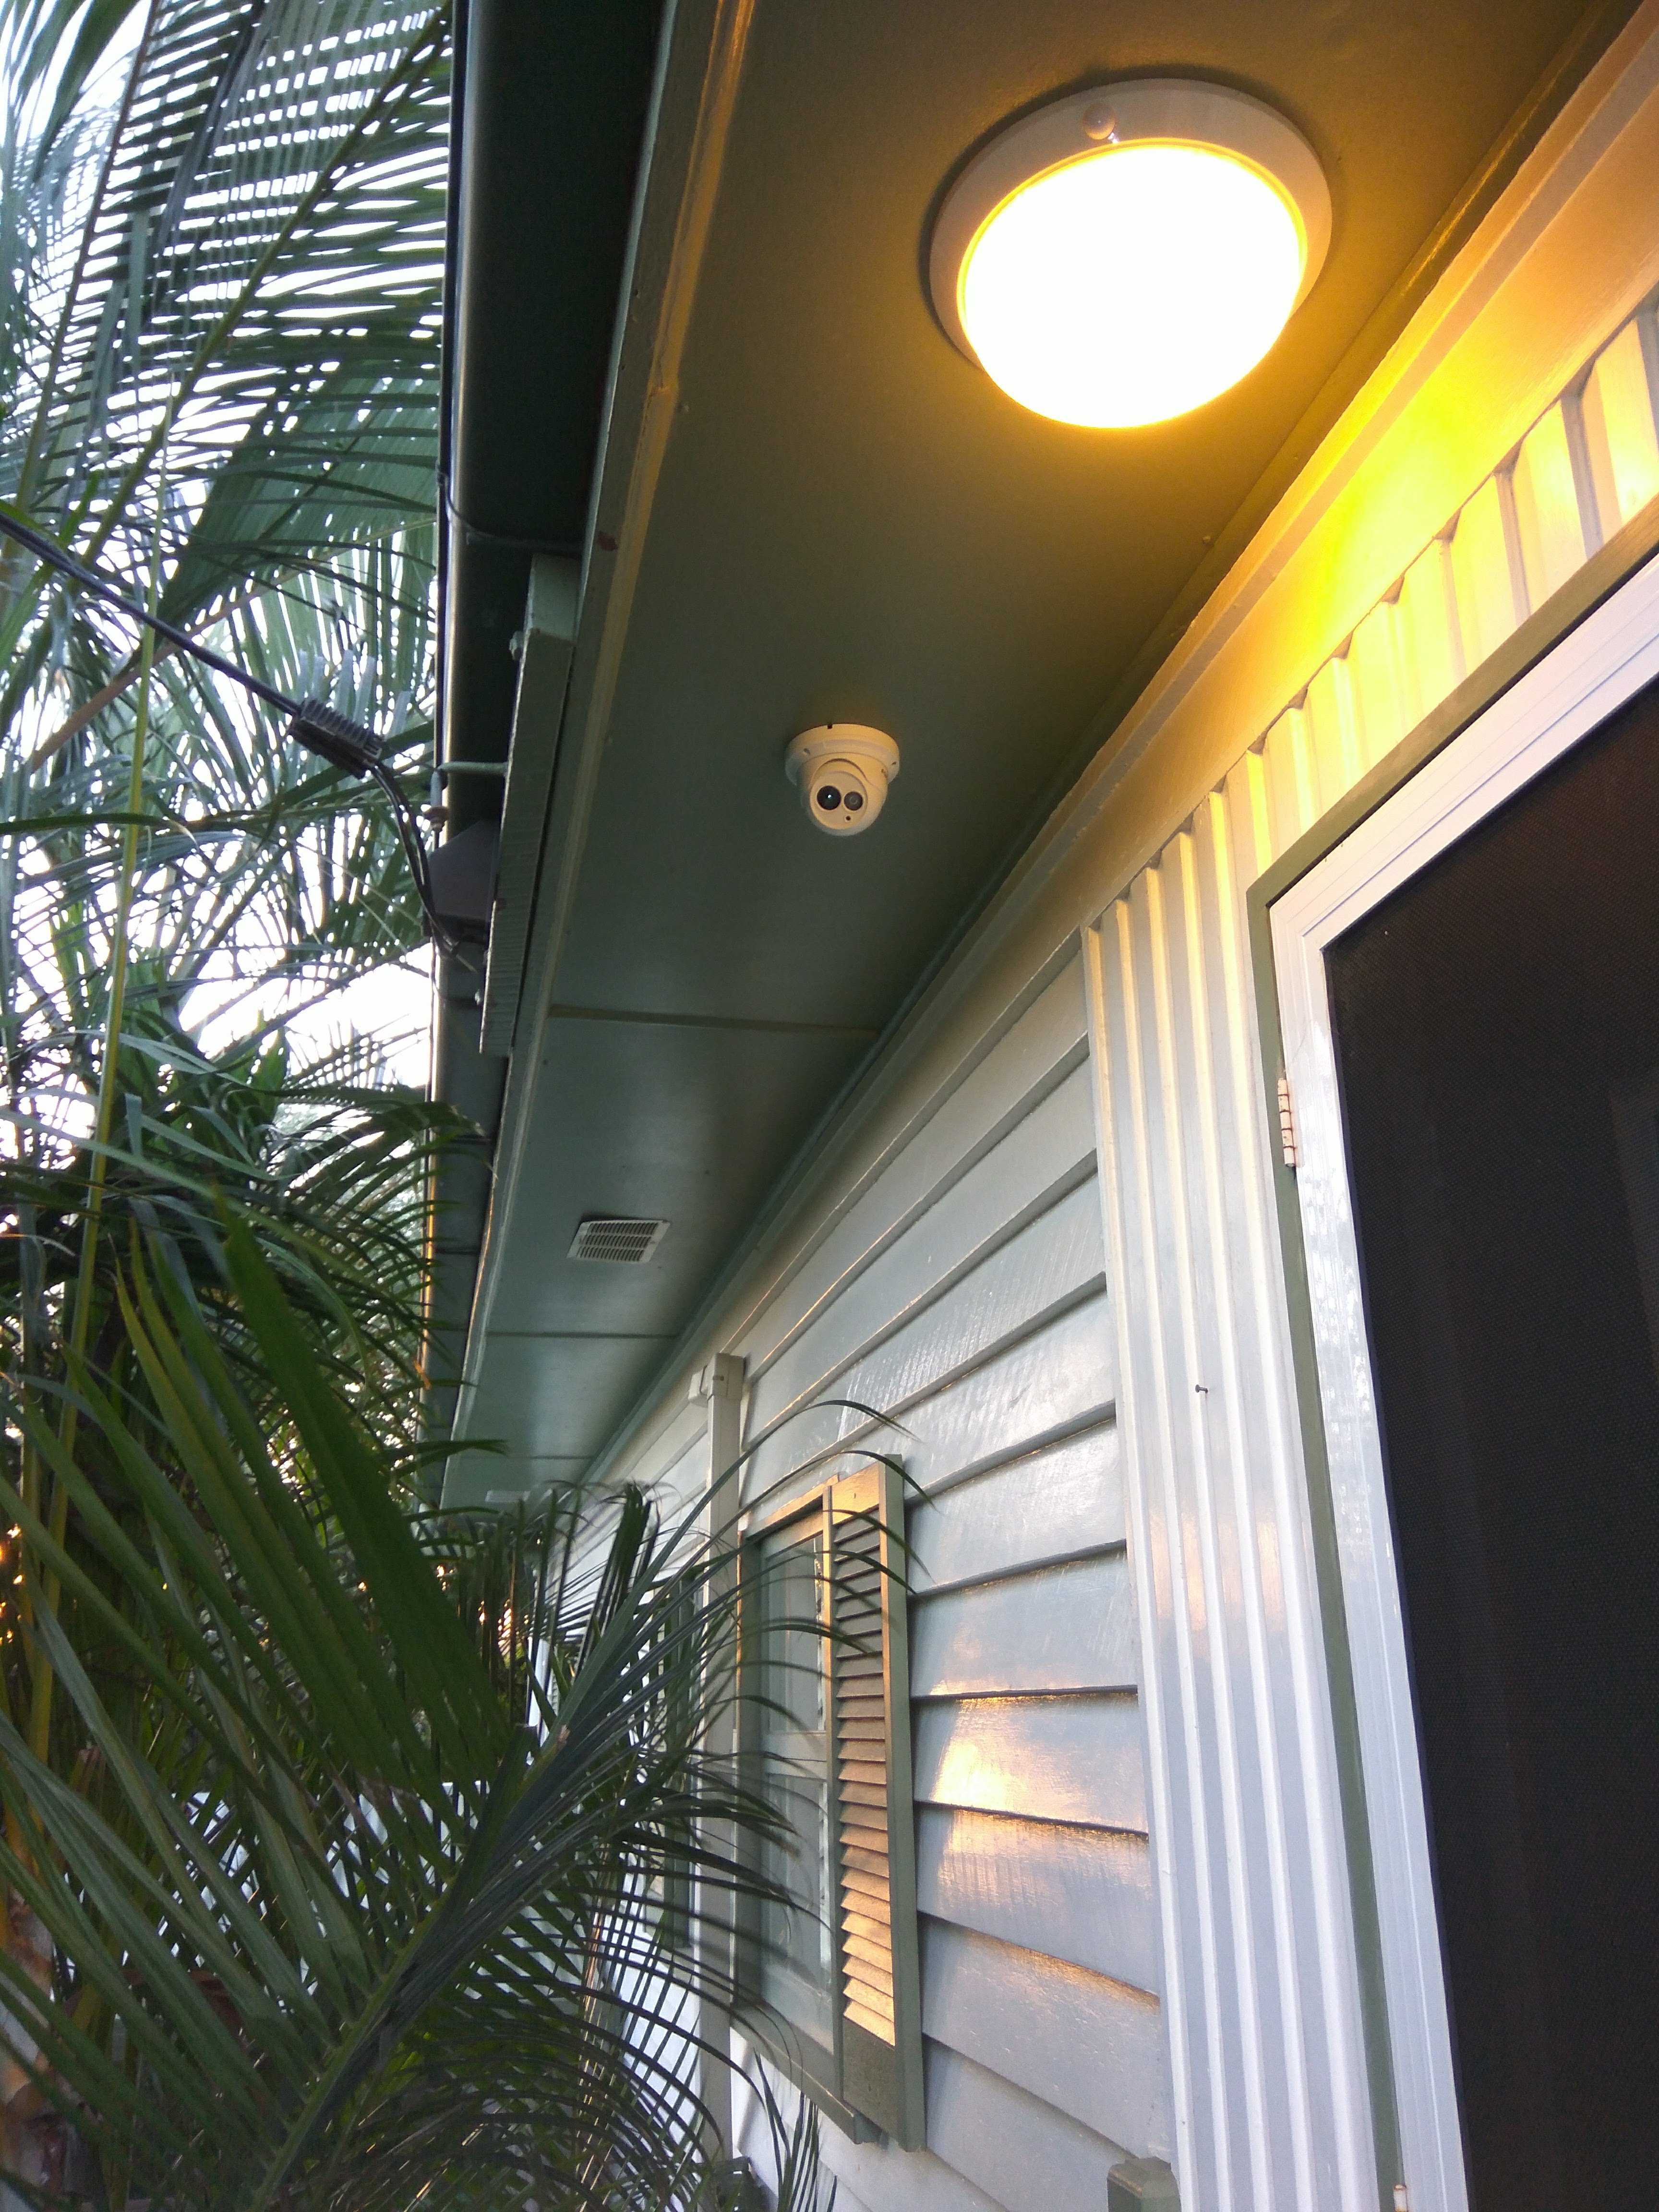
Cameras are of two types: analog or digital. Analog cameras need more hardware to operate on a network based system. For video monitoring, I prefer digital cameras as they connect using ethernet, offer flexible configuration and generally cost the same if not less. I chose cameras powered over ethernet (PoE) which means I can provide power and communications over CAT6. The open standard for network cameras is ONVIF (https://www.onvif.org). I recommend ONVIF compatible cameras, such as Foscam FI9853EP, to mitigate compatibility issues.
ODROID-HC2 Setup
The ODROID-HC2 is perfectly suited for my CCTV video monitoring system. It offers gigabit network speed, 3.5” or 2.5” HDD/SDD native SATA interface and no unnecessary bells or whistles. I want to store footage for at least 30 days using inexpensive hard drive storage media.
I Initialised the ODROID-HC2 using the latest ODROID-XU4 Ubuntu minimal OS Image. Flash the image onto a microSD using WinDiskImager, then insert into the ODROID along with an ethernet connection and 3.5” hard-drive. Power up with a compatible 12 volt PSU. It took about 2 minutes to initialise the ODROID and on the next boot it had SSH access over a DHCP assigned IP.
Apply any available updates:
$ sudo apt-get update
$ sudo apt-get upgrade
$ sudo apt-get dist-upgrade
Mount the hard-drive. The hard-drive should show up as /dev/sda but run the following command to check:
$ sudo fdisk -lThe following assumes the hard drive shows as /dev/sda. Create a single partition using fdisk. Reference fdisk documentation for partitioning the drive.
$ sudo fdisk /dev/sdaAfter you have a partition, format the partition:
$ sudo mkfs.ext4 /dev/sdaThe ODROID-HC2 only has space for a single hard drive. As such, I just mount the disk referencing /dev/sda. You can mount using the UUID if you prefer. Add the following line to fstab:
$ sudo nano /etc/fstab
/dev/sda /media/CCTV ext4 defaults 0 2
The following script helps park the hard drive on shutdown. Download and install the script:
$ wget https://dn.ODROID.com/5422/script/ODROID.shutdown
$ sudo install -o root -g root -m 0755 ./ODROID.shutdown /lib/systemd/system-shutdown/ODROID.shutdown
I shared the entire hard drive using Samba. This gives me the option to retrieve recordings over a network share.
$ sudo apt-get install samba samba-common-binNext, configure Samba:
$ sudo nano /etc/samba/smb.conf

#===== Share Definitions =====
[CCTV]
comment = CCTV
path = /media/CCTV/
browsable = yes
writable = yes
guest ok = yes
read only = no
Restart the device and ensure you can read/write to the hard drive.
Shinobi Setup
Use the install script to install Shinobi CCTV and associated prerequisites:
$ sudo apt-get install curl

$ bash <(curl -s https://raw.githubusercontent.com/ShinobiCCTV/Shinobi-Installer/master/shinobi-install.sh)
Install all dependencies. I chose the Shinobi Pro branch with the remaining options as defaults. Access the Shinobi administrator view using accessing the link: https://[your-ODROID-HC2-ip]:8080/super on your browser.
Then, add a new account, add the hard-drive to the configuration and save it:
"addStorage": [
 {
 "name": "second",
 "path": "/media/sda/CCTV"
 }
You may also want to change the email settings, API keys and Shinobi superuser password.
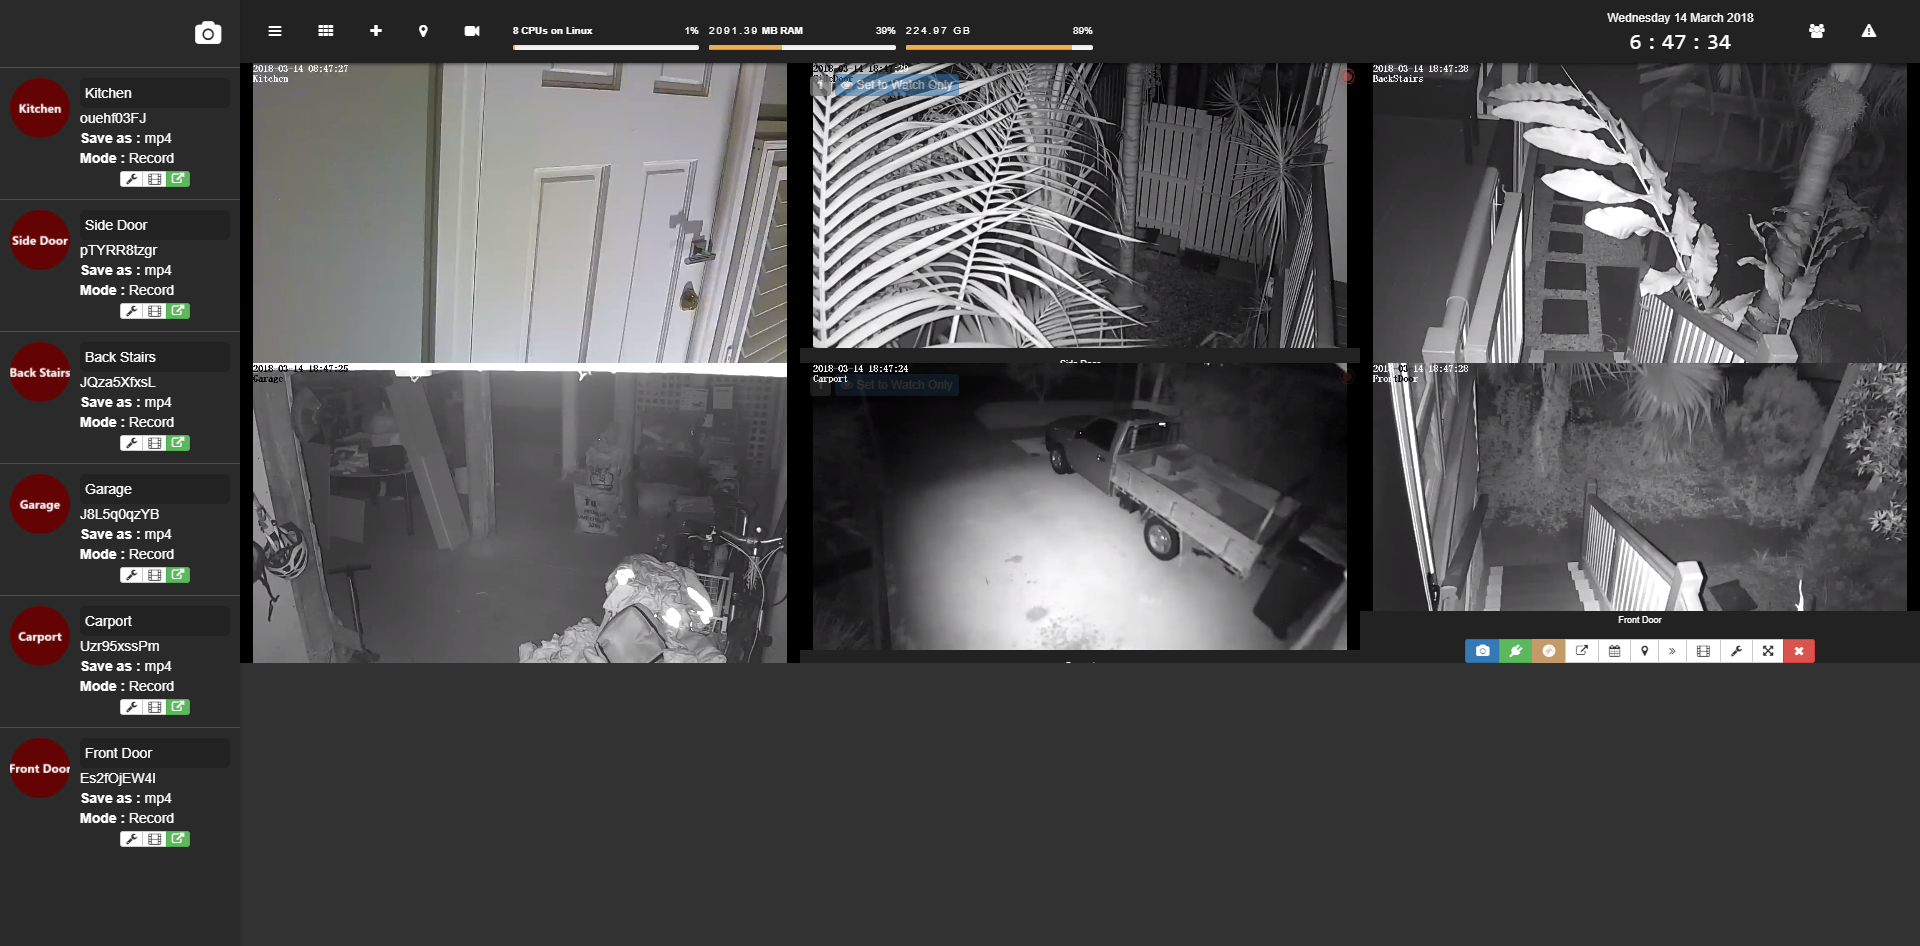
Now login to the primary Shinobi CCTV interface in your browser at https://[your ODROID]:8080 using the new account. Click on the plus [+] symbol with a tooltip ‘Add Monitor’. Configure your camera as follows (your ideal settings may vary):
Identity
Mode: Record
Monitor ID: (leave default)
Name: (i.e. Front Door)
Retry Connection: 0
Storage Location: second

Input
Input Type: H264 (or that supported by your camera)
Connection Type: RSTP
RTSP Transport: UDP
Username: (Camera login)
Password: (Camera password)
Host: (Camera IP)
Port: (Camera RTSP Port)
Force Port: No
Path: (RSTP Path)
Analyzation Duration: 100000
Probe Size: 100000
Accelerator: No

Stream
Stream Type: FLV
FLV Stream Type: Websocket
Max Latency: 20000
Video Encoder: Copy
Audio Encoder: No Audio
TV Channel: No

Stream Timestamp
Enabled: No

Stream Watermark
Enabled: No

JPEG API Snapshot (cgi-bin)
Enabled: No

Recording
Record File Type: MP4
Video Codec: Copy
Audio Codec: No Audio
Double Quote Directory: No
Recording Segment Interval: 15

Custom
(leave blank)

Logging
Log Level: (set to silent once camera is stable)
Save Log in SQL: No
You will need to review your camera setup manual to establish options. The JPEG API should work for most cameras, but unfortunately not mine. I prefer UDP for camera streams. If you plan to stream over the internet or route through a busy LAN, choose TCP. HTTP Live Streaming (HLS) is supposed to be superior to Flash Video (FLV) streaming but I could not make it display smoothly.
There are many more customizations for Shinobi. You can configure a motion detector, email alerts and customer scripting to name a few. I found the following Shinobi pages useful:
https://goo.gl/47M2Ty https://shinobi.video/docs/cameras https://goo.gl/kvKax1
You will need to setup port-forwarding or other methods to view Shinobi over the internet. I was able to view all streams smoothly at from a friend’s place. Viewing live streams on a mobile phone however seems to be problematic but recording playback is flawless. I expect that mobile phone live view should improve with tweaking or future updates.

I am capturing and recording 6 cameras at 720p 2M 15fps. My ODROID-HC2 sits between 1% to 5% CPU and 36% memory use. So far the system has run stable for 2 weeks with no signs of degrading. No crashes, reboots or other abnormal behaviour. It took a few days of trial and error to get the system running the way I like.
For comments, questions, and suggestions, please visit the original article at https://goo.gl/tJprLA.
Be the first to comment