

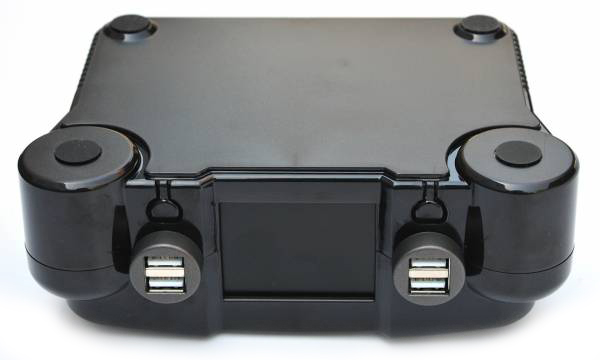
The OGST Gaming Console Kit for the ODROID-XU4 kit allows you to build your own gaming console with a powerful ODROID-XU4 or ODROID-XU4Q. Its attractive design includes a fancy 2.4” LCD to show programmable game logo animations, and is specifically designed to work with the popular ODROID GameStation Turbo disk image. The Gaming Console Kit is available at the Hardkernel store for USD$24, and pairs well with the new GameSir G3w USB Controller Joystick. The ODROID-XU4 or XU4Q, microSD card or eMMC module, 5V/4A PSU and USB game controller/joystick are not included.
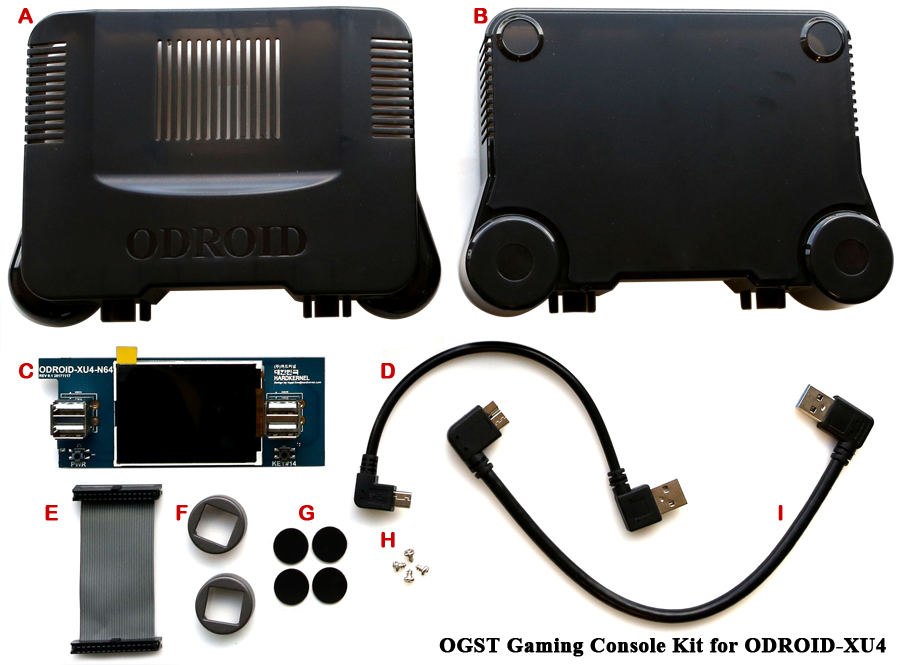
Kit contents
- A. Top case
- B. Bottom case
- C. OGST-XU4 LCD Board
- D. USB2.0 extension cable
- E. 30-pin flat cable
- F. USB-port cover
- G. rubber feet set
- H. screws
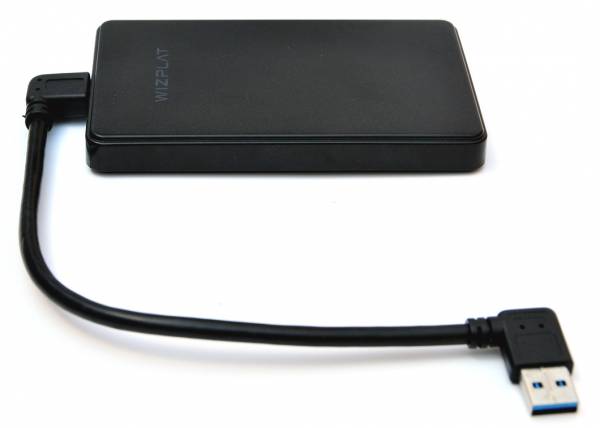
- I. USB3.0 extension cable (For optional 2.5" USB HDD storage)
For more information, please visit our GameStation WiKi page.
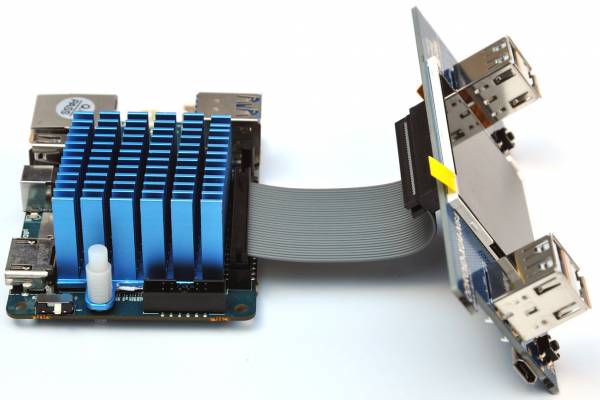
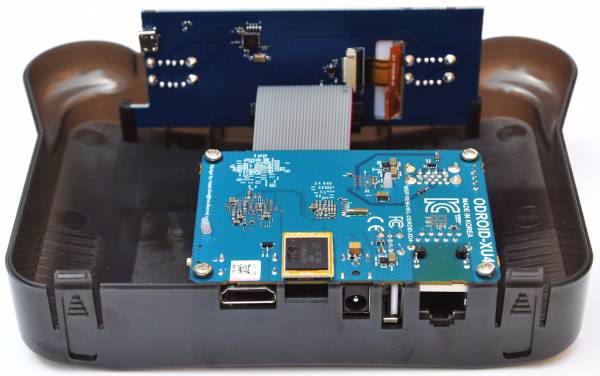
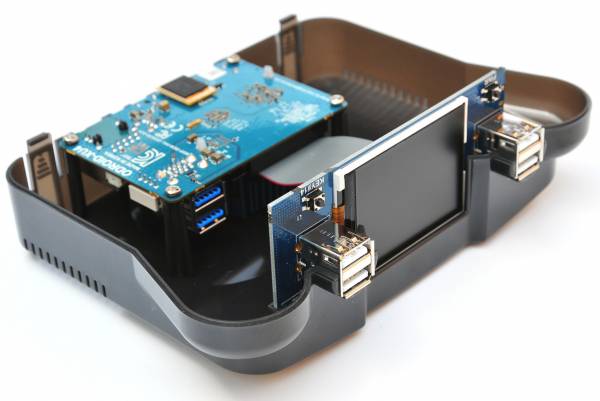
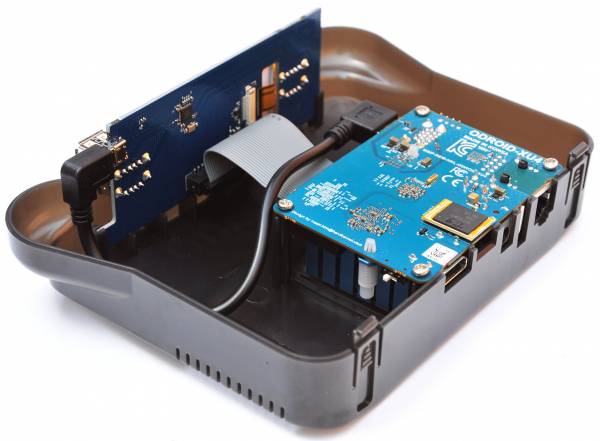
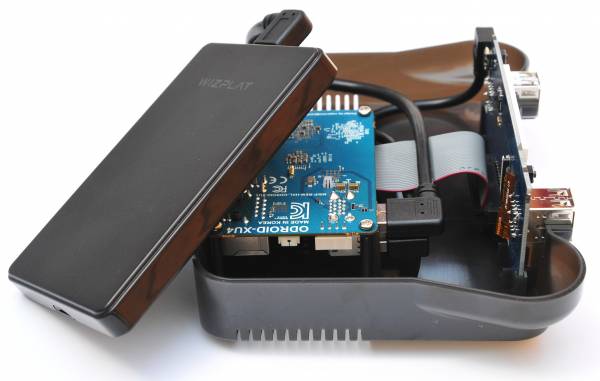
Assembly
Software
ODROID GameStation Turbo is an entertainment based ODROID OS image aimed for watching movies on Kodi, listening to music, playing games from your Desktop as well as playing retro games over different emulators from within Kodi, EmulationStation or Attract-Mode as a frontend.
The image can be downloaded from the ODROID Forum in the ODROID GameStation Turbo for XU3/XU4 thread. Scroll down until you find the text shown in Figure 9.

Click to select one of the links. The two links here should be identical but if one is slow for you, you can try the other link. The md5, sha512 and sig files are for people that want to make sure the downloaded file is not corrupted and wasn't tampered with, but you can ignore them if you don't know what to do with them.
Once you've downloaded the image, follow the guide at the easiest way to install new OS to flash the image on your SD card or eMMC card. You'll need at least an 8GB SD/eMMC card to use this image, but due to the nature of the image (games and videos) I suggest using larger SD/eMMC cards such as 32 GB or 64 GB (or using an additional external storage unit).
If you use an SD card, I suggest using a SanDisk Ultra (not Ultra Plus, or Extreme), since it seems the most compatible brand/model available (it's also rather cheap), and other models may have issues (limitation of the XU4 hardware). Once you've flashed the image on your SD or eMMC card, plug it into the ODROID and boot the system.
When you first boot the image, it will boot into the desktop and start Kodi, and will then reboot after a short while to finish some first boot maintenance. You don't have to do anything, it will happen automatically and you should simply wait for the system to reboot. This may take up to 5 minutes, but generally should happen much faster.
After the system is rebooted, it will boot back into the desktop and into Kodi. Exit Kodi by pressing "S" on the keyboard and select Exit/Quit Kodi. You're now on the desktop of your OS and can access all programs that you want, like the web browser, music player, install new programs, or can go back to Kodi to watch movies. But let's start with some basics and then put some games on the system so we can play them.
At this point, you will want to be connected to the Internet. Either plug in your WiFi Module or Ethernet cable onto your ODROID. On the desktop of your OS, make sure you are connected to the internet. To do so, click on the top right menu to check/connect to internet. Select the desired WiFi network and enter your password.
Next, open a new terminal window, either by pressing the MATE Terminal symbol in the Quickstart list on the top of the screen, or on the Desktop, or by pressing the key-combination CTRL + ALT + T. In the newly opened terminal Window type the following commands to upgrade the system.
$ su
$ apt-get update && apt-get upgrade && apt-get dist-upgrade
This will log you in as root and ask for your root password which is "odroid" (without quotes) by default. After you're logged in as root, the system will update to make sure you have all the latest drivers and programs installed. After all the updates are installed, reboot the system.
Installing ROMs
To play some retro games, you first have to copy so called ROM files onto the system into the correct folders. A list of supported ROMS can be found on the ODROID GameStation Turbo for XU3/XU4 site where you find a table with the supported systems, as shown in Figure 10.

Let's focus on one of my favorite consoles, Gameboy Advance (GBA), and use this as an example. As you can see in the list above, ROMS for GBA need to be placed in the folder /home/odroid/ROMS/GBA and have to have a file extension of .gba. Other extensions such as .zip, .rar or .7z are not allowed at this point.
There are several different ways to get ROMs on your system. You can download them from a web browser, which is the easiest way. Download the ROM you want to use, then place the extracted file in the folder mentioned above.
If you already have a collection of ROMS on a PC and don't want to download them again, you can copy from your PC to your ODROID. In Windows, download and install a tool called WinSCP. It will allow you to connect from your Windows PC to your ODROID and copy files over to it. For this, start WinSCP on your Windows PC and create a new connection, as shown in Figure 10.
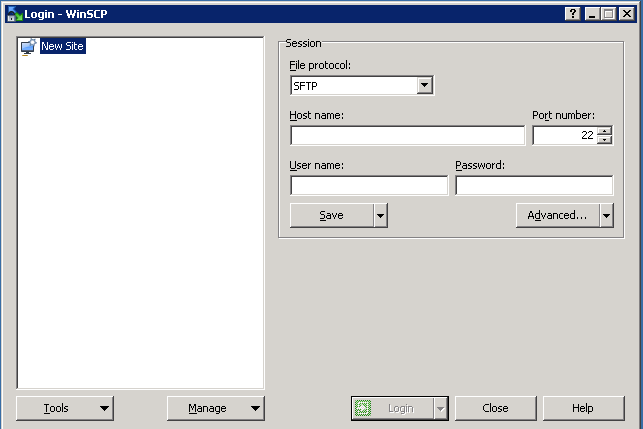
For the Host name, use the IP address of your ODROID. To find the IP, go to your ODROID, open a terminal and type the following command, which will output information similar to Figure 11:
$ ip addr show
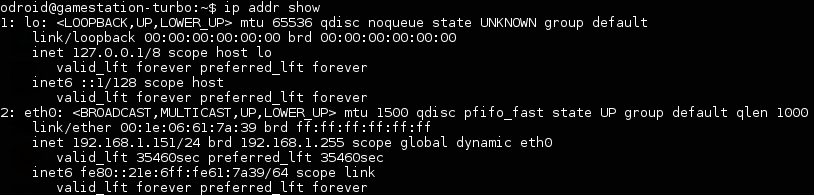
If you're connected via LAN, the IP of your ODROID can be found under eth0:, or if you're connected via wireless network, the IP will be under wlan0:, below the label inet. In the above example the IP would be: 192.168.1.151. The user name and password should both be "odroid" (without quotes), if you haven't changed it yet. You can now navigate on your ODROID to /home/odroid/ROMS/GBA/ and copy your games from your collection on your PC over to the ODROID.
For Linux users, I assume you already know how to copy files from one PC to another. Tools like "scp" or "mc" should be common to you and you should know how to copy files. You can alternative use Filezilla, a file manager available for Windows, Linux and Mac which can be used like above WinSCP on all systems.
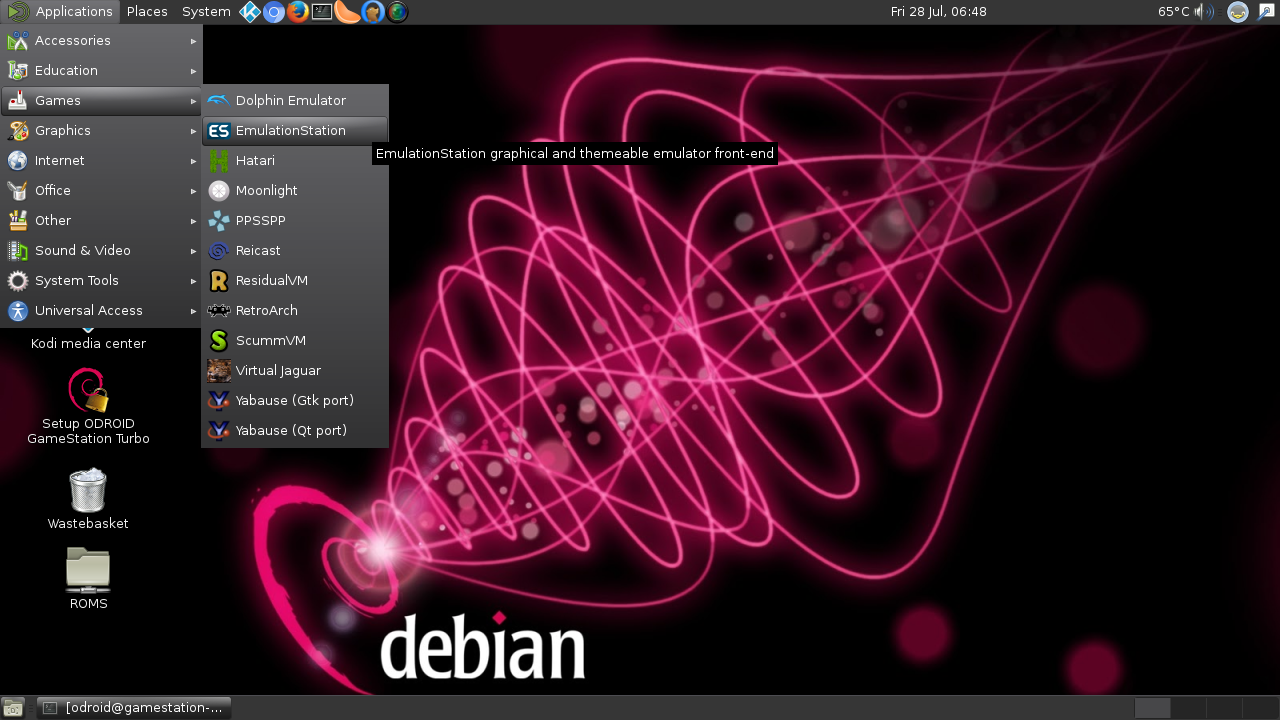
Once you've copied the ROMS over to the ODROID you're ready to go! On the OS screen, open up EmulationStation. Go to Applications -> Games -> EmulationStation and your games should already be listed.
When you start EmulationStation for the first time, you will be asked to setup your controller. Please note that this does not affect the emulator and games you want to run, but is only used to navigate inside EmulationStation. You will need the directions (up, down, left, right), the select and start button (for menus), and A and B (select and go back). Every other key that EmulationStation asks you to configure is not used, and should be skipped by pressing and holding one button/key until everything that is not needed is skipped (not defined).
At this point, you should be ready to play games with your new OGST Gaming Console Kit for the ODROID-XU4! For more information on settings up ODROID GameStation Turbo, please visit https://www.electromaker.io/blog/article/getting-started-with-gamestation-turbo-on-odroid-xu4-gamestation-turbo-xu4-installation. There is also an in-depth review of the OGST Gaming Console Kit at https://www.youtube.com/watch?v=AbzSgE2KCYo&feature=youtu.be.
Be the first to comment