

With the ODROID-N2 inevitably on its way, you may face the same problem I did: you have a complex setup running fine on an XU4 and you want to migrate it to a newer 64-bit platform. In my case, I want to migrate my XU4 NAS (which has too many services and tweaks to reproduce) to an ODROID-N2.
The best way to do it is to go with a clean install, but since this is Linux, you can migrate from 32 to 64 bits with a complex process called crossgrading. The requirement is for the destination system to be able to natively run instructions from the source system (so 64->32 bit won't work). Before you begin, be forewarned: it's not a process for the faint-hearted, and you must have a backup of your data because it doesn't always go as planned. Having serial access may also be necessary because you'll be uninstalling most of your system in the process.
The 64-bit kernel
You can start off by making a clone of the system you want to crossgrade. You can use a tool like odroid-backup (https://github.com/mad-ady/odroid-backup) or dd. You'll need to prepare a destination sd card or eMMC module with a working image for your target platform (preferably with the same distro version). For example, to crossgrade a Ubuntu 18.04 armhf system you can start with a 18.04 arm64 image. Boot it, perform all kernel, uboot, and boot.ini updates and copy some files to a safe location (preserving permissions):
# uname -a
# apt list --installed | cut -d '/' -f 1 | tee ~odroid/armhf_packages.txt
# tar -cvf ~odroid/modules.tar /lib/modules
# tar -cvf ~odroid/firmware.tar /lib/firmware
# tar -cvf ~odroid/packages.tar /etc/apt
# tar -cvf ~odroid/include.tar /usr/include/linux/
Your arm64 kernel has to have "CONFIG_COMPAT=y" enabled in its config, so that it can run 32 bit code. You can check with:
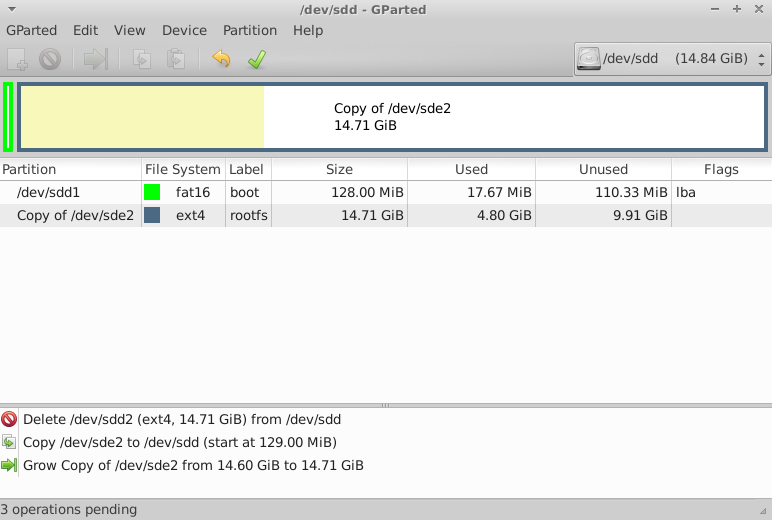
$ zcat /proc/config.gz | grep CONFIG_COMPATNext, turn off the arm64 system and on a separate PC overwrite the rootfs partition (typically the second partition) with the rootfs of the armhf system (Figure 1). Of course, make sure you save the files you just created before overwriting the partition (not after, like I did).
After copying is done, you'll have to unpack the tar files to the target root filesystem so that the 64bit kernel can find its modules when booting:
# cd /path/to/armhf/rootfs
# tar -xvf ~/modules.tar
# tar -xvf ~/firmware.tar
# tar -xvf ~/packages.tar
# tar -xvf ~/include.tar
In case the armhf partition has a different UUID than the arm64 rootfs, you will need to fix this either by overwriting the armhf UUID, or by changing bootargs in boot.ini. In my case, I chose to overwrite UUID with the UUID that the arm64 system expects:
# e2fsck -f /dev/sdd2
# tune2fs /dev/sdd2 -U a130ca78-0841-400a-8823-06a304a00850
You are now ready to boot into a hybrid system: a 64-bit kernel with a 32-bit user space. It's best to use a serial connection to the box to identify and troubleshoot any problems. It's also best to leave unconnected any peripherals (external disks, etc) at this point. I had to manually disable watchdog before it could boot stably on the new hardware.
# rm -f /path/to/armhf/rootfs/etc/systemd/system/default.target.wants/watchdog.serviceOnce you boot, check the network settings to make sure you're not duplicating the IP address in your LAN (in case it was static) and we can start converting the packages to 64 bit.
64-bit conversion
Now comes the tricky part: you have to reinstall most packages while the system is running. Thankfully somebody prepared a script that automates most of the job, but it was designed for i386 to amd64 migration. I made a fork and some changes (mostly renaming i386 to armhf and amd64 to arm64) and it can do the job on the ODROID.
Before you begin, you should take a look at /etc/apt/sources.list* and disable specific ODROID repositories for the armhf platform (e.g. http://deb.odroid.in/5422-s for XU4) and enable repositories (if any) for the arm64 board. You should also check that universe, restricted and multiverse components are enabled for ubuntu to get better chances of finding all needed packages.
You can clone the script from here on the target system:
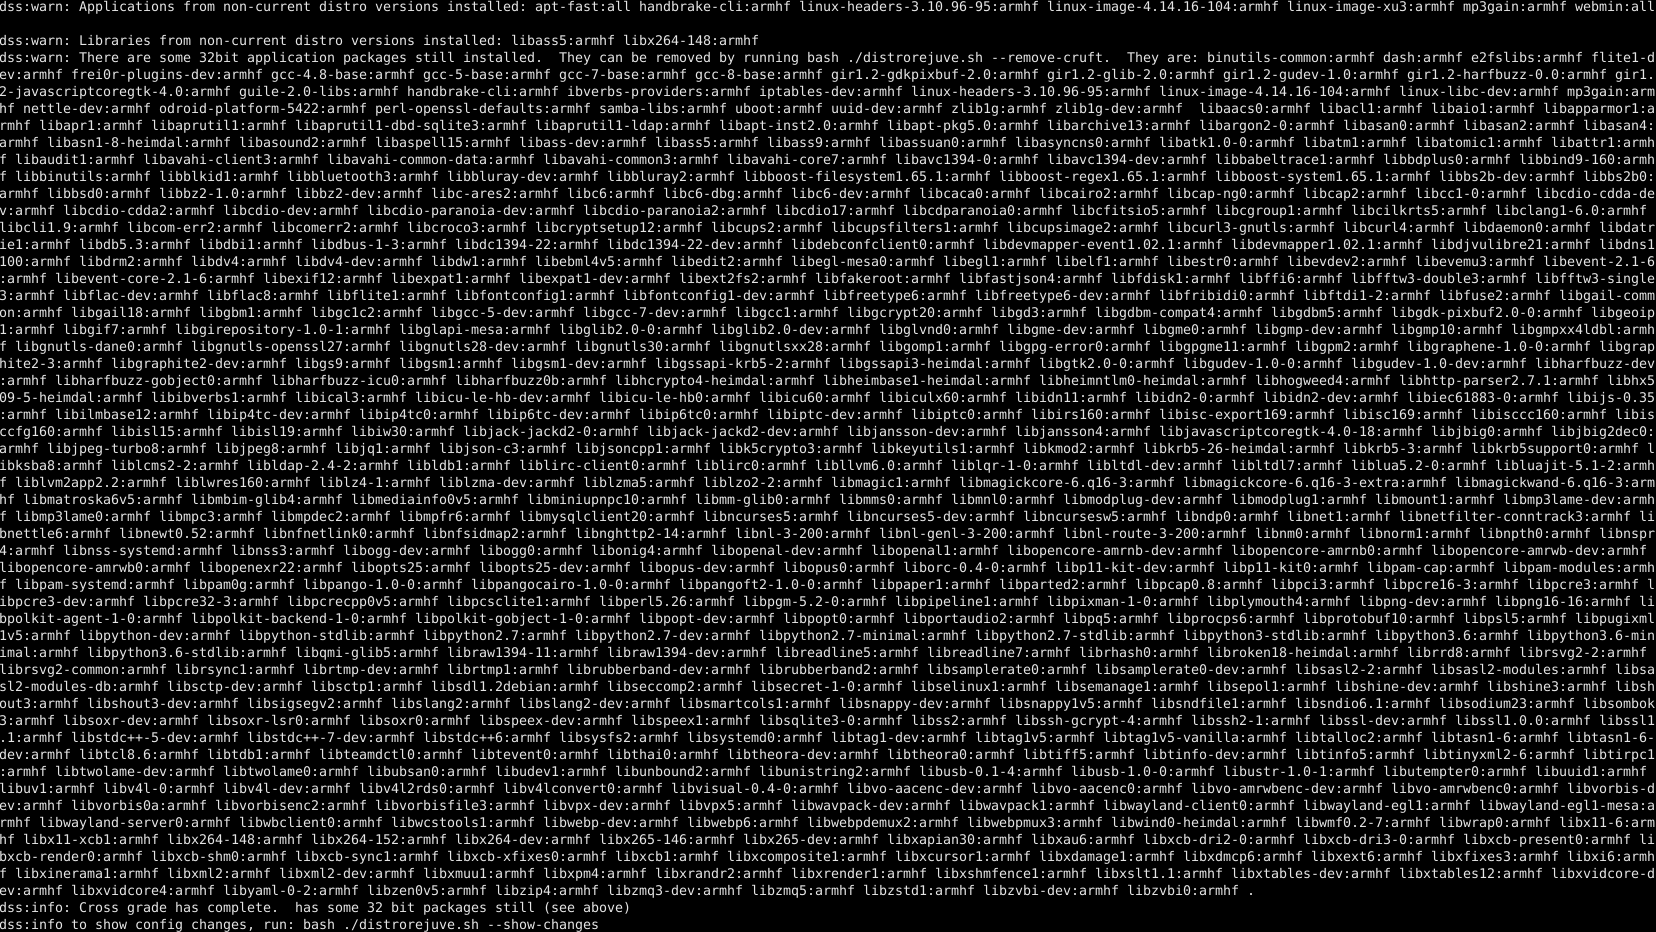
# apt-get install git
# git clone https://github.com/mad-ady/distrorejuve.git
# cd distrorejuve
# ./distrorejuve
When you run it without arguments, it checks your system and makes some recommendations to help with the migration. For instance, in my case it recommended that I uninstall a long list of X11 packages, that I can reinstall later, which I did.
You're now ready to start the crossgrading process. Make sure the network is connected, that there is plenty of free disk space (a few gigs at least) and that there is nothing that can interrupt the process (run from serial or from within a tmux/screen session).
# ./distrorejuve.sh --to-64bit | tee -a distrorejuve.logOnce it runs, it might still complain that some deb packages are not installed from apt and they're best removed. Some of them might be critical - like kernel packages, so be on the lookout with what you're removing. You can ignore it and run again with IGNORECRUFT=Y.
# IGNORECRUFT=Y ./distrorejuve.sh --to-64bit | tee -a distrorejuve.logExpect the script to complain some more and ask you to manually uninstall some packages. Make a list of them so that you can install them back again when you're done. The script asked me to remove wpasupplicant (which took down Network Manager), so make sure networking is handled by systemd-networkd or static.
Once the script starts doing its thing, you can watch endless screens of packages being removed, various dependency errors and ultimately packages being installed as arm64 again. This process will take a while depending on how many packages you had installed.
The inevitable failure
The crossgrading process may take a few hours, but in my case it seemed to get stuck while trying to install libclang1-6.0 (it tried to install it over and over again). The error message was:
Unpacking libclang1-6.0:arm64 (1:6.0-1ubuntu2) ...
dpkg: error processing archive /var/cache/apt/archives/libclang1-6.0_1%3a6.0-1ubuntu2_arm64.deb (--unpack):
trying to overwrite shared '/usr/lib/llvm-6.0/lib/libclang-6.0.so.1', which is different from other instances of package libclang1-6.0:arm64
The file in question is a symlink to a armhf library:
# ls -l /usr/lib/llvm-6.0/lib/libclang-6.0.so.1
lrwxrwxrwx 1 root root 43 Apr 6 2018 /usr/lib/llvm-6.0/lib/libclang-6.0.so.1 -> ../../arm-linux-gnueabihf/libclang-6.0.so.1
I manually removed the file (from a separate shell) and the upgrade process chugged along:
# rm /usr/lib/llvm-6.0/lib/libclang-6.0.so.1
# ls -l /usr/lib/llvm-6.0/lib/libclang-6.0.so.1
lrwxrwxrwx 1 root root 41 Apr 6 2018 /usr/lib/llvm-6.0/lib/libclang-6.0.so.1 -> ../../aarch64-linux-gnu/libclang-6.0.so.1
You might get different problems that you must resolve, so this is not a complete guide.
Once distrorejuve finishes its job, it will likely tell you that you are left with a bunch of armhf packages that you can remove.
You should also run the following command to see which configuration files differ from the regular packages.
# bash ./distrorejuve.sh --show-changesIn my case, apt was broken and still had a bunch of broken packages that needed attention. For instance, running the following command resulted in complaints about libcdio-dev which tried to overwrite a shared config file as shown in Figure 3.
# apt-get --fix-broken install

The way around this problem was to uninstall the offending packages:
# apt-get remove libcdio-dev:armhf libcdio-cdda-dev:armhf libass-dev:armhf libcdio-paranoia-dev:armhf libgnutls28-dev:armhf libharfbuzz-dev:armhf libxml2-dev:armhf libbluray-dev:armhf libicu-le-hb-dev:armhf librtmp-dev:armhf samba-libs:armhf libcdio-cdda-dev libcdio-paranoia-dev ibverbs-providers:armhf ibverbs-providers:armhfAfter this, apt managed to configure all the leftover packages. You can also take the time to remove old 32-bit packages:
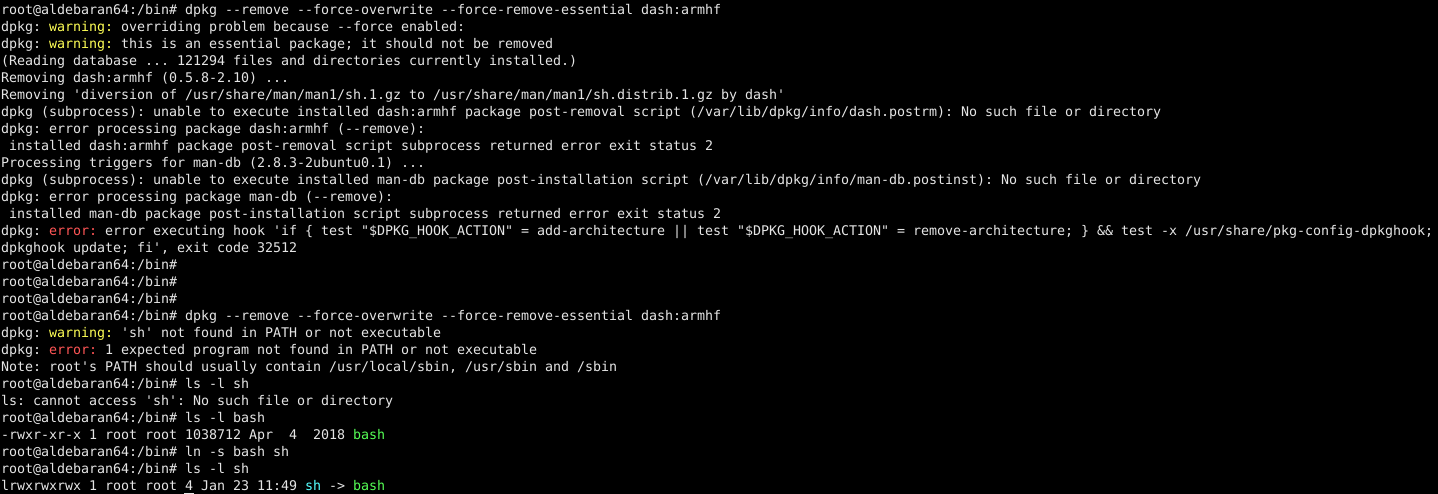
# ./distrorejuve --remove-cruftI was having problems removing dash:armhf, so I pointed /bin/sh and /bin/sh.distrib to /bin/bash instead of dash. If there is no valid /bin/sh you're going to have lots strange failures, including with apt.
At this point, you may want to do a bit of checking to make sure the system is in a sane state. You will need to check the following:
- You still have basic packages installed (vim, ip, bash, netplan, etc). I was missing vim, so I needed to reinstall it.
- Check that the kernel, uboot, bootini packages look fine. In my case I'm on an N1 which has no such packages for Ubuntu, but there's a risk that key components have been removed in the crossgrading process and your board is unbootable. Install any missing packages or restore missing files if needed.
Keep your fingers crossed and reboot.
Service checking & fixes
Presumably your board booted without too many problems. If yes, rejoice! If not, restore the backup and try again looking more carefully at what packages get removed (remember, no refunds!).
But still, the system may not be in such great shape. You'll still need to check critical services and see what's missing or what is not working anymore. In my case:
- Apache2 wouldn't start because it was missing libapache2-mod-php7.2 and libapache2-mod-fcgid
- Git was missing and needed a reinstall
- Samba was missing and needed a reinstall (configuration was fine, though)
- Nfs-kernel-server was missing and needed a reinstall
- Transmission-daemon was missing
Remember that you made a backup of the installed armhf packages - now is the time to check that list and compare it with what you have now to see if anything important is missing. Notice the grep filter that ignores libraries, because those are usually a dependency of something else. On the arm64 system run:
# apt list --installed | cut -d '/' -f 1 | tee /root/arm64_packages.txt
# diff -u arm64_packages.txt armhf_packages.txt | egrep '^\+' | grep -v '^\+lib'
You should review the list and install the needed packages before you proceed.
32-bit legacy programs
There may be programs that were compiled manually and not installed as deb packages. In this case, you'll need to find them and recompile them for arm64. Assuming that they're somewhere in /usr/local (or in known paths), you can find them with:
# find /usr/local -type f -executable -exec file {} \; | grep 32-bit
The problem with these programs is they won't run because crossgrading has removed the armhf libc (/lib/ld-linux-armhf.so.3) and libraries they depend on. If you try to run one of them you'll get an unhelpful "No such file or directory" error - which refers to the missing loader, not the program itself. If you can't recompile them, you can add armhf as a foreign architecture and install the missing libc6 and library dependencies, but you end up with a partly hybrid system again.
# dpkg --add-architecture armhf
# apt-get update
# apt-get install libc6:armhf

GPIOs and WiringPi
Modules (such as lirc_odroid) and programs that make use of GPIO pins will need to be manually checked because GPIO pin numbers may differ from board to board. Also, if you're using WiringPi you'll need to get and install the correct version for the arm64 board.
Configuration pointing to 32-bit dirs
There are some programs which might fail to run because their configuration points to 32 bit libraries. Lirc may fail to start because it used to point to /usr/lib/arm-linux-gnueabihf/lirc/plugins. You will need to adjust /etc/lirc/lirc_options.conf and change plugindir = /usr/lib/aarch64-linux-gnu/lirc/plugins and restart lirc. KDE may point to 32 bit shared libraries and may result in broken panels as well. (https://wiki.debian.org/CrossGrading#Caveats_and_Known_Problems)
Perl 32-bit libraries
Perl XS libraries that were installed from CPAN might be broken as well. These libraries have some compiled code in them that is architecture dependent. You can find them out with:
# perldoc perllocal | grep XS
Special data types
Other programs may encode their data using structures which depend on the platform's size (or use 32 bit timestamps). One such data type is rrd, which holds round-robin time series data. Tools like munin or cacti generally write to rrd files. The 64-bit rrdtool program can't work with rrd files created on 32-bit systems, so you'll need to export all your rrd data to xml while still running on a 32bit system and recreate the rrd on the 64bit system. You can do this on the armhf system:
# cd /path/to/rrd/files
# find . -type f -name '*.rrd' -exec rrdtool dump {} {}.xml \;
You can recreate them on the arm64 system with:
# find . -type f -name "*.rrd.xml" -exec sh -c 'file="{}"; newfile=`basename $file .xml`; dir=`dirname $file`; rrdtool restore "$file" "$dir/$newfile"' \;
Conclusion
How did the process go for me? Better than expected! Should you try it? If you have time and a backup, I don't see why not. To be fair, I only tried it on a "server" system so far, but with the right packages (and config tweaks in /etc/X11/xorg.conf) it should work for a desktop system as well. More info and help are available in the support thread at https://forum.odroid.com/viewtopic.php?f=55&t=33861.
Be the first to comment