

Requirements
Tools:
- A small screwdriver set that contains a few small Phillips head screwdrivers.
- A clean static free work surface.
- Monitor or TV with HDMI support to test the device.
- Mac SD card image writing software. I use balenaEtcher, it is free and works great.
- Window SD card image writing software. I use Win32 Disk Imager, it is free and works well but can be a bit finicky with very large drives.
ODROID items:
- ODROID-XU4 / ODROID-XU4Q x1
- Case x1
- 64GB Micro SD Card x2
- HDMI Cable x1
- Power Supply 5V/4A x1
- GameSir Wired Controller x1
- USB WiFi Module x1
- SD Card Reader x1
The total project cost as described above and not including shipping or tools you do not have is around $94. If you exclude the game controller or already have one you can save around $17. Also you do not need two micro SD cards. I like to have a spare one, in case one goes bad and the dual set listed above has a great price. Also, the card is well rated and from my personal experience I have only had one fail unexpectedly out of 12 purchases so I have been using them regularly during the configuration and development of these devices. If you have an HDMI cable, a micro USB cable, and a 5V/4A 5.5mm barrel AC adapter then you can save even more on the cost of this project. So while the price listed is around $94 you can probably get it done for around $80 if you have some parts already. Not too bad once you see what this thing can do.
Introduction and Tutorial Goals
This tutorial will cover the setup, and construction of the game console from a hardware and software point of view. Now unlike the Monku Retro 1 and 2, we will not be adding any special hardware buttons. The ODROID-XU4 comes with a hard reset button built in, so that is already done for us. As for the custom control button I have not found a good location for it using the current case. However, this device is much more powerful than the ODROID-C1+ or even the ODROID-C2, so for now we will not add one to the R3. We will also cover all the software setup including installing and configuring Ubuntu, retroarch, and antimicro. Let us take a look at some of the features of the device we are working building. And look at that emulator list!
R3 / ODROID-XU4 Features:
- ODROID Goodness!
- Hardware Reset Button
- Support for Atari 2600, Atari 7800, Atari Lynx, ColecoVision, MSX-1, MSX-2, NES, GameBoy, GameBoy Color, Virtual Boy, SNES, GameBoy Advance, WonderSwan Pocket/Color, NEO GEO Pocket/Color, Sega SG-1000, Sega Mark 3, Sega Master System, Sega Genesis, Sega GameGear, NEC Turbo Graphics 16, NEC Super Graphics, PSP, and PS1 emulators configured and ready to go.
- Retroarch with XBM, custom scripts to monitor the software button, start retroarch, maintain antimicro.
- Configured for low memory usage and for use with included controller.
- Full linux desktop environment gamepad control when not in game kiosk mode via antimicro.
- WiFi network connectivity.
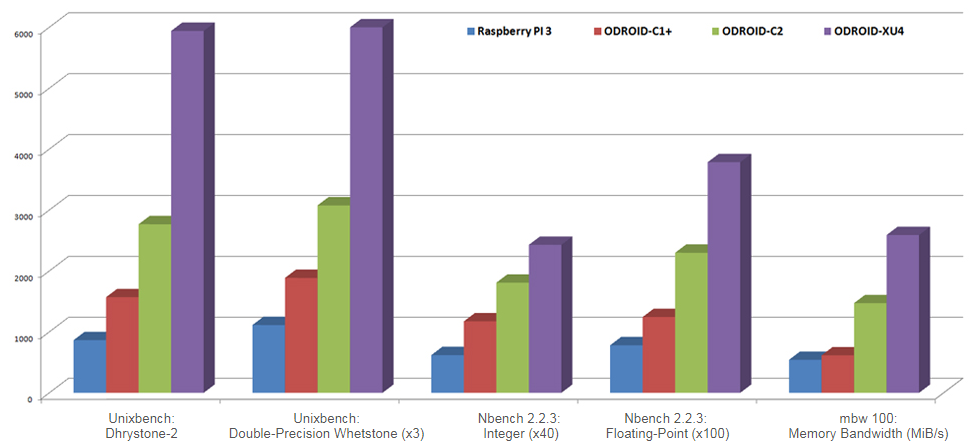
Take a look at the performance specs of this device when compared to some other common devices.
The Hardware
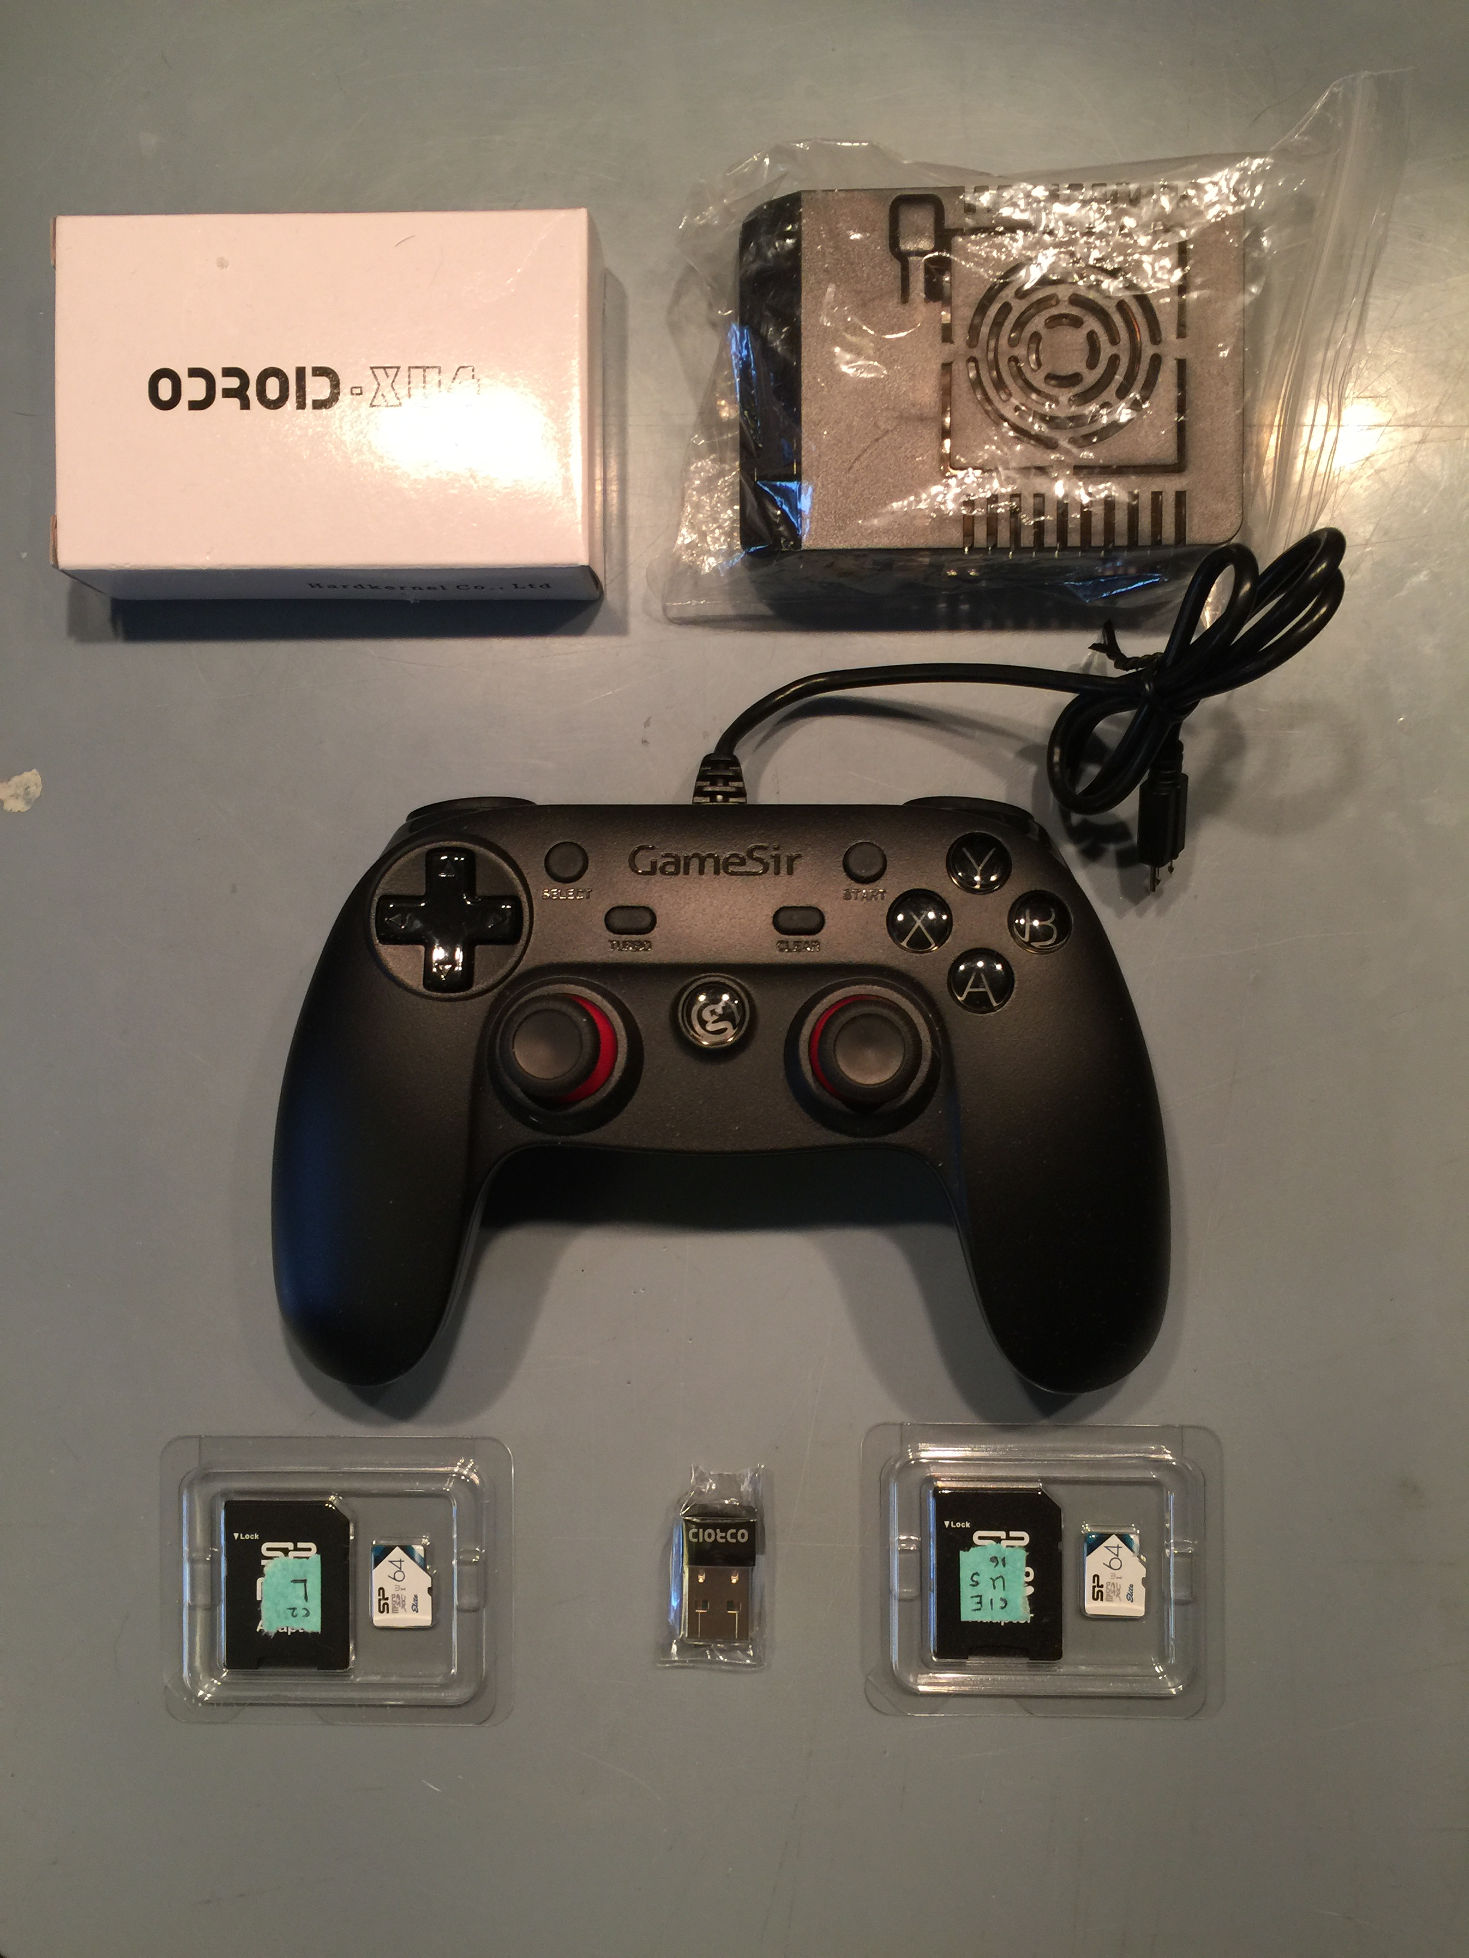
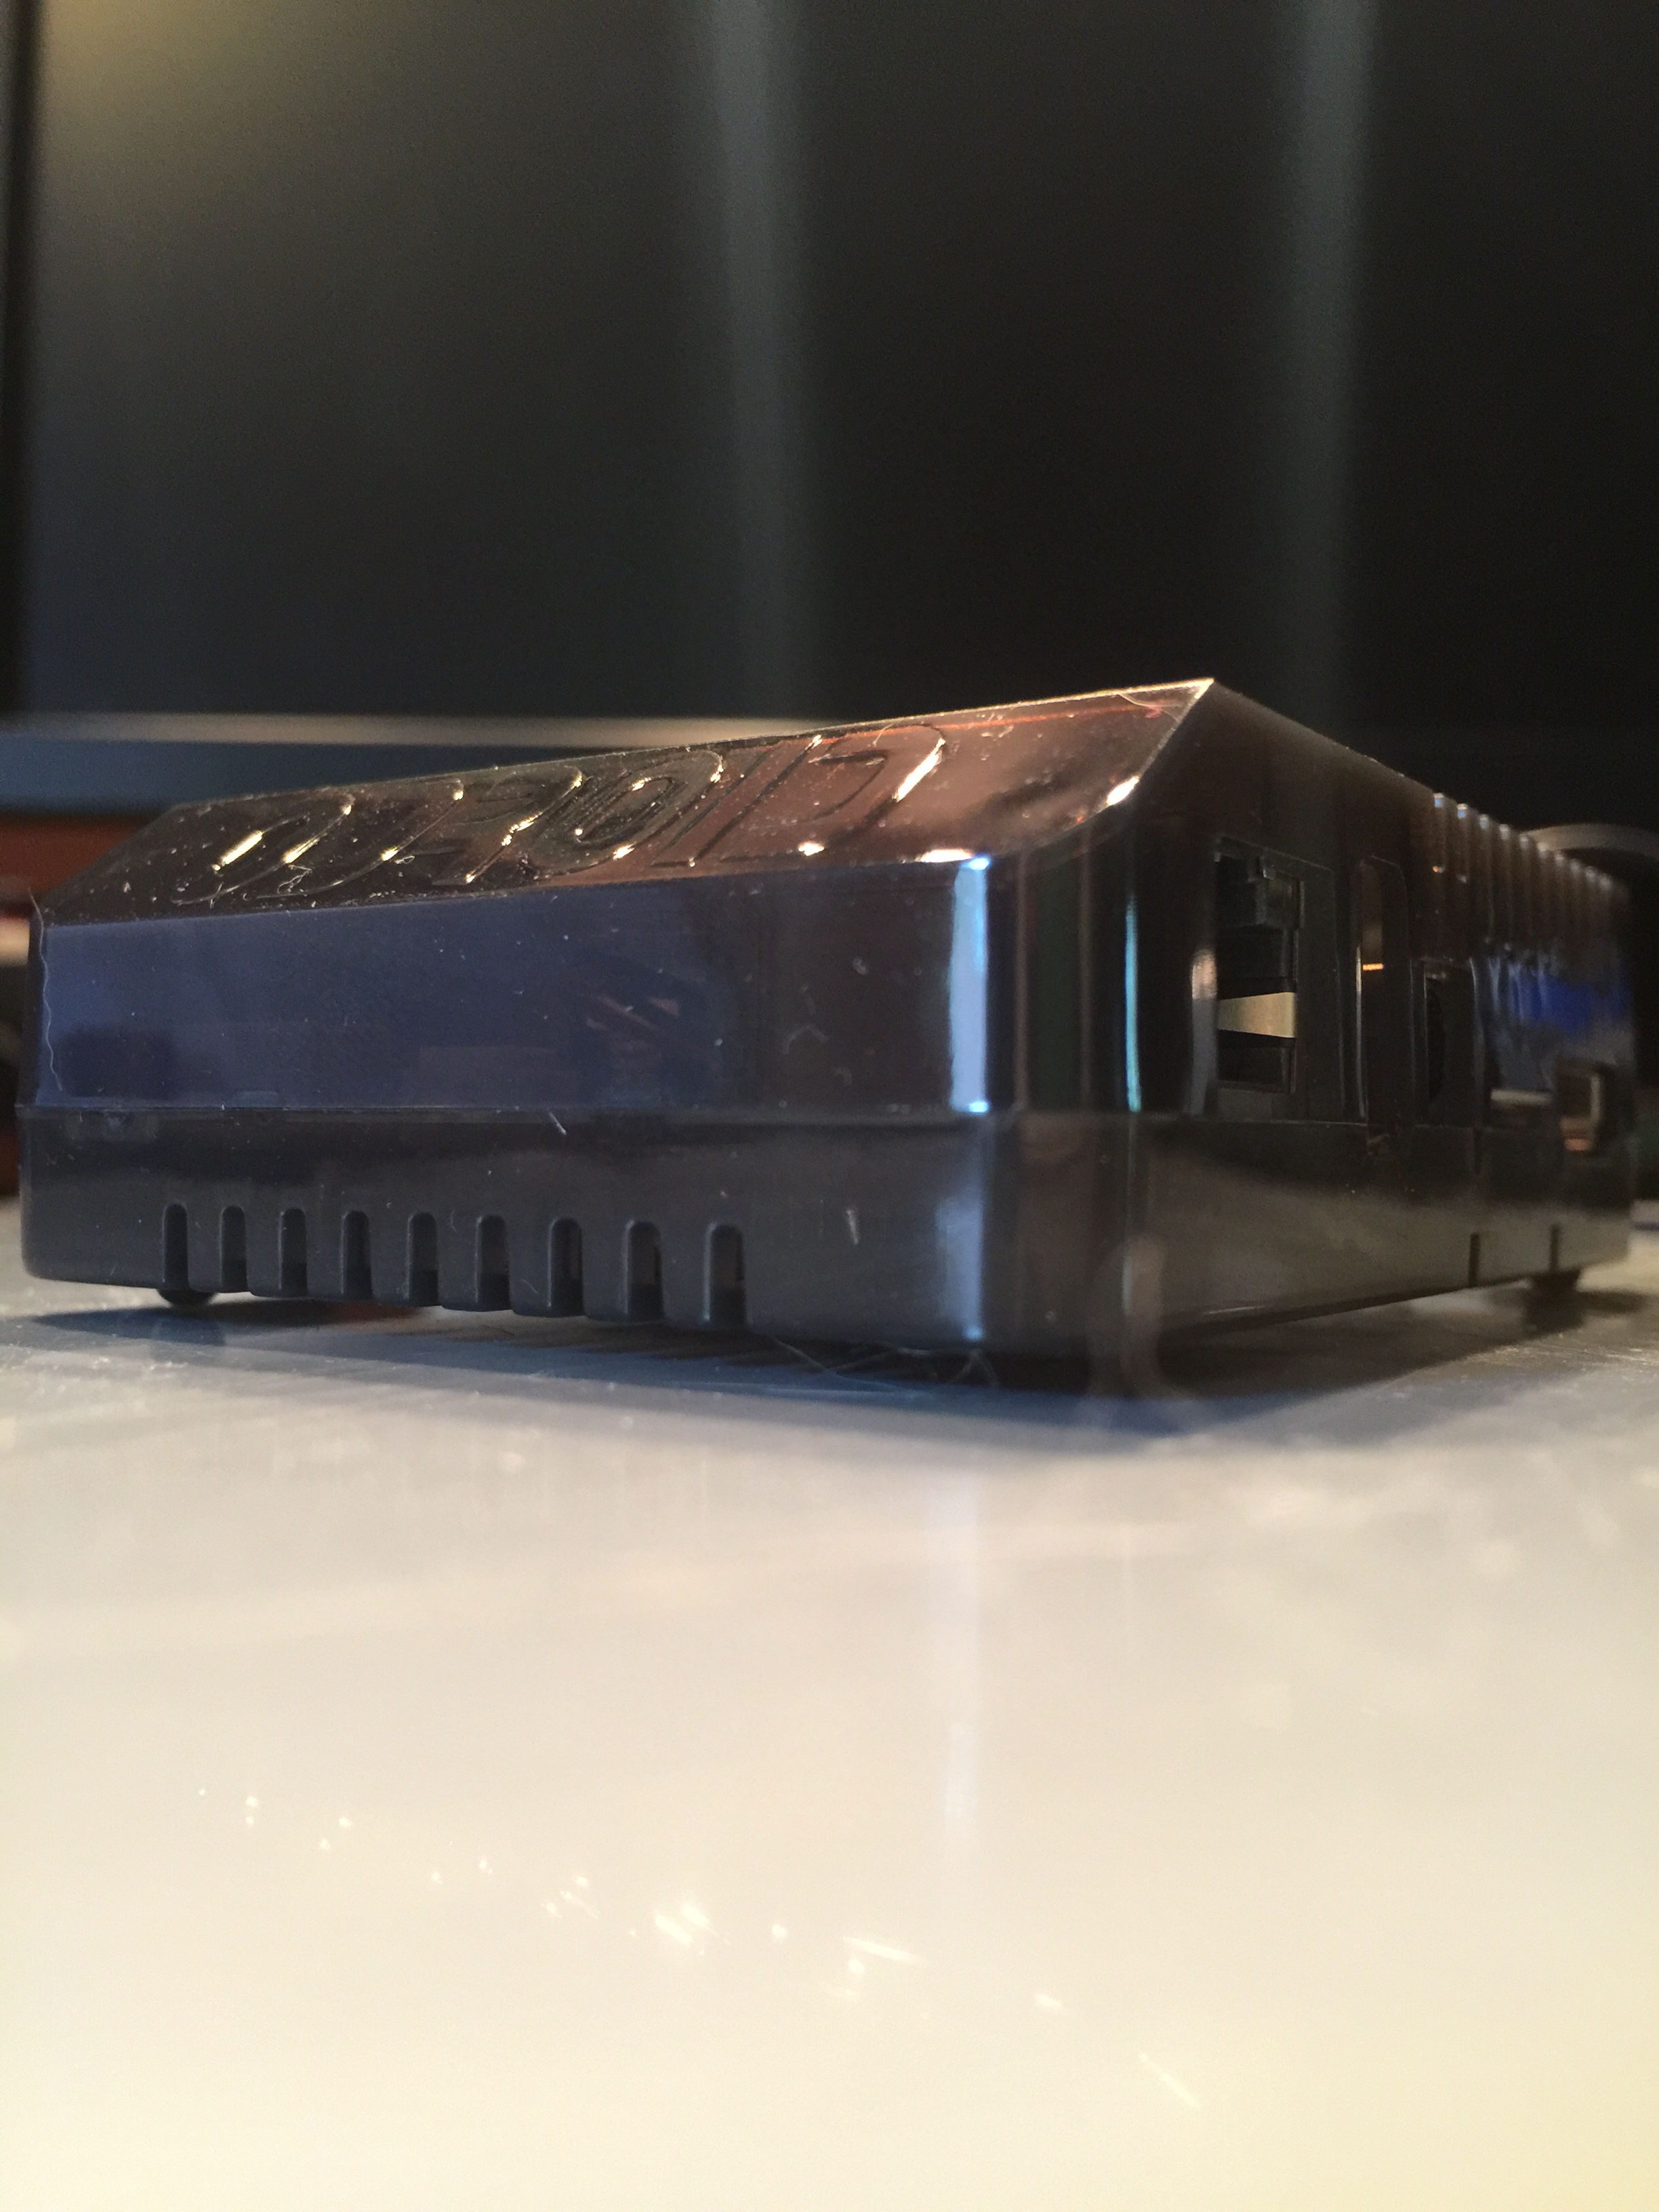
First things first - let us go over the tools and parts, lay them out, and get ready to build. We have an electronics screwdriver set. If you have built an ODROID-GO, the same screwdriver set should work fine. Our target device, an ODROID-XU4, is depicted below. This tutorial applies equally to the ODROID-XU4 or the ODROID-XU4Q version of this device. The device runs just about every emulator you can think of and it runs them wonderfully. We have our board, case, SD cards, USB WiFi module and tools all ready to go.
Clear your workspace and grab the case, take it out of its plastic bag if need be, place it down in the center of the work space. There are two main clips on the case, all-in-all it is easier to work with than the ODROID-C1+ / ODROID-C2 cases. The first main clip is on the left hand side of the case bottom, near the top. The second main clip is on the top side of the case bottom, near the right. You can see slight rectangles near these areas in the image below.
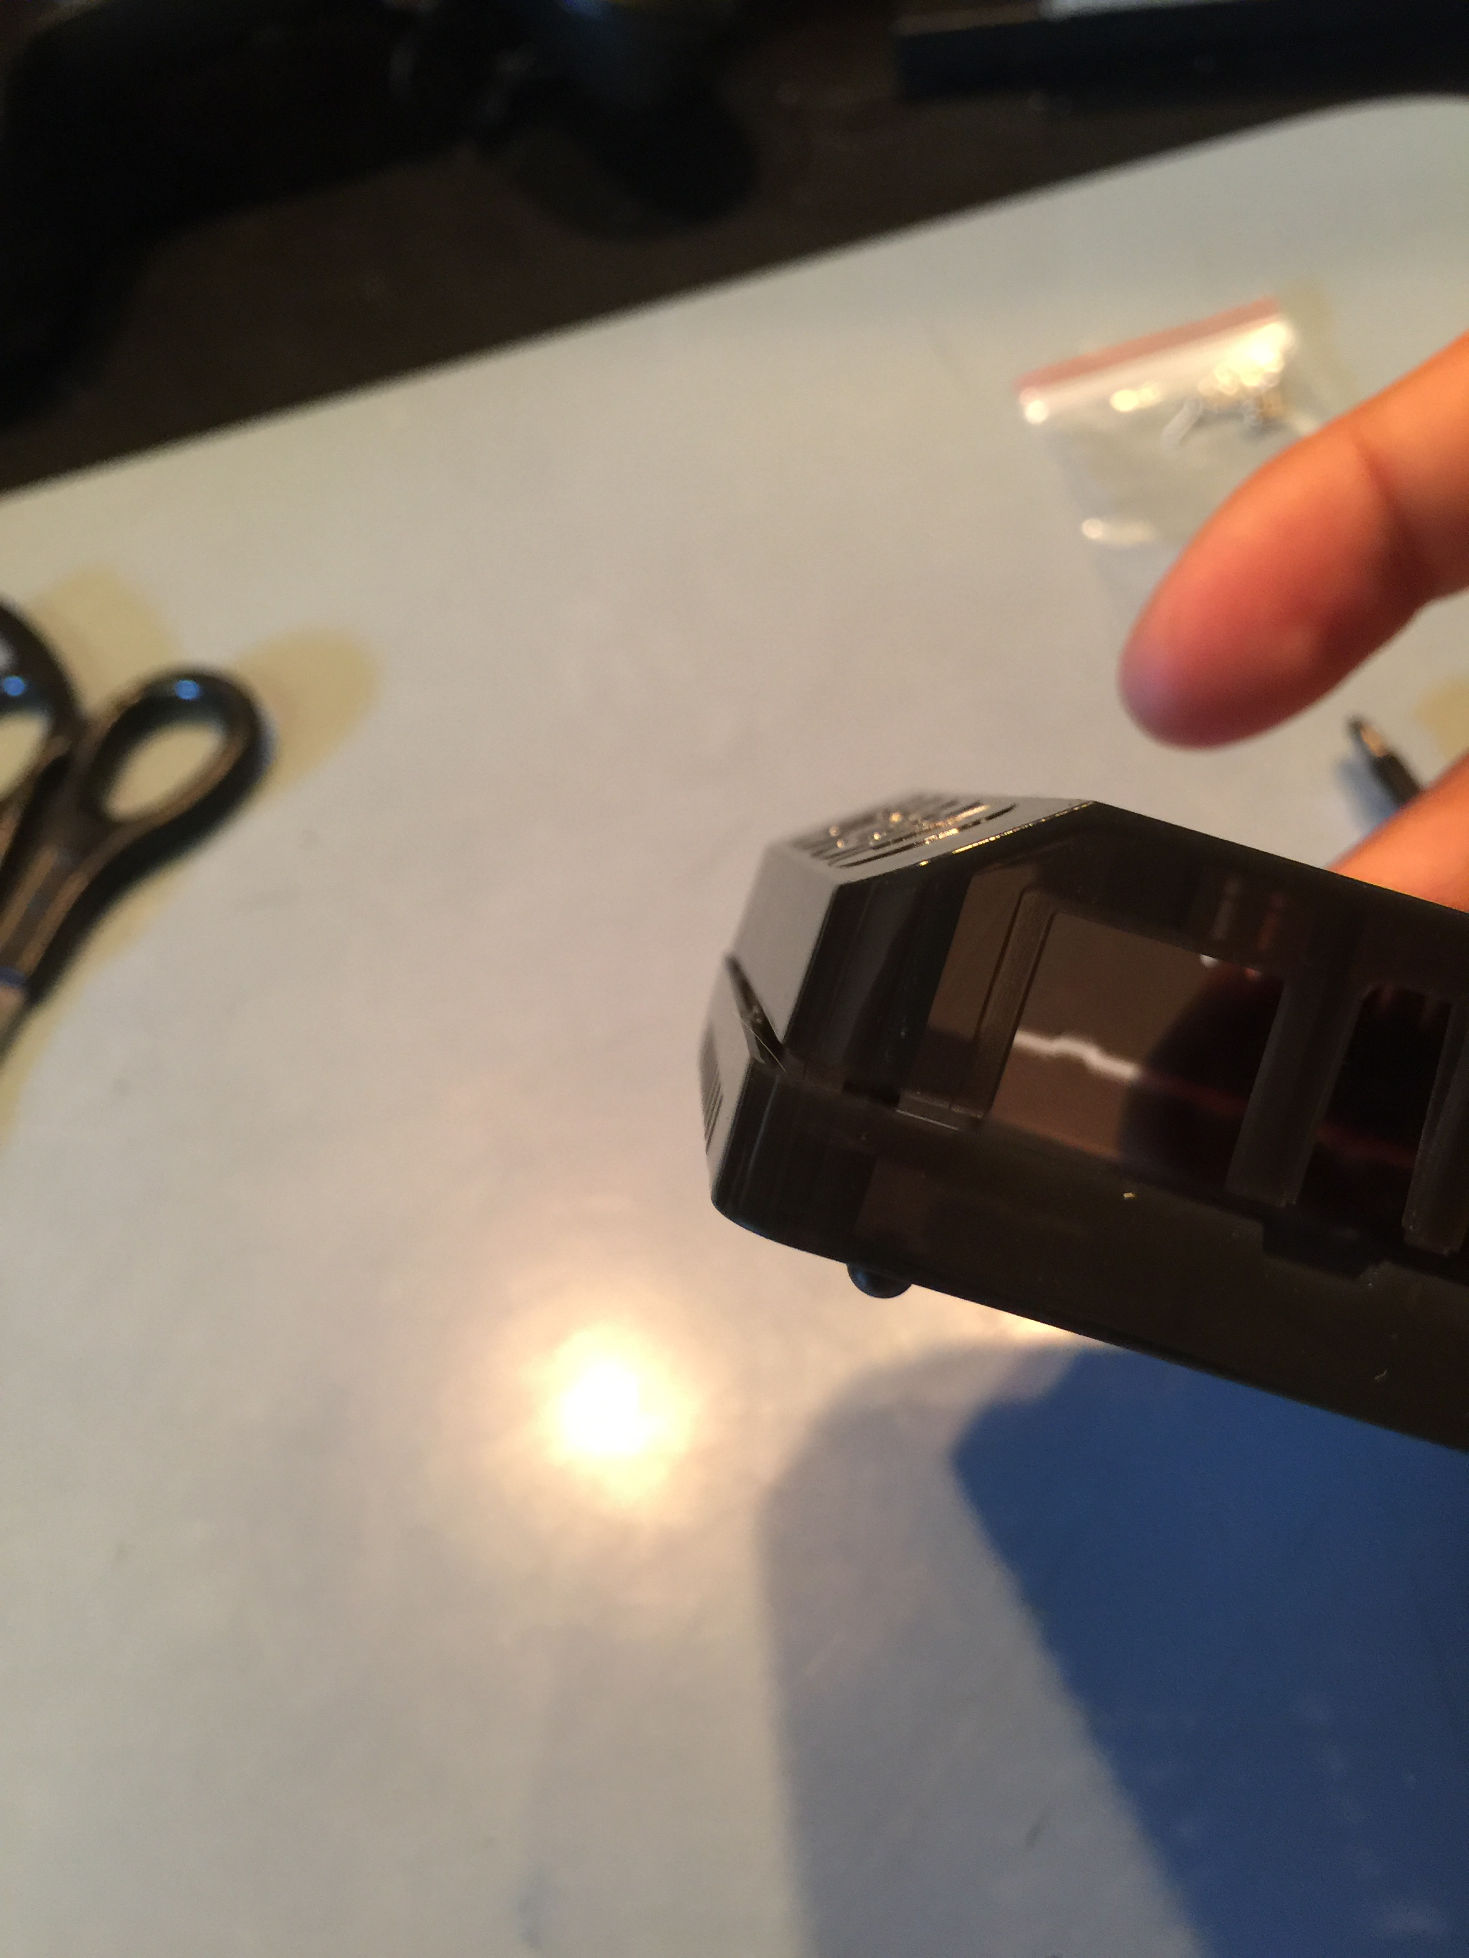
To clear the first main clip, give the case a slight skew as shown below. Ever so slightly pushing the bottom to the left while pushing the top to the right should do it.
Once it comes undone flip the case around so that the other main clip is in the position depicted below. Apply a similar set of actions until the clip separates. It should come apart easily once you get it right. Notice we are using a similar technique for the second main clip as we used for the first.

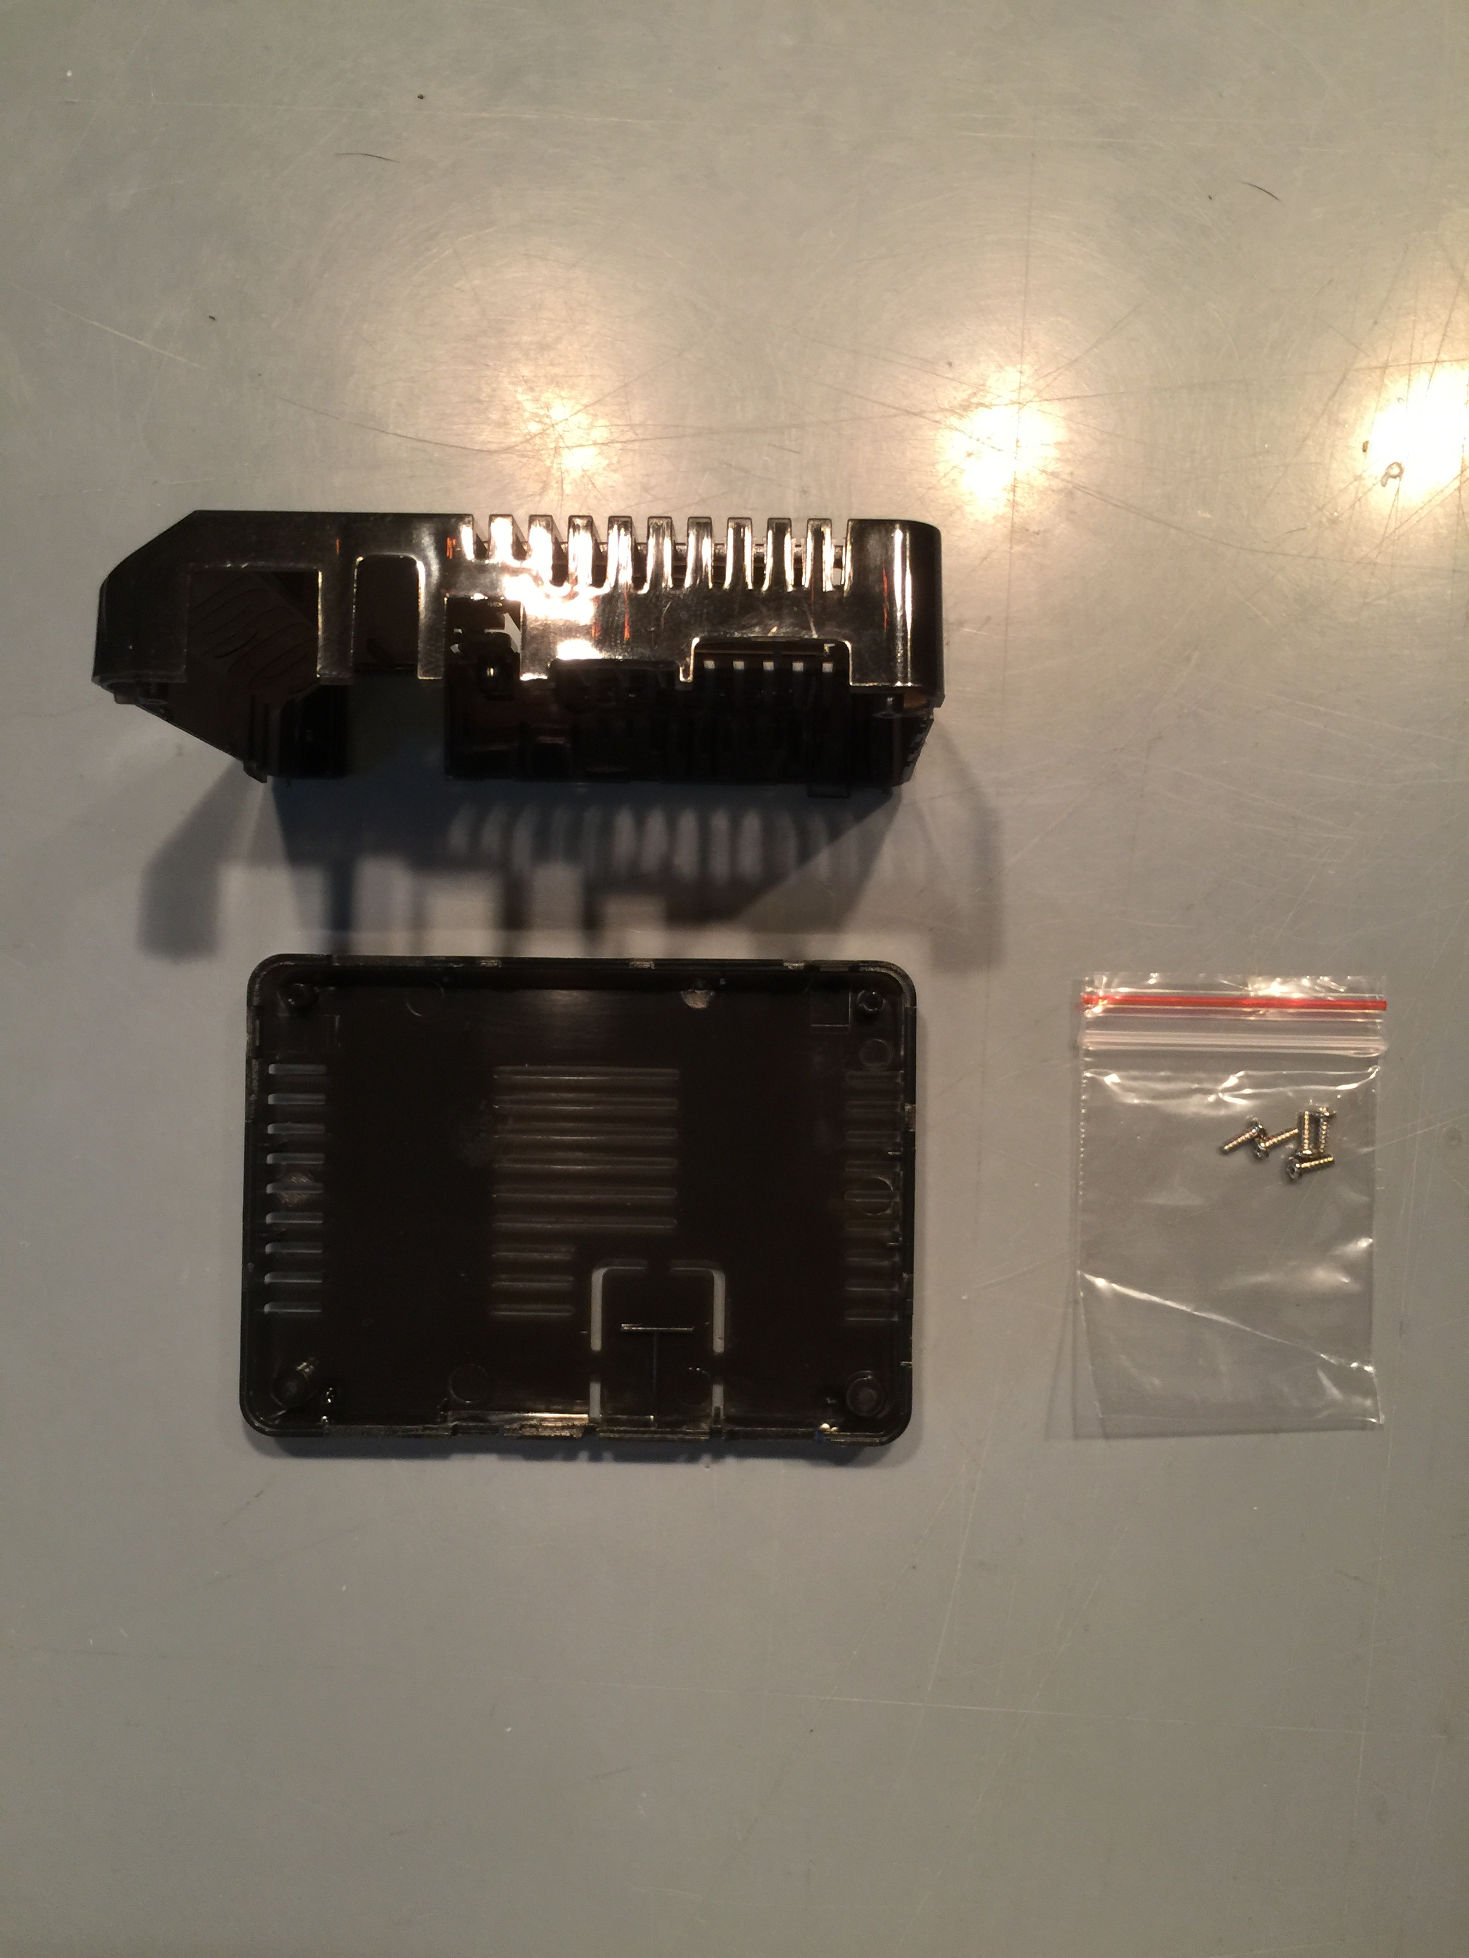
Once you have the case separated you will find a surprise inside. A bag of tiny screws. If you have an ODROID-GO and you have a good amount of leftover screws I would recommend using them instead of the screws provided. Now this could have changed but at one time the default case screws were a bit smaller than the ODROID-GO screws and I found the extra screws in the ODROID-GO kit to be easier to work with. Let us layout the tools and parts we need to assemble the case with the ODROID-XU4 board mounted inside. You will not have to worry about SD card access, if you are familiar with the ODROID-C1+ or ODROID-C2 case, the SD card is easily accessible by default.
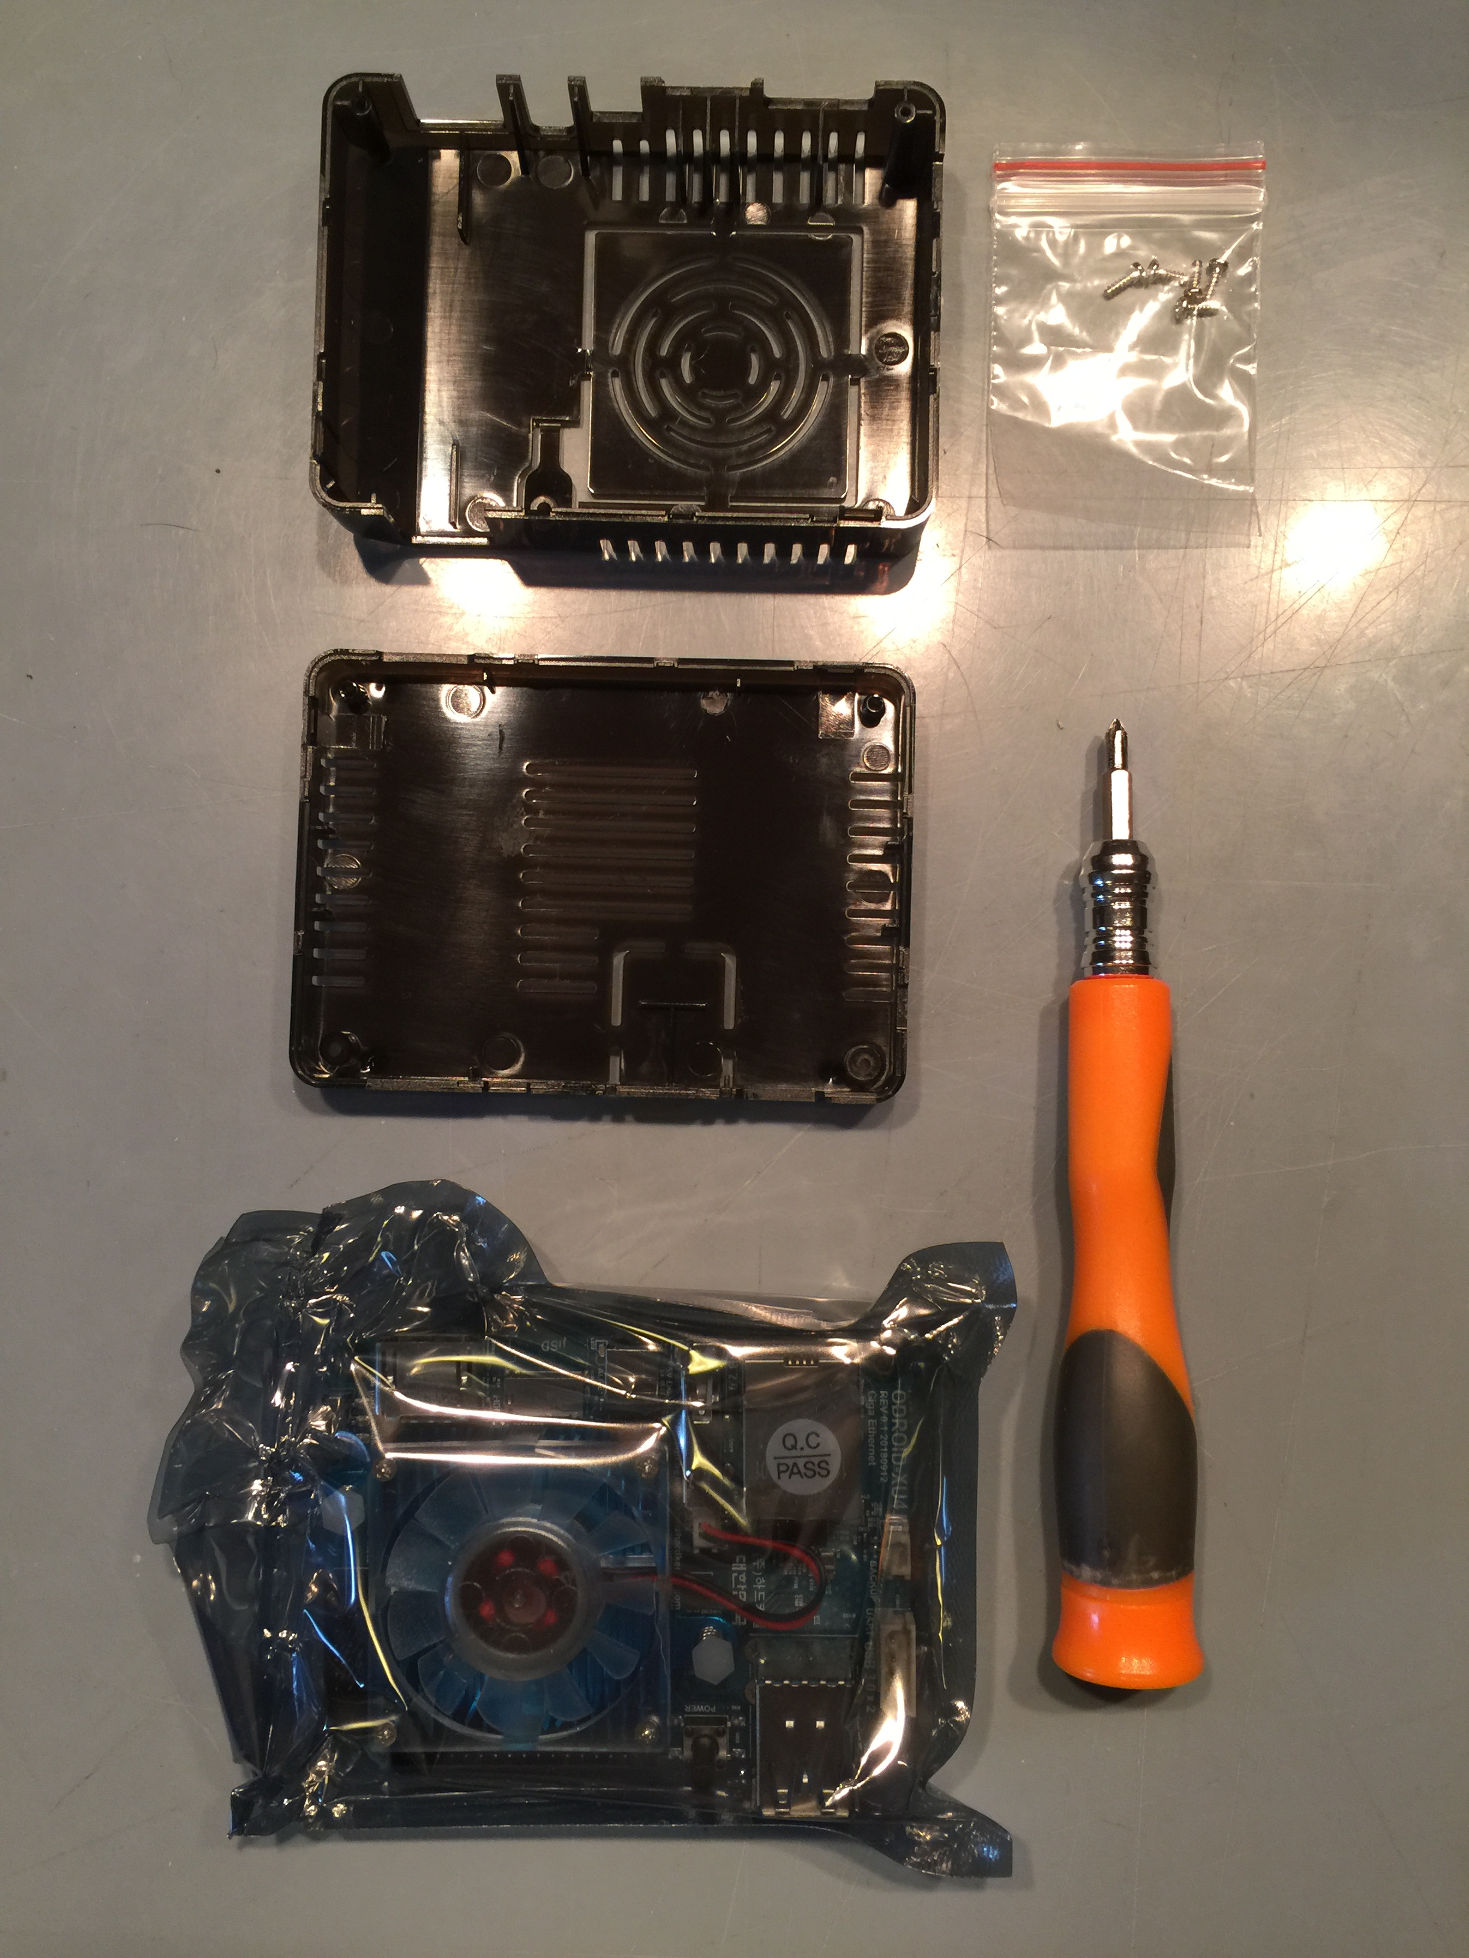
Carefully open the antistatic bag that the ODROID-XU4 comes in. Make sure you do not have a static charge: discharge yourself against something large and metal. Layout the case and the board, rest the board on top of the antistatic bag, we are going to place the board on the bottom half of the case and place and tighten the 2 internal screws. The ODROID-XU4 case is similar to the ODROID-C1+ / ODROID-C2 case in that there are two internal screws and 2 external screws.
Tip: Make sure the screws are tight but do not over tighten them, snug would be a good description of how much to tighten them.
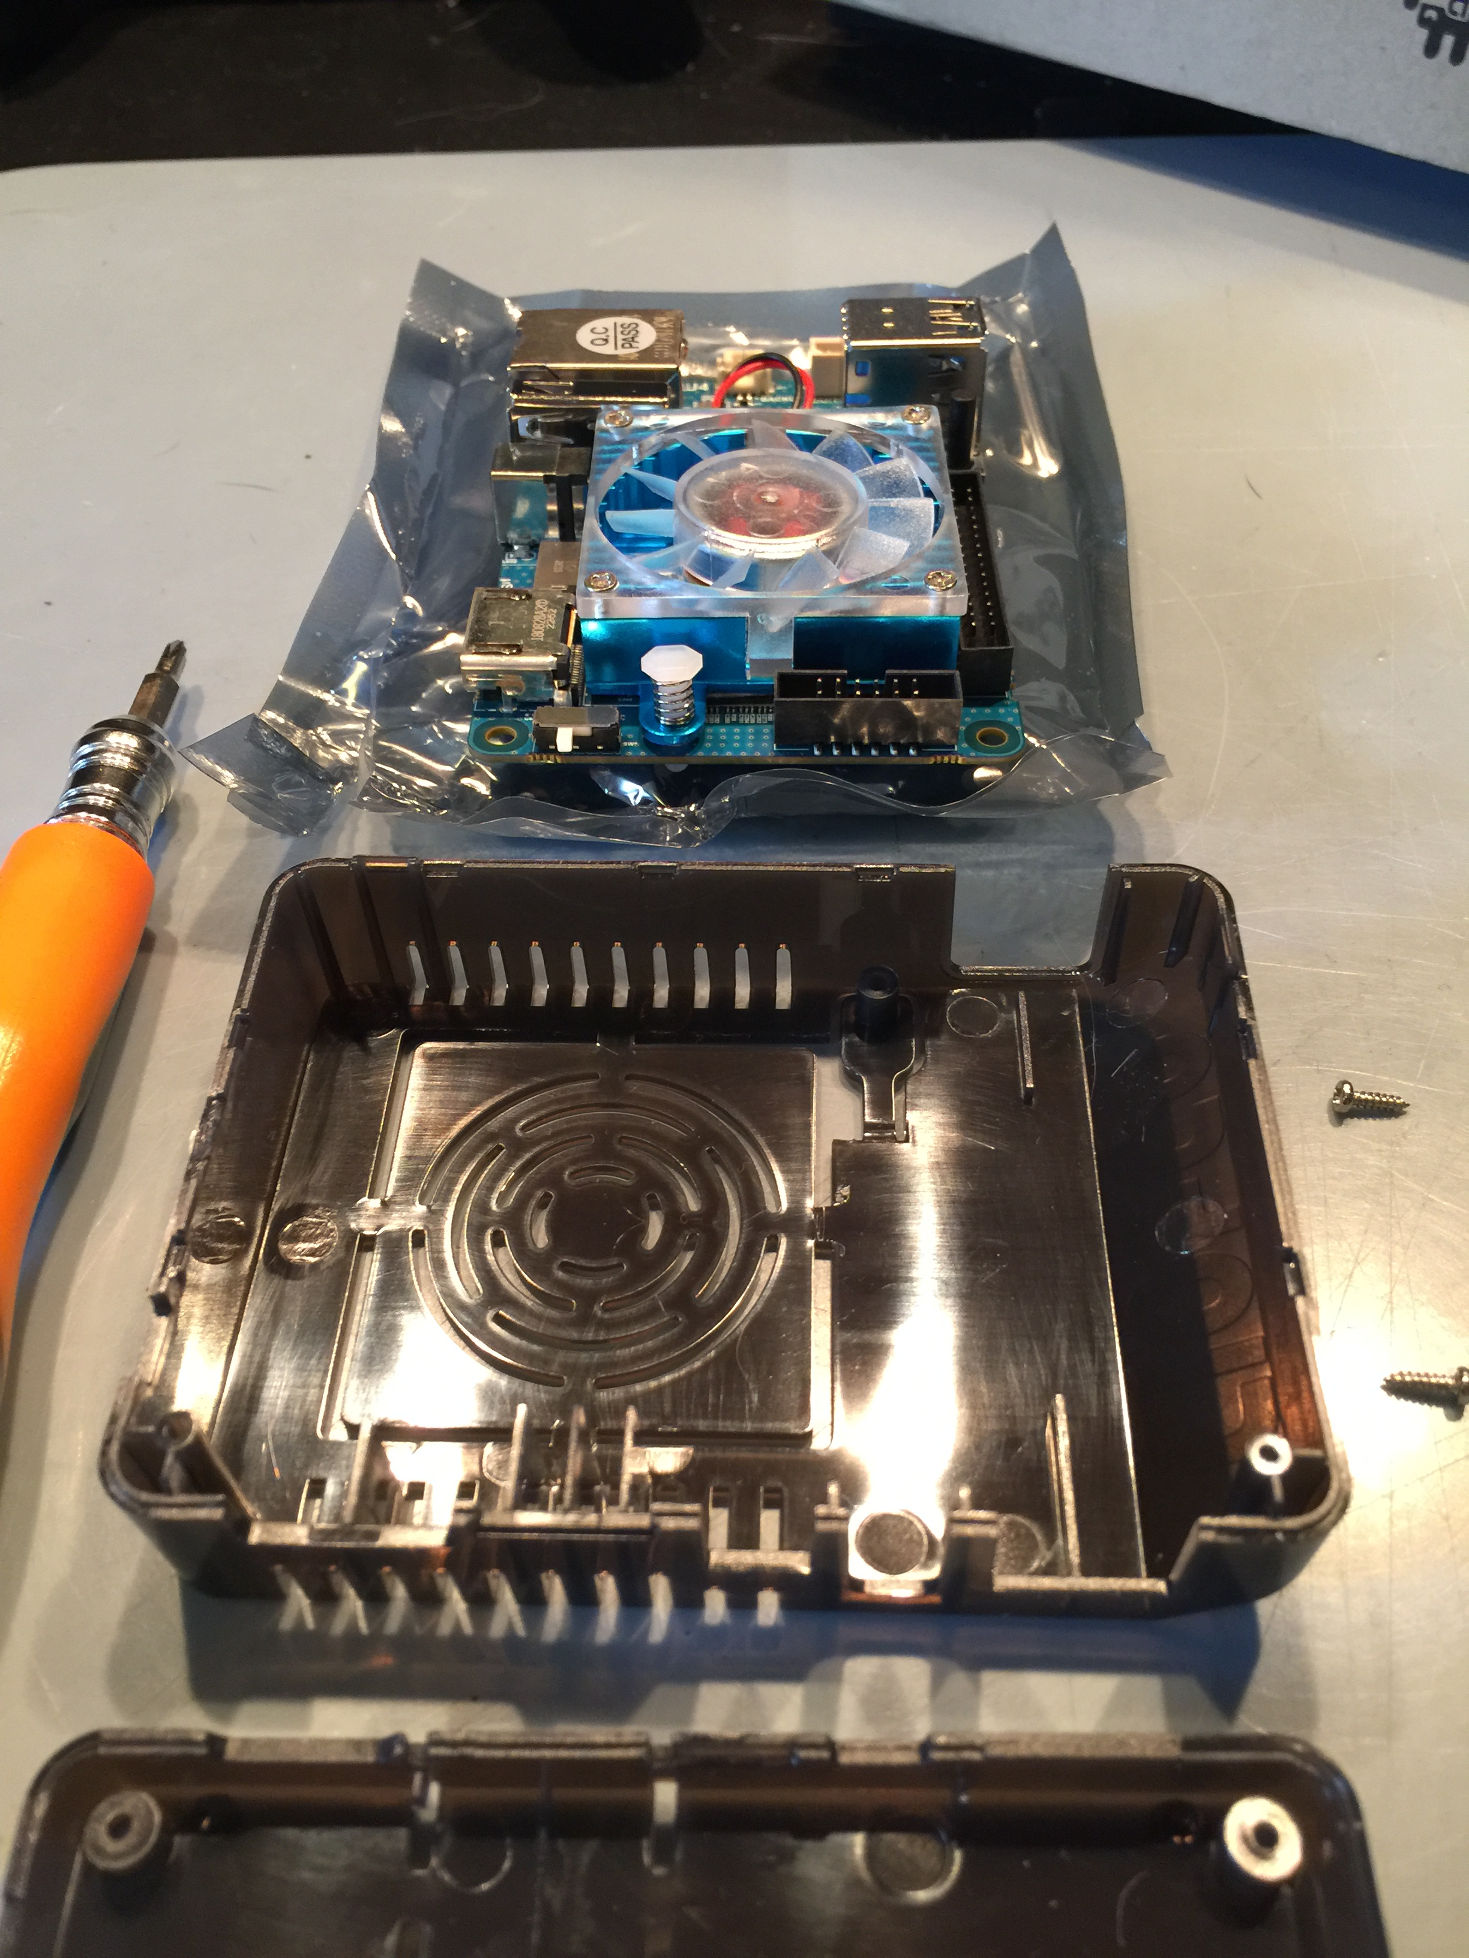
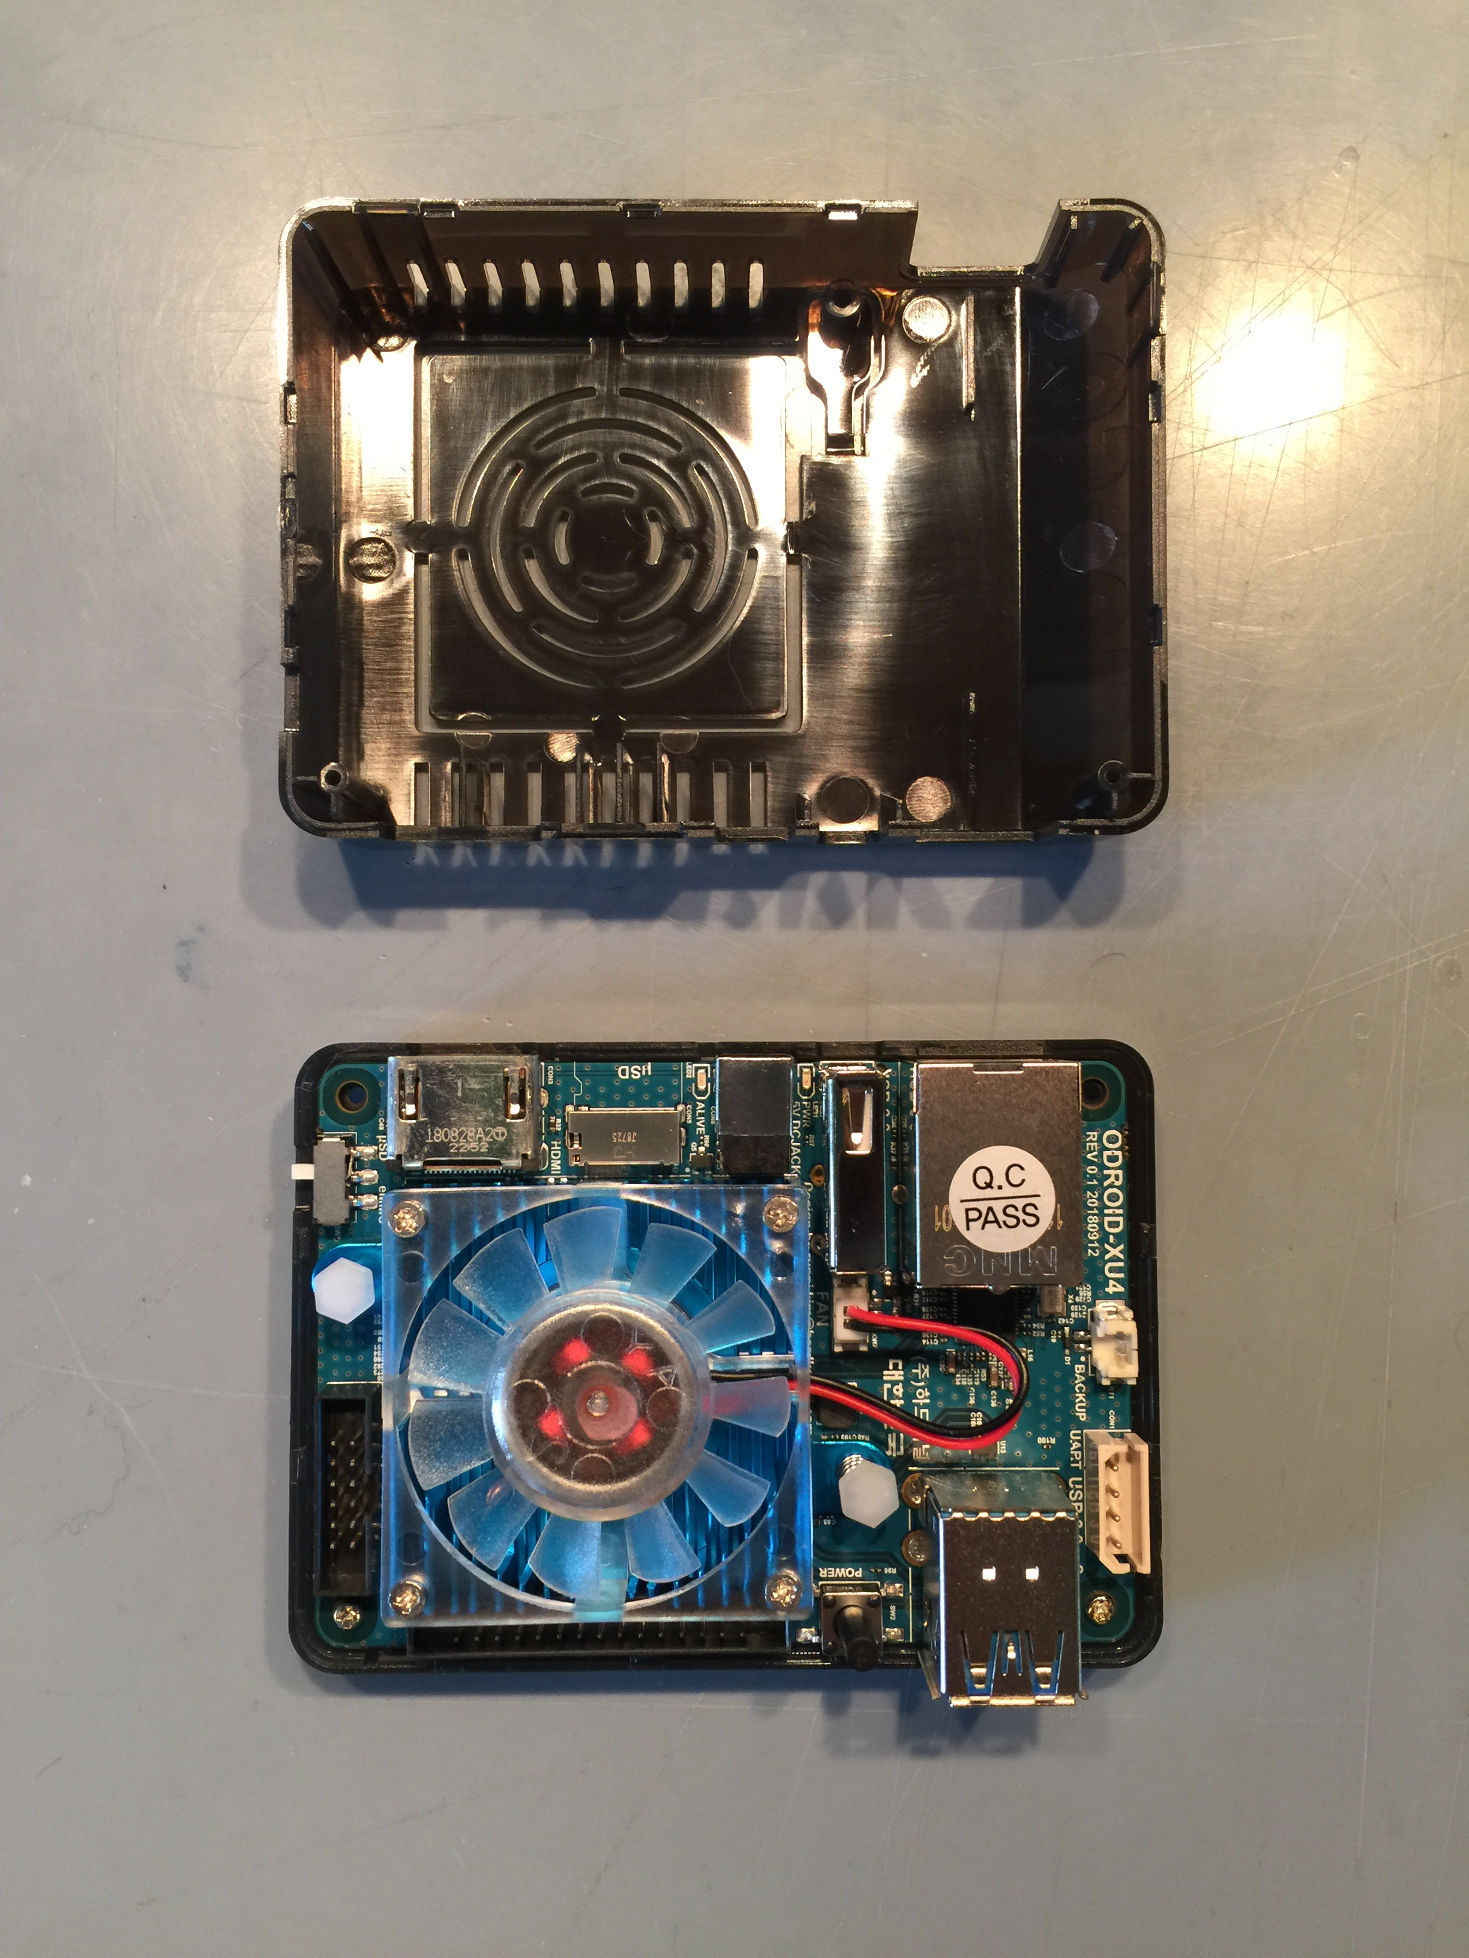
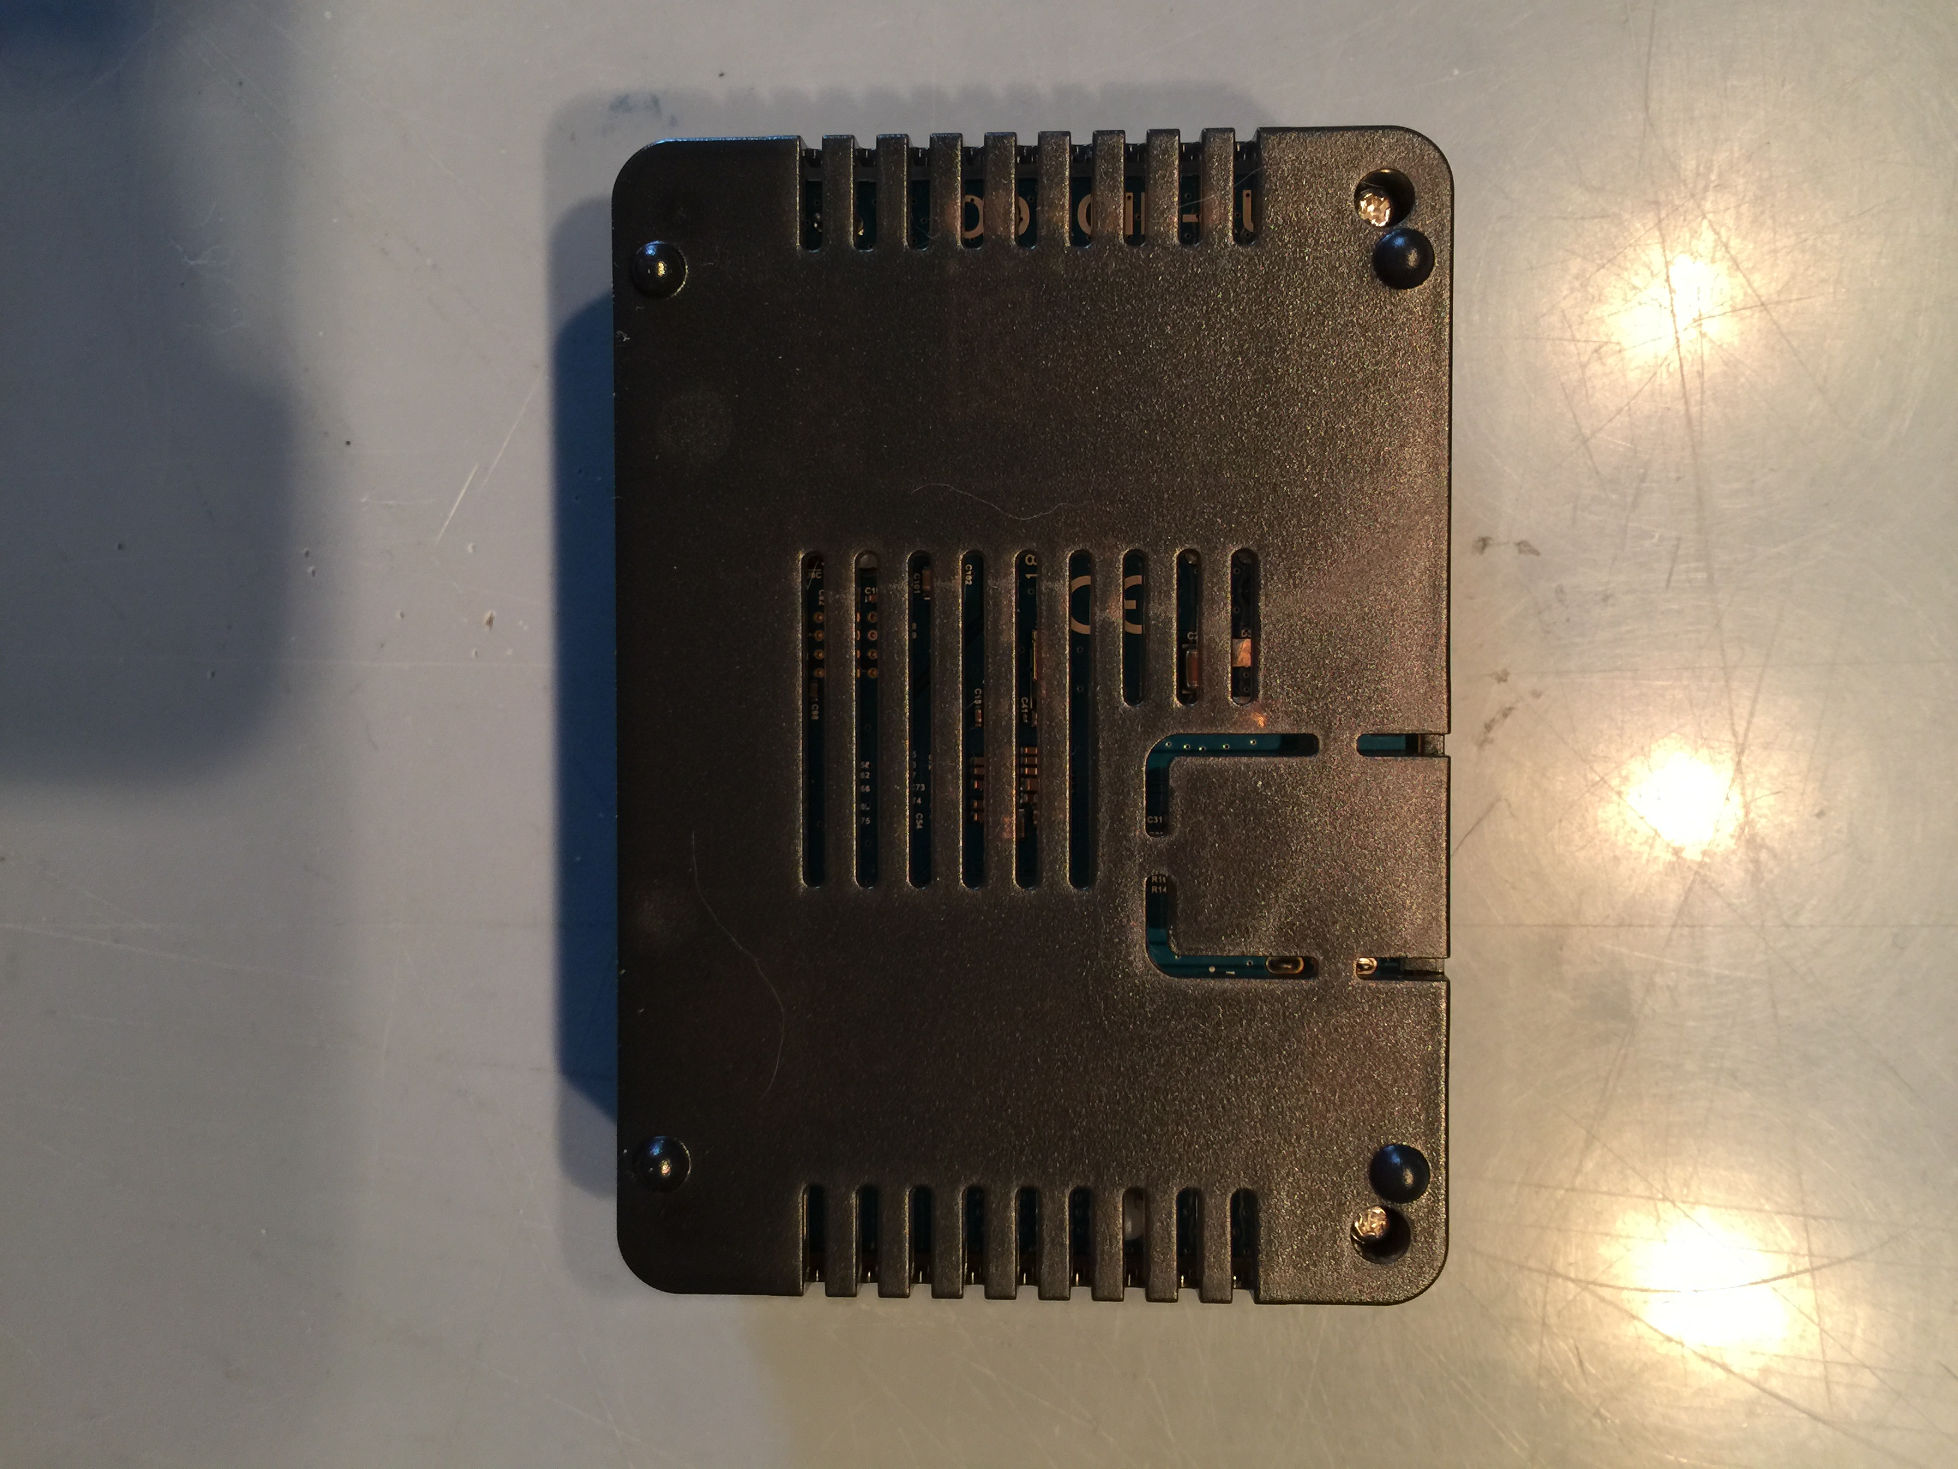
Flip over the case and place and tighten the two external screws. With the back of the case facing towards you, note the small white switch. Flip the switch closer to the edge of the case for SD card use, flip the switch the other way, closer to the center of the case, for eMMC use. You are all done with the hardware construction. Next up we will be working on the base SD card and OS image.
The Software
For the next step we are going to locate a specific Ubuntu OS image. I have tried a few images and ran all sorts of tests and I have come to the conclusion that Ubuntu 16.04 LTS offers the best mix of performance, features, and support. Head over to the Hardkernel wiki. Locate the ODROID-XU4 entry on the right hand side of the site. Select it, and then select os_images from the list of options. Next select linux and ubuntu_4.9. I know it is an older kernel and no longer supported but I wanted to run with a slightly older kernel that has less features and is a little bit more efficient. You can try a newer one. The software configuration steps should be almost identical as long as you are using MATE.
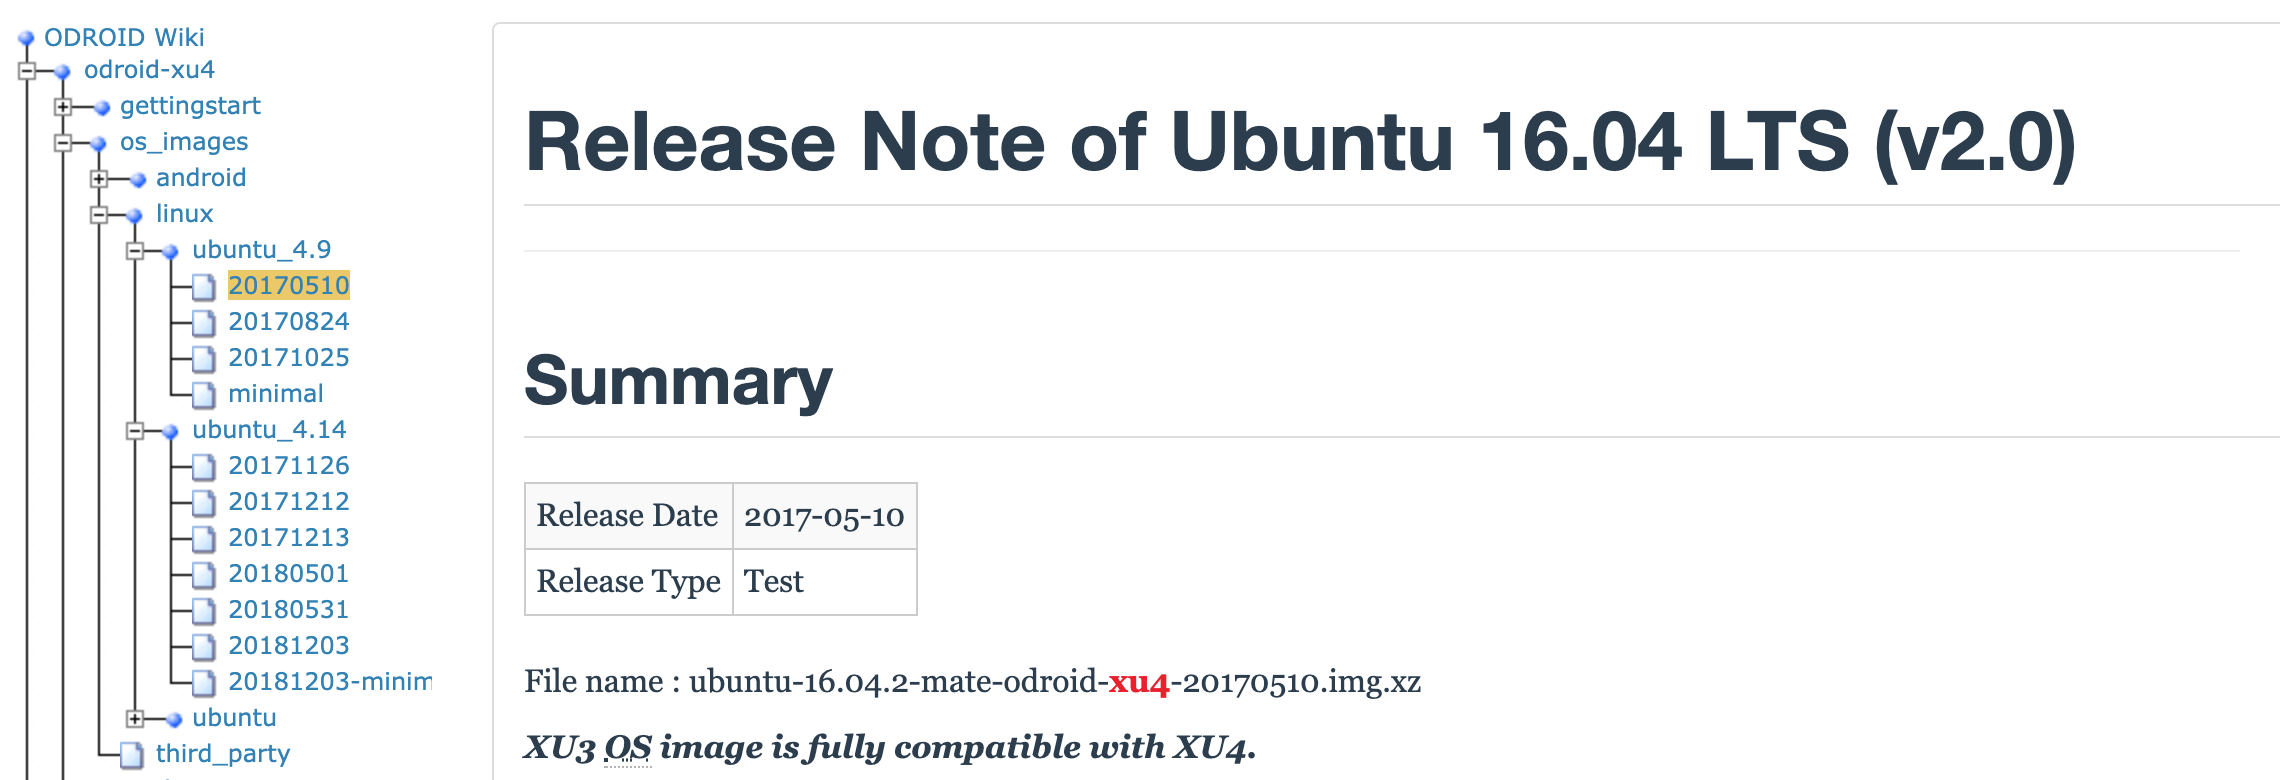
I use the South Korean mirror most of the time. You can use any one that works best for you. Find the entry ubuntu-16.04.2-mate-odroid-xu4-20170510.img.xz or you can use this direct link https://tinyurl.com/y3oj4lr3.

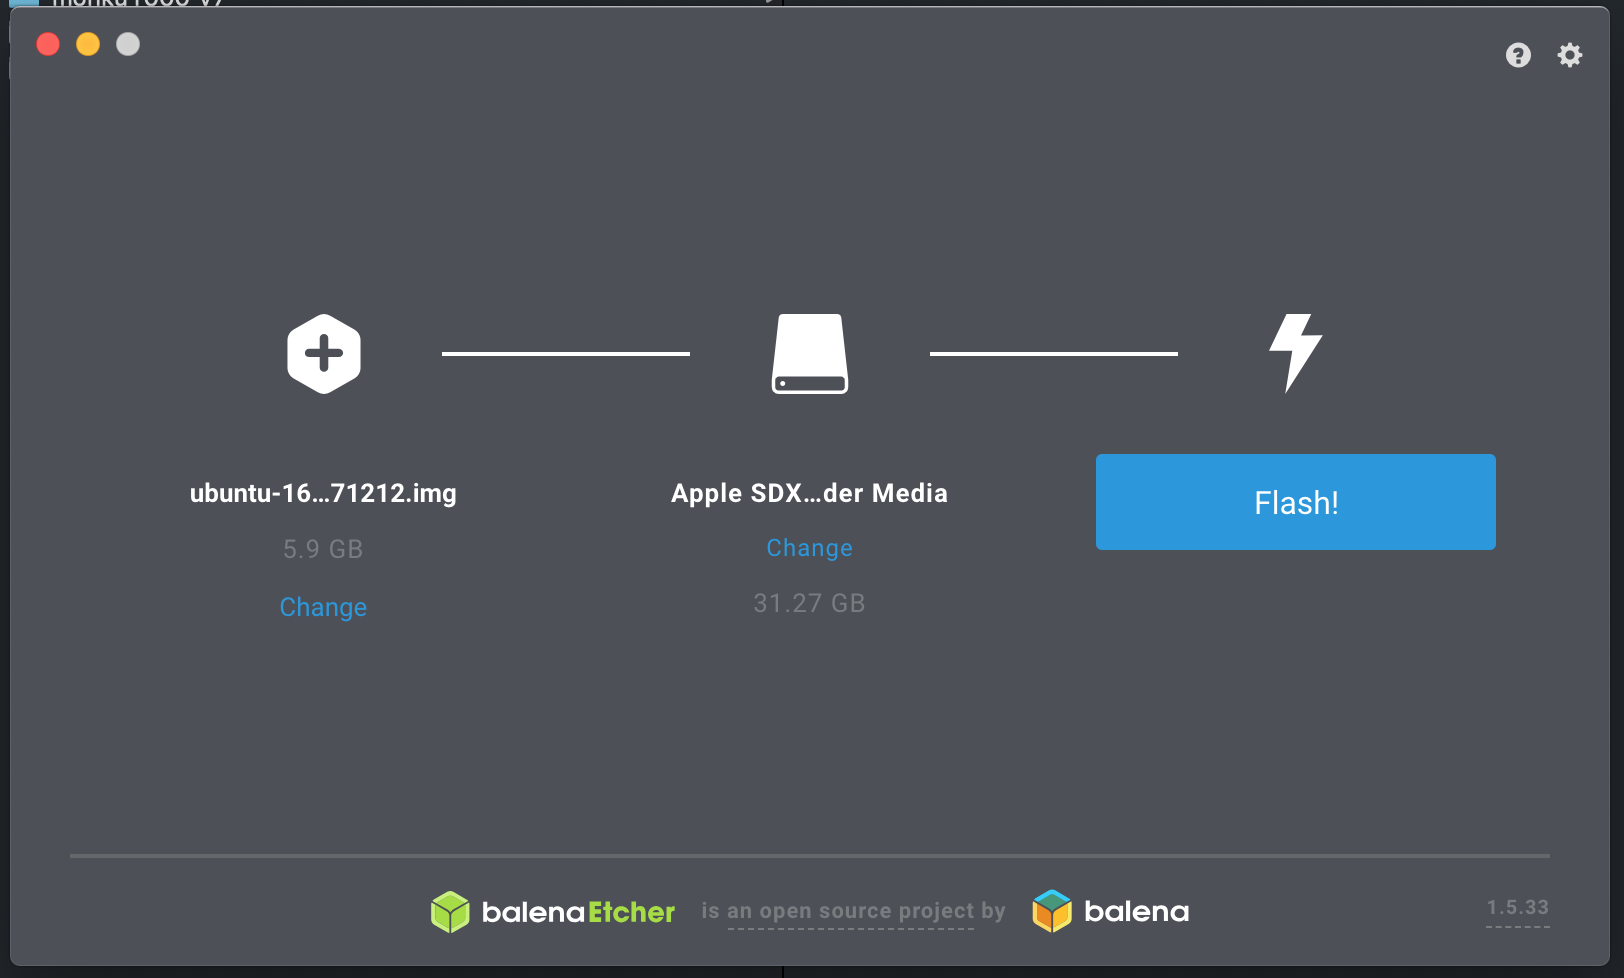
Next decompress the downloaded OS image. You should end up with a file entry named ubuntu-16.04.2-mate-odroid-xu4-20170510.img that is almost 5GB in size. You will need to flash a microSD card with the OS image now. A link to the SD card I currently use is posted above in the parts listing. For Apple MacOS, I use Balena Etcher. On Microsoft Windows, I use Win32 Disk Imager. Linux users can use some CLI tools like dd.
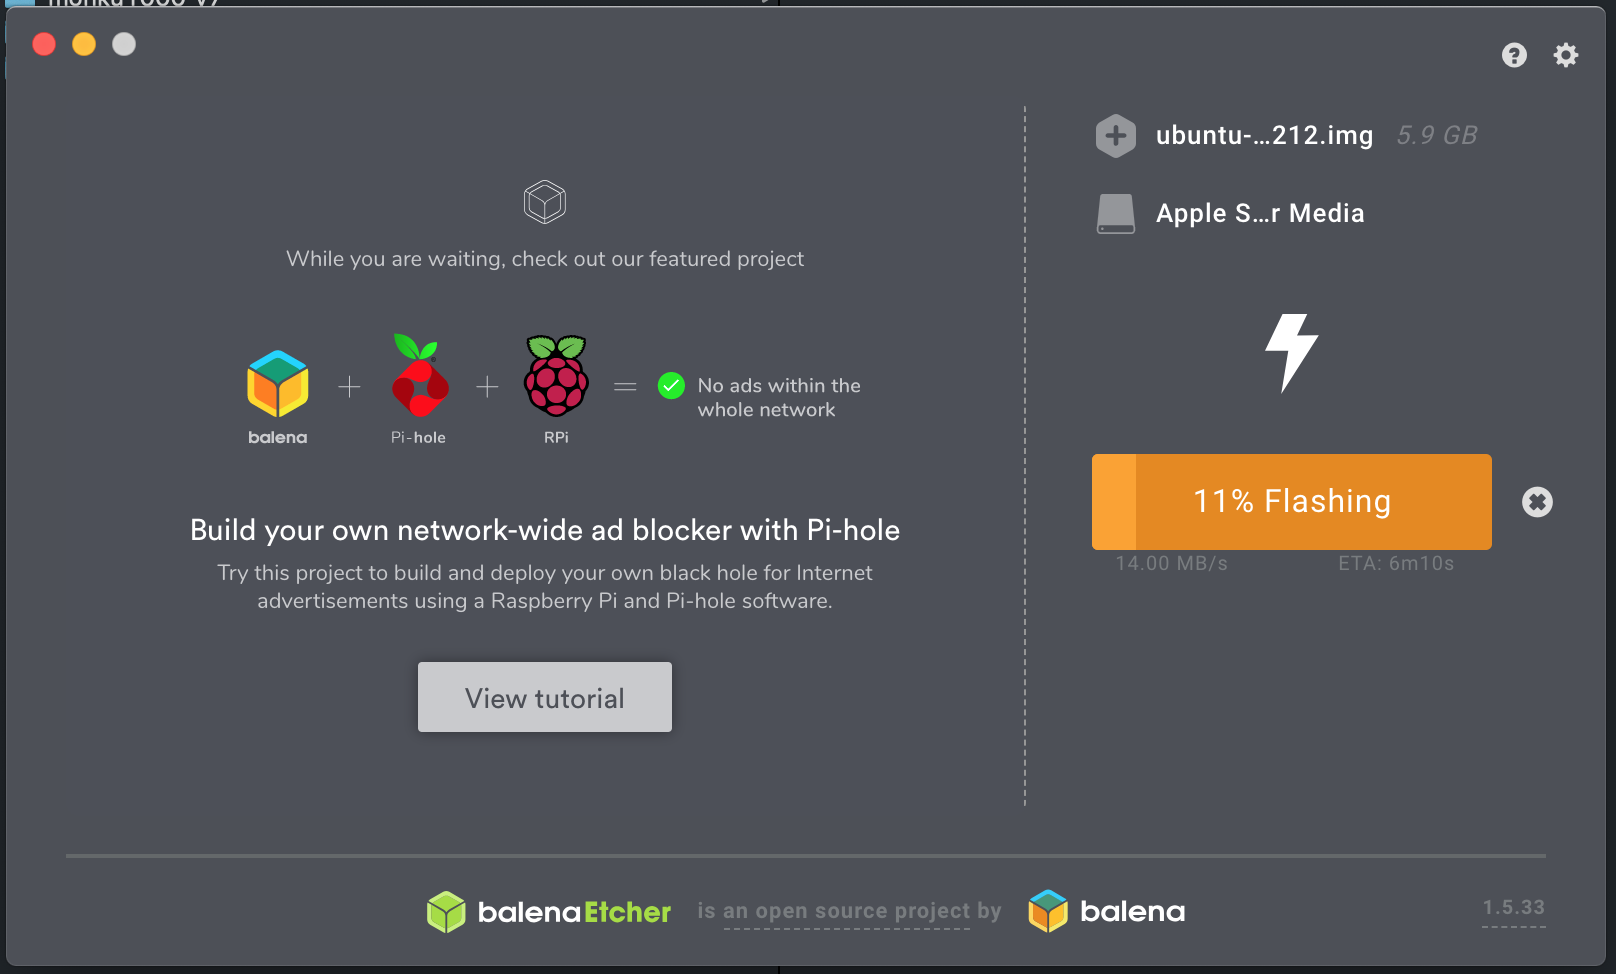
On MacOS, install Balena Etcher from the link. Select the uncompressed OS image we just downloaded. Insert your micro SD card into your Mac using a converter of some kind, link to one listed above. Make sure to select the proper target drive. You do not want to overwrite important data so make sure to double check the destination drive. Once you are sure everything is set correctly, flash the OS image to the SD card. This will only take a few minutes. The SD card will be unmounted and ready to remove at the end of the process.
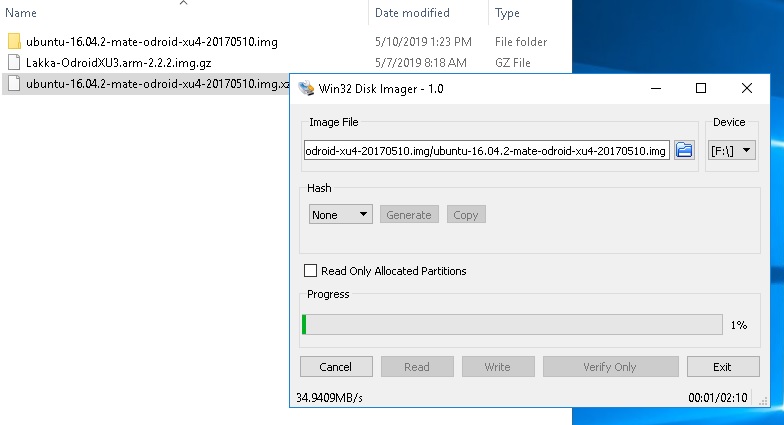
On Windows, install Win32 Disk Imager from my link. Select the uncompressed OS image we just downloaded. If you have trouble uncompressing the OS image, try using 7-Zip. It has come in handy for me in the past.
ALERT: Make sure to triple check your destination drive letter. It is very easy in Windows, using this software, to select the wrong drive and ruin your PC. So triple check and make sure you have the correct drive letter selected. Once that is done, click the Write button to write the OS image to the SD card. Wait a few minutes and let it complete. You will want to unmount the SD card before removing it from the computer.
On Linux use the following command to list the drives on the system.
$ sudo fdisk -lLook for an entry like the following. Make sure you have identified the correct drive by ejecting the SD card and checking that the entry is not longer available.
ALERT: Be careful and take the time to correctly identify the correct Linux device or you could end up overwriting one of your drives.
Device Boot Start End Sectors Size Id Type
/dev/sda1 8192 30253055 30244864 14.4G c W95 FAT32 (LBA)
To restore an image to a drive using the terminal on an Ubuntu linux system, use the following command:
$ sudo dd of=/dev/sda1 if=~/ubuntu-16.04.2-mate-odroid-xu4-20170510.imgWait a few minutes for the process to finish and an output report to be printed to the terminal. Now you have an SD card ready to use on your ODROID-XU4!
Software Updates, Partition Sizes, and More
First things first--let’s get rid of that pesky login prompt. If your device has USB trouble on boot up just power cycle it. I would say though to use the software control buttons once things are all setup and never use the hardware power button unless you are turning it back on again. For the remainder of the tutorial, you should have a keyboard and mouse hooked up to the device. If you go to the following menu location Applications -> System Tools -> MATE Terminal it will open up a terminal window for you.

We are going to run a series of commands at the terminal. I am going to list them below. Some take a while to run but you may have to sit near the screen in case you are prompted by an installation question. We are setting up auto login, updating Ubuntu, and installing some packages.
Type this command or copy and paste it into the terminal window.
$ sudo nano /usr/share/lightdm/lightdm.conf.d/60-lightdm-gtk-greeter.confYou will be prompted for the password, use odroid. You will see some text like this in the file.
[Seat:*]
greeter-session=lightdm-gtk-greeter
You are going to add a line at the bottom, autologin-user=odroid, and then save and close the file. Press Ctrl+O then hit enter to save the file. Press Ctrl+X then press enter to exit the editor. You will not be prompted to login on the next reboot.
Next up we will be running updates on the OS packages and installing a few things. This part takes some time, but, for the most part, it runs by itself. Enter and execute each of these commands in the order shown below from the terminal window.
$ sudo apt-get update -yIf you get a boot.ini prompt for this command just hit enter.
$ sudo apt-get upgrade -y
$ sudo apt-get install git -y
$ sudo apt-get install gparted -y
$ sudo apt-get install make -y
$ sudo apt-get install cmake -y
$ sudo apt-get autoremove -y
Now that all of that is done, the system is starting to shape up a bit. The next thing we want to do is turn off any swap space the OS is using. The conventional wisdom is that swap partitions will degrade the SD card which I think are rated for some number of read/write operations before they begin to fail. So far I have been disabling them without a noticeable performance hit. Run the following command at the terminal.
$ swapon -sIf you see output similar to the following, then you have zram enabled. Follow the steps below to turn it off and remove it.
$ swapon -s
Filename Type Size Used Priority
/dev/zram0 partition 219824 2080 5
/dev/zram1 partition 219824 2076 5
/dev/zram2 partition 219824 2076 5
/dev/zram3 partition 219824 2076 5
Ok so we want to disable these swap partitions so our SD card lasts as long as it can. Run the following command. The ODROID-XU4 I believe does not have a swap partition by default.
$ sudo apt-get remove --purge zram-config -yIf you notice a standard swap partition listed, use these steps to remove and disable the swap partition.
$ swapoff -aThis will immediately disable swap on the system. Next remove any swap entries from /etc/fstab by editing the file as root and commenting out any swap partition entries. Reboot the system. If, for some reason, the swap partition is still there open gparted, System -> Administration -> GParted. Locate the partition in the list of active partitions and unmount, then delete the partition.
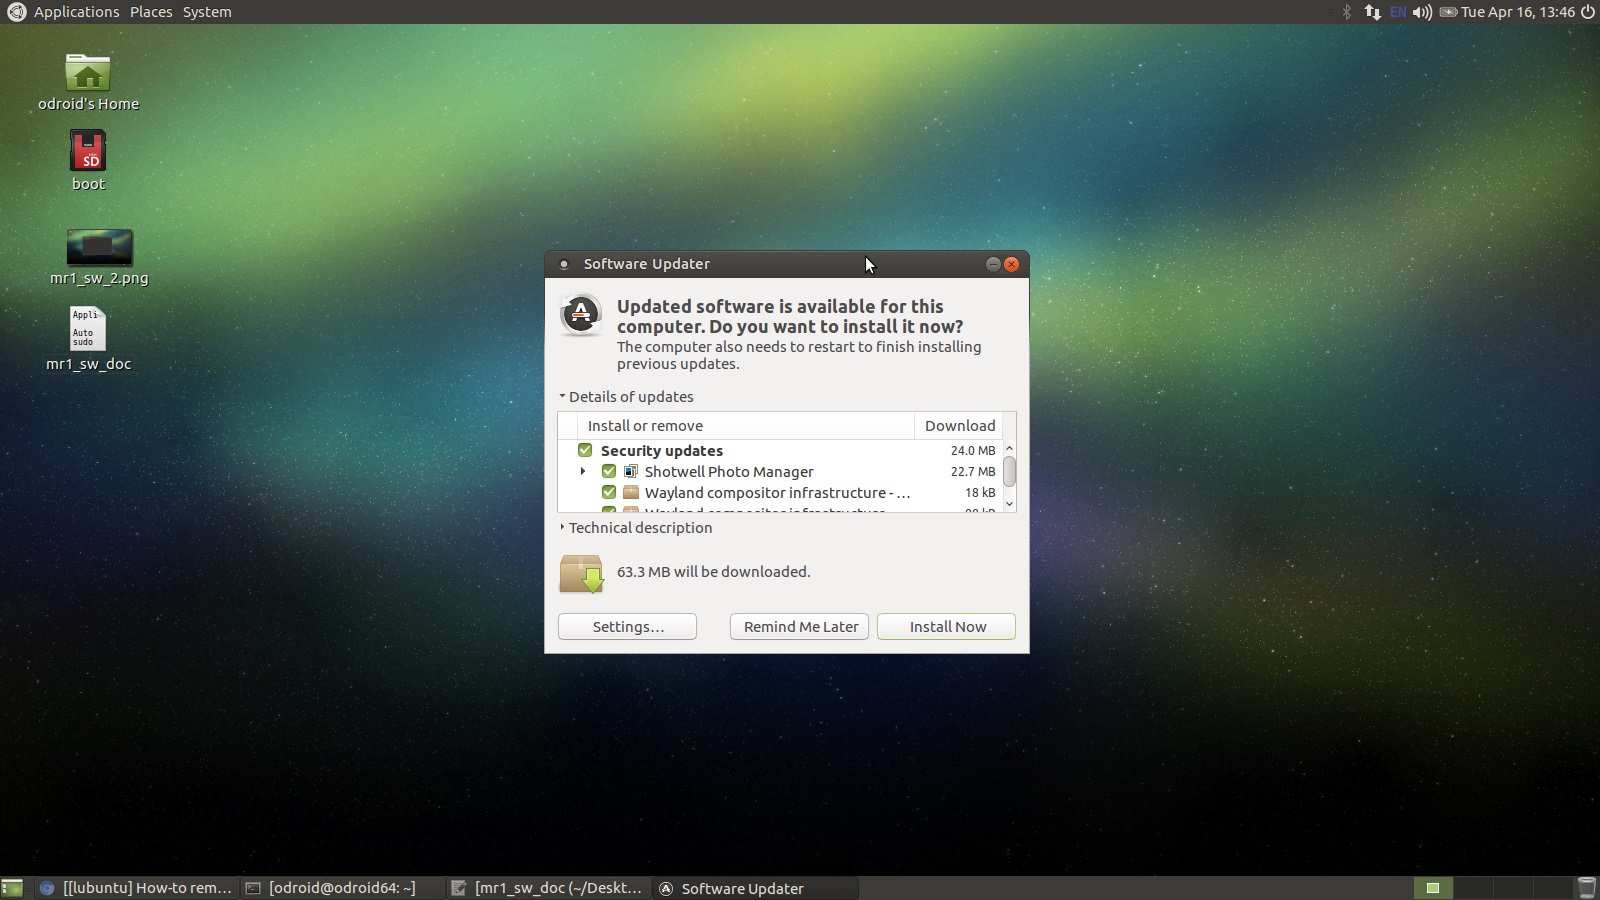
Next up we are going to run a MATE software update by navigating to System -> Administration -> Software Update in the menu system.
ALERT: If you are asked to perform a partial update, then skip this step. We will run with the packages we have installed. I have noticed that in some cases the packages can get out of control. I would only proceed with an update, if no Partial Update dialog pops up.
If there is not a partial update prompt, click the Update button, wait a little while it slowly turns into a progress bar dialog and perform the updates. At the end of the process, you will be prompted to restart the system.
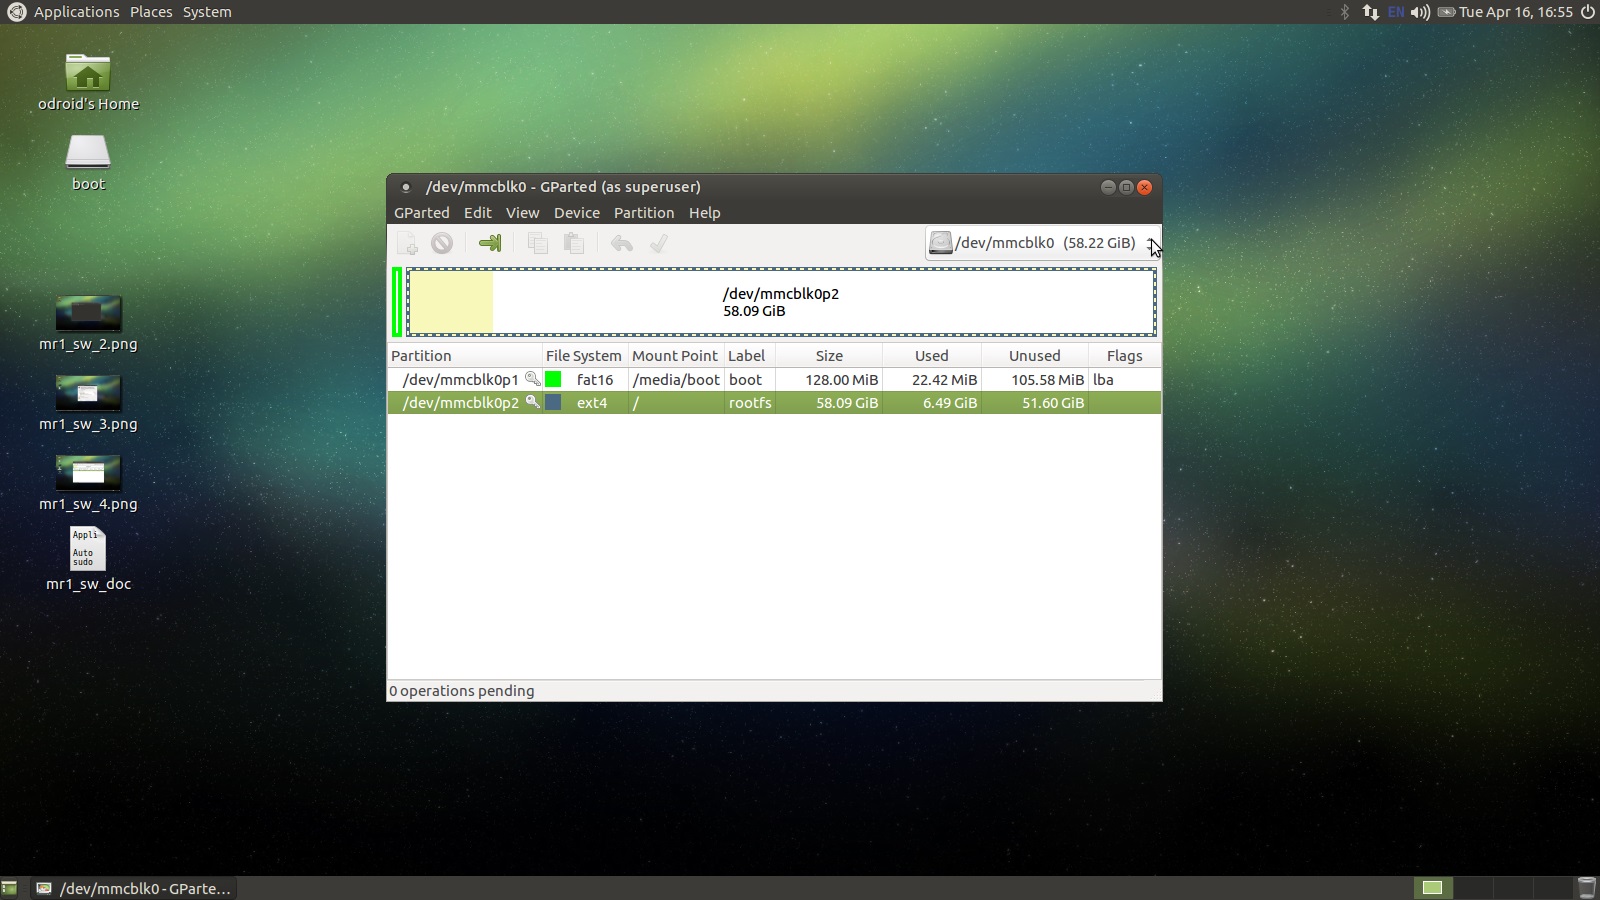
Notice the absence of a login prompt when the system started up. It’s looking more and more like a retro gaming console by the minute. Ok last thing we are going to do is resize the main partition to use all the available space. If you go to System -> Administration -> GParted in the menu system you should see something like what's depicted below. Notice that there is around 50GB of unused space. If you have less unused space, but still have room on the SD card, you need to resize your root partition.
I will give you a quick rundown of the process.
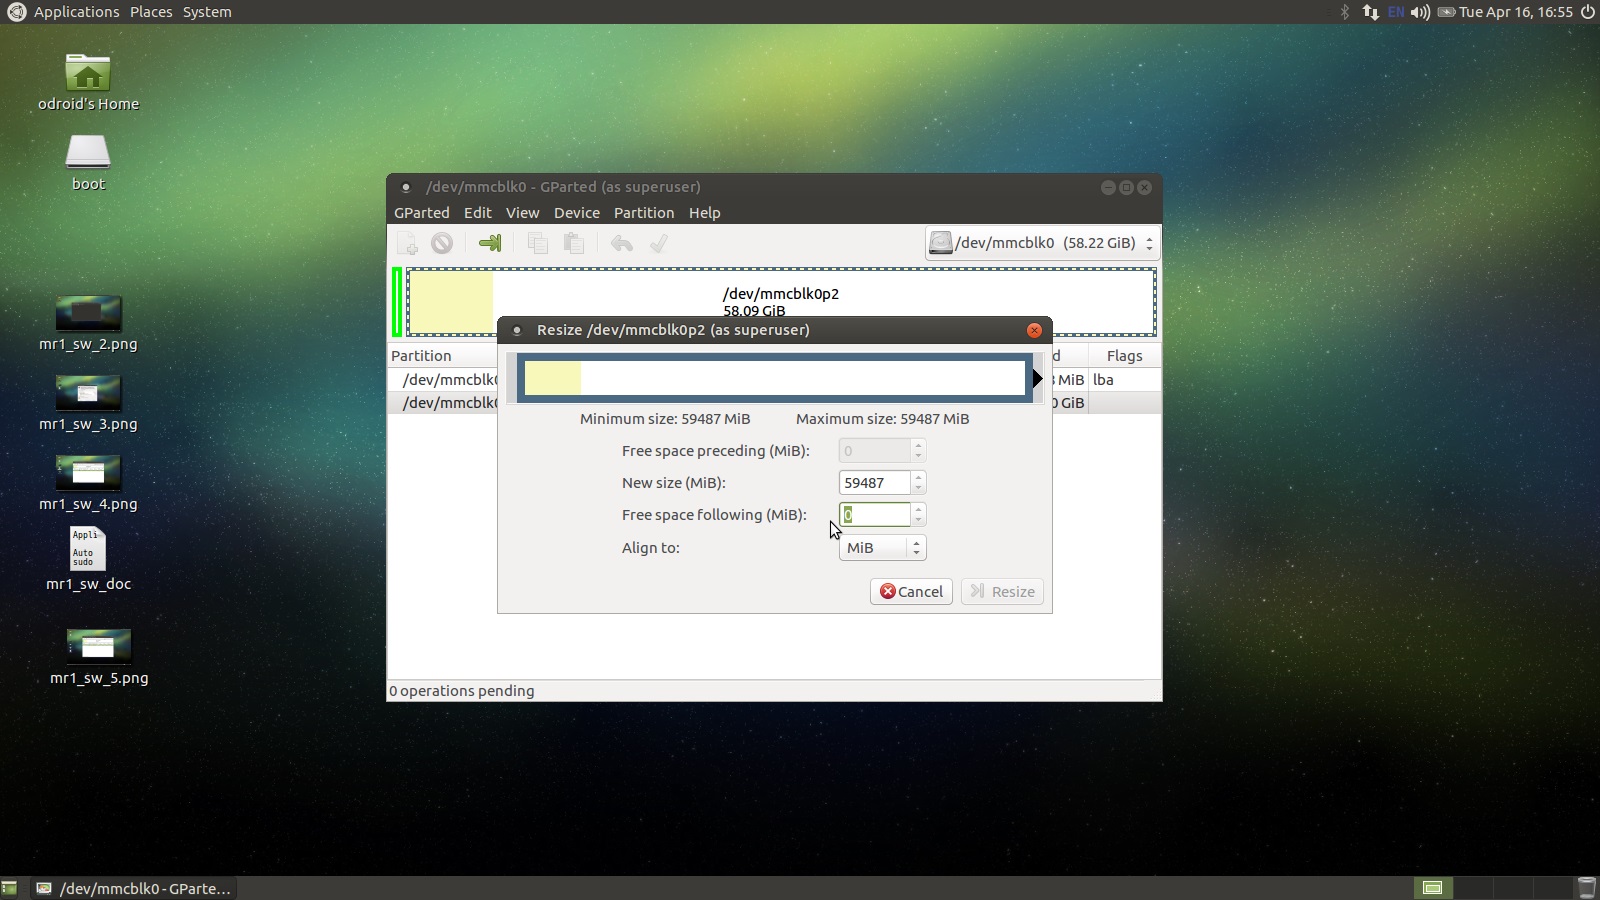
ALERT: You may not need to do this but you should double check anyway. The best way to work with an ext4 file system is on our ODROID-XU4. Use the second SD card that comes with the recommended purchases listed on the hardware build. Write the base OS image onto the SD like we did above and install gparted, also like we did above. You do not have to run all the updates, just make sure gparted is installed. Use the SD to USB adapter, listed above, to mount the SD card that we want to resize its partitions onto the OS. You should see a little drive icon appear, we will call this SD-USB for SD to USB.
Fire up the bare bones Ubuntu SD card if you haven't already. Start gparted from the menu System -> Administration -> GParted and select the SD-USB card attached--not the root file system running Ubuntu.

Select the root file system on the SD-USB card. Right click on it and go to the resize option if you get an error you may need to unmount this partition and then try to resize it. You can visually resize the partition now by dragging the arrow all the way to the right or by setting the fields contained in the form to have 0 free space following. We are done with this section.
Retroarch and Antimicro Installation
Alright now we are getting somewhere. Let’s get retroarch and antimicro installed, so we can begin the configuration process. To install retroarch we need to open a terminal, Applications -> System Tools -> MATE Terminal.
$ sudo add-apt-repository ppa:libretro/stable && sudo apt-get update -y && sudo apt-get install retroarch* libretro-* -yTry the command above on the ODROID-XU4, hit enter if prompted, and Y if prompted. If it fails, do not worry. I noticed it fails on the ODROID-C2, but I am not sure about the ODROID-C1+--the *'s in the package lists are the culprit. It will pull down some packages that have dependency issues and that then halts the whole command. If it fails, try running this command instead.
$ sudo apt-get install retroarch retroarch-assets retroarch-dbg libretro-beetle-lynx libretro-genesisplusgx libretro-handy libretro-4do libretro-bsnes-mercury-performance libretro-bsnes-mercury-accuracy libretro-bsnes-performance libretro-beetle-wswan libretro-dinothawr libretro-beetle-ngp libretro-bsnes-balanced libretro-gambatte libretro-fbalpha2012 libretro-fba libretro-beetle-psx libretro-vba-next libretro-gw libretro-mupen64plus libretro-beetle-sgx libretro-2048 libretro-tyrquake libretro-beetle-pcfx libretro-prosystem libretro-bsnes-accuracy libretro-parallel-n64 libretro-picodrive libretro-mame libretro-nestopia libretro-mednafen-psx libretro-core-info libretro-gpsp libretro-mess libretro-beetle-pce-fast libretro-mgba libretro-fbalpha2012-neogeo libretro-fba-neogeo libretro-beetle-vb libretro-tgbdual libretro-fba-cps1 libretro-fba-cps2 libretro-fmsx libretro-stella libretro-yabause libretro-mess2014 libretro-mess2016 libretro-desmume libretro-beetle-bsnes libretro-glupen64 libretro-catsfc libretro-quicknes libretro-bsnes-mercury-balanced libretro-vbam libretro-bluemsx libretro-fceumm libretro-nxengine libretro-snes9x-next libretro-mame2014 libretro-mame2016 libretro-fbalpha2012-cps1 libretro-fbalpha2012-cps2 libretro-fbalpha2012-cps3 libretro-fbalpha libretro-snes9x libretro-prboom libretro-beetle-gba -yOk, if one of these packages fails, remove it from the list, and try again. The command above is the exact command I use on my ODROID-C2s. For my ODROID-XU4s, I have been using the initial command listed above. After that is done, do a little updating and cleaning.
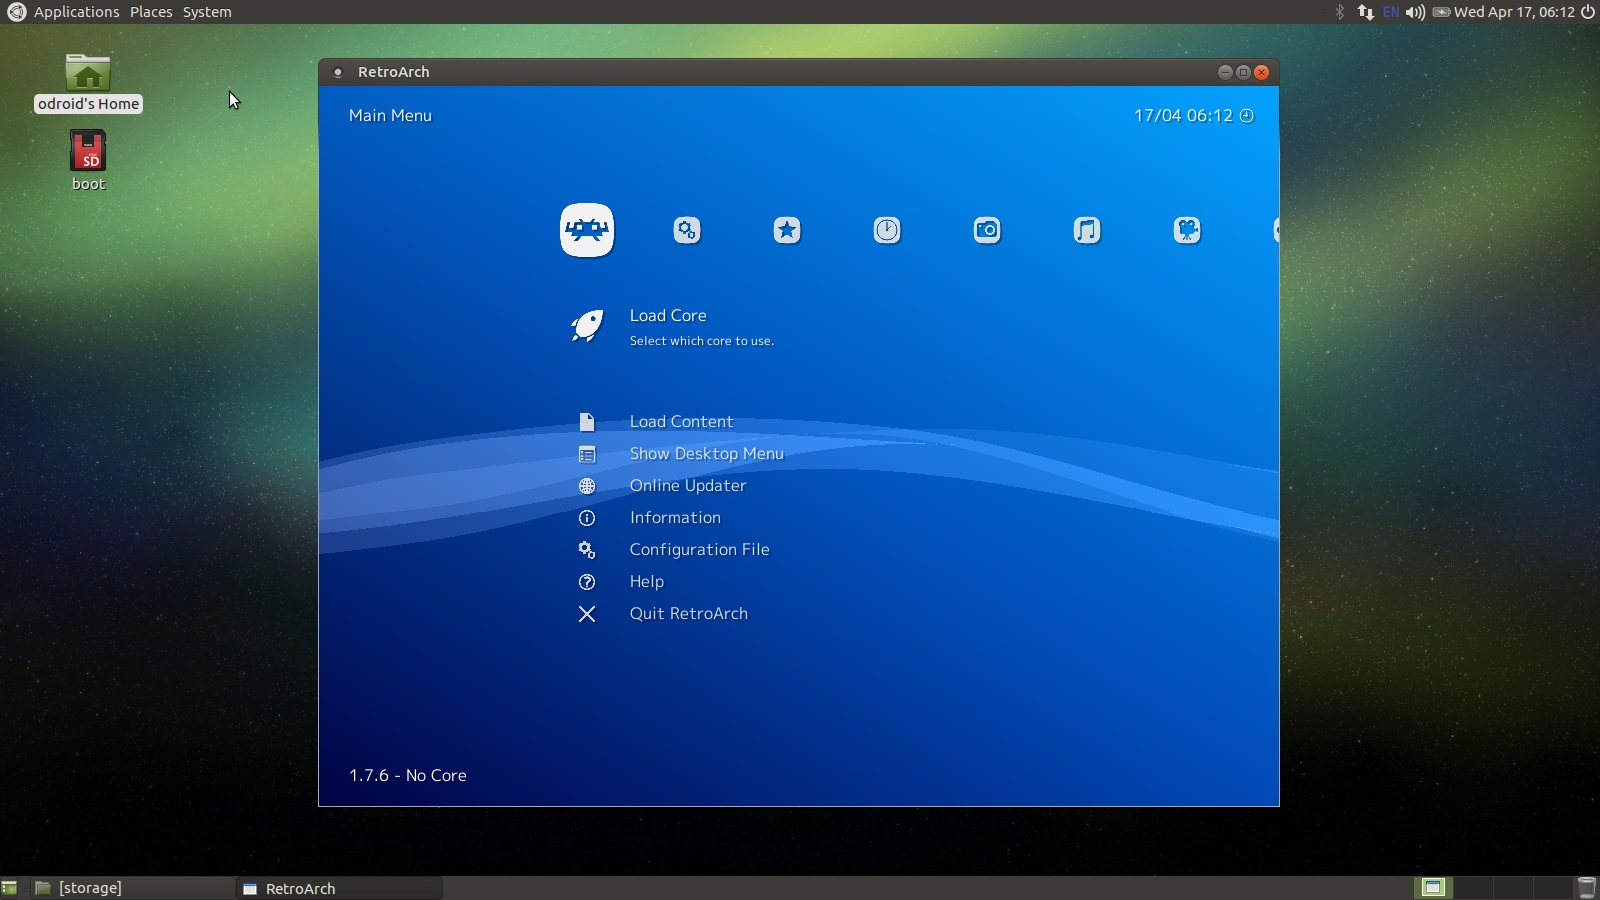
$ sudo apt-get update -y
$ sudo apt-get upgrade -y
$ sudo apt-get autoremove -y
Now you should have this menu option available after the commands are done running, Applications -> Games -> Retroarch. Click on it and you should see something similar to what is depicted below.
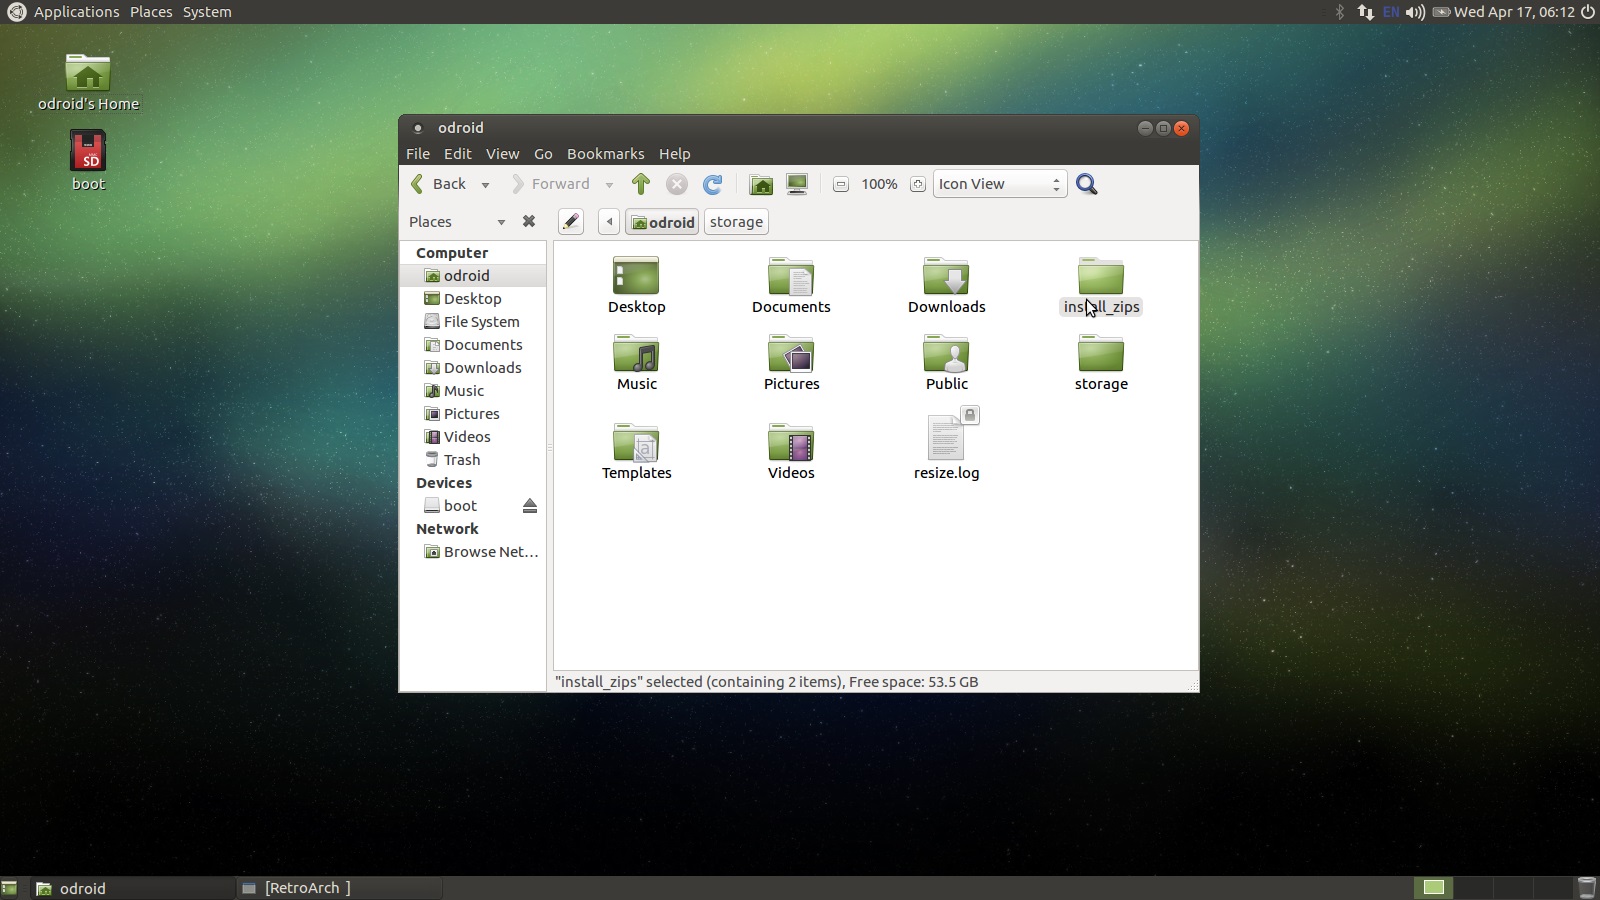
Do not mess with retroarch now, we will come back to it. Next we have to get antimicro installed so we can control everything with a gamepad when retroarch is not running. Go to this URL, https://github.com/AntiMicro/antimicro/releases and download the latest release as a zip file. You should see it below the Windows EXE entries. Once it is done downloading, open the ODROID home folder. There is a link on the desktop for it. Create a new folder called install_zips as depicted below.
Now go to the downloads folder and copy the antimicro zip file from there and paste it into the install_zips folder. Right click on it and select Extract Here.
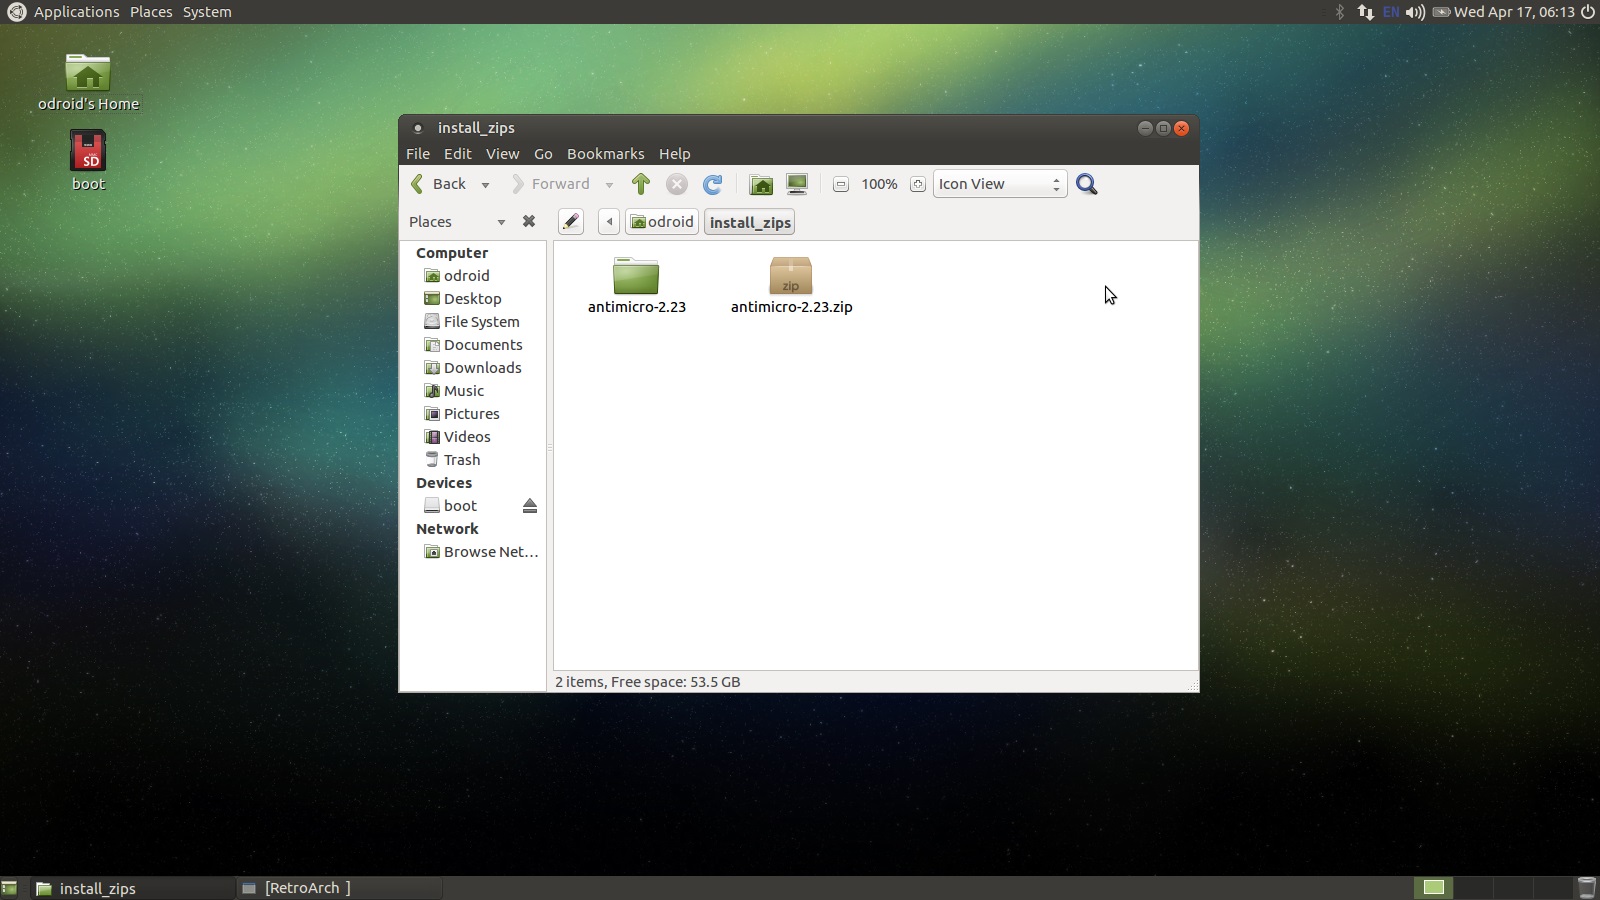
Now open up a terminal at, Applications -> System Tools -> MATE Terminal, and run the following commands. If your antimicro folder, after file extraction, has a different name use that name in the change directory command below.
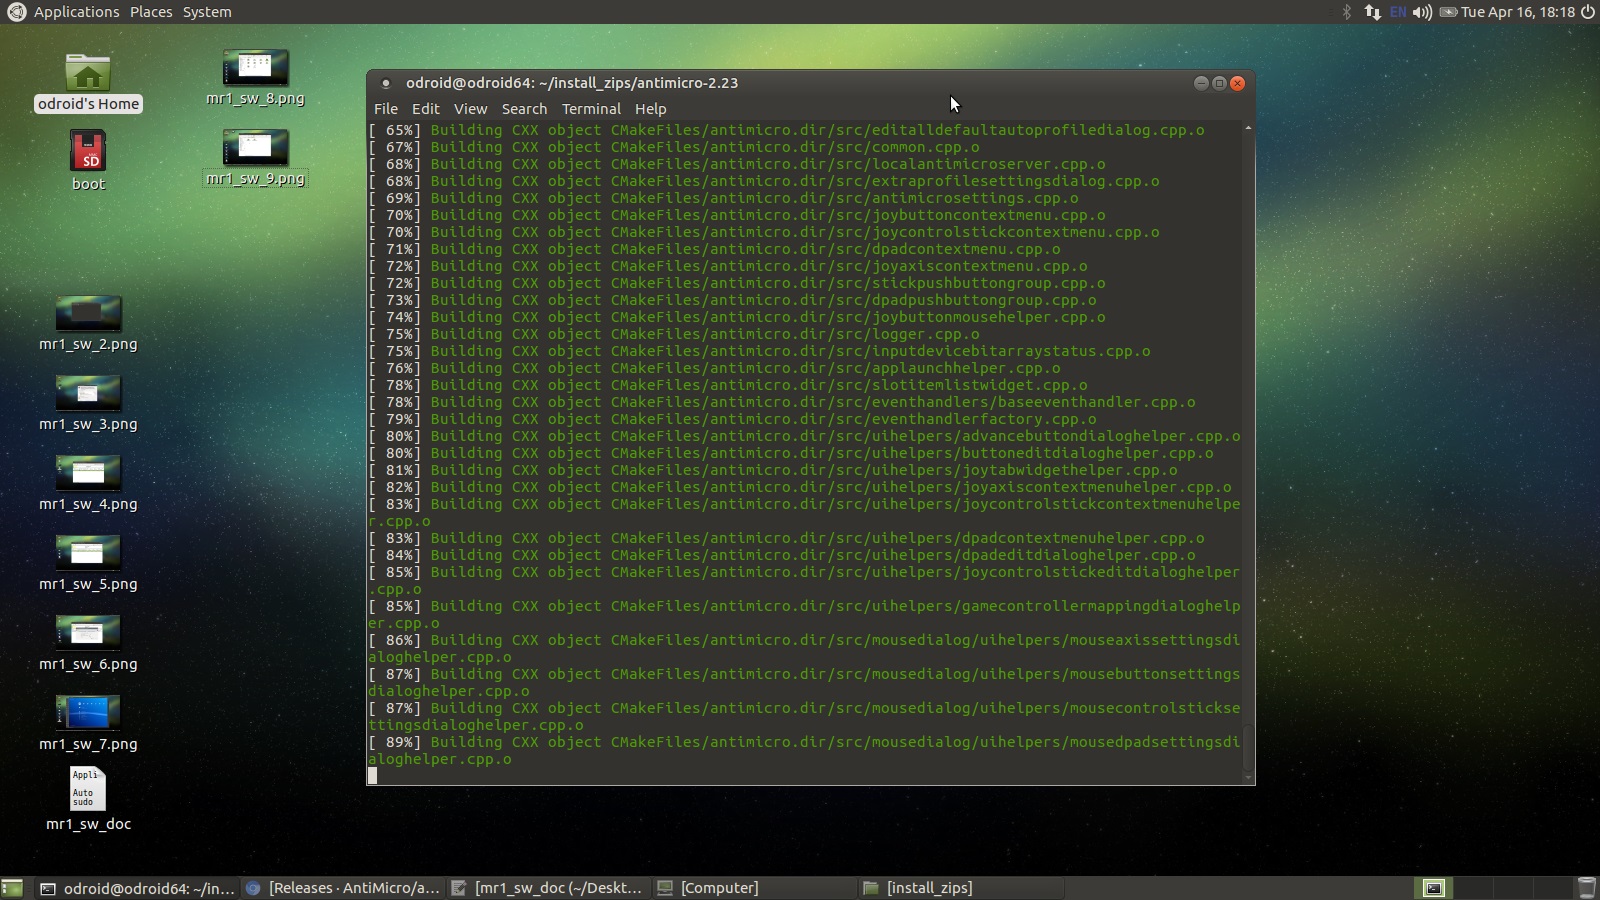
$ cd install_zips/antimicro-2.23/
$ sudo apt-get install libsdl2-dev -y
$ sudo apt-get install qttools5-dev -y
$ sudo apt-get install qttools5-dev-tools -y
$ sudo apt-get install libxtst-dev -y
Once all those packages are installed we can compile antimicro without any errors. Run the following commands.
$ cmake .
$ sudo make
$ sudo make install
You should see something like the following during this process.
Once that is done, test antimicro, by typing run antimicro at the terminal. If everything is ok you should see something like what is depicted below.
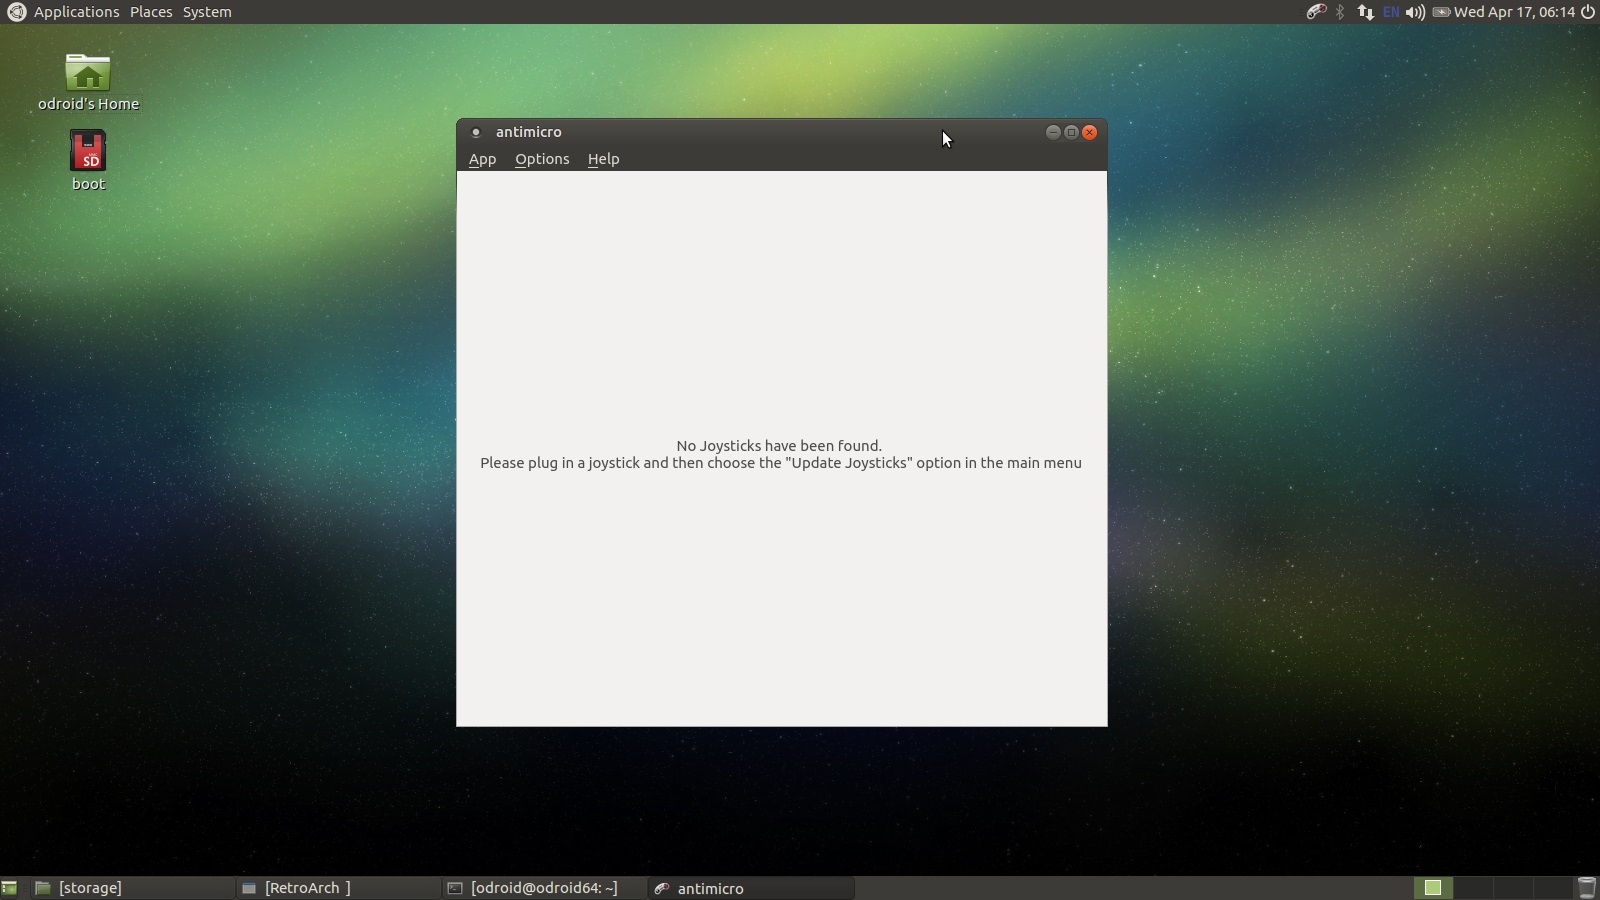
Plug in a game controller that is supported by Linux. Hardkernel has the best price I have seen for GameSir controllers. So, if you pick up some ODROID-GOs or other hardware grab one of these GameSir Wired Controllers. Start retroarch, Applications -> Games -> RetroArch and you should see large yellow text flash across the bottom of the screen, look closely. I have had some versions of the controller act a bit weird, but I have had no problems. Close retroarch. Now type into the terminal window the antimicro command. You should see something similar to what is depicted below with a properly detected controller.
Next up we are going to configure antimicro, and retroarch.
Retroarch and Antimicro Configuration
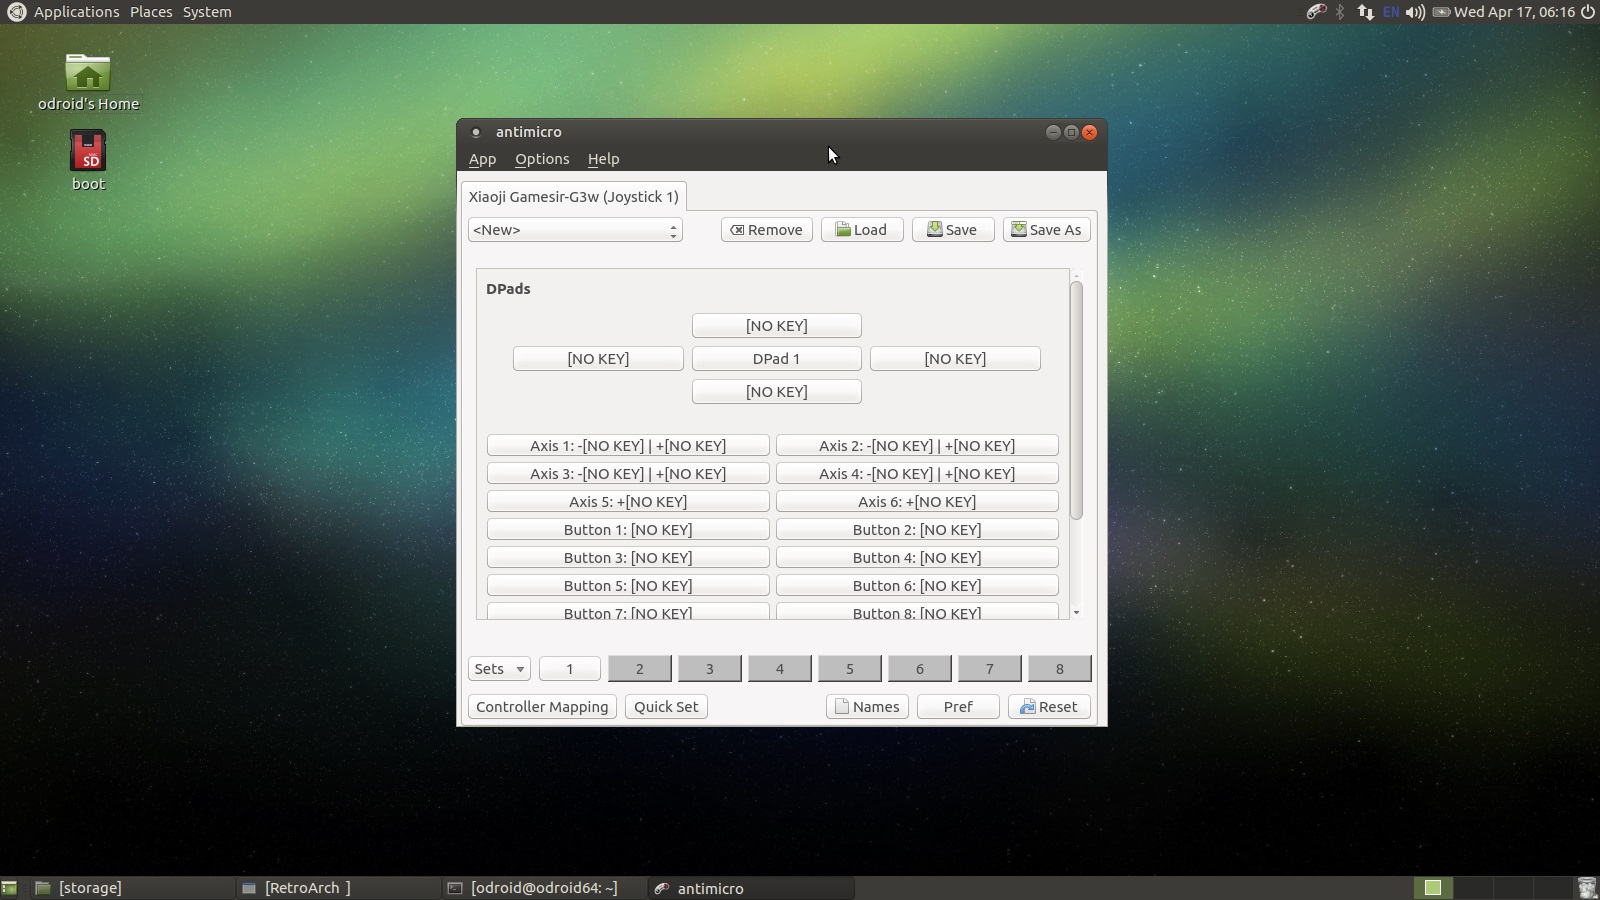
Get antimicro configured first, so that we can start controlling the desktop environment with the gamepad. Open up a terminal, I will not list the menu path for it from this point forward. Type antimicro in the terminal and wait for the app to launch. Connect your linux supported controller and make sure that antimicro recognizes it. If it does not you will need to try another controller.
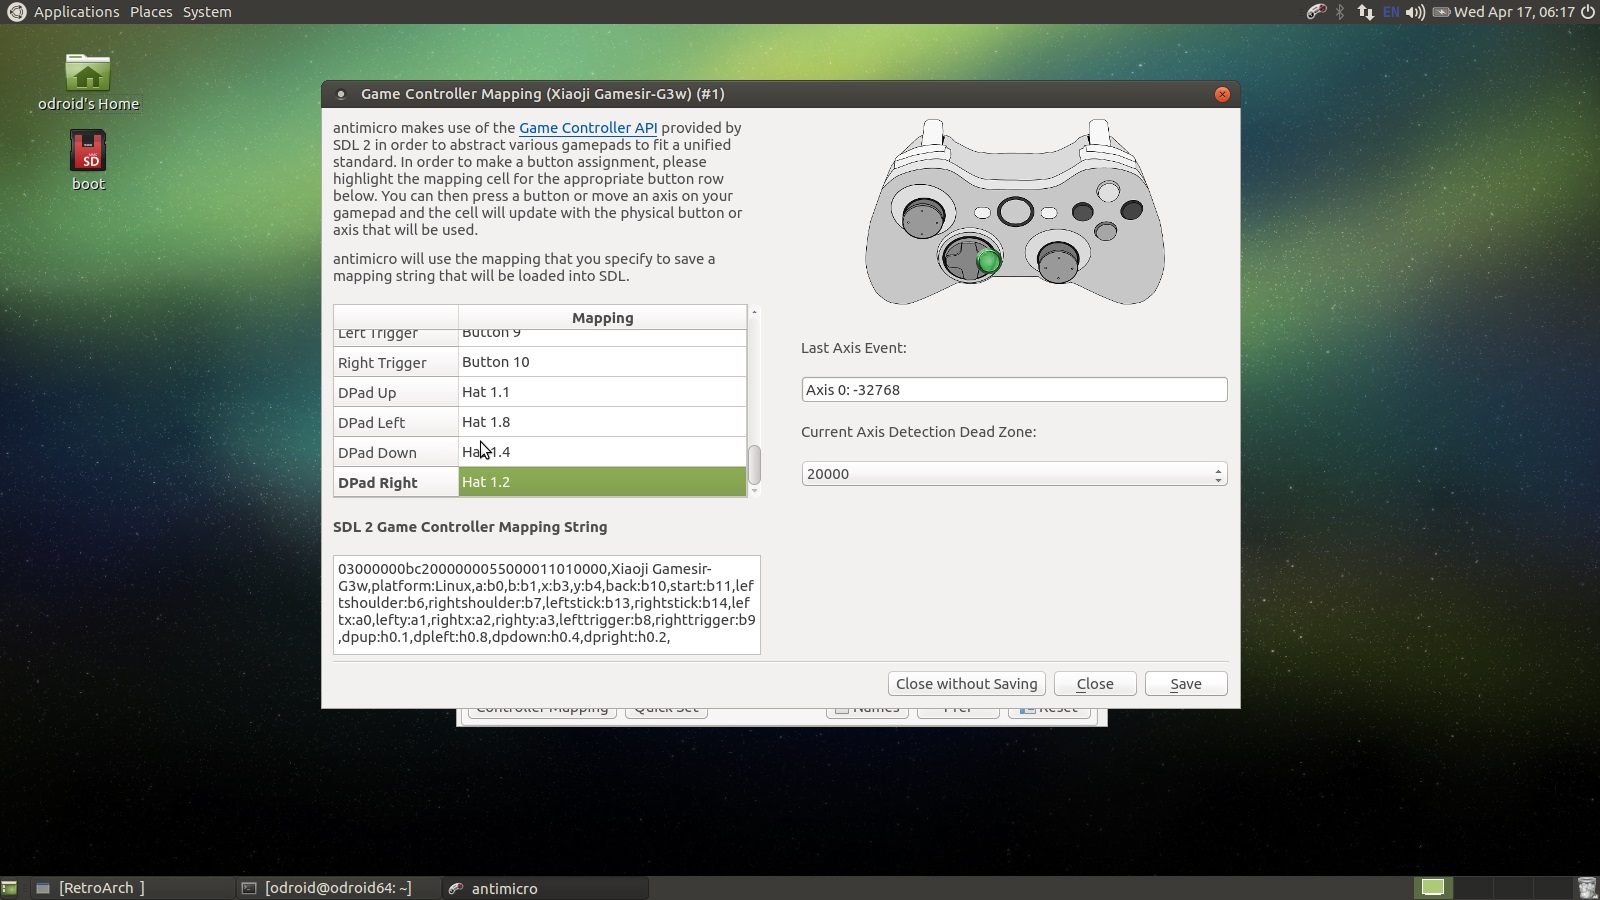
Click the Controller Mapping button on the bottom left hand corner of the UI. This is where you tell antimicro about the base functionality of your controller. If you do not have a button for a specific position in the list, for instance Linux seems to ignore the blue central button on the GameSir controllers, use your mouse to click down to the next viable option. Match up the buttons on the gamepad with the controller graphic's green button indicator.
ALERT: Some buttons act like triggers and fire multiple times. Use the mouse to back up the position of the mapping and fix the double entry. Click save when you are done and return to the main antimicro UI.
You will see a new mapping on the main antimicro UI that contains buttons for all the new mappings you just made. What we are going to do here is setup mouse support so that you can control the desktop environment from the gamepad when retroarch is not running. We will use the left thumbstick for precise, slower, mouse control and the right thumbstick for faster, coarse mouse control. The A and B buttons will serve as the left and right mouse buttons. Right click on the left thumb-stick area and select mouse normal from the option list.
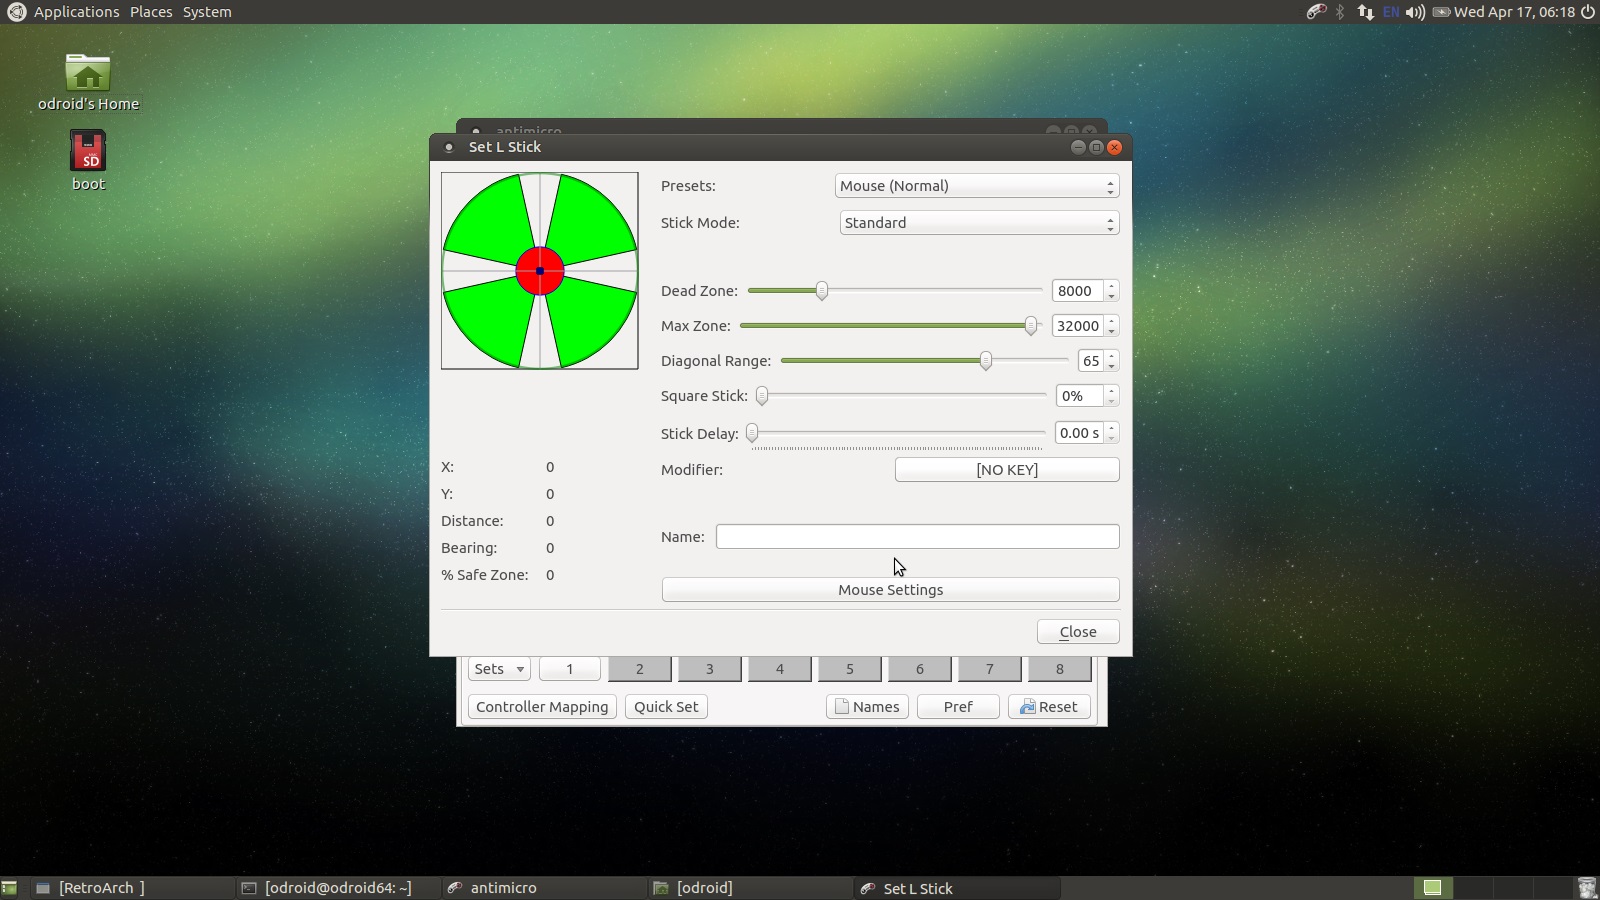
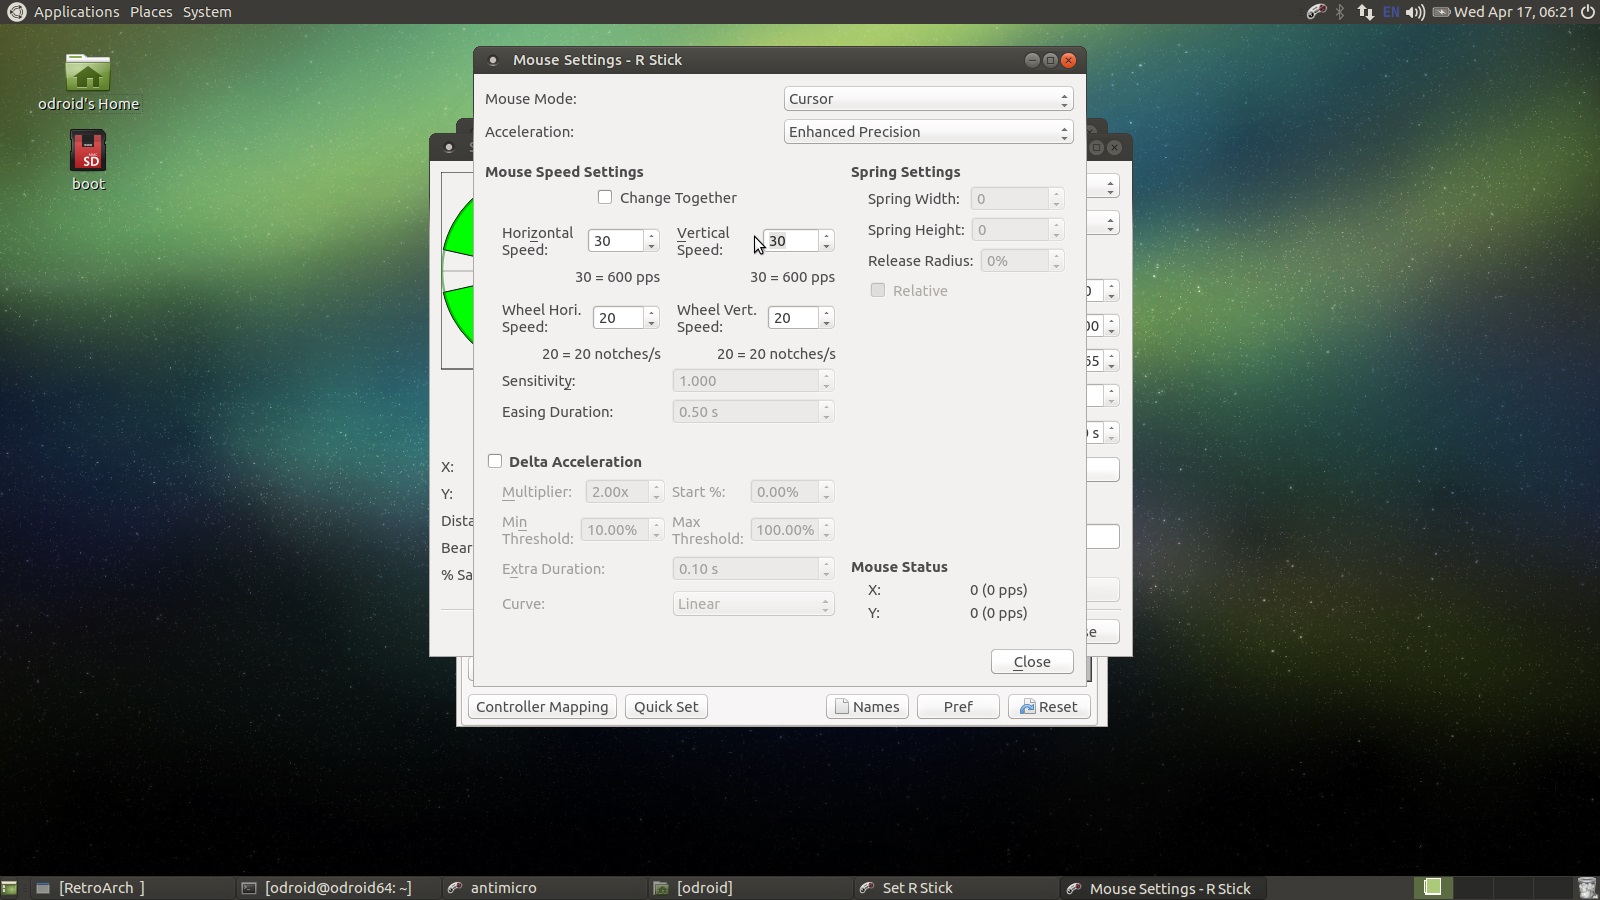
Click on the left thumb, tick buttons again, and find the Mouse Settings button at the bottom of the window. The image above shows the button. In the mouse settings window, set the Horizontal Speed and Vertical Speed to 10 for the left thumbstick as depicted below.

Do the same thing for the right thumbstick except now set the Horizontal Speed and Vertical Speed to 30 as depicted below.
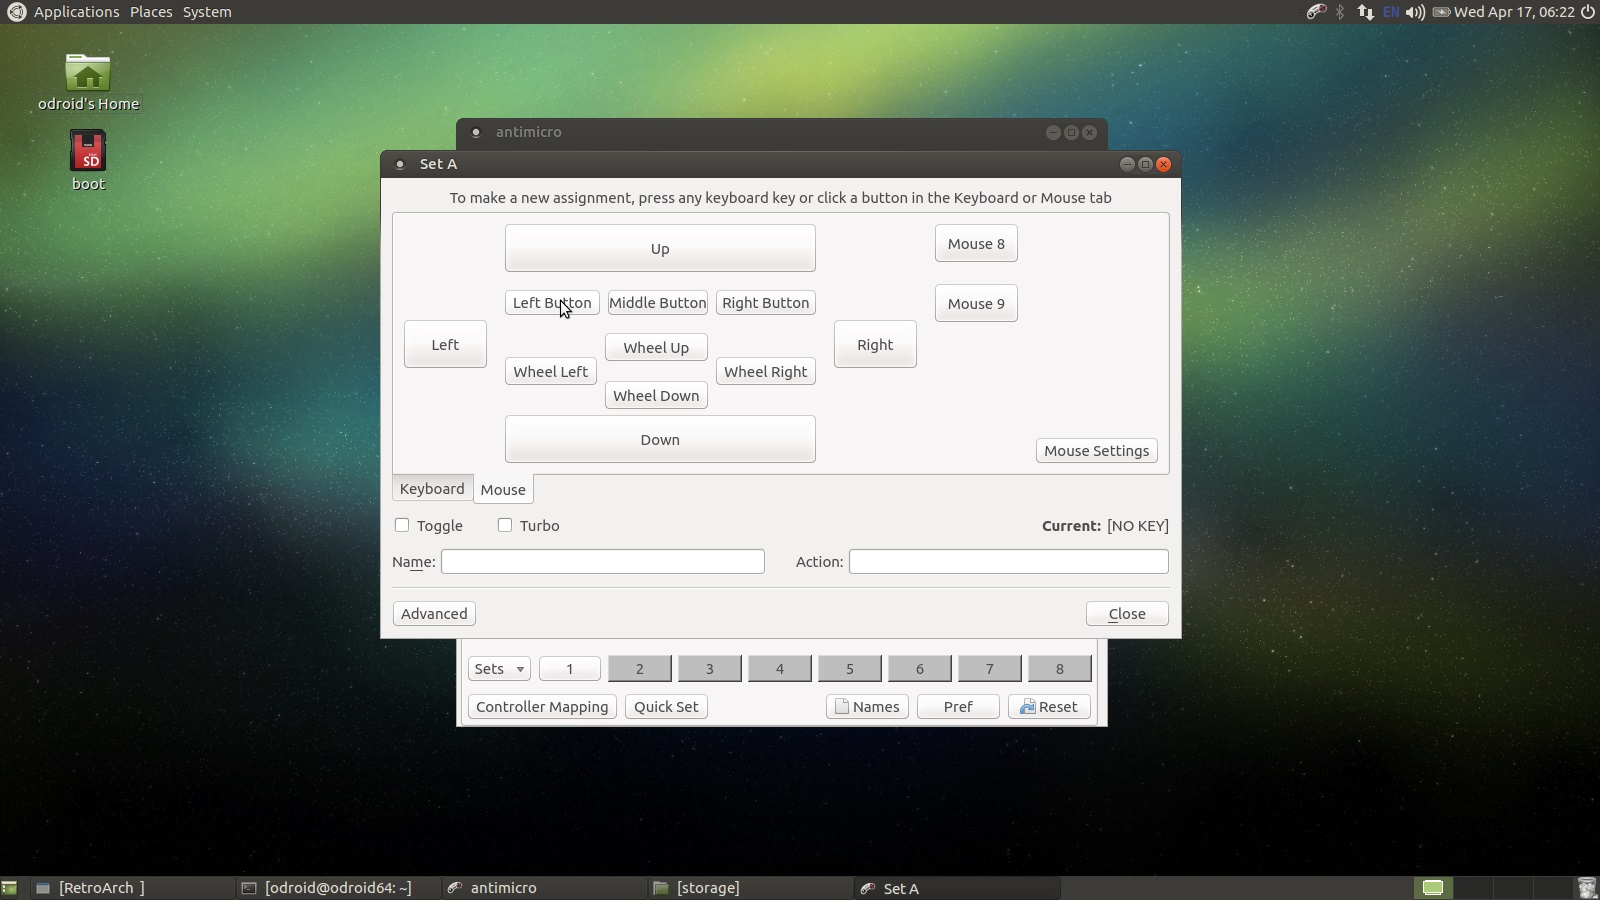
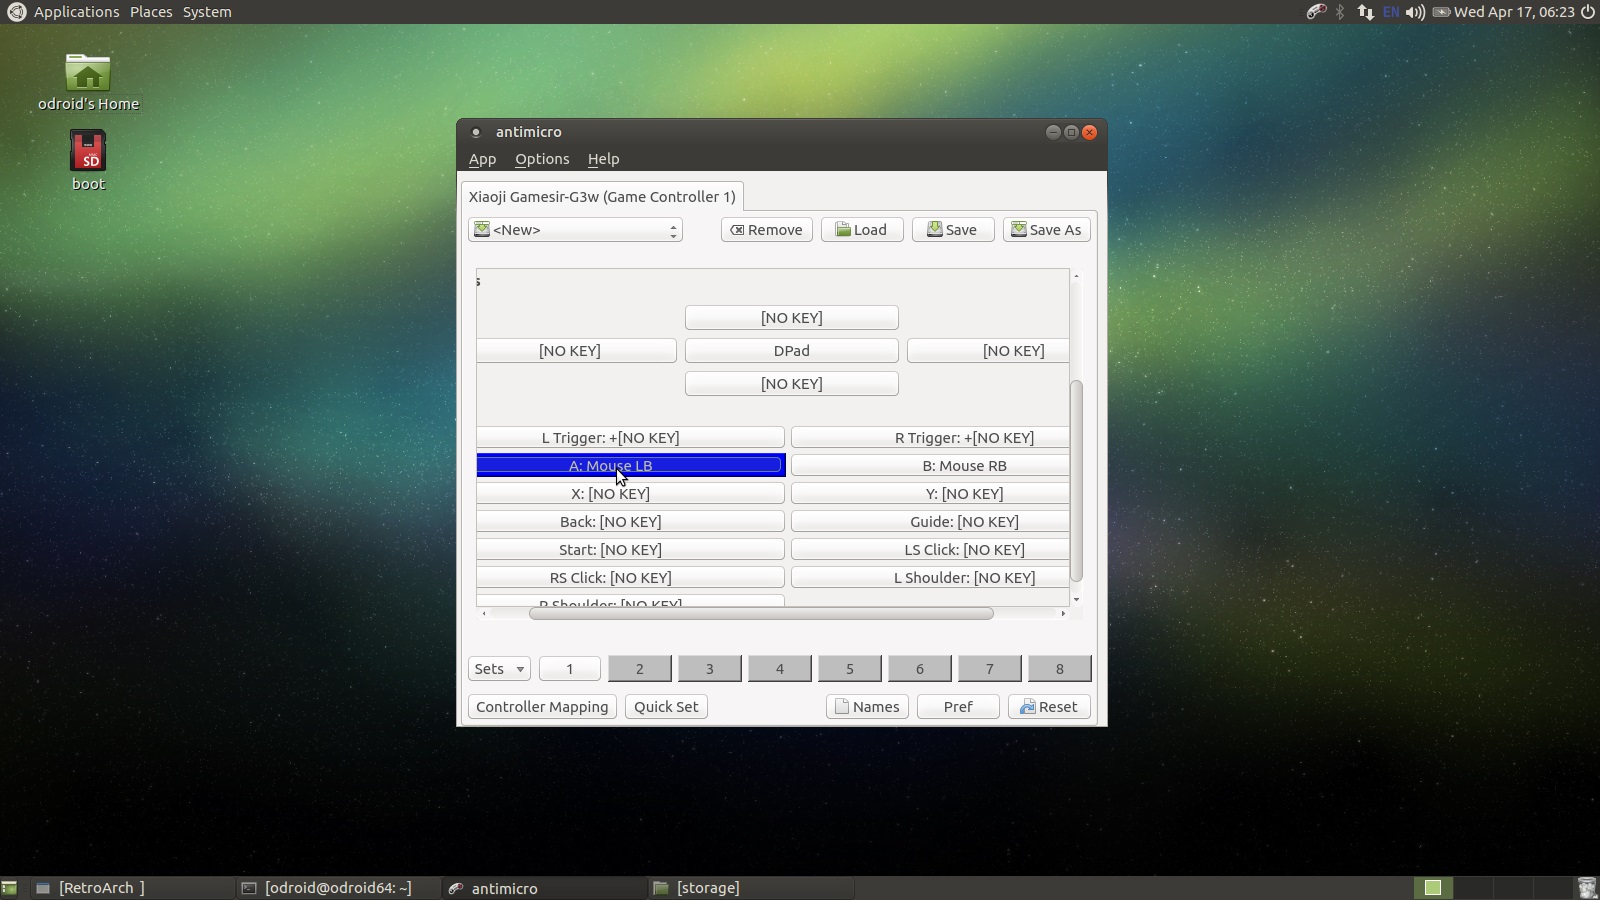
Now let us map the mouse buttons, close all dialogs and get back to the main antimicro UI. Find the A button in the button list below the thumbstick and dpad listing. Click on it then click on the Mouse tab. Select the left mouse button. Do the same thing for the B button except choose the right mouse button for that mapping. Below is a screen shot depicting the left mouse button mapping in action.
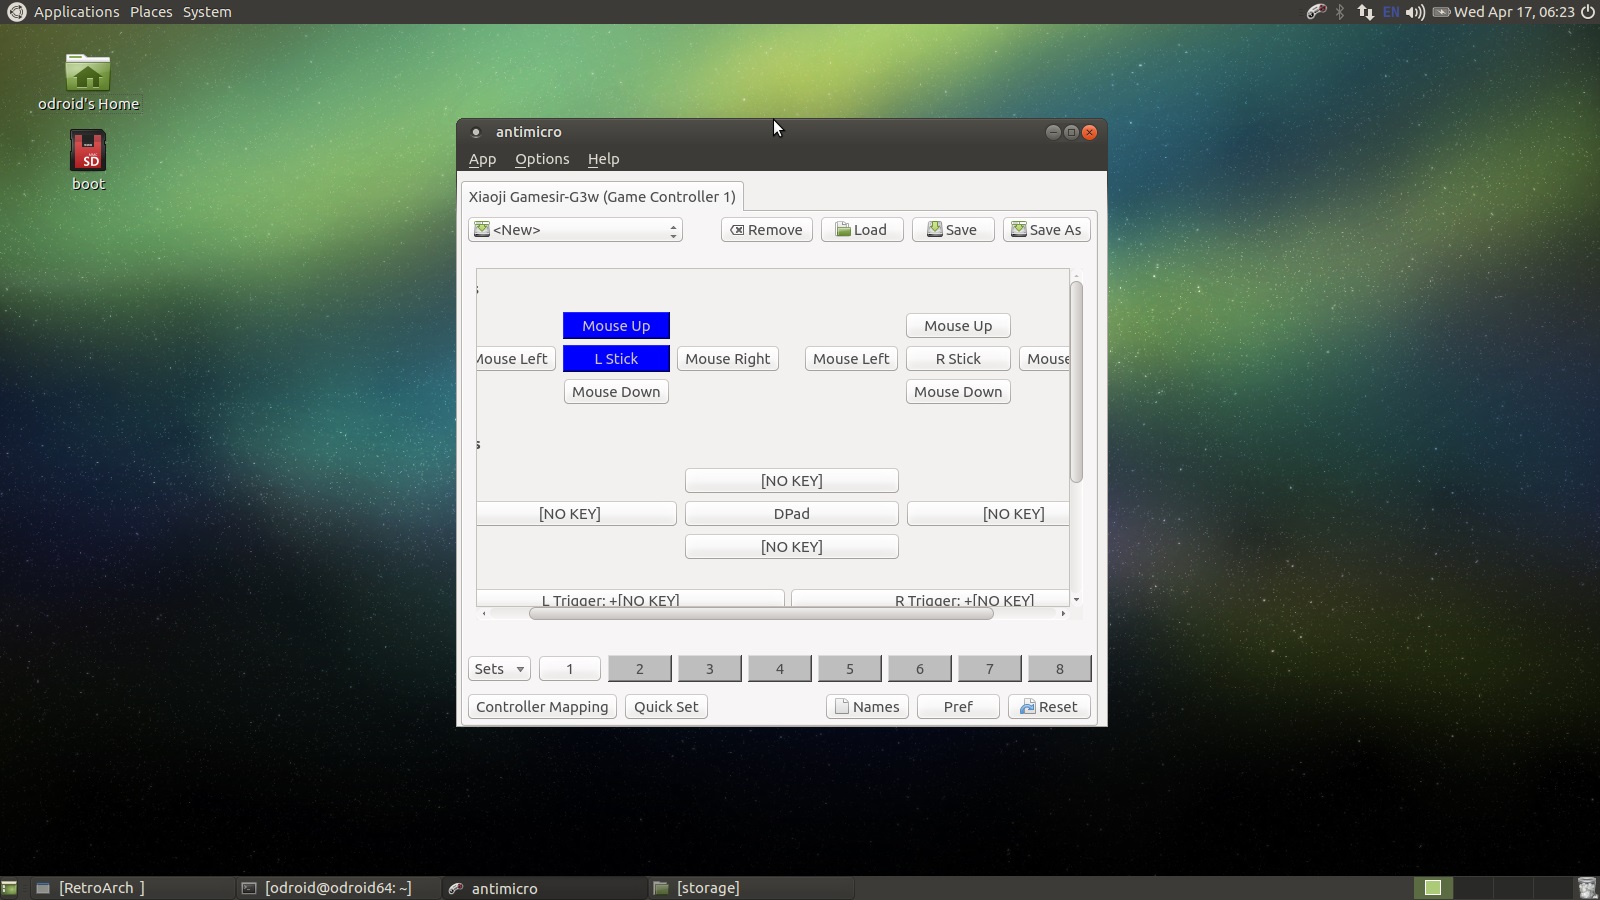
Take it for a spin while the main antimicro UI is open. You should see the mouse move around the screen as the button listings in the antimicro UI turn blue to indicate they are active. Adjust the speeds of the mouse controls according to your personal preferences.
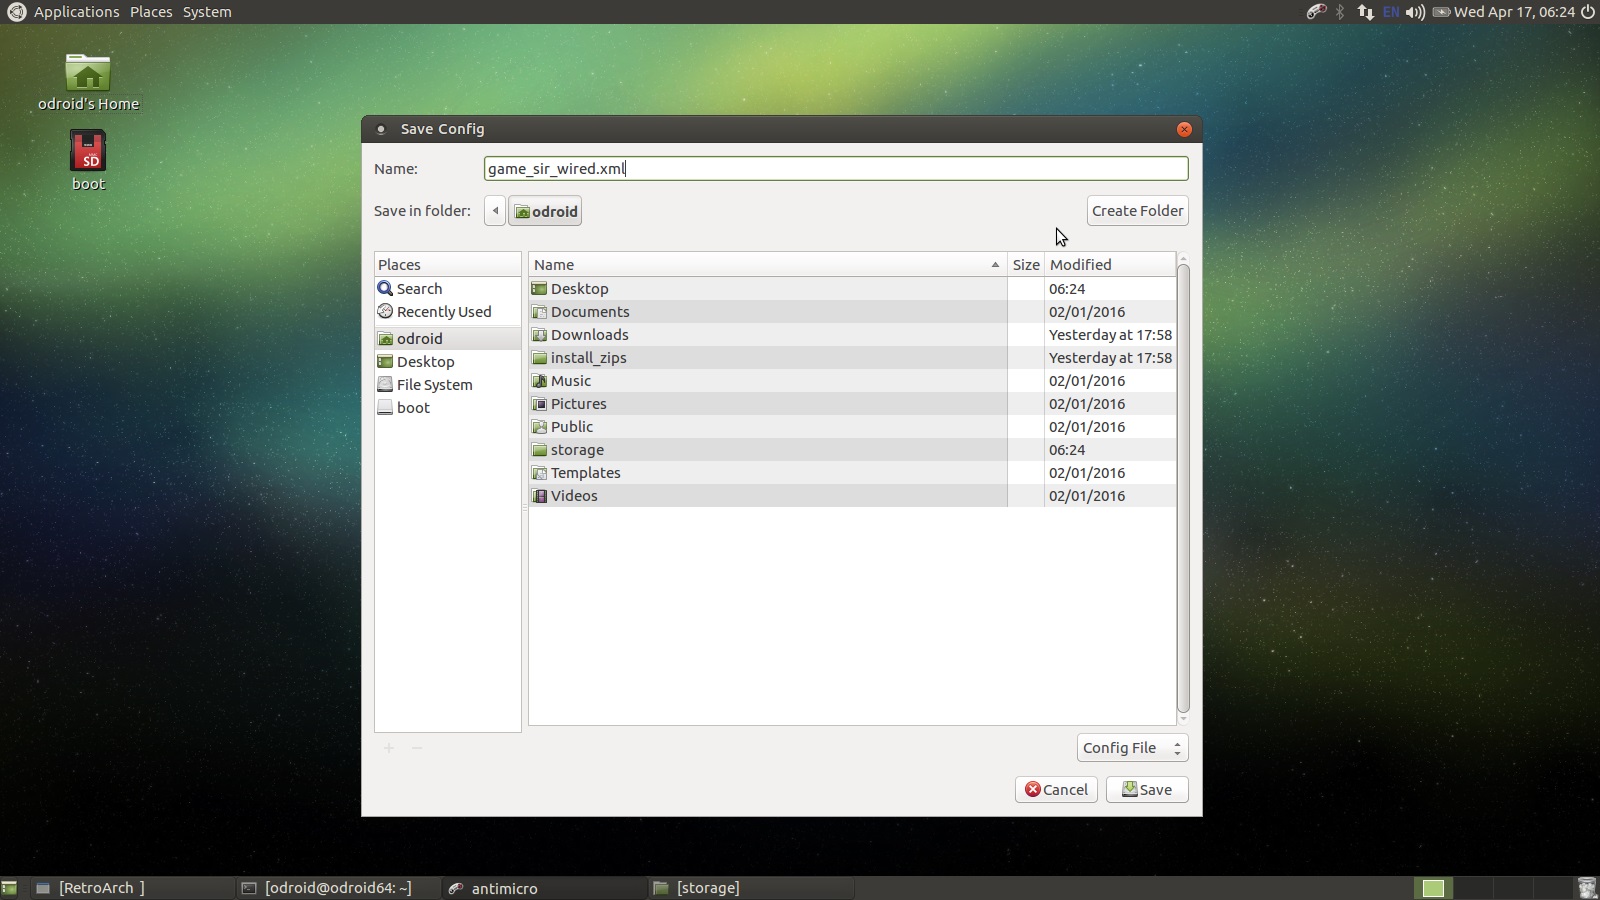
When you are all set, go back to the antimicro main UI and click the Save As button at the top right hand side of the screen. Save the controller configuration as game_sir_wired.xml or whatever you want to name your controller in the odroid home directory as shown below.
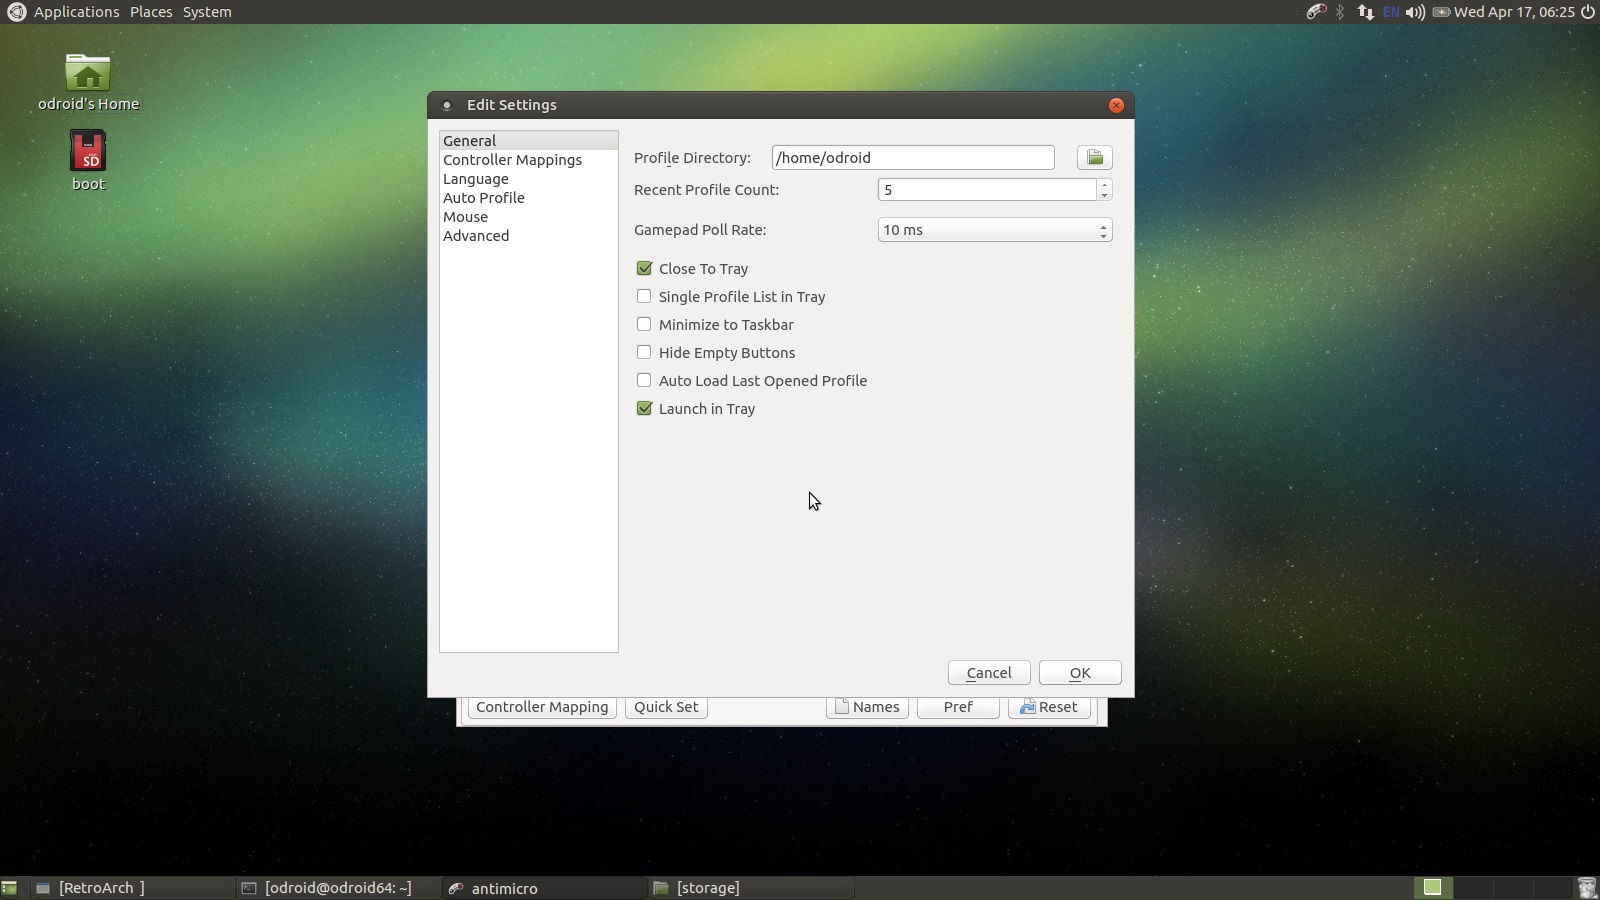
Click on Options -> Settings in the antimicro menu and make sure only Close To Tray and Launch In Tray are checked. This will ensure antimicro lives in the app tray and does not clutter up our screen. We have one more setting to adjust and then we will be done with antimicro and on to retroarch!
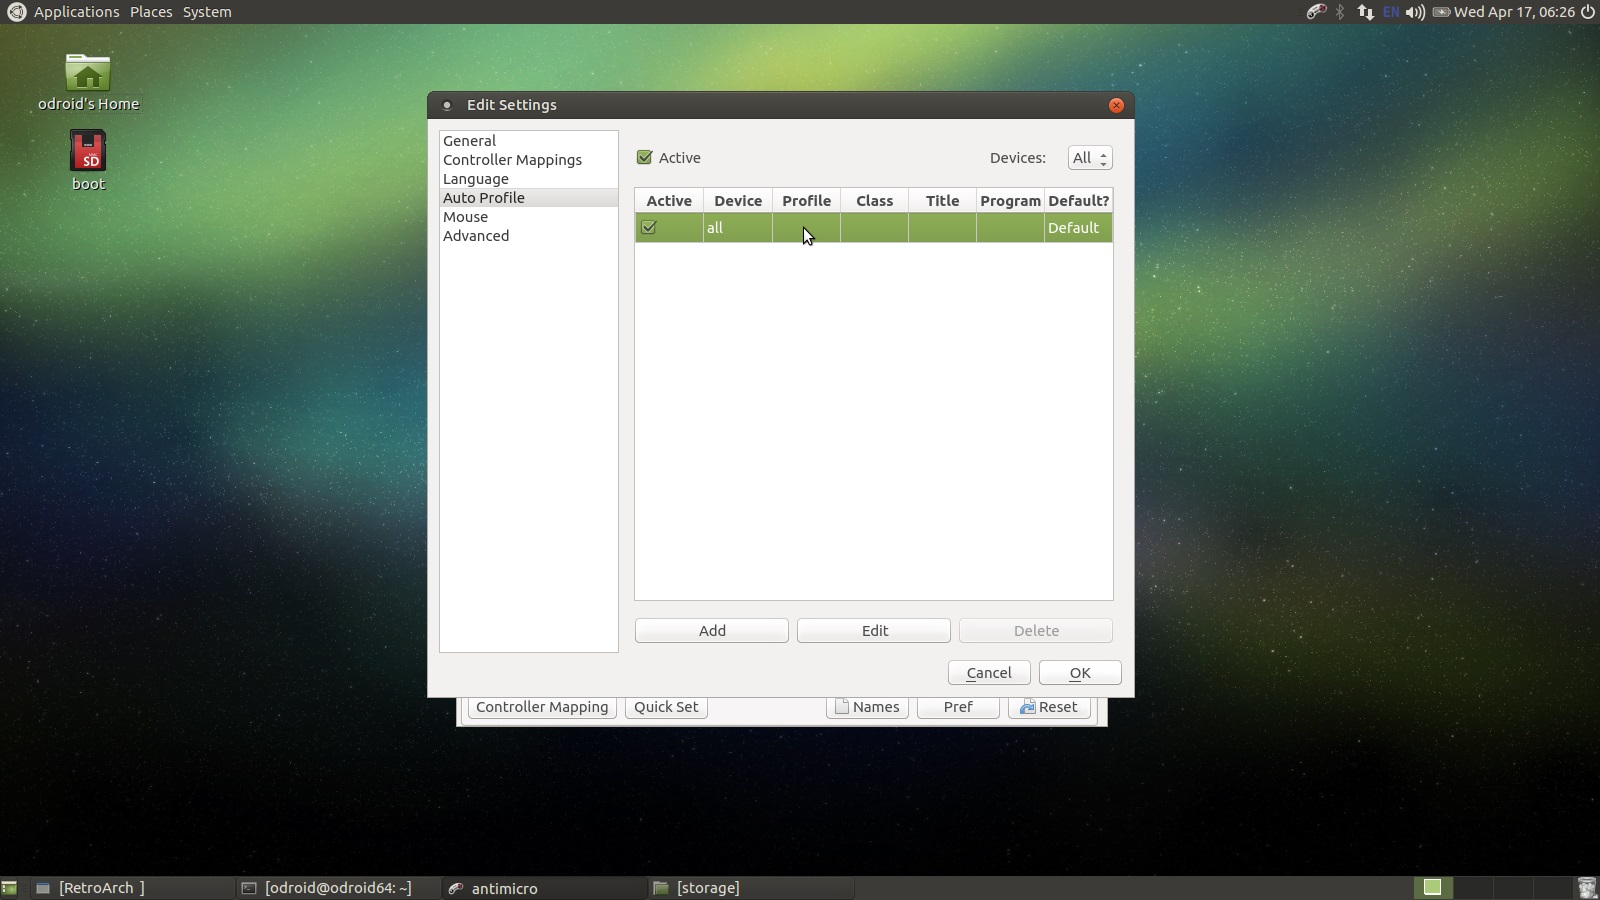
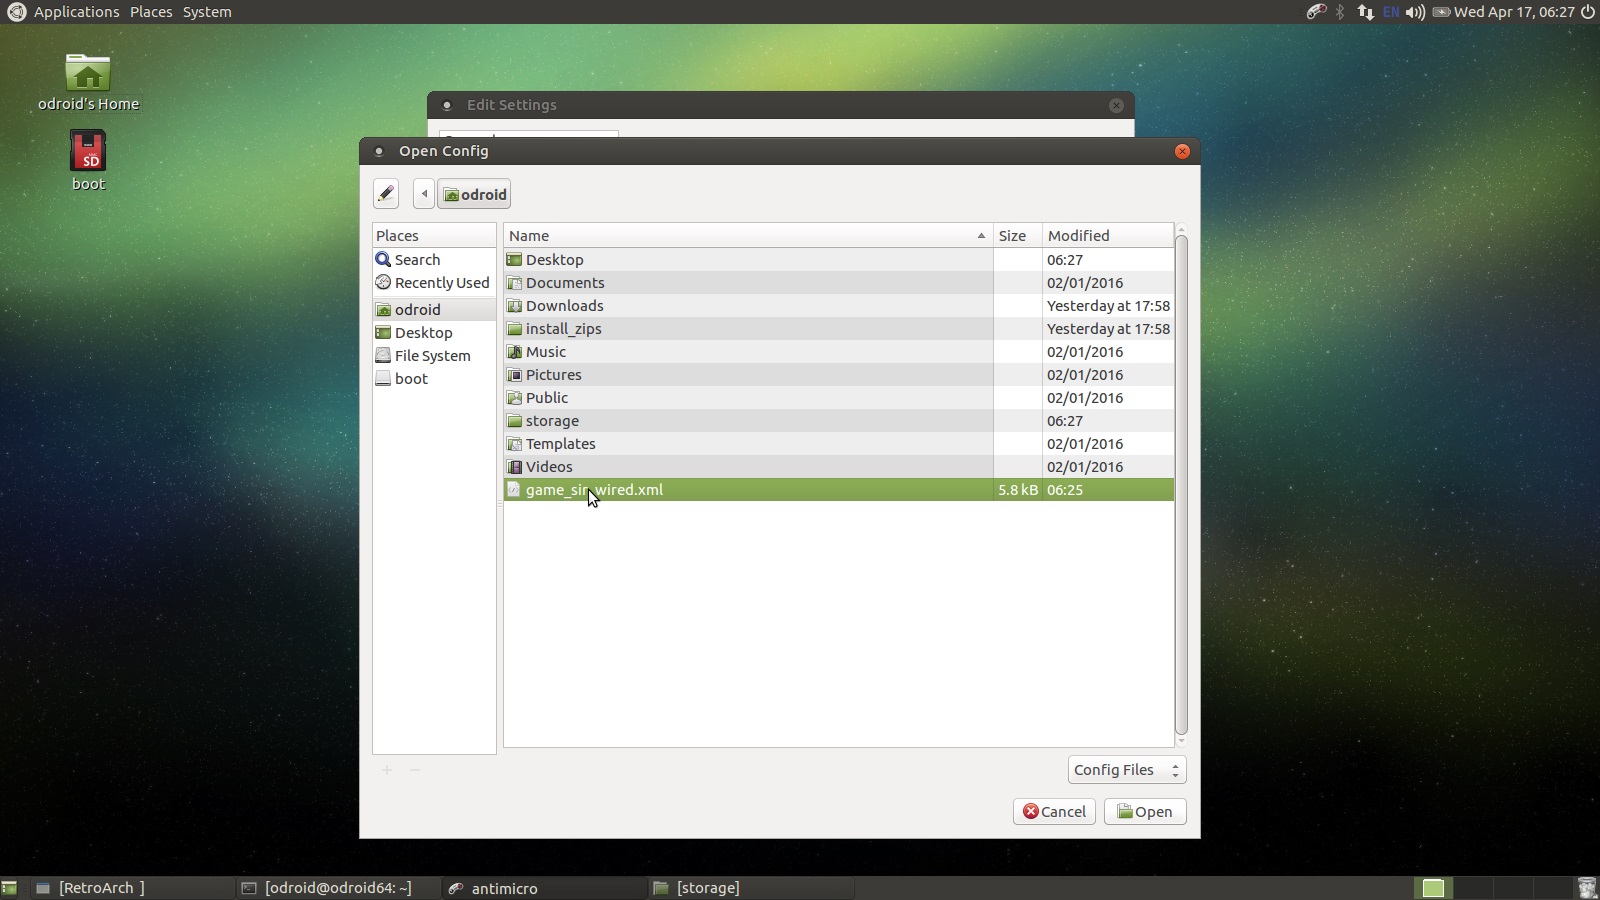
While still on the antimicro setting window click on the Auto Profile option on the left. This will determine what profile will automatically be associated with the attached gamepad. You only get one mapping. Click the Active checkbox at the top of the window. Then select the Default row in the table. Click the Edit button and browse to the controller mapping XML file you saved just a few steps back. Click Ok then quit out of antimicro, if it appears in the system tray click the controller icon in the system tray and quit the app. We are done with the antimicro configuration!

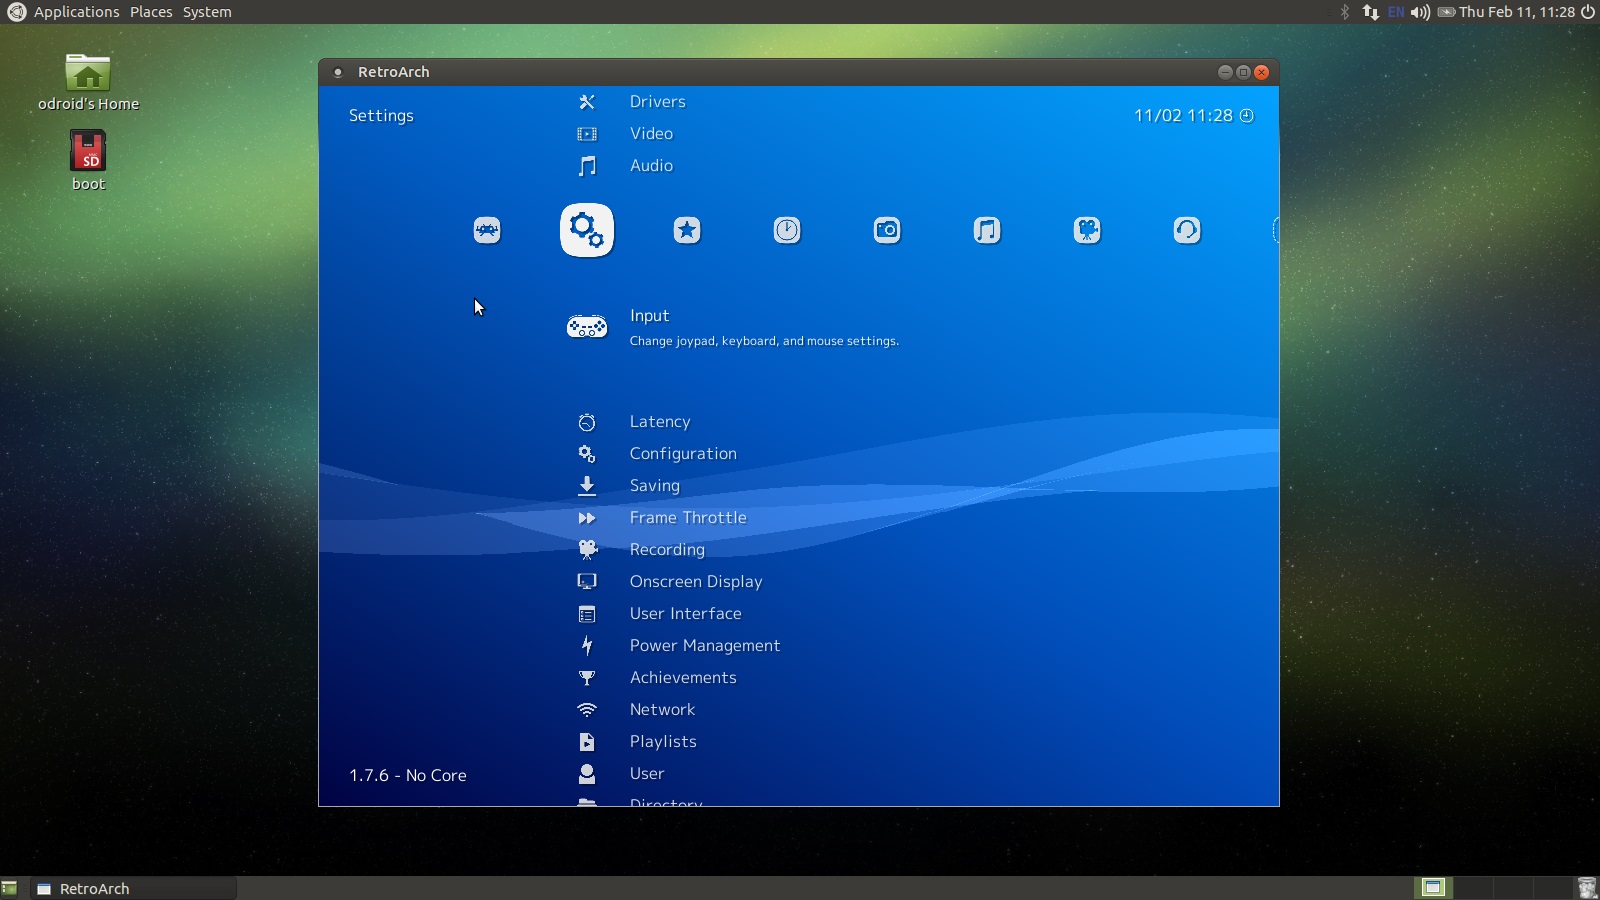
Next up, fire up retroarch from the menu system, I will not list the menu path for it from this point forward. First Let us get the gamepad working in retroarch. In retroarch, you can use the keyboard arrow keys, enter, and backspace to navigate the menu system without the gamepad. Make sure you have a mouse, keyboard, and game controller connected to your ODROID. First thing we will do is get the controller working. Use the arrows on the keyboard to navigate left to the Settings section, the move down to the Input section as shown below.
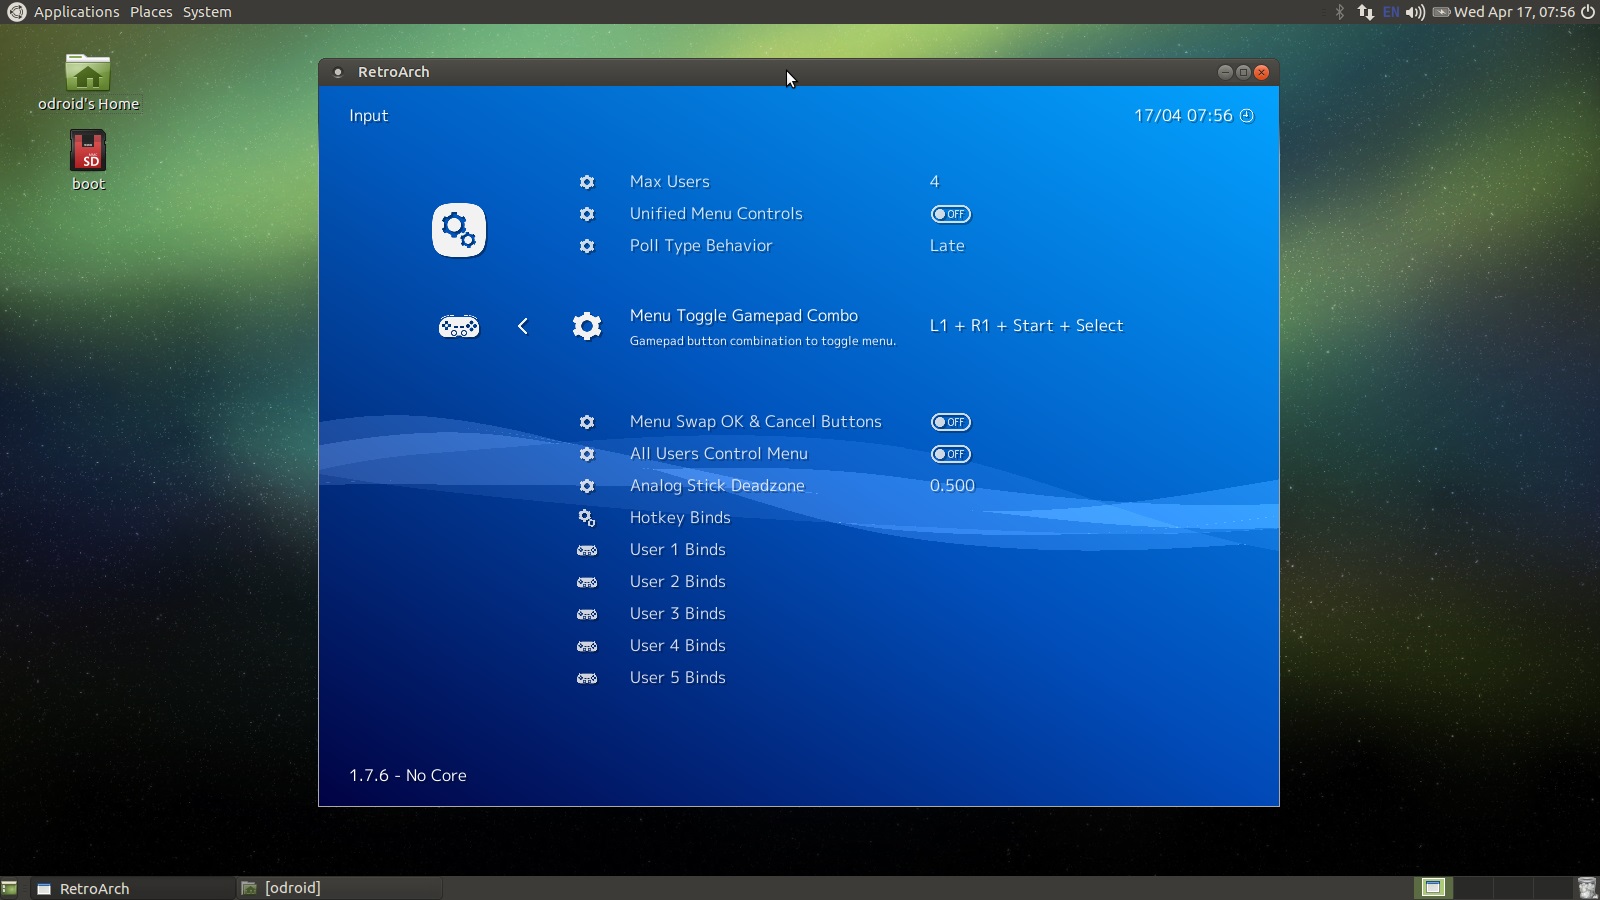
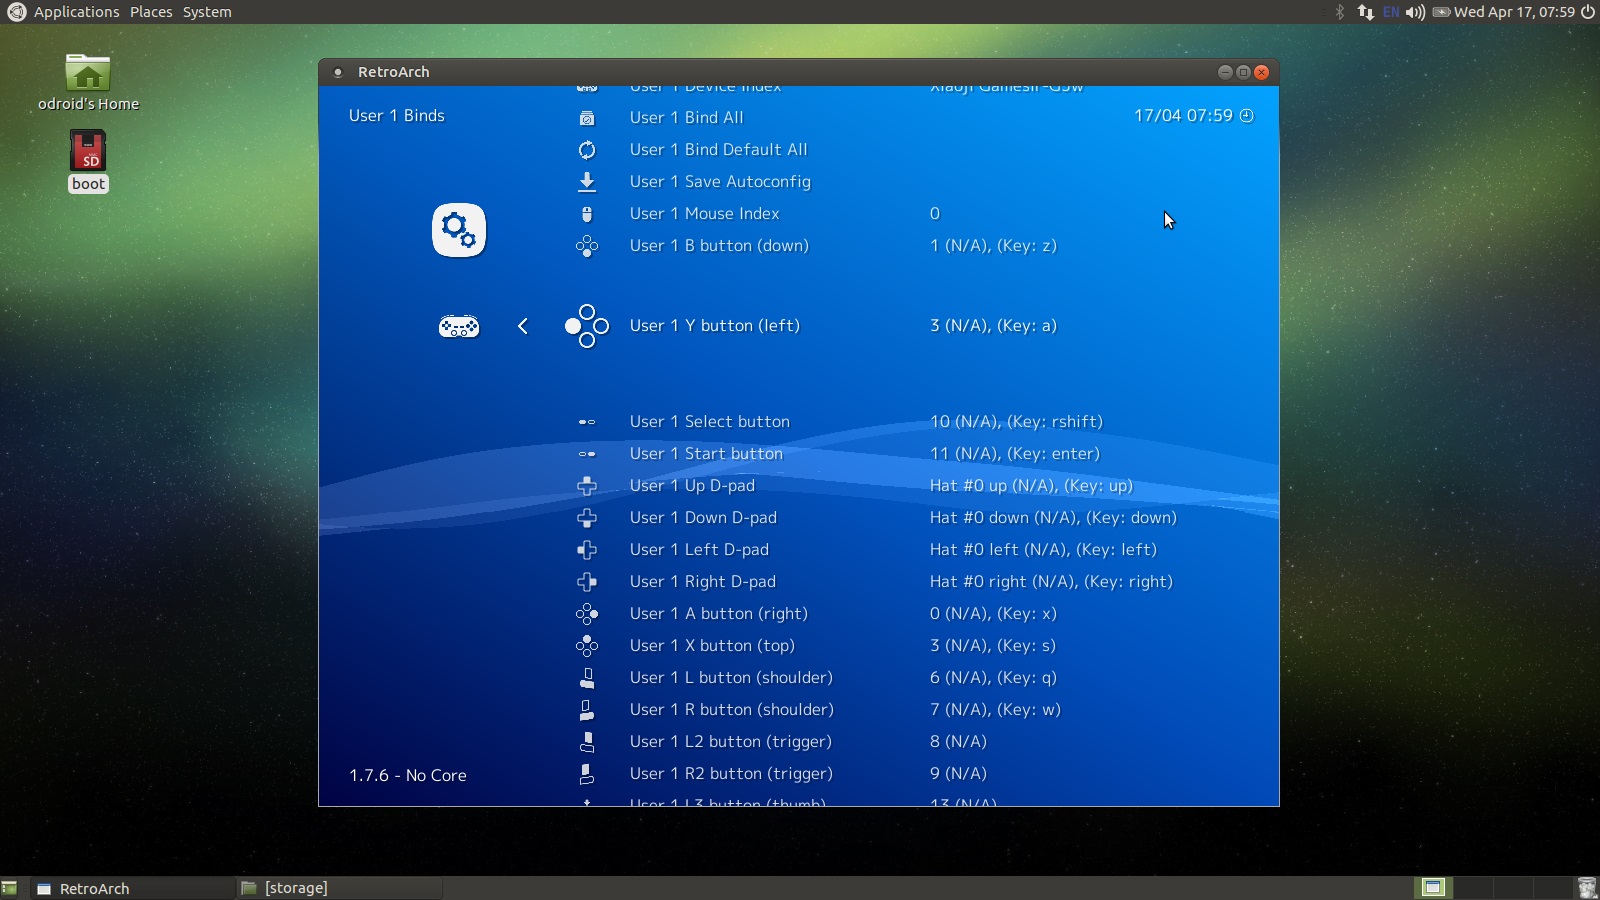
Adjust the settings on this screen as you see below. I usually set the max number of controllers to 4 since there are 4 USB ports. I like the "L1 + R1 + Start + Select" Menu Toggle Gamepad Combo setting. Leave the remaining settings and scroll down to the User 1 Binds. You will have to setup each user input.
Tip: Map the A and B buttons by name not position. If you are using a GameSir controller, map the colors green and red to positive/select, negative/back button usage. It is just what I like to do, you can map ‘em anyway you like!
The next step takes a little while but requires very little work on your part. You just have to click on a few things and wait for them to complete. Navigate back to the Main Menu which is the first section retroarch starts on. Make sure you're connected to the internet. Scroll down to the Content Updater and open that section.

I usually run each option in order. Try the Core Updater option first.
Tip: You may have to start retroarch from the terminal: sudo retroarch; when updating core files. If you run retroarch with a -v for verbose output and you see an error message during the Core Update command's execution, then you should close retroarch and relaunch it with the sudo command.
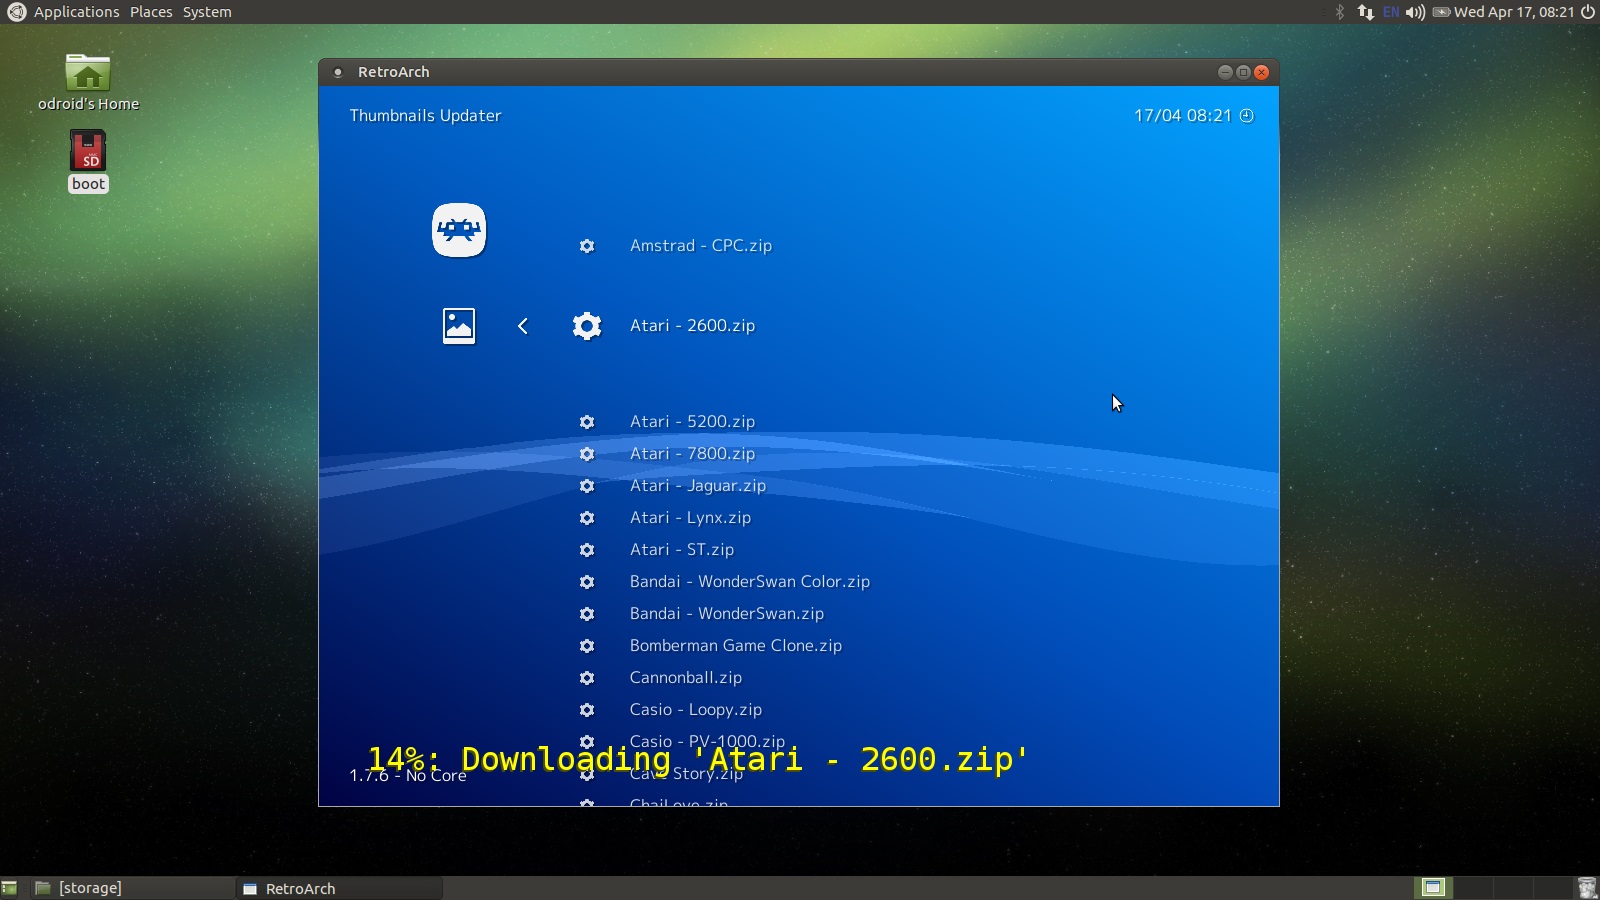
Next go to the Thumbnails Updater, this part can take a while, and select each system you plan to load ROMs. Resist the urge to click a bunch in a row. I have done that and it can crash the app or slows down each individual process as they are all competing for resources. Best to let one blast through then move on.
Tip: There are some one-off games you can get thumbnails for here like DOOM Demo, Cave Story, and Dinothawr. You will be able to load those games from the Content Downloader.
Next you will want to back out of the Thumbnail Updater section with the backspace key. Scroll down to the Content Downloader and download any special content you want from the listing.
Tip: If you see a screen that has no options wait a minute, back out, and go into that section, again. It might not have finished downloading the index of available options. I usually do not install the one-off games, but this is the spot for it. Most of the content I think you can safely ignore, but I will leave that up to you. Run the following list of updates one at a time.
- Update Core Info Files
- Update Assets
- Update Joypad Profiles
- Update Cheats
- Update Databases
- Update Overlays
- Update GLSL Shaders
- Update Slang Shaders
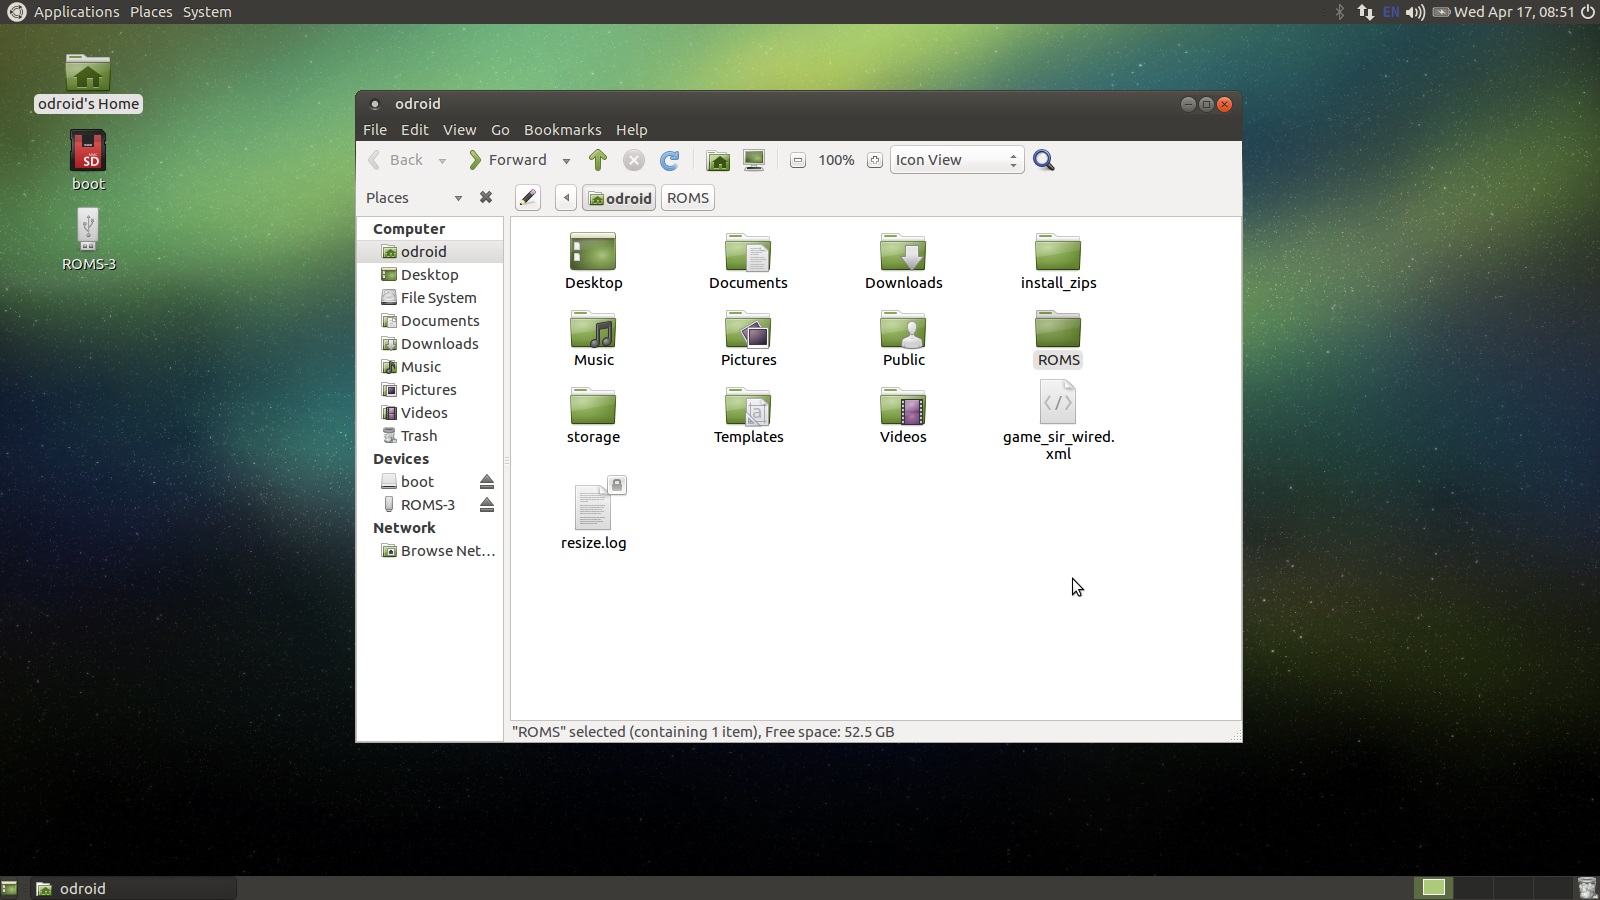
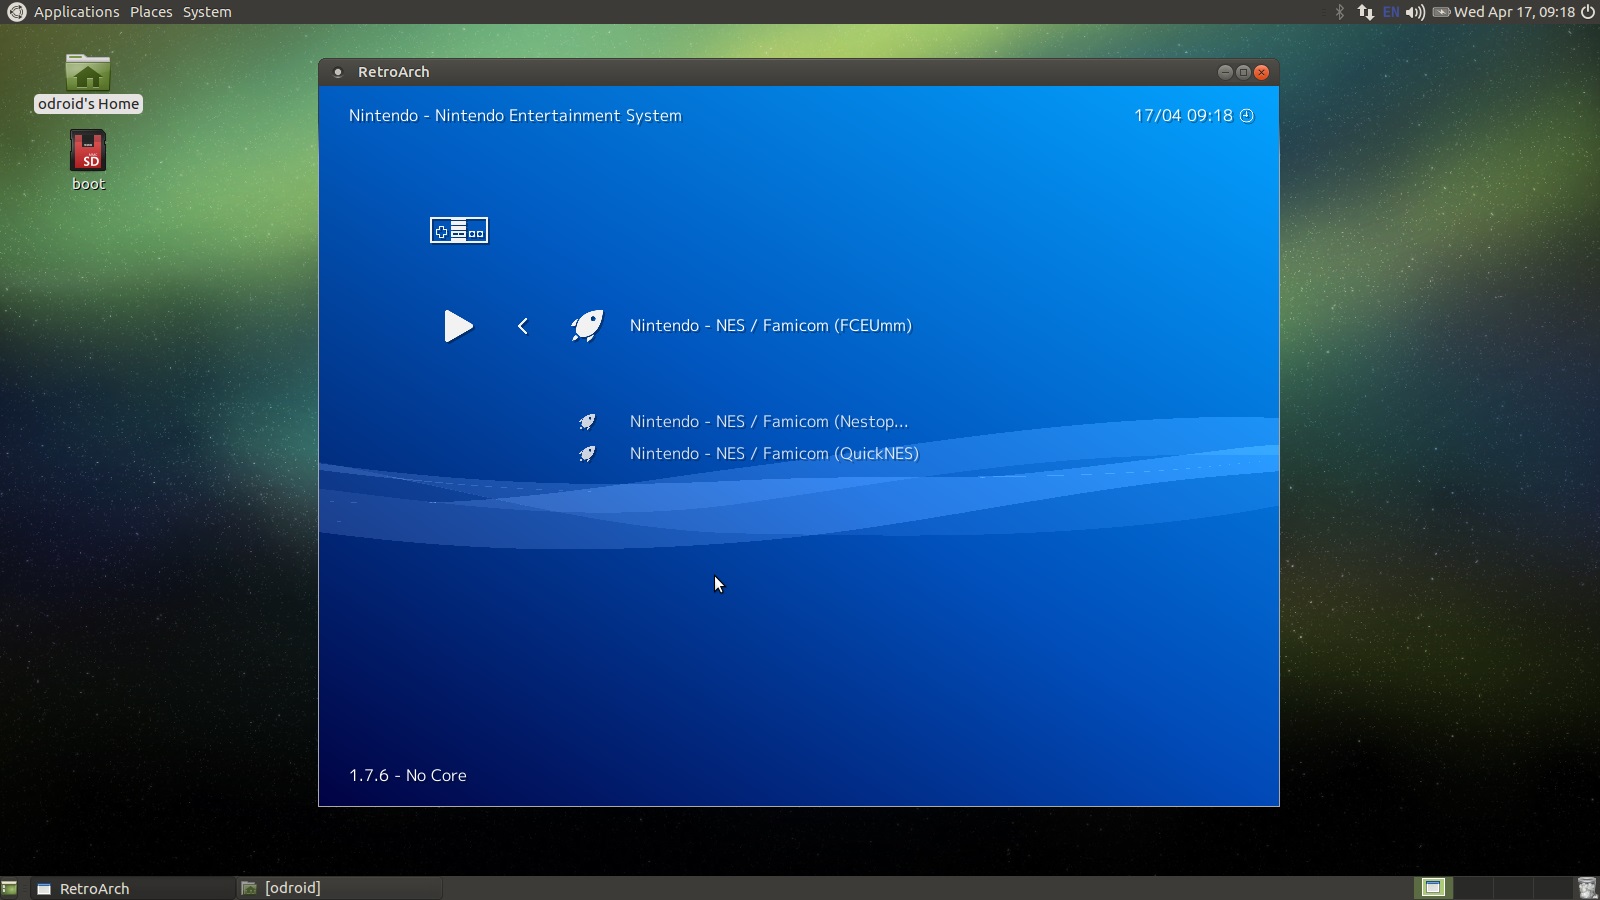
Close retroarch. Next up, load some ROMs. I own a copy of Contra for the NES and I have a version of it in ROM form. Open the odroid home folder using the link on the desktop. Right click on the folder and create a new directory, name it ROMS. Open the ROMS folder and create a new folder and name it NES. Obviously you would substitute the NES folder for whatever system you intend to load ROMs. Not every single system is supported and some emulators have caveats for BIOS files that need to be copied, etc. Many of the older systems are well supported and easily added. The ODROID-C1+ can probably handle SNES and Genesis, but I just like to use it for 8-bit games. The ODROID-C2 certainly has enough power for 16-bit systems and I like to use it for 8-bit, 16-bit, and all of the handheld systems.
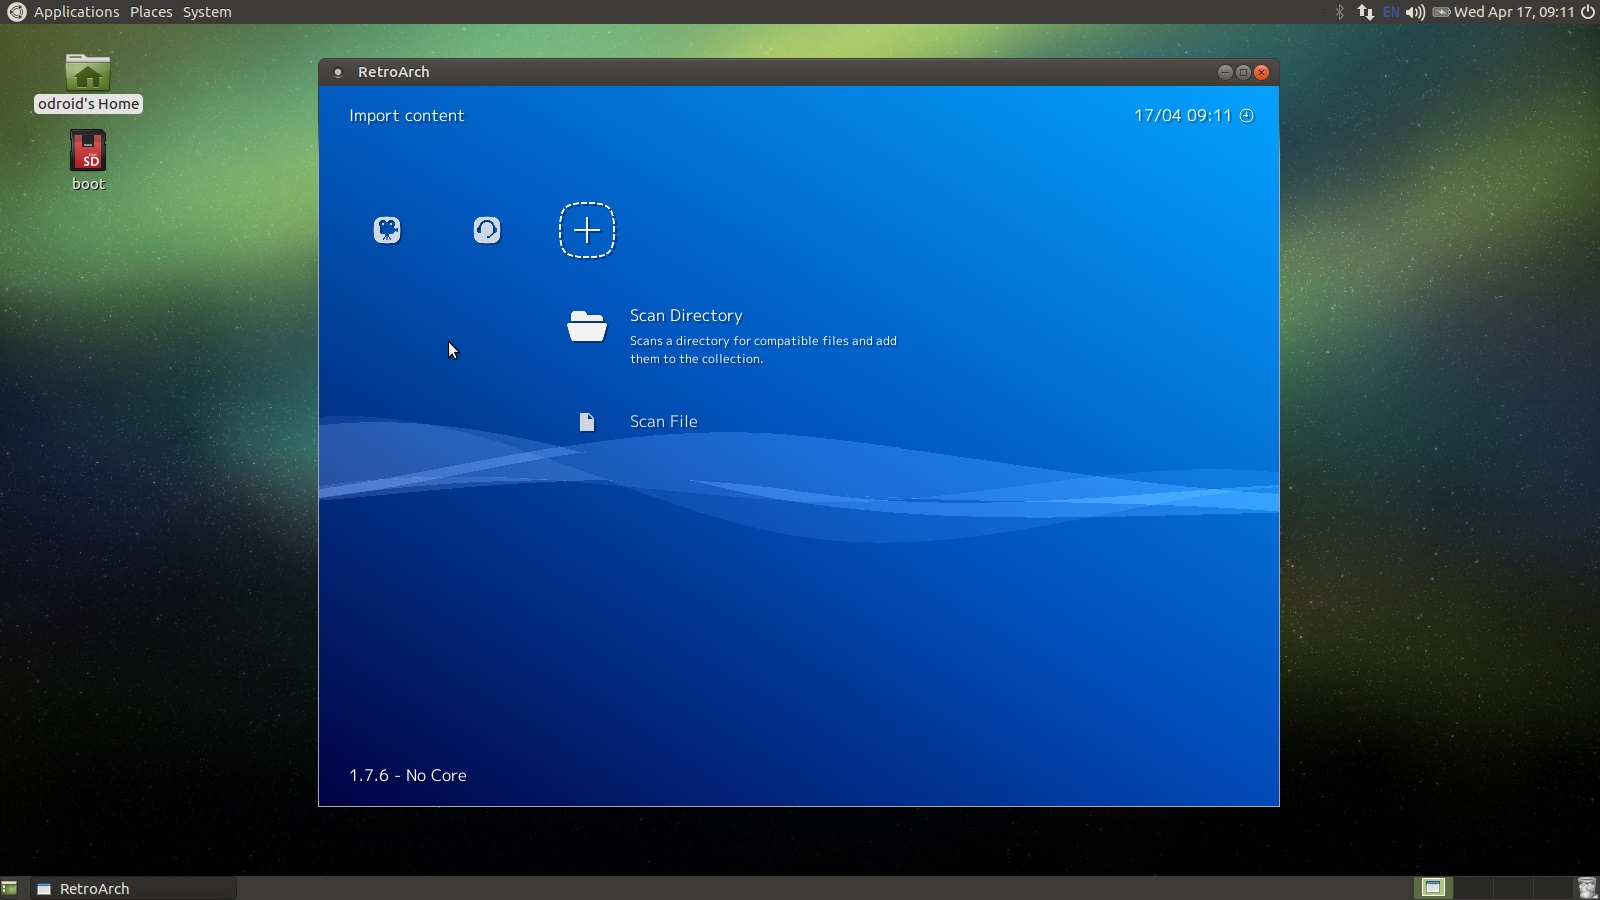
Once you have all your ROMs installed, we can start telling retroarch about the files. Fire up retroarch and scroll to the right until you see the Scan Directory option.
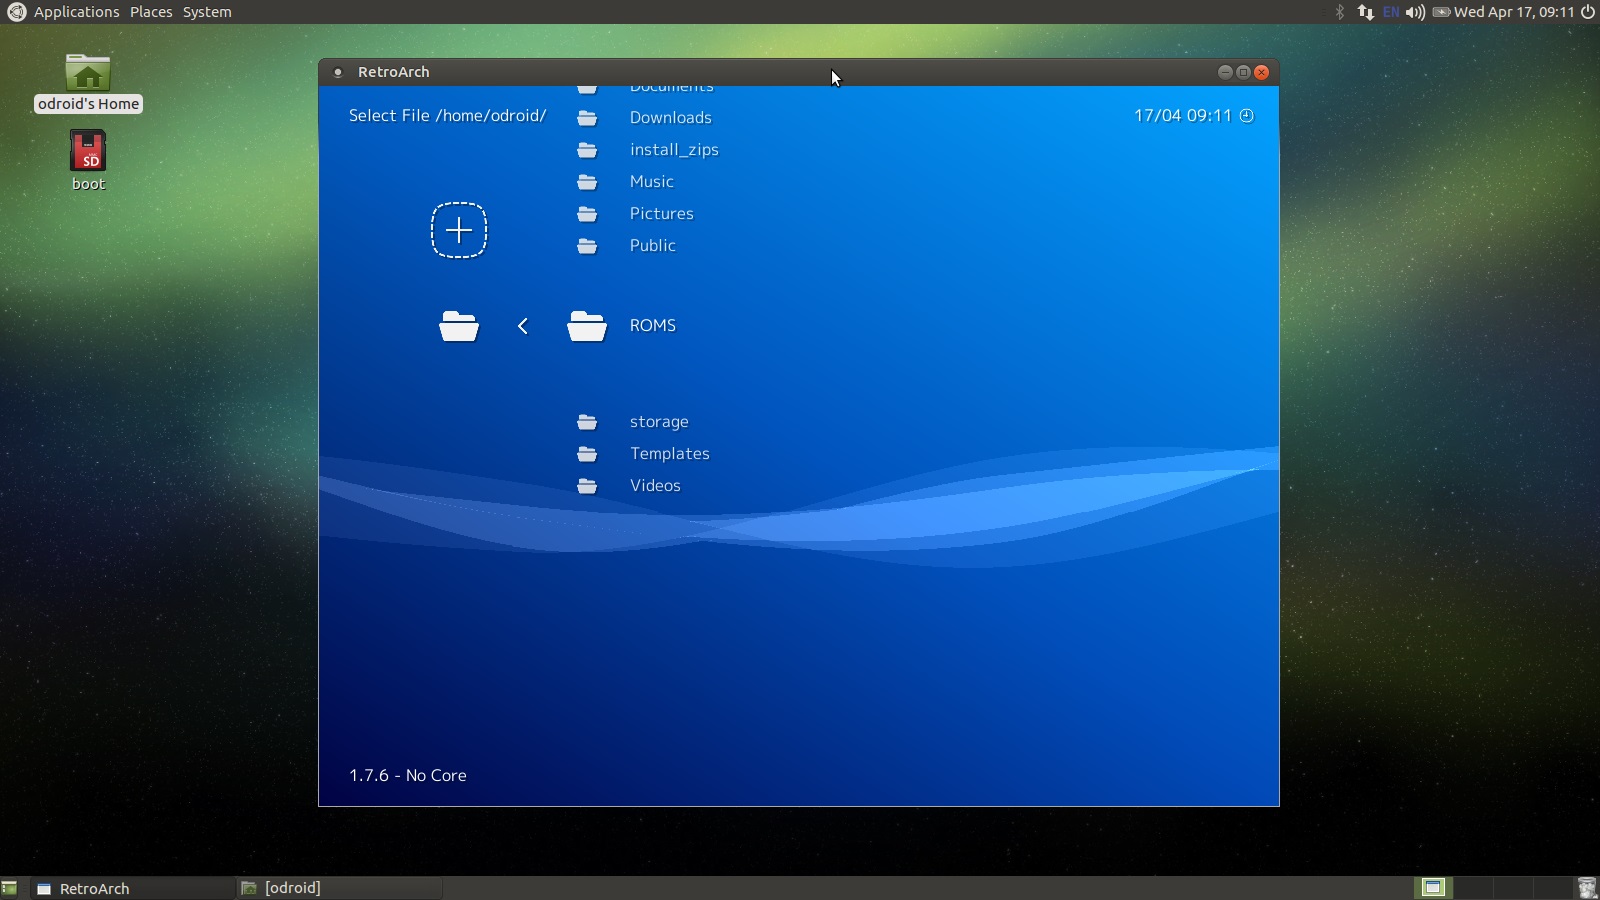
Navigate to the ROMS folder and you should see a list. Then select one system at a time for scanning. Scanning large ROM sets can take a while. Again resist the urge to start multiple scans, things will go smoother if you let an operation complete before starting a new one. In this case we only have one ROM, Contra, so it will complete the scan instantly.
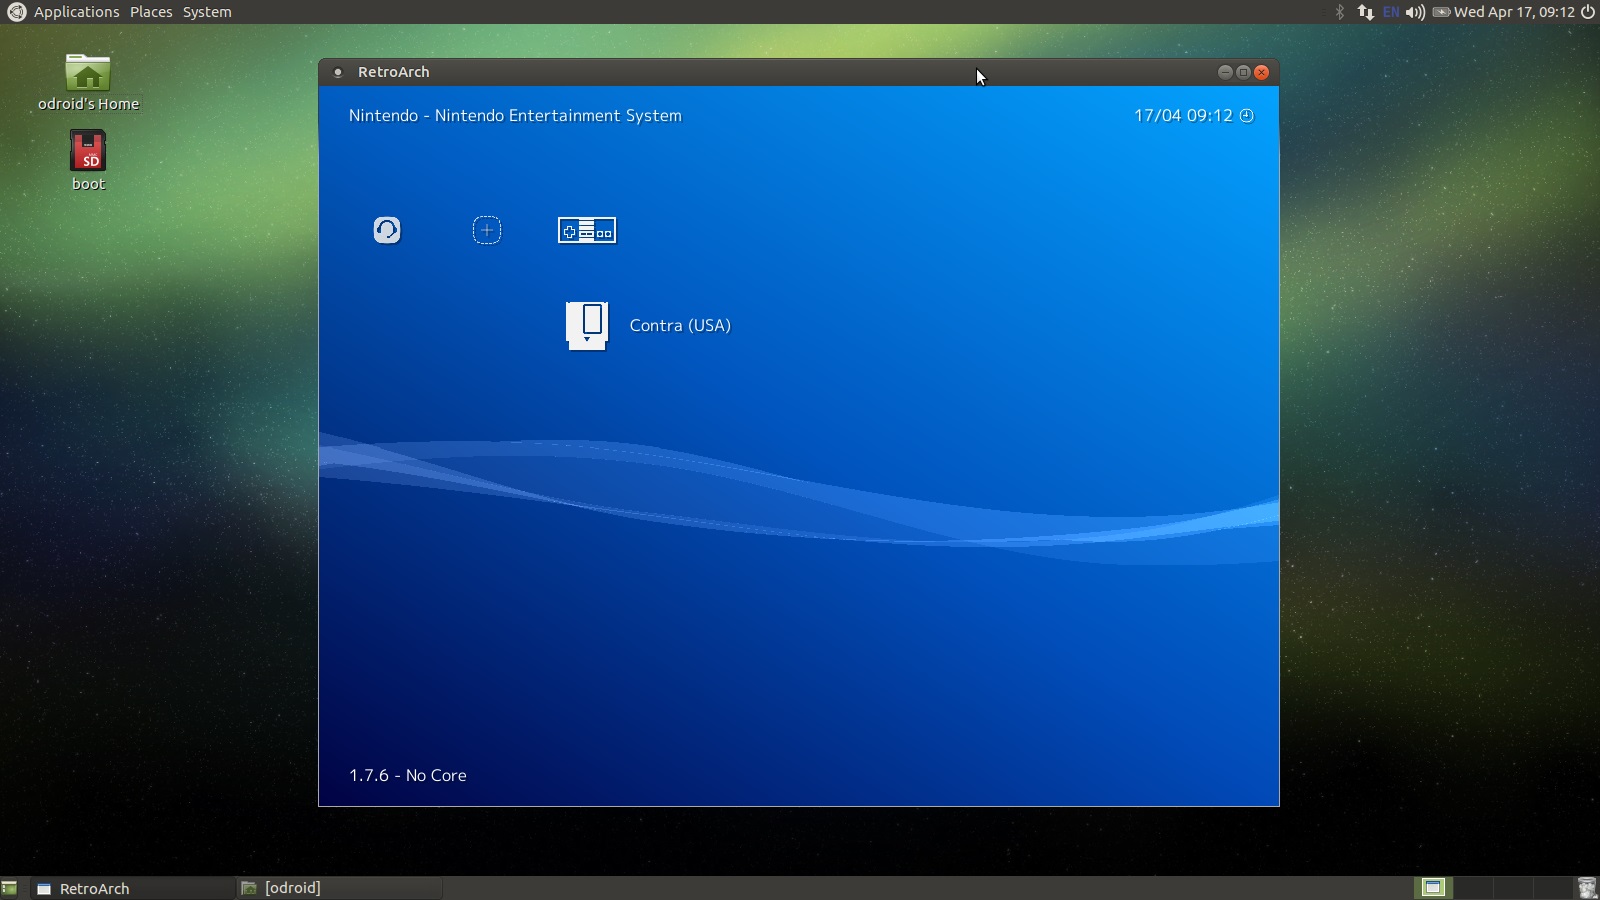
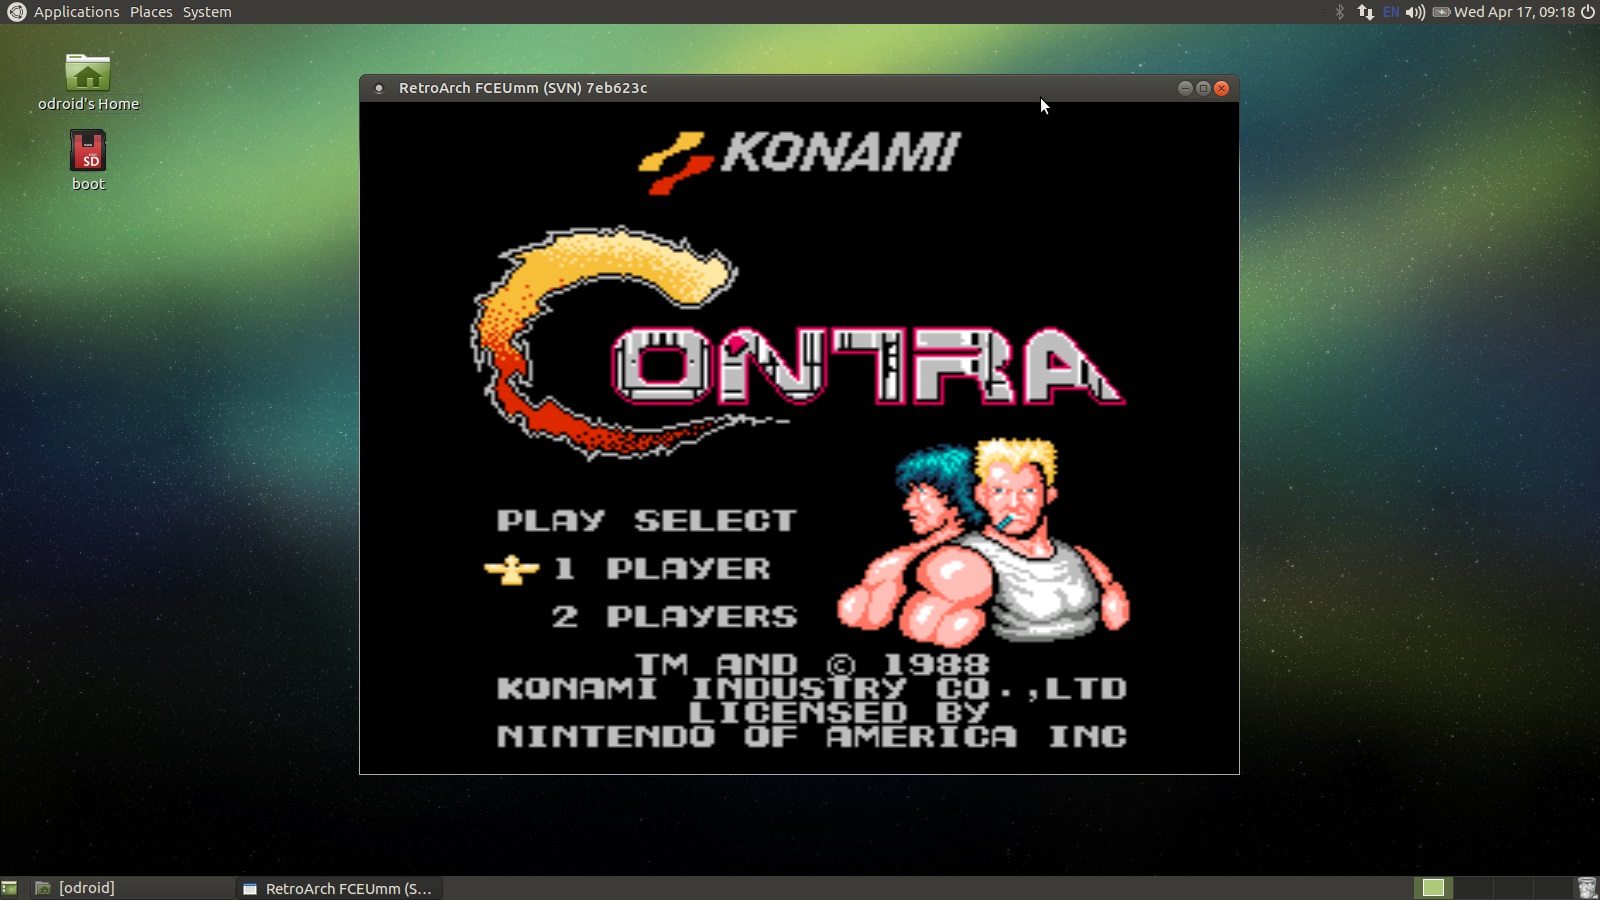
Back out of the Scan Directory section and you should now see a little NES controller on the section listing. Scroll to it and now you should see Contra, or whatever ROMS you were trying to load. Load up a game by selecting it and then selecting a target emulator. Your game should load.
Retroarch will not recognize every single ROM for every single system. Also you may want to try different emulators on troublesome ROMs. That is more advanced stuff and I will cover that in the next tutorial where I will wrap everything up.
Reference
Be the first to comment