

ODROID GameStation Turbo Advance is a feature-packed gaming OS for the ODROID-GO Advance utilizing X11 as a graphics backend and attract mode as a frontend for emulators, games and tools.
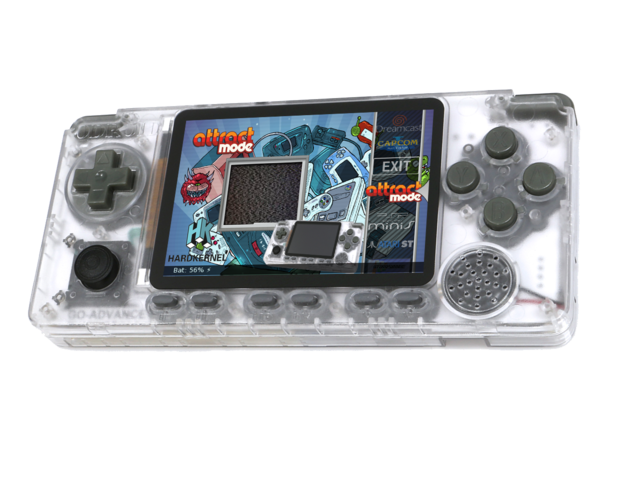
The goal is to have a shiny and flashy UI, as well as an easy way to integrate new software. It is based on @Meveric’s Debian Buster with a lot of modifications to make it work as a gaming image. Please note that I still consider this image to be a ‘Work In Progress’ as there are still some things I need to improve on, but it is at a point where it can be shared with "the public".
Currently Supported Emulators
- Amstrad CPC
- Atari 2600
- Atari 5200
- Atari 7800
- Atari 8bit
- Atari Lynx
- Atari ST
- Bandai Wonderswan
- Bandai Wonderswan Color
- Capcom Play System
- Capcom Play System I
- Capcom Play System II
- Commodore 64
- Commodore Amiga
- Colecovision
- GCE Vectex
- Magnavox Odyssey 2
- Mattel Intellivision
- Microsoft MSX
- Microsoft MSX2
- NEC SuperGrafx
- NEC Turbografx-16
- NEC Turbografx-CD
- Nintendo 64
- Nintendo DS
- Nintendo Entertainment System
- Nintendo Famicom Disk System
- Nintendo Gameboy
- Nintendo Gameboy Color
- Nintendo Gameboy Advanced
- Nintendo Virtual Boy
- Final Burn Alpha
- Sammy Atomiswave
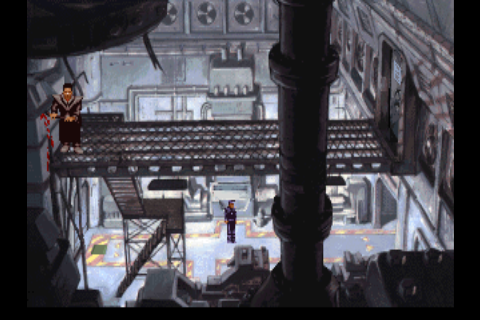
- ScummVM
- Sega 32x
- Sega CD
- Sega Dreamcast
- Sega Gamegear
- Sega Genesis/Megadrive
- Sega Master System
- Sega Naomi
- Sega SG-1000
- Sharp X68000
- Sinclair ZX 81
- Sinclair ZX Spectrum
- SNK Neo Geo AES
- SNK Neo Geo CD
- SNK Neo Geo Pocket
- SNK Neo Geo Pocket Color
- Sony Playstation
- Sony Playstation Portable
- Sony Playstation Portable Minis
- Super Nintendo Entertainment System
The default BIOS path is /home/odroid/ROMS and you need to place your BIOS files in this folder (if not marked otherwise, please check notes available from the link at the end of the article). It is also the path where you have to place your ROM files, in the respective subfolders. It is available for download at https://oph.mdrjr.net/meveric/images/OG ... GO2.img.xz md5 sha512 sig.
The image utilizes both 32-bit and 64-bit drivers which allows you to run a lot of applications already existing for armhf, even if they are not ported to ARM64, yet.
How To Start
Copy your rom files into /home/odroid/ROMS/ folders that correspond with the system the roms are for (e.g. Super Nintendo Entertainment System goes to /home/odroid/ROMS/SNES/). When you boot up the image you see "Attract Mode Setup" it has two options
- Scrape games and artwork
- Scrape games only
For artwork you need an Internet connection so either have a USB to LAN adapter installed and working correctly. This should work out of the box. Scraped games only will import your games but not download any artwork. Scraping artwork can take a very long time (and disk space) depending on your library. It's not recommended to scrape thousands of games at once, unless you have a couple of hours to spare.
You will see a progress bar while the games and artwork are being imported. This progress bar only shows the overall progress of all emulators not for each individual ROM, which means depending on how many games you import the percentage of the process will not go up until it's finished with the system it's currently importing.
Update Regularly:
Since there's constantly new development for this image and, ODROIDs in general, it is highly recommend to do all updates:
$ apt-get update && apt-get upgrade && apt-get dist-upgrade && apt-get autoremoveThis will guarantee you get the latest patches and fixes, as well as new emulators when they become available.
Setting up WLAN from the Command Line
Edit the file /etc/network/interfaces or create a new one under /etc/network/interfaces.d/ and add the following line:
auto wlan0
iface wlan0 inet dhcp
    wpa-essid
    wpa-psk
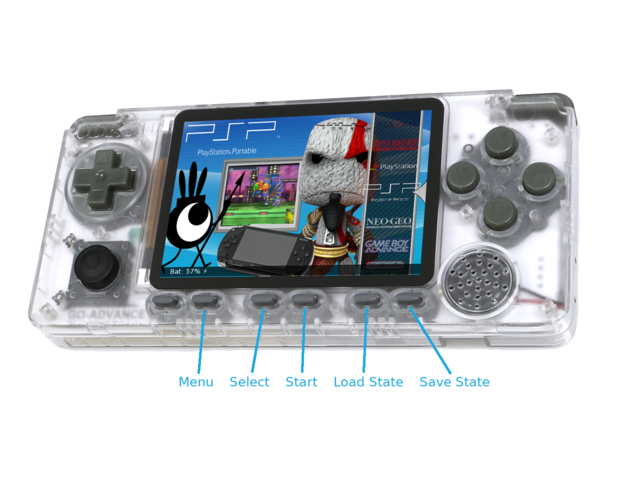
Main Menu
The Main Menu is powered by Attract Mode and uses the following button layout:
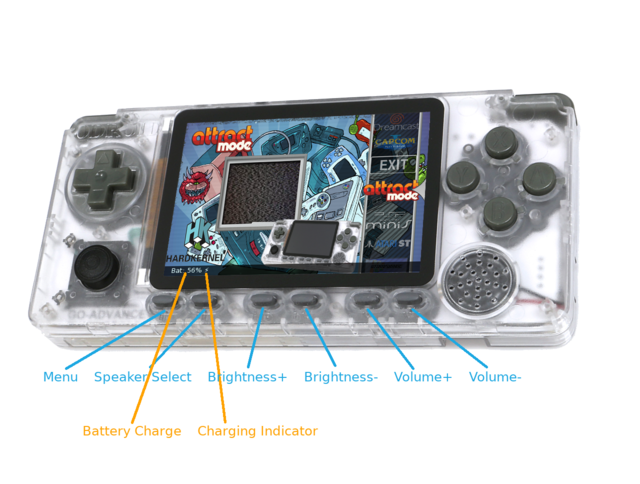
Although the Buttons work in each sub menu, the output of the button you pressed and the current battery charge is only shown on the main menu. Attract Mode has a screen saver mode, which will activate after about 3 minutes of inactivity. It will show previews of the videos and pictures of the current selection, this means on the main menu it will show videos of all the different systems itself, while in the sub menu of a system it will show previews of the different games. Finally, Speaker Select will cycle through Headphones only, Headphones + Speaker, Speaker only and OFF.
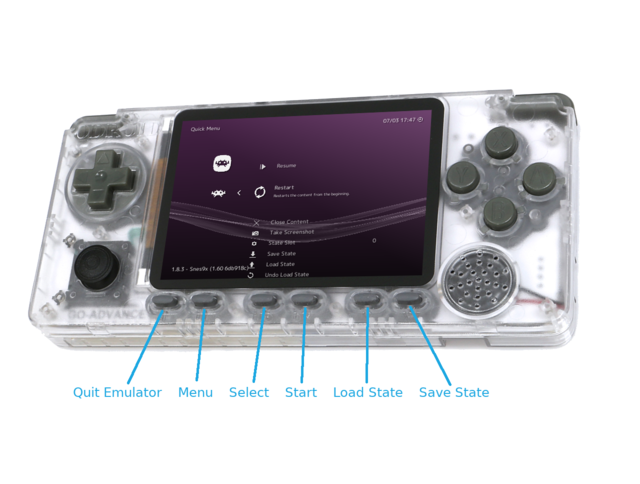
Retroarch
Many of the emulators are powered by retroarch and use the default button layout of retroarch. The special keys are mapped as following:
If you want to do changes on the settings of retroarch, I advise you to exit retroarch if you want to save the changes. If you go back into the game and then exit the emulator, your changes may not be saved.
Amiga Emulator - FS - UAE
For Amiga Emulation I'm using FS-UAE as its user interface is much more controller friendly than other emulators. I also mapped Mouse movement and buttons, as well as special keys for the Amiga. The mapping looks like this:
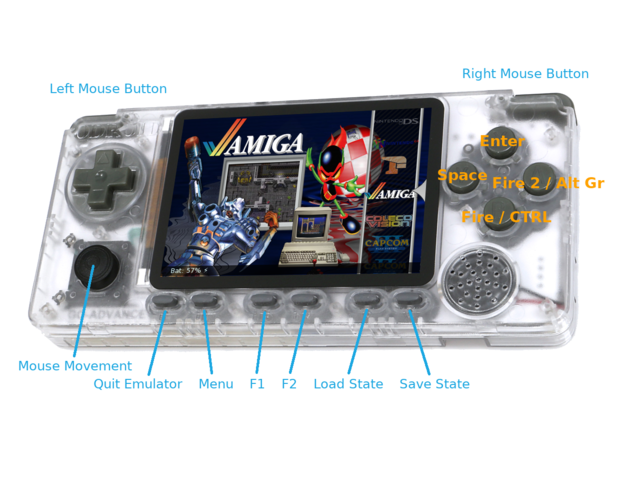
The emulator is currently configured for Amiga 500 compatible games, so your AGA or CD32 games will not work. Since many games come with multiple disks you can zip all adf files into one file. The disks will be inserted into DF0 to DF3 but you can change disks via the menu, even if a game only supports DF0, or has more than just 4 disks.
The Emulator uses separate folders for Kickstart files which can be found under: /home/odroid/Documents/FS-UAE/Kickstarts and under: /home/odroid/.config/fs-uae/ you can find the config files for your different games. You can then, for example, use different Kickstarts if you want, or change memory settings, etc.
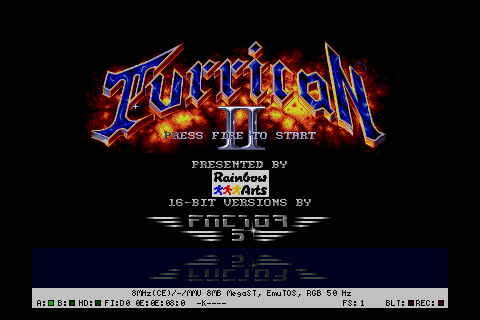
Atari ST - Hatari
Atari ST runs on the Hatari Standalone emulator, not a libretro core. It has better performance and much better button mapping. The libretro core works only on a very few number of games. The button layout is as following:
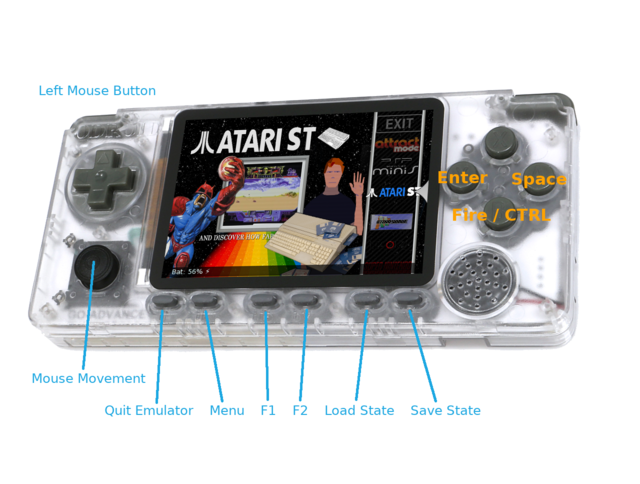
Some buttons are still free and may be mapped later. There is a way to use the menu to switch disks, but it's quite hard. The menu is not very easy to navigate, therefore I suggest using single disk games, or games that use a harddrive image instead.
Nintendo 64 - Mupen64plus
Mupen64plus standalone emulator is quite a bit faster than the libretro core alternatives, therefore, I use the standalone version here with the RICE video core which is the fastest video core at the moment, even though it's not perfect. The button layout is always a controversy but this is how I mapped the buttons:
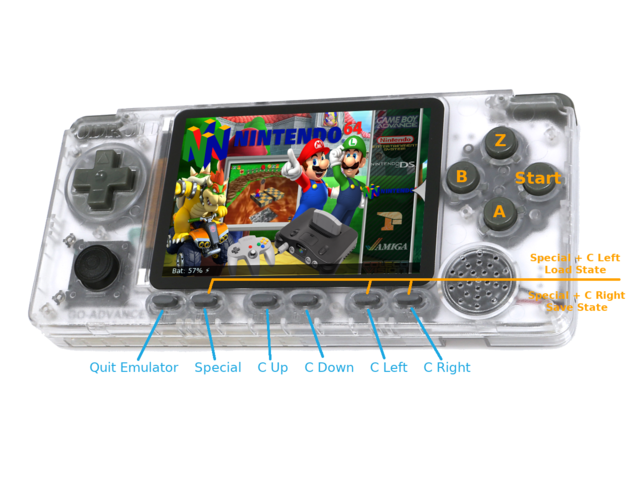
This is the only emulator where you have to press two buttons for saving and loading save states, sadly there were not enough buttons otherwise. The performance and quality of emulation overall differs a lot between games.
Nintendo DS - DraStic
DraStic by @Exophase is a very fast, but it is a closed source Nintendo DS emulator and therefore a little bit complicated to get to work. The performance is very impressive and you can play NDS very well on the ODROID-GO Advance. The button mapping looks as following:
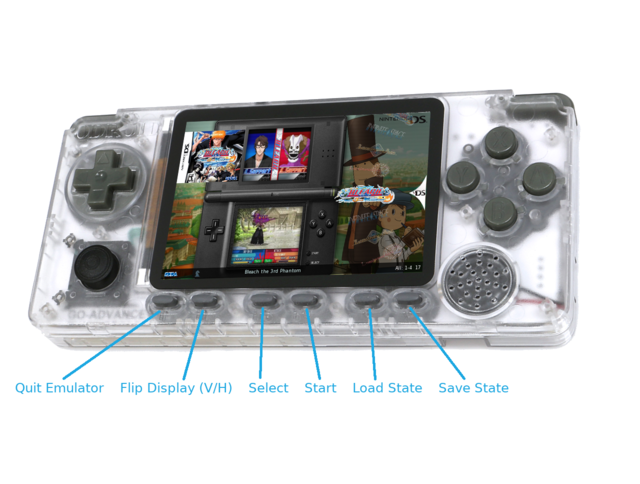
Unfortunately, the NDS (or DSi), has too many functions to map everything, so noise emulation, open and closing the lid are not supported which makes some games unplayable. It seems like every now and then DraStic does not recognize input at all (aside from the mouse pointer). Not sure why, not sure how to avoid it. I found restarting the emulator seems to solve this. Just press the Quit Emulator button and try anew. Make sure you did all system updates before trying this.
Playstation Portable - PPSSPPSDL
PPSSPPSDL is a very well known emulator for PSP and works quite well on the ODROID-GO Advance. It's not as good as other devices, such as the ODROID-XU4 or ODROID-N2, but still good enough for most games. The button layout is as following:
ScummVM Hints
The layout for ScummVM games are a little different from other Emulators. In the folder /home/odroid/ROMS/SCUMMVM/ you need to create a folder with the name of the game you want to play, for example, Beneath a Steel Sky (/home/odroid/ROMS/SCUMMVM/Beneath a Steel Sky/). In this folder, you will copy all your game files from the ScummVM game of your choice. The next step is to create a file with the same name and the extension .svm in the same folder "Beneath a Steel Sky.svm" (/home/odroid/ROMS/SCUMMVM/Beneath a Steel Sky/Beneath a Steel Sky.svm). Inside the file you put the ID of the game. In our example this is "sky". You can find the game IDs on the ScummVM Home Page in the column "Game Short Name".
Sharp X68000 Hints
The Sharp X68000 emulator supports single disk images (.dim) and multi disk images .m3u. .m3u is a "playback" list, which just houses the path/name of the .dim files. If you have games that require multiple disks, you should put all disks inside a subfolder inside: /home/odroid/ROMS/X68000/ and create a .m3u file that houses the names of the disk images.
For example: Create a folder /home/odroid/ROMS/X68000/Gradius II
$ mkdir -p "/home/odroid/ROMS/X68000/Gradius II"Copy all *.dim files inside this folder
/home/odroid/ROMS/X68000/Gradius II/Gradius II Gofer No Yabou (1992)(Konami)(Disk 1 of 2)(Disk A).dim
/home/odroid/ROMS/X68000/Gradius II/Gradius II Gofer No Yabou (1992)(Konami)(Disk 2 of 2)(Disk B).dim
Create a .m3u file that has the path of the ROMS files inside:
$ cat "/home/odroid/ROMS/X68000/Gradius II.m3u"
Gradius II/Gradius II Gofer No Yabou (1992)(Konami)(Disk 1 of 2)(Disk A).dim
Gradius II/Gradius II Gofer No Yabou (1992)(Konami)(Disk 2 of 2)(Disk B).dim
Sony Playstation
Same as Sharp X68000 you can create m3u files and folders for games with multiple CDs. You can switch the CDs from the retroarch menu. For more information please see the original article, located at https://forum.odroid.com/viewtopic.php?f=193&t=38177.
Be the first to comment