
When it comes to the ODROID-H2, my use case for it is to work as a virtualization host, to run a few test VMs to run software on, or test upgrades of systems for my company (e.g. upgrading from older OS versions to newer versions). Looking at the forum, I see people struggling to get VMware or Citrix Hypervisor running, mainly due to unsupported NICs an other components of the board. For me, that was always a little puzzling, as I know about KVM, which is part of the Linux Kernel and allows for easy virtualization, and since under regular Linux (Ubuntu, Debian, etc.) NICs and stuff work fine, as does virtualization without any issue. When I first mentioned this in the forum, I was asked to make a guide, since rarely anyone seems to know about this. So let’s see what there is to say: first, let’s explain what I’m actually talking about, and what tools and components I use for this.
KVM
KVM is built into the Kernel, and actually means “Kernel-based Virtual Machine” and uses the Linux Kernel to run Virtual Machines (VMs) on it. This allows you to run VMs directly under any Linux you run on your ODROID-H2 (or any other PC that runs Linux).
QEMU
Qemu – Quick Emulator is known as a rather quick and feature rich emulator that allows you to emulate different systems and hardware components. It can be used in combination with KVM to emulate hardware such as hard drives, CD-ROM drives, NICs, etc. but sends the commands from the devices to the KVM virtualization layer. It allows for advanced features such as snapshots for VMs.
libvirt
Libvirt is a open-source API to configure VM platforms such as KVM, Xen, VMWare, or QEMU. The list of supported Hypervisors is rather long and even includes containers such as LXC. We will use it as a frontend, both graphically as well as on the command line to do things with our VMs in KVM.
First Scenario
Now that we have decided to use KVM, let’s see what we need to run VMs and how to install both Linux and Windows VMs, as well as how to control them. Since we’re ODROID lovers, we do this of course on our ODROID-H2, but as said before, it will also work on any other x86 based PC/Server that runs Linux. Keep that in mind when I refer to the ODROID-H2 from now on, as it applies to any other system as well.
Requirements
- ODROID-H2
- Installed OS (Debian or Ubuntu for easy start)
- Internet Connection
In this first scenario, we don’t need much: only an ODROID-H2 with an installed Linux of your choice. As I favor Debian for server tasks, I will use Debian Buster as my reference OS, but the commands apply to Ubuntu as well and should work the same.
Installation and Configuration
Let’s just assume you have already installed a Linux distribution fully installed with a Desktop Environment (DE) and Network Manager and your default user is called “odroid”.
$ sudo apt install virt-manager
$ sudo adduser odroid libvirt
$ sudo reboot
Congratulations, you’re done and can start creating VMs! That wasn’t so hard, was it?
Virtual Machine Manager (virt-manager)
The Virtual Machine Manager (virt-manager) is a graphical interface that you can use to create and configure your VMs, create snapshots and all kind of other things.
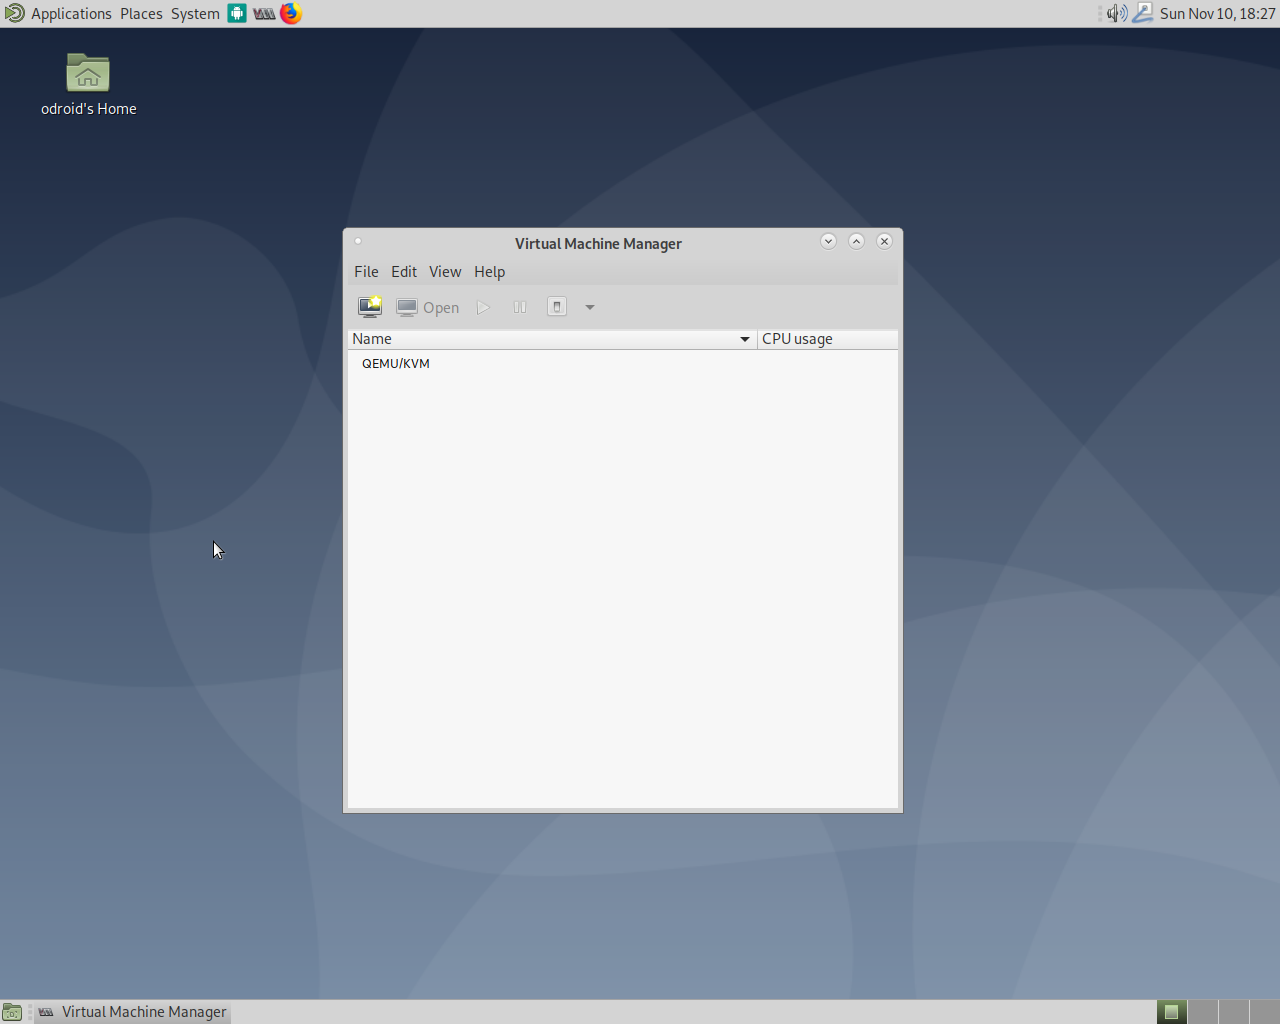
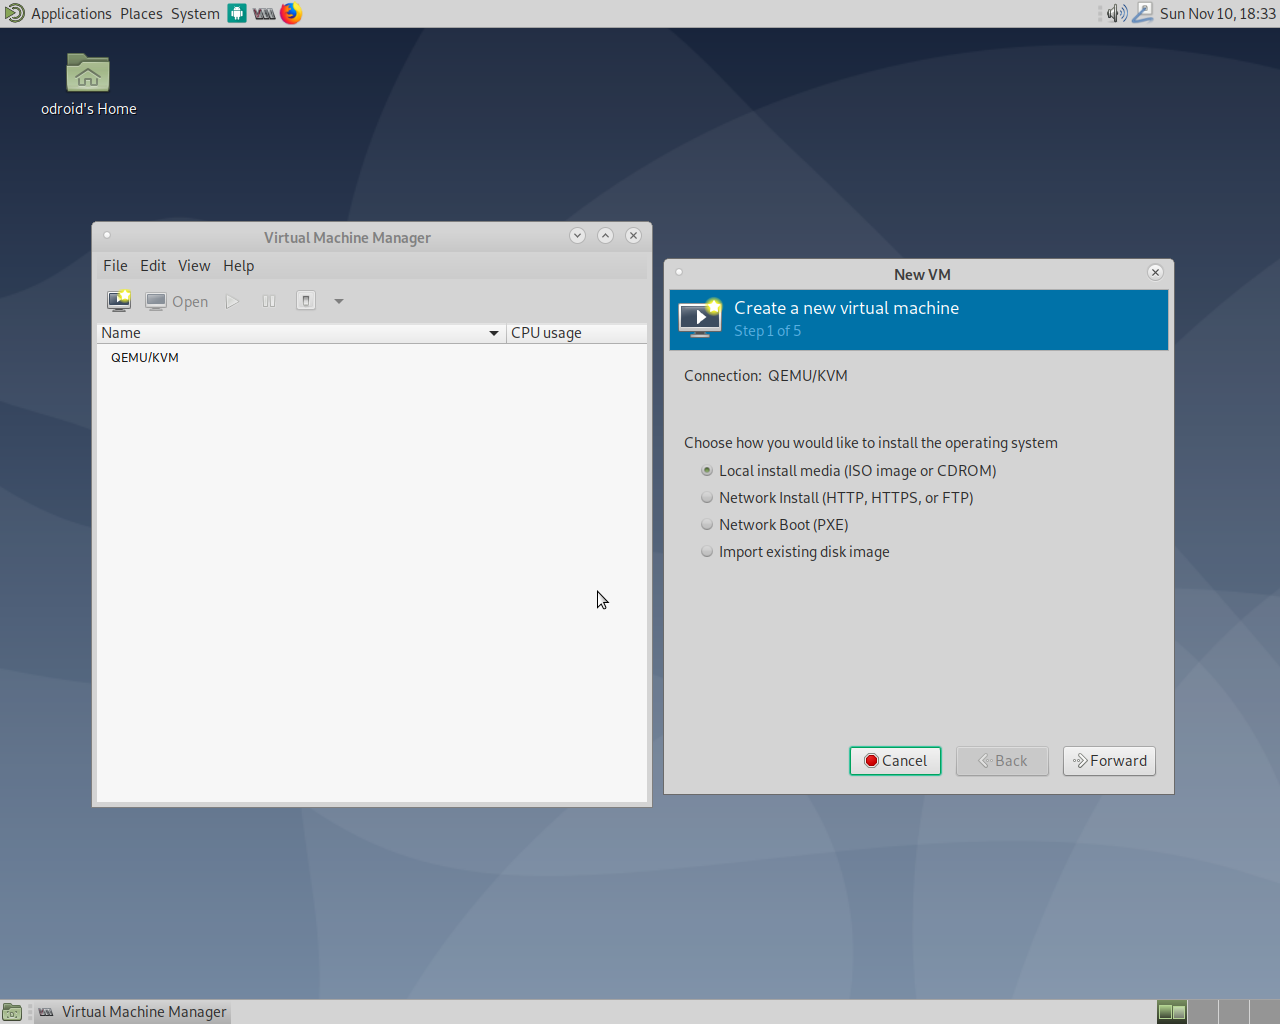
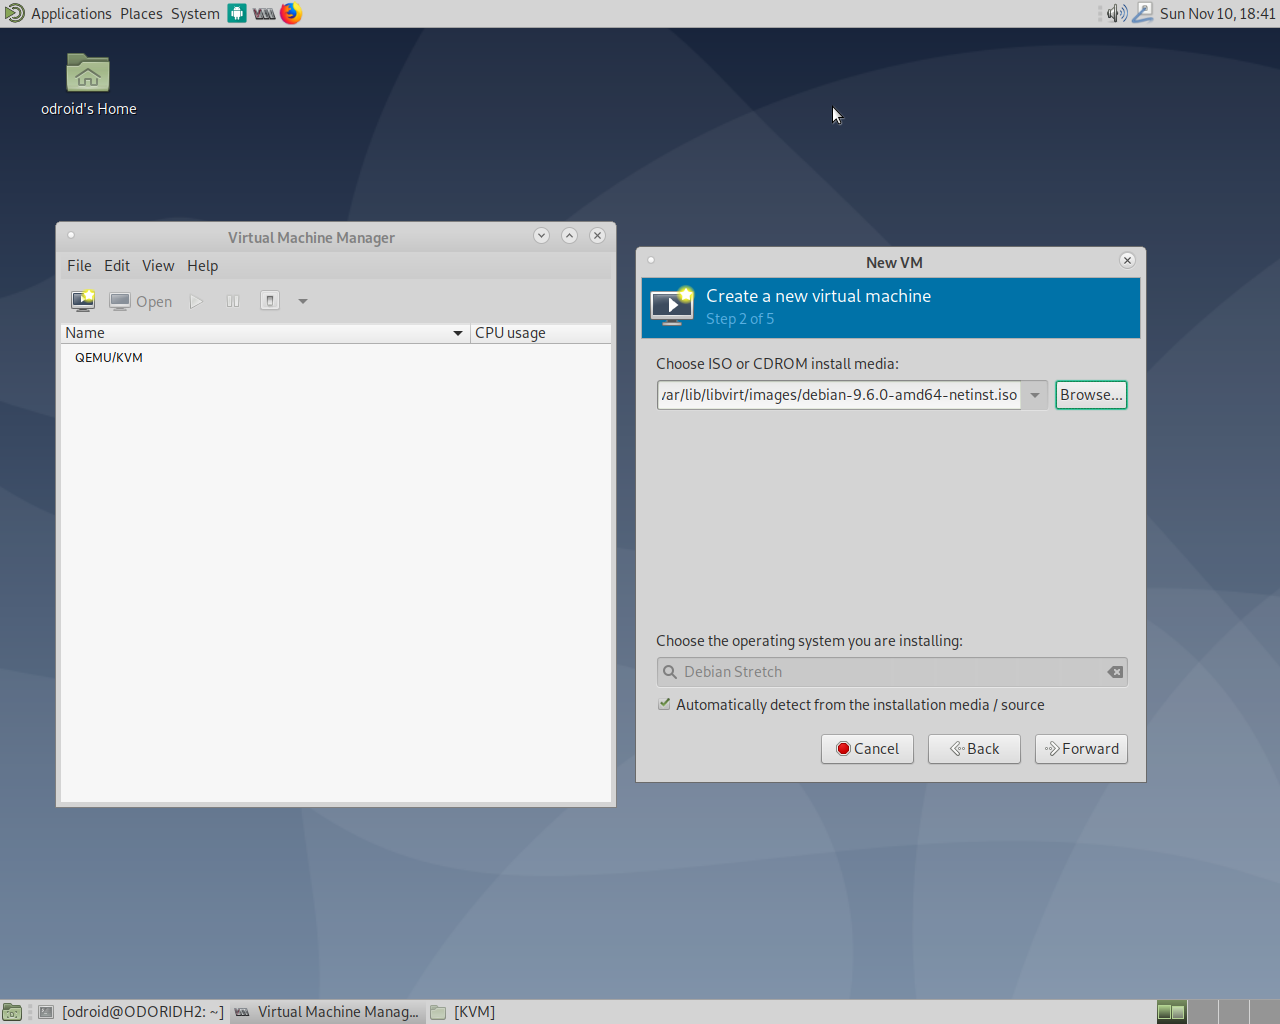
The Virtual Machine Manager is what you use to create, configure and interact with your VMs. It can be used to observe resources such as CPU usage, and other things. I don’t want to go too much into the details, let’s just say there’s a lot you can do with it, and you might want to read up on some tutorials for the advanced stuff. For now, let’s keep it simple and see what we need to create a VM. Creating our first VM I still have a Debian Stretch netinstall image laying around, which I’m going to use in this scenario. You can mount .iso files directly in VMs similar to VMware and other hypervisors. There is only one detail which is good to know: by default, virt-manager searches for all images under /var/lib/libvirt/images. It uses this as the default pool for all images, both your hard drives, as well as your ISO files that you want to mount. You can add more storage if you want, but for now, let’s keep this one and copy the Debian Stretch image that I have into this folder so that it’s found directly. After this, let’s just click on the button in the upper left corner of our Virtual Machine Manager to create a new VM. It will open a wizard that will guide you through the entire process.


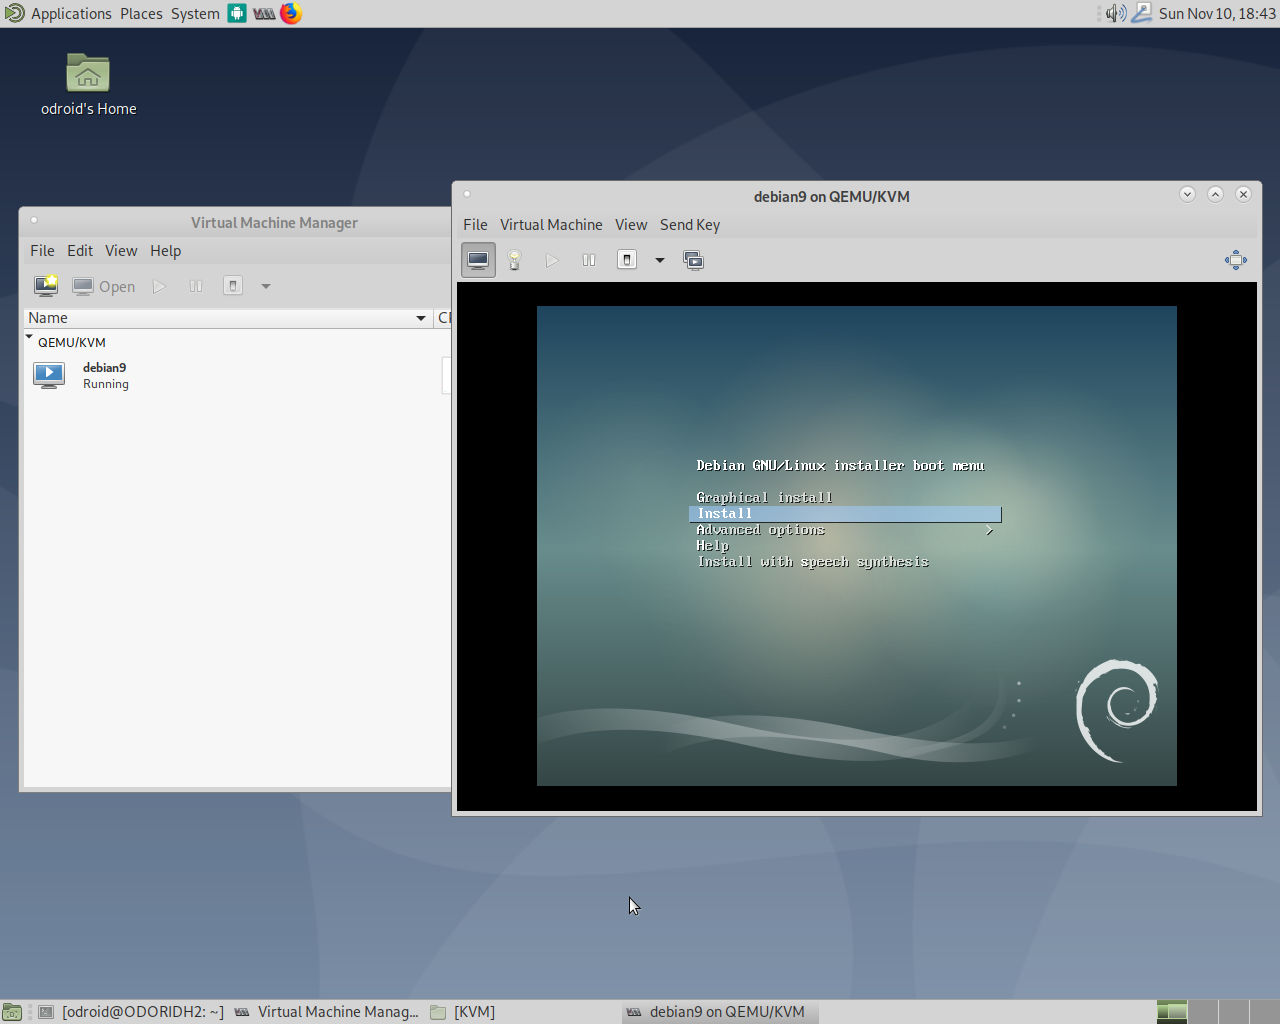
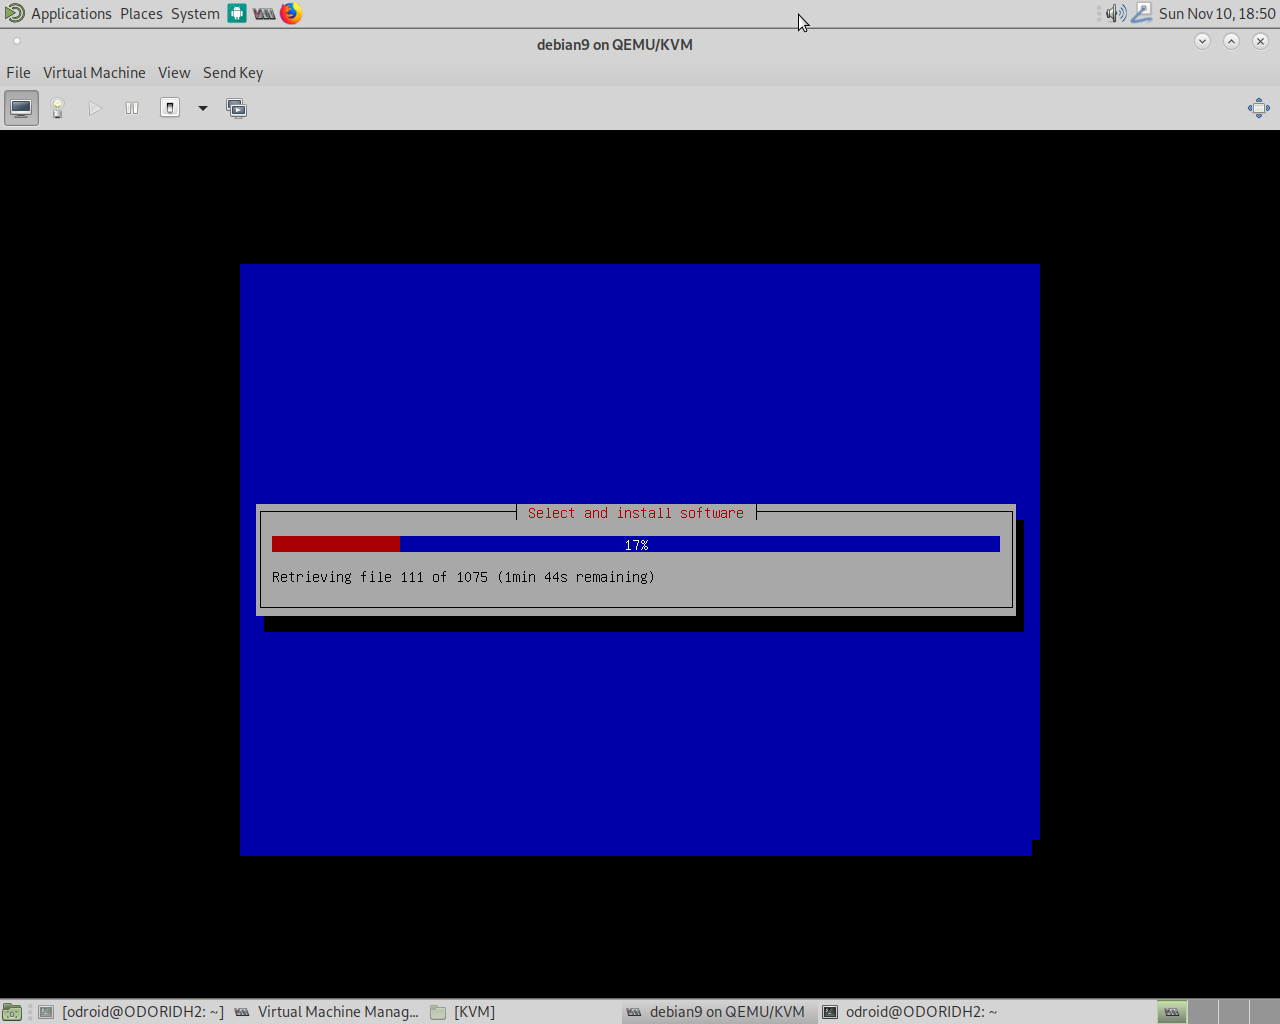
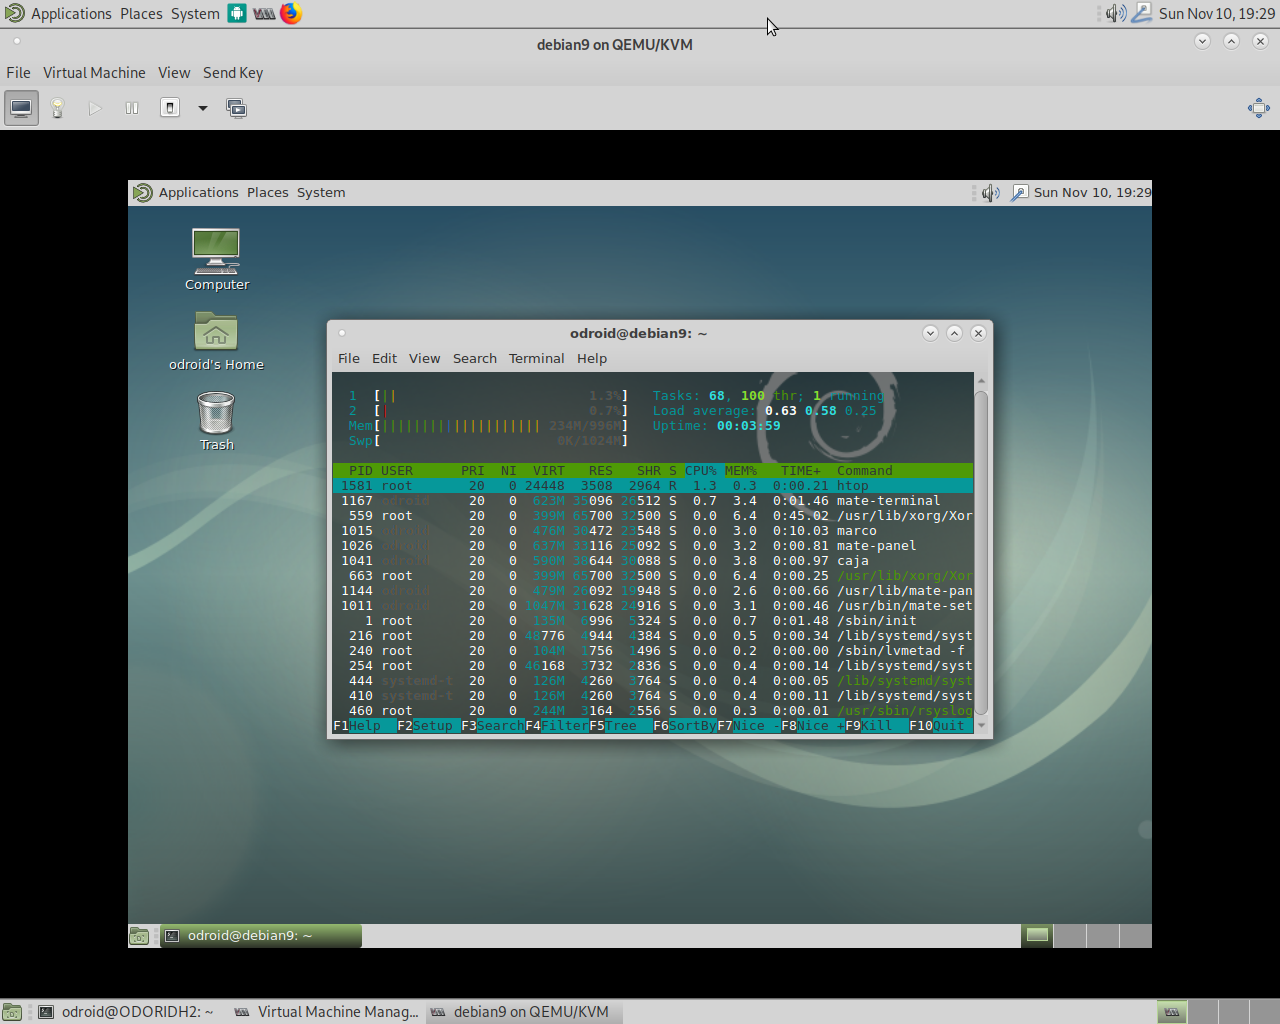
The entire process is rather easy and straightforward. And as we can see, even an installation of a graphical desktop environment is quite easy, and can be used rather well. Instead, you could also use a pure terminal installation and connect to your VM via SSH.
Installing a Windows VM
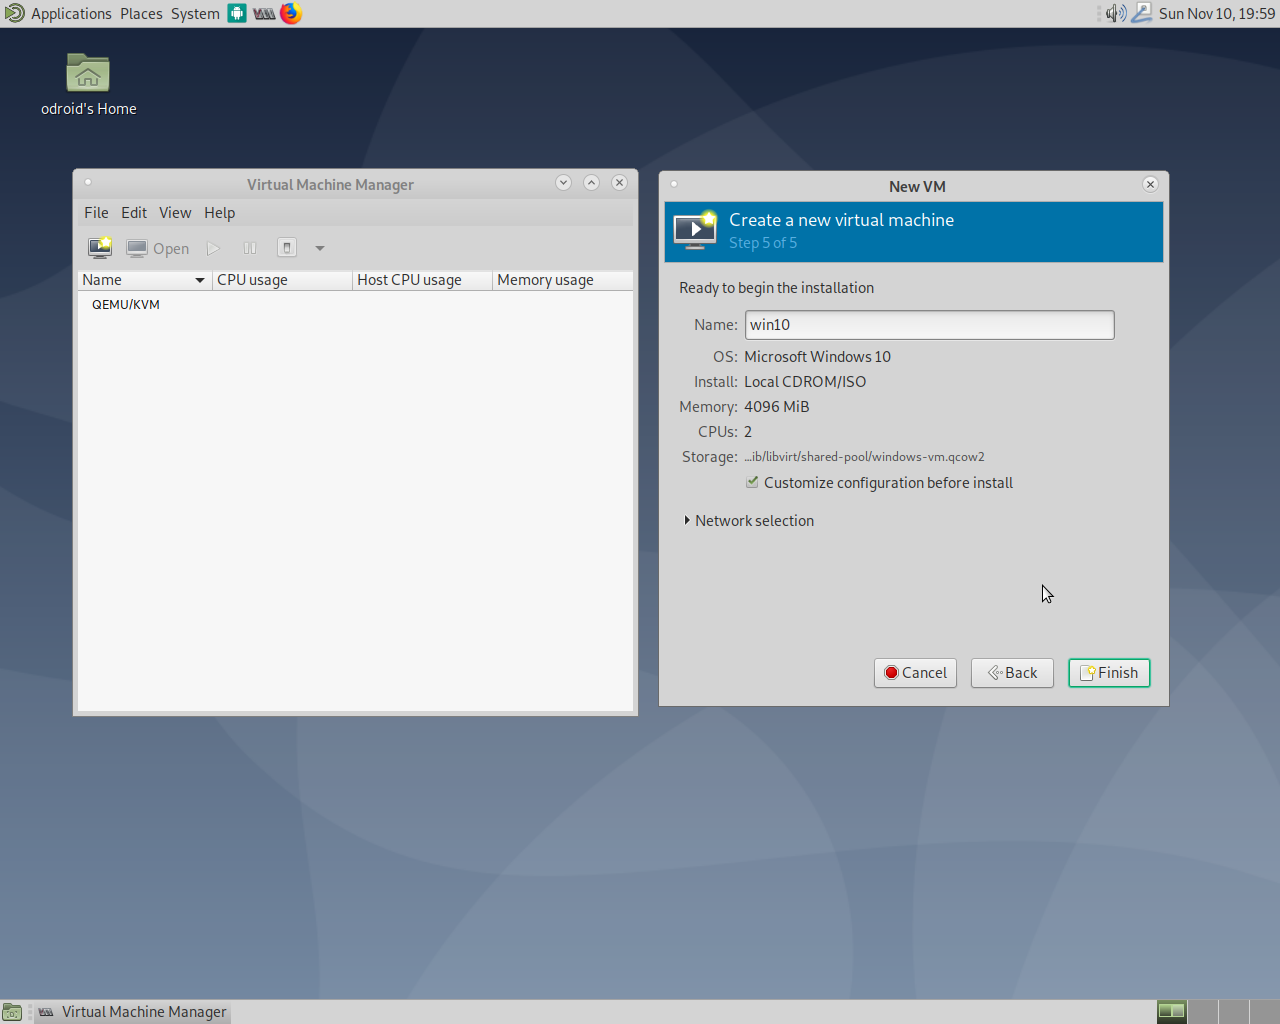
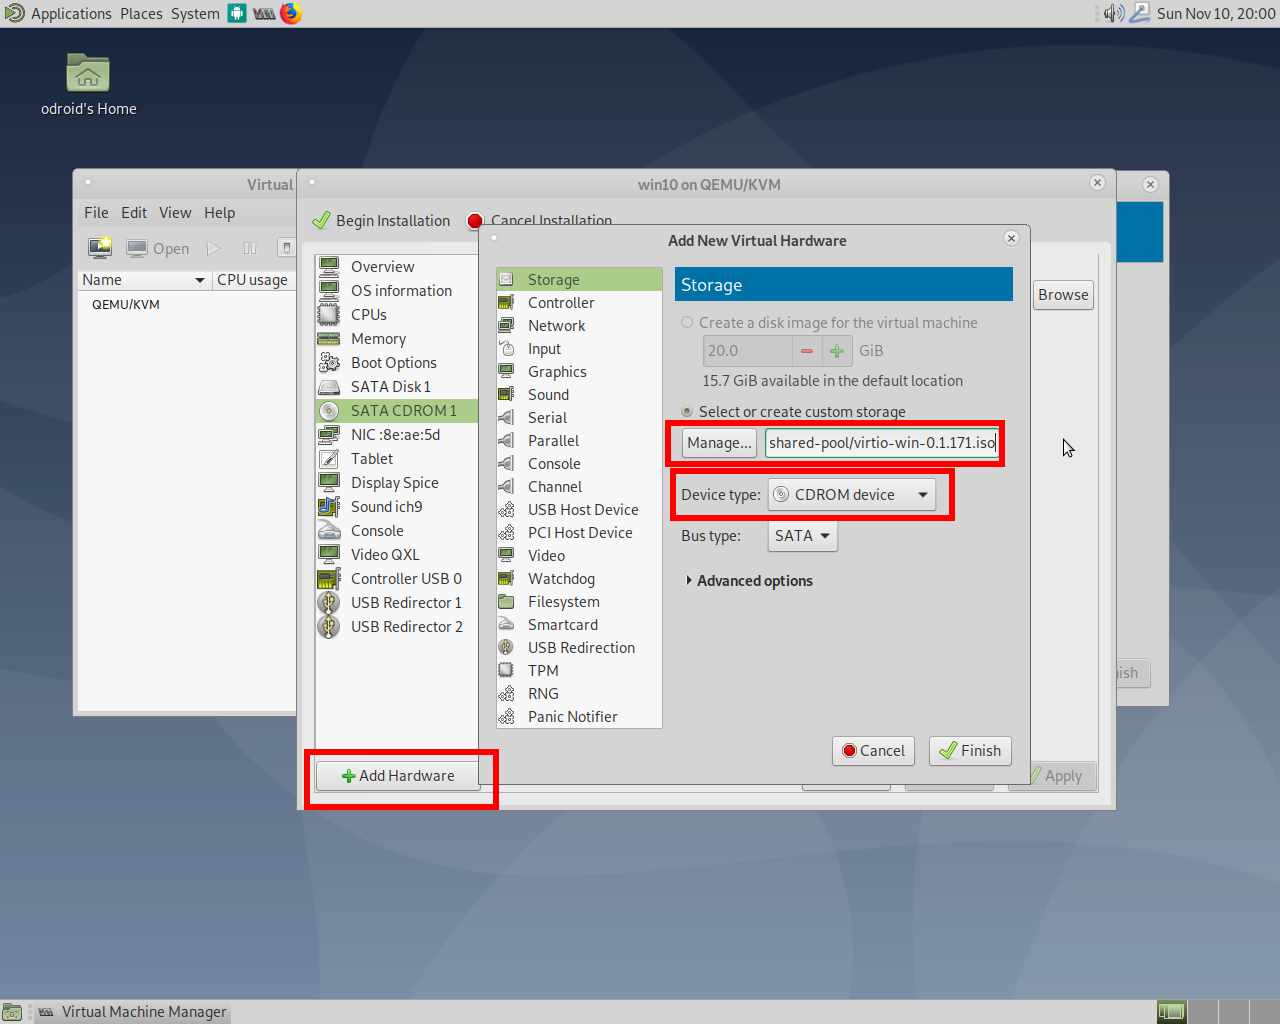
Installing Windows is similar, but a bit different. While Linux is rather good at handling virtual systems and being a virtual system itself, Windows is not as good with those things, and while we could install a Windows machine pretty much the same way as we did with the Linux system, the performance would be not very good, as Windows does not handle virtualization well enough. For this, it’s best to install Windows directly with driver support for virtualization, especially for KVM to get the best performance out of it. First, we need to download some drivers. Luckily for us, the Fedora project takes care of most of the stuff for us, and we can simply download a pre-made image for all the drivers we need. At https://bit.ly/2s3rAUK, there are several links for the stable images and the latest images with the drivers needed, either as a CD or even as a floppy disk image to download. I downloaded the stable CD image which at the point of this article was: virtio-win-0.1.171.iso and placed it in our images folder as explained earlier. Next, we can start the creation of a new VM same as we did with Linux, except for the last screen where we will check the option “Customize configuration before install”. Here, we need to change some hardware settings for the VM. We start by adding new hardware, where “Storage” should already be selected. We change the device type to CDROM device and select our virtio image which has all of the drivers.
Next, we need to adjust some existing hardware; namely our network adapter (NIC) and the disk we want to use. Both devices tend to be slow on this type of Windows virtualization, especially the disk performance, which has been an ongoing problem for me for Windows guests under KVM. I encourage anyone that wants to use Windows VMs (server or client) to read up on this topic, and I’m open to other options and suggestions as to how to increase performance.
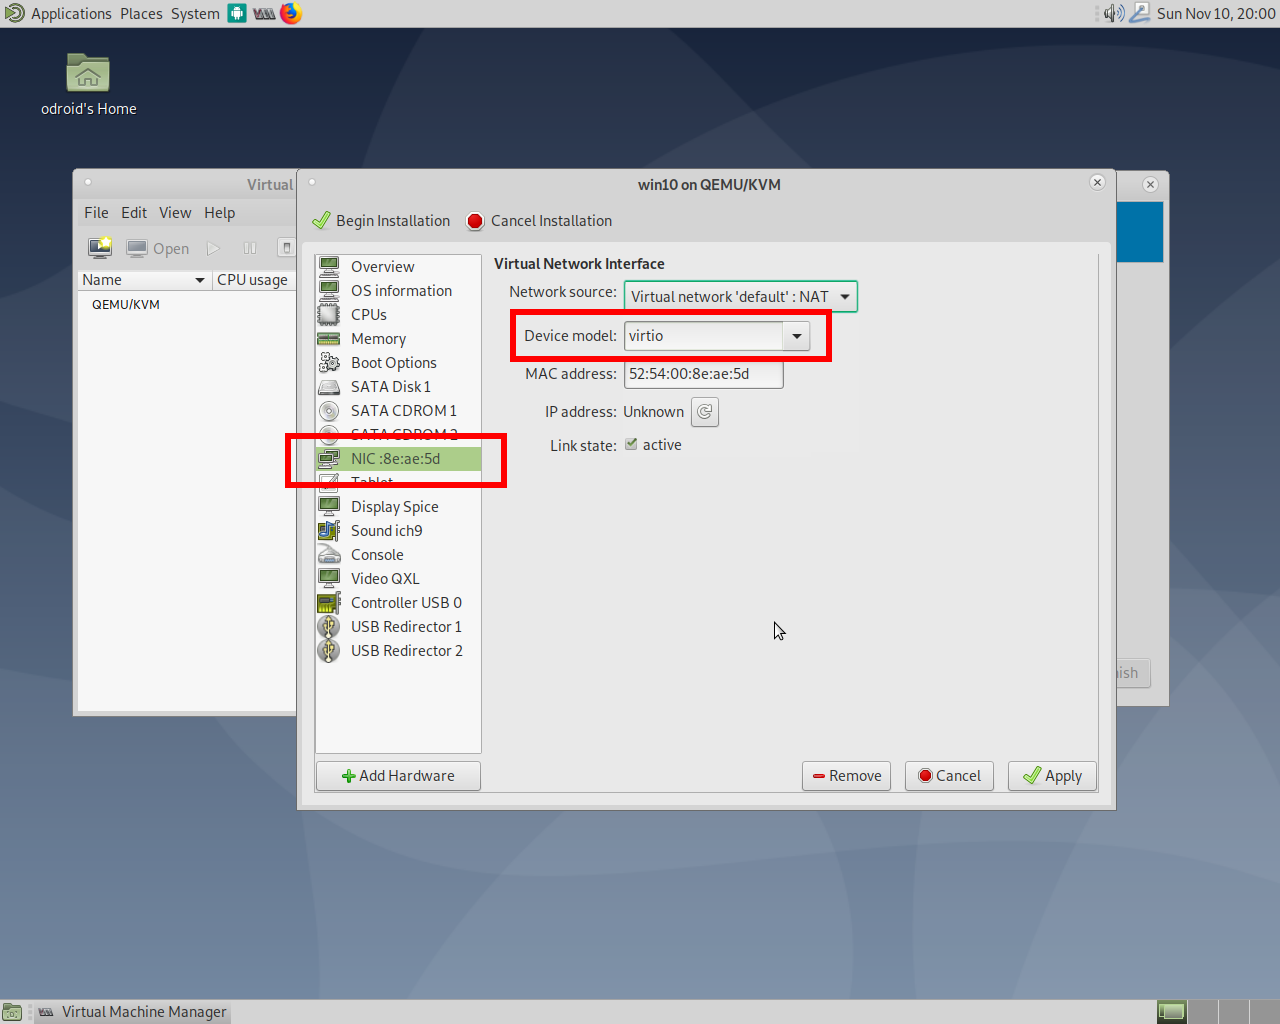
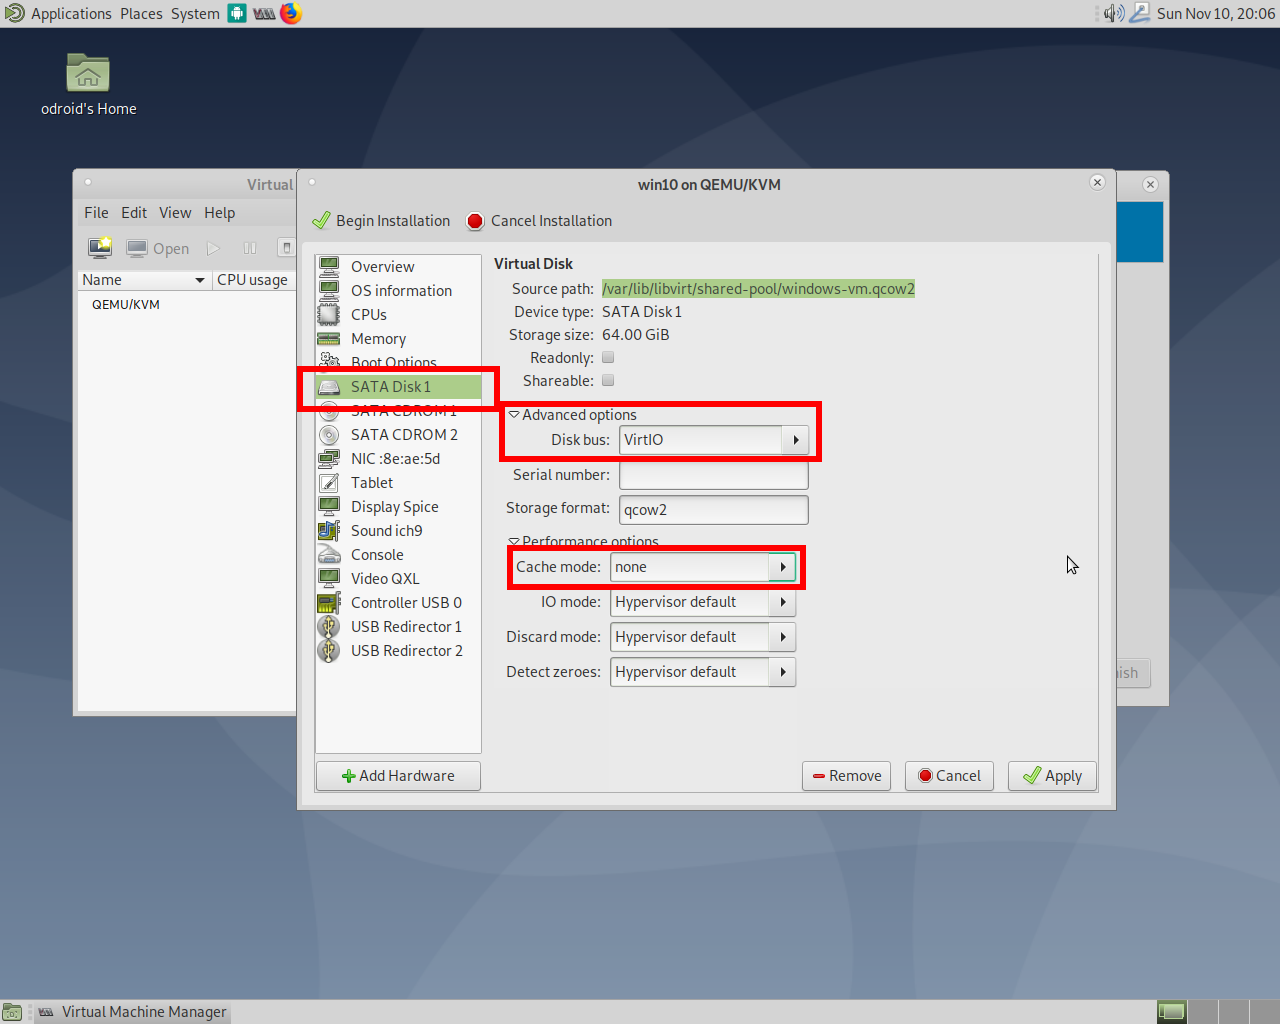
The Network adapter should be changed to virtio Device model for best performance. The same goes for the Disk bus of our virtual harddrive. Under performance options, you should set Cache mode “none”. This should increase write performance, which is the biggest issue for Windows hosts. The storage format qcow2 is the default for VMs, but some suggest using “raw” as a Storage format instead. While this can increase performance, it also removes some features like snapshots for VMs, so make sure you don’t need this. Finally, click the button “Begin Installation” in the upper left corner of the configuration window, and KVM will start our new VM and boots the Windows CD.
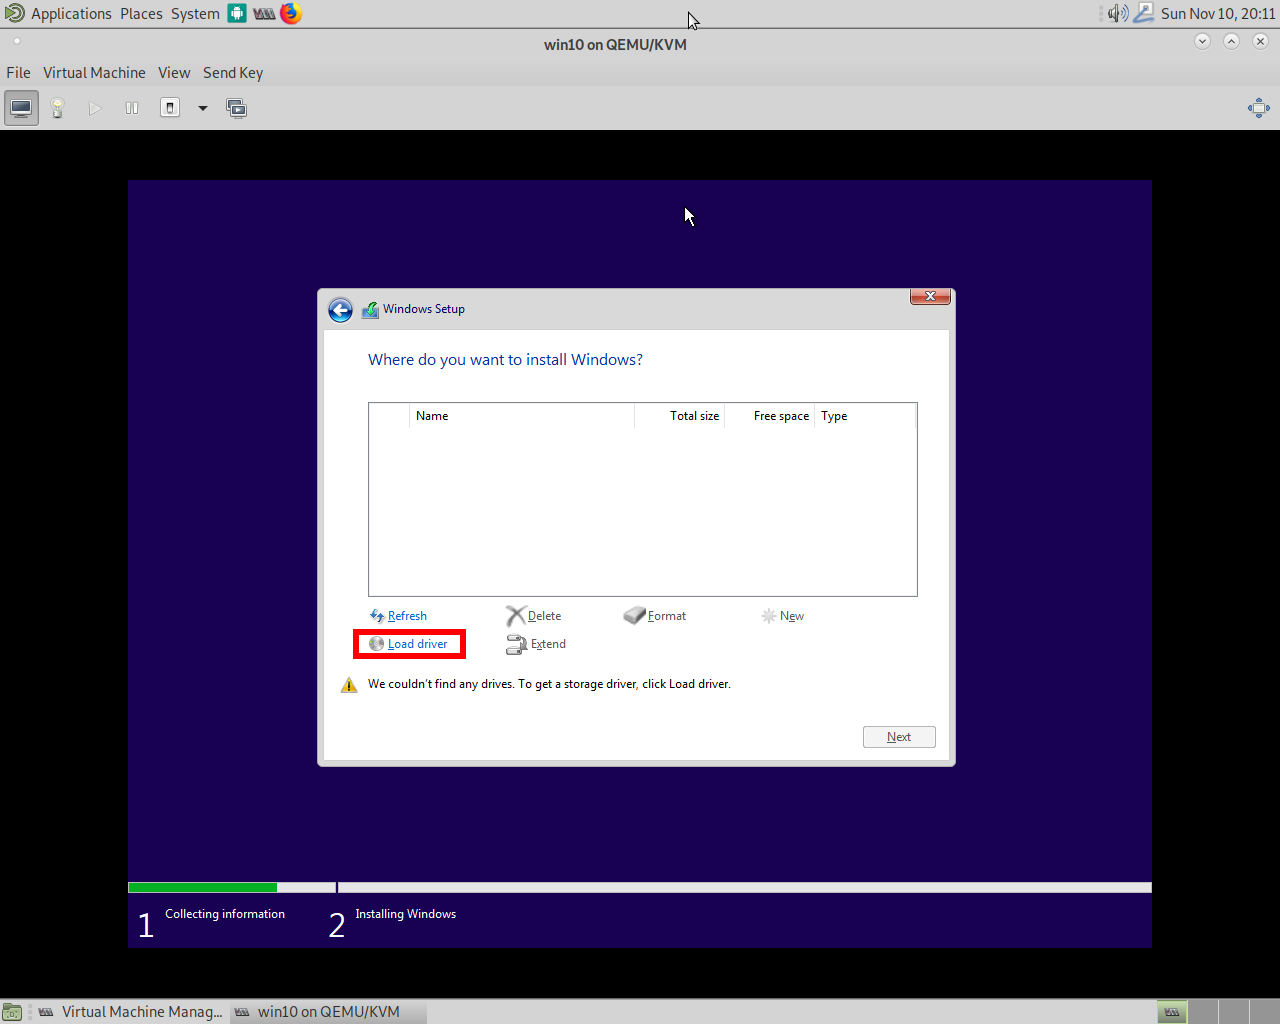
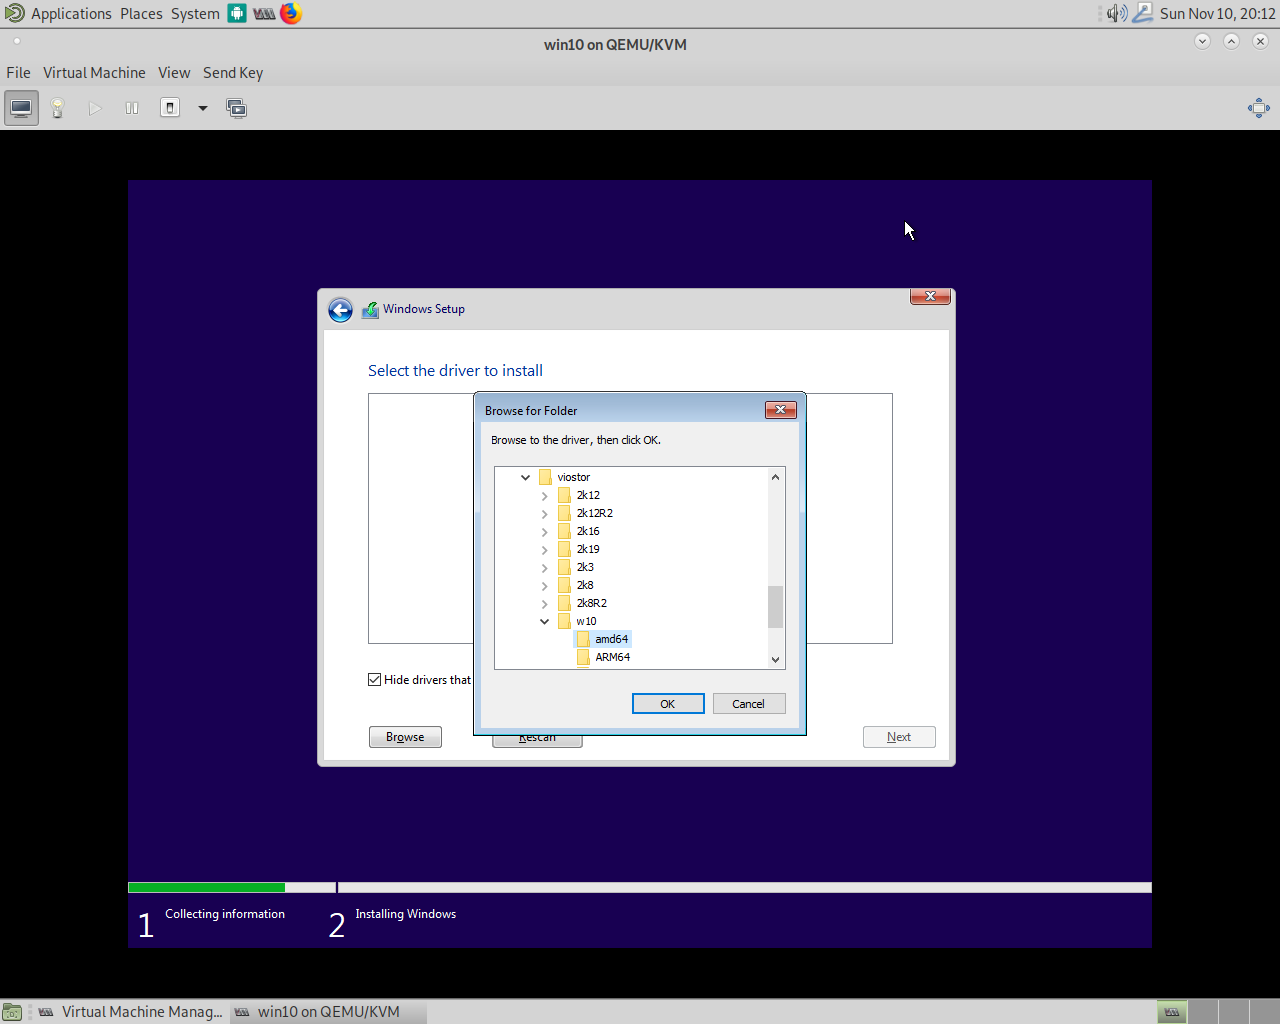
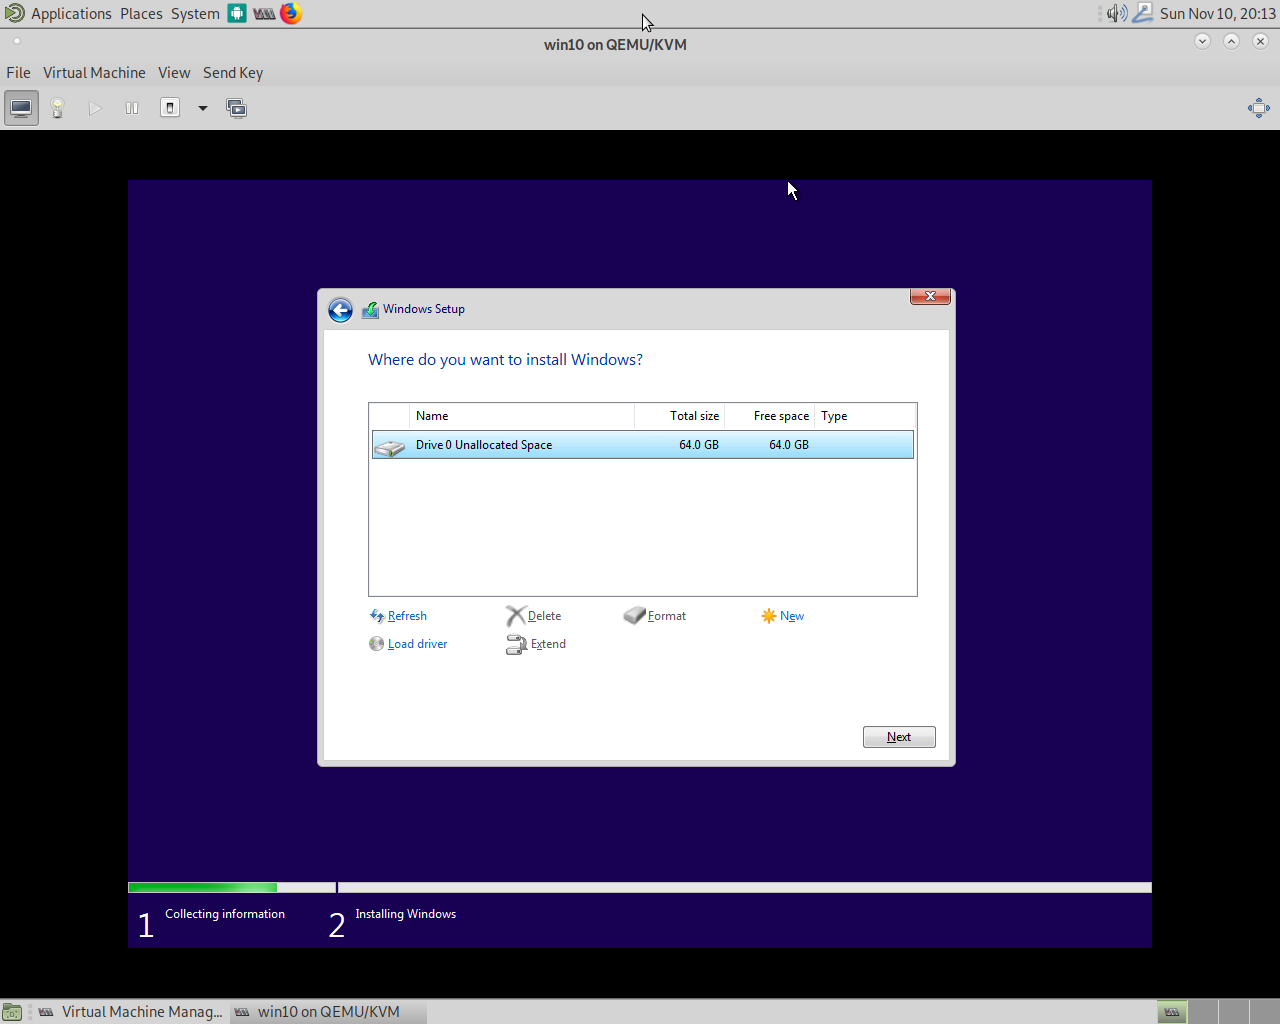
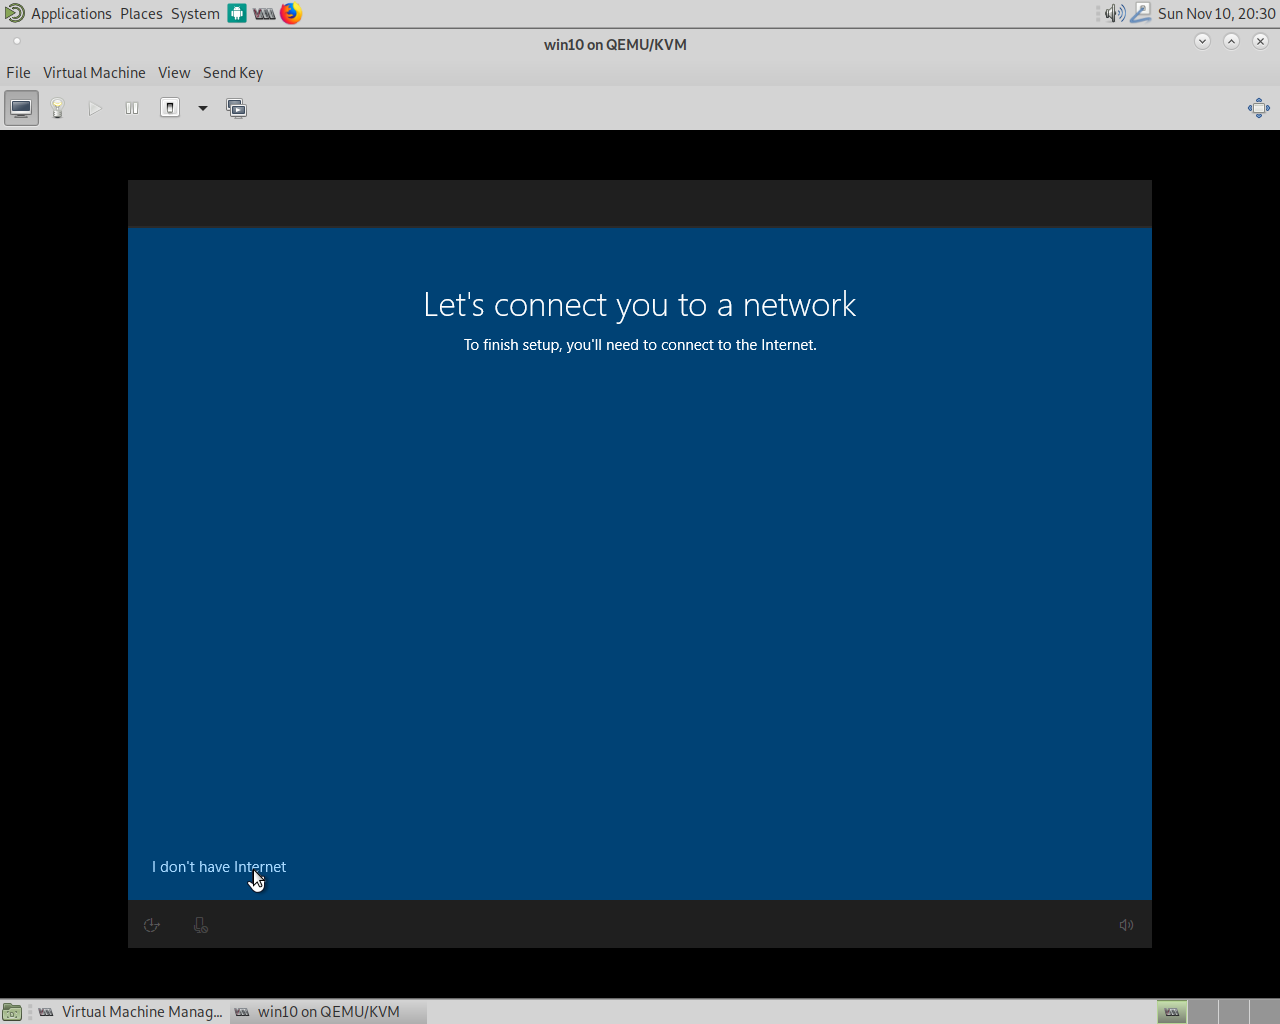
When you first start the setup of Windows and want to select the hard drive on which you want to install Windows, you will find the list is completely empty. This is due to the fact that Windows doesn’t have any drivers for VirtIO based disk drives. One Windows feature heavily used under Windows 95 or 98 but nearly forgotten by now is required to get things working: the installation of additional drivers during the Windows Setup. For this, select the button “Load drivers” in the lower left corner of the installation window and navigate to the CD we mounted in the second CD drive. Navigate to the folder “viostor” and then to the OS and architecture you want to install. For me this was w10/amd64 as I installed Windows 10 on a 64bit board (the ODROID-H2). If your OS is not listed, take one that is closest to it and it should work anyway. After the driver was installed, the setup found the harddrive and I could continue to install Windows as usual. After the setup completed and the system rebooted, Windows loaded normally but stopped again when it tried to connect to the Internet. I did not install drivers for the network when I installed the drivers for the harddrive. To be honest, I don’t know if I could have, and I haven’t tried. I probably could have installed all the necessary drivers right then and there, but it’s not important as you can continue without them, and install the drivers later.
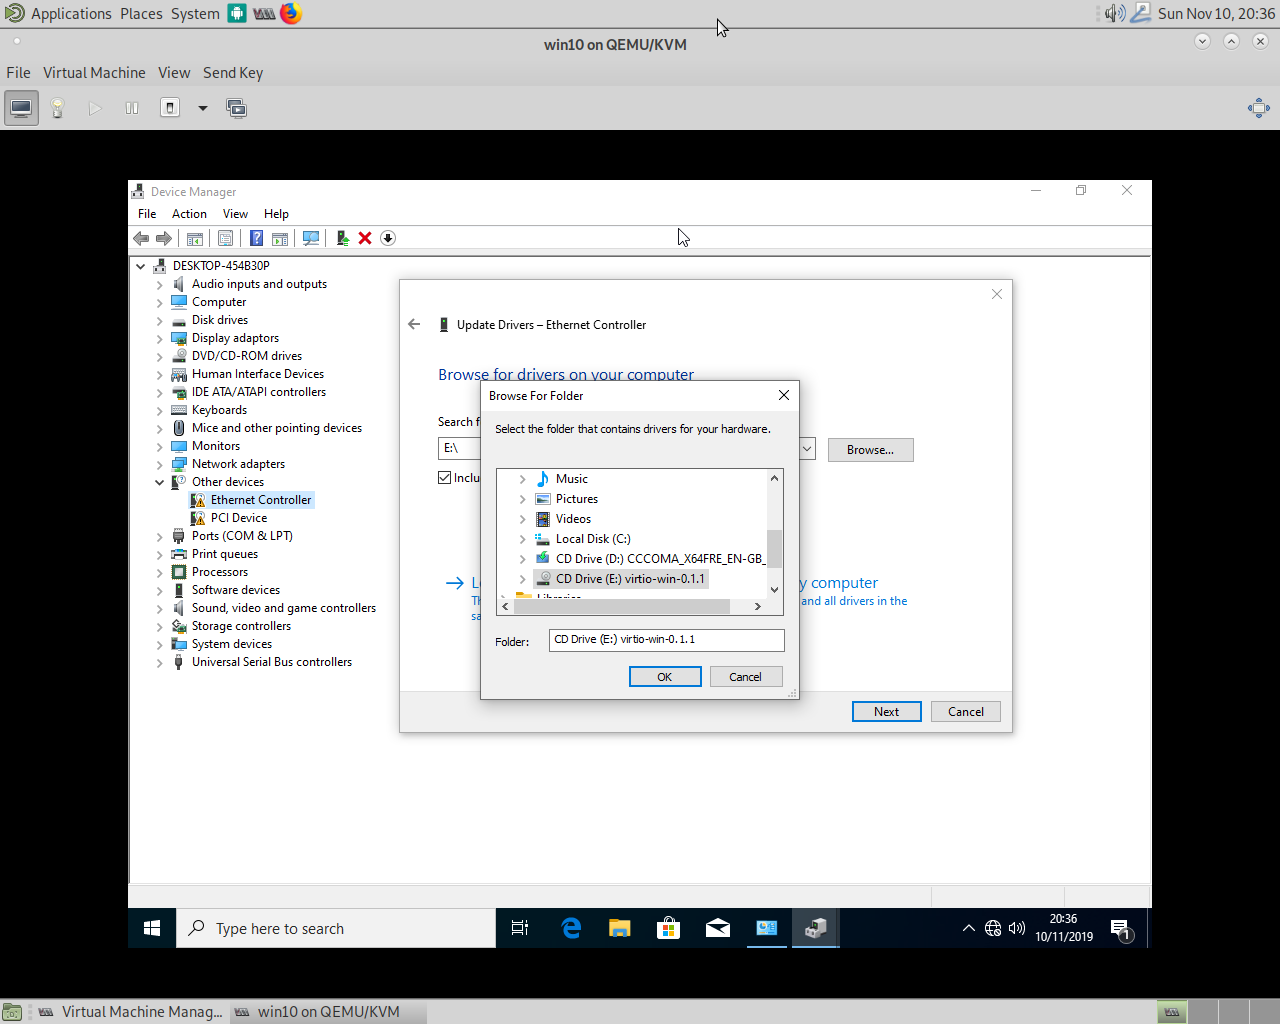
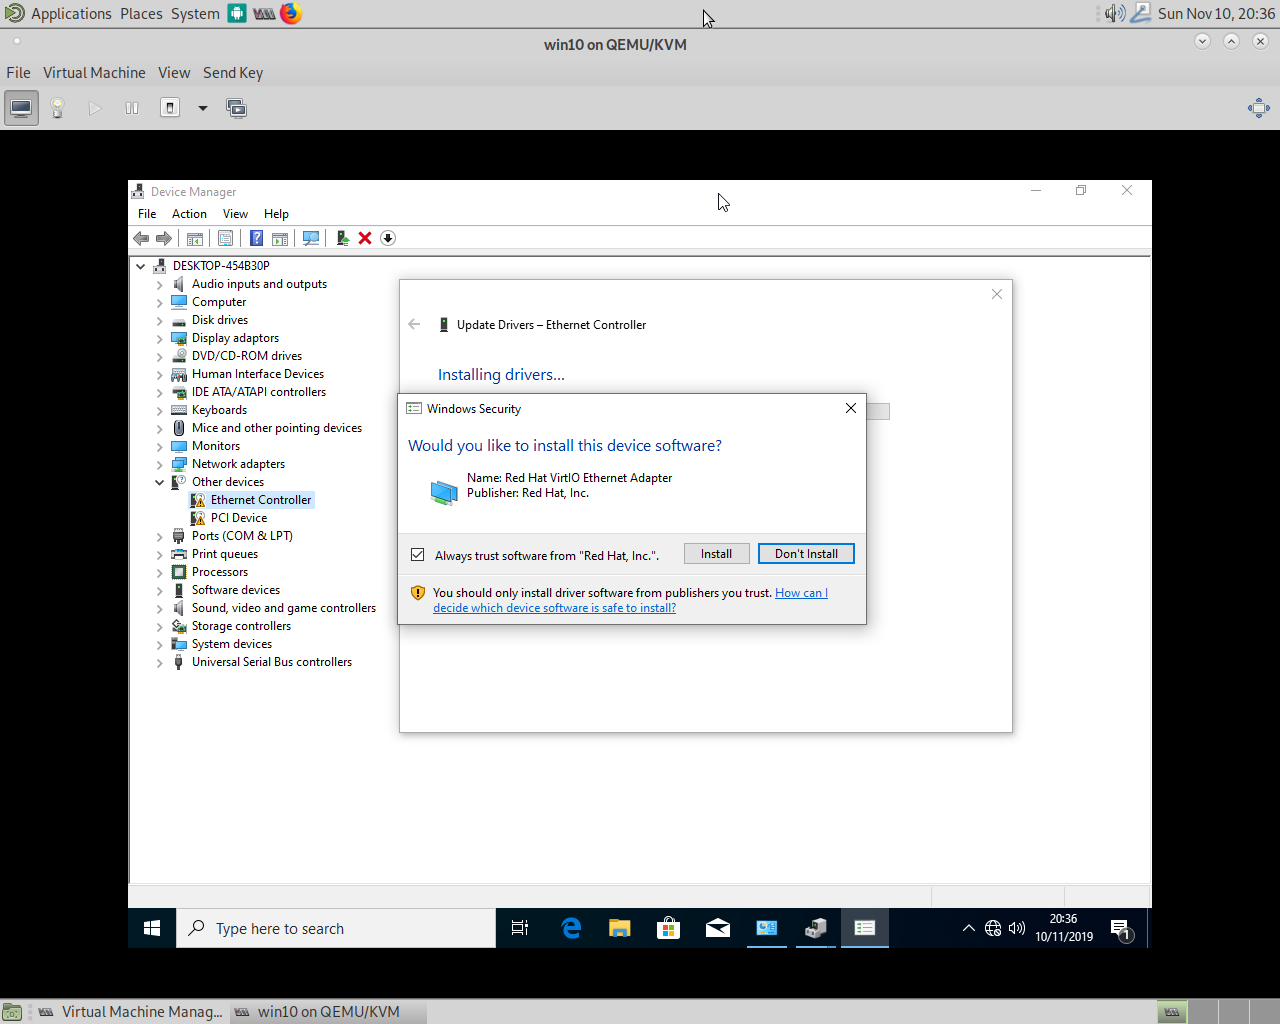
Once Windows is up and running, just navigate to your System → Device Manager in Windows, and you will find the devices where the drives are missing. Right click them and select update drivers, then navigate to the CD with the virtio drivers. You do not need to select the correct folder for the drivers, since Windows will find them on its own.

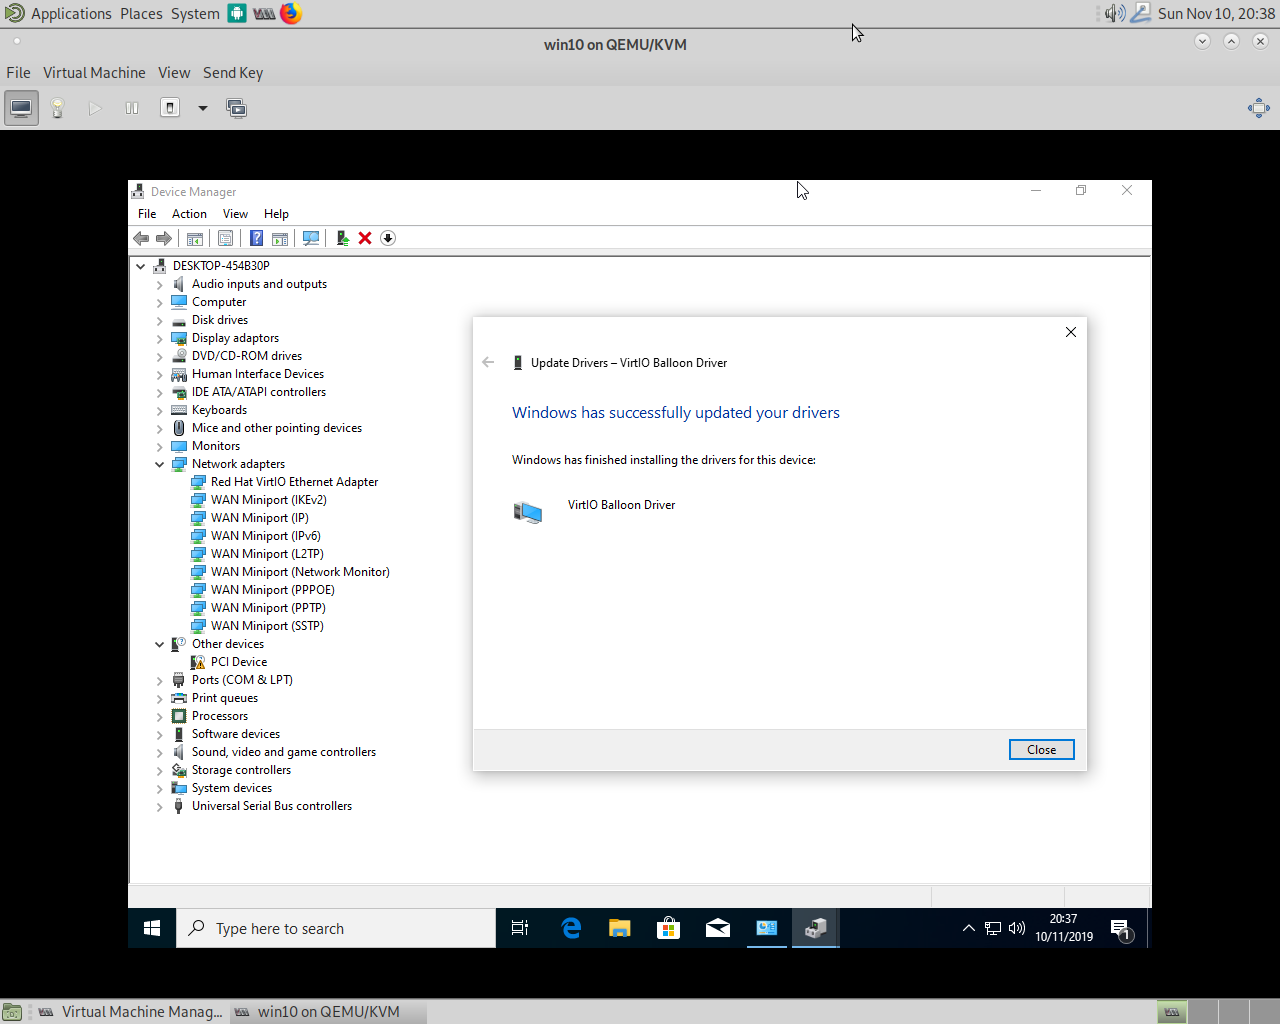
Installing the “PCI Device” Balloon Driver is somewhat controversial. Some people claim the system runs better without, but I will let you decide about that. What it does is fill the RAM with a pseudo process, and depending on what RAM the Host OS or the Guest OS needs to run applications, it expands or reduces its size, and with that allows either the Host or the Guest to use more RAM, depending on their needs. At this point Windows is up and running, and should behave like any other Windows VM.
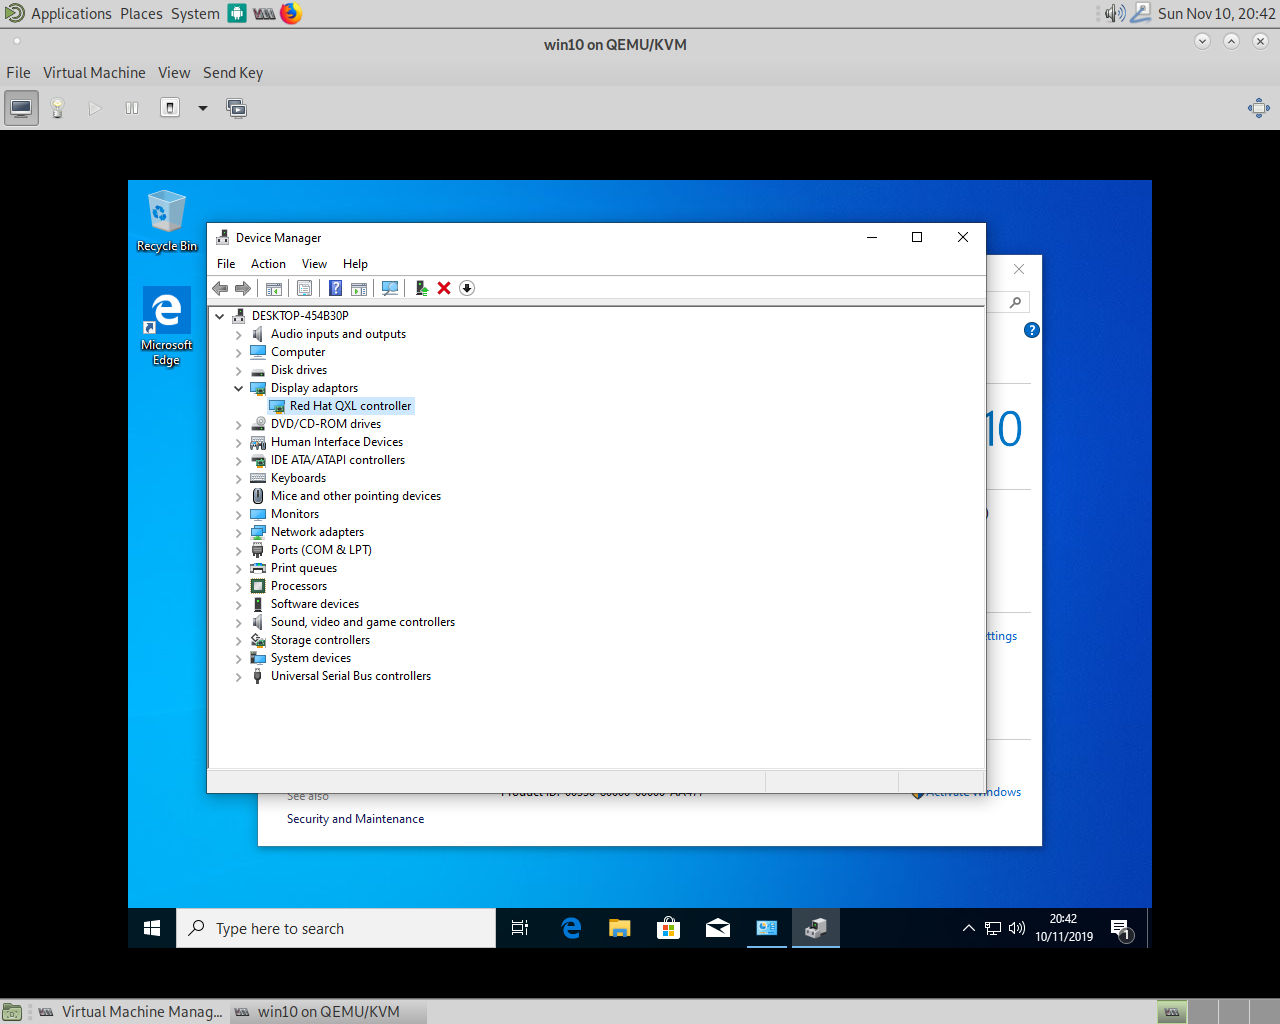
You can install additional drivers, though. Spice is a graphical interface to connect to the display of the VM. Rather than using VNC, like other hypervisors, Spice is used by default in QEMU. It is faster and more responsive than VNC. For Windows there are spice-guest-tools that can improve graphics and other features on a Windows guest. Think of it like as VMWare or VirtualBox guest tools/additions just for QEMU/Spice. You can download and install them from https://www.spice-space.org/download/binaries/spice-guest-tools/. You can check if it’s installed correctly by checking your graphics adapter after the installation of the spice-guest-tools.
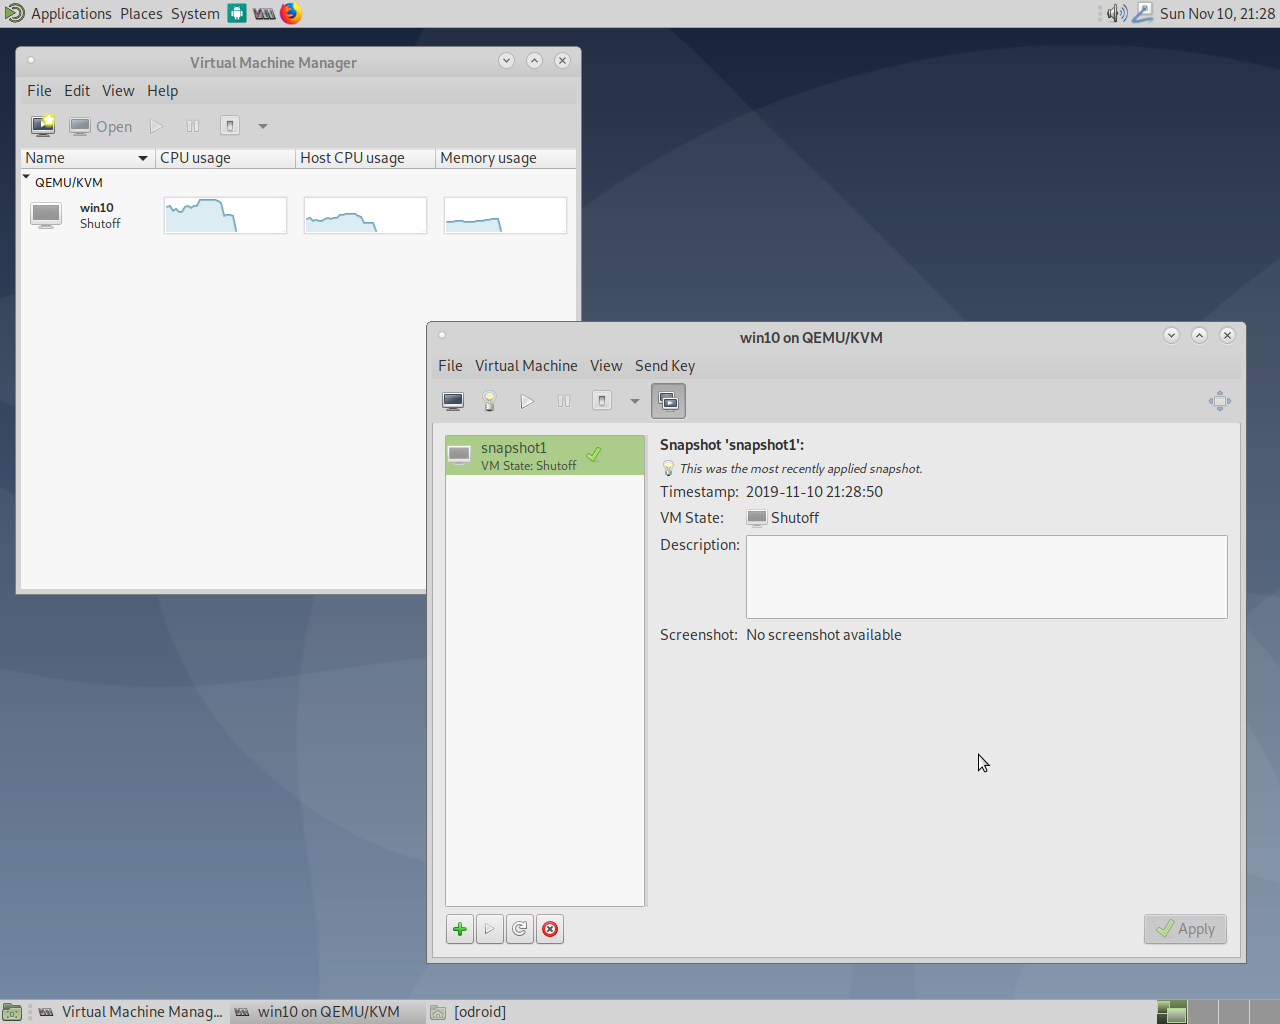
There is one feature I want to talk about, as it’s been used in other hypervisors as well: Snapshots. The Virtual Machine Manager can handle Snapshots of VMs just fine, same as VMWare, or VirtualBox or any other hypervisor would do. Simply open the Snapshot TAB in your VM click on the plus symbol and create a snapshot.

While snapshots are a nice way to revert to a previous state, which makes it essential when you want to try out new things that might affect the system (e.g. OS upgrade), please consider that snapshots can reduce overall performance as well as highly increase disk usage. Let’s assume you have a VM with two disks: one for the OS and a second with a size of 20 GB as a data store. You fill the data disk to its maximum (20GB) and make a snapshot. Then you exchange the entire data on the data disk. If you check on the host system, where your qcow2 file for the data disk is located, you will notice that the size of the file has increased to approximately 40GB. Although the size limit of the disk is 20GB, it now needs additional 20GB to store the difference between the snapshot and the new data. Keep this in mind when working with snapshots, and also that snapshots should only be a temporary solution, not a way to organize or backup your data.
Up Next
In the next article on this topic, I want to talk about advanced features, like shared storage pools and live migration of VMs from one host to another, which means moving a VM while running from one PC to another PC without interruption. I also want to introduce “virsh”, which is the command line tool for libvirt, and also show how you can connect to your virtualization hosts from a remote system, so that you don’t need a desktop installation to run your VMs on.
Be the first to comment