

This is a continuation of the Retro Gaming Console article from last month, where we learned how to configure the software for a retro gaming console. This installment will show you how to finish the project by showing you, in detail, how to polish off your Monku Retro 1 (ODROID-C1+) or Monku Retro 2 (ODROID-C2) video game console. We'll be optimizing the MATE Linux desktop environment, connecting our custom control button, setting up RetroArch in kiosk mode, and boot.ini configuration.
Tools and Parts
This tutorial doesn't require any new parts or tools. We'll be configuring the console you've already built, adjusting things to really make it shine.
Introduction and Tutorial Goals
Finalizing MATE...Almost
In this section, the first thing we're going to do is get rid of that pesky authentication prompt that pops up when you open a browser for the first time after logging in. ALERT: This is not a high security setup: we are purposely lowering the security level here to make it easier to use as a game console and web browsing set top box. Go to the following menu location: Applications -> Accessories -> Passwords and Keys and you should see a window popup similar to the one depicted below. ALERT: If at any time you are prompted for a login when working with the terminal use the password, odroid.
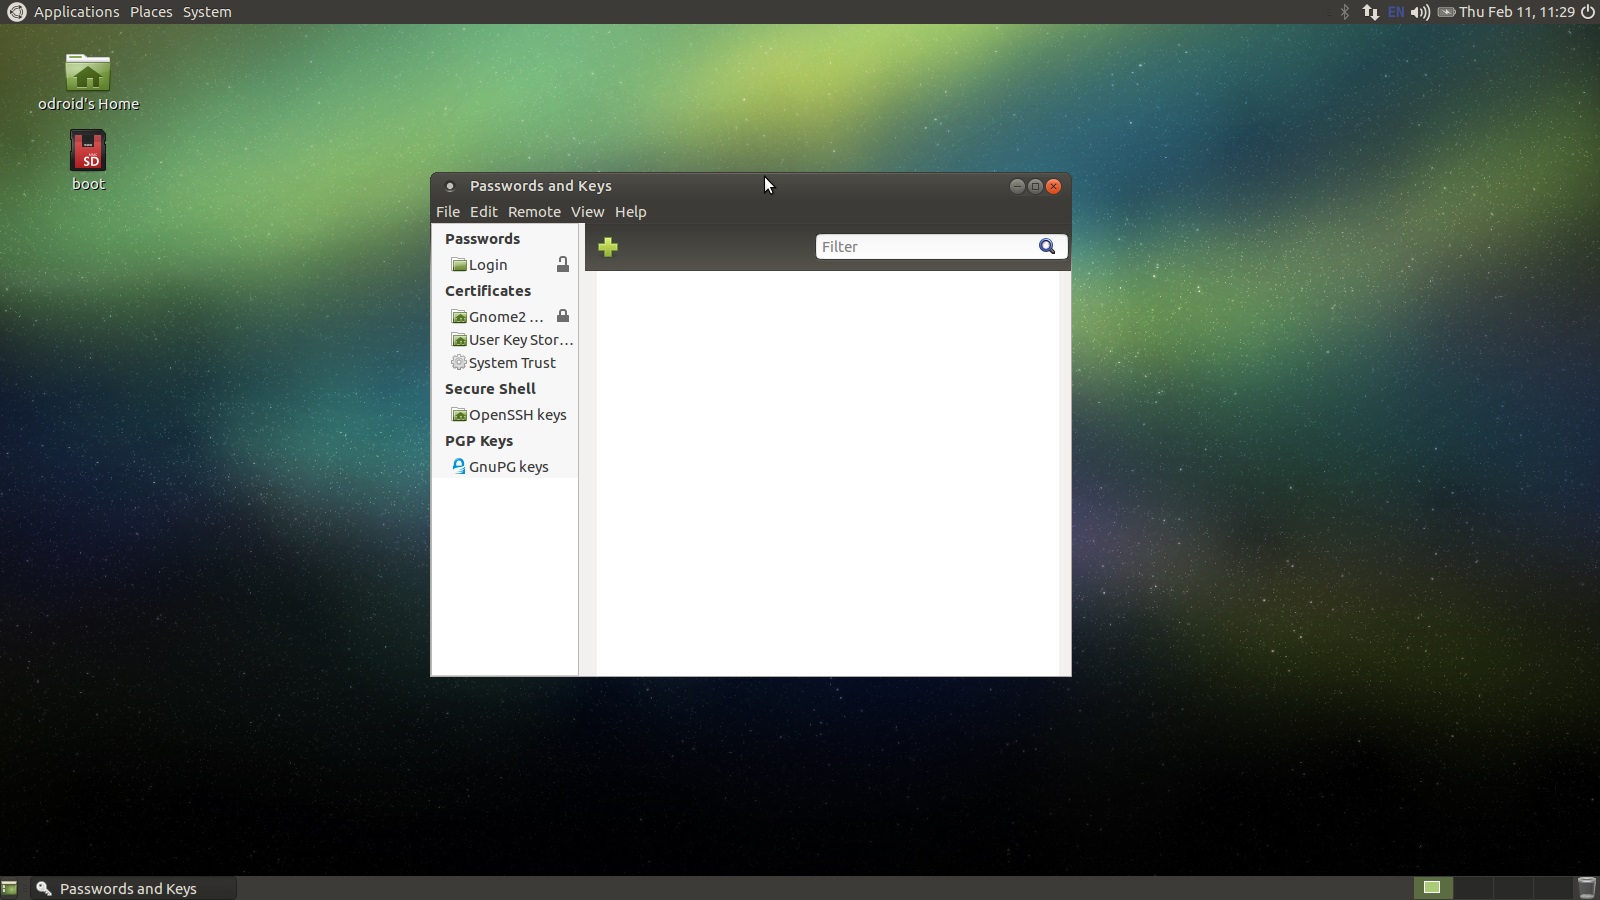
Locate the Login entry in the list on the left-hand side of the window. If the authentication popup I mentioned references a different Password keychain then find that entry in the list on the left-hand side of the window. Follow the steps below to unlock the target keychain.
- Right-click on the target entry and select Change Password.
- You will be prompted to enter the old password: type in odroid and click Continue.
- You will now be prompted to enter a new password: leave both fields blank and click Continue.
- Another dialog will popup and ask you if it's ok to allow the keychain to be unlocked: click Continue.
- Close out of all the dialogs and close the Password and Keys window; we're all set.
Next thing we'll do with the MATE environment is configure the panels and widgets a bit. You can do whatever you like here. I'll just show you how I configure things and why. First off, we're expecting to interface with this system, at least some of the time, with a gamepad. It works great, but it's not a mouse. We're not really going to be doing any rigorous Linux computing so there are a few things we don't need. The second benefit to this configuration step is that is does lower the memory overhead a little.
Follow these instructions to remove the bottom panel. We will be adding controls to the top panel to offset some of the functionality loss, but we won't be adding in the desktop selection widget. It's just a bit of overkill for our needs. If you want it, however, it won't harm anything to keep it. Follow these instructions to clean up the panels and widgets.
- Go to the bottom panel and right-click, select Delete This Panel, then click Delete again when prompted.
- Go to the top right-hand side of the screen and right-click the power button, select Remove From Panel.
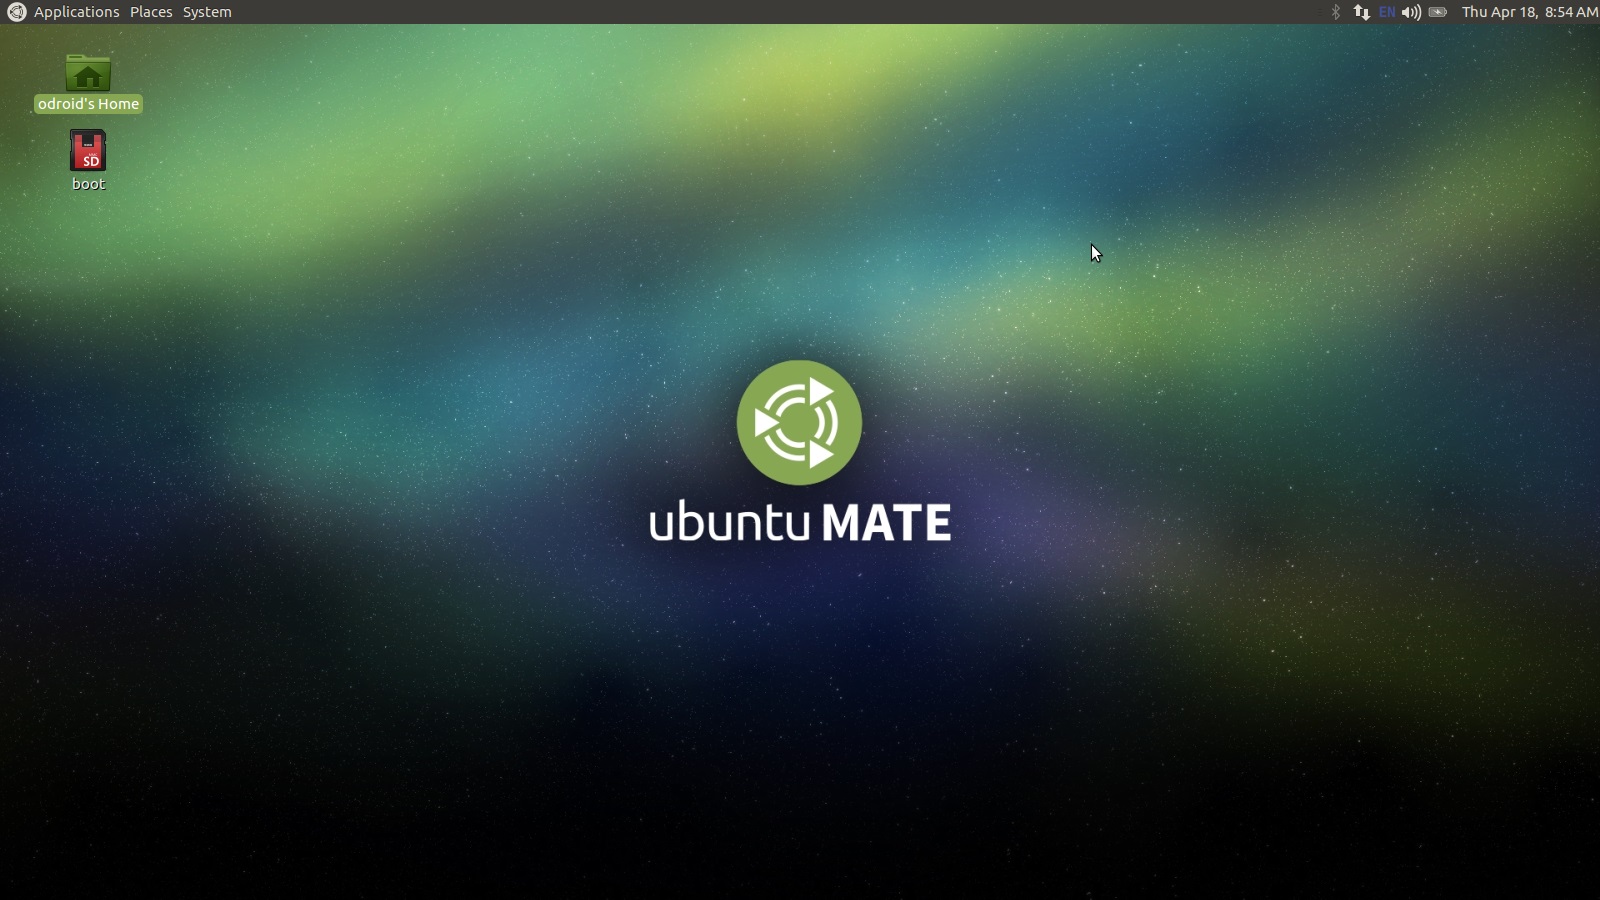
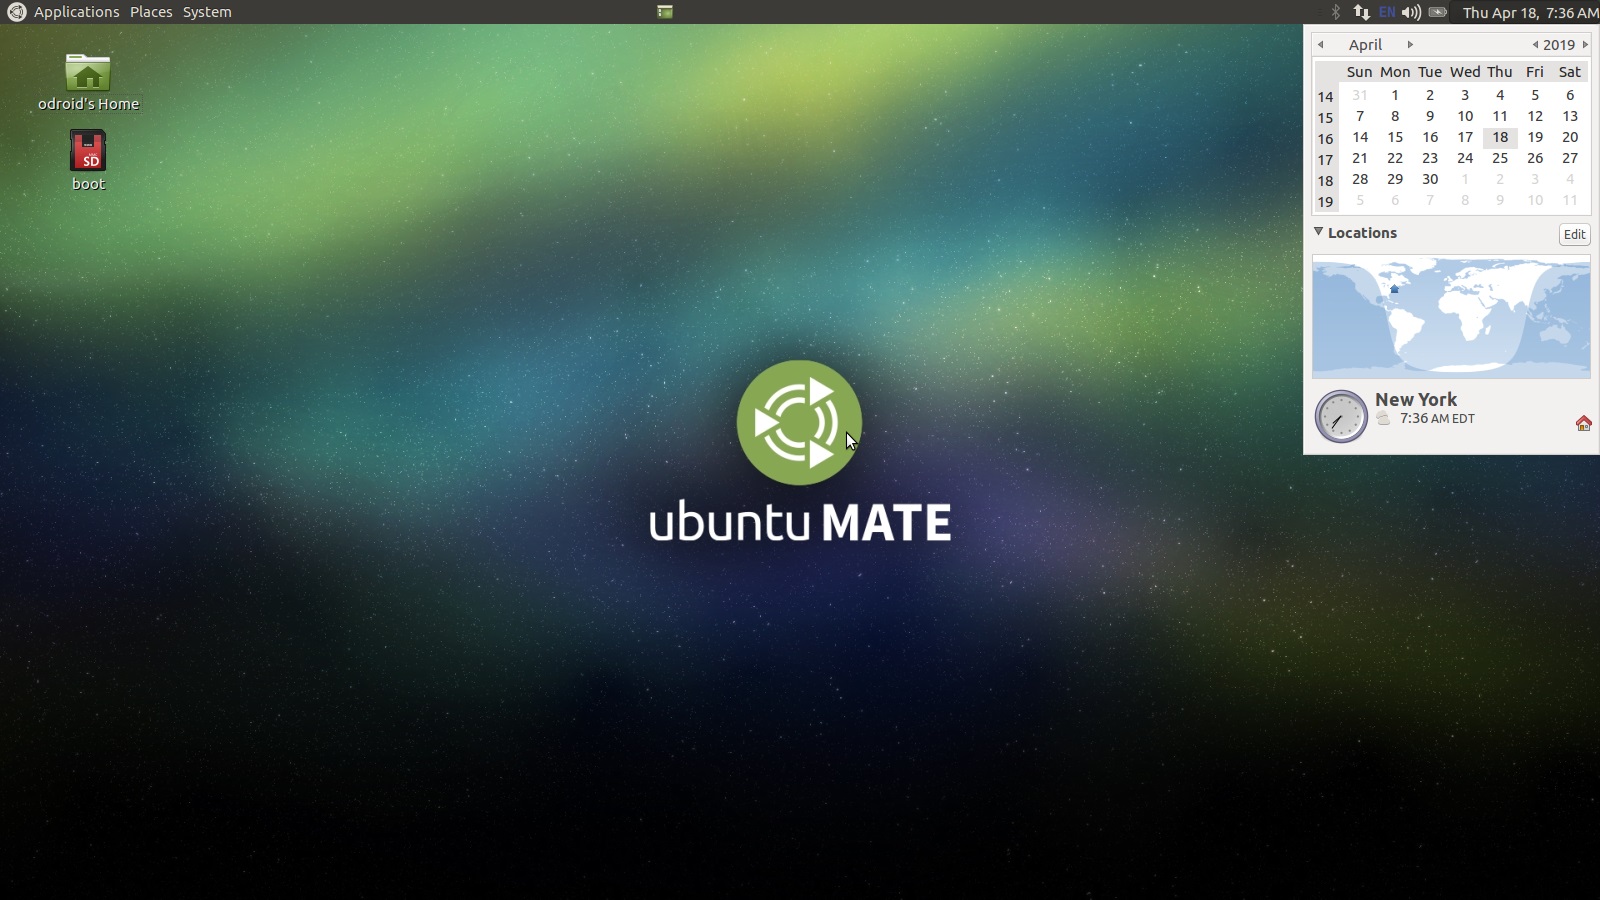
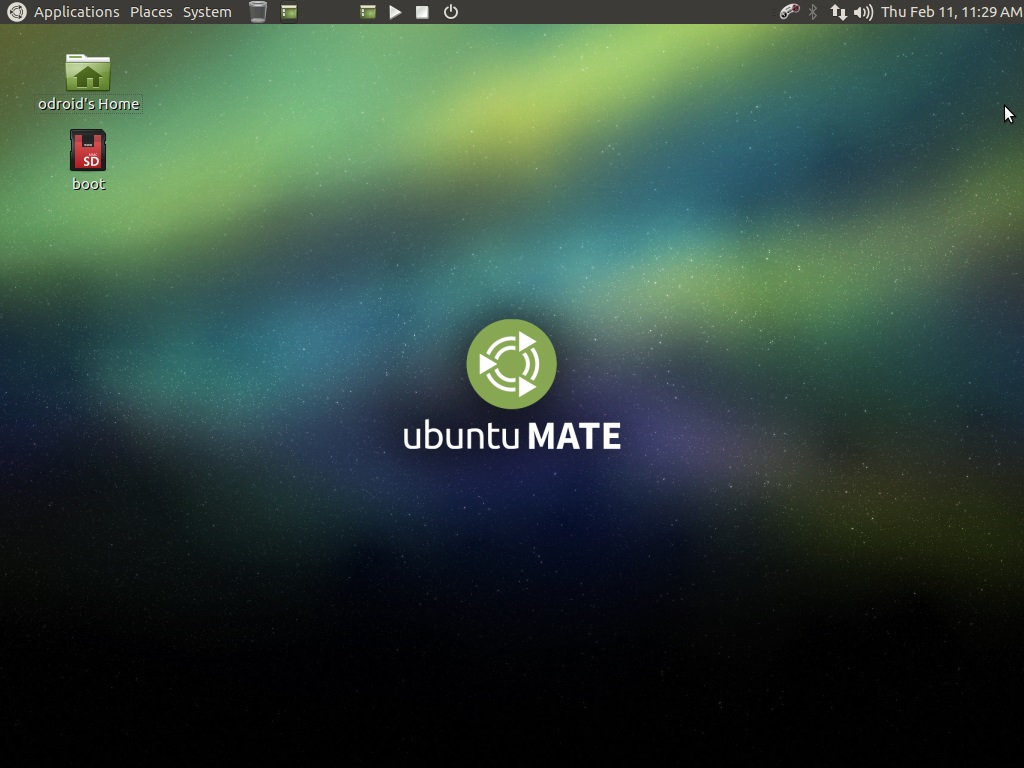
What we're going to do is re-add some of the widgets, making the top panel a more centralized point of control. This makes using the gamepad to control things much much easier. Your desktop should look like the screenshot below.
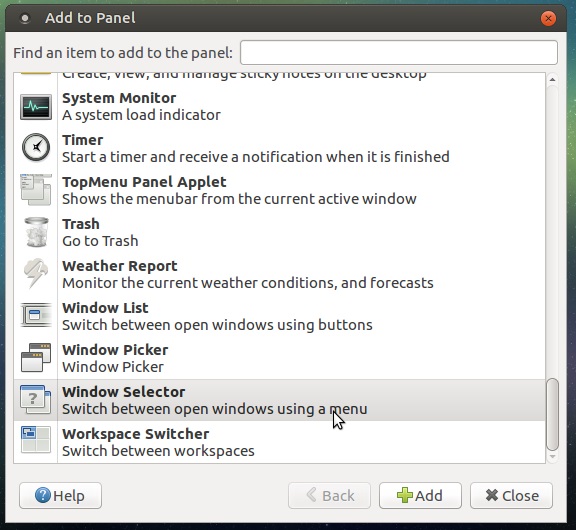
Since we got rid of our open window selection buttons when we deleted the bottom panel, let's add a new widget to the top panel that is better suited for a gamepad since it requires less cursor movement to utilize. Right-click on the top panel and select Add to Panel. Scroll down the list of options until you see the entry depicted below and then click Add.
We have a few more steps to get through here regarding the tray apps and the date and time configuration but we're almost done.
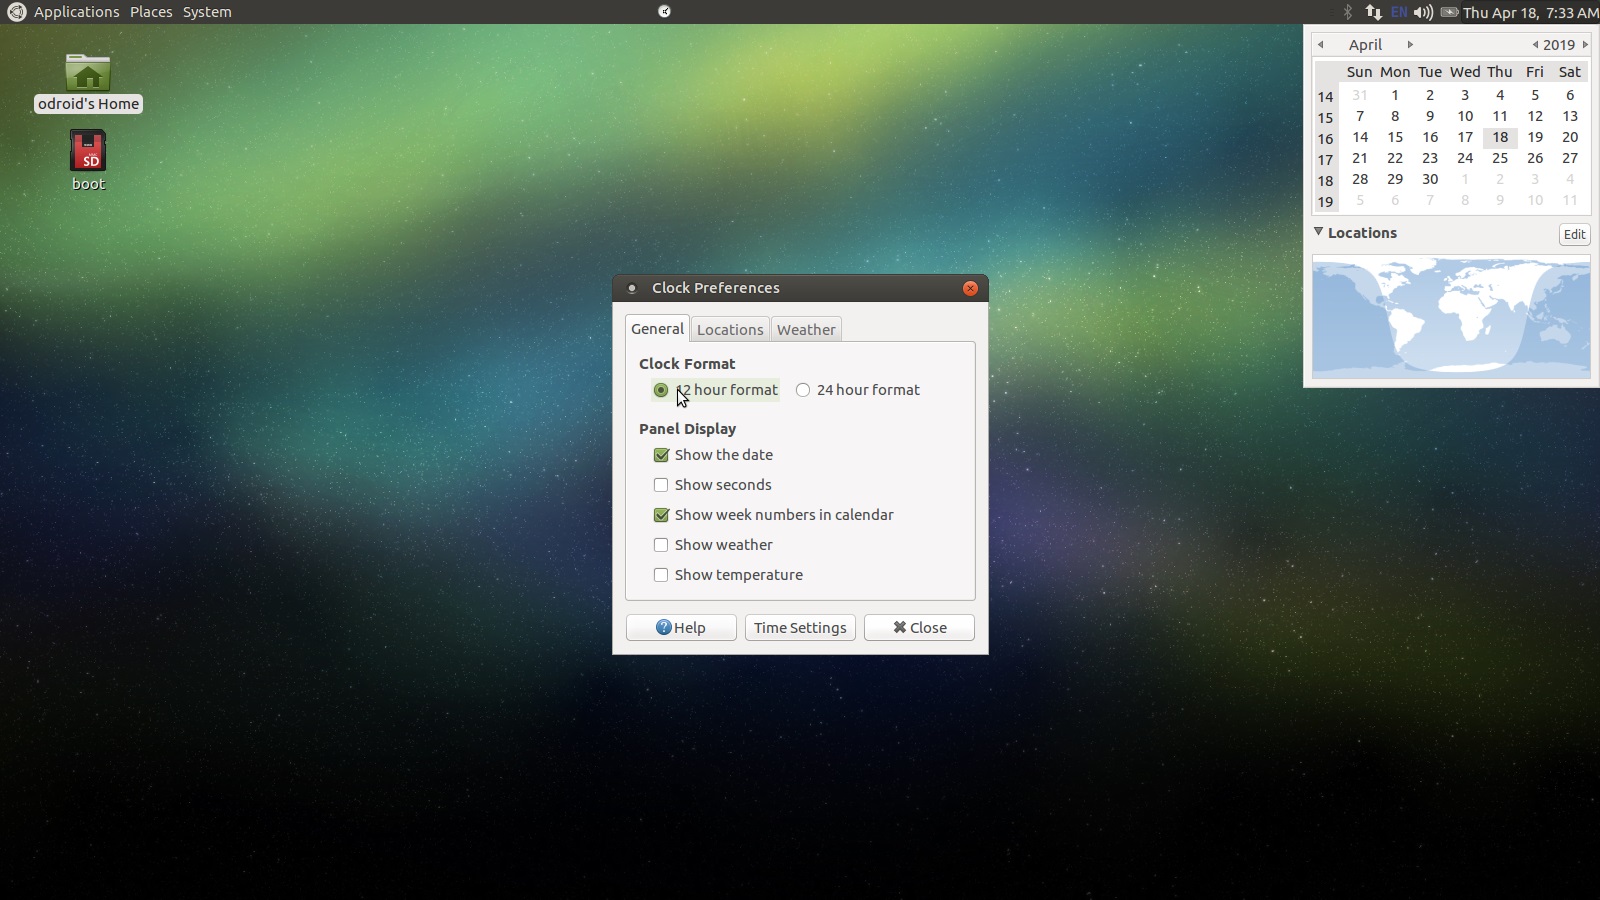
Next let's click on the Date and Time string in the top right corner. A calendar drop down should appear. Expand the Locations section and click the Edit button. Configure the General tab as depicted below or as you see fit.
Let's add some location information so the time will be correct when we have an internet connection and sync with network time protocol (NTP). Click on the Locations tab then click the Add button.
Start typing the nearest major city into the Location Name text box. If that doesn't work, try another major city or the city representative of your time zone (e.g. mine is New York). Select a location from the list that pops up. Click Ok once you've found something suitable. Now you will see a location entry in the locations list as depicted below.
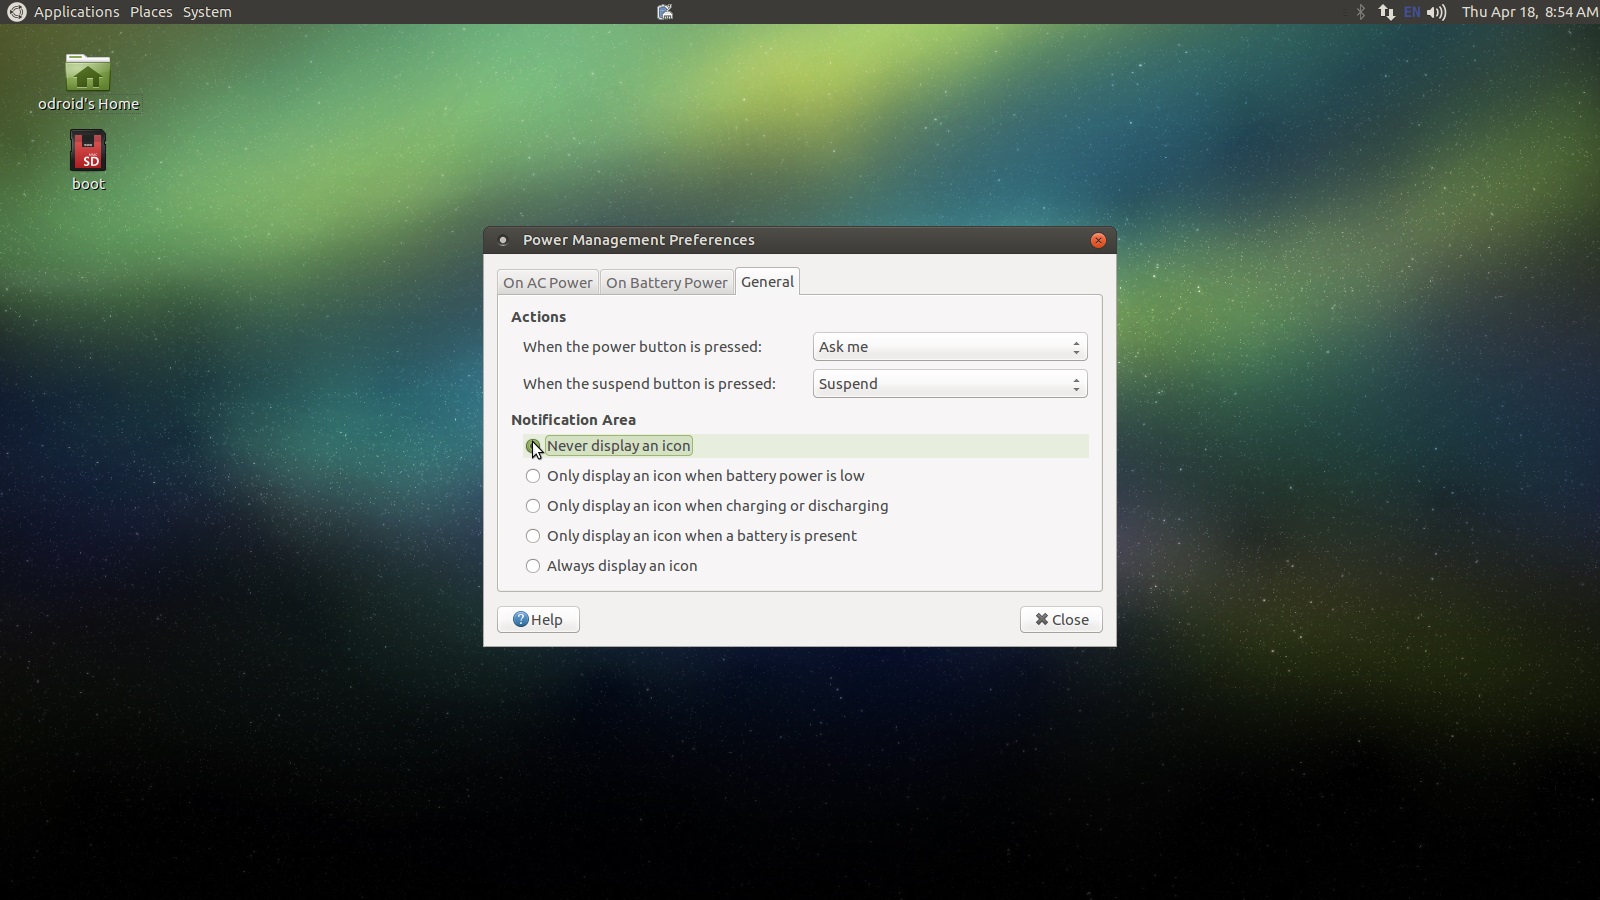
There are just a few more things left to do here. Right-click the battery icon in the top right tray. Select the Preferences option. Click on the General tab and toggle Never Display An Icon. If you have an EN or UK string in the system tray, right-click on it and select Preferences. On the General tab, uncheck Show Icon On System Tray. We won't really worry about switching the keyboard language. If you need this, you can turn both system tray icon back on by using the System -> Control Center menu option and clicking on Power Management and iBus Preferences respectively. The screenshots below show the forms we just discussed.

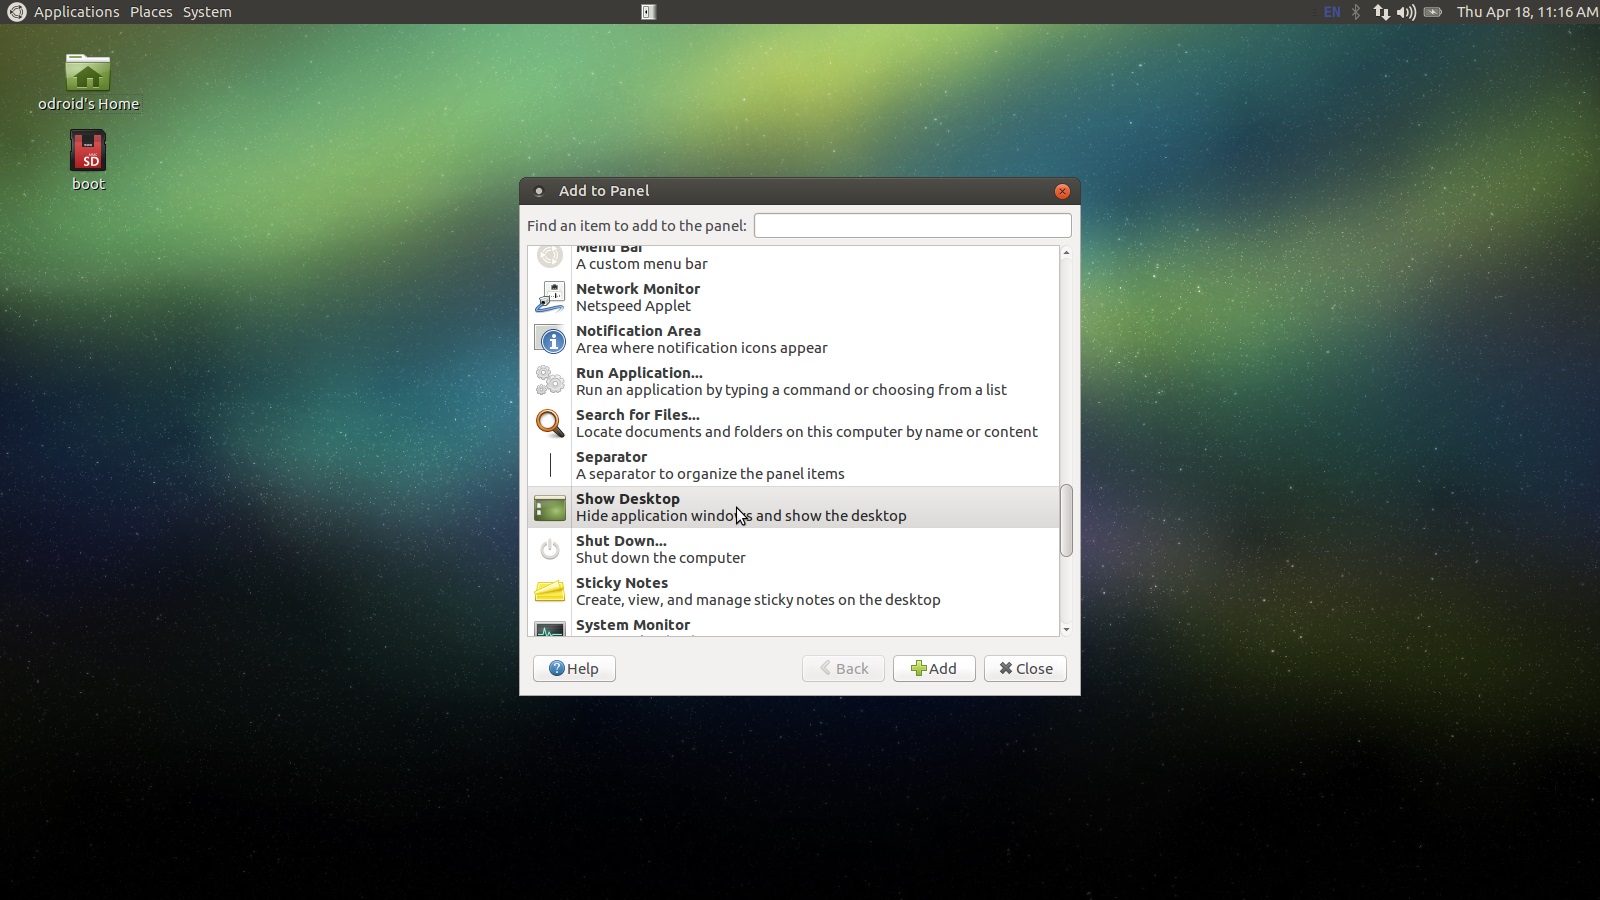
There are just two little things left in this section, then we'll be moving onto the custom control button and scripts! Move the mouse to the top panel and right-click. Select Add to Panel, then scroll down until you see the Show Desktop option as shown below. Do the same thing for the Trash option.
Use the center mouse button, or the mouse wheel, to move the widget icons on the top panel. Let's drag these two new widgets a little closer to the System menu, and separate them a little bit. Now we're ready to start adding custom scripts. These scripts will automatically start RetroArch on boot, and start AntiMicro when RetroArch closes, returning mouse control to the gamepad. We'll also set up some magic with the custom control button.
Scripts and Custom Control Button
In this section, we're going to set up some custom scripts to control the software we installed and configured. This will bring the experience up from a Linux desktop experience to more of a game console experience. Download the script bundle for your device below and then copy and paste it into the install_zips folder you created in the second tutorial. It is located in the ODROID user's home directory.
Once you have downloaded and copied the zip file into the install_zips folder, right-click and select Extract Here. Eleven files should appear in a sub-directory. Open it and copy them all into the ODROID user's home directory. The ODROID user's home directory is the default location of the file browser. You can also access it from a link on the desktop, or from the left-hand side of the file browser where the folder shortcuts are listed.
Let's make sure these scripts have the correct permissions and can be executed. Open up a terminal, Applications -> System Tools -> MATE Terminal, and run the following commands.
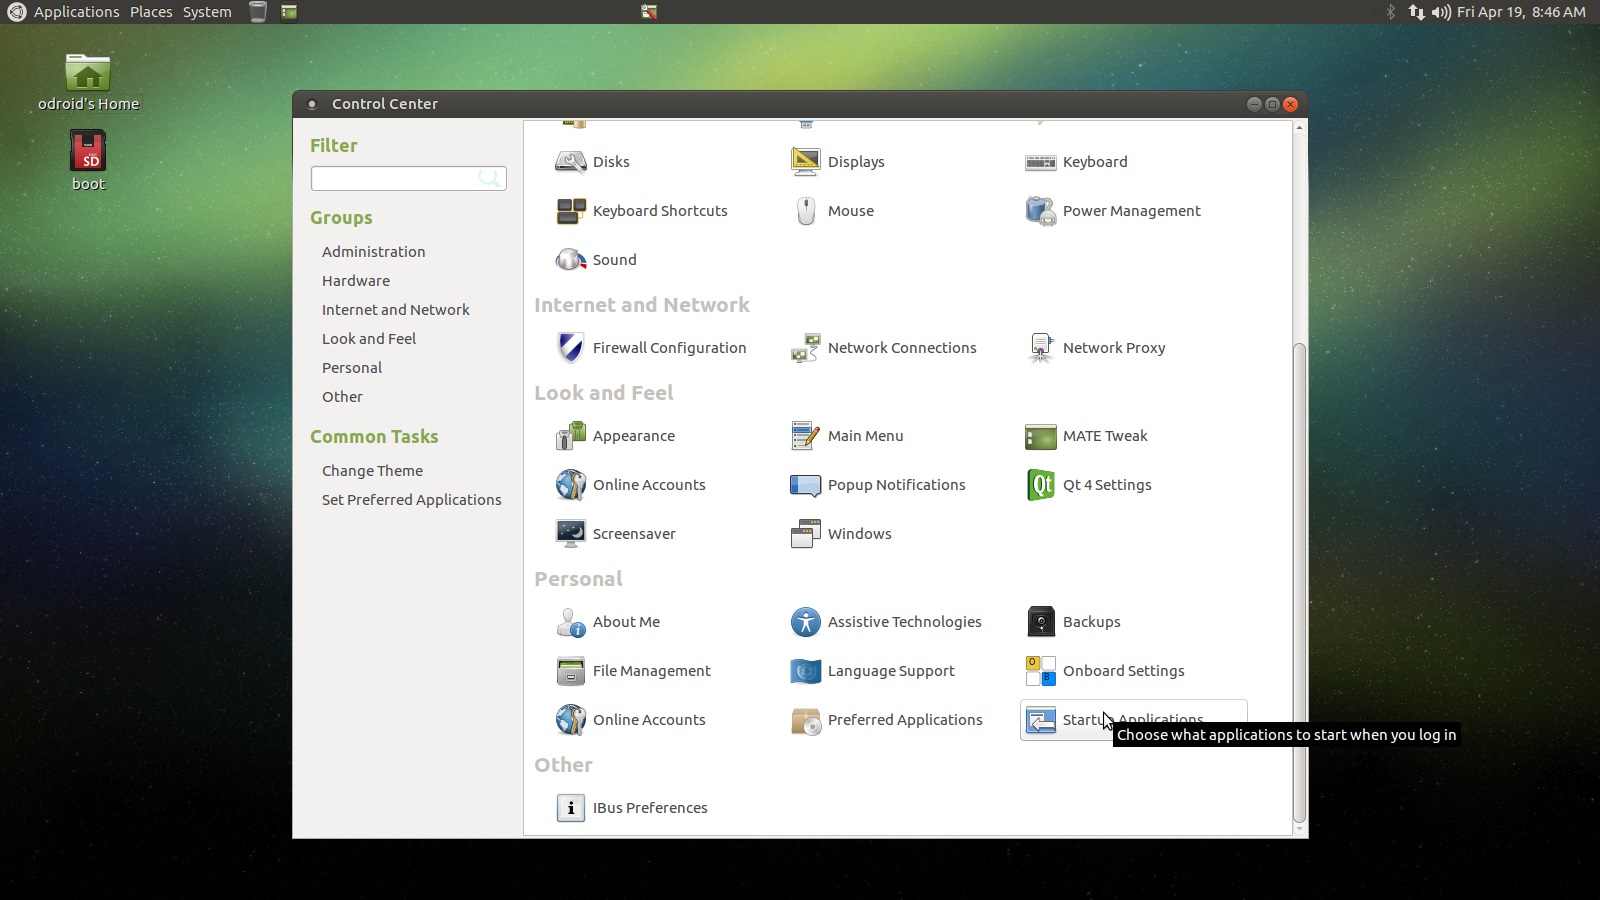
$ sudo chmod 755 power_btn power_btn_test pwrbuttonsvc.service restart_now shutdown_now start_am start_antimicro start_auto start_pwr start_ra stop_auto

$ sudo chmod +x power_btn power_btn_test pwrbuttonsvc.service restart_now shutdown_now start_am start_antimicro start_auto start_pwr start_ra stop_auto
Now close the terminal and go to System -> Control Center in the menus. Find and select the Startup Applications option. You should see something similar to what's depicted below.
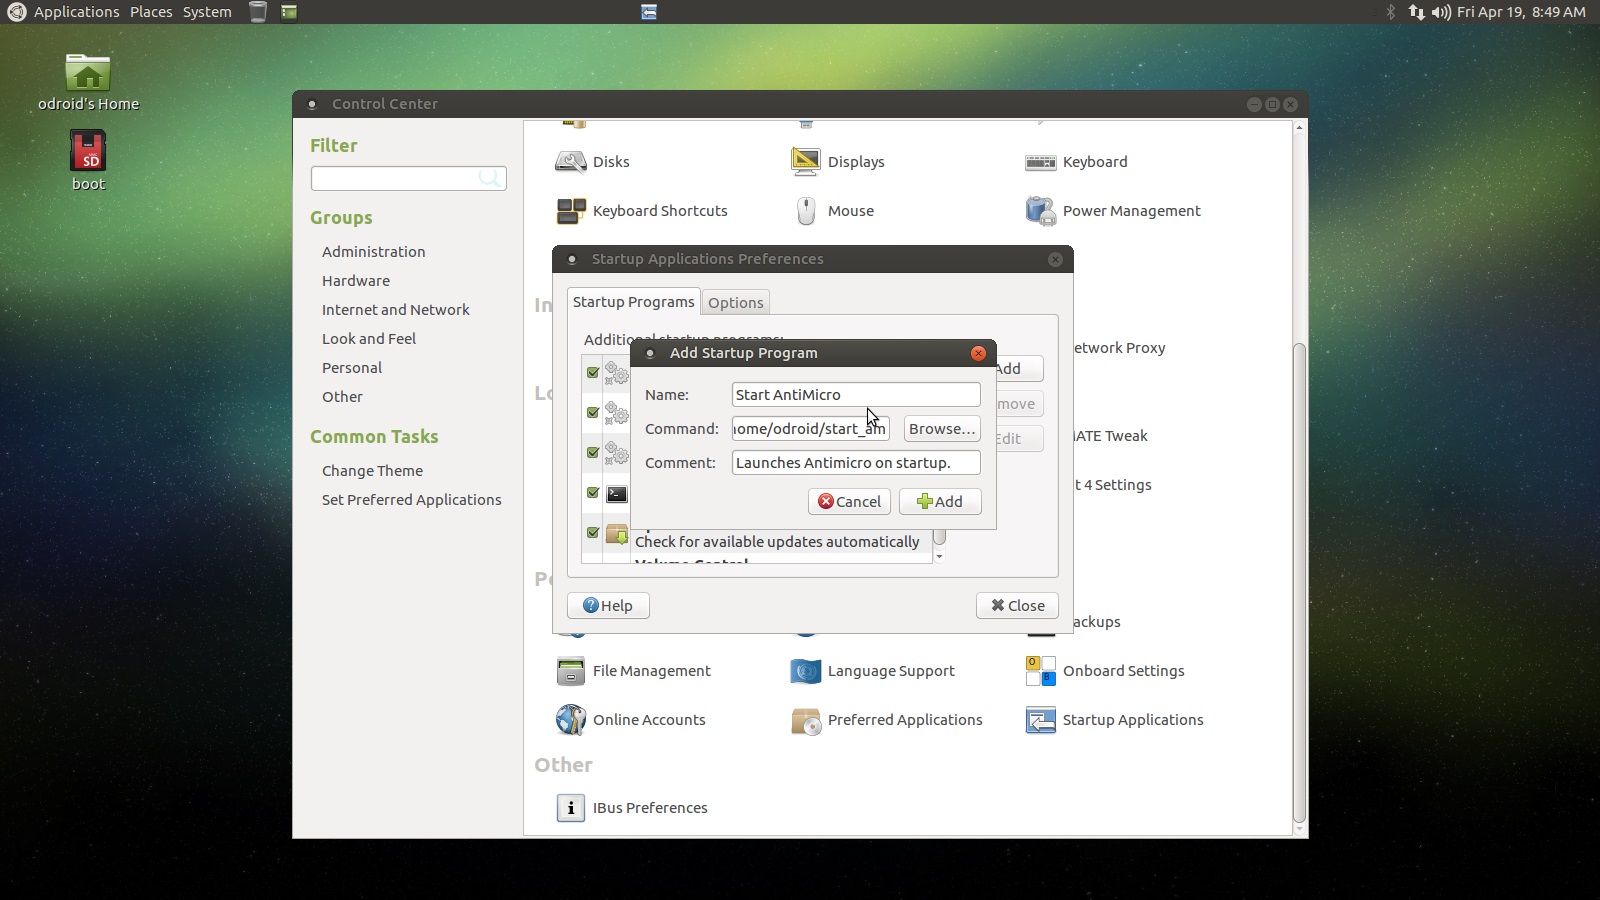
Click the Add button and fill out the form as depicted below. I'll put the exact text here also.
Name: Start RetroArch Path: /home/odroid/start_ra Description: Launches RetroArch on startup.
Now, we also want to start a special AntiMicro script. So let's do the same thing for that script, also shown below. Again I'll list the values used here.
Name: Start AntiMicro Path: /home/odroid/start_am Description: Launches AntiMicro on startup.

Shutdown the device: System -> Shut Down. Use the hardware reset button to turn it back on. You should see RetroArch launch automatically. Now, if you close RetroArch and wait about 5 seconds, you should see AntiMicro popup into the system tray and restore gamepad control of the device.
Things are shaping up nicely now. Our beautiful ODROID is looking more and more like a great retro gaming console. Let's finally add custom control button support. Before we plug it into the system we should test it. Go to the terminal: Applications -> System Tools -> MATE Terminal and type sudo ./power_btn_test then hit enter. You may get a GPIO pin export error if you run it twice in a row. You can ignore this; the test will still work. You should see a series of 1's scroll across the terminal if you are using a C2, zero's for a C1+. Hold down the custom control button and see what happens. Make sure you don't hit the hardware reset button by accident or else you'll have to wait for a reboot. You should see something like what's depicted below.

For the C1+ the 0's and 1's are flipped, just the way I happened to set it up. The image above shows the C2 test. If you don't get the same results, turn off the device, separate your case -- remember, we decided not to close it -- and double check your jumper positions on the GPIO header. If it is working, then awesome! Try holding the button for different periods of time. It will print out to the terminal what script would run for that duration. Below is a listing of the functionality we'll setup.
Software Button Functions: - 02 Second Hold: Software reset. - 04 Second Hold: Software shutdown. - 06 Second Hold: Turn off game kiosk mode. - 08 Second Hold: Change to 1024x768x32bpp resolution and reboot. - 10 Second Hold: Change to 720px32bpp resolution and reboot.
Now that we've tested the custom control button's functionality, let's add it to the system as a service. From time to time, depending on the SD card and a few other things, the device may act up. This software control button is really useful for forcing it to cleanly reboot in a safe and controlled way. Open up a terminal and run the following commands. These will register, start, and flag our service to start automatically on boot. Open up a terminal -- Applications -> System Tools -> MATE Terminal -- and run the following commands. Resist the urge to test the 6, 8, and 10 second functions. We don't want to mess with boot.ini just yet.
$ sudo sudo cp pwrbuttonsvc.service /etc/systemd/system
$ sudo cp ./power_btn /usr/bin/power_btn_test
$ sudo systemctl start pwrbuttonsvc
$ sudo systemctl enable pwrbuttonsvc
If you ever need to stop the service you can use this command, but don't run it now.
$ sudo systemctl stop pwrbuttonsvcAre you ready? Hold the custom control button for 4 seconds and a tiny bit extra. You can practice on the test script we ran above. The system should shut down really fast and, if you counted correctly, it shouldn't boot up. If you held it for 2 seconds less, it would have done the same thing but then come back up from the reboot.
Finalizing MATE... Really This Time
I hope you're really enjoying everything so far. It's really very cool to finally connect the button and make that literally part of the operating system. We have a little bit more work to do with MATE but it'll go by quickly, I promise. Right-click the top panel and select Add to Panel, then scroll down through the list of options until you find the Shut Down entry. Click Add and use the middle mouse button or mouse wheel to grab the new widget and position it so that it is about an inch or so away from the open programs widget. By keeping all the controls in a tight group, we greatly enhance the user experience when controlling things with the gamepad.
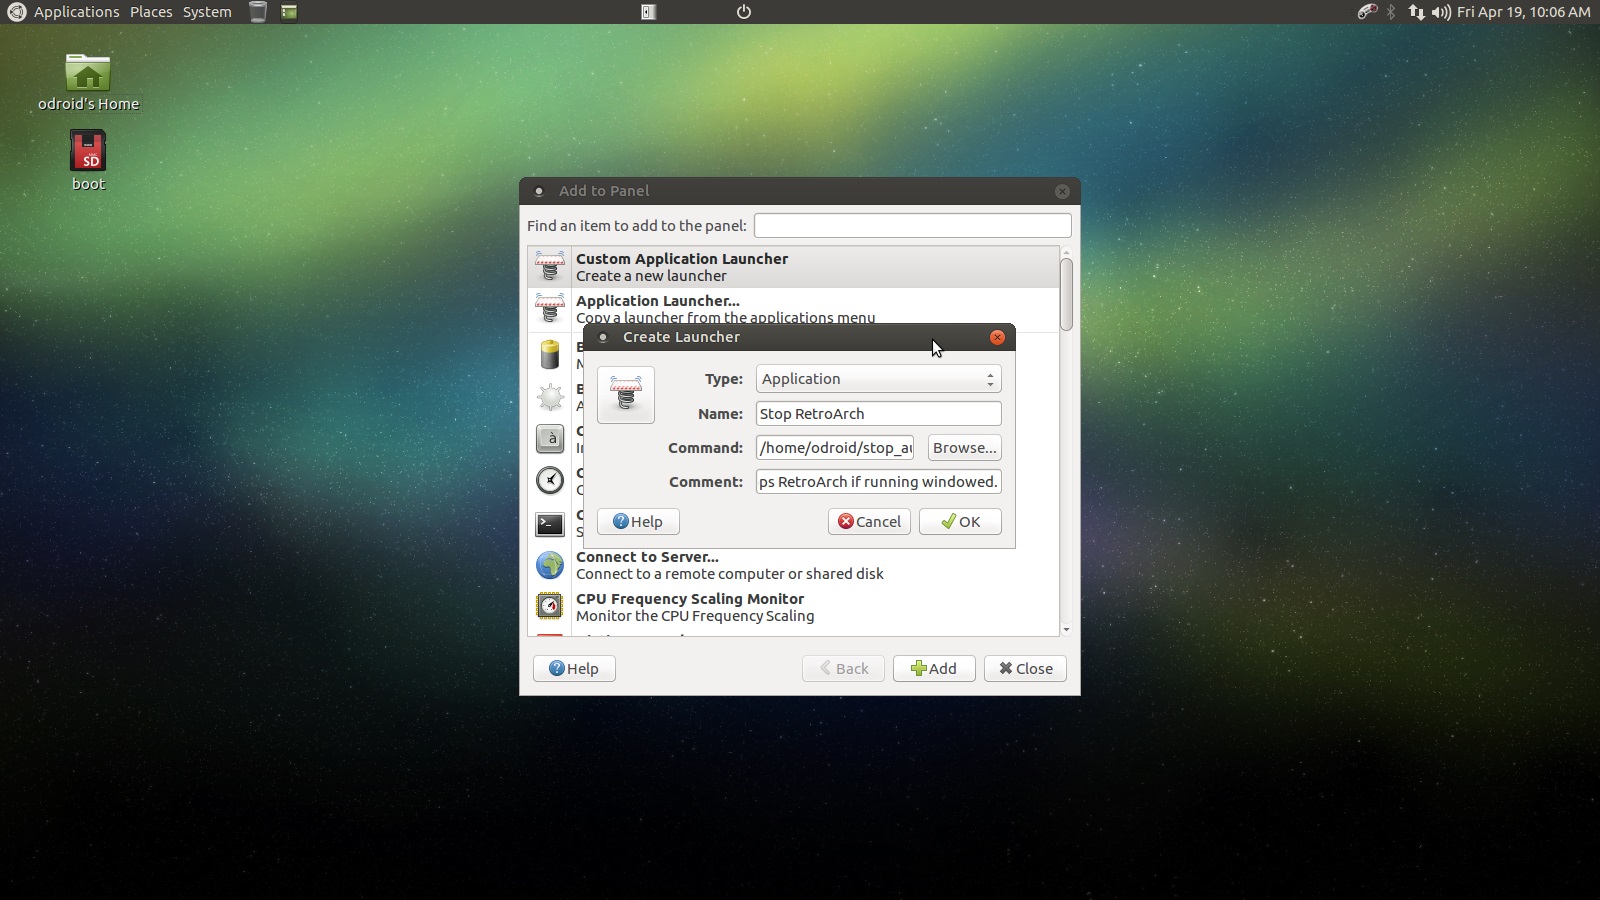
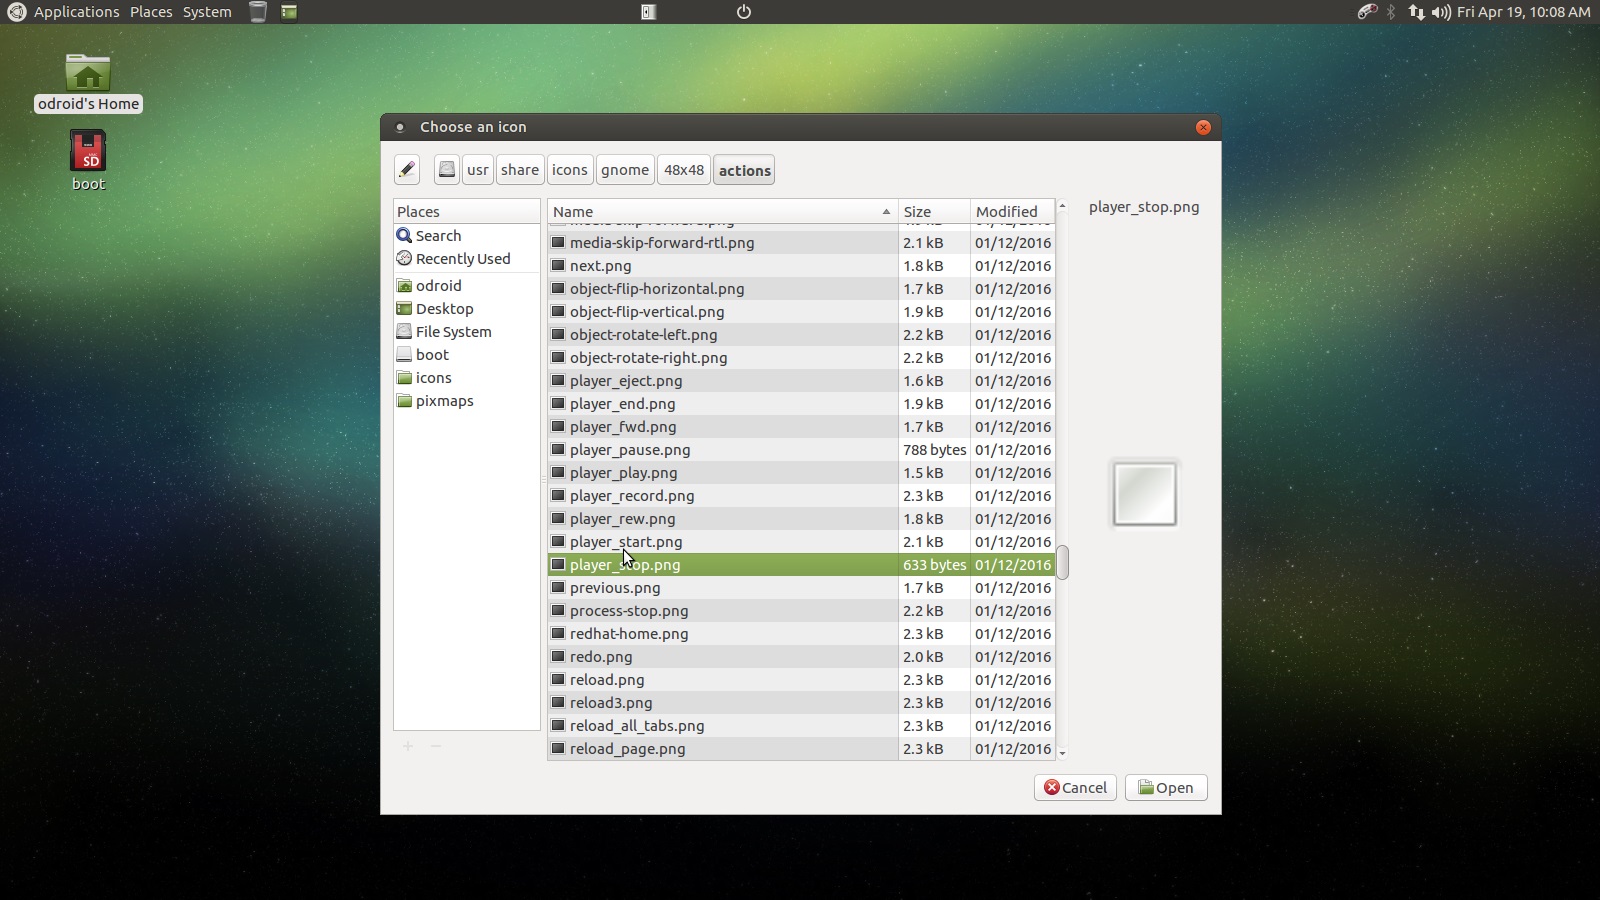
Next, we're going to add two custom buttons to the top panel. Right-click the panel and select Add to Panel. Choose the very first option, Custom Application Launcher. We'll add the stop button first and then the play button. The form field values are listed below. Use the screen shots to navigate to the proper icon. You can see the path in the screen capture near the top of the window.
Stop Button Values:
Type: Application
Name: Stop RetroArch
Command: /home/odroid/stop_auto
Comment: Stops RetroArch if running windowed. (Really just stops RetroArch and resets AntiMicro)
Start Button Values:
Type: Application
Name: Start RetroArch
Command: /home/odroid/start_auto
Comment: Starts RetroArch and AntiMicro scripts.
The screenshots below depict this step. Use them to help with finding the right icon if need be.
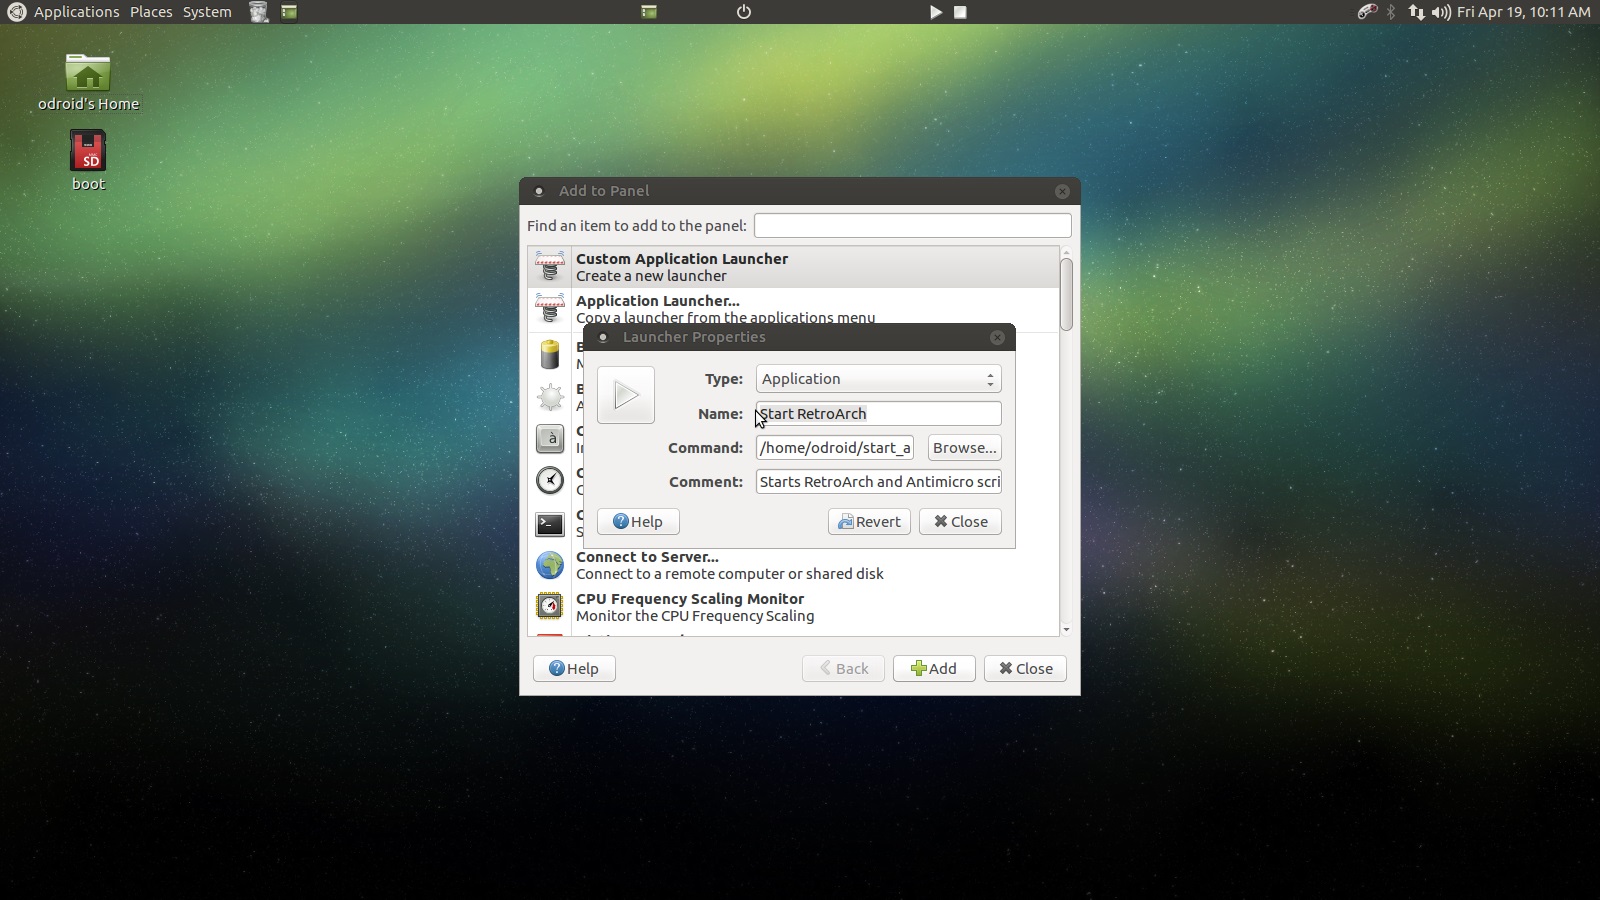
Let's test the new controls. Close RetroArch and any other open window. Click on the play button and you should see RetroArch pop up. Click the stop button and RetroArch will close. Wait about 5 seconds, and you should see AntiMicro in the system tray giving us back full gamepad control.
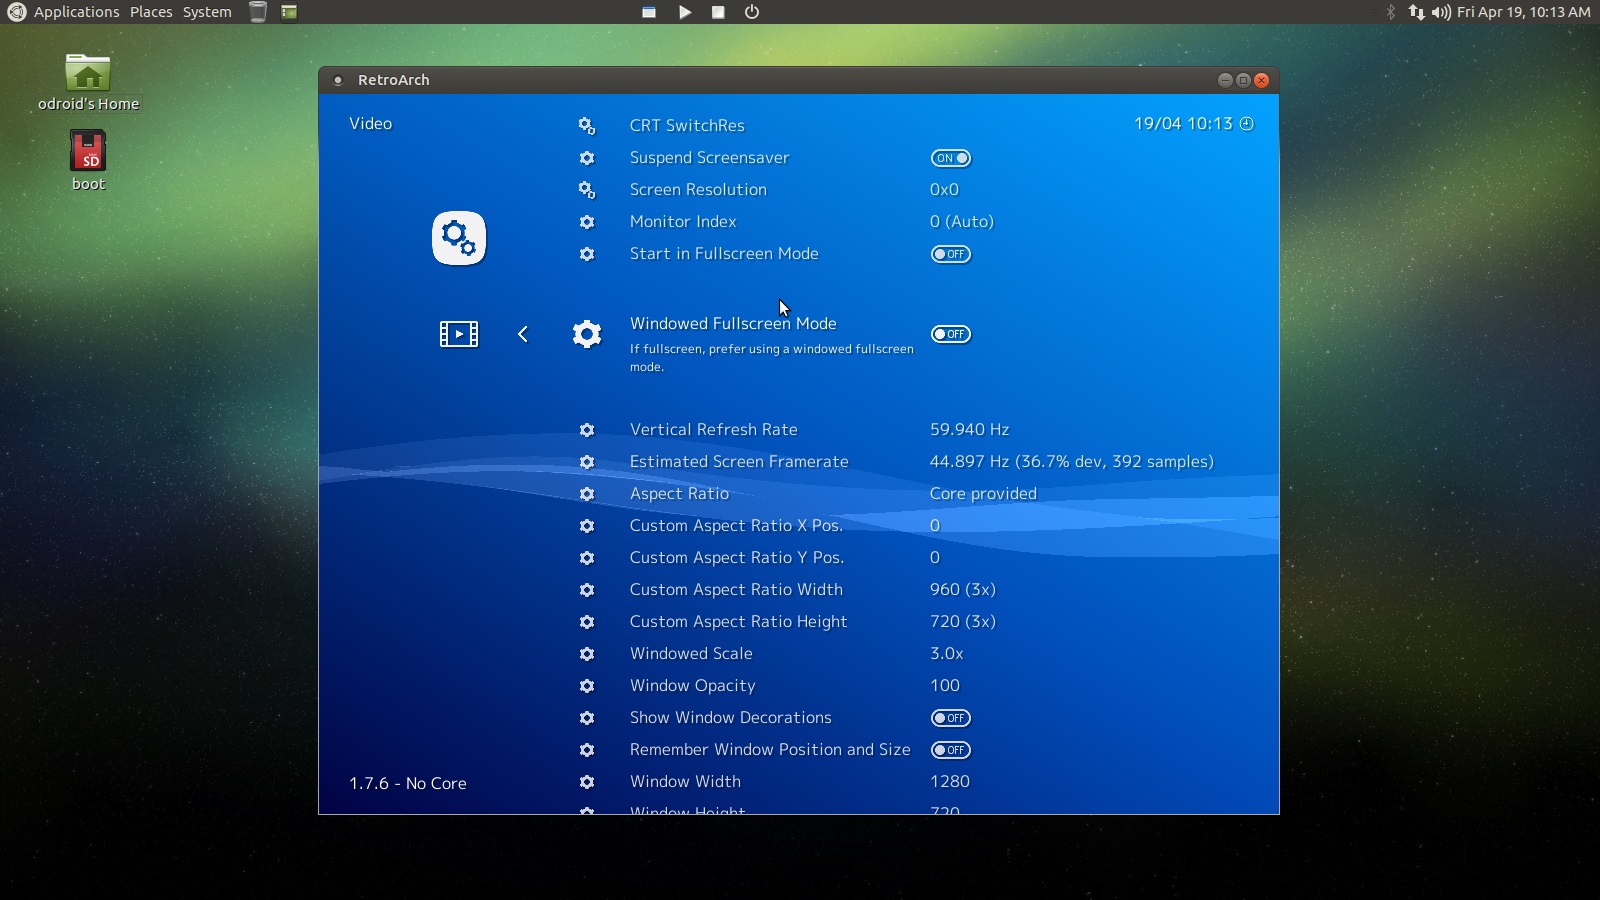
Wow, this is really cool. We've completely customized our ODROID-GO hardware and software to create a retro gaming console with RetroArch kiosk mode and full Linux environment, if needed. The next thing we'll do is make RetroArch run in fullscreen mode and adjust a few video settings. I won't go into advanced configuration here. This tutorial is about as long as I like to make them, so I'll push advanced RetroArch and emulator errata to a small follow up tutorial. Start RetroArch, and you can use the little widget you just made! Scroll right to the Drivers section find the Video entry.
Apply the following settings listed below in the order they have been listed. The application may close and re-open for some of the settings you change; that is normal.
Windowed Fullscreen Mode: Off
Show Window Decorations: Off
Threaded Video: On
Bilinear Filtering: Off
Start in Fullscreen Mode: On
Use the ESC button to close RetroArch when it is in fullscreen mode or use the keyboard/mouse to navigate to the Main Menu section and select Quit RetroArch.
Hold your custom control button down for 2 seconds plus a tiny bit more and the system will reboot. When it comes back up, you should see a full RetroArch screen as depicted below. Scroll over to your ROMs with the gamepad and fire one up. Game on!
Updating boot.ini
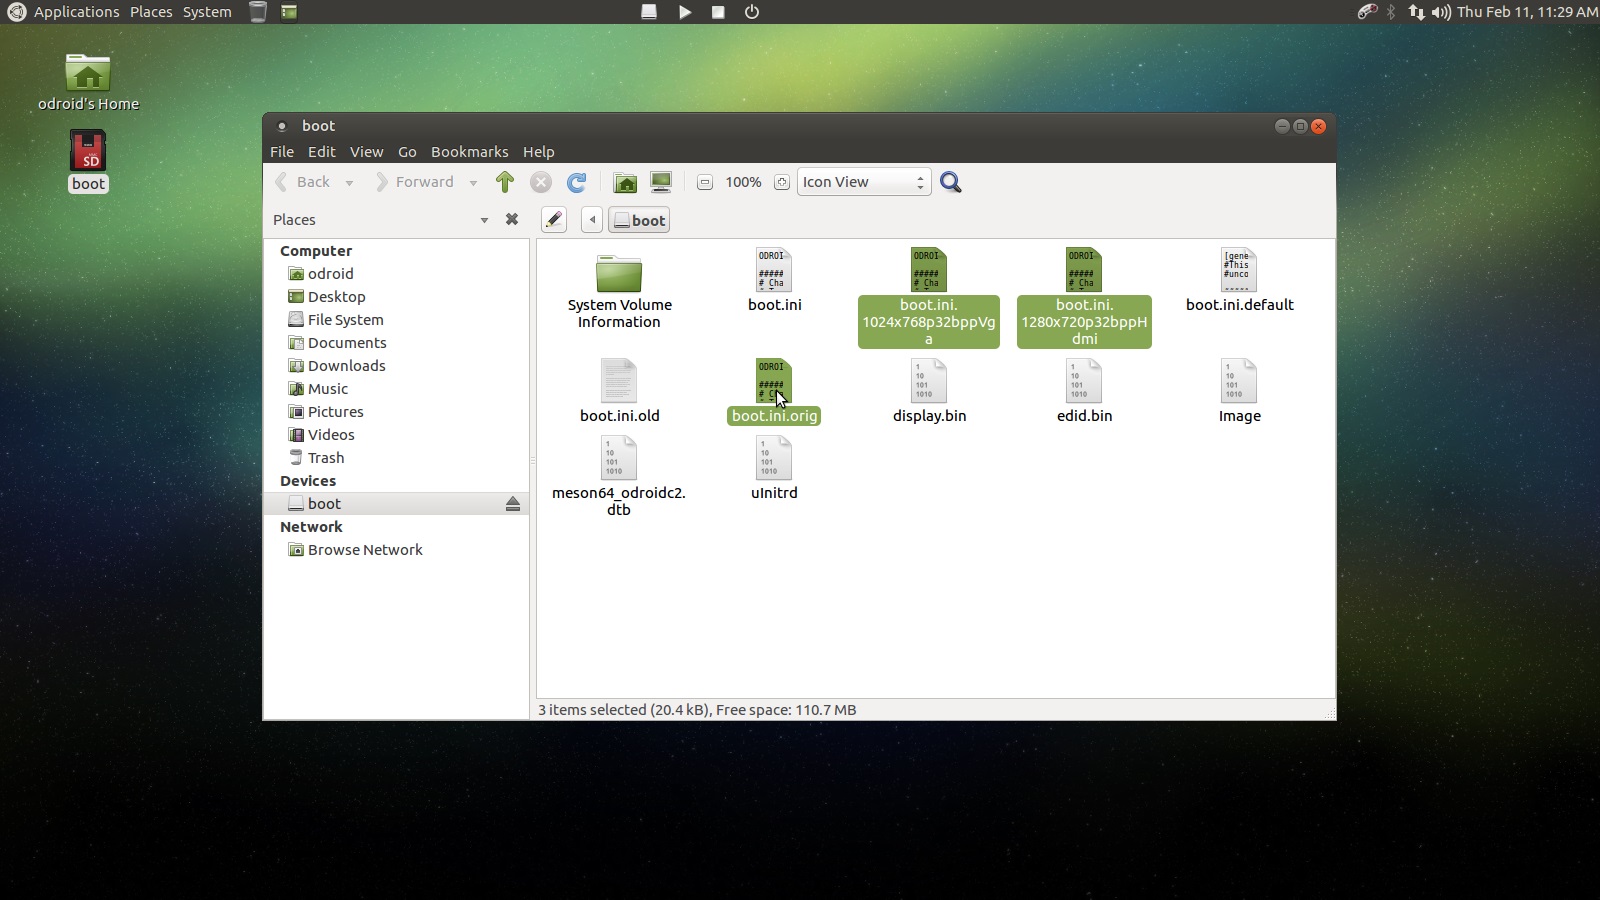
For this section, the first thing we'll do is make a backup of the boot.ini file. Open the boot icon on the desktop and copy boot.ini to boot.ini.orig. We're also going to make two more copies: one you'll name boot.ini.1024x768p32bppVga, and one you'll name boot.ini.1280x720p32bppHdmi. We'll get to editing them in just a bit. You should have something similar to what's depicted below.
In my experience, these video settings work really well. The VGA resolution of 1024x768 is supported on most, if not all, recent computer screens, and the resolution of 720p is supported on most, if not all, recent TVs. While the ODROID-C2 has noticeably more power, we really don't need more than 720p to display 8bit and 16bit games. Of course, you can make your own choices here as you see fit. The idea is if we plug our device into a TV, we can hold the custom control button for the proper amount of time and the device will reboot with the proper, memory efficient, HDMI resolution. If we bring the device with us to work and we want to play some awesome games at lunch we can hold the custom control button for the proper amount of time and the device will reboot with the proper VGA resolution.
Let's boot up our ODROID device and close RetroArch by hitting escape on the keyboard or navigating to the exit option using the controller. Open up a terminal, Applications -> System Tools -> MATE Terminal, and type the following command.
$ nano power_btnScroll down to the bottom of the file and edit the text such that it matches the image depicted below. Once you've adjusted the file hit Ctrl+O to write the file, and Ctrl+X to close the nano. I'll post the text we're focusing on below.
$ elif [ $count -ge 8 ] && [ $count -lt 10 ] && [ $GPIO_VALUE -eq 1 ]; then
count=0
$ sudo cp /media/boot/boot.ini.1024x768p32bppVga /media/boot/boot.ini
$ sudo shutdown -r now

#killall retroarch
#cp /home/odroid/Scripts/retroarch.cfg.usb /home/odroid/.config/retroarch/
#/home/odroid/start_ra

$ elif [ $count -ge 10 ] && [ $GPIO_VALUE -eq 1 ]; then
$ count=0
$ sudo cp /media/boot/boot.ini.1280x720p32bppHdmi /media/boot/boot.ini
$ sudo shutdown -r now

#killall retroarch
#cp /home/odroid/Scripts/retroarch.cfg.hdmi /home/odroid/.config/retroarch/
#/home/odroid/start_ra

$ fi
Note that the C1+ will be slightly different than the text above. It uses [ $GPIO_VALUE -eq 0 ] comparisons, but we're really only interested in the file copy commands and commented out commands. Keep in mind that you shouldn't be changing anything else. Next, run the following command in the terminal to activate the script.
$ sudo cp ./power_btn /usr/bin/power_btn_testOnce that is done we'll adjust the copied boot.ini file you made to reflect the proper output and resolution.
Essentially, we copy over the boot.ini file with a pre-configured version that is set to a certain screen resolution, then we reboot the device. I'll cover the changes we need to make to each file for the C1+ and the C2, but I'll also provide a download for them to make things a bit easier. We'll cover the C2 first.
Open a terminal and type in the following commands. We'll do the 1024x768 VGA mode first.
$ cd /media/boot/
$ nano boot.ini.1024x768p32bppVga
We want to set the video output to be 1024x768 VGA. Comment out the lines listed below. Make sure there are no uncommented video output modes except the one we want.
# setenv display_autodetect "true"
# setenv m "1080p60hz" # Progressive 60Hz
Make sure the lines below are uncommented. If you make a mistake, just restore the boot.ini.orig copy you made earlier. Any Windows or Mac computer will see the boot partition of your ODROID's SD card because it is a Fat32 partition. You can use that to fix your boot.ini if the device isn't booting up properly.
$ setenv m "1024x768p60hz"
$ setenv vout "vga"
Next we'll do the 720p HDMI mode. Open up a terminal and type the following commands:
$ cd /media/boot/
$ nano boot.ini.1280x720p32bppHdmi
We want to set the video output to 720p HDMI. Comment out the lines listed below. Make sure there are no uncommented video output modes except the one we want.
# setenv display_autodetect "true"
# setenv m "1080p60hz" # Progressive 60Hz
Make sure the line below is uncommented.
$ setenv m "720p60hz" # 60HzALERT: Many computer screens don't support 720p. If that is the case, you'll likely end up booting into a blank screen. Just wait a minute or two then use the custom control button to change the video mode to 1024x768. It takes a little getting used to, but once you get the hang of it you can switch modes fairly easily. Below is a screenshot of a Monku Retro 2 (ODROID-C2) running in VGA mode on a computer screen after closing RetroArch.
And here is the R2 running in 720p on a TV.

Like any good TV cooking show we have an already prepared dish to show you. For the C1+ use the guidelines above along with the files provided below. The process is similar, the files provided indicate the changes you need to make. Or you could just copy and paste them into your /media/boot directory, it's really up to you.
- Monku R1 / C1+ boot.ini - Monku R2 / C2 boot.ini
Finishing up
Closing up the case is pretty simple, but I'll go over it anyway. It's not fun to finish everything, close the case and tighten the outside screws before you remember to put in the inside screws, trust me. First thing you'll want to do is organize your jumpers. They can get a bit crazy so I usually curl and twist them up.
I highly recommend cutting out the SD card door because it gives you so much benefit as far as easily being able to swap in and out SD cards etc. I used a razor blade to scour all the little plastic tabs holding it on. Two close to the edge of the case are easy and safe to cut into with a bit of pressure. After a little while you'll cut through the two tabs near the edge of the case first. Then bend the door up to twist off the remaining tabs. Tip: Weaken the tabs as much as you can by scratching at them with a razor.
Mount the board in the case and place and tighten the two screws on the one side of the case. The remaining screws are inserted from the outside of the closed case. Before you close the case try to see if it goes together easily. You may have to adjust some jumpers to get it to do this. Snap the case together, place and tighten the outside screws, and you're all set.
I hope you had fun going through this process to build your own retro gaming console from the ground up. I know I did. I'll have more to say in a follow-up tutorial that touches on some advanced topics regarding RetroArch and emulator configuration. Until then, game on!
For comments, questions, and suggestions, please visit the original article at http://middlemind.com/tutorials/odroid_go/mr1_build_fn.html.
Be the first to comment