

There comes a time in everyone's life when you want to put some things in order and have simple access to complex solutions. For example, maybe you have several scripts taking care of various problems (like turning a heater on/off, taking pictures with your security cameras, handling presence detection, etc), but you're the only one who can manage them because they require maintenance through SSH, or through some old-looking web page. I too have reached the same place in my life, and have to look for an "umbrella" solution to manage all my personal automations and offer easy access for my family.
I was thinking of building a web dashboard to fit my needs, but I hate web development. I’m somewhat lazy and my sites are not good looking at all. Furthermore, it needed to be functional on all sorts of devices and screen sizes, and also future-proof. Fortunately, I spent enough time looking around until I found the perfect solution - Home automation with Home Assistant (https://www.home-assistant.io/) - HA for short.
Home Assistant is an open-source home automation platform built on Python 3 that supports over 1100 components, which are modules that facilitate interaction with things like physical "smart" switches, relays, lights, sensors, network devices (TVs, routers, and cameras), software (like Kodi, MPD, and Transmission), network services (like weather), but also allows you to add your own custom components. All of the major home automation brands and technologies, like Hue, Nest, IKEA, Vera, ZigBee, and MQTT are present, and a complete list of components can be found at https://www.home-assistant.io/components/.
Apart from the components, the platform has a dashboard-like web interface and an automation engine where you can combine data from different components and generate an event. For example, if it's Monday-Friday between 8:00 - 15:00 and the outside weather is sunny, and the outside temperature is above 30C, and there is no chance of rain, and the outside sprinklers have been off for at least 4 hours, then turn on the sprinklers for 20 minutes. The only complicated thing in the automation above is having a way to turn your sprinklers on and off - the rest is provided by existing components and Home Assistant's automation engine. Other use cases might include locking and unlocking the front door when a specific person connects to the wifi (although I wouldn't do this personally), or starting the air conditioning automatically when the system detects you’re coming home from work. There are more use cases in the 1-hour video, "Automating your life with Home-Assistant.io". If you're familiar with Tasker for Android or IFTTT, then Home Assistant is the equivalent for your home.
Installation
You can install Home Assistant on any ODROID device. Depending on how many automations you plan to have, you could use a C1 for a light setup, or even an XU4 for large homes and complex rules which might involve face recognition. I'm using it on a C2 which doubles as a Kodi player without issues.
The current Home Assistant version (0.71) requires Python 3.6. You can install it on Ubuntu 18.04 with the "virtualenv" installation (describerd below), which means that all the required python modules will be installed in a specific directory and will not interfere with system modules. We will also use a distinct user for Home Assistant. There are also Docker images available which we can use with Ubuntu 16.04. The complete instructions with comments are available at https://www.home-assistant.io/docs/installation/virtualenv/.
$ sudo apt-get update
$ sudo apt-get dist-upgrade
$ sudo apt-get install python-pip python3-dev
$ sudo pip install --upgrade virtualenv
$ sudo adduser --system homeassistant
$ sudo addgroup homeassistant
$ sudo usermod -G dialout -a homeassistant
$ sudo mkdir /srv/homeassistant
$ sudo chown homeassistant:homeassistant /srv/homeassistant
$ sudo su -s /bin/bash homeassistant
$ virtualenv -p python3 /srv/homeassistant
$ source /srv/homeassistant/bin/activate (homeassistant)$ pip3 install --upgrade homeassistant
$ exit
If you want to use Home Assistant without docker on Ubuntu 16.04, you can install a Python 3.6 PPA (https://launchpad.net/~jonathonf/+archive/ubuntu/python-3.6) and initialize the virtualenv with it like this:
$ sudo add-apt-repository ppa:jonathonf/python-3.6
$ sudo apt-get update
$ sudo apt-get install python3.6
$ sudo apt-get dist-upgrade
$ sudo apt-get install python-pip python3.6-dev
$ sudo pip install --upgrade virtualenv
$ sudo adduser --system homeassistant
$ sudo addgroup homeassistant
$ sudo usermod -G dialout -a homeassistant
$ sudo mkdir /srv/homeassistant
$ sudo chown homeassistant:homeassistant /srv/homeassistant
$ sudo su -s /bin/bash homeassistant
$ virtualenv -p python3.6 /srv/homeassistant
$ source /srv/homeassistant/bin/activate
(homeassistant)$ pip3 install --upgrade homeassistant
$ exit
In order to start and manage the process, it's best to create a systemd service to handle it:
$ sudo vi /etc/systemd/system/homeassistant.service
[Unit]
Description=Home Assistant
After=network.target time-sync.target
Requires=time-sync.target

[Service]
Type=simple
User=%i
ExecStart=/srv/homeassistant/bin/hass -c "/home/homeassistant/.homeassistant"

[Install]
WantedBy=multi-user.target
In order to start Home Assistant, simply start its service:
$ sudo service homeassistant start
$ sudo service homeassistant enable
Note that if you will be using components that need HTTPS, you will need to have time correctly set up at boot, so that the certificates are valid. The service startup depends on systemd-timesyncd, which in turn depends on ntp *not* being installed:
$ sudo apt-get remove ntpwebn
$ sudo service systemd-timesyncd restart
$ sudo systemctl enable systemd-timesyncd
In case of problems, you will be able to review the logs through journalctl:
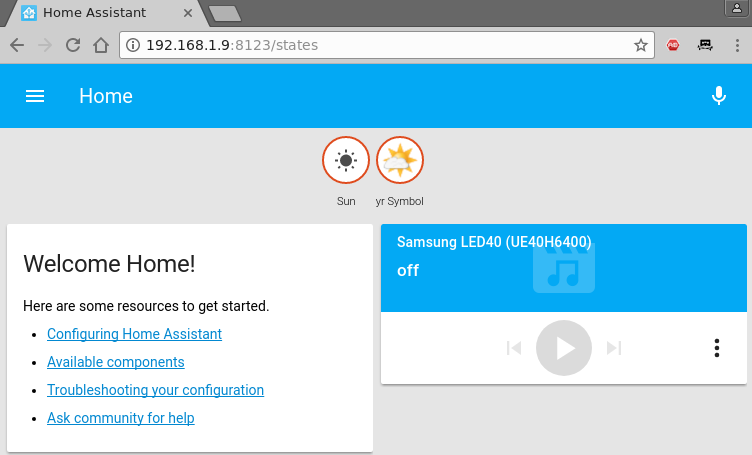
$ sudo journalctl -u homeassistant -fOnce the process starts, you will be able to connect to http://odroid-ip:8123/. Note that the first startup (or a startup following an update) might be slower, so leave it run for a few minutes until accessing the web interface. Home userAssistant also provides a native app for IOS (http://apple.co/2tYi2WI), while for Android clients you can pin the page as a homescreen launcher (Chrome -> navigate to http://odroid-ip:8123 -> Menu -> Add to homescreen).
The configuration file
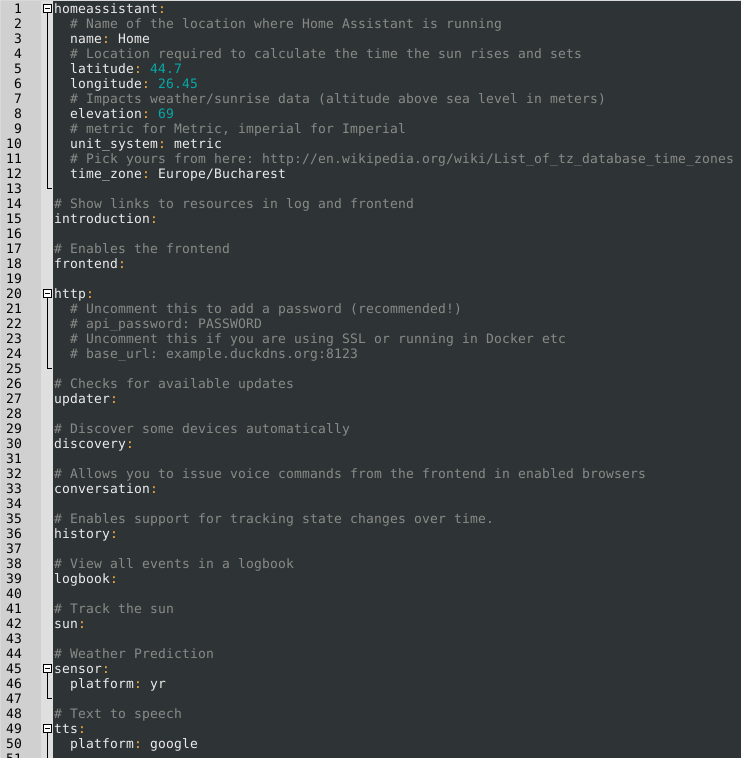
In order to set up components and configure your installation, you'll have to work a lot with Home Assistant's configuration file(s). You can manage some of the configuration from the web interface, but for now, you'll need a text editor. The main file is /home/homeassistant/.homeassistant/configuration.yaml. Its format is YAML - which stands for "Yet Another Markup Language". Like Python, it uses white space (not tabs!) to delimit sections of code. By default it uses a two space indentation for nested sections. In case you get into trouble, you will receive error messages when starting the service. You can validate the syntax with a service like http://www.yamllint.com/ which will let you know where you went wrong. There is also a troubleshooting guide at https://www.home-assistant.io/docs/configuration/troubleshooting/.
Once you've made changes to the configuration file, you will need to restart the homeassistant service to apply those changes. You can do this either from the shell with sudo service homeassistant restart, or from HA's web interface, by clicking the top left icon, selecting the "Configuration" icon and calling the "Restart" option from the "Server Management" section. The video, How To Configure Home Assistant" shows some tips you should consider when editing the configuration.
If you plan on using HA from outside the LAN (e.g. from the Internet), you have several options. One of them is to enable HTTPS support and forward port 8123 on your router. This gives you encryption, but exposes your installation to the internet (and there might be vulnerabilities that could allow attackers take control of your system/LAN). A second option (which I prefer) is to set up a VPN on your router (or even on your ODROID) that allows you to connect and access HA (and other LAN resources) securely.
If you want to use HTTPS, in order for all features to work you will need to supply valid SSL certificates (not self-signed). In order to get valid certificates you will need to have a public DNS name (e.g. by using a dynamic DNS service like duckdns.org) and use letsencrypt.org to set up a valid SSL certificate for your installation. Step by step details can be found in the video, "Port Forwarding, DNS, and Encryption - How To Secure Home Assistant with DuckDNS and Let's Encrypt". If you must use self-signed certificates, there is a guide available at https://www.home-assistant.io/docs/ecosystem/certificates/tls_self_signed_certificate/.
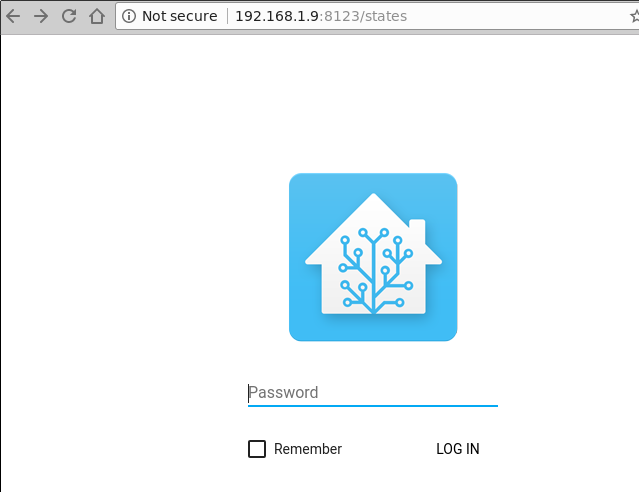
Regardless of access mechanism (http or https), you will want to set up a password. HA doesn't support multiple user accounts yet, but you can set an API Password that you will need to log into the web interface. The best way to do this is to create a file that will keep all your sensitive data (like passwords and URLs), name it “secrets.yaml” and reference it in the configuration.yaml file.
$ cat /home/homeassistant/.homeassistant/secrets.yaml api_password: odroid
$ cat /home/homeassistant/.homeassistant/configuration.yaml
 …
 http:
 api_password: !secret api_password
 …
Now, when you will restart HA, you will be asked for a password. More details about secrets may be found at https://www.home-assistant.io/docs/configuration/secrets/.
In order to get acquainted with how HA configuration works, we will set up some components. I want to set up weather, some IP cameras, Kodi and MPD, presence detection based on WiFi and also a 1-wire temperature sensor connected to the ODROID.
Weather from Darksky
There are several weather providers already integrated in HA (http://bit.ly/2t4l1Rh), so you can pick your favourite. I'm going with DarkSky (http://bit.ly/2t4gq0S), which provides quite accurate forecasts for my area. You should consult the component's help page for details about configuration and which variables you can use. You will need to register with Dark Sky and get an API Key which will let you make 1000 calls per day for free. It's best to save this API Key inside your secrets.yaml file (replace with your own key):
darksky_api_key: 87f15cbb811204412cc75109777ea5cfThe configuration has several variables, most of which are optional, however, under configuration.yaml, under the sensor section you would have the following (feel free to delete the “platform: yr” entry):
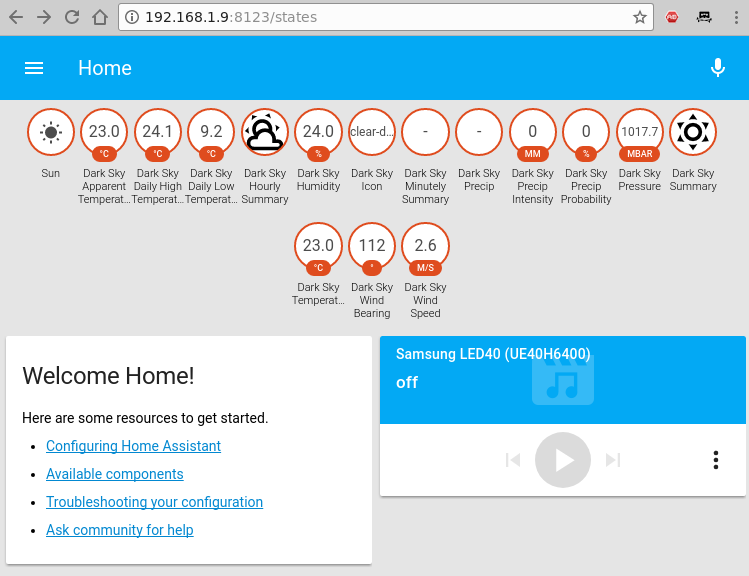
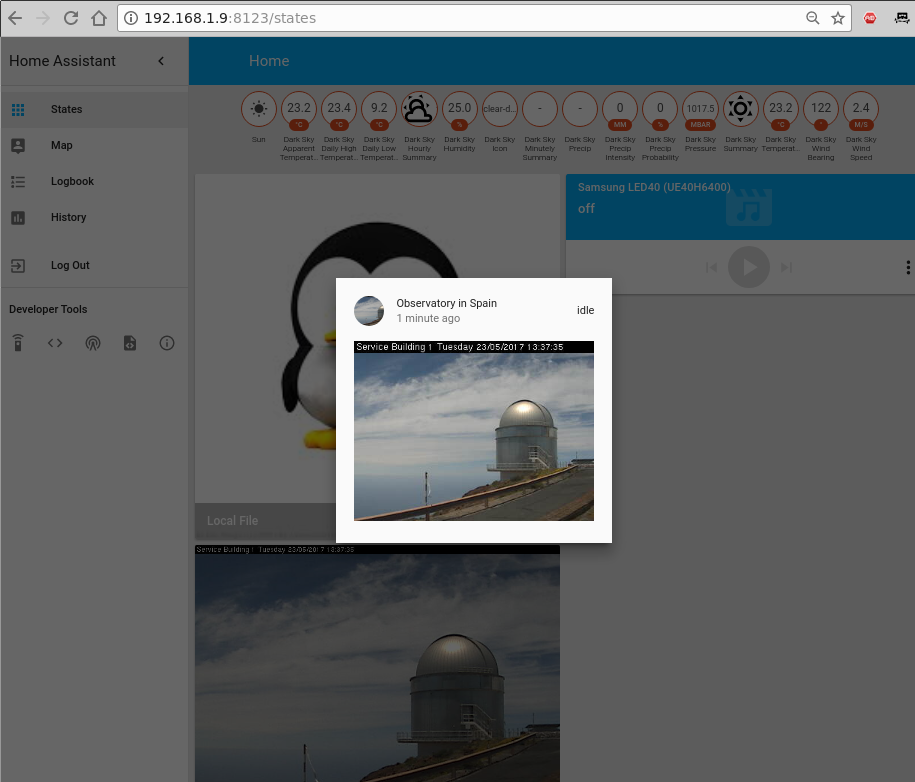
sensor:
 - platform: darksky
 api_key: !secret darksky_api_key
 name: Dark Sky
 language: ro
 monitored_conditions:
 - summary
 - precip_type
 - precip_probability
 - temperature
 - apparent_temperature
 - humidity
 - precip_intensity
 - wind_speed
 - pressure
 - wind_bearing
 - apparent_temperature
 - icon
 - minutely_summary
 - hourly_summary
 - temperature_high
 - temperature_low
 - apparent_temperature_high
 - apparent_temperature_low
 units: si
 update_interval: '00:15'
The code is mostly self-explanatory. It configures a new platform of the type "darksky", with a specific name (optional) and api_key (required) and pulls a set of parameters (monitored_conditions) from the weather provider every 15 minutes. Your actual location is taken from the latitude/longitude parameters under homeassistant, so make sure that's correct. After you restart the homeassistant service, you should be able to see the monitored variables as badges on the top of your window. Clicking on a badge will show you how that particular value has changed over time.
Viewing IP cameras
HA supports a lot of cameras (http://bit.ly/2t4DtsD), including reading data from a file, which could be used to display a graph, or visual data generated by other tools. We will be using the Generic MJPG Camera (http://bit.ly/2t4tIKM) component and the Local File (http://bit.ly/2s4Y5w4) component.
The camera we want to monitor is available at http://bit.ly/2t4cHkc (it's a public webcam), which we should add to the secrets.yaml file.
camera1_stream_url: http://iris.not.iac.es/axis-cgi/mjpg/video.cgi?resolution=320x240
camera1_still_url: http://iris.not.iac.es/jpg/image.jpg
The configuration part inside configuration.yaml looks like this for both cameras:
camera:
 - platform: mjpeg
 mjpeg_url: !secret camera1_stream_url
 still_image_url: !secret camera1_still_url
 name: Observatory in Spain
 - platform: local_file
 file_path: /tmp/tux.jpg
As usual, you will need to restart the HA service to reread the configuration (this might be a good time to comment out the “introduction” component as well). Note that when you click on a webcam you will see a live feed, otherwise the still image is updated every 10 seconds.
So, what can you do with these configured webcams apart from looking at them? Well, you can use them with other components such as OpenCV (http://bit.ly/2s4UUEJ) to generate triggers when certain faces are seen, or Seven Segments Display (http://bit.ly/2sAbOP0), which can take readings of various digital displays.
Kodi and MPD
To configure media players, you can look under the Media Player component list at http://bit.ly/2s0IAtQ. To configure Kodi (http://bit.ly/2sA5qr6), you will need to enable the "Allow remote control via HTTP" option (http://bit.ly/2t4cYne) and set an appropriate username and password first. To do so, add the user and password to the secrets.yaml file:
kodi_user: kodi
kodi_pass: kodi
Then, edit configuration.yaml:
media_player:
- platform: kodi
host: 192.168.1.140
name: Kodi Livingroom
username: !secret kodi_user
password: !secret kodi_pass
To configure MPD, assuming that you already have a MPD server in your network, add the MPD component (http://bit.ly/2s5sbzE) and add the password to secrets.yaml:
mpd_secret: mpdAnd next, edit configuration.yaml:
media_player:
...
- platform: mpd
host: 192.168.1.140
name: MPD Living
password: !secret mpd_secret
After you restart Home Assistant, you will get the two new media players and be able to see their state (playing/stopped), control volume and even change the current playlist or use the text-to-speech component to have the media player "speak" what you want.

Presence detection
The presence detection components (http://bit.ly/2t0Gt8H) try to track people's locations so that you can apply geofencing rules (e.g. do something if a person enters or leaves a location). Usually tracking is done by detecting devices connected to a router (via wifi), or via bluetooth proximity (http://bit.ly/2s0Sqfw), or by using location services such as Owntracks (http://bit.ly/2rLQdR1).
We will use a router-based tracker that, depending on your router, periodically connects to the management interface of your router, lists the ARP table, and discovers which devices are connected. A lot of router types are supported, from high-end vendors like Cisco, to consumer-grade routers like Asus, Netgear and TP-Link. Even open-source firmwares are supported, like OpenWRT, DD-WRT and Tomato.
We will be using an Asus router with SSH enabled, so we need the ASUSWRT component: http://bit.ly/2s4T32Q. You can chose to login with username/password or setup an SSH key and log in with a key instead. Note that certain firmware versions enable security measures which limit the number of SSH connections, and can blacklist your IP if a lot of connections are initiated.
As usual, we will set private data (such as the path to the key or the ssh password) in the secrets.yaml file:
router_user: admin
router_password: my_secret_password
Inside configuration.yaml add the following section:
device_tracker:
- platform: asuswrt
host: 192.168.1.1
username: !secret router_user
password: !secret router_password
interval_seconds: 120
consider_home: 300
track_new_devices: yes
The device tracker configuration page (http://bit.ly/2s4WPcA) gives more details about what options you can use. The interval_seconds option is the time between scans (2 minutes) and the consider_home option keeps you "at home" even if your devices is not seen for 300 seconds.
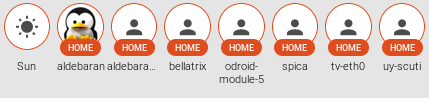
Once you restart HA, after the initial discovery is done a new file will be created, called known_devices.yaml. Here you will be able to assign a friendly name and even a picture to a specific device, or have other devices be ignored.
One entry in known_devices.yaml may look like this:
aldebaran:
hide_if_away: false
mac: 00:1E:06:31:8C:5B
name: aldebaran
picture: /local/aldebaran.png
track: true
vendor: WIBRAIN
Notice that I added a path to local picture which is stored in /home/homeassistant/.homeassistant/www/aldebaran.png. You can create the “www” folder with the following command:
$ sudo mkdir /home/homeassistant/.homeassistant/wwwIf there are devices which you don't want to monitor, you can set “track: false” in the known_devices.yaml file.
Measuring temperature
A very powerful feature of Home Assistant is the ability to track all sorts of sensors (http://bit.ly/2cNb4gJ). We want to monitor a temperature sensor based on the 1 wire protocol, connected locally to the ODROID (http://bit.ly/2s12ZPx). Before adding the sensor in HA, make sure it’s readable from the command line. You can follow the setup guide on the wiki at http://bit.ly/2s0zbTp.
You will need to know the sensor’s ID in order to add it to HA:
$ ls /sys/bus/w1/devices/
28-0516866e14ff w1_bus_master1
$ cat /sys/bus/w1/devices/28-0516866e14ff/w1_slave
92 01 4b 46 7f ff 0c 10 b5 : crc=b5 YES
92 01 4b 46 7f ff 0c 10 b5 t=25125
Next, you can make the following changes in configuration.yaml and poll the sensor every 5 minutes:
sensor:
...
- platform: onewire
names:
28-0516866e14ff: Living room
scan_interval: '00:05'
After restarting HA, the new reading will be visible in the web interface as a badge in the top part of the page.
Sorting the views
You will notice that once you start adding a few components, the web interface starts to get messy with a lot of items scattered everywhere. You can use groups and views to clean up the interface and put related items in their own tab. To understand what needs to be done, let's clear the vocabulary.
Entities are variables which provide data, such as a sensor or switch. Platforms (like dark_sky) usually provide access to multiple entities (min/max temperatures or forecast). You can view a list of entities, their names and their value if you navigate in the web interface under Developer tools -> States (<>) -> Entities.
A group is simply an object that holds a list of entities. Visually, a group is rendered as a panel, or a card. By default the group “group.all_devices” exists and holds the items discovered by a device tracker platform. Groups usually contain a list of entities.
A view is rendered as a separate tab inside Home Assistant. Views are actually groups of groups and differ from regular groups by having the property of "view: yes". You can also add individual entities, as well as groups to a view.
We will group our existing sensors into the following categories:
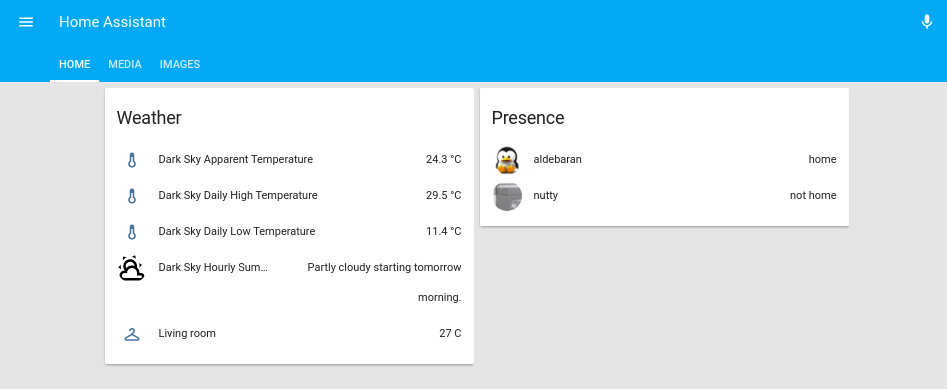
- The first tab is called Home and contains the following groups (it will be internally called default_view, so that it is displayed when you log in):
- Weather data
- Presence information
- System information (to show you if there are updates available)
- The second tab is called Media and contains the following groups:
- Media players
- The final tab is called Images and contains:
- Webcams
The configuration looks similar to the list above:
group:
default_view:
view: yes
entities:
 - group.weather
 - group.presence
 - group.systeminfo
media:
view: yes
entities:
 - group.mediaplayers
images:
view: yes
entities:
 - camera.observatory_in_spain
 - camera.local_file
weather:
name: Weather
entities:
 - sensor.dark_sky_apparent_temperature
 - sensor.dark_sky_daytime_high_apparent_temperature
 - sensor.dark_sky_daily_low_temperature
 - sensor.dark_sky_overnight_low_apparent_temperature
 - sensor.dark_sky_hourly_summary
 - sensor.living_room
presence:
name: Presence
entities:
 - device_tracker.aldebaran
 - device_tracker.nutty
systeminfo:
name: System Info
entities:
 - updater.updater
mediaplayers:
name: Media Players
entities:
 - media_player.mpd_livingroom
 - media_player.kodi_livingroom
More details about groups and layout are available in the video at http://bit.ly/2s5d6xT.
Updates
Since Home Assistant was not installed via apt-get, you will need to handle updates manually. Before updating, it's best to read the release notes and verify that the update is not breaking any previous configurations, since the configuration for new components sometimes gets redesigned, which means you’ll need to redo it. You can get a notification for a new version by using the updater.updater entity which periodically checks for newer versions and can display them inside Home Assistant. Updates are pretty frequent, and you can expect a major version every 2-3 weeks. The update procedure is simple, and details can be found at http://bit.ly/2s0Kn24.
$ sudo service homeassistant stop
$ sudo su -s /bin/bash homeassistant
$ source /srv/homeassistant/bin/activate (homeassistant)$ pip3 install --upgrade homeassistant (homeassistant)$ exit
$ sudo service homeassistant start
If you've installed via docker, you can pull a new image:
$ sudo docker pull homeassistant/raspberrypi3-homeassistant:0.72.0In subsequent articles, we will look at setting up more complex components like a remote relay or an air conditioning unit, setting up automations, and setting up a dashboard. For comments, questions and suggestions, please visit the support thread at http://bit.ly/2s13GbB.
Be the first to comment