

This article will show you how to build a WiFi AP mode web server that blinks a LED from your web browser remotely.

Before starting, there are two important things to read first:
- Refer to the Arduino official documents. This tells us useful common functions with great instructions, available here: https://www.arduino.cc/reference/en/
- Refer to the ESP32 official programming guide. Most of ESP32 specific functions introduced here: https://esp-idf.readthedocs.io/en/v3.0/
WiFi in AP Mode
ESP32, which is used on ODROID-GO, supports WiFi 802.11b/g/n, so we can program WiFi features with helpful libraries on Arduino. In this guide, we're going to use the wifi.h library:
#include

const char *apSsid = "ODROID_GO_AP";
const char *apPasswd = "12345678";

WiFiServer server(80);

void setup() {
IPAddress gateway(192, 168, 4, 1);
IPAddress subnet(255, 255, 255, 0);

if (WiFi.softAP(apSsid, apPasswd)) {
server.begin();
}
}

void loop() {

}
This is the basic code for WiFi in AP mode. As you know what AP mode means, this code makes ODROID-GO generating its on WiFi signal and you can access to that AP on your WiFi connectable device. To do that we've defined the AP information for SSID and password, and gave the gateway IP address and subnet mask. These IP addresses should be created as an instance of IPAddress class. So with this code, it will be on 192.168.4.x IP addresses, and you can connect to that by accessing to 192.168.4.1. This AP activates with a WiFi.softAP() function.
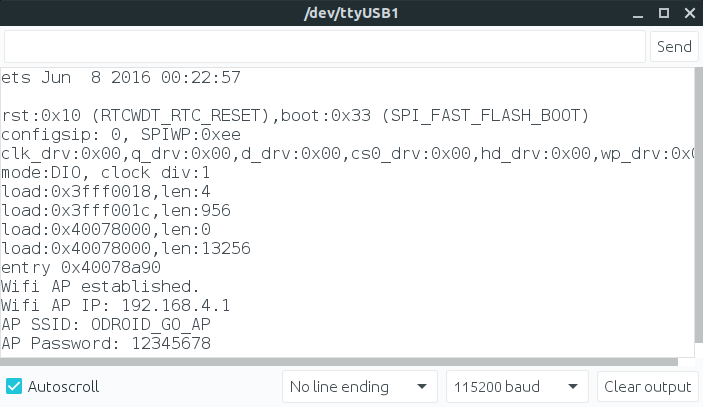
To provide a web page, define an WiFiServer instance as a global variable. This begins when the WiFi activates successfully in AP mode. Next, add code for setting the blue status LED up and some debugging messages shown on the serial monitor. This should be very helpful to show how the code flows.
#include

#define PIN_STATUS_LED 2

const char *apSsid = "ODROID_GO_AP";
const char *apPasswd = "12345678";

WiFiServer server(80);

void setup() {
Serial.begin(115200);

pinMode(PIN_STATUS_LED, OUTPUT);
digitalWrite(PIN_STATUS_LED, LOW);

IPAddress gateway(192, 168, 4, 1);
IPAddress subnet(255, 255, 255, 0);

if (WiFi.softAP(apSsid, apPasswd)) {
Serial.println("WiFi AP established.");
Serial.print("WiFi AP IP: ");
Serial.println(WiFi.softAPIP());
Serial.print("AP SSID: ");
Serial.println(apSsid);
Serial.print("AP Password: ");
Serial.println(apPasswd);

server.begin();
} else {
Serial.println("WiFi AP establishing failed.");
}
}

void loop() {

}
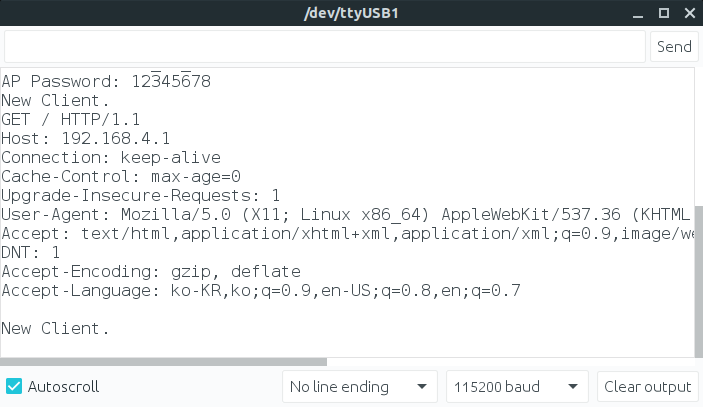
Finally, create a client listener in the loop() function. This listener code loops and will respond only when the client accesses. We're not providing a description for this web code, since the important thing is that you can respond as a packet containing your intended contents:
#include

#define PIN_STATUS_LED 2

const char *apSsid = "ODROID_GO_AP";
const char *apPasswd = "12345678";

WiFiServer server(80);

void setup() {
Serial.begin(115200);

pinMode(PIN_STATUS_LED, OUTPUT);
digitalWrite(PIN_STATUS_LED, LOW);

IPAddress gateway(192, 168, 4, 1);
IPAddress subnet(255, 255, 255, 0);

if (WiFi.softAP(apSsid, apPasswd)) {
Serial.println("WiFi AP established.");
Serial.print("WiFi AP IP: ");
Serial.println(WiFi.softAPIP());
Serial.print("AP SSID: ");
Serial.println(apSsid);
Serial.print("AP Password: ");
Serial.println(apPasswd);

server.begin();
} else {
Serial.println("WiFi AP establishing failed.");
}
}

void loop() {
WiFiClient client = server.available();

if (client) {
Serial.println("New Client.");
String currentLine = "";
while (client.connected()) {
if (client.available()) {
char c = client.read();
Serial.write(c);
if (c == '\n') {
if (currentLine.length() == 0) {
client.println("HTTP/1.1 200 OK");
client.println("Content-type:text/html");
client.println();

client.print("Click <a href="\">here</a> to turn the blue status LED on.
");
client.print("Click <a href="\">here</a> to turn the blue status LED off.
");

client.println();
break;
} else {
currentLine = "";
}
} else if (c != '\r') {
currentLine += c;
}

if (currentLine.endsWith("GET /H")) {
digitalWrite(PIN_STATUS_LED, HIGH);
}
if (currentLine.endsWith("GET /L")) {
digitalWrite(PIN_STATUS_LED, LOW);
}
}
}
client.stop();
}
}
Compile and upload to your ODROID-GO and you can see the debugging code at the Serial monitor.
Connect to ODROID-GO and toggle the LED
You can connect to ODROID-GO on your WiFi connectable device.
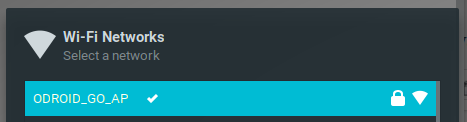
Access the ODROID_GO_AP with password 12345678, then visit 192.168.4.1 on your web browser.
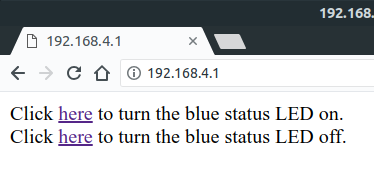
If you click the text, you can see the status LED turns on or off. The behaviors may be monitored on the Serial monitor.
The complete example is available by clicking on Files → Examples → ODROID-GO → WiFi_AP menu to import, then press CTRL-U to compile/upload. This guide was taken from the ODROID wiki which is available at https://wiki.odroid.com/odroid_go/arduino/08_wifi_ap.
Be the first to comment