

This guide will show you how to download and compile the Android kernel for ODROID-XU3/XU4. If you have not built Android on your desktop yet, please read Google’s official build environment setup guide at http://bit.ly/1Hd3Z3P. Carefully review this before you proceed, or you may have unexpected errors and will need to read through long and complicated build logs to find the problem.
We used Ubuntu 14.04 64bit with 8GB of RAM since other newer versions of Ubuntu have had some issues while building the Android OS. http://bit.ly/2yGT5Tw If you want to build the full Android source tree, don't download and build the kernel source separately. A separated Kernel build might break the Android build process. Install the openjdk-8-jdk If your build environment is Ubuntu 14.04 or 12.40, enter the following:
$ sudo add-apt-repository ppa:openjdk-r/ppa
$ sudo apt-get update
And you can install the openjdk-8-jdk using apt:
$ sudo apt-get install openjdk-8-jdk
$ java -version
openjdk version "1.8.0_131"
OpenJDK Runtime Environment (build 1.8.0_131-8u131-b11-2ubuntu1.16.04.3-b11)
OpenJDK 64-Bit Server VM (build 25.131-b11, mixed mode)
If you have more the one Java versions installed, you can change the Java version:
$ sudo update-alternatives --config java
$ sudo update alternatives --config javac
Please note that we distribute the Linux kernel in different branches for Android and other Linux distributions.
Android platform and kernel
The repository is available for download at http://bit.ly/1Syr1sf. Android’s full downloaded source code size is around 70GB, so make sure to prepare enough space before building the Android platform:
$ mkdir
$ cd
$ repo init -u https://github.com/voodik/android.git -b cm-14.1_5422
$ repo sync
Opengapps (optional)
To include Opengapps to the target image, create the “opengapps.xml” file in /.repo/local_manifests folder with this content:
<!--?xml version="1.0" encoding="UTF-8"?-->< manifest>
< remote name="opengapps" fetch="https://github.com/opengapps/" />
< project path="vendor/opengapps/build" name="aosp_build" revision="master" remote="opengapps" />
< project path="vendor/opengapps/sources/all" name="all" clone-depth="1" revision="master" remote="opengapps" />
< project path="vendor/opengapps/sources/arm" clone-depth="1" revision="master" remote="opengapps" />
</ manifest>
Then, run the following commands:
$ cd
$ repo sync --force-sync
Before compiling, you must configure the ODROID-XU3 with the following commands.
$ ./build.sh odroidxu3Once you complete the long build process, the img files can be found in the “/tmp/odroidxu3/” directory. To use ADB over a TCP/IP connection, please refer to http://bit.ly/2gtWzAo.
Installation for ODROID-XU3/XU3-Lite
There are different instructions for installing a Linux kernel image for Android and Linux. Since Android loads both from a kernel partition, we have to use fastboot to install into the dedicated partition. Before beginning, please refer to the partition table at http://bit.ly/2irbjnC. By contrast, Linux boots by the instructions described in boot.ini on the 1st FAT partition.
First, install the kernel image zImage-dtb, onto the boot board:
$ sudo fastboot flash kernel <path/of/your/zImage-dtb>Next, install the android platform files system.img, userdata.img, and cache.img:
$ sudo fastboot flash system <path/of/your/system.img> $ sudo fastboot flash userdata <path/of/your/userdata.img> $ sudo fastboot flash cache <path/of/your/cache.img>Finally, initialize the FAT partition:
$ sudo fastboot erase fat
Installation for ODROID-XU4
You can avoid using fastboot on an ODROID-XU4, because it doesn't have an USB OTG port. First, setup an ADB connection or copy an image to the FAT partition:
$ adb push xxxx.img /sdcard/
$ adb reboot
View the U-Boot logs by connecting to the ODROID-XU4 with a USB-UART kit:
U-Boot 2017.05-12209-g43745f3 (Aug 17 2017 - 09:37:39 +0900) for ODROID-XU4

CPU: Exynos5422 @ 800 MHz
 Model: Odroid XU4 based on EXYNOS5422
 Board: Odroid XU4 based on EXYNOS5422
 Type: xu3
 DRAM: 2 GiB
 MMC: EXYNOS DWMMC: 0, EXYNOS DWMMC: 1
 MMC Device 0 (eMMC): 14.7 GiB
 Info eMMC rst_n_func status = enabled
 MMC Device 1 ( SD ): 7.4 GiB

*** Warning - bad CRC, using default environment

In: serial
 Out: serial
 Err: serial
 Net: No ethernet found.
 Press quickly 'Enter' twice to stop autoboot: 0
Type the following commands after pressing “Enter” twice to pause the booting process:
Exynos5422 # ext4load mmc 0:3 40000000 media/0/system.img
379342968 bytes read in 13284 ms (27.2 MiB/s)
Exynos5422 # fastboot flash system 40000000 0

*** Partition Information for Android ***
Control Device ID : 0
pNo     Start Block     Block Count     pName
 0             1              30        fwbl1 (15 KB)
 1            31              32        bl2 (16 KB)
 2            63            1440        bootloader (720 KB)
 3          1503             512        tzsw (256 KB)
 4          2015              32        env (16 KB)
 5          2047           16384        kernel (8192 KB)
 6       2752512          204800        fat (102400 KB)
 7        131072         2097152        system (1048576 KB)
 8       2957312        27688960        userdata (13844480 KB)
 9       2228224          524288        cache (262144 KB)

Erasing partition(system)...  blk_st = 131072, blk_cnt = 2097152
*** erase block start 0x20000, cnt 0x200000 ***
write_compressed_ext4 : total chunk = 1373
mmc write dev 0, blk = 0x00020008, size = 0x00000008, remain chunks = 1372
mmc write dev 0, blk = 0x00020010, size = 0x00000008, remain chunks = 1371

...

mmc write dev 0, blk = 0x00160010, size = 0x00000008, remain chunks = 10
none chunk
mmc write dev 0, blk = 0x00160208, size = 0x000001f8, remain chunks = 9
mmc write dev 0, blk = 0x00160218, size = 0x00000010, remain chunks = 8
none chunk
mmc write dev 0, blk = 0x001a0000, size = 0x0003fde8, remain chunks = 7
mmc write dev 0, blk = 0x001a0010, size = 0x00000010, remain chunks = 6
none chunk
mmc write dev 0, blk = 0x001e0000, size = 0x0003fff0, remain chunks = 5
mmc write dev 0, blk = 0x001e0008, size = 0x00000008, remain chunks = 4
mmc write dev 0, blk = 0x001e0010, size = 0x00000008, remain chunks = 3
none chunk
mmc write dev 0, blk = 0x001e0208, size = 0x000001f8, remain chunks = 2
mmc write dev 0, blk = 0x001e0218, size = 0x00000010, remain chunks = 1
none chunk
mmc write dev 0, blk = 0x00220000, size = 0x0003fde8, remain chunks = 0
write done

partition 'system' flashed.

Exynos5422 #
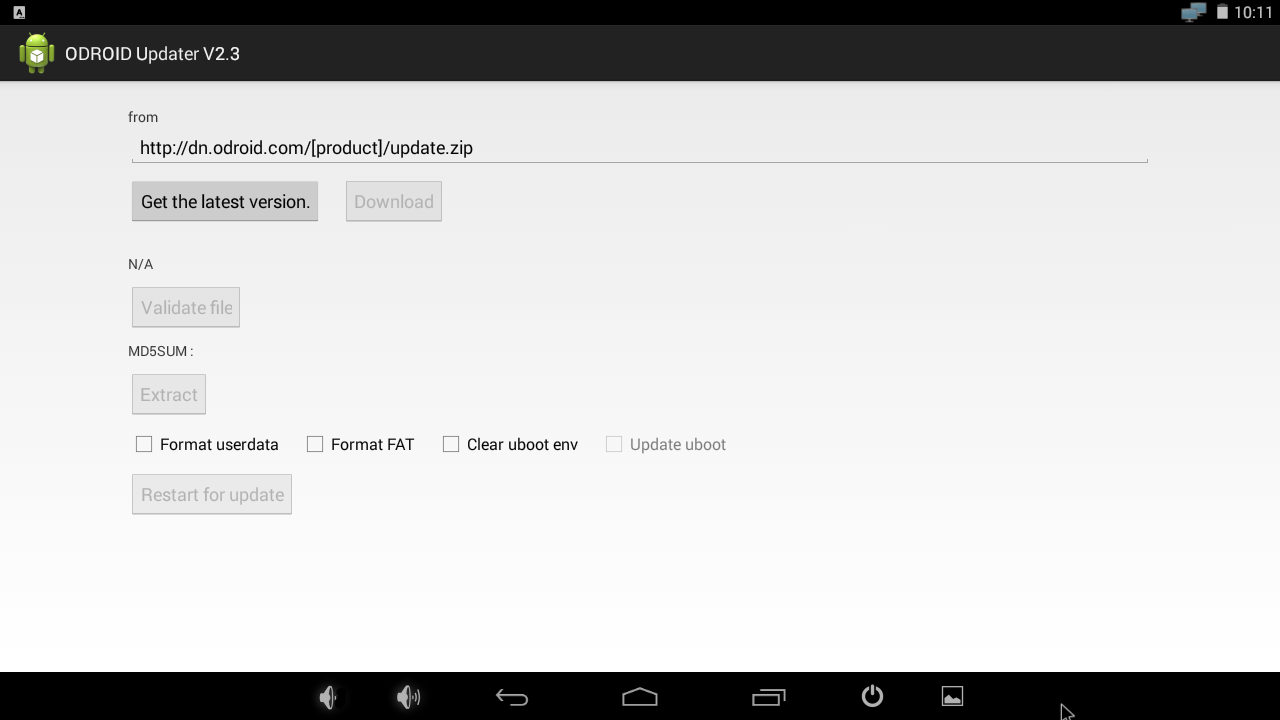
ODROID Updater
You can update from Stock Android Kitkat 4.4.4 to Android 7.1 using the ODROID Updater verison 5.6 or higher (http://bit.ly/2yFz9lf). Always check the option “Format userdata” when updating from other Android revision, as shown in Figure 1.
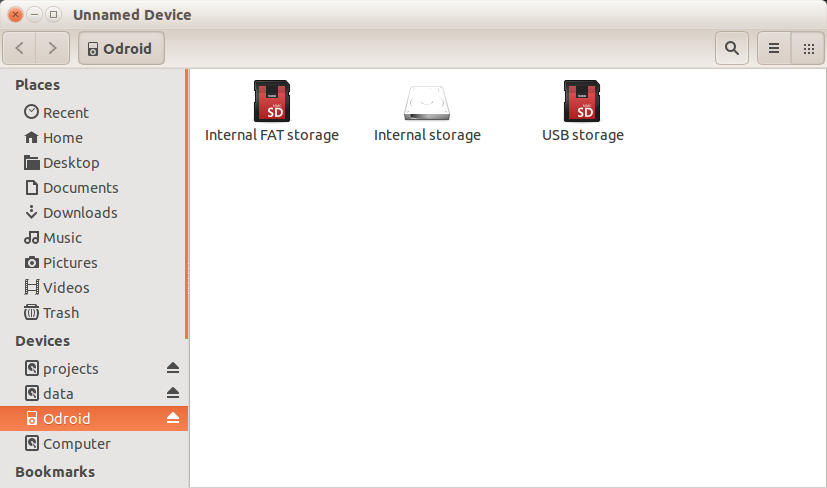
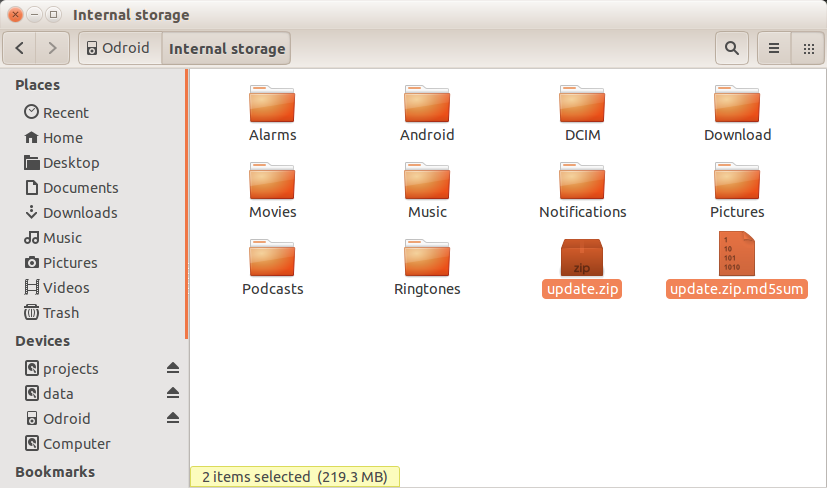
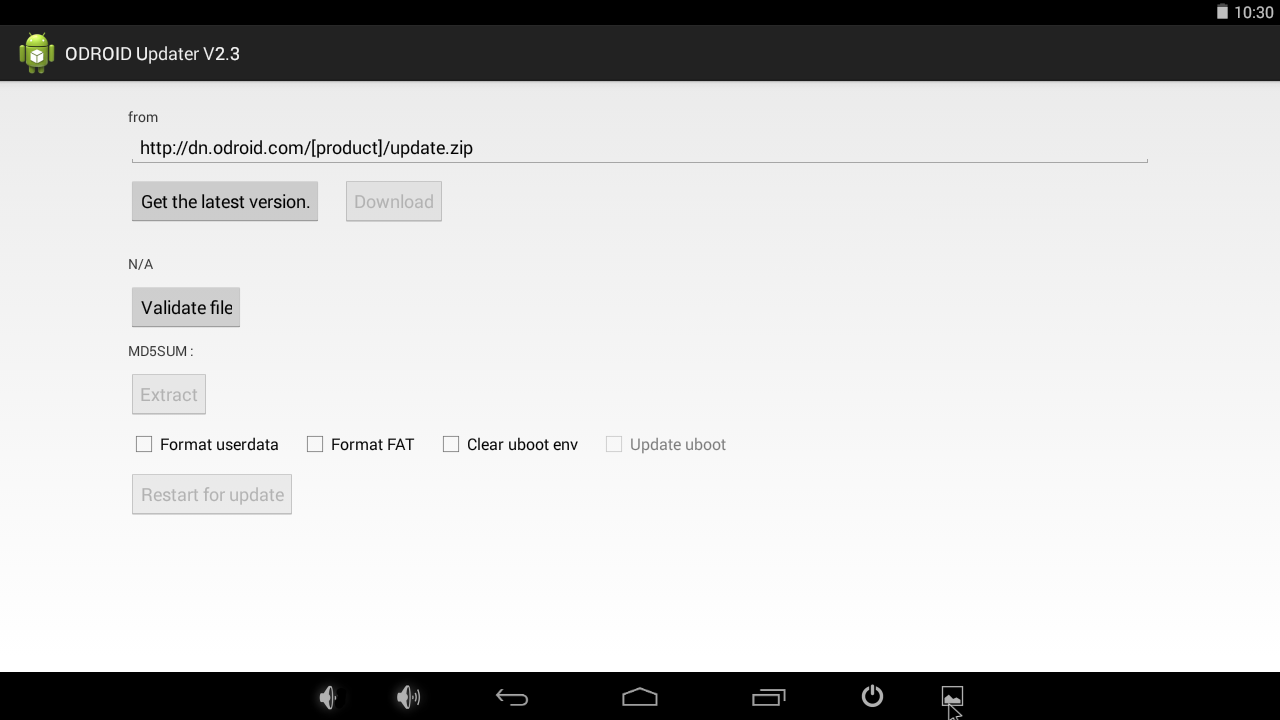
$ adb connect 192.168.x.x
$ cd out/target/products/odroidxu3/
$ adb push update.zip /sdcard/
$ adb push update.zip.md5sum /sdcard/
Open “Internal storage”, as shown in Figure 2, then copy update.zip and update.zip.md5sum as shown in Figure 3. Enable the “Validate file” button as shown in Figure 4.
Storage Information
/storage/sdcard0 fat partition of eMMC or microSD INTERNAL STORAGE /storage/sdcard1 microSD slot SD CARD /storage/usb2host USB 2.0 Host port USB STORAGE /storage/usb3host USB 3.0 Host port USB STORAGE /storage/usb3device USB 3.0 Device port USB STORAGE
For comments, questions, and suggestions, please visit the original article at http://bit.ly/2yUeqvm.
Be the first to comment