

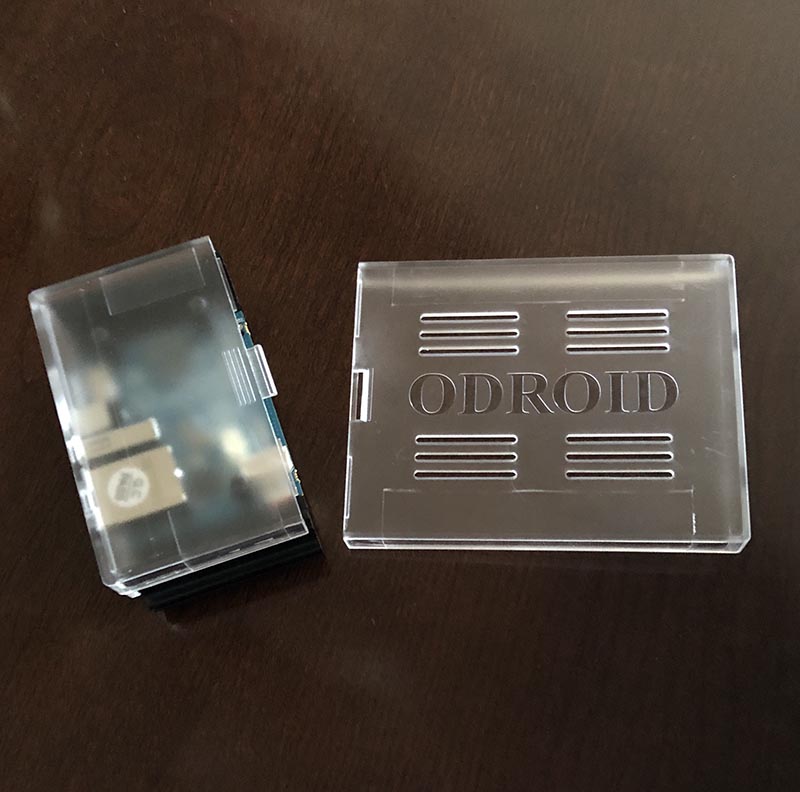
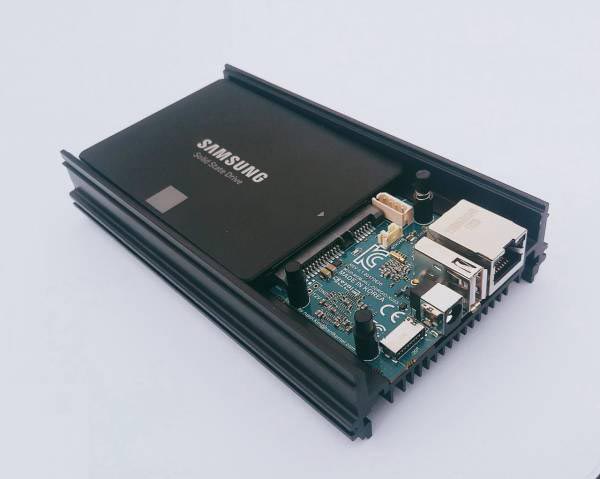
If you’re looking for a great case to protect your ODROID-MC1 Solo, then look no further than the Hardkernel Web site. Inside the “Dollar Shop” is a clear case for the ODROID-HC1. Priced at, you guessed it, $1, this case is the ideal companion for protecting your headless ODROID-XU4 clone.
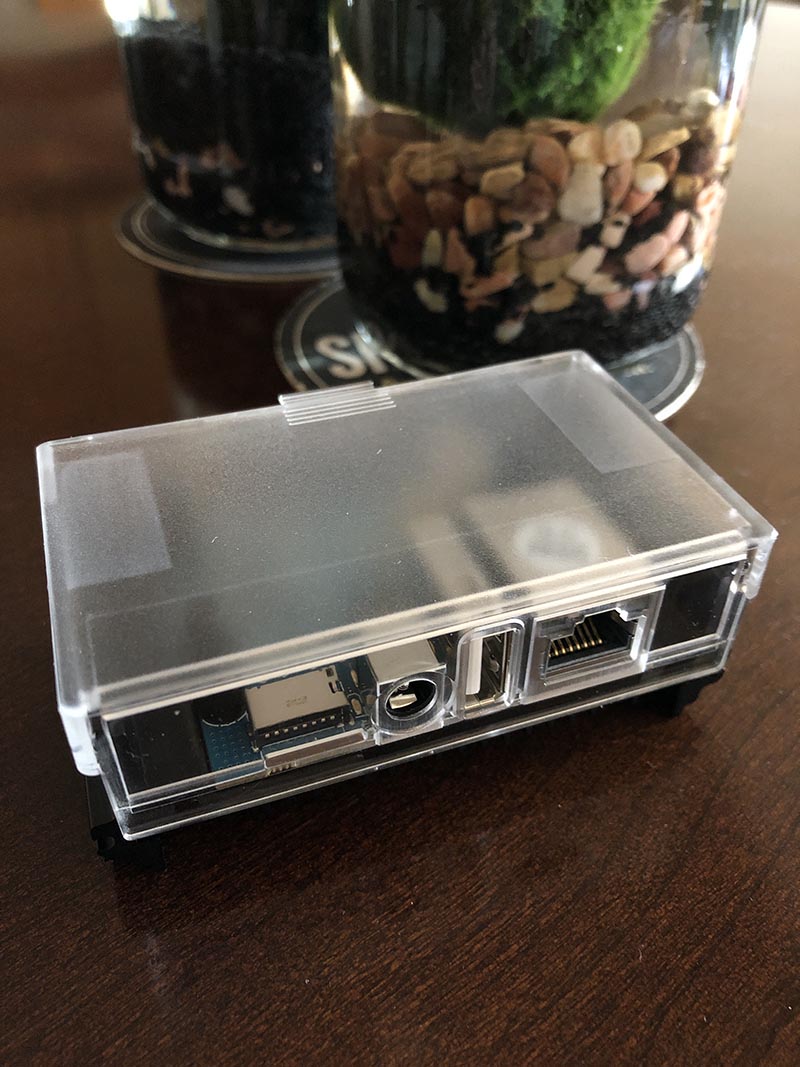
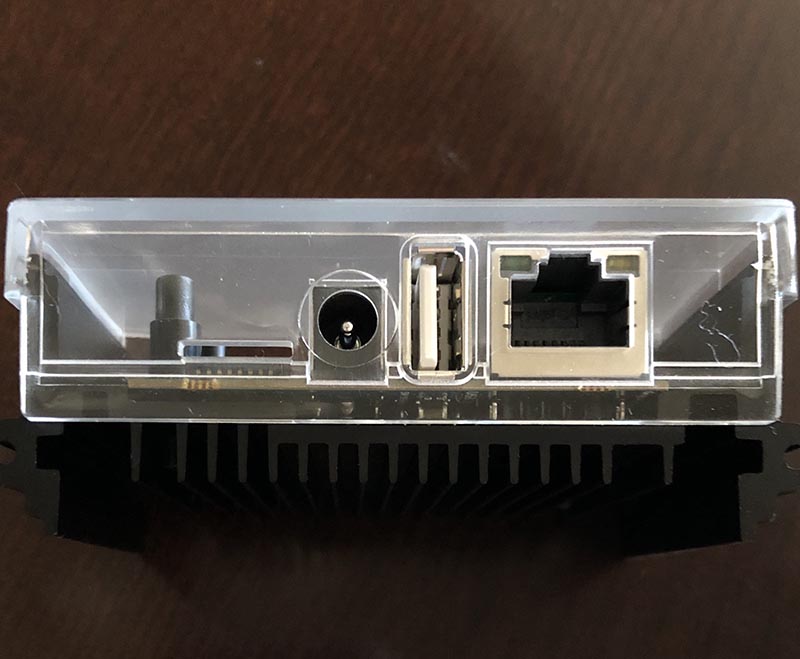
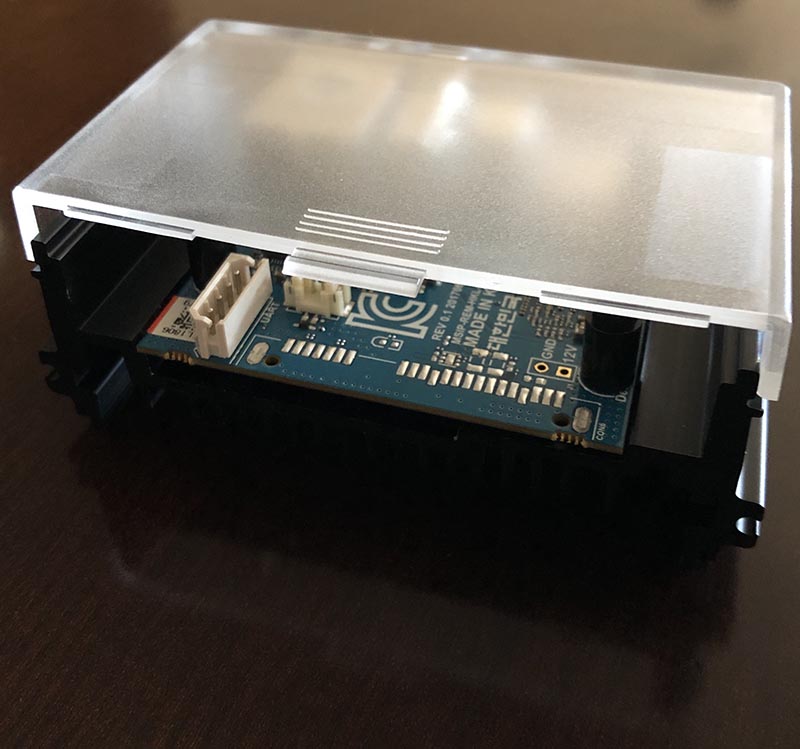
Simply slide the shortest piece of the ODROID-HC1 clear case over the ODROID-MC1 Solo heatsink and you have a snug protective case for keeping dust and debris off the printed circuit board (PCB). Furthermore, this case is adequately ventilated for enabling the PCB to remain cool during strenuous work sessions.
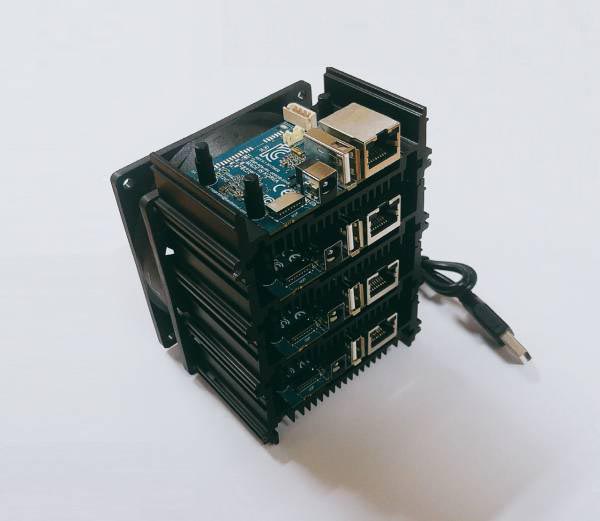
Finally, while you’re purchasing your Dollar Shop case, be sure to examine the incredible sale price for the ODROID-MC1 Solo. At the time of publication, this powerful octa-core single board computer cluster node is priced at $9. That’s a remarkable $39 savings over the regular price. Oh, and while your filling your shopping cart, don’t forget to include a 5V/4A power supply, Ethernet cable, and 8GB microSD card to your order. The total cost for this fully fleshed out computing node will be less than $25 (excluding shipping and handling). This purchase will help you get one step closer to realizing that dream of wrangling bytes on your own build farm.
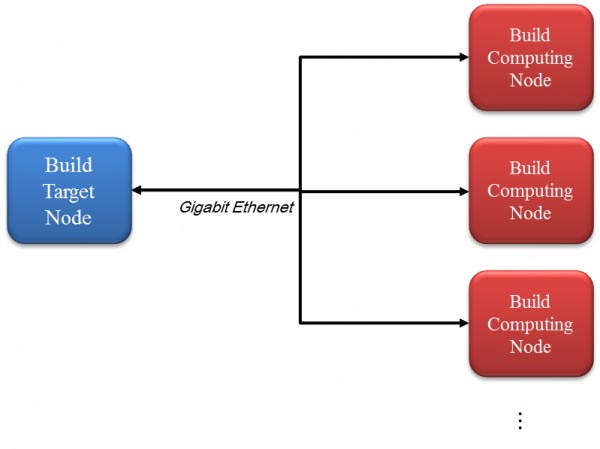
There are two types of nodes for the build farm system – Build Target node and Build Computing node. For this example, we will use the ODROID-HC1 for the build target node. The build target node contains the source codes which will be compiled in this build farm system. An ODROID-HC1 is perfect as a build target node because it can have a large amount of storage space with its attached hard drive. It is helpful for improving build performance if the SATA HDD(or SSD) has good I/O performance. The build computing node receives the source file and compiles it. An ODROID-MC1 is the best choice for a build computing node, since it is optimized for distributed computing.
Build Computing Node Configuration To access yjr ODROID-MC1 and ODROID-HC1 consoles, you have to get the IP address of the nodes. Please refer to Boot the ODROID and find IP address section in the Headless setup wiki page. All it takes is to Install distcc and configure it:
$ sudo apt update
$ sudo apt install distcc
$ nano /etc/default/distcc
/etc/default/distcc
STARTDISTCC="true"
ALLOWEDNETS="192.168.100.0/24"
JOBS="8"
ZEROCONF="false"
On my network, the 192.168.100.0/24 IP network range is my local network IP address. It must be modified to suit your network environment. Next, restart the distcc service:
$ sudo /etc/init.d/distcc restart
Build Target Node Configuration
Install distcc, distcc-pump and distccmon-gnome. distcc-pump is for running distcc pump mode. Distcc's pump mode accelerates remote compilation with distcc by also distributing preprocessing to the servers. distccmon-gnome is the distcc monitoring application:
$ sudo apt update
$ sudo apt install distcc distcc-pump distccmon-gnome
Next, set the IP addresses of the build computing nodes. In this case, there are 8 build computing nodes (ODROID-MC1s). It is different for each network environment. Write the distcc host’s IP addresses for your environments.
$ nano ~/.distcc/hosts
~/.distcc/hosts
192.168.100.17,lzo,cpp
192.168.100.19,lzo,cpp
192.168.100.23,lzo,cpp
192.168.100.24,lzo,cpp
192.168.100.26,lzo,cpp
192.168.100.27,lzo,cpp
192.168.100.37,lzo,cpp
The examples add the following options to the address: lzo: Enables LZO compression for this TCP or SSH host (slave).
cpp: Enables distcc-pump mode for this host (slave). Note that the build command must be wrapped in the pump script in order to start the include server. A description for the distcc pump mode can be found at distcc's pump mode: A New Design for Distributed C/C++ Compilation. Next, run distcc-pump:
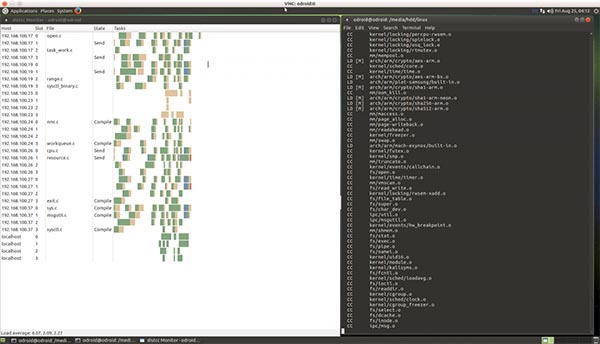
$ distcc-pump make -j64 CC=distccFigure 8 shows the distcc compiling status on distccmon-gnome:
$ distccmon-gnome
Build Performance Measurement Experiment
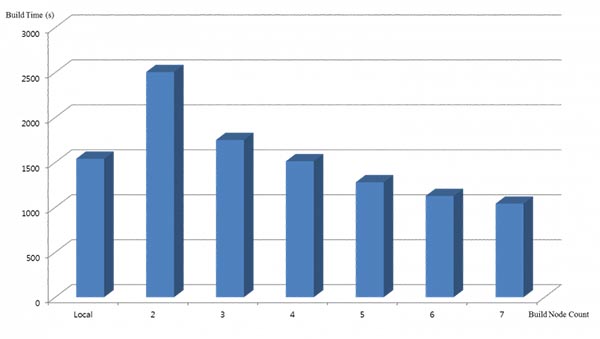
We measure the distributed compiling performance according to number of build computing nodes. This is the build time of Linux kernel sources for the ODROID-XU4. It has better performance than a local build when it has more than 4 build computing nodes, since distributed compiling has additional overhead because of the network. The build commands used for testing are:
$ sudo apt update
$ sudo apt install git
$ git clone --depth 1 https://github.com/hardkernel/linux.git -b odroidxu4-4.9.y
$ cd linux
$ make odroidxu4_defconfig
$ time make -j8 # Local build for baseline
$ make clean
$ time distcc-pump make -j64 CC=distcc # Distributed build for testing
Be the first to comment